My First Film Camera – by Aukje

By Aukje

My first year of shooting film – Part 1

A year ago, I became a photographer. Well of course that depends on your definition, I am not a professional, nor do I intent to become one, but a year ago I bought a Leica and became obsessed with photography. In the past year I made 14.000 photos with my Leica, but all digital. In the process of reading and learning about photography, I found a couple of interesting people online, some of which are clearly obsessed with film. That kind of triggered my interest in film as well, but I felt I have so much to learn about my digital M that I didn’t take any action. Until I got in touch with Hamish, and writing a guest post about my first film camera became the perfect excuse to start exploring it. So here’s my report on my first steps into film (who knows where it will lead).

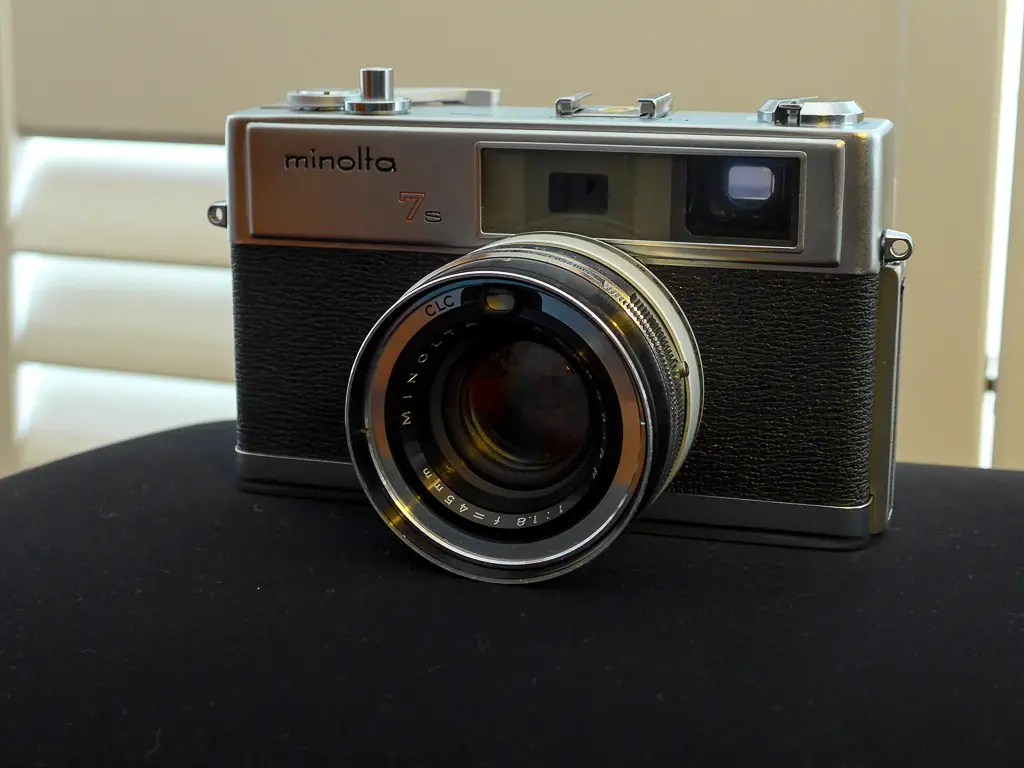
Now I have decided to give film photography a try, I need a camera. I decided to go for a rangefinder, as that is what I like most about my M. Based on availability and price, I chose the Minolta Hi-matic 7s. I bought some cheap rolls of film (I didn’t even know if the camera would work), found an owners manual for the Minolta online, and I was good to go.

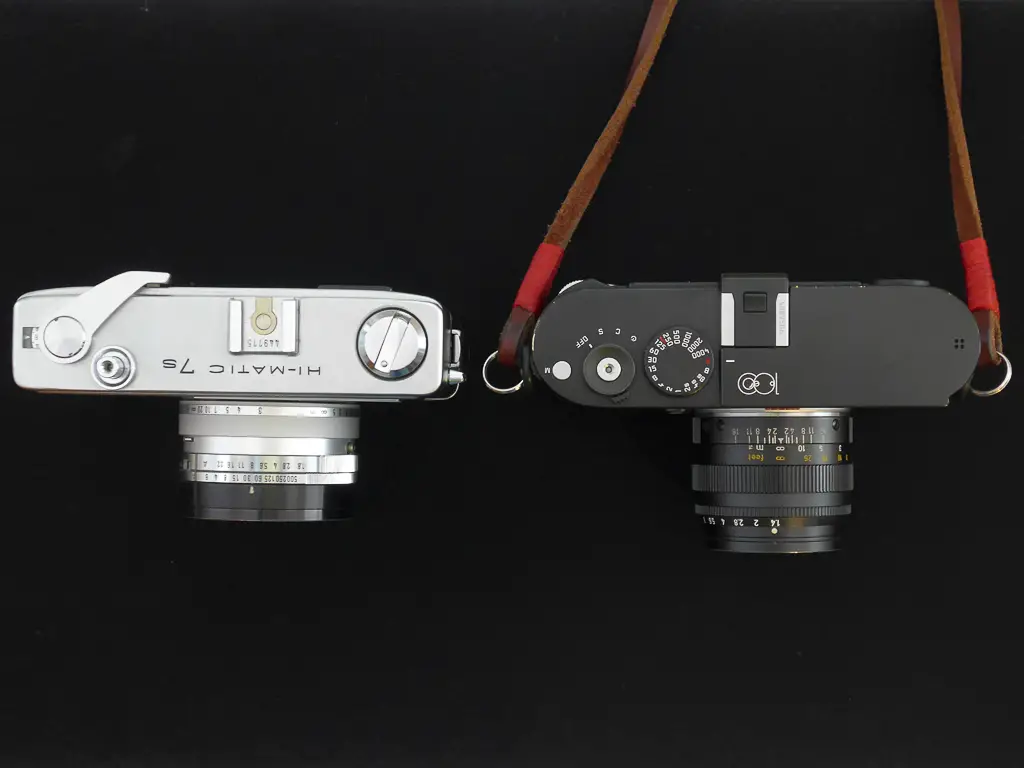
Just a few words about the camera: size-wise it is very similar to the M, it’s a bit lighter, but not much.  Next to manual mode it has semi- and full-automatic exposure mode. I found focussing quite difficult as the viewfinder is a bit hazy, and the focus throw is only 90 degrees (biggest drawback of this camera as far as I’m concerned). But the 1.8 45mm lens infused some confidence in me.

Minolta-2
Size comparison Minolta Hi-matic 7s and Leica M (Typ 240)


I decided to start with some comparison shots. I know that it is not a fair comparison, a camera and lens that is at least 45 years old and a state-of-the art modern camera. I just thought it would be educational for me to compare the results, for example with respect to exposure and colour. Next, I think it is good practise to use a loved one as a subject for a first photo with a new camera or lens, so here is the first photo (Minolta left, M right):

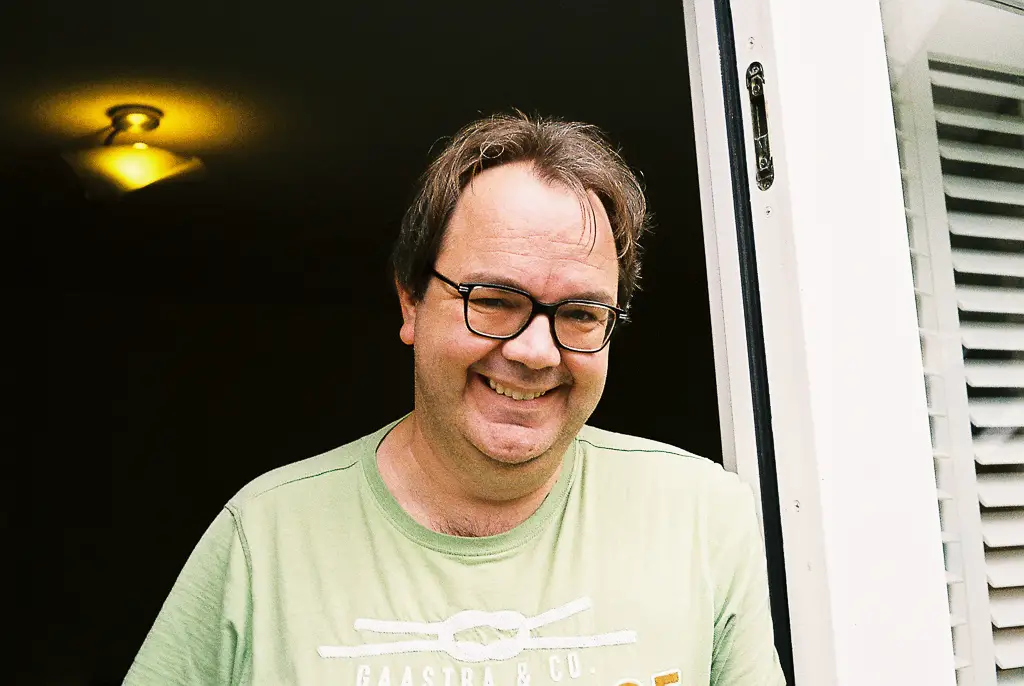
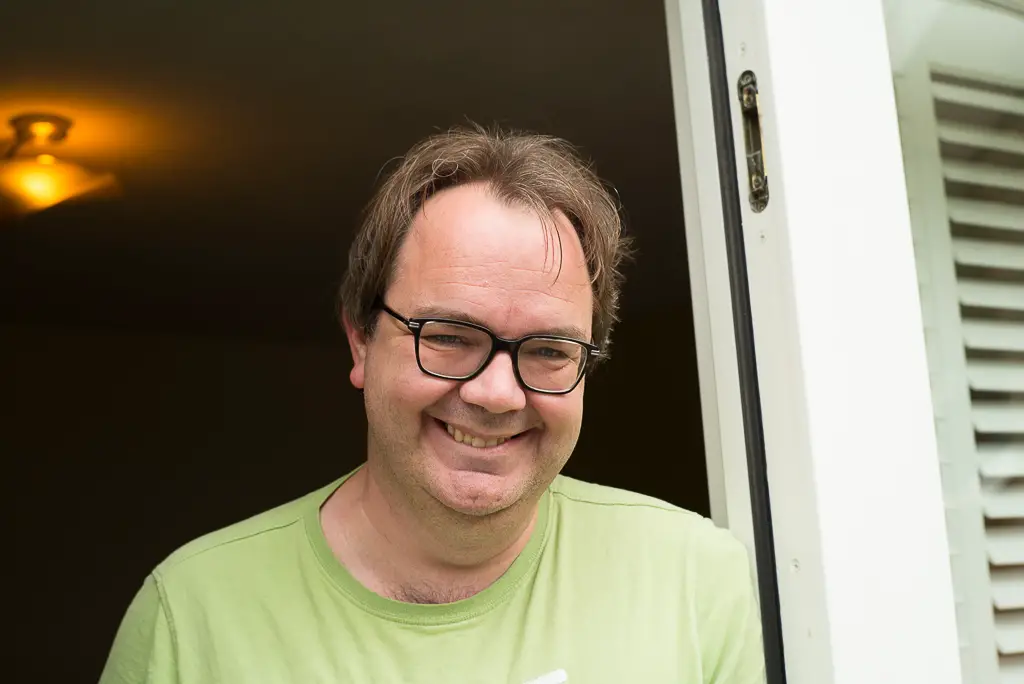
For the first photo I used the automatic exposure of the Minolta (it uses EV values), and matched the exposure with the M. I think the result is pretty compatible, auto-exposure seems to work well with the Minolta. On the M I used a Summilux 50mm lens, which is from the same era as the Minolta, levelling the field a little bit.

Next step: go out and explore. I must admit that I felt scared. Scared to make mistakes, scared to break anything. It felt as if I was using someone else’s camera. I kept doing duo-shots, giving myself something to hold on to. I wanted to use manual mode, but comparing exposure to the M gave me more confidence. With my M I have some weird emotional connection, I feel really at ease when it is in my hand. But the Minolta felt out of place. However, I started this journey, so I just had to press the shutter at some point. But even pressing the shutter felt weird, it felt as if I had to push harder, causing me to worry about motion blur. Finally, after checking and double checking exposure values (on the camera, on an iphone app, and on the M) I managed to take some photos…

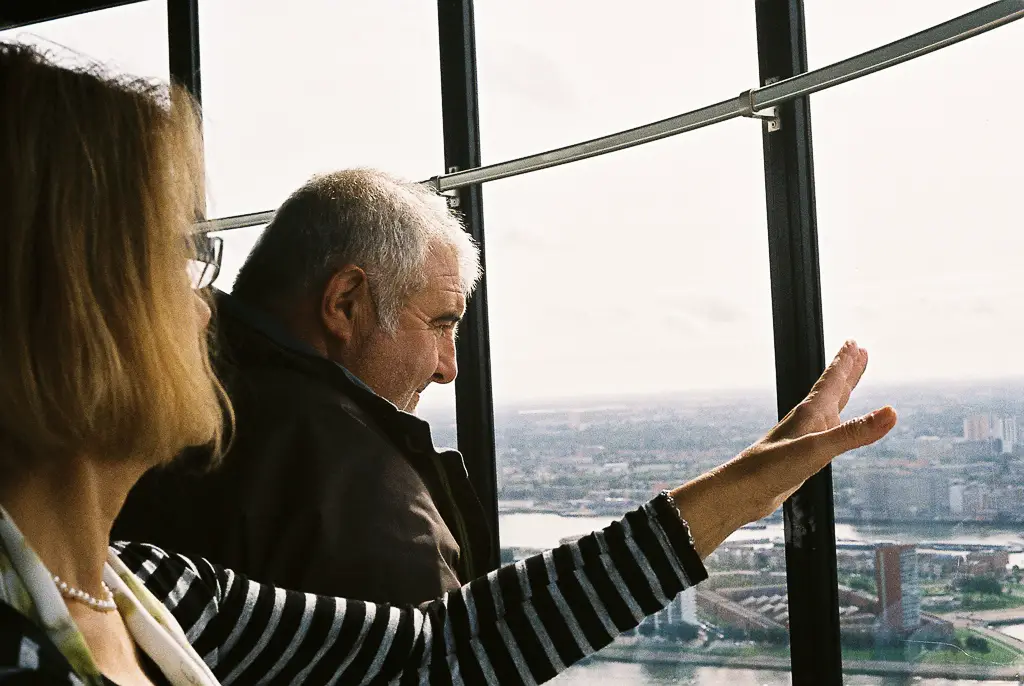
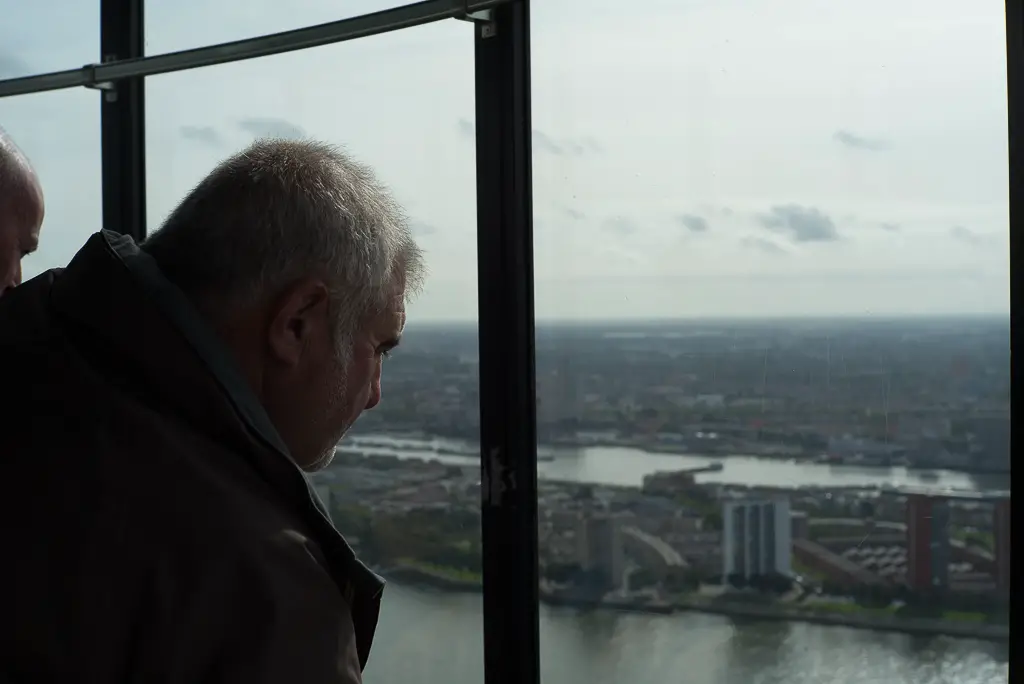
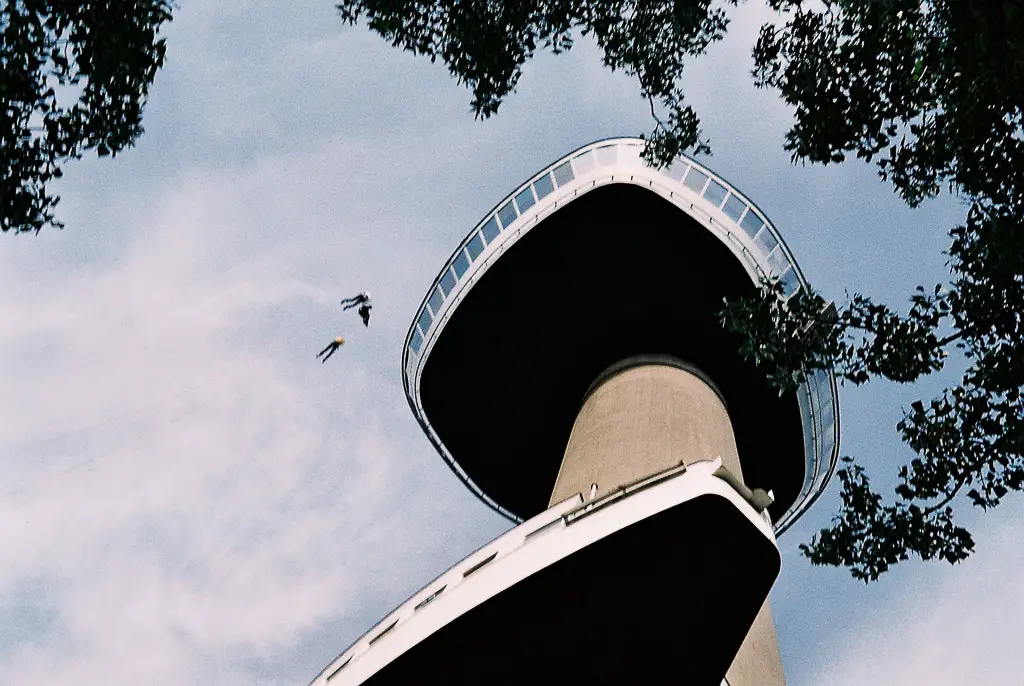
The photos were made from the Euromast in Rotterdam (a tourist tower, with a viewing platform):

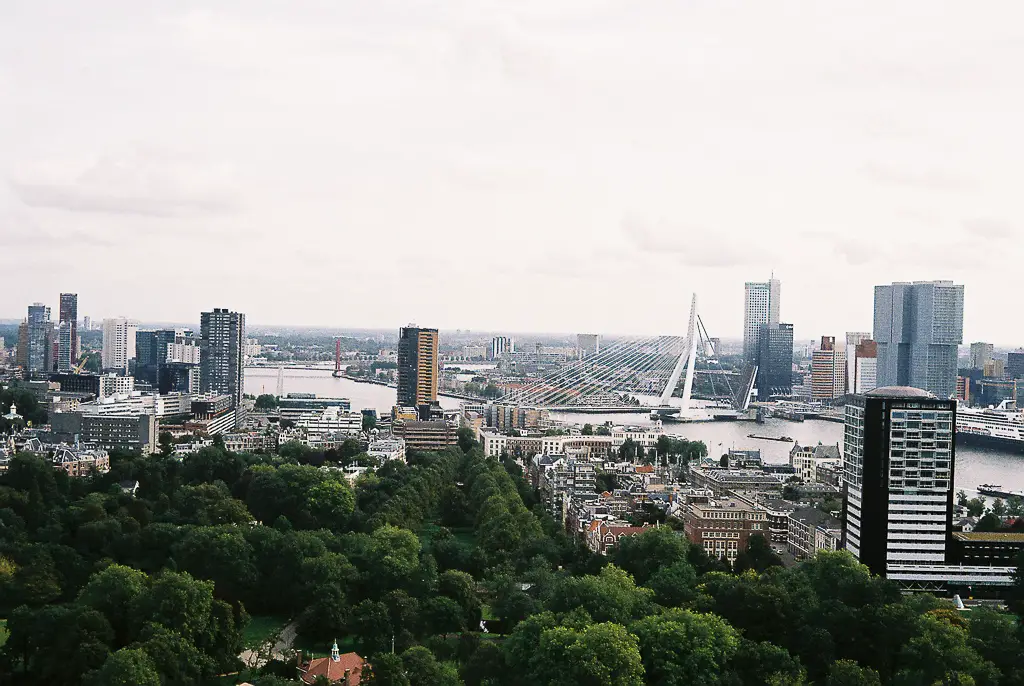
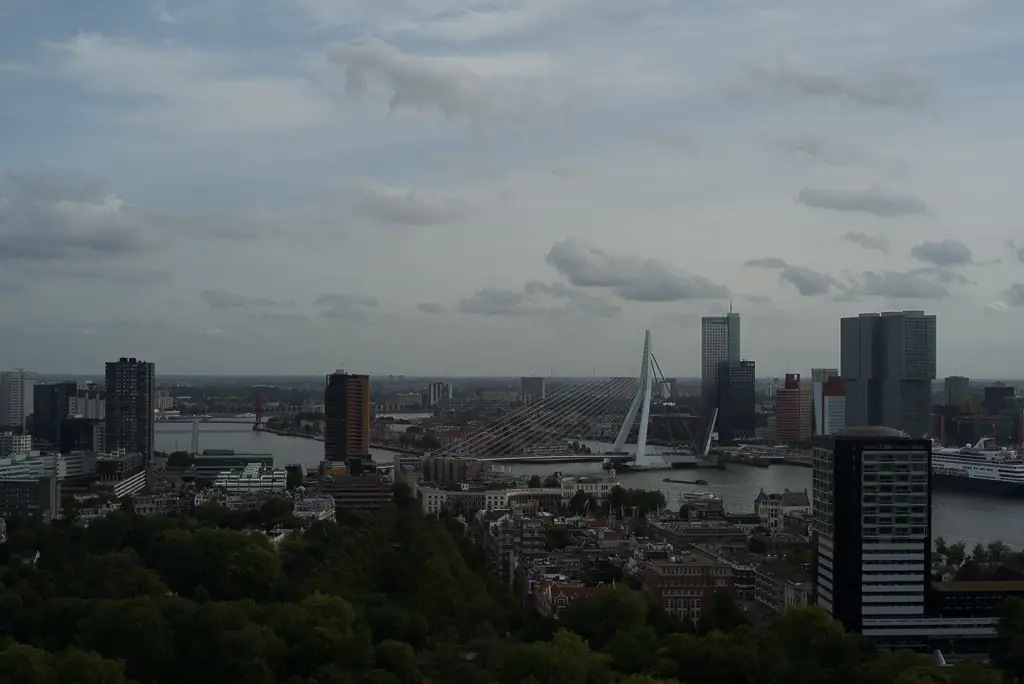
Exposure seems to be off, there is definitely a difference between the film and the digital result. In the film photo I miss the details and color in the sky that I do get with the M. But the circumstances were difficult, I would definitely do some postprocessing on the digital file to bring out the shadows.

For the next photos I think the lighter version of the Minolta is better, as the exposure on the skin is better. But again, same settings with different result, where the auto setting gave very similar results. I have no idea how to explain this. Something to do with aperture setting?

After a while I let go of comparing, and just used a light meter app for setting exposure. I think I was getting used to the feeling of this camera. Here are a couple of shot I made that day:

1/500 sec @ f/11 1/500 sec @ f/11 1/125 sec @ f/11 1/500 sec @ f/4 FilmPost-12

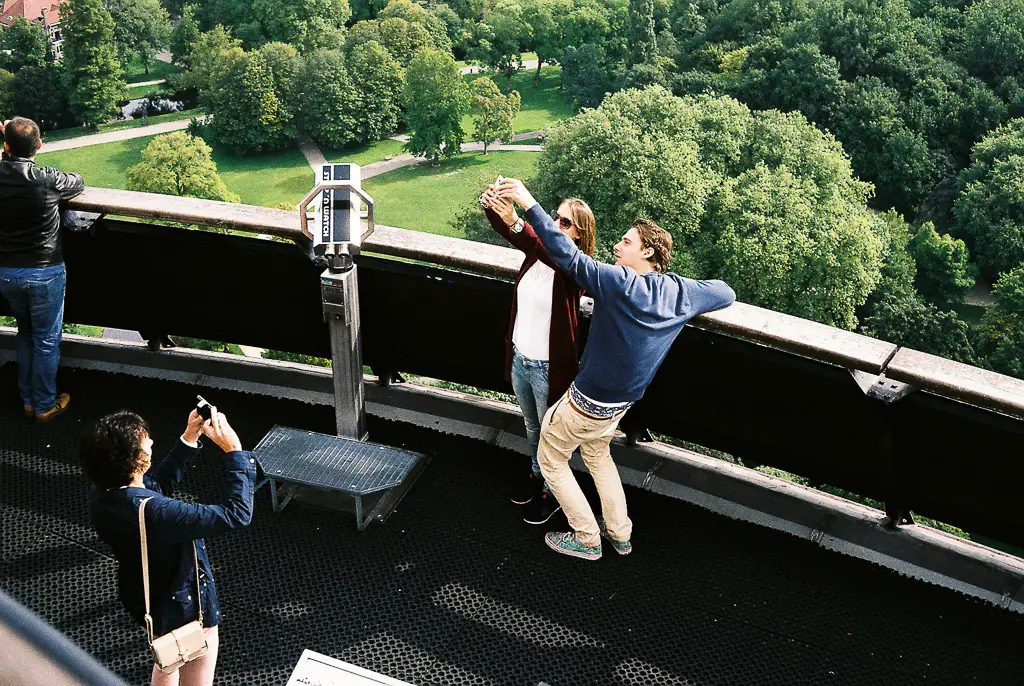
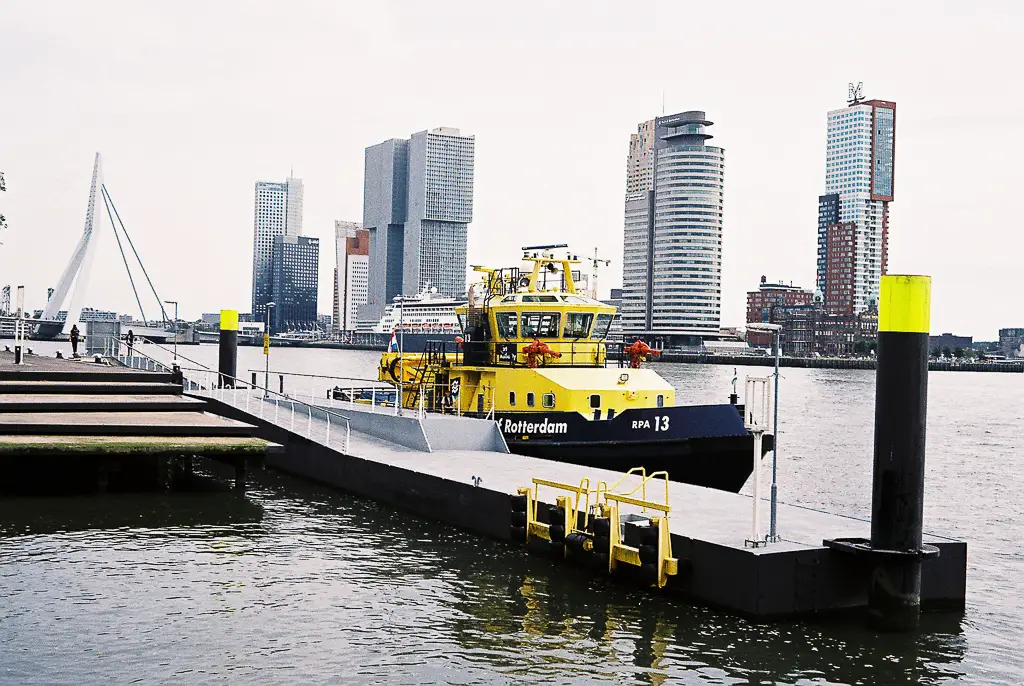
You can see I have mixed results with the exposure. But I will keep practising…

With the finished first roll I was ready for the next exciting/scaring step: development. I did some online research and concluded that I have two options for now: a cheap option with a local warehouse, or a local photographer. I decided to go with the local photographer’s shop. This presented another weird moment for me: I felt really uncomfortable leaving my roll of film with a guy I didn’t know. And the conversation I had with was strange, like we spoke a completely different language. But I managed to order prints and a scan from the negatives. And accepted that I have to wait for a couple of days….

Compared to the results from the Leica the photos on film have quite some contrast. I am not sure that I like that. You can see the comparison above, but it is not completely fair as the scans have even more contrast than the prints. Another thing to consider and to figure out…

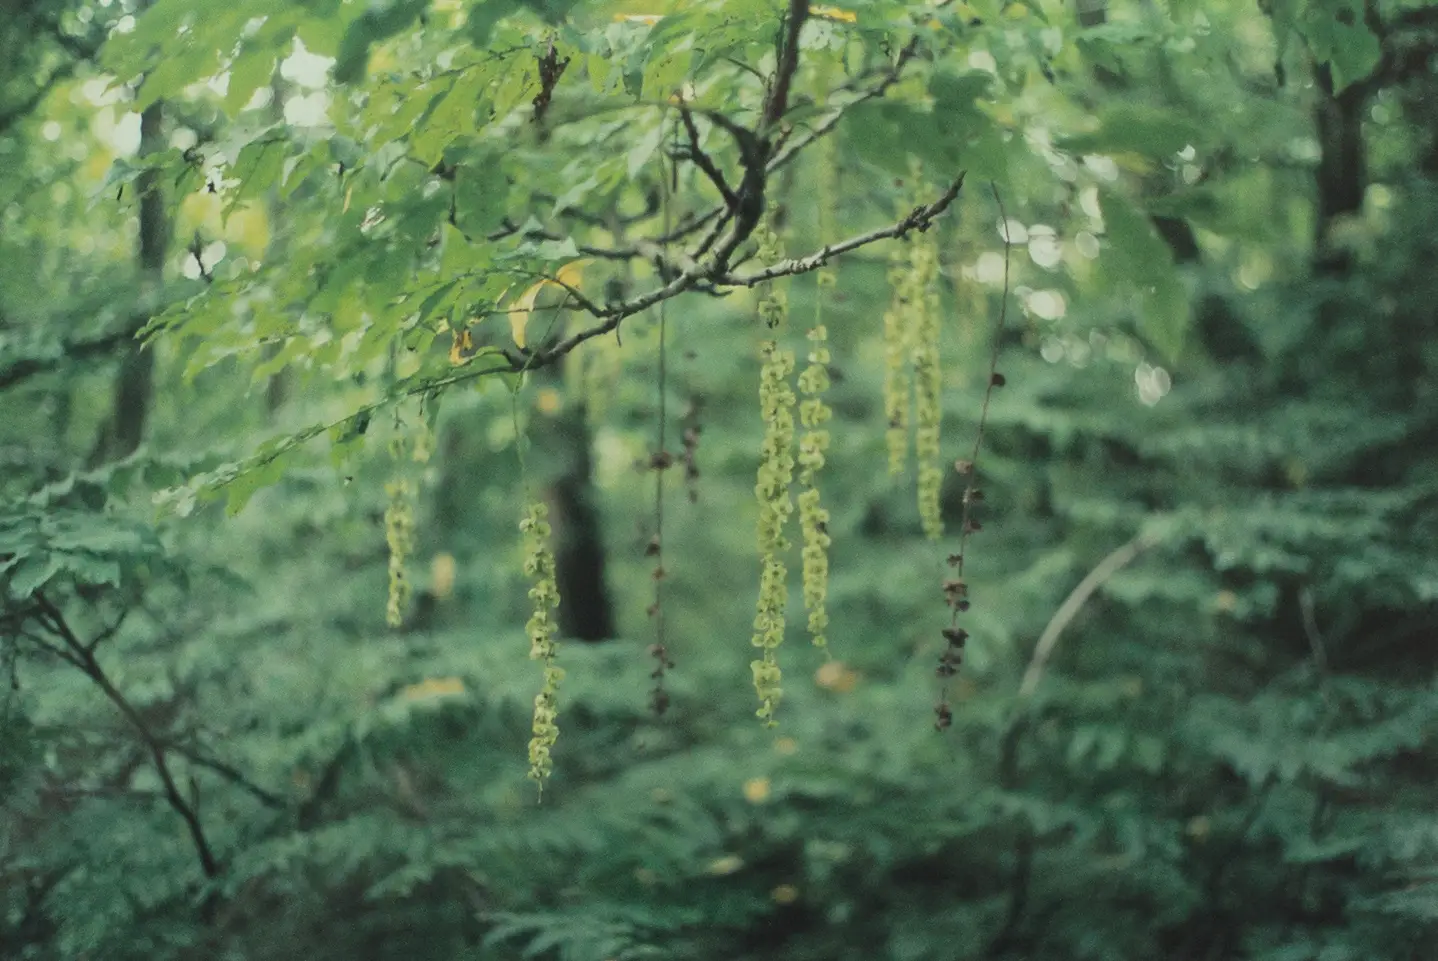
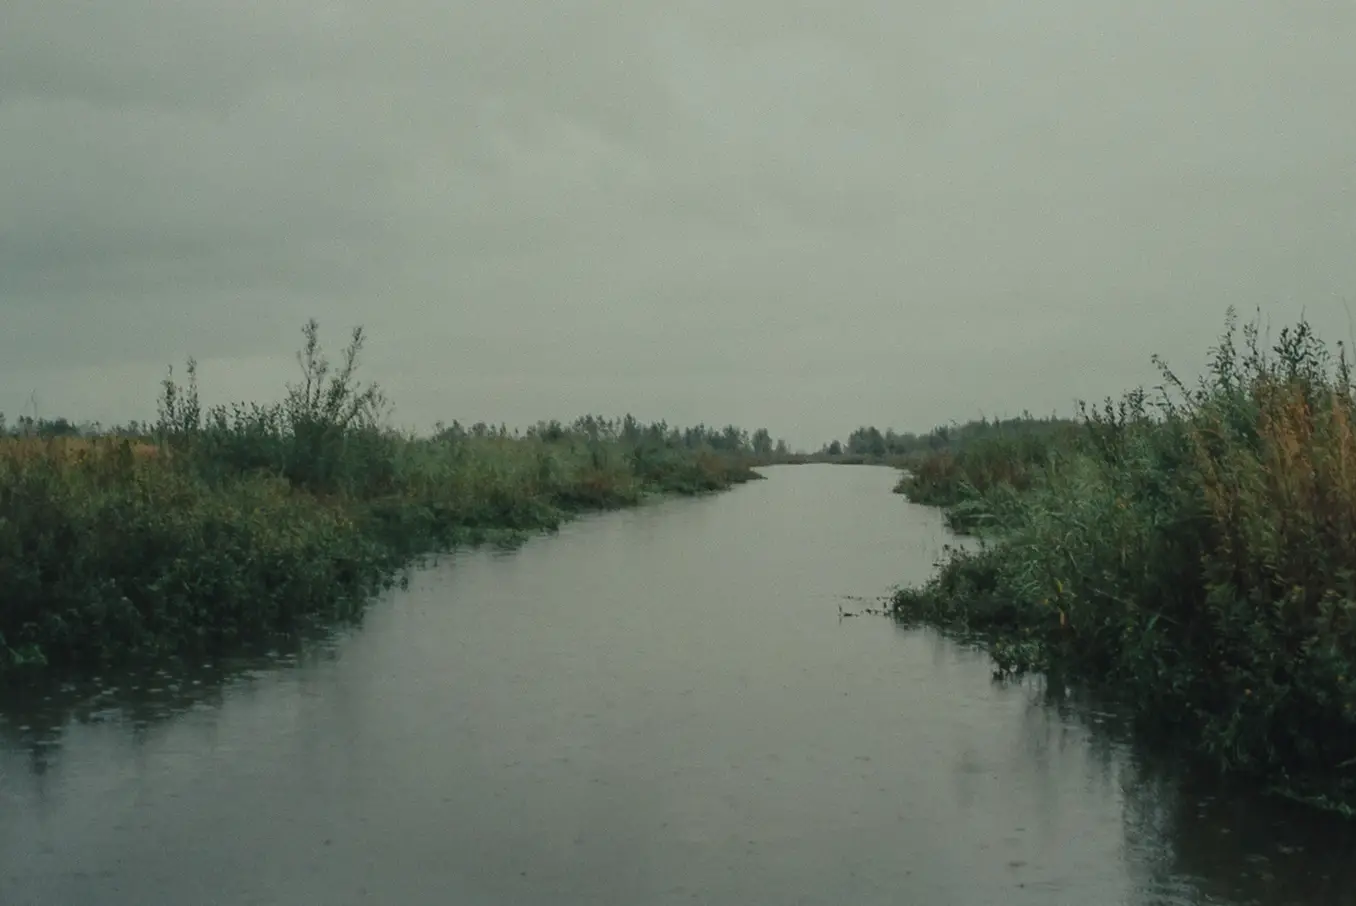
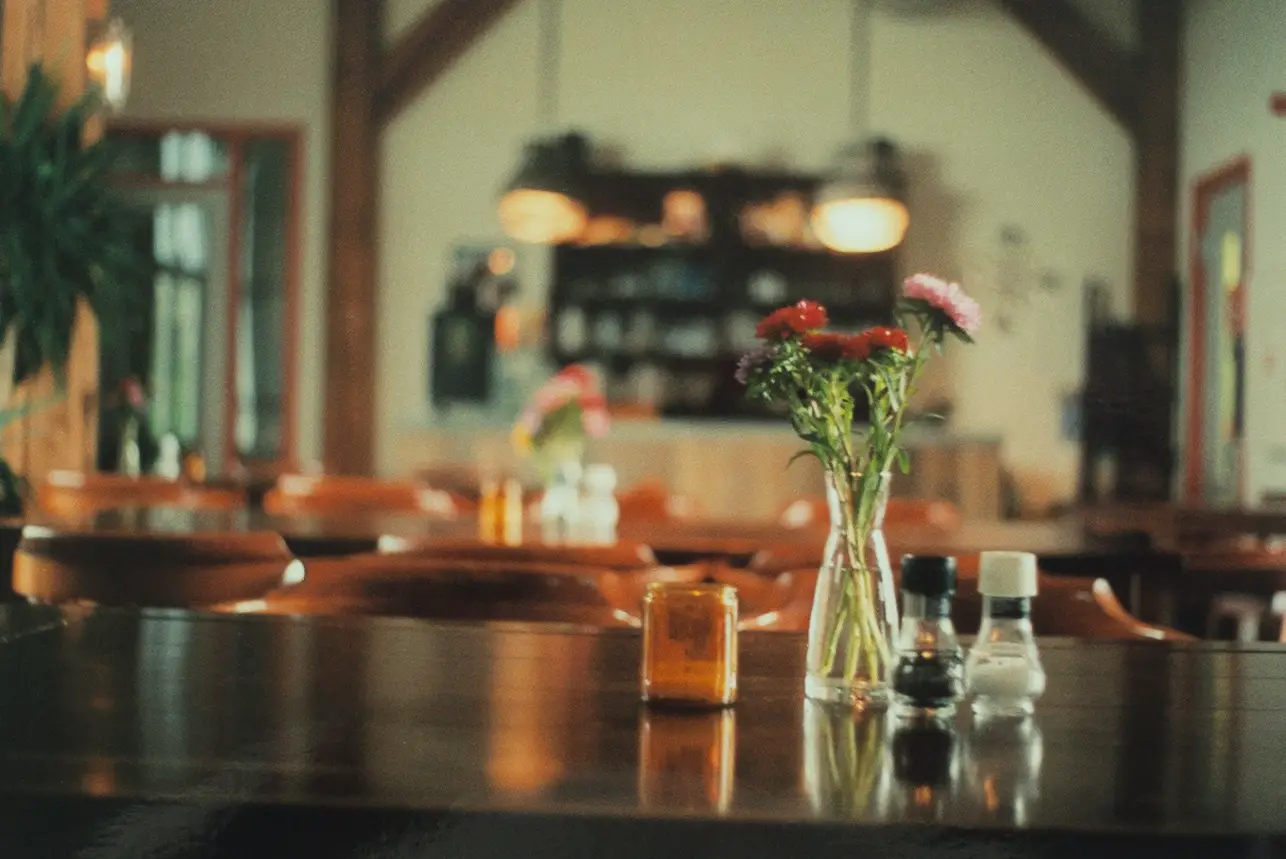
For my second film I tried to find some different light conditions with lower contrast. And as fall is definitely setting in, I had no problem finding that. First: rain (plus a nice lunch-location)!

Film2-1
I like the separation of the branch in front from the background. The 1.8 lens does its job!
Film2-2
Rain, rain, rain. But finally some better definition in the sky. However, the scan does not do it justice (the print is better)!
Film2-3
Good example of the bokeh.

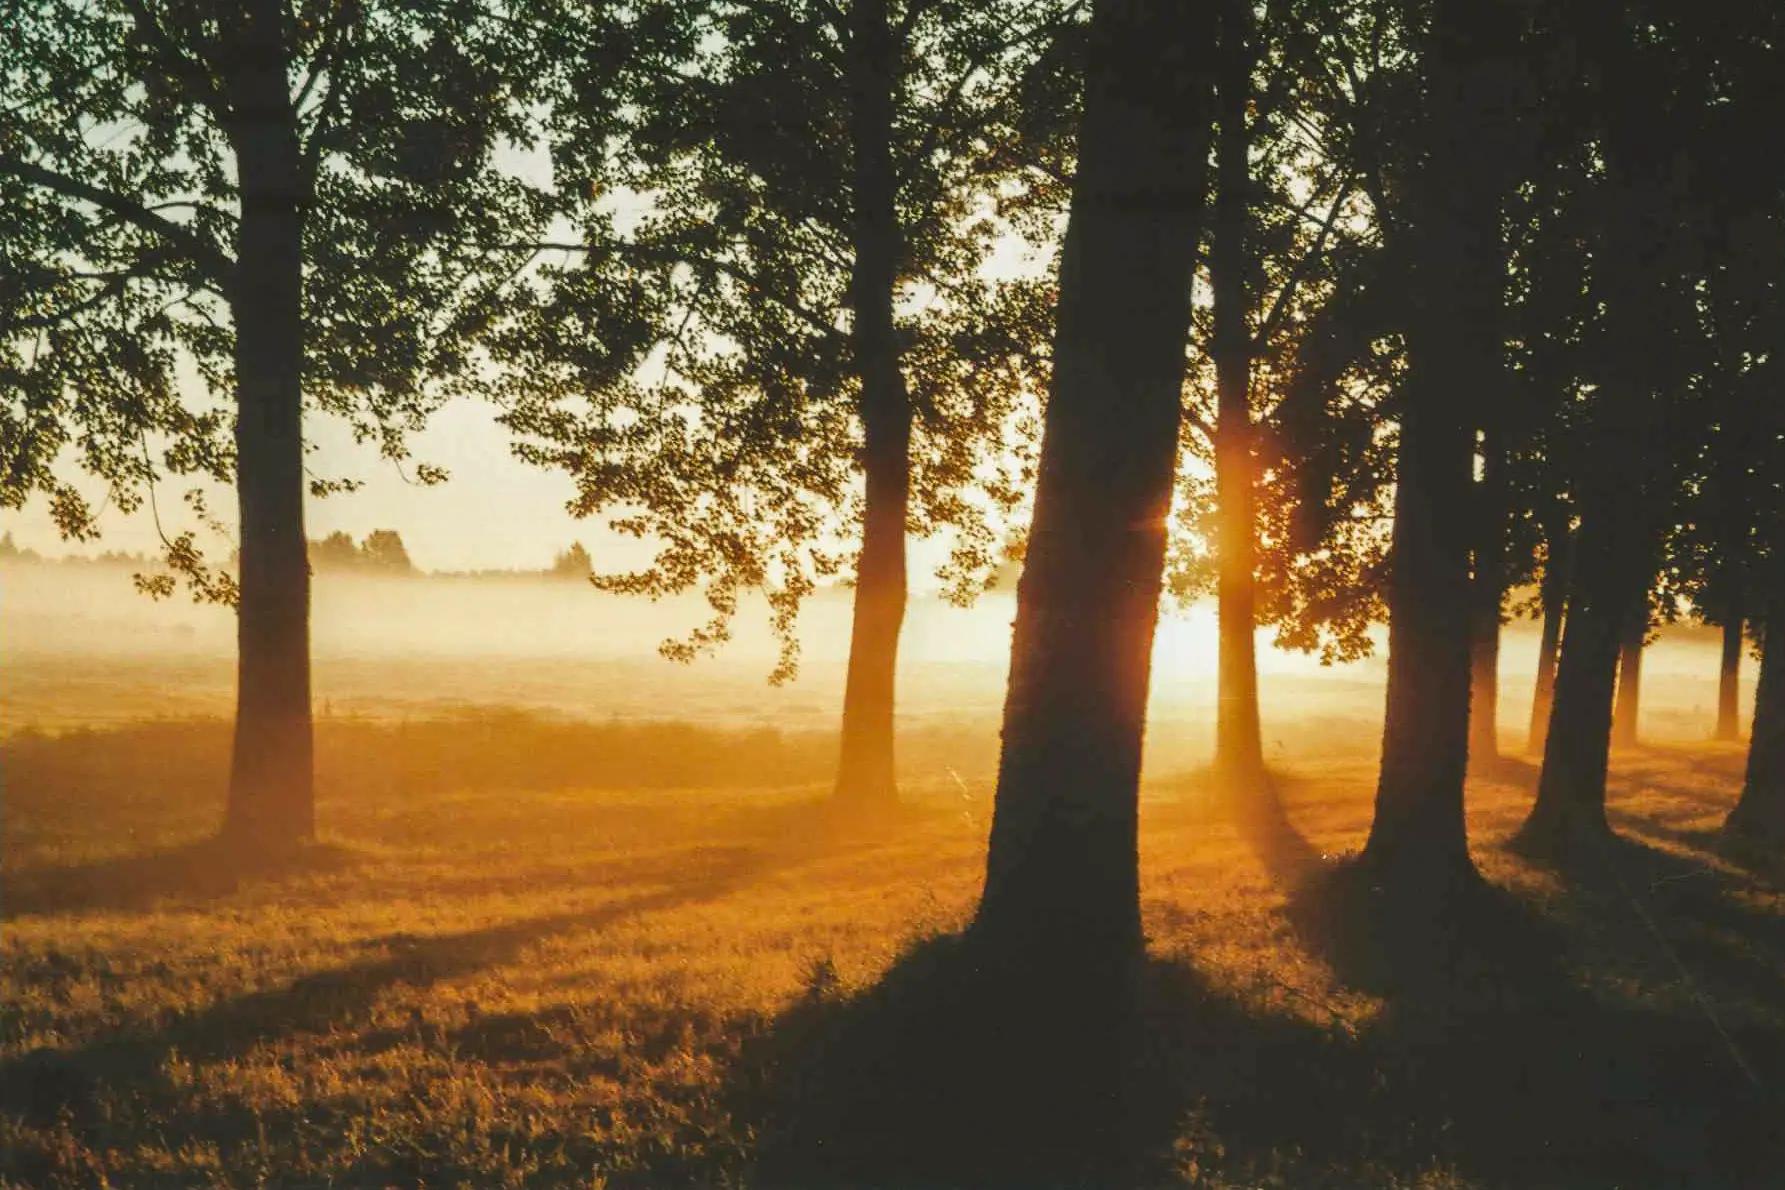
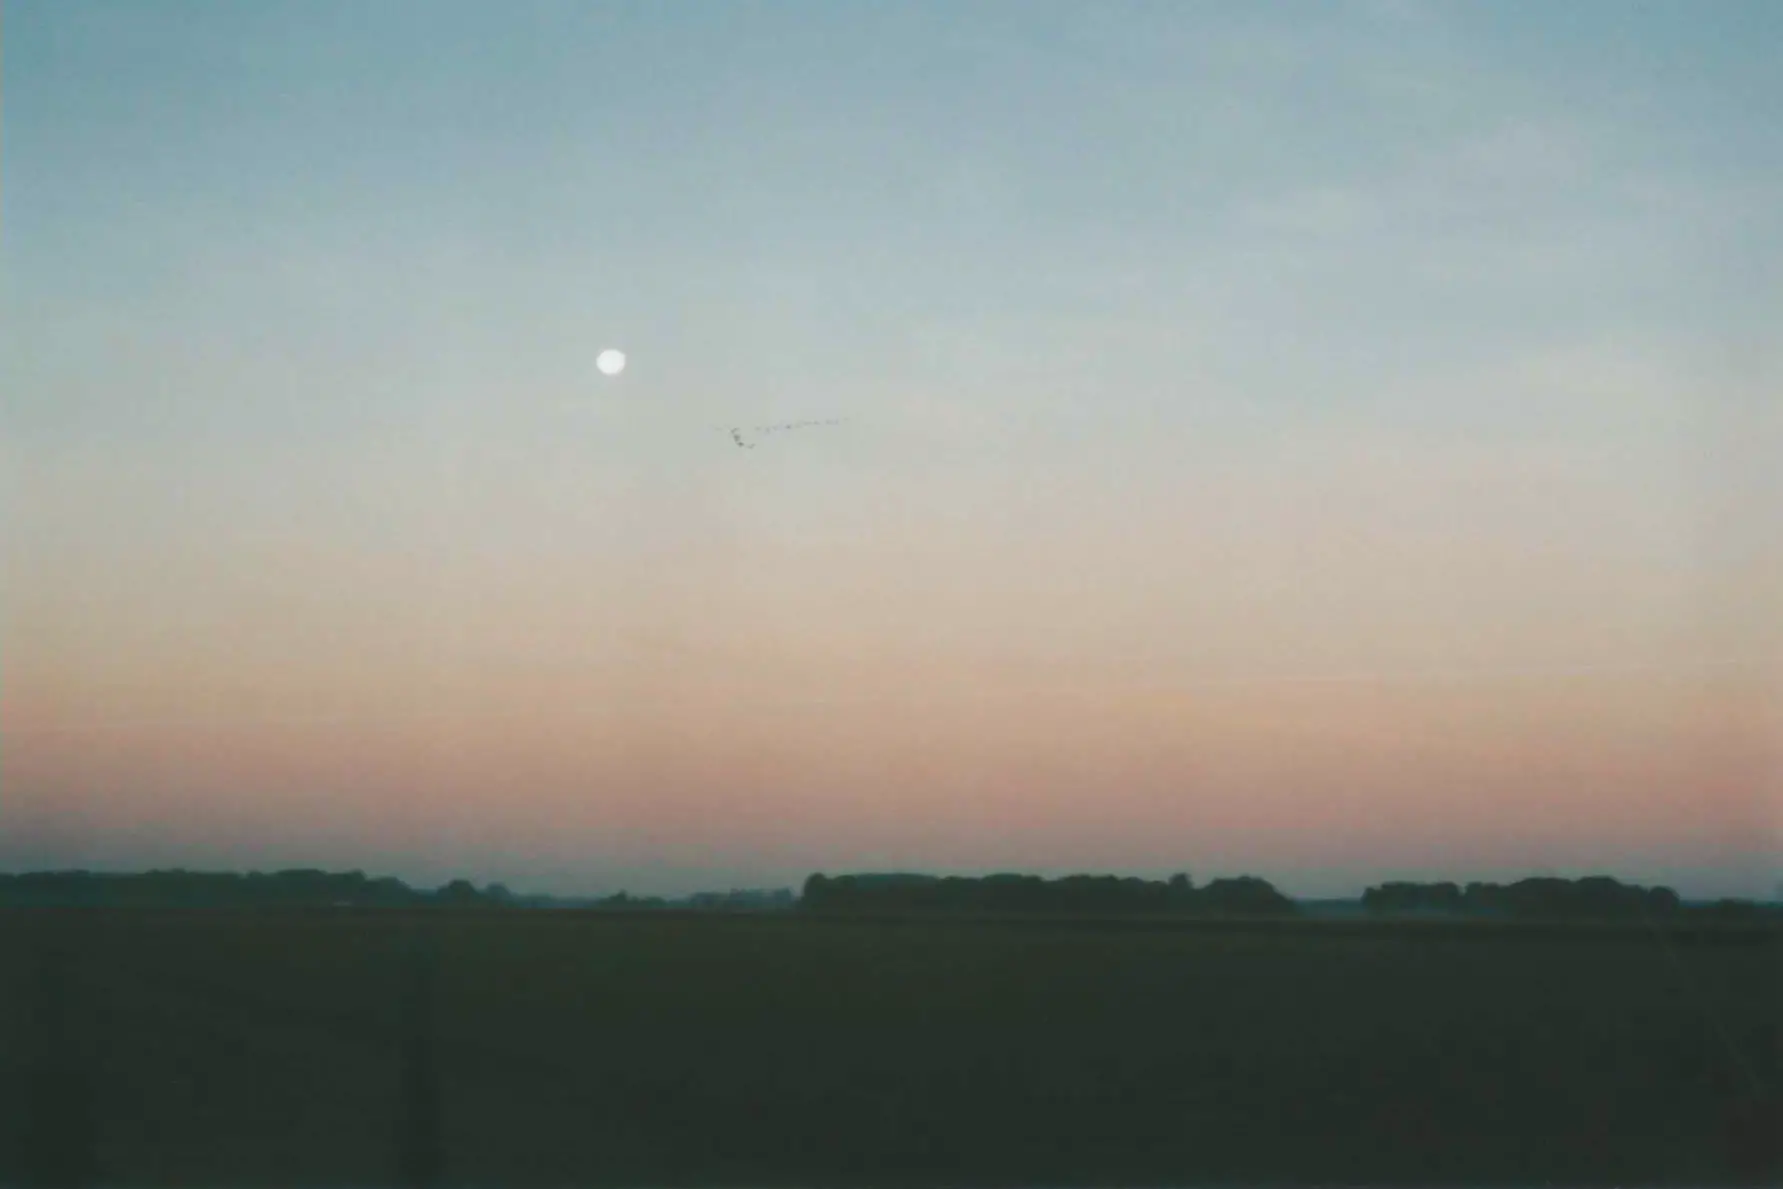
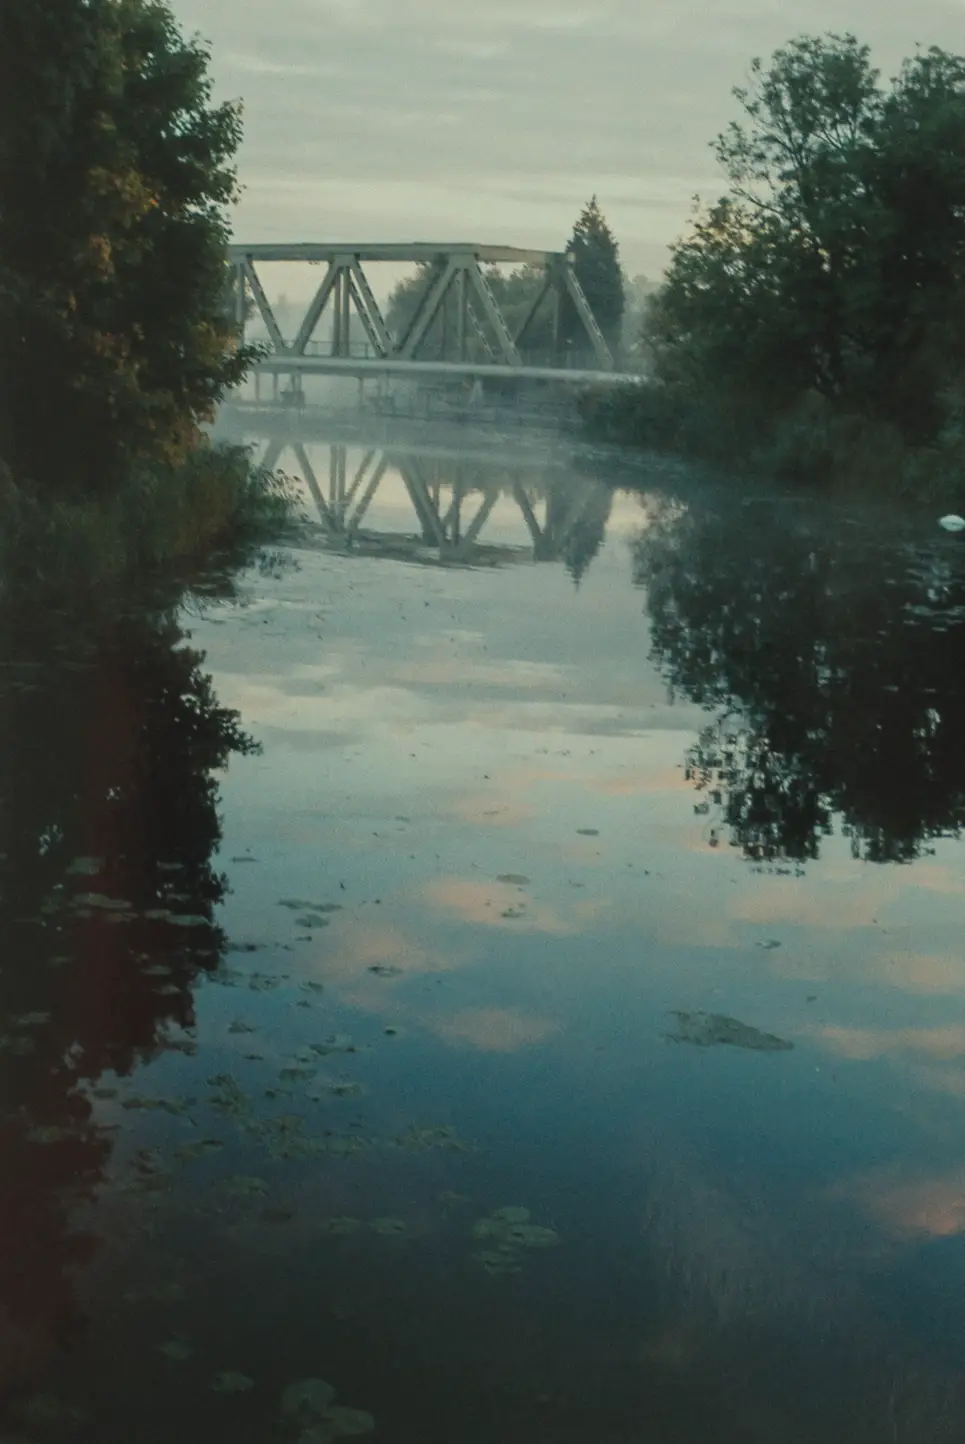
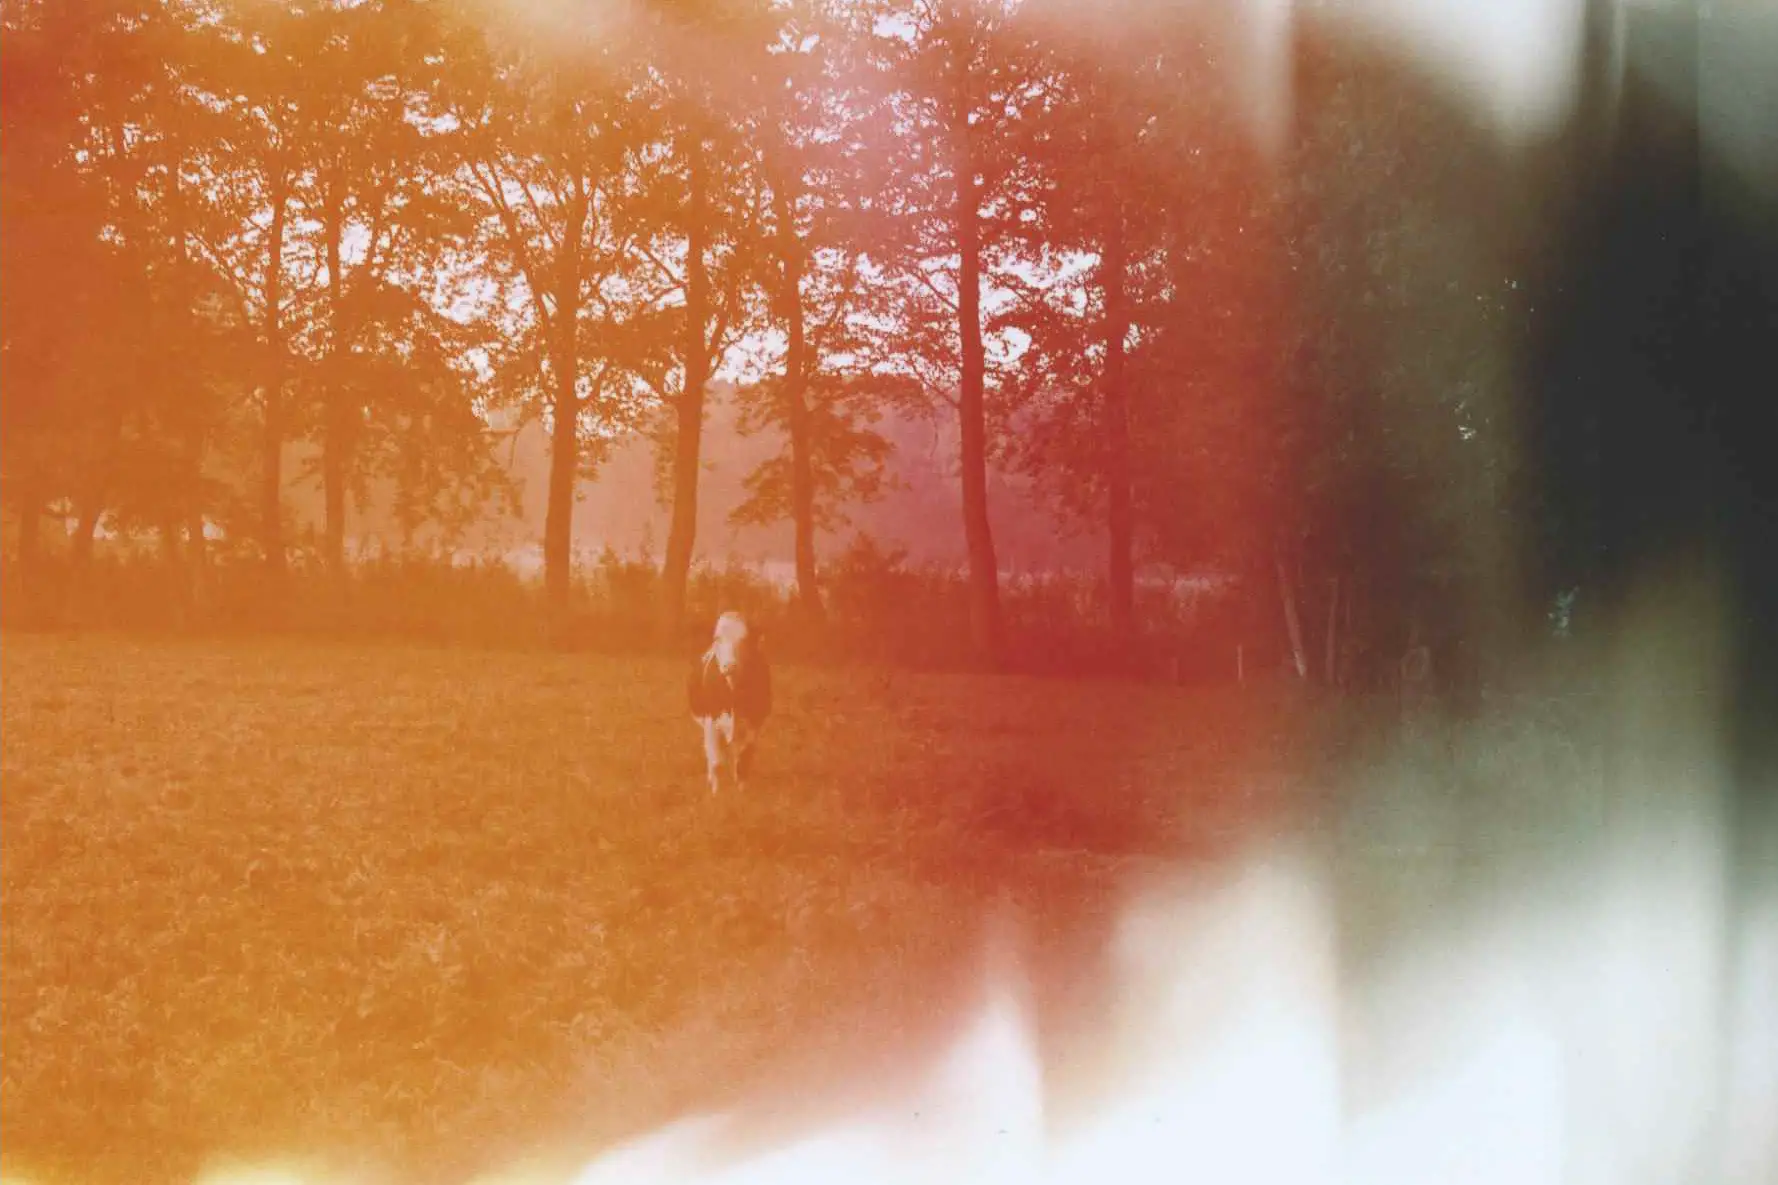
And on a couple of different days I managed to catch some fog and sunrise:

Film2-4
Happy with this, no problem shooting against the sun!
Film2-7
In this photo I miss the crisp sharpness that I get with my digital camera. The birds in the sky are a bit fuzzy.
Film2-5
Again, better definition in the sky.

My confidence was growing, the Minolta felt more natural, I felt more at ease, and I stopped using the light meter app and even stopped bringing the M. And then I messed up…

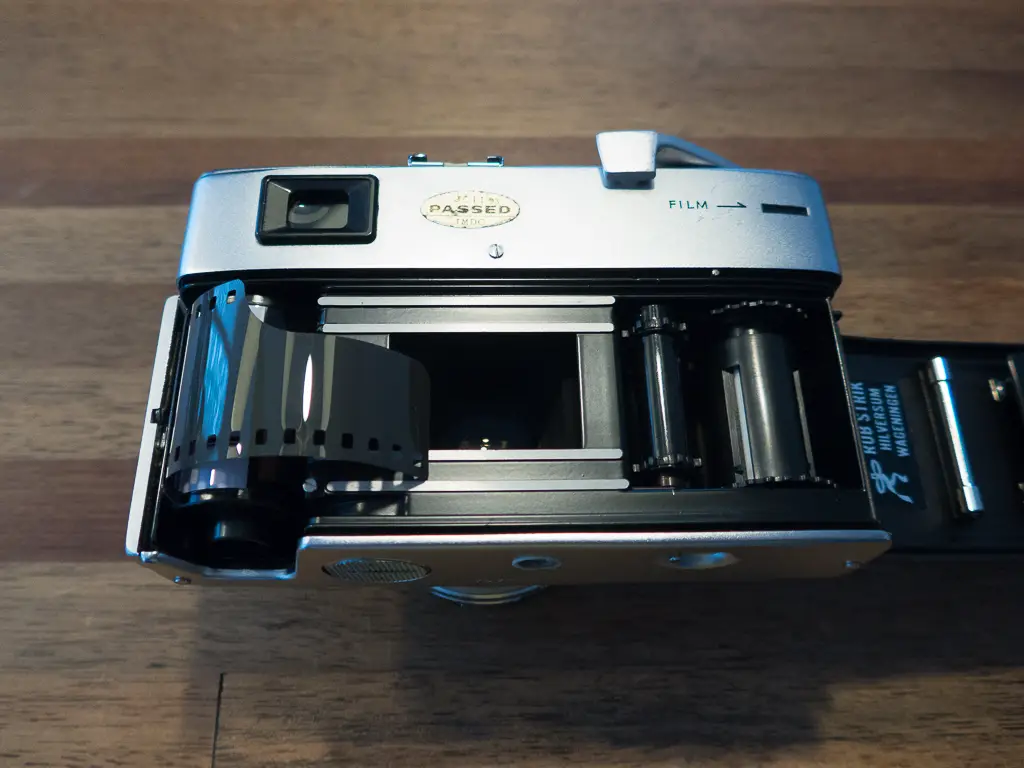
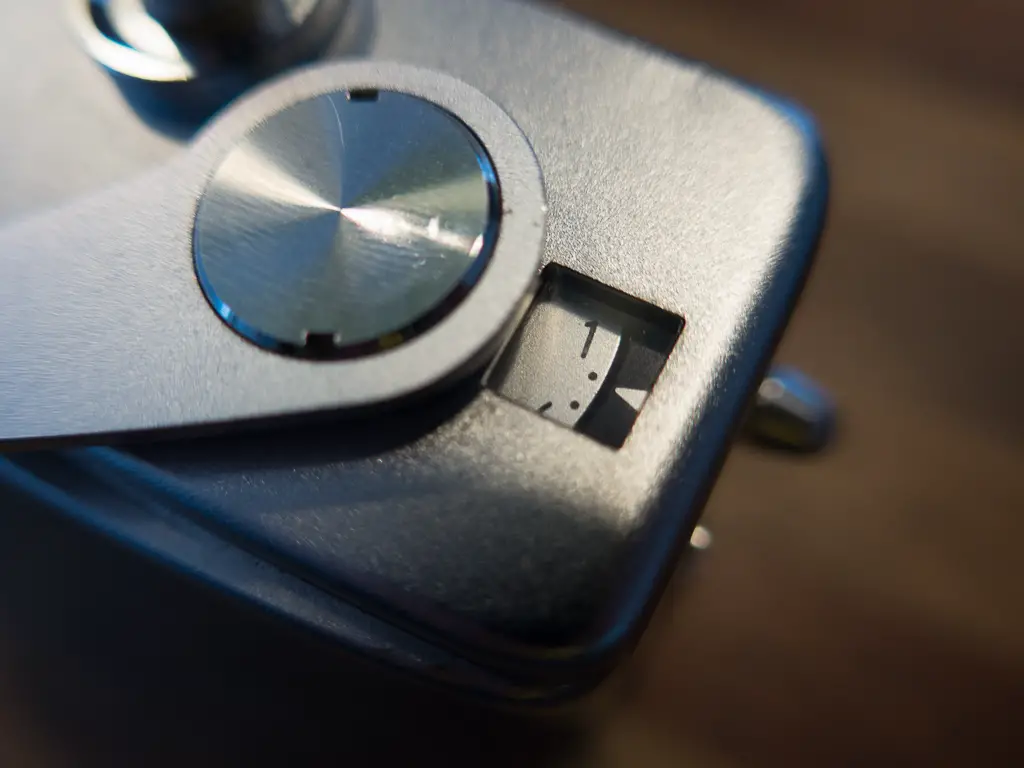
I shot my last photo of the film and thought I remembered how to rewind the film. But I was wrong. I tried both directions (clockwise and counterclockwise) but forgot to push the small pin on the bottom. At a certain moment I heard a click, when I knew I couldn’t have rewinded the whole film, but I didn’t feel any resistance anymore. I didn’t know what had happened, but it felt as if there was no connection between the film and the lever. On my way home I came across a photographer’s store, so I walked in and discussed with her what to do. I think she didn’t really understand what I tried to explain, but we decided to open the door of the camera to have a quick look inside. Bad choice… But I noticed the film was on the right, and the film’s holder (how do you call that?) was on the left. Unattached. The lady photographer then advised me to go to a different store with a more experienced owner. This guy was clearly more knowledgable (and aged, he remembered selling the same Minoltas when they were new!). We were able to save most of the film, but this is the result for some of the last photos:

Film2-8
I made a mistake, and opened the camera to see that the film had tore from the holder. Of course this resulted in this.. Poor cow 🙁
Film2-9

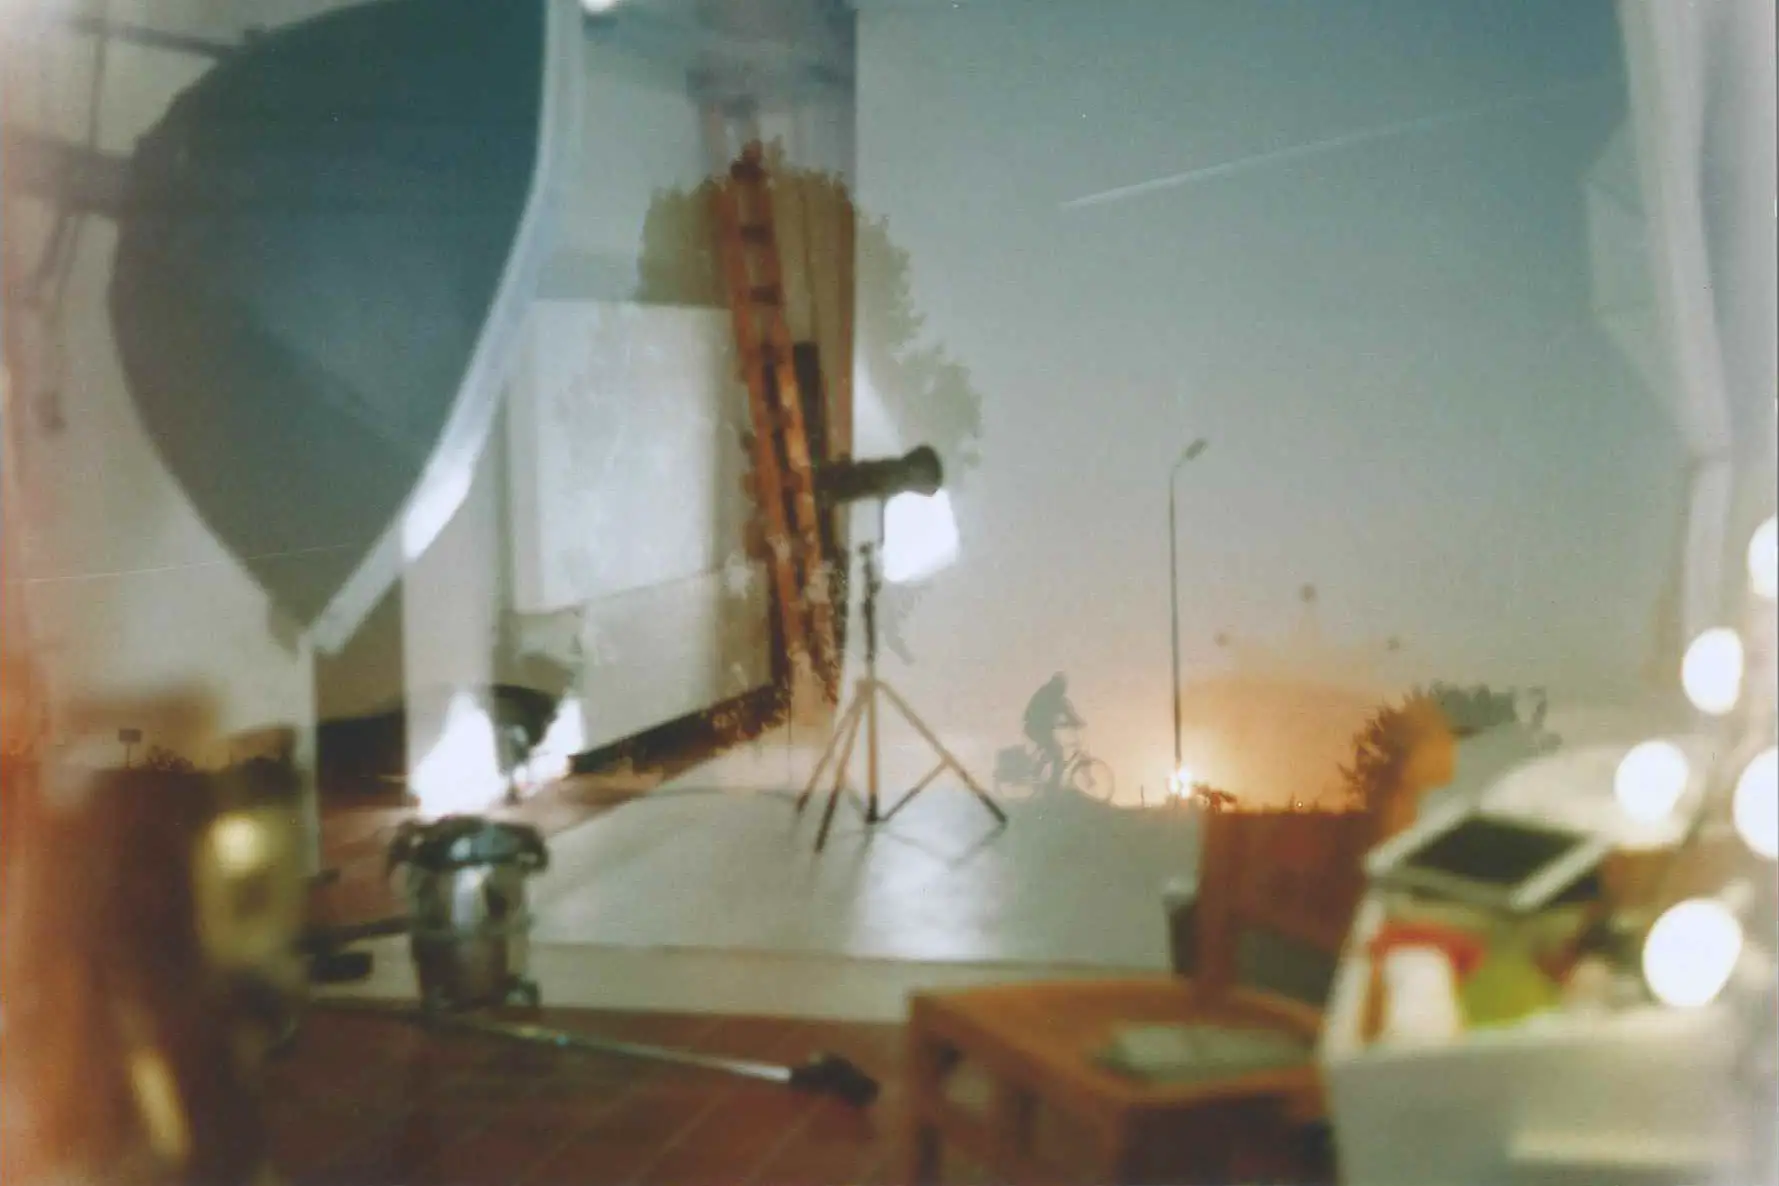
I actually kind of like the double exposure effect on this last one, but of course it was not intentional.

For this second film I tried different scanning options. As I wasn’t happy with the scans from my first film I wanted something different. The nice guy from the last store I visited advised some high-resolution scans, but at 2 euro per photo. That might be fine for a small selection of photos, but seemed a bit expensive for this experiment. So for this post I tried scanning the print with a HP scanner, and making a photo of the print with my Leica M. Both are not perfect. I am now considering buying a reflecta x8 negative scanner, but any tips and recommendations are appreciated!

So far, I am not really sure whether I like film. With digital, I like the post processing part. I shoot raw, and I quite enjoy creating the look I want in Lightroom. With this set of photos I missed that part. And I didn’t quite feel at ease leaving my film at some place else, in the care of someone else. But I love to learn new things. That makes this process really enjoyable. And there is a lot to learn: the difference between types of film, where to have it developed, how to scan…

I am not totally happy with the results yet, but I love a challenge, and now I am determined to get a good photo from film. I was already more happy with the results from the second film than from the first, so I can appreciate a bit more the magic and excitement of getting back the results from a film. To improve my chances I bought some fuji film (instead of the unbranded ones I used here). Ultimately, if I can make this work, it could be another tool in my photographers bag. That would be great!

I will continue this journey, and if you are interested in reading about my progression, you can read Part 2 here, or check my website (where you can also find my digital journey): www.whataukjesees.com.

Thanks for reading, and Hamish, thanks for having me!

Share this post:

Find more similar content on 35mmc

Use the tags below to search for more posts on related topics:

Contribute to 35mmc for an ad-free experience.

There are two ways to contribute to 35mmc and experience it without the adverts:

Paid Subscription – £2.99 per month and you’ll never see an advert again! (Free 3-day trial).

Subscribe here.

Content contributor – become a part of the world’s biggest film and alternative photography community blog. All our Contributors have an ad-free experience for life.

Sign up here.

About The Author

By Aukje
Amateur photographer from the Netherlands, trying to figure it all out. I mainly shoot landscapes, but as I love taking photos I shoot other things when there is no landscape available.
View Profile

Comments

Matthew on My First Film Camera – by Aukje

Comment posted: 07/10/2015

I honestly prefer the film photos, though maybe the M240 needs some post processing.
Reply

Leave a Reply

Your email address will not be published. Required fields are marked *

Aukje replied:

Comment posted: 07/10/2015

Thanks for your comment, Matthew. I would do some pp on the M240 photo, but I used the raw file here for comparison.

Reply

Leave a Reply

Your email address will not be published. Required fields are marked *

Rob on My First Film Camera – by Aukje

Comment posted: 07/10/2015

Aukje, we've all forgotten to press the film rewind release at some point - I've even managed to do it three times. Doh! But eventually the brain adapts!

As for the images - if you are used to digital editing, it takes some time to adapt to film, as it's a totally different medium. Comparison is never a good thing to base your practice on. I found it helpful to look at as many film images as I could by other photographers, so my eye became focussed, so to speak, on what film does well.

I think the shots from your second film are excellent! Really. Maybe your digital eye can't see clearly what you have there. Eventually your film eye will help you realise that you are already producing really good film photography.
Reply

Leave a Reply

Your email address will not be published. Required fields are marked *

Aukje replied:

Comment posted: 07/10/2015

Thanks for your kind words and advise, Rob. For me it is a bit like using a new lens, it takes time to learn how to use it best, and to understand it's application.

Reply

Leave a Reply

Your email address will not be published. Required fields are marked *

Fang-Wei Lin on My First Film Camera – by Aukje

Comment posted: 07/10/2015

Hi Aukje,
I think the film photography is a way of learning to accept what may seem imperfect in the digital point of view... for example, I totally loved the cow photo because it has such a pretty rainbow kind of colours on it, and that's not something digital photos can fake. Your careful attitude towards films does inspire me to be more respectful to each click I make with my film camera though, thanks for your article here !
Reply

Leave a Reply

Your email address will not be published. Required fields are marked *

Aukje replied:

Comment posted: 07/10/2015

Thanks for your comment, fang-wei. I like the 'failed' photos too...

Reply

Leave a Reply

Your email address will not be published. Required fields are marked *

Stephen on My First Film Camera – by Aukje

Comment posted: 07/10/2015

Some nice pictures, the one of the bridge is painterly and I like the "rain rain rain" picture of the ditch/drain running off into the distance.

Since you are happy to post process your digital pictures Aukje, why not consider processing your film negatives too?

By that I mean, develop the negatives and then scan them into Lightroom or something?

It doesn't seem to be easy to find a good scanner for this process, but they are out there and I believe Epson top of the line "V850" flatbed scanners are pretty good.
Reply

Leave a Reply

Your email address will not be published. Required fields are marked *

Aukje replied:

Comment posted: 07/10/2015

Thanks for you comment and advise, Stephen. I think part of the process of learning film photography is developing a good work flow, whether it is finding the perfect photolab or finding a good scanner. I would like to include postprocessing, and I do appreciate your recommendation. However at this moment I am not willing to part with the amount of cash needed for a top of the line Epson.

Reply

Leave a Reply

Your email address will not be published. Required fields are marked *

Matthew replied:

Comment posted: 07/10/2015

Ive got a v600 for scanning 35mm and MF, Id say in the early days just pay the extra for scanning professionally from whoever developing it. If you really get the film bug then self dev and scanning will come.

Reply

Leave a Reply

Your email address will not be published. Required fields are marked *

Anthony Killeen on My First Film Camera – by Aukje

Comment posted: 07/10/2015

Aukje, very nice work, and welcome to film photography! My favorites are also the bridge and the rain scene. I like the atmosphere of both! The double exposure is quite artistic. As we say, a "happy accident". I hope to see more of your work.
Tony
Reply

Leave a Reply

Your email address will not be published. Required fields are marked *

Aukje replied:

Comment posted: 07/10/2015

Thanks for your kind words, Tony!f

Reply

Leave a Reply

Your email address will not be published. Required fields are marked *

walker on My First Film Camera – by Aukje

Comment posted: 07/10/2015

I like every single shot you've made [faults included!]. Keep shooting film!
Reply

Leave a Reply

Your email address will not be published. Required fields are marked *

Aukje replied:

Comment posted: 07/10/2015

Thanks for the support Walker!

Reply

Leave a Reply

Your email address will not be published. Required fields are marked *

Dina on My First Film Camera – by Aukje

Comment posted: 07/10/2015

Hi, Aukje, well, i have a minolta too and it's a good camera with a great lens.

And film works it magic even when you open your camera with the film in it!

I started learning about film in my first year of college (more seriously).
After college i bought my first "profissional" digital camera (6 year ago), worked with it for...i don't know...one month...and now i don't even remember i have a digital camera, but i always carry with me one camera or two.
Film is magical. I don't shoot as much as i want because of the lack of time, but for me it is better in every aspects. I like the feeling that you have when you have to stop and think in what you are seeing, really seeing. Stop the time for a moment. In digital you don't have that, because you just press the button and keep shooting.
I'm not a profissional photographer, but i know a bit about photography, not much as i want, but even now (i had my first camera when i was a child) i hate most of my pictures, and it's fine, it is part of the process, you just have to push yourself to one more roll and another one...and another one...
Aukje, try another roll of film and forget about the post process in Lightroom and the raw files, soon you will fall in love...i can tell you that!

Have fun girl!
Reply

Leave a Reply

Your email address will not be published. Required fields are marked *

Aukje replied:

Comment posted: 07/10/2015

Thanks for the support Dina!

Reply

Leave a Reply

Your email address will not be published. Required fields are marked *

JR on My First Film Camera – by Aukje

Comment posted: 07/10/2015

There's a very important thing to know, here, and it took me a long time—probably the better part of a year—to learn it: The exposure you see in your scans and your prints is *only loosely related* to what you shot on the film. The same is true for contrast and color, by the way. Please let that sink in.

What's going on is the lab scanner is producing a digital RAW file by scanning your negative. This RAW file receives auto adjustments—possibly based on the scanner’s scene detection software with possible lab technician input—before being cooked into JPEGs for your CD and or prints. Again, the resulting images are only loosely related to the image recorded on film. I don't see this discussed much, especially for a newer film shooters, and I find that unfortunate.

The best solution for learning and then controlling the look of your images is to scan yourself with a decent—and not necessarily expensive–dedicated film scanner. I find the resulting RAW files to be just as flexible as my digital RAW files. I wanted you to know that since you mentioned your digital workflow involves plenty of post-processing. Understand: a film-to-digital "hybrid" workflow can give you much of that same ability.
Reply

Leave a Reply

Your email address will not be published. Required fields are marked *

Aukje replied:

Comment posted: 07/10/2015

Thanks for your comment JR. That is indeed helpful. I like to have some control, that's also what I like about shooting raw with my digital camera. You are right that there is less discussion online about the scanning and post processing part of film photography, some film-photographers actually prefer film because of the lack of post-processing. I guess there are different options, the same as with digital.

Reply

Leave a Reply

Your email address will not be published. Required fields are marked *

Rollbahn replied:

Comment posted: 07/10/2015

I was about to write the same thing JR having also been through the same experience over the last couple of years and coming from a digital workflow to film. The scans - which I am 100% certain are Fuji Frontier, in most labs are automated. So comparing the exposure by looking at the film versus digital RAW have almost nothing to do with each other. The RAW from your M is just that - you would then fix the image and push and pull the exposure and everything else to get the image you want. The film scan has already had that done to it and as such its "exposure" is not the actual one on your negative. Having done ALOT of scanning (on everything from Epsons to Imacons to Fujis) you can very easily get back all the detail in the sky, while still keeping the rest of the image looking natural. If you go to pro labs they will fine tune your exposures to account for colour casts and highlights/lowlights etc but the automated Fuji/Noristsu scans pick the middle ground. Also film should be exposed for the shadows and digital for the highlights so when shooting the cityscape with the large area of sky you want your M to underexpose so your sky doesn't blow out because digital can is far better bringing back shadow detail but for film you should be looking at the scene and thinking there is dark area in the park on the bottom left and giving your film shot an extra stop or two more light if light permits eg 250th to 60th but perhaps not 60th to 15th as you risk a blurred picture. There is a lot to learn with film but it is extremely forgiving on the highlights side of things so you can go 3-4 stops over and when you get your scans back nothing will be over-exposed - just the shadows will look better. I almost always set my Portra 400 to ISO100 on the camera eg shoot everything two stops over and even then I meter for the shadows so 1 or 2 stops. Having said all that - your images look great - especially the top ones - great colour and clarity. You'll find the Fuji or Noritsu scanners in most labs will give you the best result and normally far better than doing it yourself on an Epson V700 or similar - you will pull your hair out trying to get the "right" colour. With film if you get the light right, the scanning part is very simple. Just remember that $5 automated scans are $5 for a reason. After I purchased a Fuji scanner recently I was blown away by the amount of detail available on a full res scan as opposed to the very same negative scanned quickly at a local lab - they literally look like two different shots so don't get put off film by your scans. A good idea is also to get a loupe from somewhere like B&H and put your negatives over your Phone with a white screen and look at what is actually on your negative. So the image where you think the birds are soft in the sunset - check to see if that is your fault. It could be that the rangefinder is off at infinity, it could be that you focussed incorrectly, it could be that your $5 scans just aren't hi-res enough to show that level of details - but the detail si actually there on the negs. Anyway enough rambling from me - but don't give up on film. Like everything it is a craft that has to be learnt like shooting RAW and using Lightroom or Photoshop - huge learning curves...pun intended :)

Reply

Leave a Reply

Your email address will not be published. Required fields are marked *

Aukje replied:

Comment posted: 07/10/2015

Thank you Rollbahn, for taking the time to comment. I realised yesterday after reading the other comments that I was indeed comparing an undeveloped digital file to a developed analogue file. I learn a lot from all your comments, so thanks!

Reply

Leave a Reply

Your email address will not be published. Required fields are marked *

Rollbahn replied:

Comment posted: 07/10/2015

No worries Aukje - the main thing is you have a good eye for photography so any camera is going to work well...digital or film :)

Reply

Leave a Reply

Your email address will not be published. Required fields are marked *

tani P on My First Film Camera – by Aukje

Comment posted: 07/10/2015

Nice shots! I also have a 7S & love it. It was my first rangefinder, found it in a thrift shop. The comparison shots were super interesting. Film tends to have a much wider exposure latitude than a digital sensor, so that might explain some of it. I think I'll have to load up my 7s again soon...
Reply

Leave a Reply

Your email address will not be published. Required fields are marked *

Aukje replied:

Comment posted: 07/10/2015

Thanks for you comments Tani!

Reply

Leave a Reply

Your email address will not be published. Required fields are marked *

jeremy north on My First Film Camera – by Aukje

Comment posted: 08/10/2015

Great article Aukje and of course the Minolta is a superb camera.

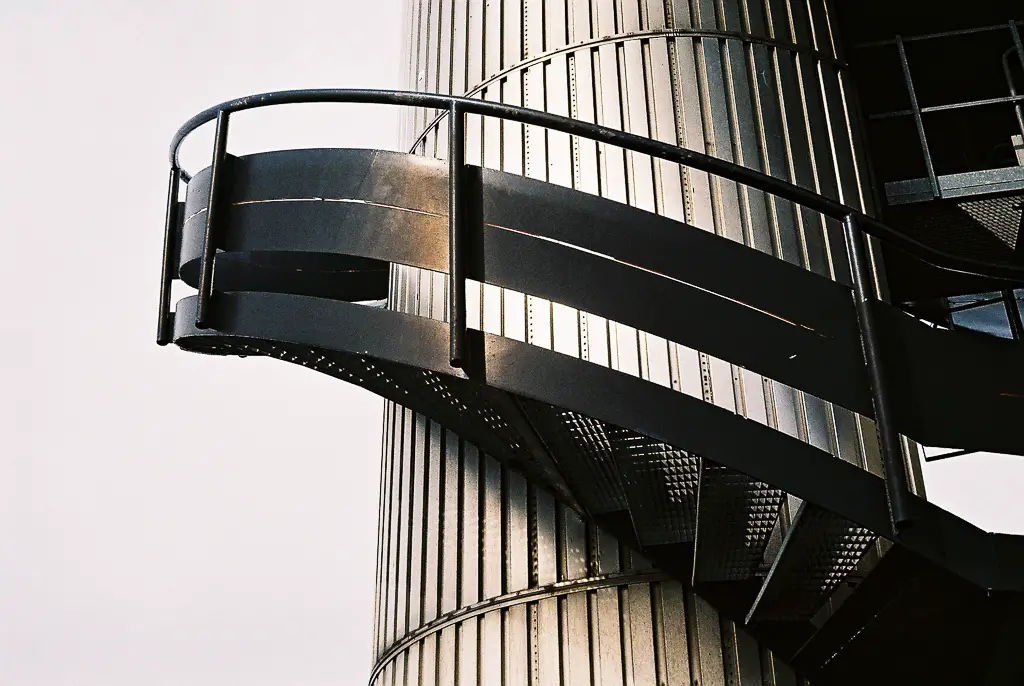
My favourite picture is of the spiral steps. I really like the sheen on the metal of both the staircase ant the body of the structure.

I can tell that you are going to love shooting film. I think your next experiment should be with black and white. HP5 or Tri-X.

I agree with the comments above about getting a scanner. However don't lose heart if your scans aren't perfect first time. It is an art in itself to learn how to get the most from your negatives/transparencies.

Speaking of transparency film you must shoot a roll of that too. You'll delight to see the developed result.

I bet the next camera you buy will be an old M.
Reply

Leave a Reply

Your email address will not be published. Required fields are marked *

Aukje replied:

Comment posted: 08/10/2015

Thanks for your nice words Jeremy. And I will take your suggestions to heart.

Reply

Leave a Reply

Your email address will not be published. Required fields are marked *

My First Film Camera - Part 2 - Guest Post by Aukje - 35mmc on My First Film Camera – by Aukje

Comment posted: 07/11/2015

[…] month ago I wrote a guest post about my first steps in film photography. I got some very useful feedback, and encouragement to […]
Reply

Leave a Reply

Your email address will not be published. Required fields are marked *

A Fun Intermezzo with the Minolta Riva Panorama - Guest Post by Aukje - 35mmc on My First Film Camera – by Aukje

Comment posted: 22/02/2016

[…] is not my first film camera experience. The Minolta I wrote about in my first guest post was not my first film camera. The truth is that I am old enough to remember a time when there were […]
Reply

Leave a Reply

Your email address will not be published. Required fields are marked *

Ralph replied:

Comment posted: 22/02/2016

Good morning, Aukje; Thank you for relating your experience in becoming a "film photographer" after some time working with digital photography. Just by your starting with a direct comparison of what you see with your film compared with what you get with a good digital camera, you have discovered that there really are differences in the ways that the two photography systems perform in recording a subject or scene, and that there are also many other factors that can influence what you eventually see in a print made from a film negative. The emphasis here is on the "many other factors" in the equation. Color or colour in a photographic print is a fleeting thing, and it is hard to capture and reproduce faithfully. I wish you could have been here starting to do this back about six years ago when we still had at least Eastman-Kodak Company (EKCo) Kodachrome-64 color negative film, and Dwayne's Photo in Parsons, Kansas still had the EKCo K-14 Process machine running still. Paul Simon's song about his Nikon camera and Kodachrome film really did describe a lot of the "flavor" of that film, although I think that he was describing more what you got from the earlier EKCo Kodochrome ASA 25 color negative film. Rollbahn and others have already described many of the things that influence the color you get eventually on your print. About the only thing I can add to their comments are such things as the lens itself and the coatings on the lens glass elements to reduce internal lens reflections. The Ernst Leitz Leica lenses, such as the Summicron, seem to have a very pale bluish color cast that gives the image a slightly "cool" look to the image colors that are formed on the film, while the Minolta ROKKOR lenses tended to use coatings that produced a "warmer" cast to the colors on the film negative. That is one direct difference I can point to as providing some influence in what you will see on your prints from just the two cameras you used. For trying to adjust and color balance your film scanners, color monitors, a color correcting filter pack for use with an enlarger, and just about any other equipment used in making a comparison of the colors resulting in any comparison, the use of a standardized color patch target as an original color subject might be a useful tool to have in pursuing this work. And it is work. Even the venerable Nikon CoolScan LS-9000-ED has adjustments for color response. One drawback I can see at this time is the price of such a standardized color patch target. When I was looking for one last year in preparing for recording the lighting color shifts seen during the 2017 August 21 Total Solar Eclipse, I think such a target was about $ 200.00 USD. Then the smoke in the air from the forest and rangeland fires around the site where I was, added a variable of unknown characteristics that made such photography moot. Oh, Well. There is always 2024 April 08 coming. My own preference in the Minolta Hi-Matic rangefinder line is the Hi-Matic 9 with a full range of lens apertures and shutter speeds that allow a wider range of photographs under varying lighting conditions. It is also a little heavier than the Hi-Matic 7s or the 7s II, which does help in keeping the camera still when taking a photograph. Mass and inertia are still the original camera image stabilization or vibration reduction system. Anyway, Aukje, keep at it, and have fun with your cameras. Enjoy; Ralph Latte Land, Washington

Reply

Leave a Reply

Your email address will not be published. Required fields are marked *

Aukje replied:

Comment posted: 22/02/2016

Thanks for your elaborate response. It has been over 2 years since I wrote this article, and I have a lot more experience with color photography, but it still is a puzzle sometimes. I posted a photo once in a facebook group with a remark that I particularly loved the blue in it, which I only found on one day at a specific moment of the day. The reaction of the moderator was that color is just a white balance setting, that made me so angry! Anyway, I left the group and continue looking for the right colors with all the tools we have (film/lens/light/etc...)

Reply

Leave a Reply

Your email address will not be published. Required fields are marked *

Leave a Comment

Leave a Reply

Your email address will not be published. Required fields are marked *