Searching for a hobby, I re-discovered photography. I’ve always loved to ‘take pictures’ and remember becoming so obsessed with my grandfathers old Agfa Isolette that he left it to me when he passed. I obviously still have it and I guess I should put a roll of film through it now that I managed to un-stick the focus that had frozen up after being left in storage for a few decades. Perhaps a post for another time?
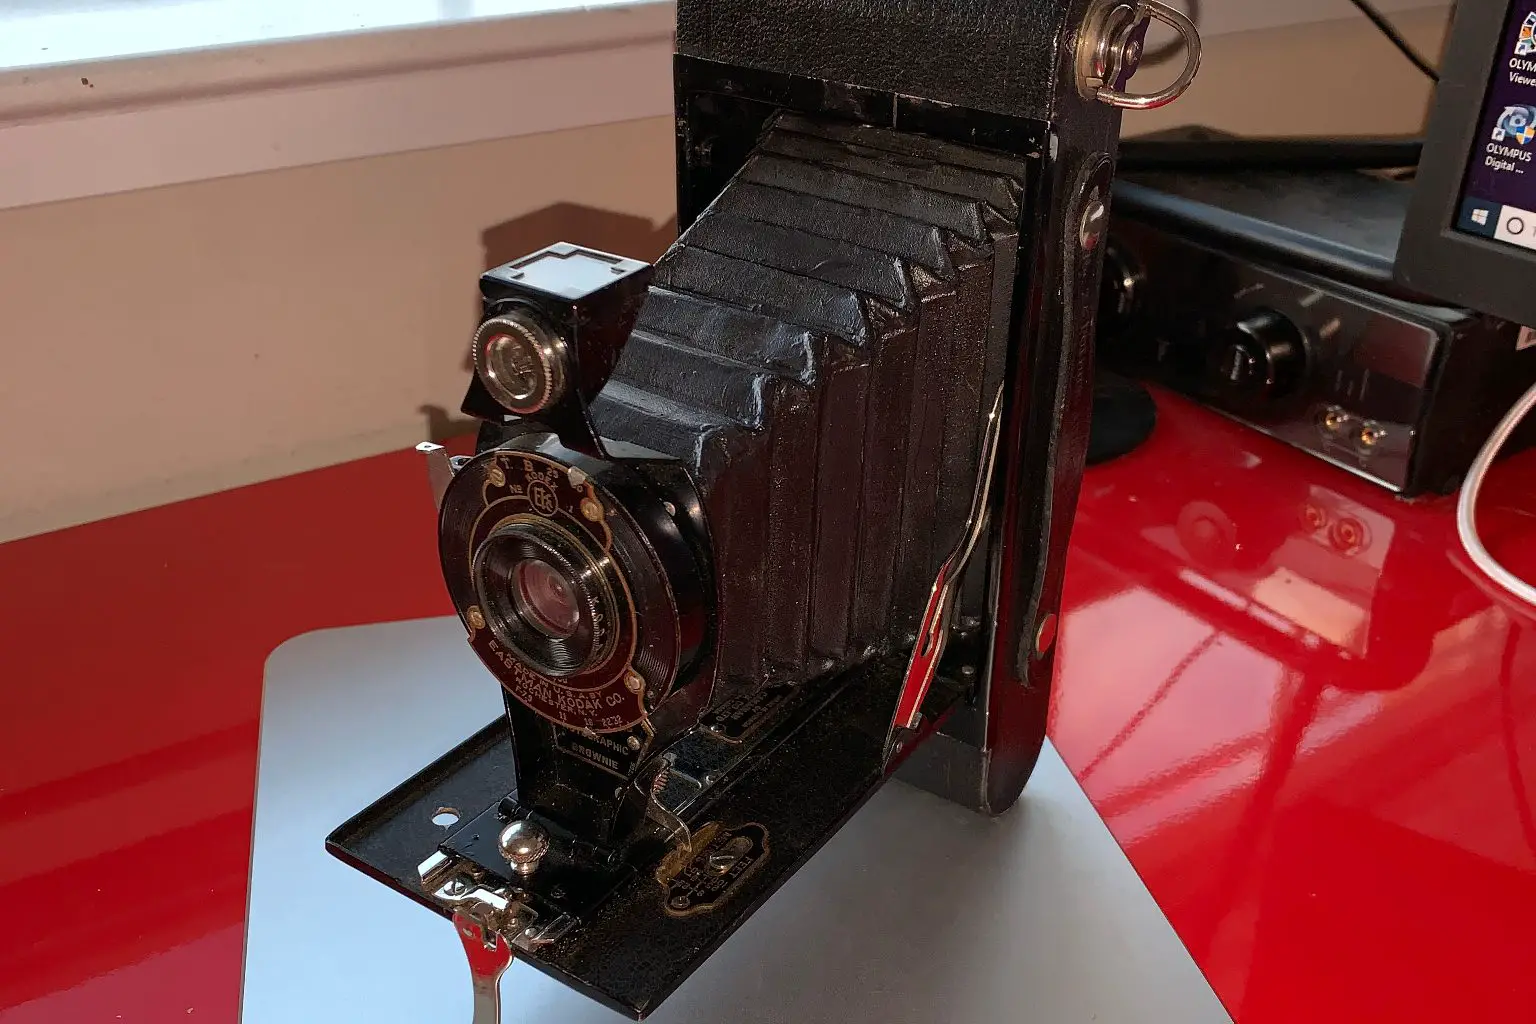
As seems to happen with many people who do the same, I started to acquire lots of random cameras, gear and experimenting with different film formats and film. I also recently ‘graduated’ to starting to develop at home. Once the parentals found out I was into cameras – and after showing them a couple of antique ones I’d picked up mostly for display – they bought me an antique Autographic 2a camera.
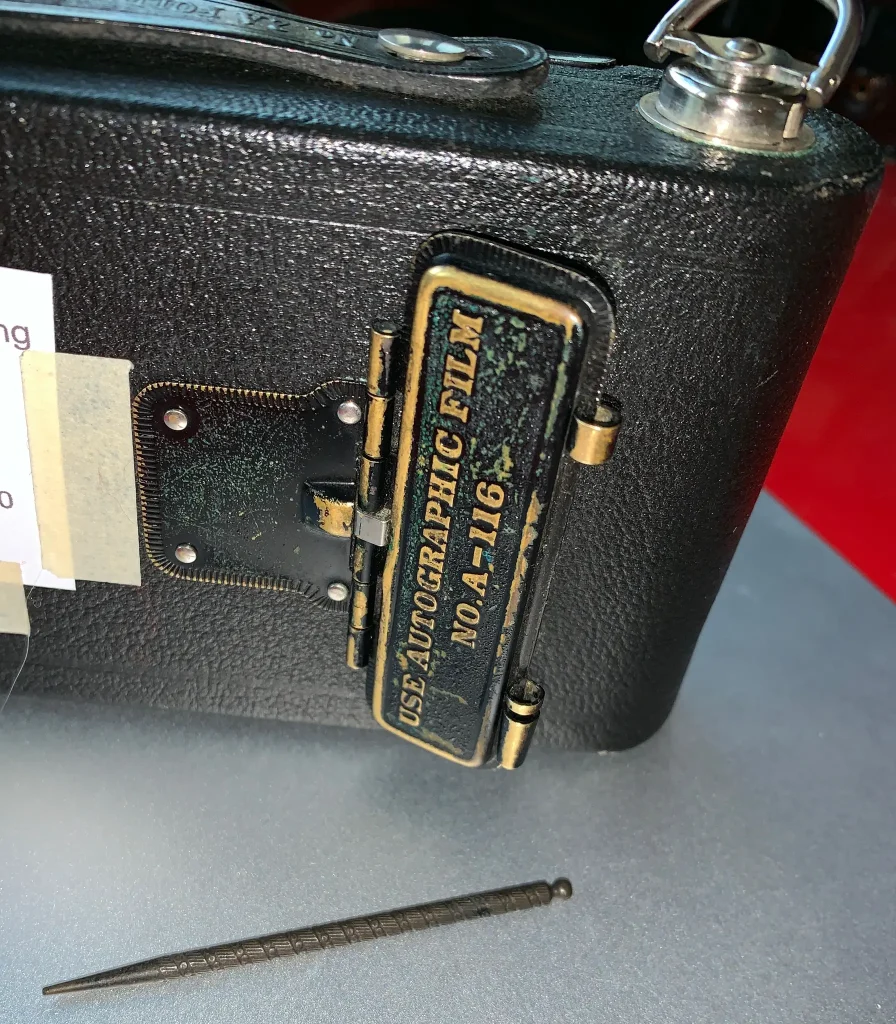
Autographic? I guess if you read the history of Kodak, you will see that over the years, they introduced several film formats that came and went. Autographic film was one of these, being discontinued in 1932. The idea behind it was that there is a small strip of carbon paper that allows light from behind the film to etch itself onto the negative. You open a small door on the back of the camera and scrawl with an iron stylus any information you want to record about the image you’ve just taken, expose it to light for a few seconds and close the door. Think of it as metadata before metadata was even a thing! It sounds really cool, and I wonder if there would be a way to ever replicate this process again through some film hacking with strips of carbon paper…?
A lot of these old camera’s can be found out there, I think most of them are sold as display pieces, because who would actually be crazy enough to go out there and still use one (ahem!) Of course there are a few barriers to overcome before you can go out there and snap away, and some considerations to be made when actually using the camera.
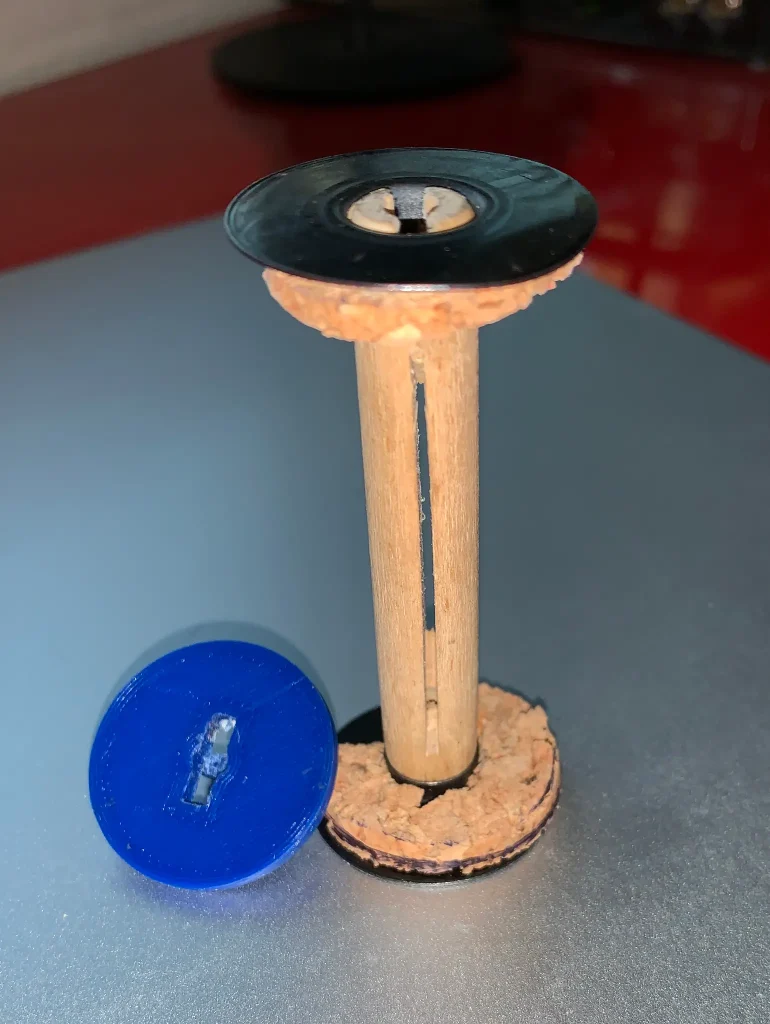
The first of these is the film. Obviously Autographic film is long gone, and so is its non-autographic cousin standard 116 film. The closest film we have today is 120 film, which is not quite as wide as 116 film, which was a whopping 70mm wide. I picked up a 3d printed adapter that allowed me to use 120 film rolls in my camera, but I ran into a problem that might be unique to the Autographic. The key on the mechanism that winds the film goes quite some distance into the film spools, and using the adapter, I found that it was not fully engaging and that I got a lot of slipping when trying to wind the film on.
My solution to this has been to use the empty spool that, luckily, was still inside the camera. I just make some spacers out of a champagne bottle cork to allow the 120 fim to wind onto the wider 116 spool straight. (Ahhh Champagne… is there nothing it cannot do…)
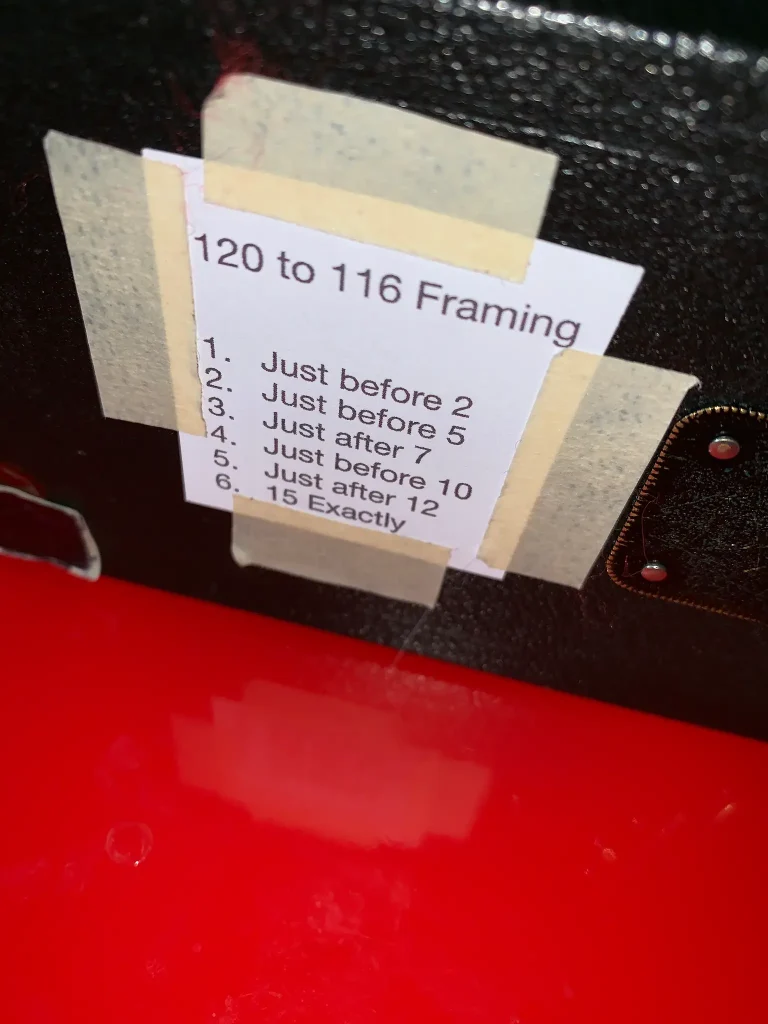
The second problem was figuring out the spacing of the negatives on a 120 film. This was done by running old backing paper through the camera and making a note of where the numbers are when enough film has passed across the film plane so as to not blur the images together. I also needed to mask off the inside and outside of the red window frame counter window due to differences in film width. Unfortunately, this did not prevent a little bit of light leakage during use (see pictures below). I am going to have to design a sliding window that I can 3d-print and stick to the back of the camera so I can seal the window when not advancing film.
With all that done I was ready to go out there and see what kind of images a hundred year old camera can take. But before I did, I was somewhat dismayed that my particular camera had light leaks aplenty on the bellows. Was all my tinkering for nothing? In hindsight, I probably should have checked the bellow’s first.
I was just about resigned to put my gift with all my other display camera’s until I read that it’s possible to repair light leaks with latex paint. So over the next few weeks, I set about lightly painting the holes over and leaving the paint to completely cure. it took a few coats, but I was able to seal up the camera nice and light tight.
So forward to New Years Day 2019 – this was the big day. I was going to take this newly refurbished and modified camera out to take some pictures. It got me wondering about the history of my camera, and what it’s seen and when was the last time somebody used it.
Due to the whopping size of negatives this camera produces – they’re a massive 6x12cm – I only get 6 full shots per roll of 120 film, so I have to make every shot count! Lastly, before I squeezed the cable release for the first time, I needed to adjust my exposure and film type to compensate for the shutter on this camera – a very speedy 1/50 of a second!
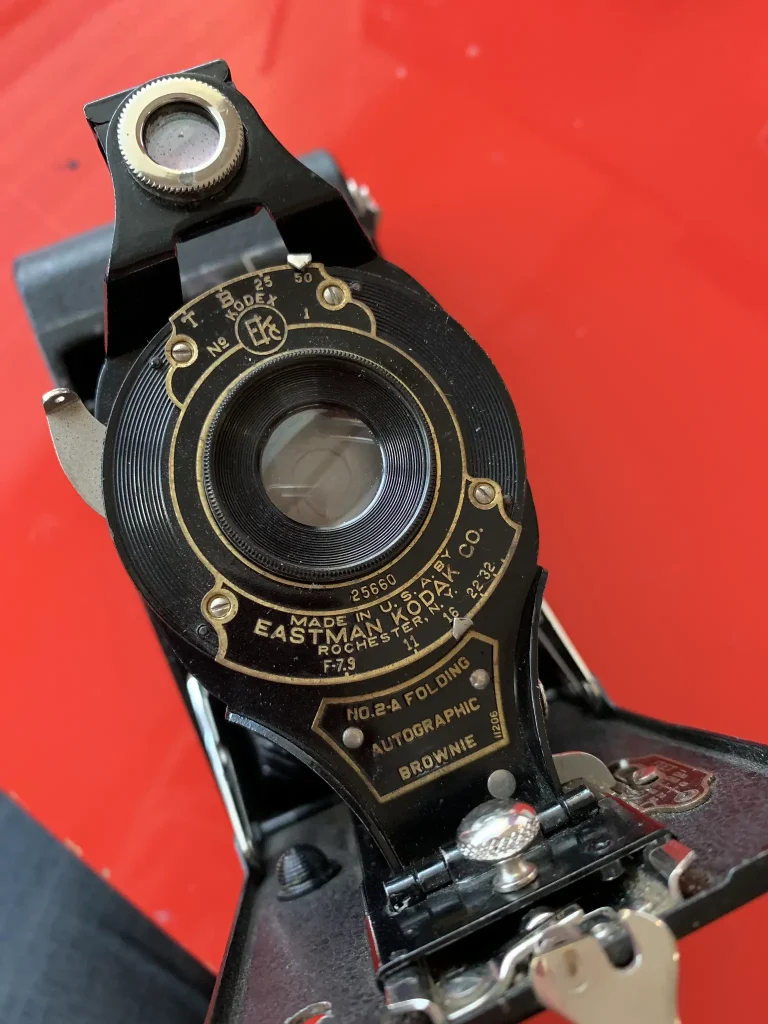
In keeping with the vintage theme of my shoot, I metered everything with an old Gossen Super Pilot light meter and found that using the f/22 aperture would be a 1/60 exposure – close enough!
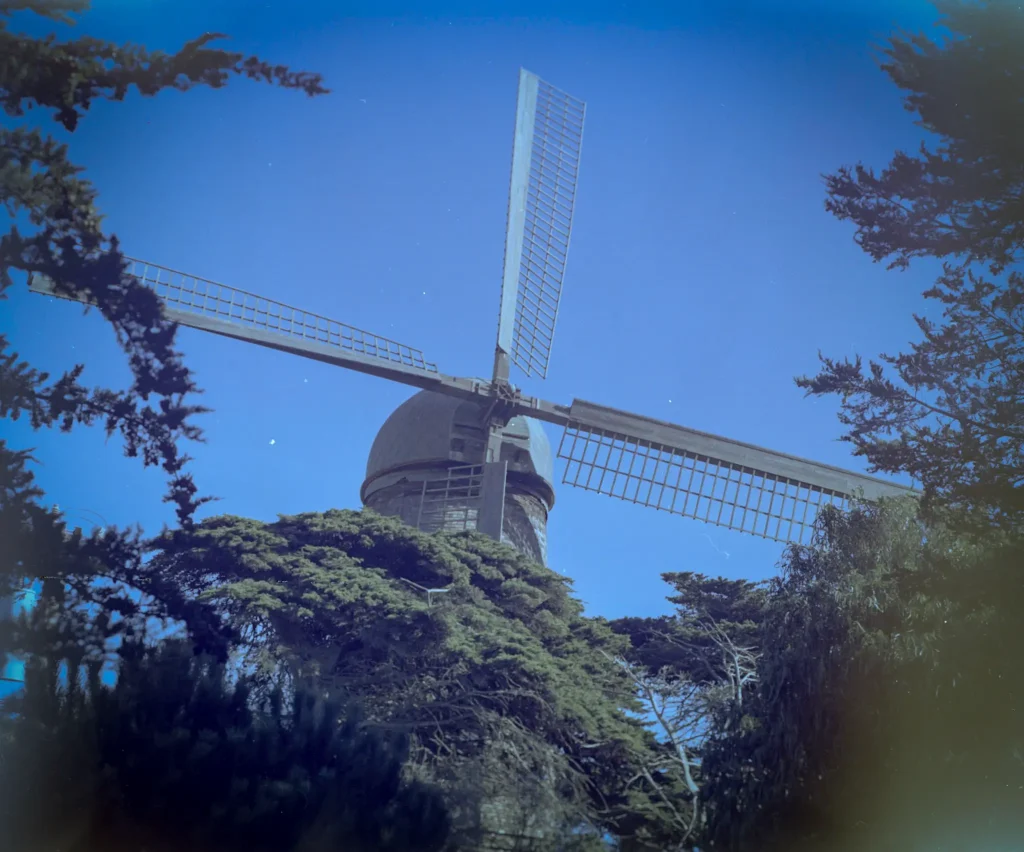
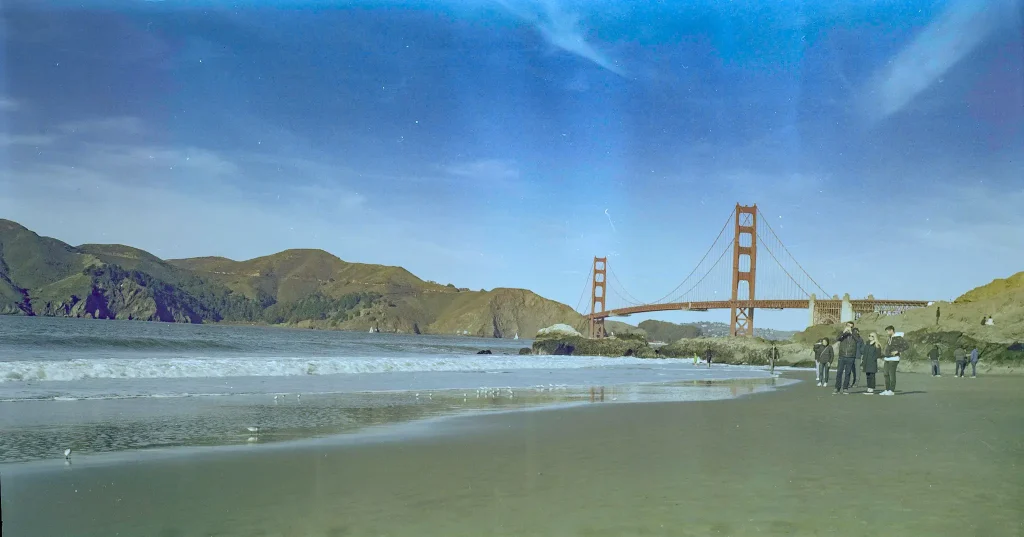
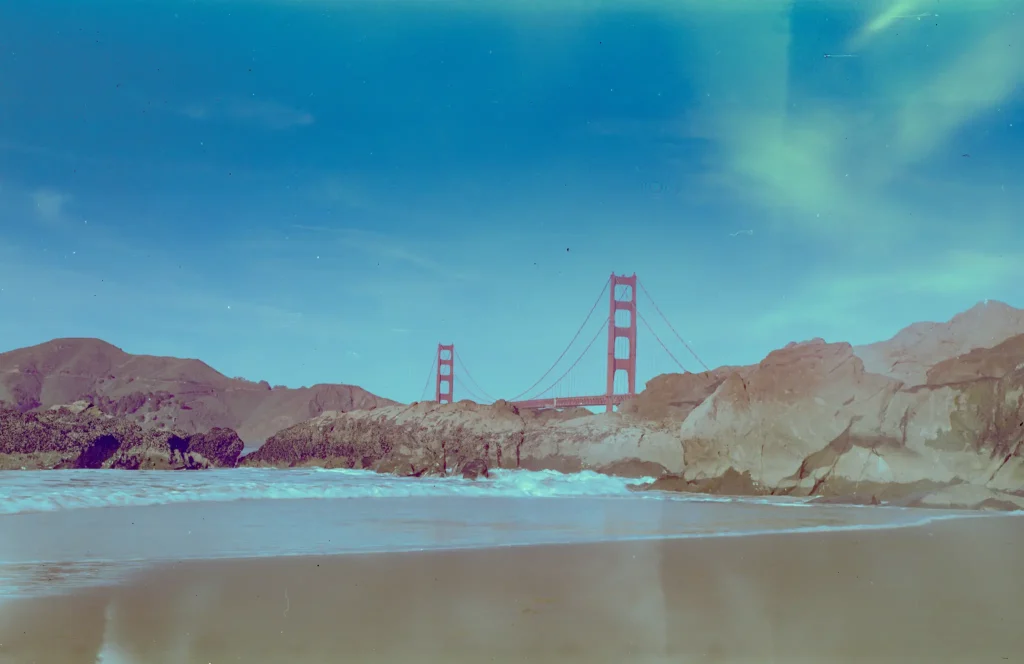
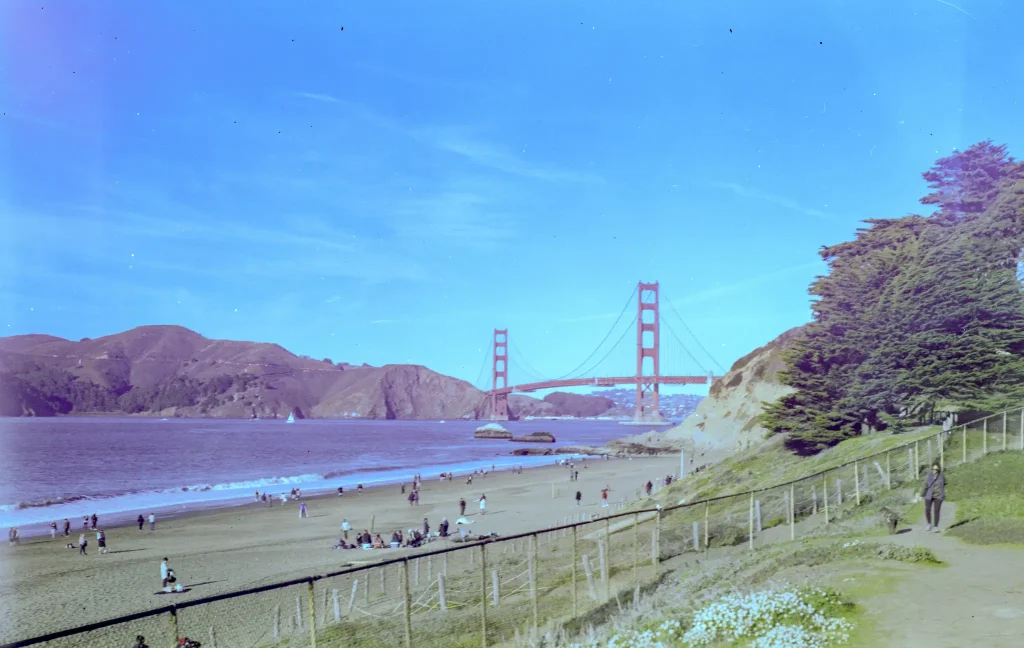
Here are four of the six pictures I took using Lomography 100 color film. I’ve had to crop a couple of them because I did not get the spacing perfect when winding on, and there was a little bit of light leakage, probably from the still exposed framing window and I had to do a little tweaking of my exposure setting slightly in Lightroom but all in all I’ve been really pleased with how these came out for my first try with this camera.
My instagram – fashionistalori
Share this post:


Comments
Jim Grey on Kodak Autographic Brownie 2A with 120 film - By Lori Brooks
Comment posted: 30/01/2019
Adam Smith on Kodak Autographic Brownie 2A with 120 film - By Lori Brooks
Comment posted: 30/01/2019
Eric N on Kodak Autographic Brownie 2A with 120 film - By Lori Brooks
Comment posted: 30/01/2019
Mike Hinkleman on Kodak Autographic Brownie 2A with 120 film - By Lori Brooks
Comment posted: 30/01/2019
I have a similar camera. The film size is kind of a hassle but on low speed 120 like Efke, the images are beautifully old looking -- far from anything out of a CMOS sensor.
If you like simple cameras like this, I recommend a Leica 1 a or c (standard). 35mm film, mo batteries, no rangefinder
M
Zvonimir on Kodak Autographic Brownie 2A with 120 film - By Lori Brooks
Comment posted: 30/01/2019
lori_brooks on Kodak Autographic Brownie 2A with 120 film - By Lori Brooks
Comment posted: 30/01/2019
Just this last weekend picked up a vest pocket Kodak at a camera fair for the incredible sum of $20 that is basically this camera's younger and smaller sibling. The shutter was not working, but I've managed to repair that and the camera is now working as good as new. I'll see if I can get out there and take some shots with that one as well. It takes 127 film, so I'm going to either cut down 120 film, or just respool some 35mm into backing paper. Fun times!
Comment posted: 30/01/2019
Comment posted: 30/01/2019
Dorian on Kodak Autographic Brownie 2A with 120 film - By Lori Brooks
Comment posted: 30/01/2019
Daniel Castelli on Kodak Autographic Brownie 2A with 120 film - By Lori Brooks
Comment posted: 31/01/2019
NigelH on Kodak Autographic Brownie 2A with 120 film - By Lori Brooks
Comment posted: 31/01/2019
François karm on Kodak Autographic Brownie 2A with 120 film - By Lori Brooks
Comment posted: 01/02/2019
Debra Haynes on Kodak Autographic Brownie 2A with 120 film - By Lori Brooks
Comment posted: 31/08/2021
Comment posted: 31/08/2021
Bariss Bull on Kodak Autographic Brownie 2A with 120 film - By Lori Brooks
Comment posted: 29/10/2021
My Name is Bariss Bull, an old fella, 77, living in Tauranga, New Zealand just to set your mind at rest.
Bariss Bull on Kodak Autographic Brownie 2A with 120 film - By Lori Brooks
Comment posted: 31/10/2021