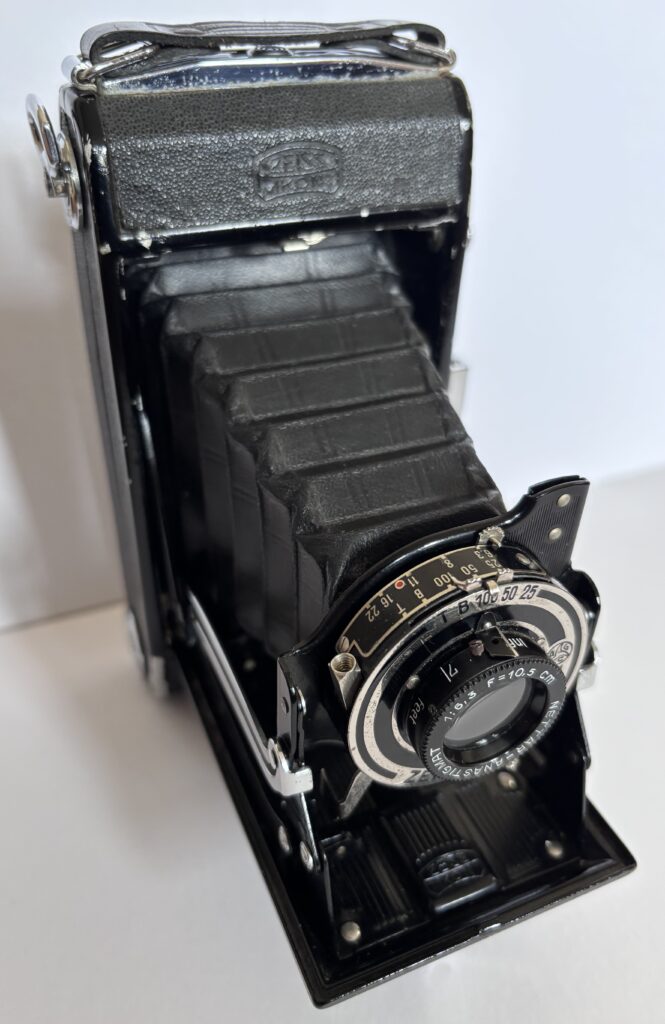
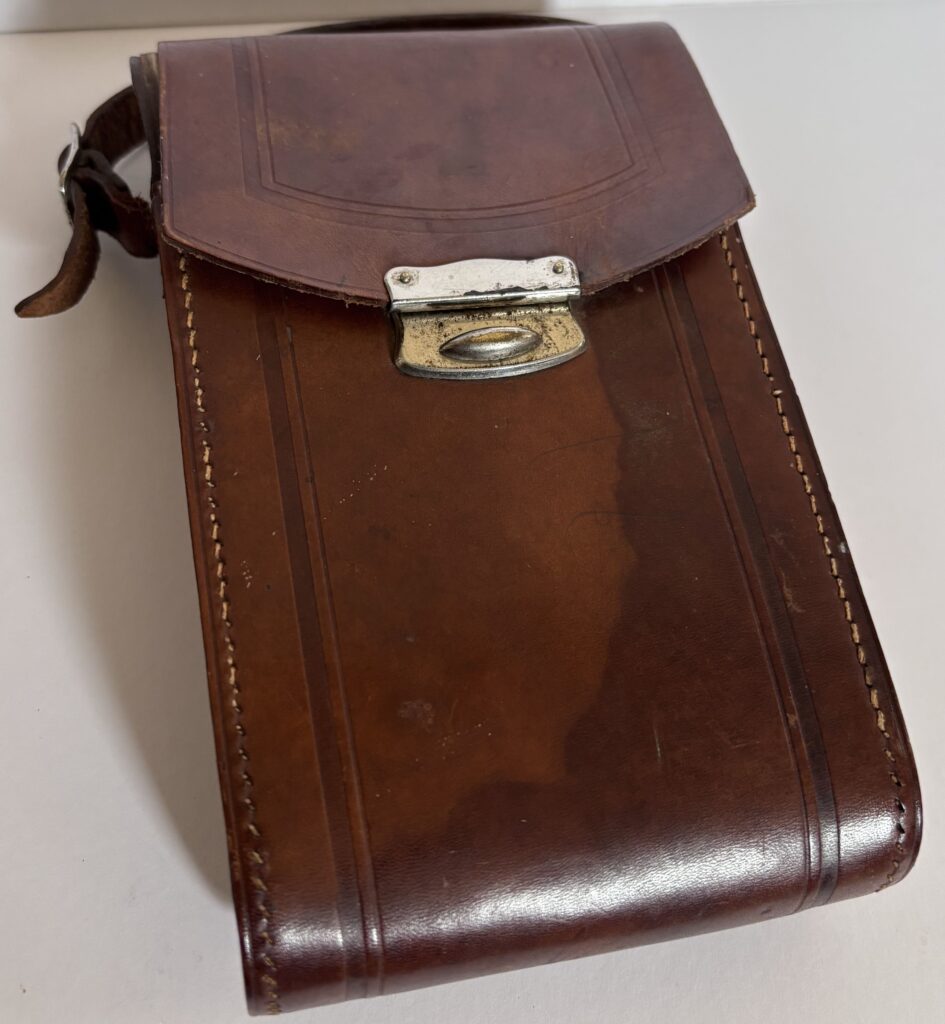
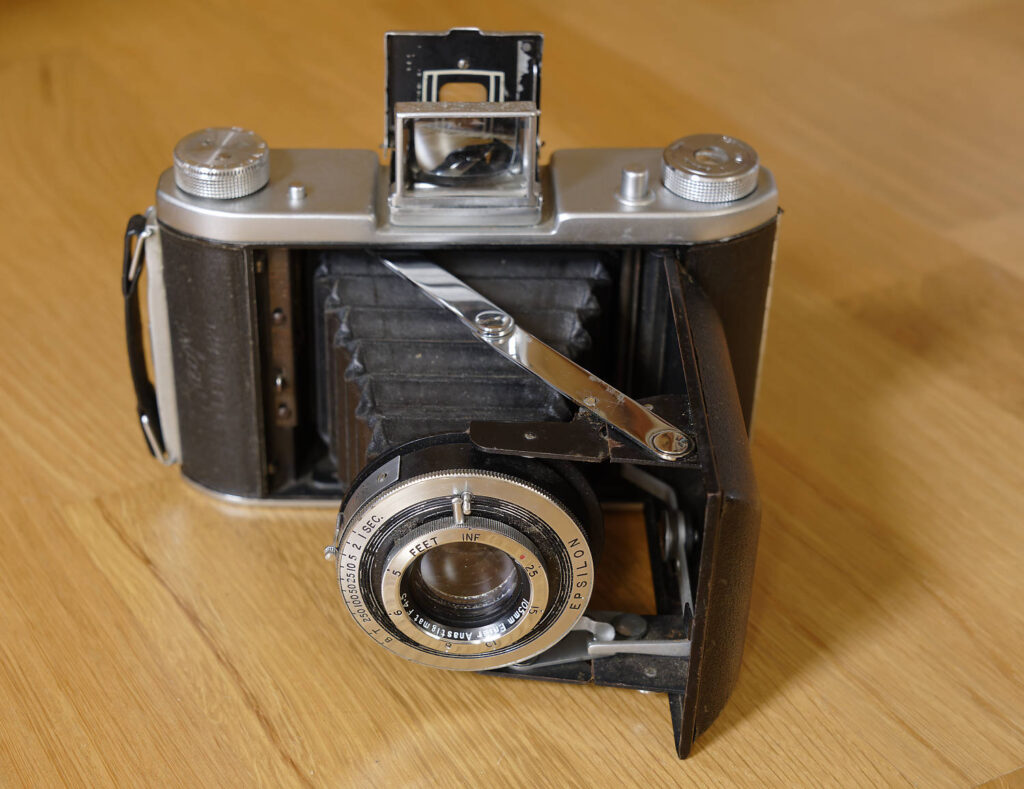
The story begins with a visit to a flea fair, where I succumbed to a Zeiss Nettar for what I hoped was a reasonable price. The paintwork was very chipped but the aperture was working, the shutter sounded good, and the folding mechanism seemed to work. And it had a case in surprisingly good condition.
When home, I rushed to shoot a roll of film, using the cheapest I had (Kentmere 100). At 8 exposures to a roll that did not take very long. The negatives were very muddy and a few had what appeared to be scratches, though puzzlingly only on some, and then very short. I still don’t know what caused them. The first shows the scratches. Maybe it does not look that bad otherwise, but it required a lot of processing to get anything half decent.
 If anyone has an idea of what causes marks like this, I would be happy to hear them. All I could think of was that there was dirt on the roller over which the film passes before being exposed. It is around 1mm in diameter, so maybe it could leave a mark of length pi mm on the film, but that is a pure guess.
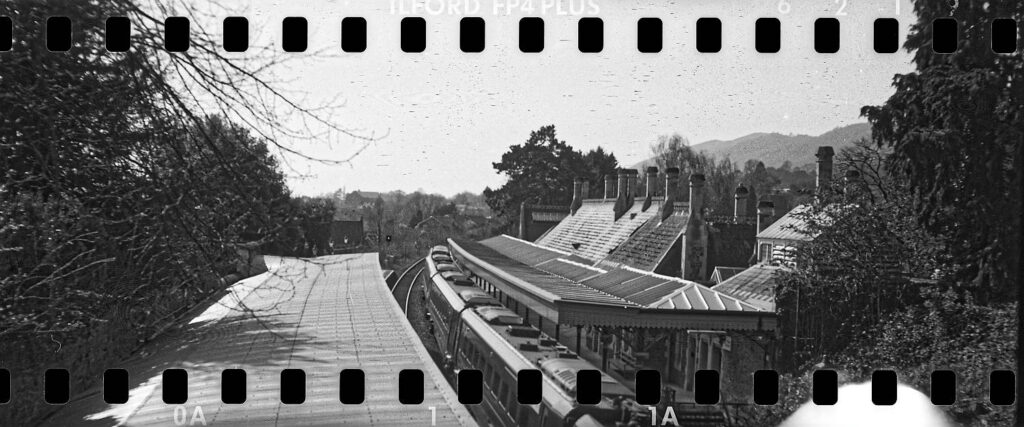
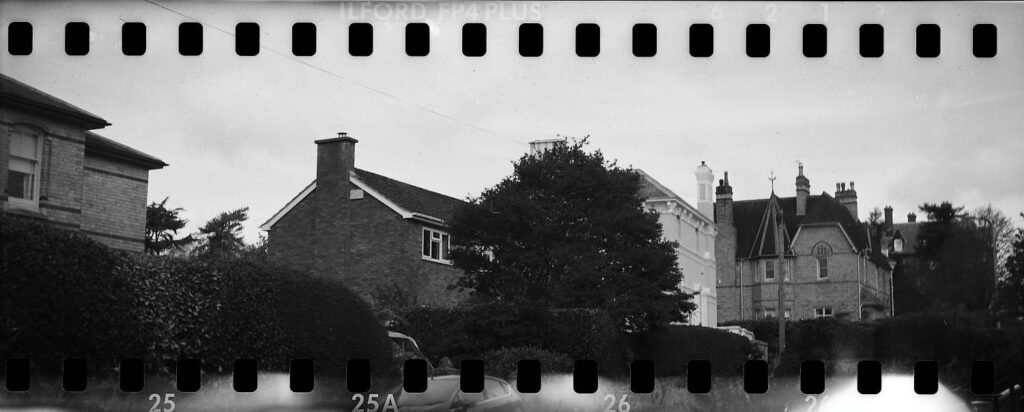
A couple of days later I put some 35mm film through it using some 3D printed adapters and winding on by counting the number of turns on the winding knob. (After taking a few shots I went into the darkroom and cut of the film I had used, leaving the rest for another time.) This was FP4+ that was probably 15 or even 20 years past its expiry date, so I was not worried about whether it was a disaster or not. The following shows the same pattern of scratches, the microcontrast slider pushed up to show them more clearly. I know the composition is a disaster, but the viewfinder gave me no idea of where the film was in the frame. If I do this again I need to think more carefully about how to frame the shots as I want them.
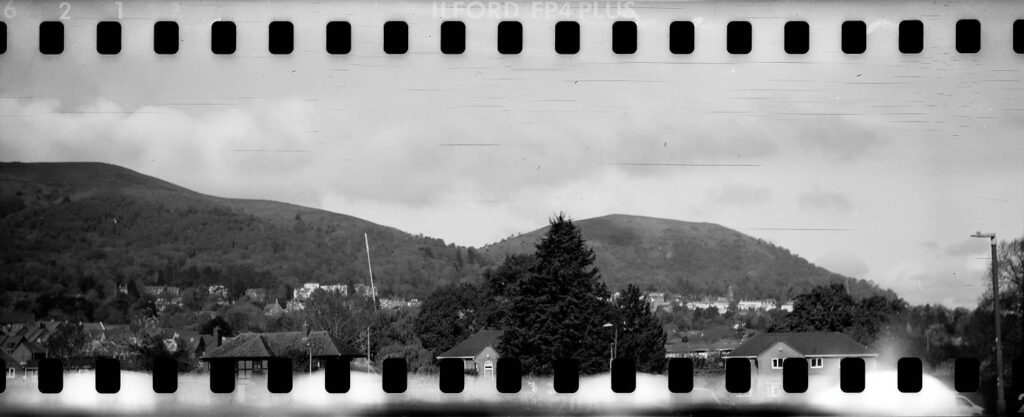
The next one has no scratches because they have been removed, though there are other defects. Here I put in a plug for the Lasersoft SRDx plugin for photoshop (it works even with my ancient version of Photoshop) which cleaned up the sky.
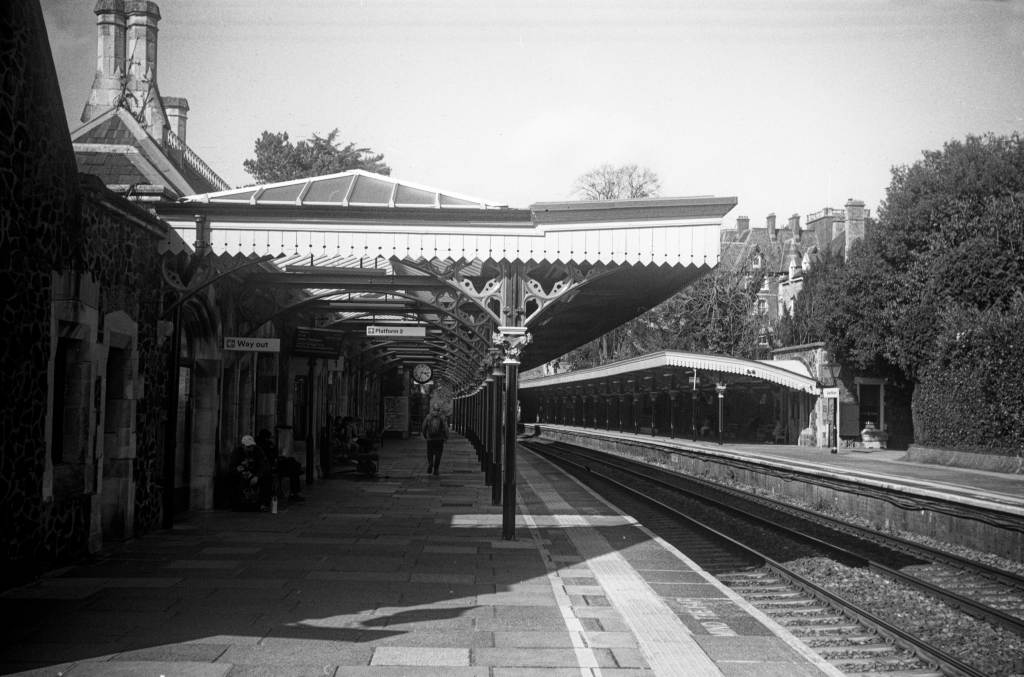
This perhaps the best of the roll, though still does not have the clarity and detail I hoped for (these are 6×9 negatives, which I can scan at 3200 dpi, so there ought to be lots of detail).

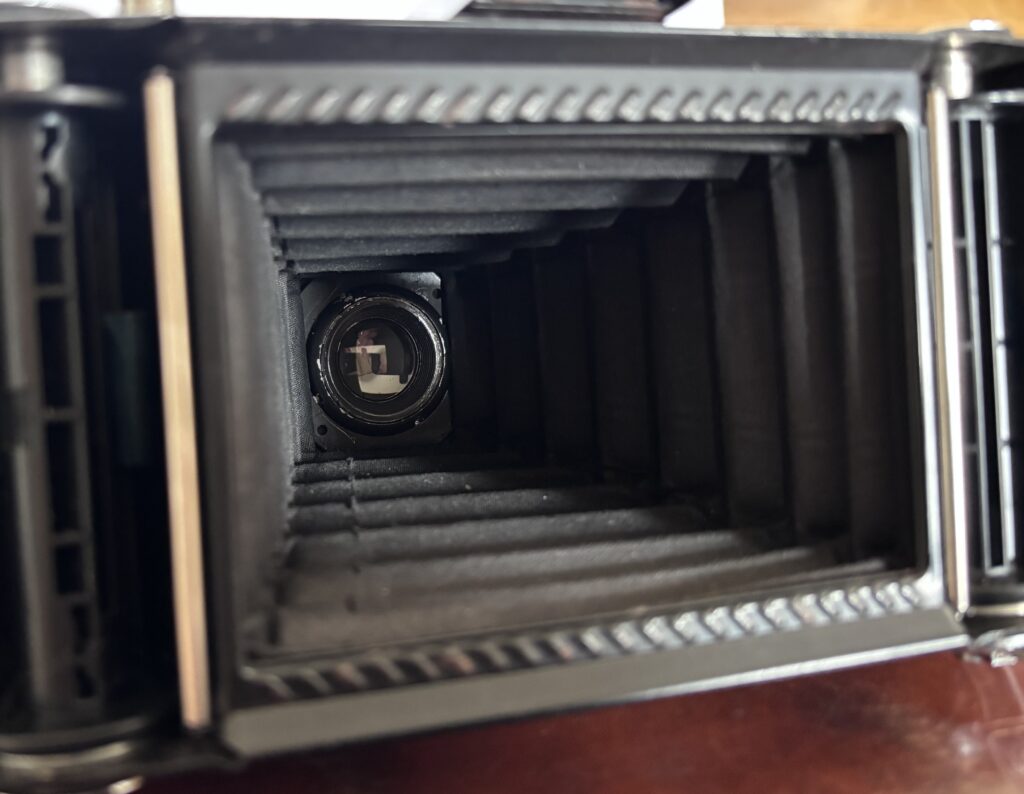
Then I held the camera up to the light and looked through the lens, something I should have looked at more carefully before, but which had been difficult in the subdued light at the flea fair, and it was clear that there was simply too much dirt and fungus somewhere in the lens, probably on the middle element. It is a triplet, so I needed to get inside it to do some cleaning. I should have taken a picture of the fungus, but did not think of doing that.
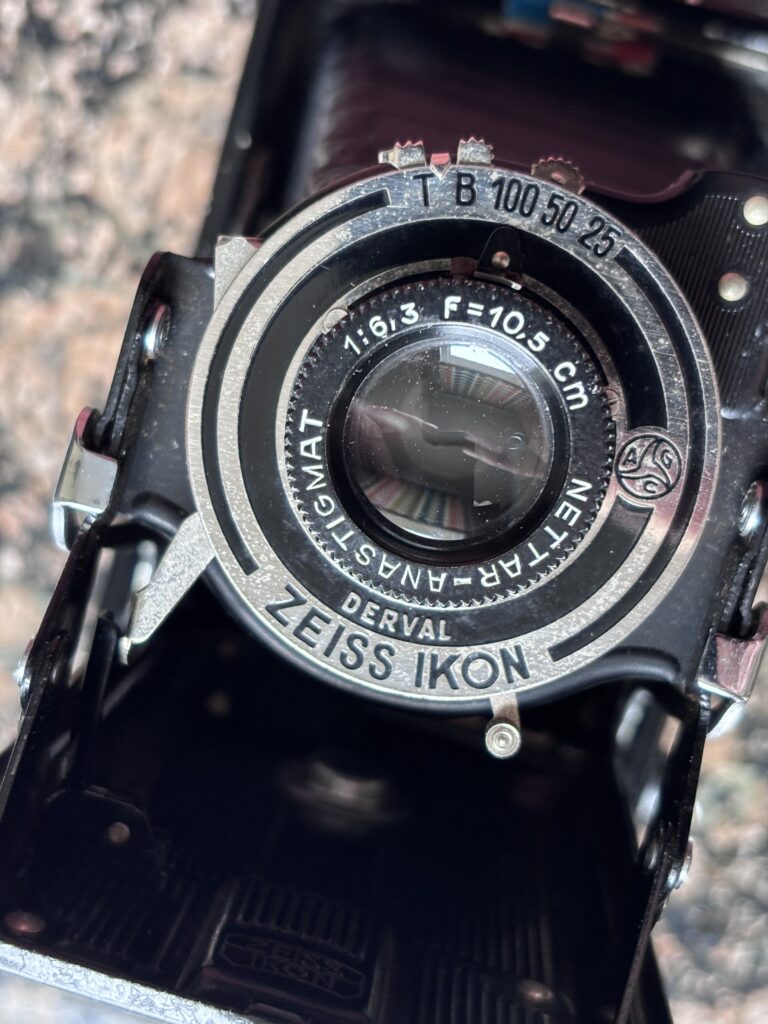
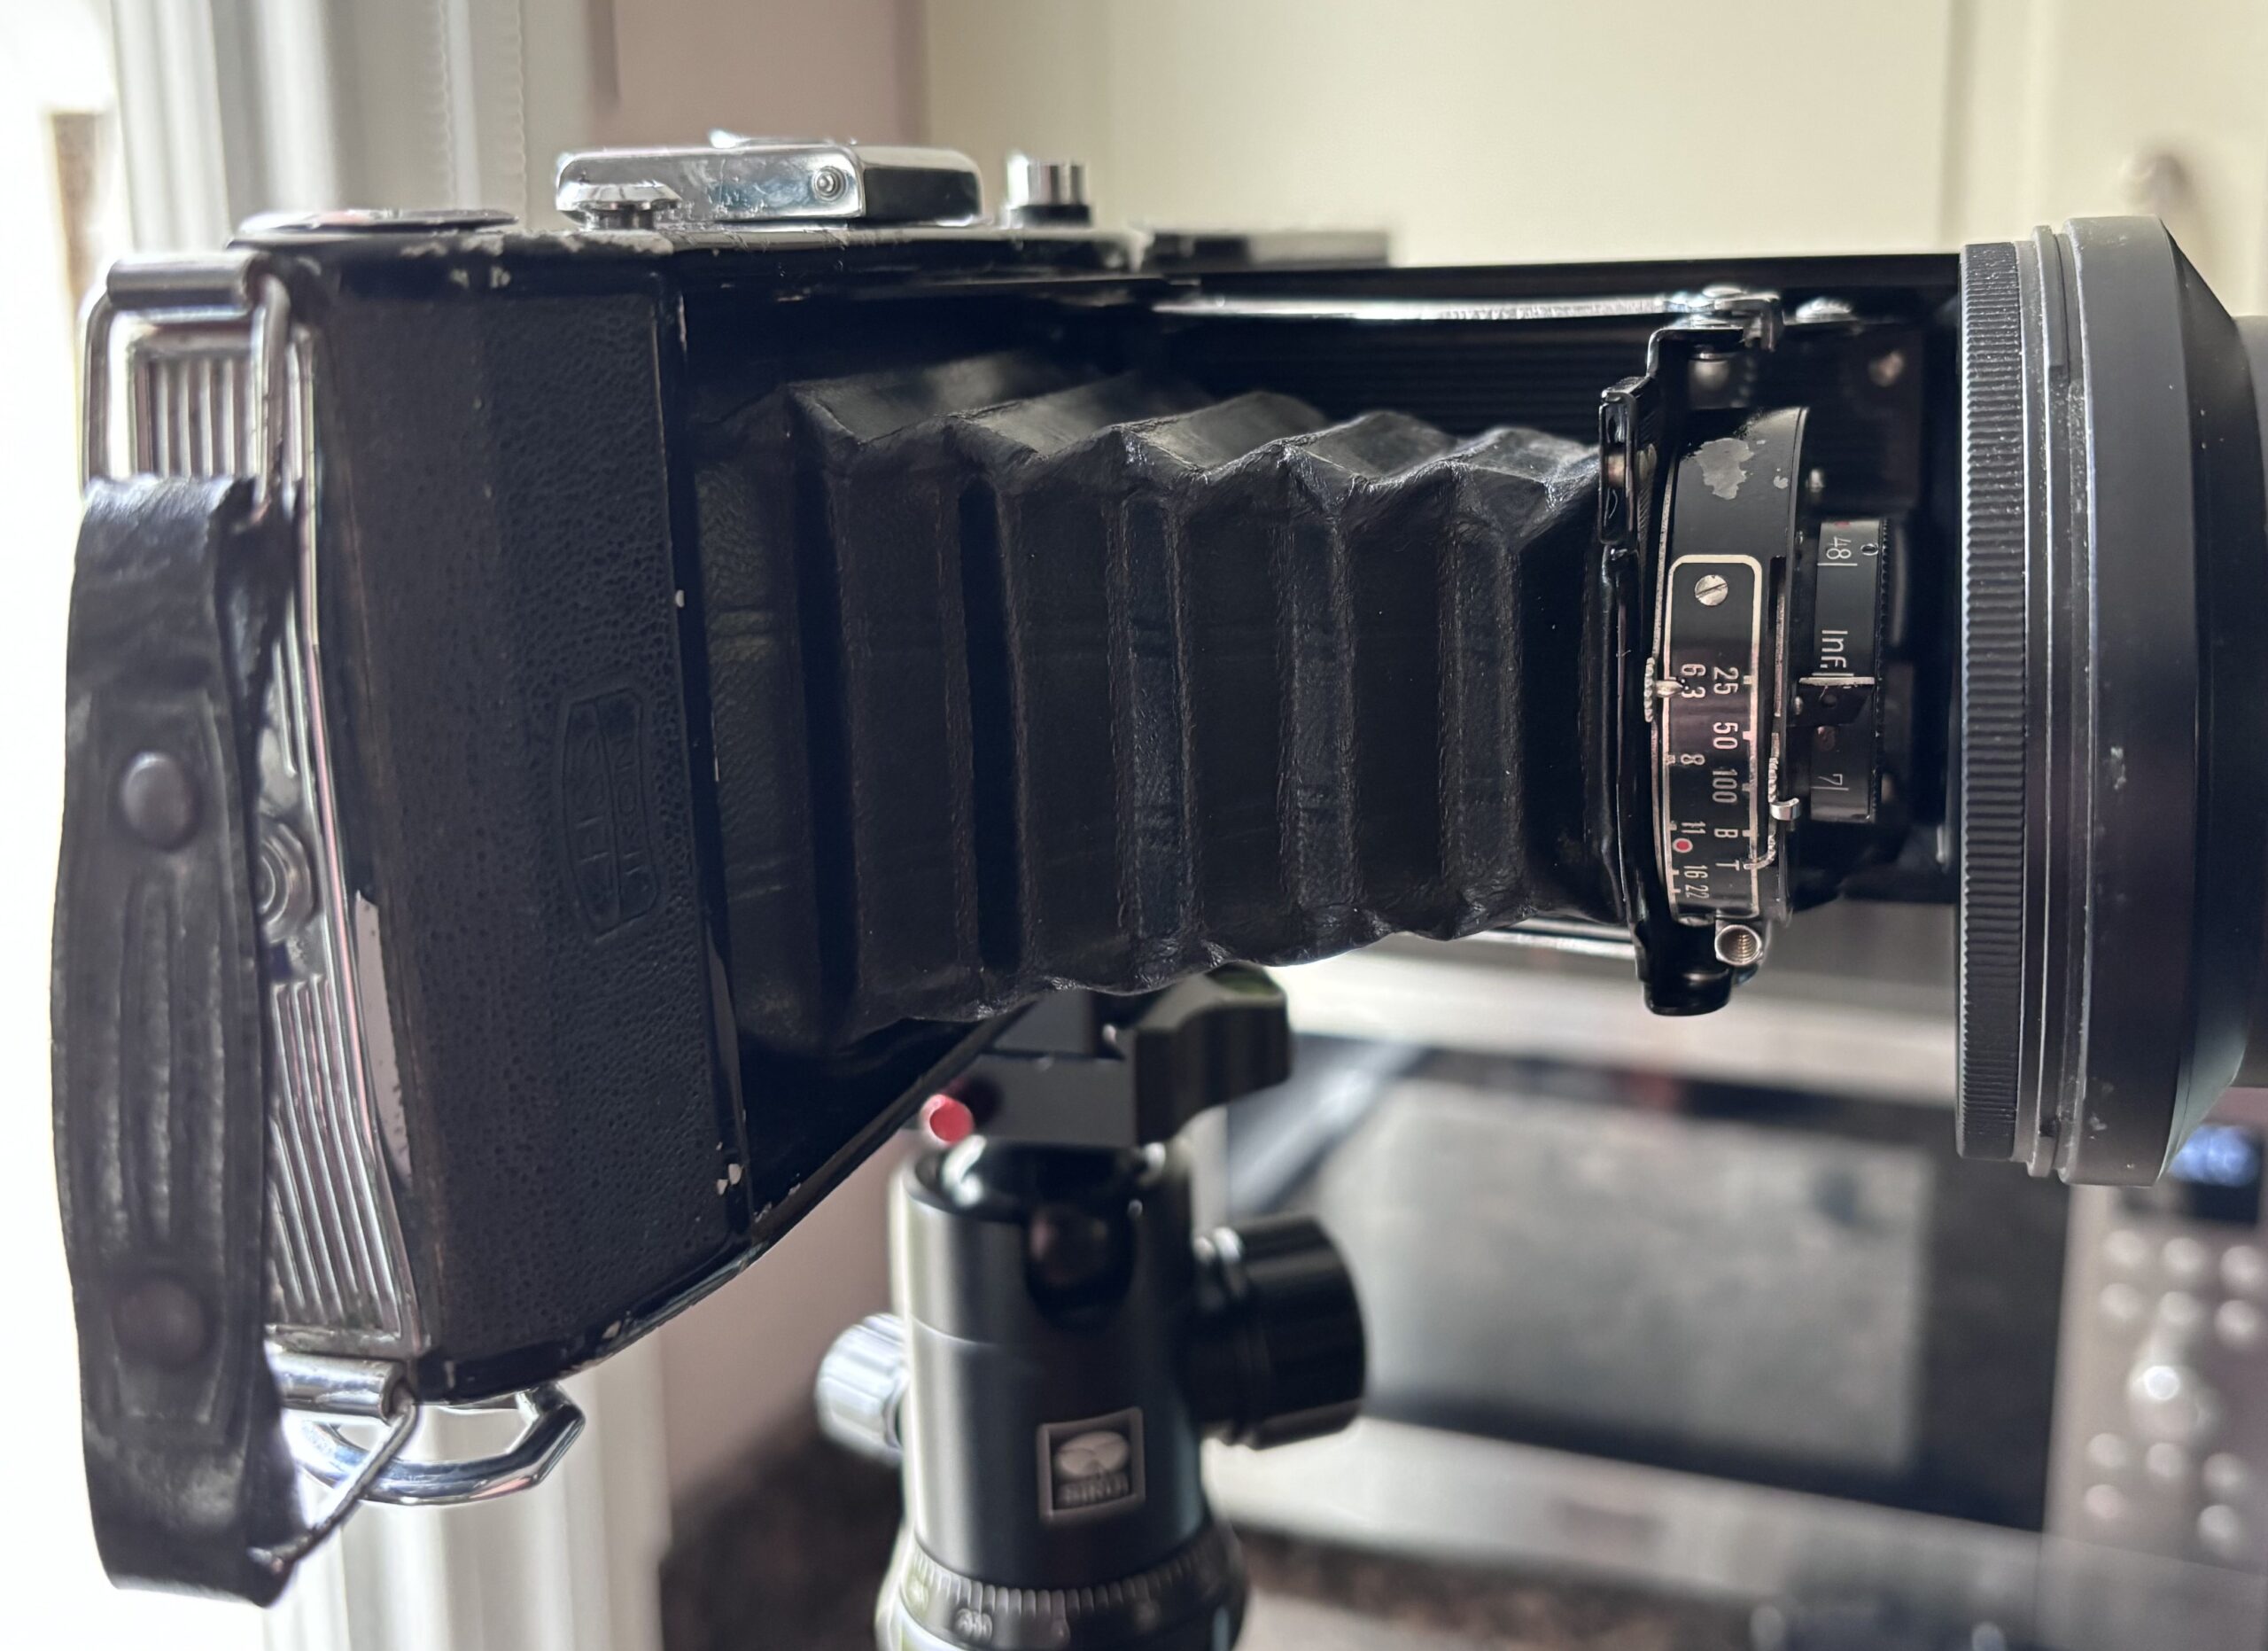
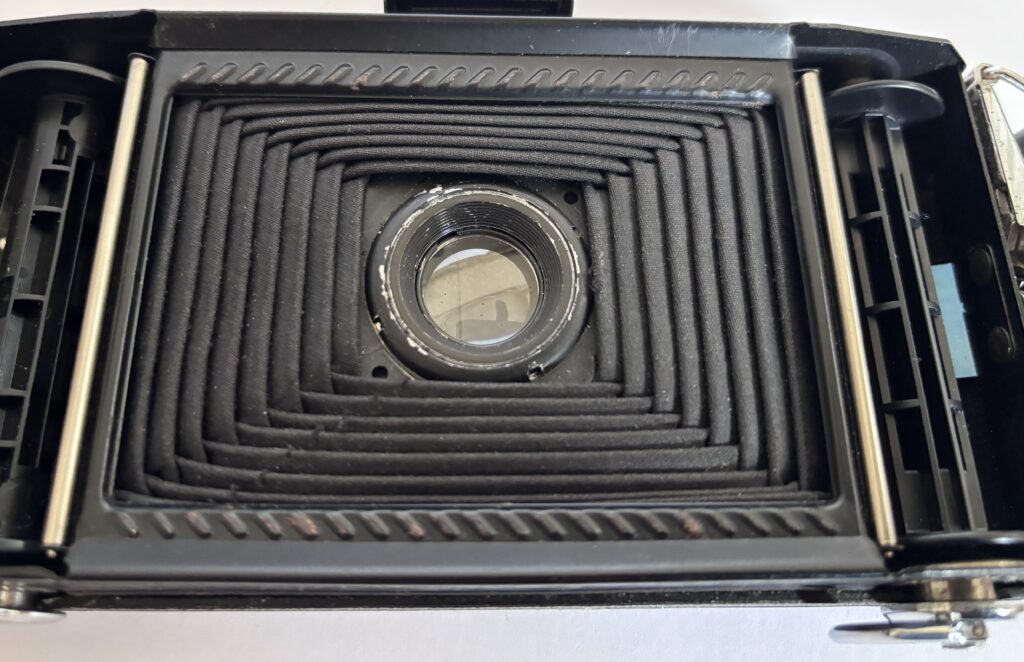
Removing the front element turned out to be very easy. Three grub screws and the Bezel came off, and then the assembly with the front element simply unscrewed. This image shows the camera with the Bezel removed (is there on the worktop).
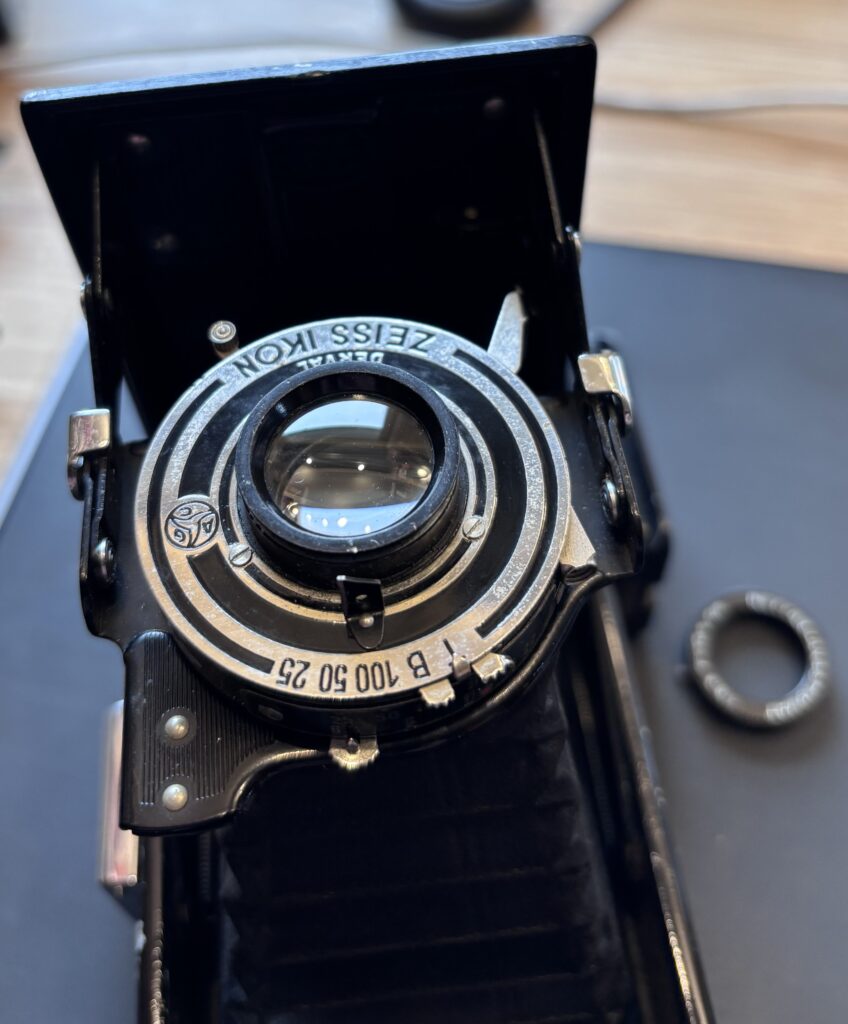
I could then clean the front of the middle element. A cotton bud sprayed with lens cleaning solution worked. Very easy, but it did not solve the problem, which was now clearly visible as being on the rear of the middle element. There was only one way into the back, using a lens spanner to undo the ring round the lens. Easy so far (the worn paint was there already).
That caused the shutter/lens assembly to drop off the bellows, and when I removed a clip holding the rear element in (not easy) I finally got to the rear of the middle element, using a cotton bud through the opened shutter. That “T” setting which leaves the shutter open until you press it again was very useful.
The lens is not perfectly clean, but I decided it had reached the point where a seller would say, “Dust but will not affect image quality.”
The rear element went back into the lens/shutter assembly, and then another puzzle. To keep the lens in place so I could screw it back on to the bellows, I needed to have the bellows open, because if I closed it, the lens would rattle inside the case and I would not have been able to screes the nut/washer on. But with the bellows extended, setting a lens spanner in was obviously impossible. This was a point where I wondered whether I would ever get it back together again.
The solution: double sided carpet tape (very sticky) on the end of an empty film spool, and I used that to screw it back together while resting the camera, lens facing down on the lens, so that it was pushed firmly on to the bellows, which I held down with my left hand. Once the thread had been engaged I could collapse the bellows and use the lens spanner.
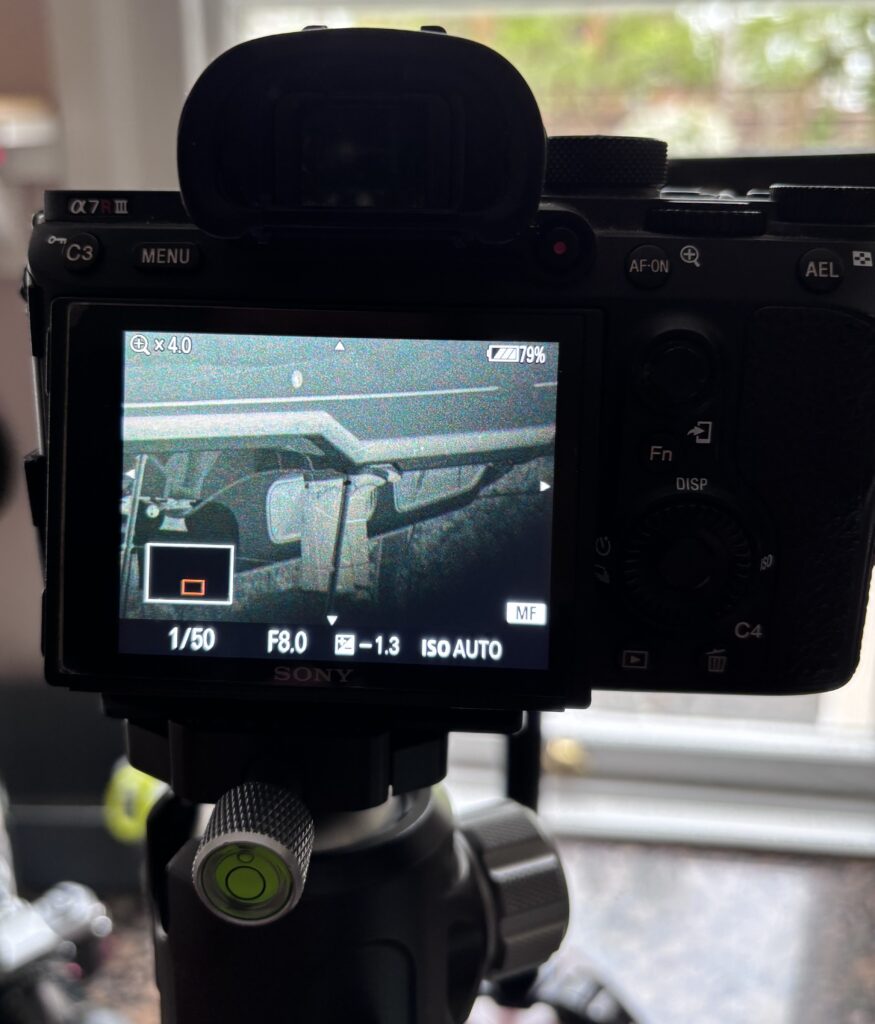
That left one problem – adjusting the lens so that the focusing scale was correct. One method is to create a focusing screen in the film plane, and then aim the camera at a bright object in a dark room and then focus. I found this difficult, but then a friend told me it could be done using a digital camera. The method involves putting a sharp negative in the film plane, and then pointing a digital camera, with a lens the same focal length, in front of it, focused on infinity (crucial). I used a Sony with a 24-105. The back of the Zeiss has to be open to let light in (I used a window).
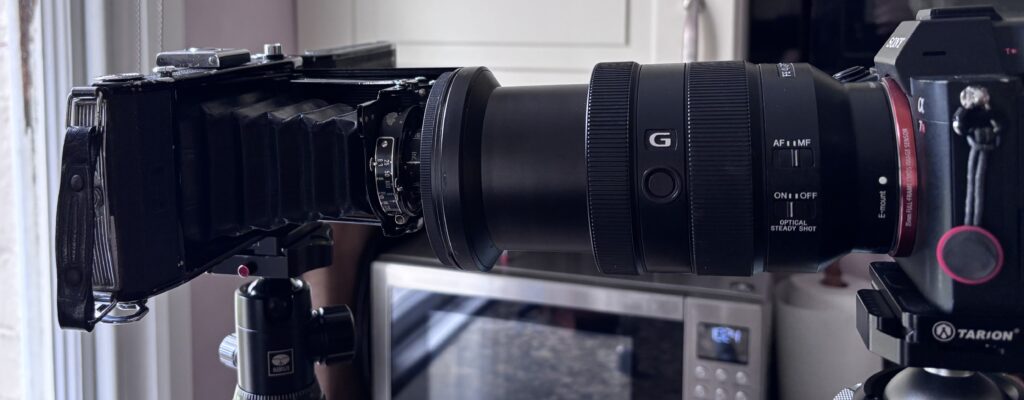
You then see an image of part of the negative in the Sony, and adjust the focus on the Zeiss until the image is sharp.
Problem: as be back is open, there is nothing to keep the negative flat and where it would be if taking pictures. I solved this by cutting a 6.5×9.5cm piece of mounting board, with a hole for a 35mm negative, which is taped in place,]. The board is then taped into the Zeiss.
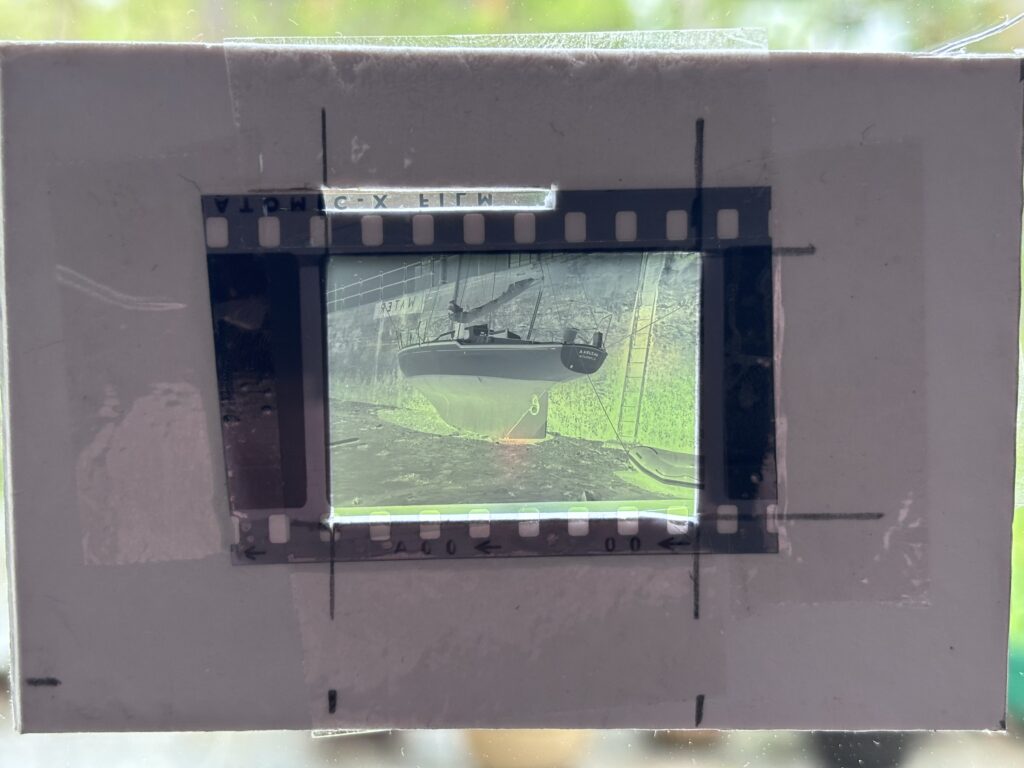
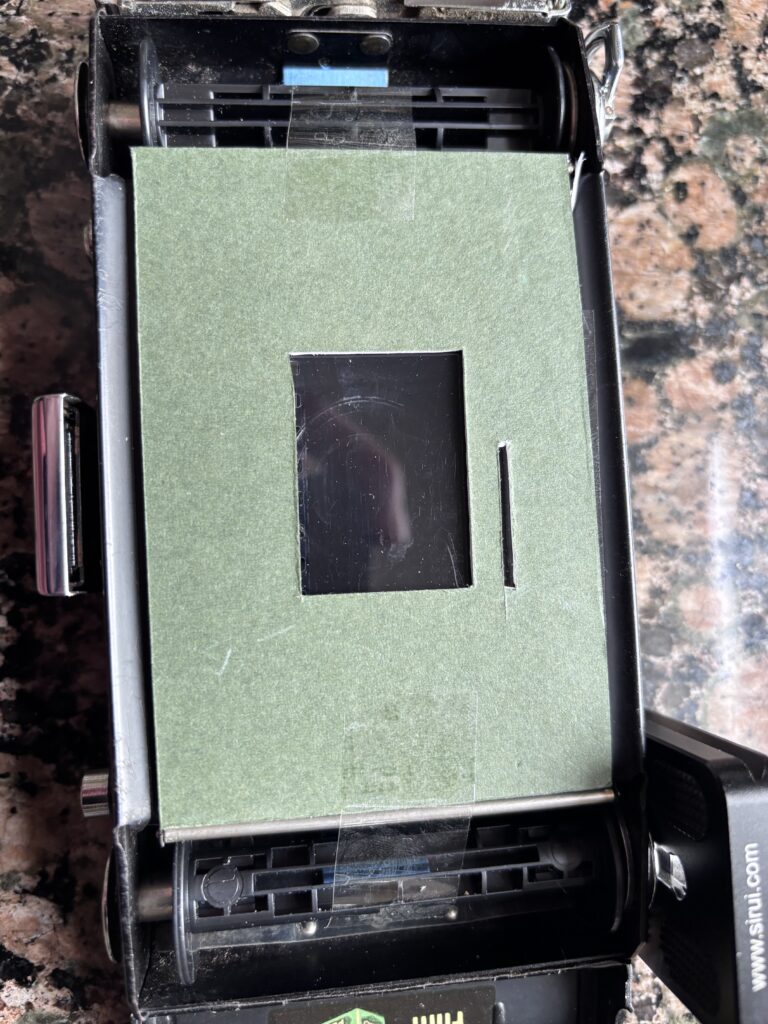
The little slot is because I thought it might be easier to focus on the “Panatomic X” on the edge of the film (it is a very old negative!), but I never got to see that because I could see only the middle of the negative..
This is a situation where dust and scratches on the negative help!
In case the Sony was not focused on infinity, despite what it said, I tried with a film SLR, but this was hopeless as I could not zoom in enough to see clearly. I then tried a digital compact camera with manual focus and that agreed roughly with the Sony.
The final step is to put the Bezel back, at the infinity mark, without changing the focus. Then test it again to make sure I had not accidentally shifted the focus. That leaves touching up the worst of the chipped paint.
At this point I would like to show a picture taken with the cleaned, focus-adjusted lens, but I cannot. It is raining and I haven’t put a film through the camera yet. Maybe I will be able to add that before this is posted.
Postscript (a few days later)
Being reluctant to waste a new roll of film when the focus might still be unusable, I used more of my expired FP4+ (probably expiry around 2010 or 2006 – I am not sure which) with the adapters bought on ebay. Two typical images are:
They can be summed up in a single word: “terrible”. However, the focus does not seem too bad, and certainly not enough to make me want to go through the rigmarole of adjusting it again. I conclude that the method described earlier works. Here is a crop from the first image. Other than the scanner’s default, there was no sharpening applied. This is a 1:1 crop from an image scanned at 3200 dpi. I am impressed I can see the handle on the window.
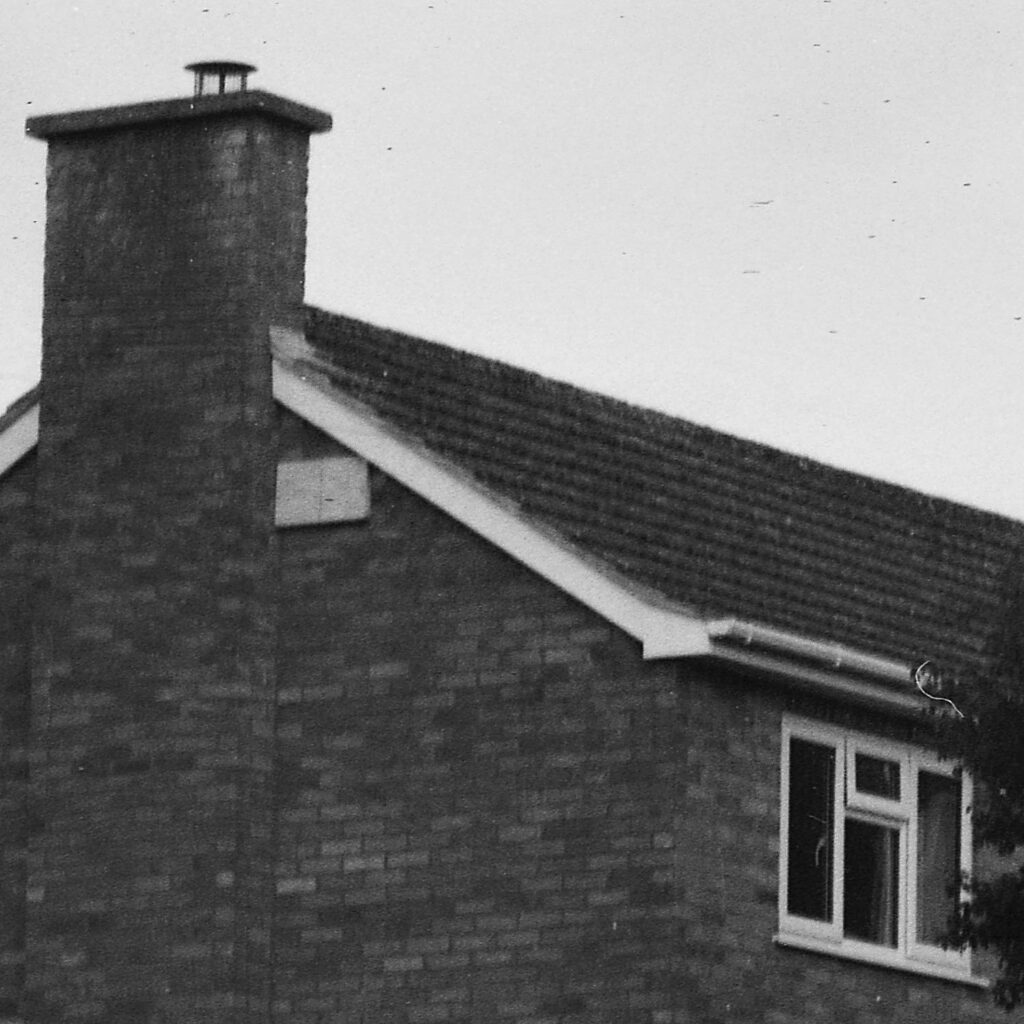 I blame the very poor tonal gradation on the old film, and the light leak must be because the sliding door on the window used to see what exposure you are on when using 120 film is not as light-tight as I thought. Also there are far more scratches than before – long ones, and I guess that is because with 35mm film the back can get scratched because there is no backing paper to protect it. The level of dust is presumably because I was careless, or could even be on the old cassette I used as the take-up spool, but I am still puzzled by what look like short scratches – dashed lines on both 35mm and 120,
The focus issue seems solved and if inspiration strikes on getting less scratched and cleaner images, maybe I will try it again, but I think I am more likely to use other cameras for 35mm panoramas or 120 shots. Still, it was an interesting experiment.
Post-postscript (even later)
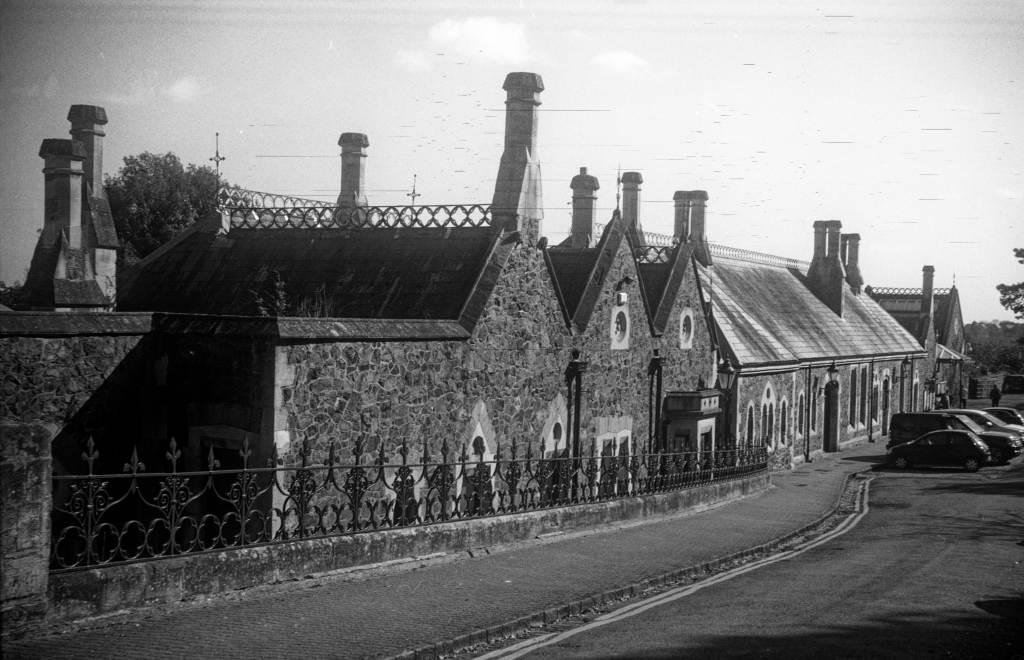
I decided that the intermittent scratches must be related to the rollers over which the film passes and so looked very carefully at them. It turned out that there were tiny dots along each roller, which I guess were corrosion – no bigger than pinpricks – but running my hand along, I could just feel them. I decided to try rubbing them smooth with very fine wire wool. Not something I would normally have anywhere near the film path of a camera, but I decided I had nothing to lose. To test it, rather than waste a film, I took three exposures (this time 120 film), then in the darkroom removed the film, rewound it and used the rest it to test another camera. The result:

The markings have completely gone. There is a single scratch in the top left corner, but that looks more “normal, as if caused by a bit of dirt that needs cleaning (maybe a trace of wire wool, or dust. and it is not on all the photos). I haven’t got the focus quite right, so I must learn to have a rangefinder with me and use it, but the camera now seems usable. It seems worth touching up the missing paintwork.
Share this post:


Comments
Michael Aaron Sherman on Zeiss Nettar – Cleaning and Bringing Life Back to a Flea Fair Find
Comment posted: 04/06/2025
davesurrey on Zeiss Nettar – Cleaning and Bringing Life Back to a Flea Fair Find
Comment posted: 04/06/2025
Very different to the hideously complex Ikon Contarex bodies which even scare most camera repairers off.
Well done resurrecting an old girl which will serve you well no doubt.
May I ask where abouts were the shots taken?
Dave
Comment posted: 04/06/2025
Comment posted: 04/06/2025
Alexander Seidler on Zeiss Nettar – Cleaning and Bringing Life Back to a Flea Fair Find
Comment posted: 05/06/2025
Russ Rosener on Zeiss Nettar – Cleaning and Bringing Life Back to a Flea Fair Find
Comment posted: 05/06/2025
The front lens needs to be screwed on at the correct starting point. This will take a few tries! Once that is done you can check the focus, All you need is a tripod and some frosted tape... sometimes called "Magic Tape". It is easily available.
Mount the camera on a tripod and open the back. That "T" shutter setting will allow you to open the shutter and keep it open.
Also open the aperture to its maximum setting.
Stretch a long piece of the magic tape across the film plane rollers, exactly where the film will sit. The matte surface of the tape forms a focusing screen!
A maginfier or "loupe" for viewing negatives, jewelry or fabric is going to be essential.
Put that magnifier near the tape and focus the front element. Check the distance with the focus scale on the lens and see if it matches up. If not, unscrew the front element and start over!
You can easily remove the lens on this camera by bending the metal stop backwards. Once correct focus is established bend it back in place.
Voila! You've got a cheap but good medium format camera.
Comment posted: 05/06/2025
Mr. Prabhat Chandra`````````````````````````````````````````````````````````````````````````````````````````````````````````````````````````````````````````````````````````````````````````````````````````````````````````````````` on Zeiss Nettar – Cleaning and Bringing Life Back to a Flea Fair Find
Comment posted: 23/07/2025
Your photographs are of very high quality, considering the fact that were using outdated film in such difficult conditions, without the use of any accessories such a rangefinder or an exposure meter.
Please keeo the Zeiss Ikon flag flying!