Thank you!
Firstly, thanks for offering to spend your time creating content for 35mmc. Contributions like yours are a huge part of what keeps this website and the community that surrounds it going.
Don’t forget, this is a community blog – now you’re now a contributor, you’re welcome to login and add more new content anytime you like.
Before I get to the instructions, there are a few things I am regularly asked about how this process works…
Publishing Lead Time
One of the most frequent questions I am asked is, “when will my content be published?” The short answer to this is that it varies. The fist variable is around issues with the content. Quite often we like to see content on the website before we are able to properly give feedback or make suggestions. This initial process can take up to two weeks, but we usually feedback within a week. If you don’t hear from us within two weeks, then you can assume all is well with the content and we have scheduled it for publication.
The usual lead time from when we have edited and scheduled an article is around 4 weeks. But again, there are variables. For example, sometimes we are looking for a certain type of article to fill a gap in the schedule, so it might go out sooner.
Once an article has been edited and scheduled, you will be able to see the scheduled date next to the article when logged in. Just please be aware, sometimes, though not often, we will change the scheduled date an article is due to go out. This is always in a bid to balance different types of content across the weeks and months.
Editing Process
The other questions I am asked are around how much we edit content. Again, this depends on the content submitted. As I have already said, if there is anything significant that needs changing, we will get in touch. We will also likely get in touch if we spot anything technically wrong or that we feel might mislead the readers.
The sorts of edits we make to content without getting in touch are around spelling, syntax and content structure. For example, we might reorganise the paragraphs to improve the flow of an article, or we might just change the wording slightly to make points easier to understand. We never change meaning or in anyway alter opinions.
We also improve English for those who have don’t speak English as a first language. Again, we will never change meaning, but we might get in touch to ask questions about what is meant to help translate into clearer English if we feel something is being lost in translation.
Adding Content – The Instructions
The process for writing articles for 35mmc is the same whether it is a short 5 frames post or a more in depth review – please follow these instructions, and don’t worry about any other input boxes, buttons or switches, they are all for us to deal with once you have submitted.
The site uses WordPress. If you are a seasoned WordPress author then this should be familiar to you, but please still read it as it just explains how things are done around here. If you are new to WordPress then hopefully this should guide you through the process. Any questions? Drop me an email!
To add content to 35mmc, first you need to login. The login page is here: 35mmc.com/login – the link is also in the menu.
Enter your details into the boxes and click ‘log in’ .
If you have forgotten your password, just use the link provided to create a new one.

You should be taken straight to the website dashboard. If not, then you should find there is a link in the menu. There is also a link in the footer.
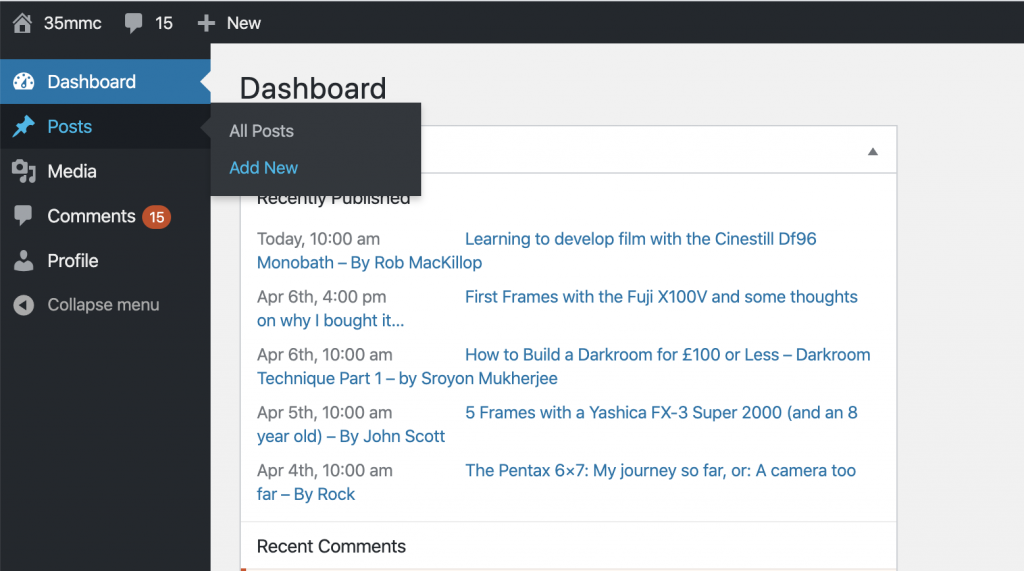
You will then be taken to the dashboard where you can start adding content. Once in the dashboard hover over “Posts” and click “Add New”
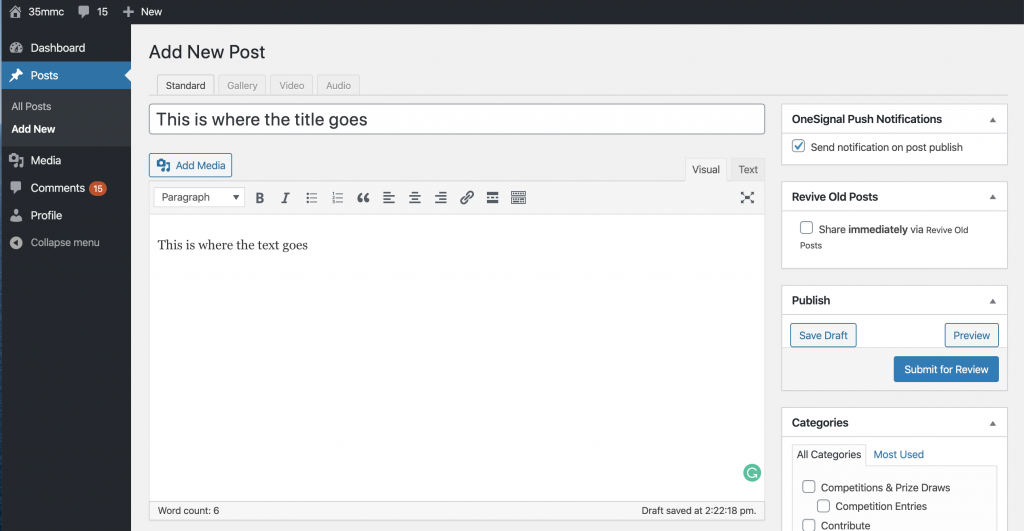
You will now find yourself in the new post dialogue. The first step is to add a title and the main body of text.
Some pointers:
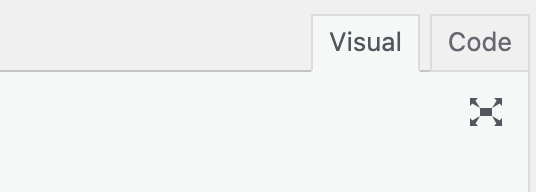
- If you have already written you article in word processing software or a note on your phone, you are going to want to copy and paste your text. To do this, you must click the “Code” button that is top right of the main text box area before pasting. Failing to do this will likely mess up the formatting and make further editing a lot more difficult.
- If either Code or Visual buttons are missing, then please read this post to make them reappear.
- Once pasted, reselect visual and edit your text.
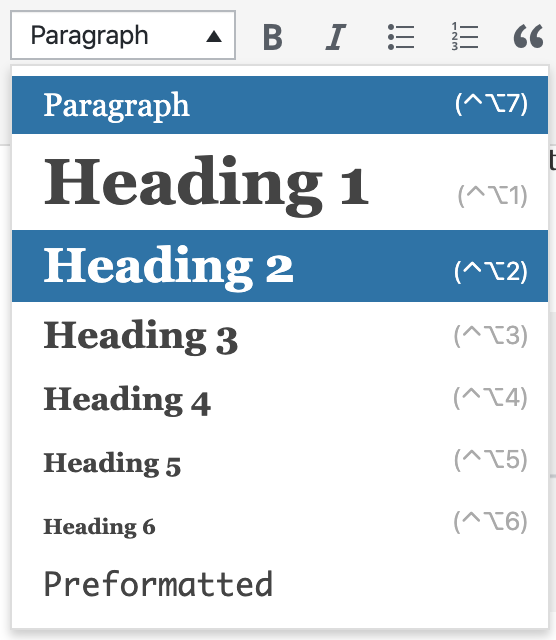
- If you would like to use headings, select your heading text then use the format drop-down labelled ‘Paragraph’. Do not choose ‘Heading 1’. You can use any of the other headings, but please try to use them in a hierarchy. This is a good example of an article that uses headings well. Once you have created more than 4 headings, the website will automatically generate the table of “contents” you will see on that post
Once you have formatted you text, it’s time to add images. Add images using the “Add Media” button, then click “Select Files”
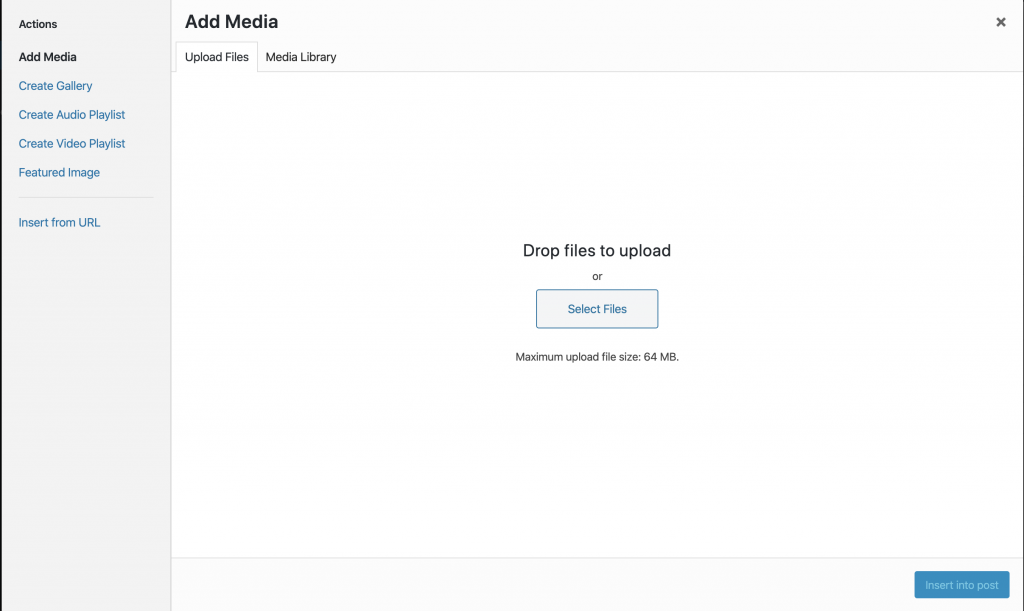
Select your files and upload them.
Some pointers:
- Images will insert into the text wherever you leave the cursor
- Images should be greater than 1024 pixels on the long edge and ideally 72dpi
- If they are larger than 1920 on the long edge, the website will resize them down to 1920 pixels
Once you have selected your images for upload, will then be presented with this screen where you will be able to see your image alongside all others in the media gallery.
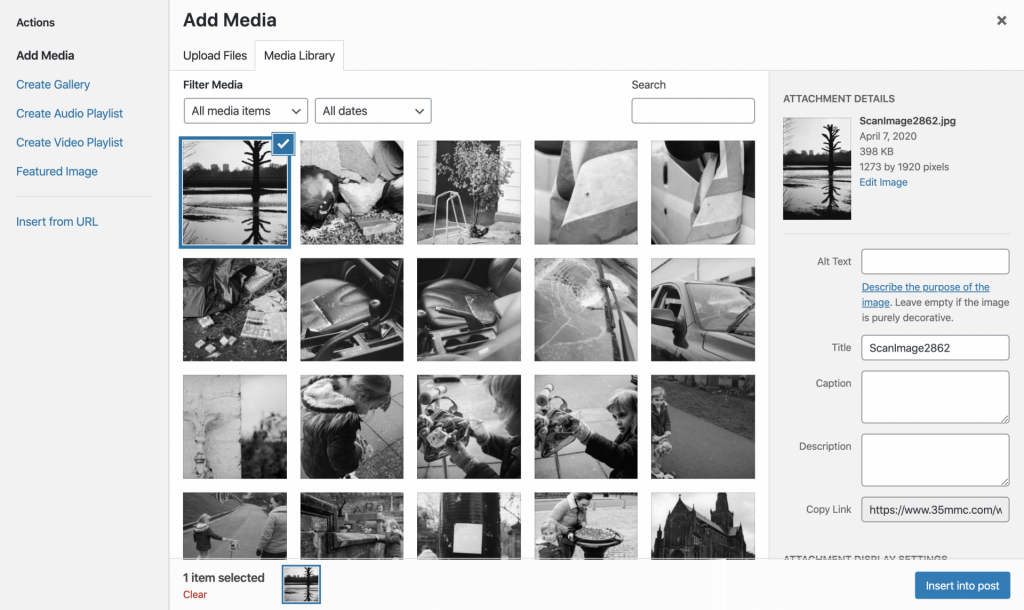
Select the image that you wish to insert into the post first. There are a few things that you need to add in the right-hand column (you might need to scroll down to see the options). You need to add:
- Alt text – this should be a description of what is visible in the photo
- Caption – this is only required if you wish to add a small caption under the image
- Description – the alt text of caption copy and pasted is fine to add into this box
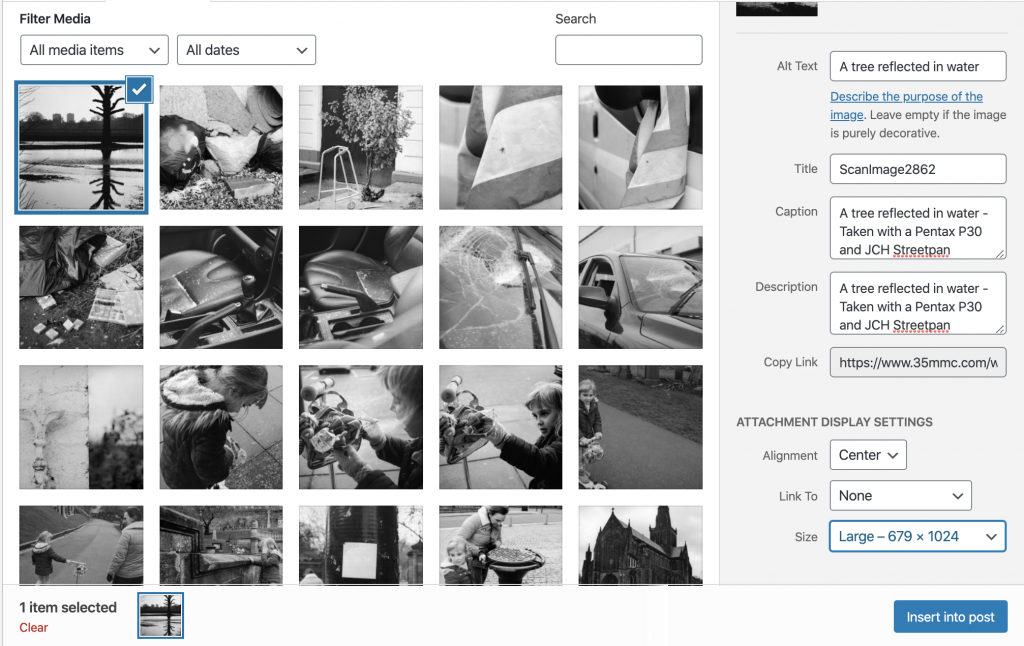
You then need to set the image alignment to “Center”, and the size to “Large”. The large size should always have 1024 as the big number, if it doesn’t, you need to upload a larger version of the image.
Once all this is done, click insert into post.
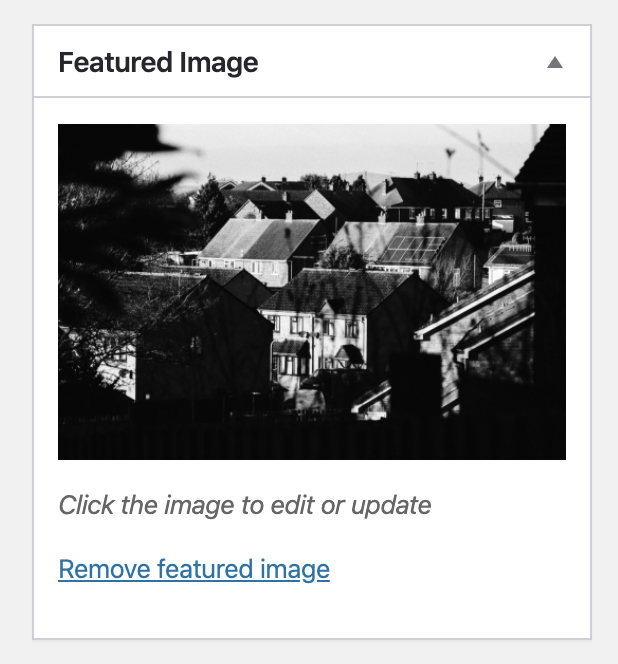
The next step is to add a featured image. For a review, this should always be a picture of the thing being reviewed, for 5 frames post, this should always be a picture of a camera. If you are unsure what images you should feature for other sorts of posts, drop me an email. The featured image will appear at the top of your post. The featured image dialogue can be found in the right-hand column. Click “Set featured image”, select an image as above.
Some pointers:
- Featured images should be landscape orientation or square.
- Portrait orientation images do not work
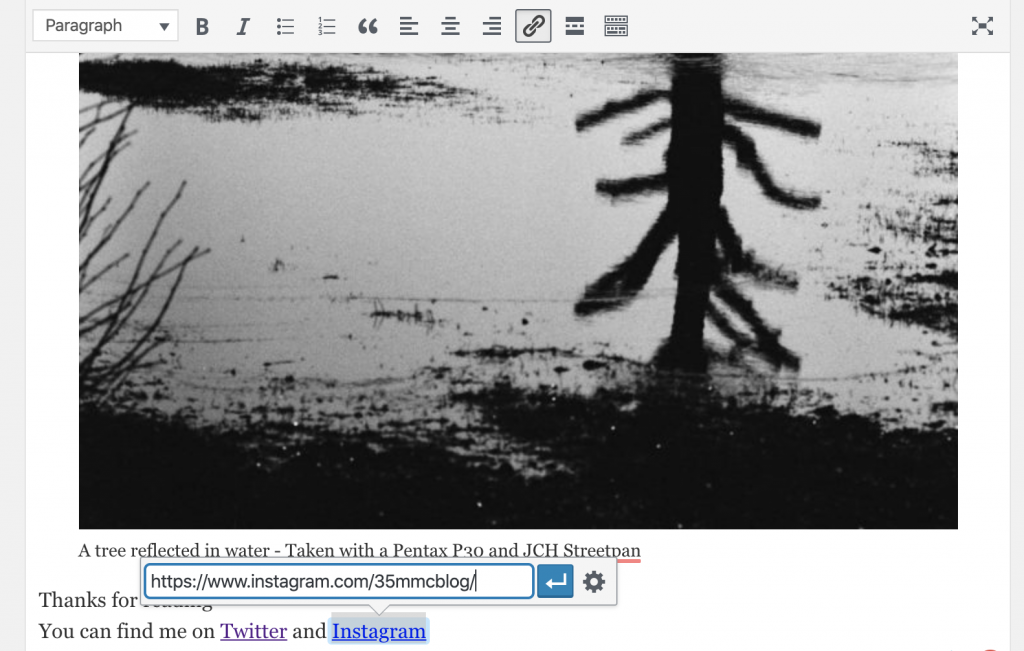
Finally, add links. You are welcome to link to other articles within or outside the website. As a minimum, add links to your social media or website after you sign off at the bottom of the post. To do this, highlight the text you wish to turn into a link, and click the add link button.

Copy and paste the link into the box, and click the white on blue arrow.
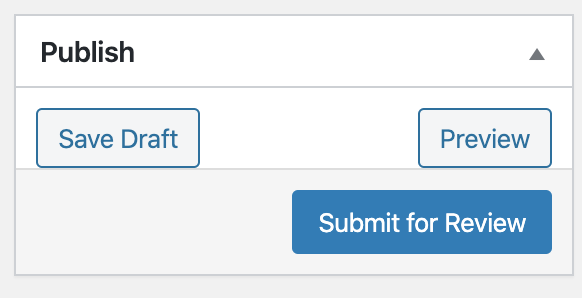
At any stage in the process you can click “Save Draft” to save and “Preview” to see your progress. Once you are finished, click “Submit for Review” (if you don’t click submit, I won’t see it)
You do not need to select or change any of the other settings.
Once you have submitted your post, it will go into the queue for me to edit. Assuming you have followed the instructions above, there is a good chance you won’t hear from me until the post goes live on the website. This can take 3-6 weeks. This really is a case of no news is good news – if there is anything wrong with the content, I will be in touch.
Adding Profile Information
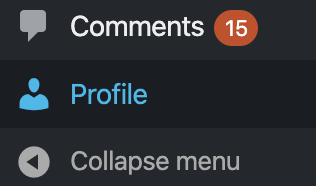
Once you have clicked submit, I would encourage you to add details to your profile. This is accessed via the “Profile” link in the left-hand column.
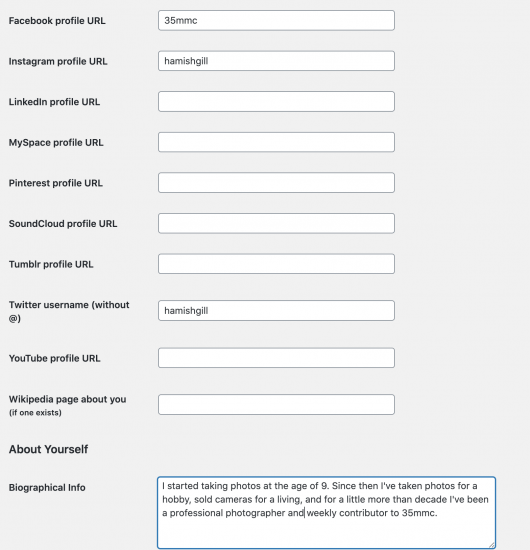
You can add social media and website links in the various boxes, as well as a biography.
Some pointers:
- You don’t need to put the full URL into the box, just the username for the account (as below).
- Keep the bio short, as it looks cleaner and more readable on the profile page (here is mine).
- Only Facebook, Twitter & Instagram show up on the profile page.
- If you don’t put your Twitter and Instagram accounts into these boxes, I might not see them to tag them when I share your article.
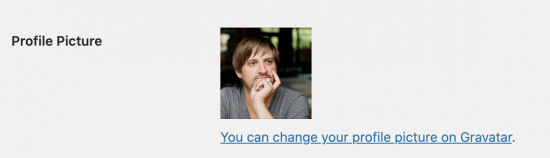
A profile image can also be added via Gravatar – just sign up using the same email you used to sign up to 35mmc, add a profile image there and it will automatically add to 35mmc.
Comments
Once the post goes live, you might find yourself receiving comment notifications. When you receive these, please login to the dashboard and respond to the comments and approve them. In the unlikely event anyone decides to troll you, or comments in such a way you do not know how to respond, please contact me and I will deal with them.
Some pointers:
- You will be able to see comments on other content – you won’t be able to approve these comments.
- Do not delete comments – I will deal with anything unpleasant
- Constructive discussion is healthy… you know the drill…
A final note
Once again, I just wanted to say thank you for taking the time to write for 35mmc, and indeed for reading this little guide. As I said at the beginning, I really appreciate the effort, and so do the readers of 35mmc! Please do feel free to add more content anytime you like. Welcome to 35mmc!


