Large landscape panoramic pictures are possible via stitching many pictures. Each picture overlapping with some degree with the previous one gives a panorama close to reality as viewed by the photographer. The result is stunning should the photographer previously finds the no-parallax point. The lens is to be rotated around the no-parallax point for perfect stitching hence generating an image with continuing features. Stitching pictures that present parallax will create a final image with interrupted features and hence with no value. Parallax is defined as a displacement in the apparent position of an object relative to more distant objects through a change in the viewer’s line of sight. What about considering the rotational point of the lens in the same plane with the lens aperture plane? Can one create large panoramic pictures with continuing uninterrupted features by this method? In this article we present a simple and precise method for creating landscape panoramas with perfect stitching of images using rectilinear prime lenses and zoom lenses via lens rotation around the axis that sits in the same plane with its aperture blades.
Introduction
Since the inception of photography, landscape photographers were always aiming at taking wider and wider frames in order to have a closer to reality impact upon viewer. Not everybody is accustomed to large format photography not to mention the impossibility to carry such a camera in remote areas. State-of-the-art Hasselblad / Fujifilm with their XPan / Fujifilm TX-1 are film cameras with sky-rocketing prices, not to mention the price for film developing and film scanning in state-of-the-art facilities. With the advent of digital photography extremely large panoramic pictures were possible via stitching.
A lens that is corrected for distortion is called rectilinear. Photographs taken with such a lens show straight lines on margins of the frame that means lack of distortion from corner to corner.
Parallax is defined as a displacement in the apparent position of an object of interest that is seen “moving” – fig.1. A measure of parallax is the semi-angle or the angle of inclination between the two axes of sight.
Trying to create a large panoramic image the novice amateur photographers with no experience in creating large panoramic landscape photographs soon figure out that they want to rotate the DSLR around some randomly chosen point. Instead of creating that large image they soon realize that those acquired images may be difficult to stitch. The failure is due to the parallax and therefore they may want to repeat the experiment until finding the “magic rotational point” which allows them to perfectly stitch all the images and create a beautiful huge panoramic image.
There is one “magic rotational point” around which you can rotate your lens and get a perfect stitch with overlapping frames, the foreground and background points line up perfectly allowing continuing features as seen be your naked eye, the no-parallax point.
This no-parallax point is also wrongly called the nodal point by photographers since is not related to the lens nodal point. The nodal point is of no significance in panoramic photography.
The entrance pupil of a lens is defined as the image of its aperture as seen through the front of the lens from the object to be photographed. Geometric location of the entrance pupil depends on the lens design and may be situated on the optical axis behind, within or in front of the lens system. If we are looking from the object to be photographed, the entrance pupil can be assimilated to a virtual image (i.e. an image of an object created as a collection of focus points of incoming light rays which are focus points created by extension of diverging light rays as opposed to a real image which is the sum of focus points from converging light rays) that lies back off the first optical surface or the first element of lens.
To summarize: more precise the geometric location of the entrance pupil of a lens is the centre of perspective or the no-parallax point. That explains why the no-parallax point is modified by changing the aperture without modifying the position of the sensor keeping all refracting lens elements in the same place.
When no lens is present in front of the aperture then the location and the size of the entrance pupil are identical to those of the aperture. Lens optical elements that are present in the front of the aperture will create either a diminished or a magnified image which is displaced from the location the aperture sits.
J. Holben in his article “Shot Craft: The Entrance Pupil of the Lens” American Cinematographer, April 6, 2020 describes a simple method for finding the entrance pupil virtual position by trial and error but he concludes: “While the definition of the entrance pupil seems simple, the practical implications are not.”
Unfortunately lens manufacturers does not specify the entrance-pupil positions for their lenses in the same manner they do for sensors location. That is of no interest for the manufacturer since it is a variable parameter for the same lens.
The no-parallax point is the center of the lens entrance pupil. Around this center the lens should be rotated in order to obtain a panorama with continuing features. That is not questionable at all.
What about considering the rotational point in the same plane with the lens aperture plane? Can one get large panoramic pictures with continuing uninterrupted features via stitching by using this method? In this article I present this simple method for creating landscape panoramas with perfect image stitching using rectilinear prime lenses.
Materials and Methods
For the purpose of this experiment I employed the Manfrotto tripod 055XPROB US. Pat. 6164843, from which I removed the Manfrotto 804RC2 Basic Pan Tilt Head w/QCK lock. The Manfrotto 627 Basic Panoramic Head Adapter was mounted directly on the tripod. On top of this panoramic head I mounted the Sirui Quick Release Platform MP-20 Arca-Swiss compatible with the SUNWAYFOTO DMP-200 Nodal Slide. The other tripod used was the Photopro C40i + FPH-53P tripod – Fig. 2 and Fig. 3.
Canon EOS 90D, FujiFilm S5Pro, and Sony ILCE-M2 were attached via the 3Leg L-Bracket QR11LG Quick Release Plate Arca-Swiss Compatible onto the same SUNWAYFOTO DM-200 Nodal Slide on the Photopro C40i + FPH-53P tripod.
The 627 Manfrotto Basic Panoramic Head Adapter – Fig. 2 – has a 360° scale that helps rotating the camera at different angles. Please, note that each lens employed for this experiment had its rotational axis in the same plane with that of the tripod and that was set using the nodal slide.
The Sirui MP-20 clamp sports a unique locking mechanism and two bubble levels for precise and rapid levelling adjustment. It is compatible with SIRUI TY series quick release plate – Fig. 2.
SUNWAYFOTO DMP-200 Multi-purpose Rail Nodal Slide 39mm sports double dovetail allowing it to be mounted onto an Arca-Swiss clamp. A perfect versatility can be achieved via DDT-53/DDB-53 clamp. Safety stop relief grooves secures the camera body from falling down. In addition, two safety stop mounting holes are located on the back of the nodal rail. A camera strap can also be attached to the nodal-rail – Fig. 2.
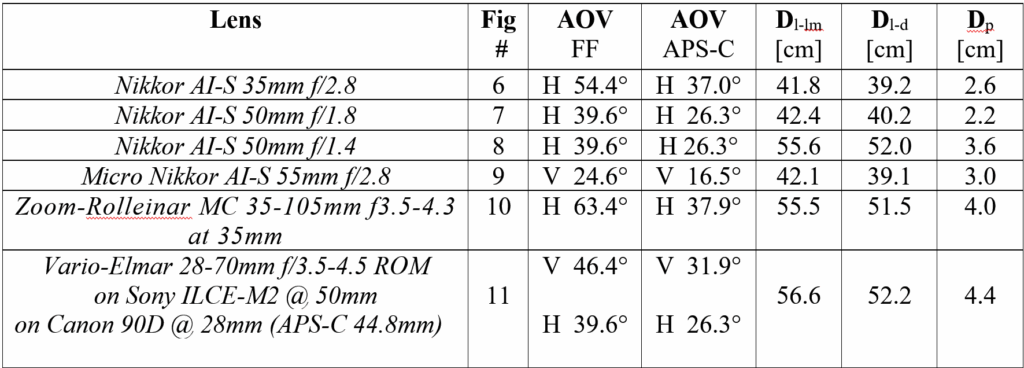
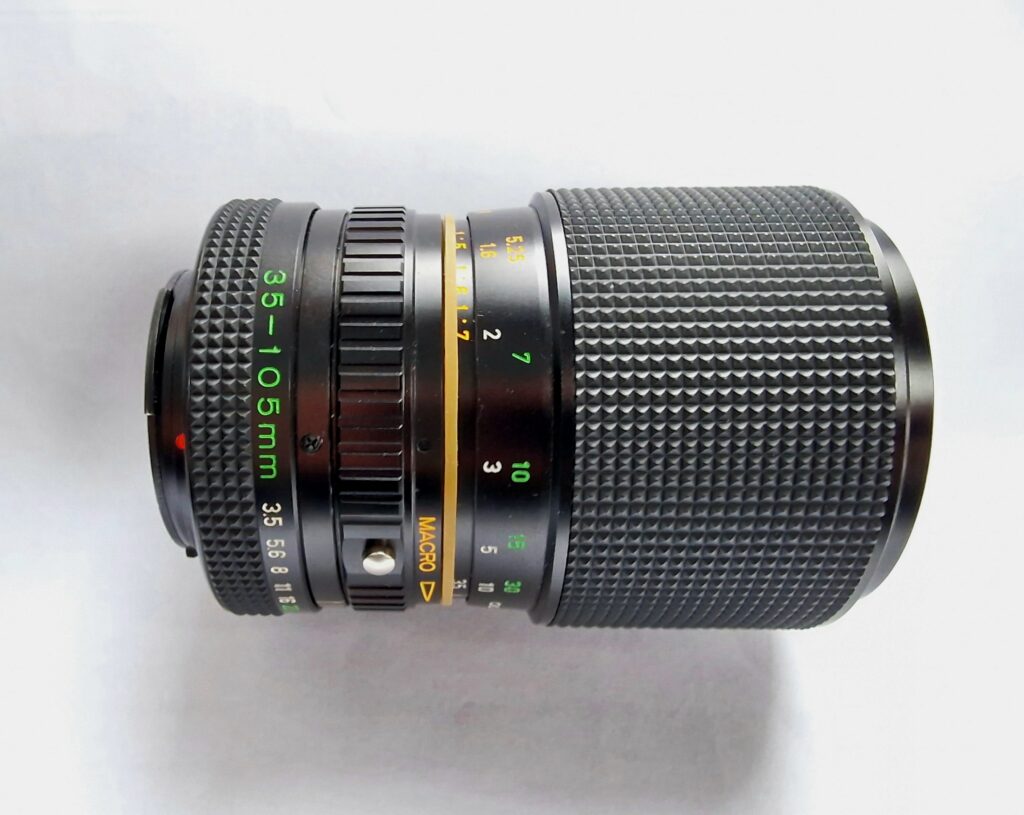
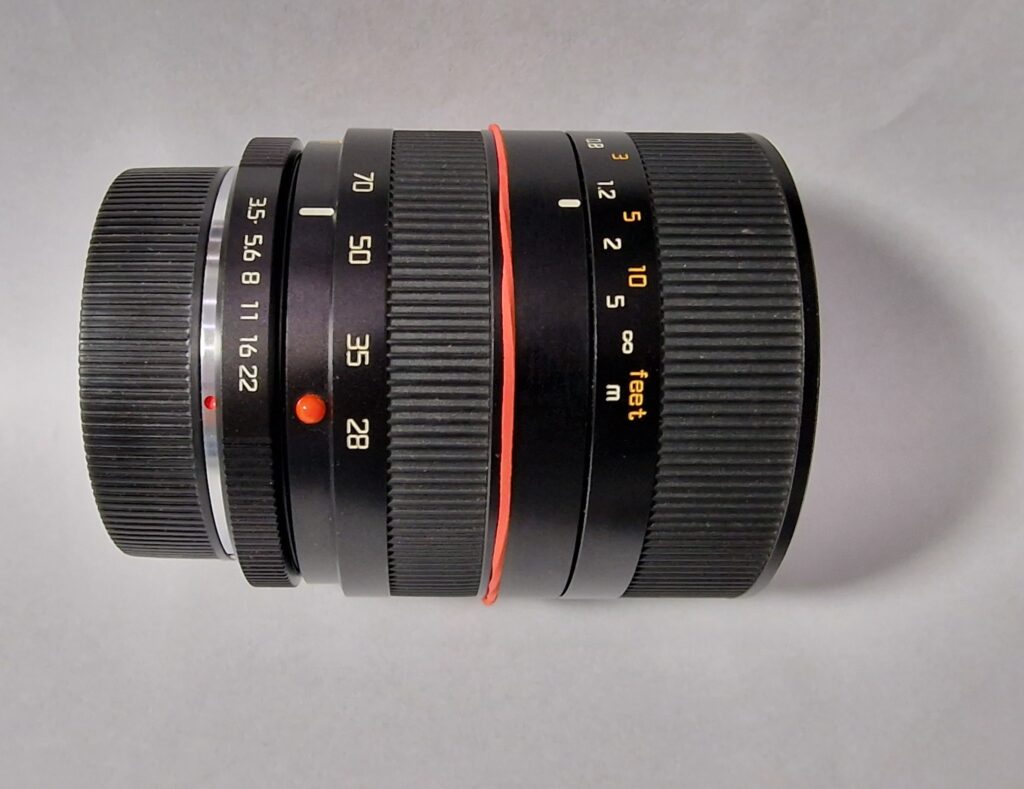
The lenses I employed were 2 zoom lenses and 4 prime lenses. The Rollei 35-105mm f3.5-4.3 Zoom-Rolleinar MC was mounted via the URTH QBM-Sony E adapter on a Sony ILCE-M2 camera. The Leica Vario-Elmar 28-70mm f/3.5-4.5 ROM zoom was mounted via the URTH R-EF adapter on a Canon 90D camera body and via the URTH R-Sony E on my Sony ILCE-M2 camera. Both zooms were manually focused.
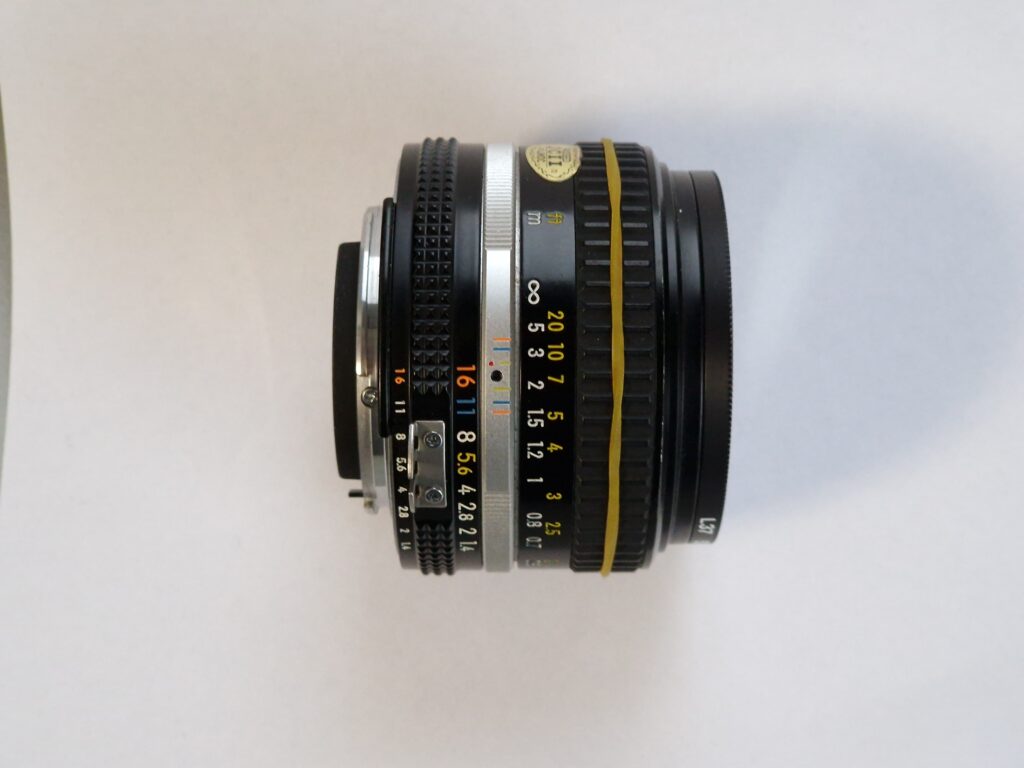
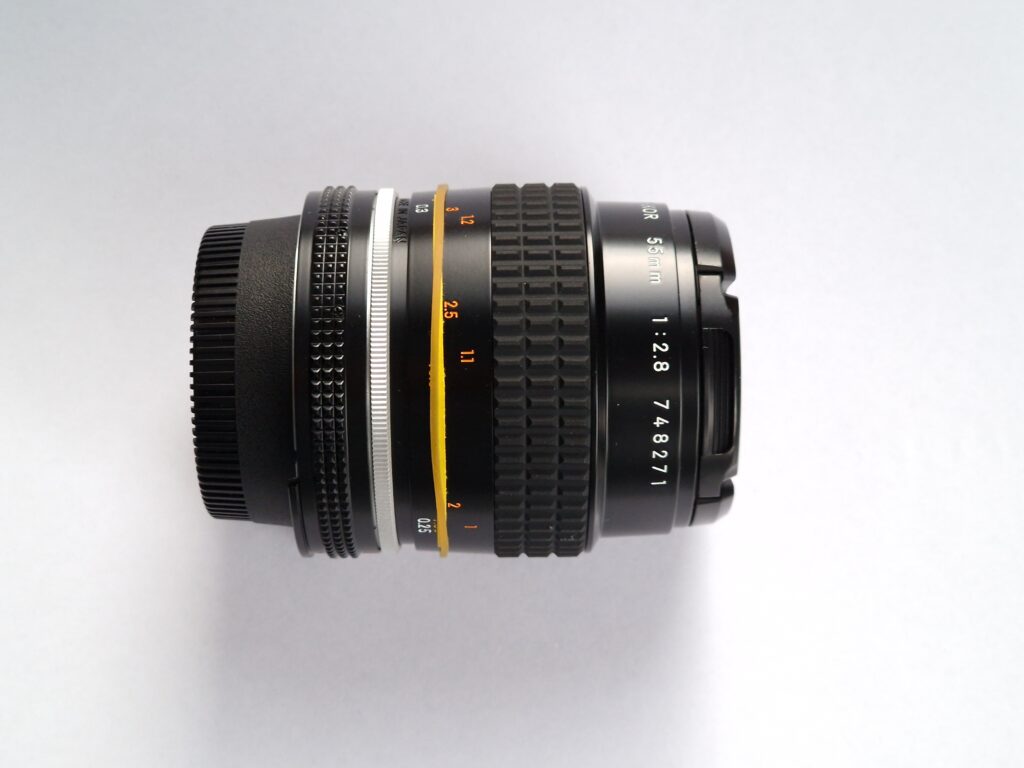
The 4 prime Nikon Nikkor lenses employed mounted on a Fuji S5Pro body were: Nikkor 35mm f2.8 AI-S, Nikkor 50mm f1.8 AI-S, Nikkor 50mm f1.4 AI-S, and Micro Nikkor 55mm f2.8 AI-S. All Nikkor AI-S prime lenses were manually focused on the FujiFilm S5Pro camera.
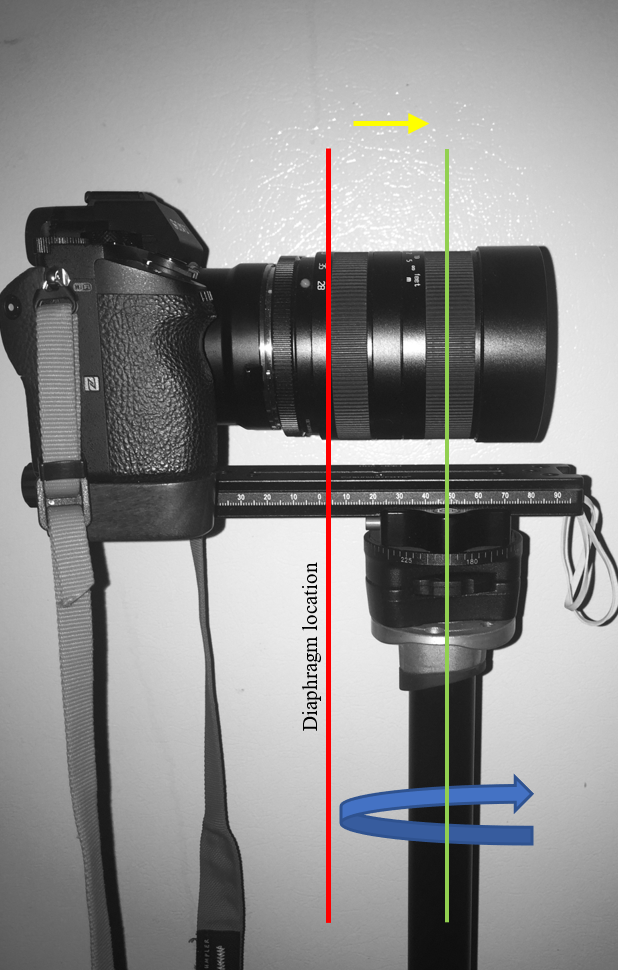
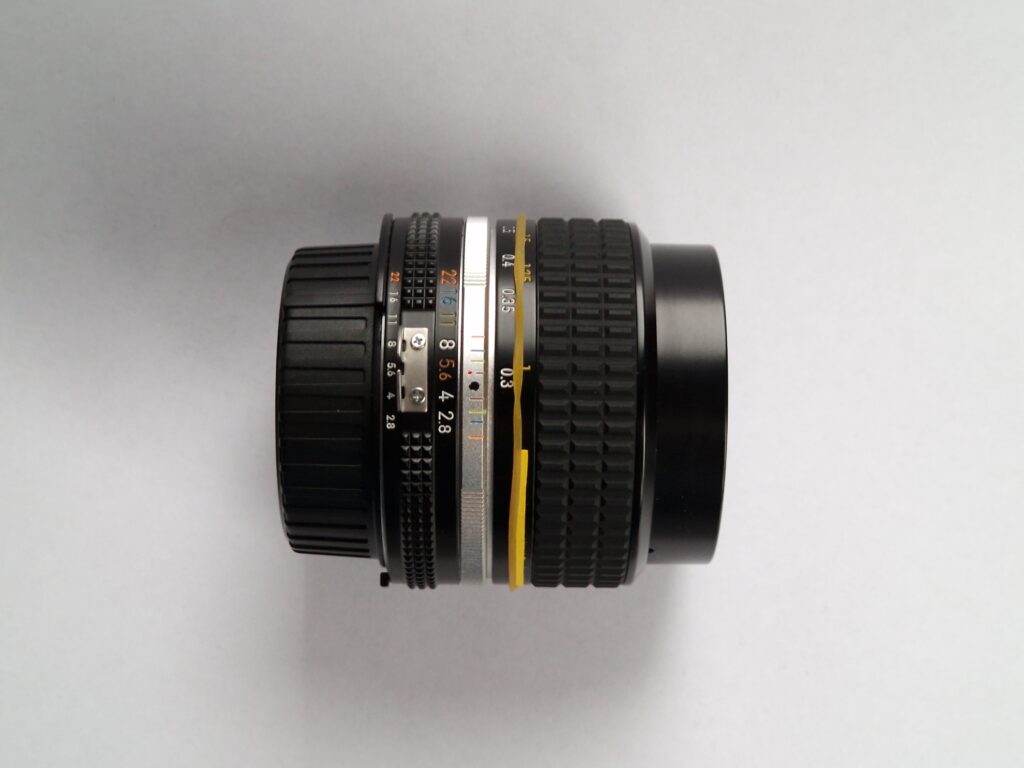
A panoramic image that means continuing features from one frame to another is achieved provided you can find your lens no-parallax point of the lens. However I took a different approach. I decided to rotate each lens so that its aperture blades are in the same plane with the rotational axis of my tripod – Fig. 5. In order to measure the location of the diaphragm in each of the 6 lenses specified above I employed a digital laser measuring tool – Fig. 3.
The background clamp – Fig. 3 – with 0.25inch ball head (Photospecialist-The Netherlands) was employed to secure the Bosch GLM 20 laser. The spring vise used has a ball head allowing a 360° rotation and a 0.25inch universal threaded screw that facilitates the attachment of any accessory with a maximum weight of 2.5kg in any position. The maximum opening is 6cm.
In Fig. 2 from the bottom to the top: the 627 Manfrotto panoramic head adapter with markings in hexadecimal degrees that are hardly seen, the only shortcoming of this head; on top of it sits the Sirui MP-20 with the Sunwayfoto nodal slide. The Sunwayfoto nodal-slide was moved back and forth according to the diaphragm position of the lens used. The two-bubble level help with maintaining a parallel level to the ground. The panoramic head is mounted directly on the Manfrotto tripod. In my experiment I rotated each lens so that its aperture blades are in the same plane with the rotation axis of my tripod. Please note the rotational axis in Fig. 5.

The background clamp was secured over the lens to be measured via a female spigot onto Photopro C40i + FPH-53P tripod.
I used the laser measuring device – Fig.3 – to locate the distance of the diaphragm from the lens filter mount. The Bosh GLM 20 laser (Robert Bosch Tool Corporation Mt. Prospect, IL 60056-2230) class 2 with a power of < 1mW at 635nm and a range of 65ft or 20m and accuracy of 0.125inch or 3.2mm was used to measure the exact position of the aperture of each lens. The manufacturer recommends 10 measurements one after another.
A schematic of my measurements is presented in Fig. 4.
The steps of my measurement are described below:
- The diaphragm of the lens was opened to the smallest f number.
- The distance from the laser to the lens mount (through the lens) which sat on a sheet of paper was measured Dlaser-to-lens mount (Dl-lm).
- The diaphragm was closed to the largest f number and the distance from the laser to the lens diaphragm was measured – Dlaser-to-diaphragm (Dl-d).
- The diaphragm is located from the lens mount at:
Diaphragm position Dp = (Dlaser-to-lens mount – Dlaser-to-diaphragm) - Each lens was provided with an elastic ribbon that indicates the diaphragm location.
- A corresponding mark sign for each diaphragm location of each lens was specified on the nodal slide.
- The mark sign of the nodal slide corresponds to the rotational axis the tripod on which I mounted the panoramic head. Again, the sign mark and the diaphragm and the rotational axis of the tripod must be collinear, more specifically – the diaphragm blades of the lens were positioned in the same plane with the rotational axis of the tripod.
- The camera with the lens attached on it was then rotated around the new rotational axis (the camera was in landscape orientation as well as in portrait orientation) from the left to the right in sequential and constant angle shots so that each frame covered between 30% to 50% from the previous one – Fig.5.
Results and Discussion
It is well known that lenses with larger field-of-view (FOV) – a horizontal length that represents how much of the scene is seen – show greater distortion which makes difficult to create panoramas via stitching. That is why I did not employ an ultra-wide lens which is any lens shorter than 24mm (full-frame format – FX) or 24mm x 1.5 = 36mm (APS-C format-DX) / 24mm x 1.6 = 38.4mm (APS-C Canon). The angle of view (AOV) represents the angular extent of an image. It is used interchangeably with FOV. That is why I employed lenses with AOV smaller than or equal to 65.5° in full-frame format-FX or 45.4° in APS-C format-DX which corresponds to 28mm in full-frame format-FX or 42mm in APS-C format-DX or 44.8mm in APS-C Canon according to field-of-view of lenses by focal length – https://www.nikonians.org/reviews/fov-tables for all Nikon Nikkor lenses. APS-C conversion was done using: AOV & FOV visualizator – https://vahonen.info/fov/. AOV for Rollei Zoom-Rolleinar MC 35-105mm f3.5-4.3 and Leica Vario-Elmar 28-70mm f/3.5-4.5 ROM are those published by “More than just a camera lens database” – https://lens-db.com/.
During my measurements I left the laser on for 10 min to see if the number recorded by the laser changed in any way due to any external factor, but that was not the case. Therefore, each number representing both Dlaser-to-lens mount and Dlaser-to-diaphragm is the exact value. Location of diaphragm with respect to the lens mount for each lens is – Table 1:

After the measurement for locating the lens diaphragm in all lenses each of them was mounted as described above on the corresponding camera. Then each mounted lens was rotated around the axis that coincides with rotational axis of the tripod, more specifically – the diaphragm blades of the lens were positioned in the same plane with the rotational axis of the tripod. Canon 90D was locked in portrait orientation while FujiFilm S5Pro and Sony ILCE-M2 cameras were locked horizontal position then the lens was rotated from the left to the right in sequential constant angle shots so that each frame covered between 30% to 50% from the previous one.
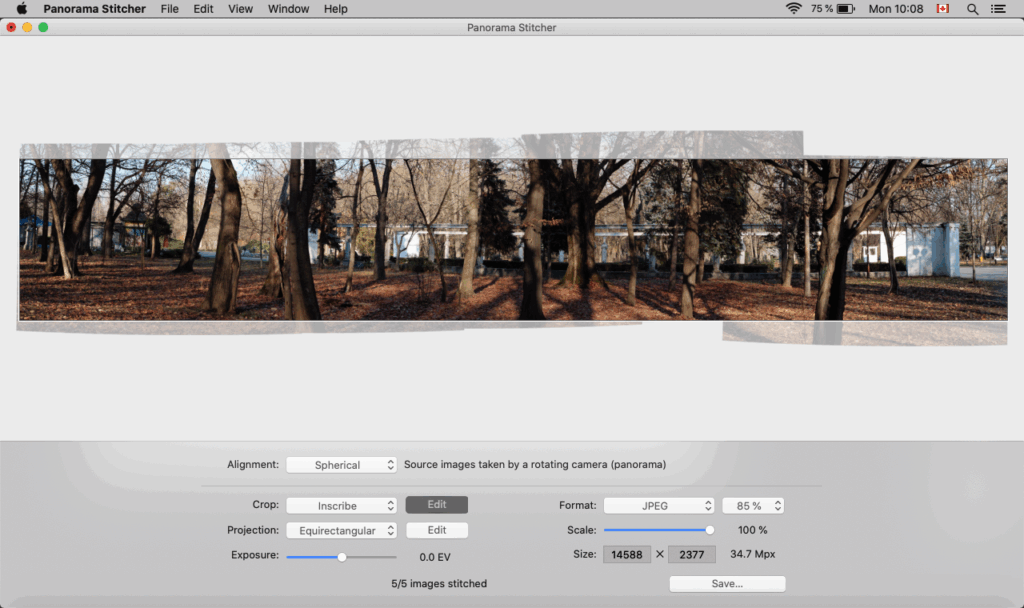
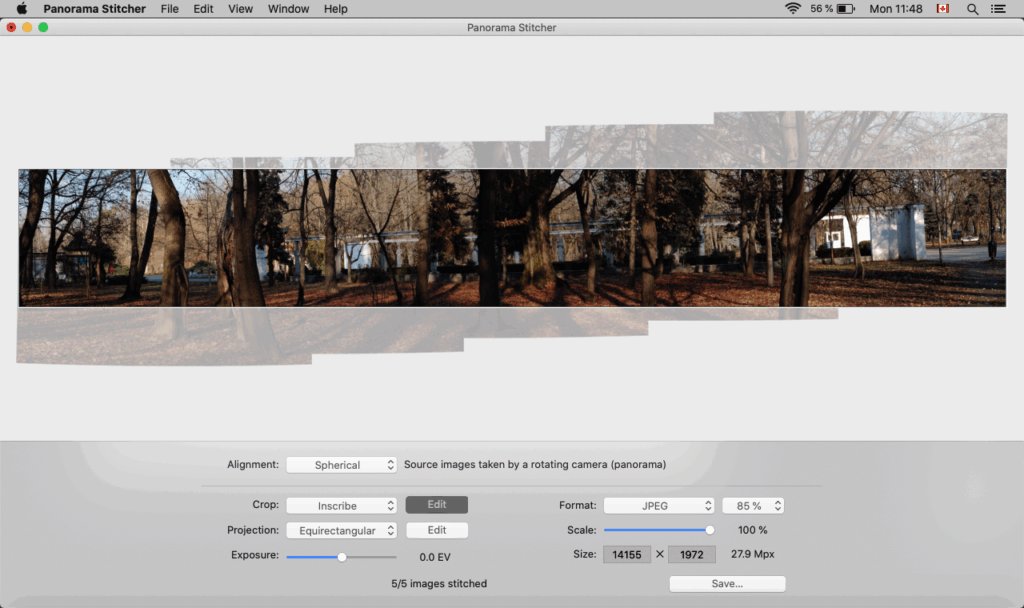
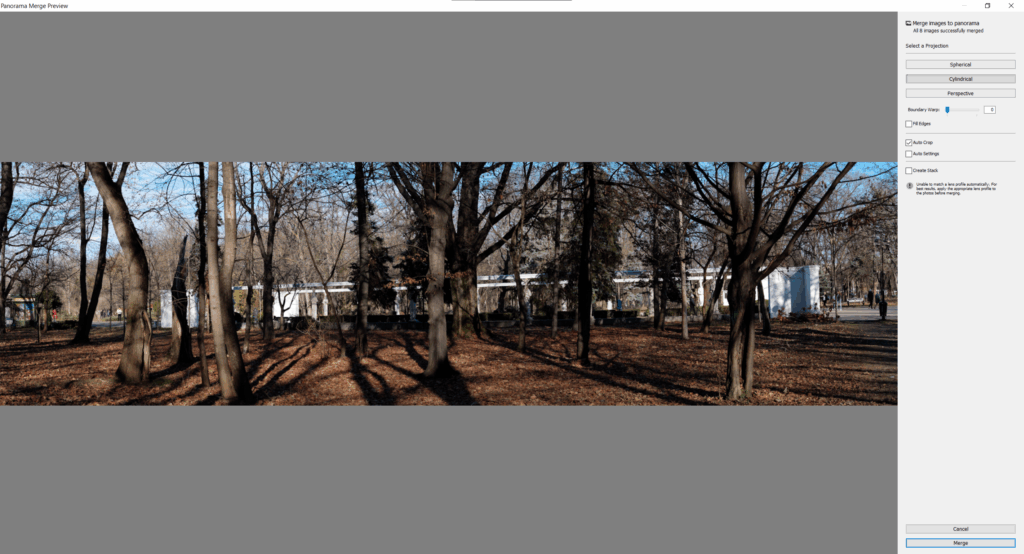
Pictures were acquired as fine jpg. I did not perform any distortion correction on any of the employed lens so all the pictures were downloaded as SOOC (straight out of the camera) .jpg files. Then the pictures were stitched using both Adobe Photoshop Lightroom Classic 10.0 Release and Apple Panorama Stitcher Version 1.11.1 (51).
Parallax effect is observable with objects close to the camera and is almost imperceptible for objects far away from the camera therefore I decided to include close objects (i.e. foreground) in my panoramas. That way I proved that my method works in similar fashion when stitching pictures to the no parallax point method. I did not experienced stitching errors due to parallax. That errors appear at the bottom of the image when objects are present in the close proximity of the camera. Continuing uninterrupted features were present all across my panoramas. So I concluded that I was on the right track with my experiment.
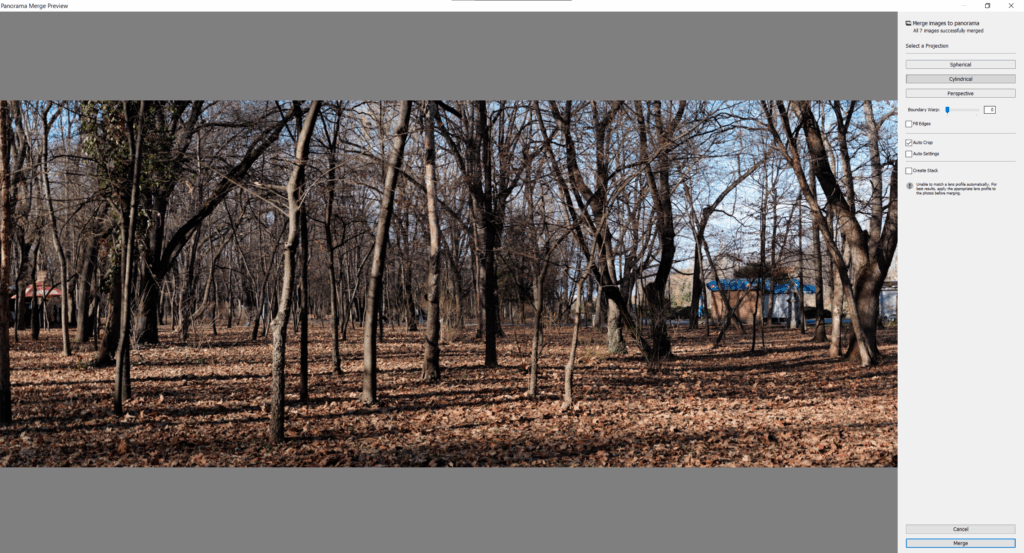
I acquired and stich 5 pictures for each lens. The print screen as I got from both the Apple Panorama Stitcher Version 1.11.1 (51) and Adobe Photoshop Lightroom Classic 10.0 Release along with the final size of each panorama are presented below.
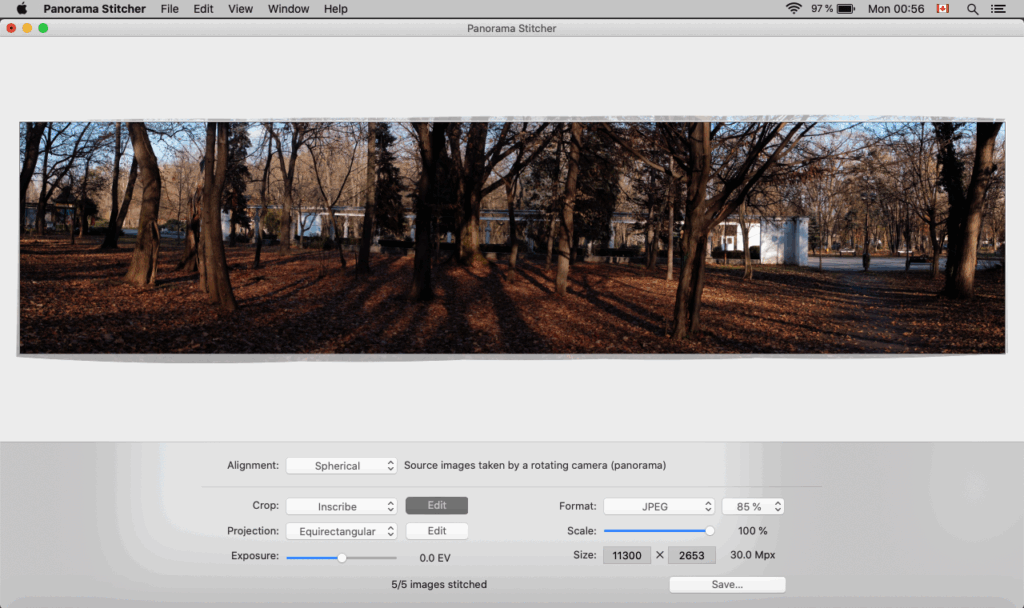


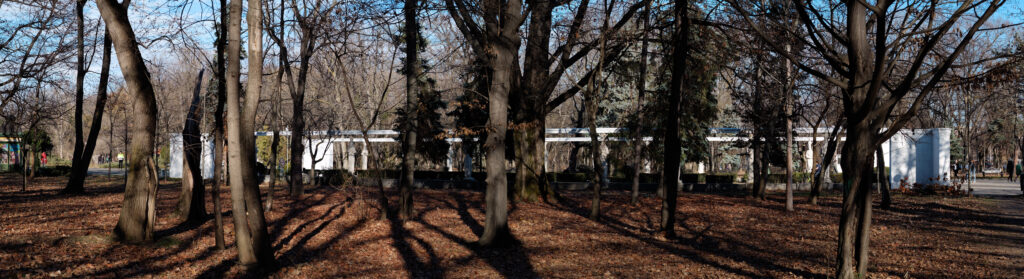

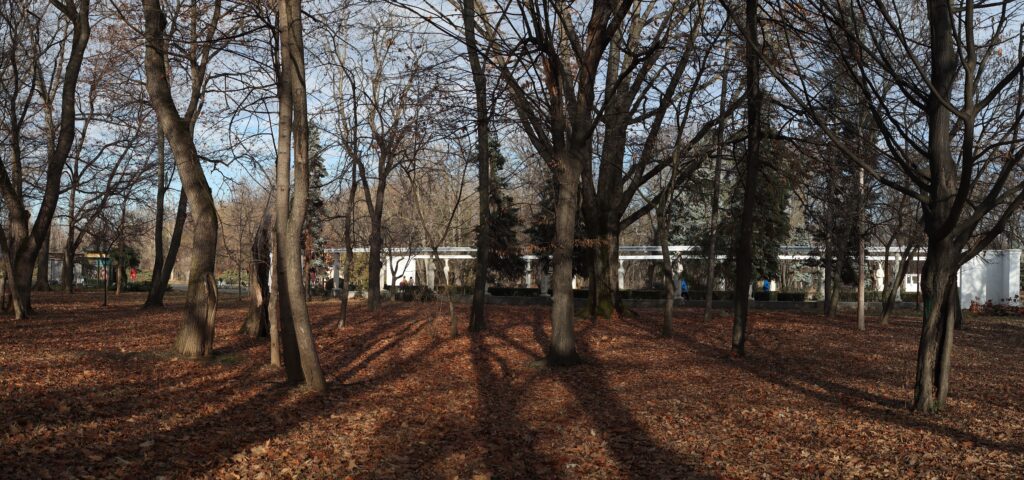

I deliberately took pictures of trees located at small distance from my camera – Fig.19, trying to create some parallax but the images stitched perfectly creating a large panorama with continuing features showing no-parallax. Since parallax is evident at small distances the lack of parallax here proves that my method of creating panoramas works perfectly.
Conclusion
Location of the diaphragm of each lens can be very easily identified via a simple measurement. For creating large panoramic pictures presented here each lens was rotated around the rotational axis that coincides with rotational axis of the tripod, more specifically – the diaphragm blades of the lens were positioned in the same plane with the rotational axis of the tripod.
I deliberately included in my panoramic images a foreground (objects close to the camera) to verify that my method works with no parallax introduced errors.
Our method gave a perfect stitching with no stitching errors at the bottom of the panoramic image, creating landscape pictures with continuing uninterrupted features.
References
[1] Merriam-Webster.com Dictionary, Marriam-Webster (2022). Available at: https://www.merriam-webster.com/dictionary/parallax
[2] Seitz Phototechnik AG, 8512 Lustdorf, Switzerland, Roundshot Super 220 VR Software Release 4.0 and higher (Released: 1.2005) Instructions to Define the Nodal Point. Available at: https://www.roundshot.com/documents/Super_220_VR_Nodal_Point.pdf
[3] Littlefield, R. (February 6, 2006) Theory of the “No-Parallax” Point in Panorama Photography Version 1.0. Available at: http://www.guillermoluijk.com/download/noparallaxpoint.pdf.
[4] Kerr, D. A. Issue 4 (April 2019) The Proper Pivot Point for Panoramic Photography Available at: http://dougkerr.net/Pumpkin/articles/Pivot_Point.pdf
[5] Dept. of Physics and Astronomy, Georgia State University, (2022) HyperPhysics Light and Vision Entrance pupil. Available at: http://hyperphysics.phy-astr.gsu.edu/hbase/geoopt/stop.html
[6] Paschotta, R (15 August 2008, revised on 23 July 2009-07-23) Nodal points in Photonics Spotlight Available at: https://www.rp-photonics.com/nodal_points.html
[7] Kidger, M. J. (2001) SPIE Press, Bellingham, WA, Entrance and Exit Pupils in Fundamental Optical Design. Available at: https://spie.org/publications/pm92_162_entrance_exit_pupils
[8] Holben, J (April 6, 2020) The American Society of Cinematographers, Shot Craft: The Entrance Pupil of the Lens. Available at: https://theasc.com/blog/shot-craft/the-entrance-pupil-of-the-lens
Share this post:


Comments
Martin on Using a Panoramic Head Adapter – A simple technique for perfect stitching in panoramic landscape photography
Comment posted: 03/01/2026
I use Autostitch for Panoramas and make photos with a rule of thumb - the wider the lens the more overlatch when shooting and then crop them down for a rectangular pic. Quick and dirty and handheld. I often get the vertical aligment wrong especially when deciding after the first shot that there was a panorama photo as well. Far from your precision and expertise.
Thanks for sharing!
Comment posted: 03/01/2026
Bob Janes on Using a Panoramic Head Adapter – A simple technique for perfect stitching in panoramic landscape photography
Comment posted: 03/01/2026
It is true that the no-parallax point is often at the centre of the camera diaphragm, but I don’t think you can rely on this being the same for all lenses. In some lenses the diaphragm moves as you focus (and zoom), in others it doesn’t. positioning of the diaphragm in a lens is sometimes a compromise.
While I admire your technically correct avoidance of ‘nodal point’ it has become so common in discussion of panoramic photography and in naming of products and is so much less clumsy than the alternatives, that I fear that boat has sailed. I dislike the current usage of ‘Decimate’, but have to accept that the meanings of words in English change with usage.
“Location of the diaphragm of each lens can be very easily identified via a simple measurement. For creating large panoramic pictures presented here each lens was rotated around the rotational axis that coincides with rotational axis of the tripod, more specifically – the diaphragm blades of the lens were positioned in the same plane with the rotational axis of the tripod.” –
While largely true, to get a really good ‘fit’ you should really test your no-parallax point by sighting a close object in line with one further away and checking that they stay in line across the full rotation.
“I deliberately included in my panoramic images a foreground (objects close to the camera) to verify that my method works with no parallax introduced errors.
Our method gave a perfect stitching with no stitching errors at the bottom of the panoramic image, creating landscape pictures with continuing uninterrupted features.”
I don’t think you have chosen subjects with objects close enough to present a real stitching challenge. If your no-parallax point is accurate, you should be able to include items that are far closer to the lens.
It should be said that modern stitching software is very capable and will only occasionally be caught out by rotations that induce parallax in the source images. My own favourite stitching tool ‘Microsoft Image Compound Editor (ICE)’ is no longer available/supported but managed very well even with a collection of hand-held shots. Done properly producing non-parallax source images should enable manual stitching.
Comment posted: 03/01/2026
Comment posted: 03/01/2026
Comment posted: 03/01/2026
Brashtown Czar on Using a Panoramic Head Adapter – A simple technique for perfect stitching in panoramic landscape photography
Comment posted: 03/01/2026
1. Mount your camera onto a sliding "nodal rail" so you can move it fore/aft, and mount that to the tripod.
2. Stop the lens down so that you can see the aperture diaphragm from the front of the lens. The apparent visual location of this is the center of perspective, which this article calls the "no-parallax point" and many others call the "nodal point."
3. Look at the aperture as you pivot the camera side-to-side on the tripod. If the aperture appears to move, slide the camera fore or aft until the aperture seems to pivot in-place, directly over your tripod head's center of rotation.
Very little equipment, time, or technical knowledge is necessary to do this, you can literally eyeball it and get it right in a few moments. Human stereo vision (depth perception) is amazing, and you can see sub-millimeter shifts in the position of the aperture easily with your eyes.
You can verify correct positioning by making a photo that includes two objects, one near and one far, apparently aligned near the right edge of the photo. Anything will do. Say, a chess piece just in front of the camera, placed so its top aligns with a distant landmark such as a building or tree. Now swing your camera to the right, so that the chess piece is near the left edge of the photo. Is it still aligned with the distant landmark? It should be, if you have correctly aligned your lens's entrance pupil over the tripod's rotation point. You can just watch the two objects on the camera's screen as you rotate the camera side-to-side (also a valid and easy way to calibrate the fore/aft position, if you find it hard to do by looking at the front of the lens for any reason).
This is all much easier than it sounds! Have fun.
Comment posted: 03/01/2026
Bill Brown on Using a Panoramic Head Adapter – A simple technique for perfect stitching in panoramic landscape photography
Comment posted: 03/01/2026
Comment posted: 03/01/2026
Comment posted: 03/01/2026
Comment posted: 03/01/2026
Comment posted: 03/01/2026
Gary Smith on Using a Panoramic Head Adapter – A simple technique for perfect stitching in panoramic landscape photography
Comment posted: 03/01/2026
Comment posted: 03/01/2026