When Zhiyun asked me if I would like to test and write about one of their gimbals, I wasn’t sure if this was the right website for it. It’s true that 35mmc has steadily expanded its niche (if you want to dive deeper into the lore, this article by Hamish is a good place to start). In the 12 years of its existence, the site has gone from being about 35mm compact cameras, to 35mm cameras in general, to other film formats, and finally (and occasionally) some digital as well. But in all this time, it has consistently been about still photography. Would it – could it – stretch to an article about gimbals which, at the end of the day, are squarely meant for video?

Hamish and I had a little chat, and I think where we landed is that video, at least for now, is a bridge too far. But if I could write about videography and gimbals in a way that connects these things to still photography, that should still be interesting and relevant for our core readership who, after all, are mainly photographers. So this article is a photographer’s intro to videography and gimbals, as well as a review of the Zhiyun Cinepeer Crane 4E.
A photographer dips his toes into video
I’ve been interested in still photography since I was a teenager. I shoot both digital and film (35mm, medium format, homemade pinhole cameras) and also develop and print in my makeshift home darkroom. I still think of myself as a hobbyist, though I occasionally do paid shoots and run workshops. But in all this time, I never really explored video. In fact, I think I used the video mode on my camera a grand total of 1 (one) time, to capture a short clip – the play of sunlight reflecting off a stream onto leaves, the sort of thing you can’t really capture in a still image.
All that changed a few months ago. Two of my friends run a contemporary dance company here in Singapore. I take photos for them, and one fine day they asked me if I would like to shoot the video trailer for their upcoming show.
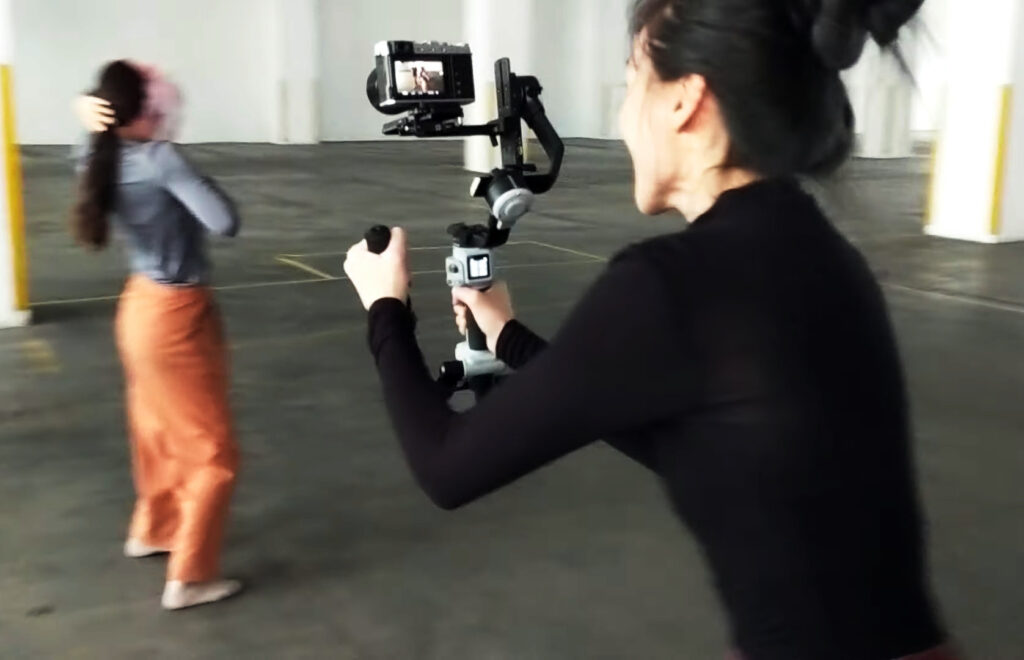
I told them frankly that I know nothing about video. They said “You don’t now, but you have one week to learn.” They also lent me a gimbal, which is a whole learning curve in itself.
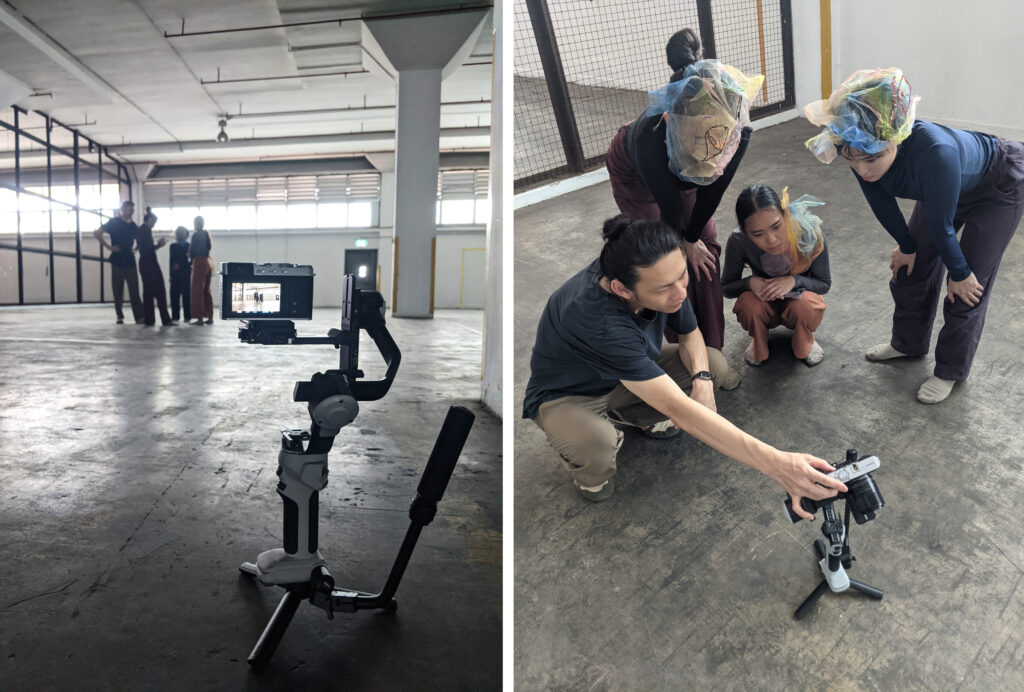
My friend took this photo of me filming with a gimbal, and I shared it in my Instagram stories:

This was the video we made (if you don’t use Instagram, you can also watch it on YouTube, and I’ve shared a screengrab below). The video was edited by my friend Emiri, as I hadn’t had yet learned how to edit.

Since then, I’ve shot a couple more dance videos, documented my friend Redwan’s residency at the National Gallery (you can watch that video on Instagram or YouTube), and also made some short personal videos of nights out and time spent with friends. I also learned how to edit videos on Da Vinci Resolve, and how to use gimbals (more on that later). In all these areas, I still have a lot to learn. Nevertheless, I thought it would be interesting to share what I’ve learned so far, as a photographer who is dipping his toes into video. Well, now maybe ankle-deep. Or knee-deep.
Anyway, I’m still new enough to video that I remember my early mistakes and learnings, which I thought may be interesting for other photographers who are in the same position as I was in a few months ago. There are some things which a lot of videography tutorials don’t cover, perhaps because they seem obvious, but which were not obvious to me as a beginner.
Tip 1: Shutter speed
The first time I shot some dance footage – thankfully this was just a test, and not the actual trailer I was assigned to shoot – I set my shutter speed to 1/250 sec, thinking it would help avoid motion blur. The resulting video looked a bit choppy, and I didn’t know why.
After a bit of poking around on the internet, I learned about the concept of shutter-angle and the 180-degree rule. In short, your “optimal” shutter speed – i.e. that which gives you “realistic” motion blur – is a function of your frame rate. It’s easy to calculate – just double your frame rate, and that’s the denominator of your ideal shutter speed.
For example, if you’re shooting video at 24 fps (frames per second) which is pretty typical, you should use a shutter speed of 1/48 or 1/50 sec. 30 fps? Use 1/60 sec. 60 fps for slow-motion footage? Use 1/120 sec. You get the idea.
If you wave your hand in front of your eyes, you see some “motion blur”. In fact we explored this idea in a collaborative article right here on 35mmc, inspired by a William Klein quote: “If you look carefully at life, you see blur. Shake your hand. Blur is a part of life.”
If you shoot video at fast shutter speeds, it sometimes looks unnatural – the choppy effect I noticed – because you are freezing motion which would have looked blurry in real life. This In Depth Cine video goes into more detail, and has some great examples of “non-optimal” shutter speeds being used for creative purposes. This video by Gerald Undone tests the effect of different shutter speeds and frame rates.
Tip 2: Too much light
The restriction on shutter speed leads to a problem which photographers rarely encounter: too much light!
Way back in the early ’80s, the legendary Nikon FM2 achieved a shutter speed of 1/4000 with a fully mechanical shutter. My more modern Fuji X-E4’s electronic shutter tops out at a ridiculous 1/32000 sec. At these speeds, you can shoot wide open, even in very bright lighting environments. The more common problem, if anything, is too little light.
With video, and (let’s say) a 1/48 sec shutter speed, you are more limited. I learned this lesson when shooting a dance video for my friend Sudi. We had bright sun, and even at my lowest ISO, I couldn’t go wider than f/16.
For example, I had to shoot this scene (00:48 of the video) at f/16, and got much more depth-of-field than I would have liked:
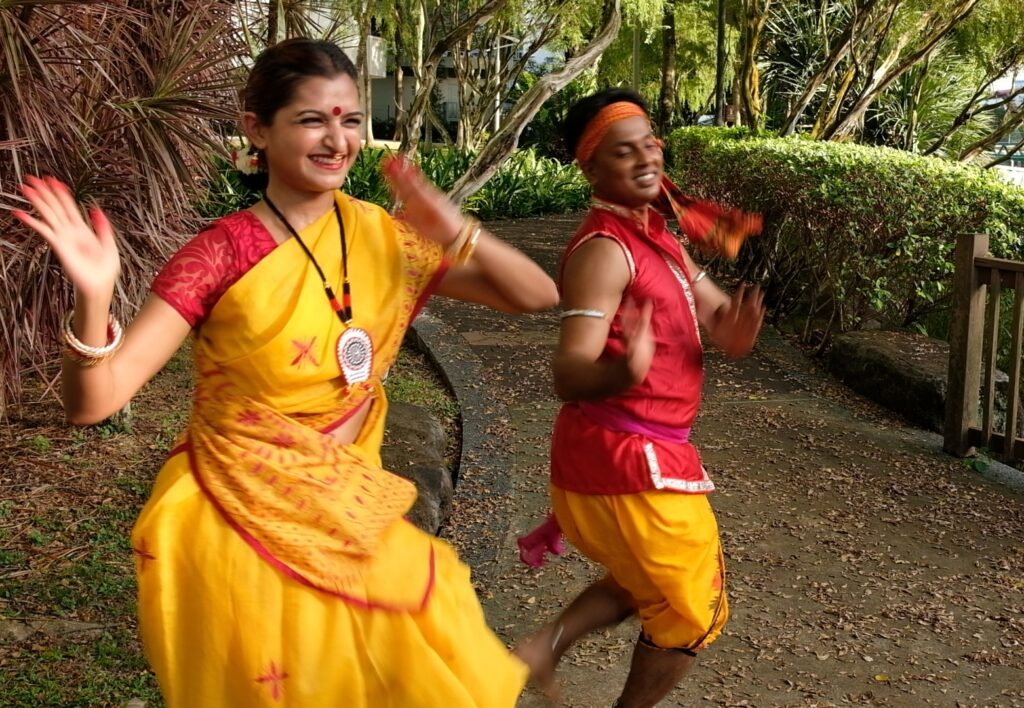
Later that afternoon, in more subdued light, I was able to shoot at f/2.8, which produced a more pleasing effect (we used a screengrab from one of those later takes as the thumbnail on YouTube):

The solution, of course, is to use neutral-density filters. Thus I learned my lesson, and now I bring a set of ND filters whenever I expect to shoot in bright light.
Tip 3: Move less
As photographers, we tend to move a lot – always looking for an unusual angle, an interesting foreground element, a juxtaposition of forms. Emiri, who edited my first few videos, told me, “Calm down, you move too much.”
Looking back at my footage, I realised she was right. I was always trying different angles and perspectives – a legacy of my still photography mindset – but as a viewer, all that movement can be distracting.
As a photographer, let’s say you find a good angle and take a photo from that position. Then you move to a new position – another good angle – and take a second photo. The viewer doesn’t care how or why you moved from A to B, and doesn’t see the frames in between.
But in video, they do see the frames in between, so those frames need to look good too. The camera movement should be intentional, and contribute to the story we are trying to tell. These two videos by Drew Schettler and StudioBinder are a great introduction to different types of camera movement. And sometimes, we don’t need camera movement at all.
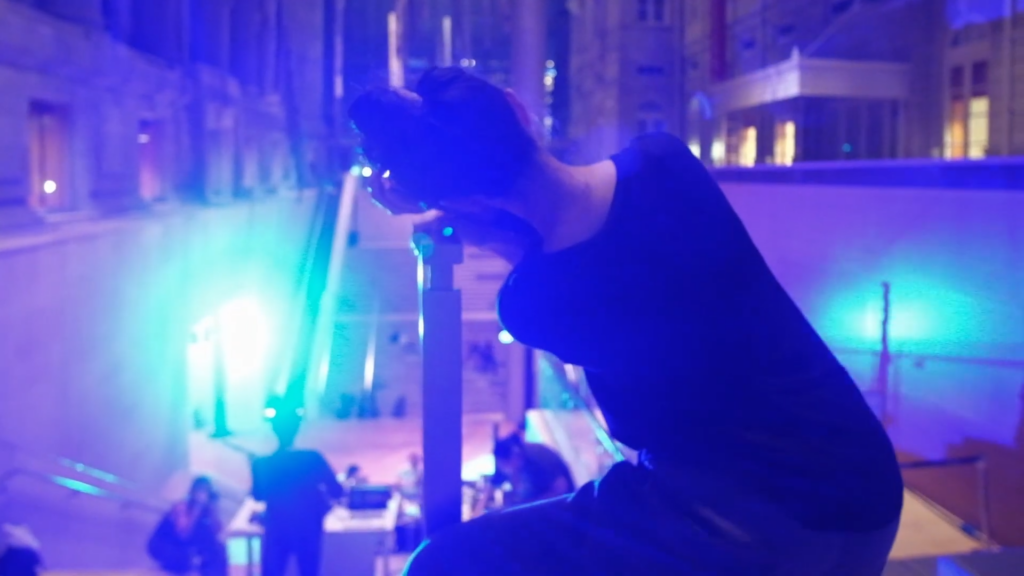
That said, the rehearsal video of my friend Redwan (Instagram, YouTube) has a fair bit of camera movement – e.g. the bit at the end, shown in the screengrab below, where the camera pans down to the dancer, Caroline – and I’m pretty happy with it. I used the Zhiyun Cinepeer Crane 4E for that shoot, and it really helped.
Tip 4: Video editing
So far I’ve talked only about capturing video. Editing video is a whole other skill, but I don’t want to get too deep into it, as it might take us away from the focus of this article. But I do want to mention a couple of things I found helpful as I was starting out.
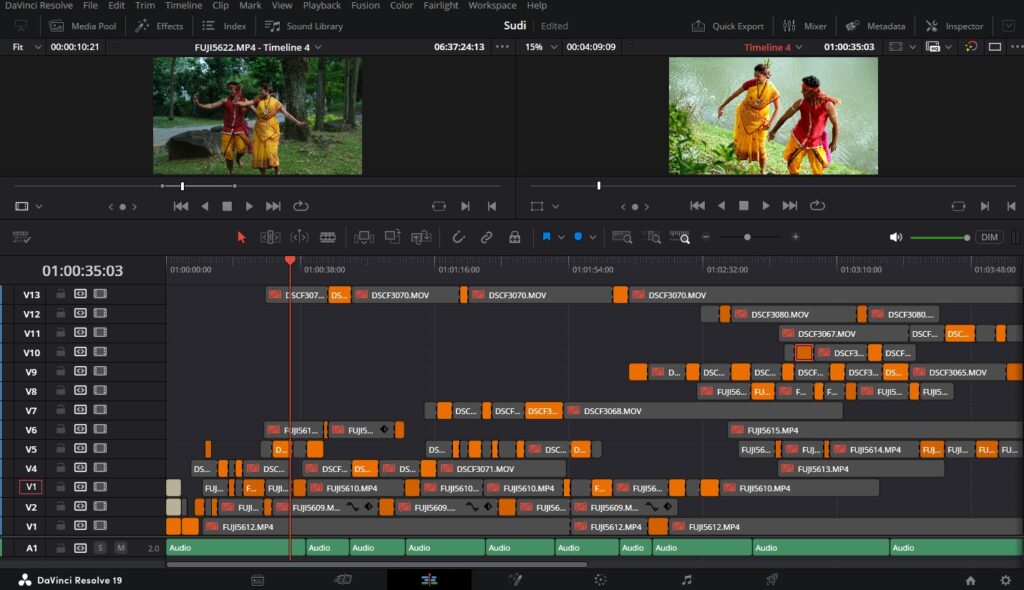
First, Da Vinci Resolve. It’s almost unbelievable that editing software this advanced is available as a free download. As with any sophisticated software, there is a learning curve. It took me a few days to learn the basics, and would probably take years to master (I use only a small fraction of its features). I believe there are certain things which the other industry-leading programs, Final Cut Pro and Adobe Premier Pro, are better at. But crucially, Da Vinci Resolve is free.
The screenshot below shows the DVR edit page for my friend Sudi’s dance video. Each horizontal bar is a separate take, and the orange sections show which part of each take plays in the final edit.
Second, a couple of editing techniques – namely eye trace and cut on action – make for much smoother edits.
Anyway, as I said, I don’t want to go into too much depth, and besides, I’m not sure how many 35mmc readers are interested in video editing. But if you are, let me know in the comments, and we’ll see what we can do.
Gimbal 101
The basic mechanism behind gimbals was known in ancient Greece and China, over 2,000 years ago. Gimbals for videography, which we’re covering in this article, are devices which stabilize your camera, typically used while shooting handheld footage. Using sensors and motors, they counteract unwanted movement like camera-shake, and produce smoother, professional-looking footage. Gimbals are especially useful when we are moving the camera, such as following a subject in motion, or walking through a landscape.
If you haven’t used a gimbal before (which I hadn’t, until a few months ago), one key thing to know is that before using the gimbal, you need to mount and balance your camera. The first time, it might take you over an hour – if there is a video tutorial for your model, that really helps – but with practice, balancing takes 5-10 minutes. Note that after balancing, if you switch to a different lens or otherwise change the weight distribution of the camera, you probably need to balance it again.

In fact, the camera should be mounted and balanced, even before you switch the gimbal on. My first instinct with a new device is to switch it on, but with a gimbal, if you haven’t mounted a camera (or if it’s mounted but not balanced), it puts a strain on the motors. Before powering on, it’s also good to check that all the axes are unlocked (gimbals are usually shipped with the axes locked).
Assuming it’s been correctly balanced, if the gimbal is vibrating when you switch it on, it probably means that the motor torque is too high (or too low) for the payload. Check your manual to see how to set the torque. Some gimbals, like the Cinepeer Crane 4E, also have an auto-calibration feature.
Finally, using a gimbal is a whole other skillset. Here’s a tutorial by Learn Online Video which demonstrates some classic gimbal moves. This StudioBinder video (I linked it before, but it’s good enough to be worth linking twice) covers a whole host of camera movements, and although the video is not gimbal-specific, most of these movements are possible with a gimbal. Experienced videographers make gimbal use look easy, but it needs loads of practice – how you hold the gimbal and how you walk, knowing which gimbal mode to use for specific situations, maintaining the desired composition while everything moves around. I have a better grip on all this stuff compared to when I first started out, but I still have much to learn.
With all that out of the way, let’s get down to the review.
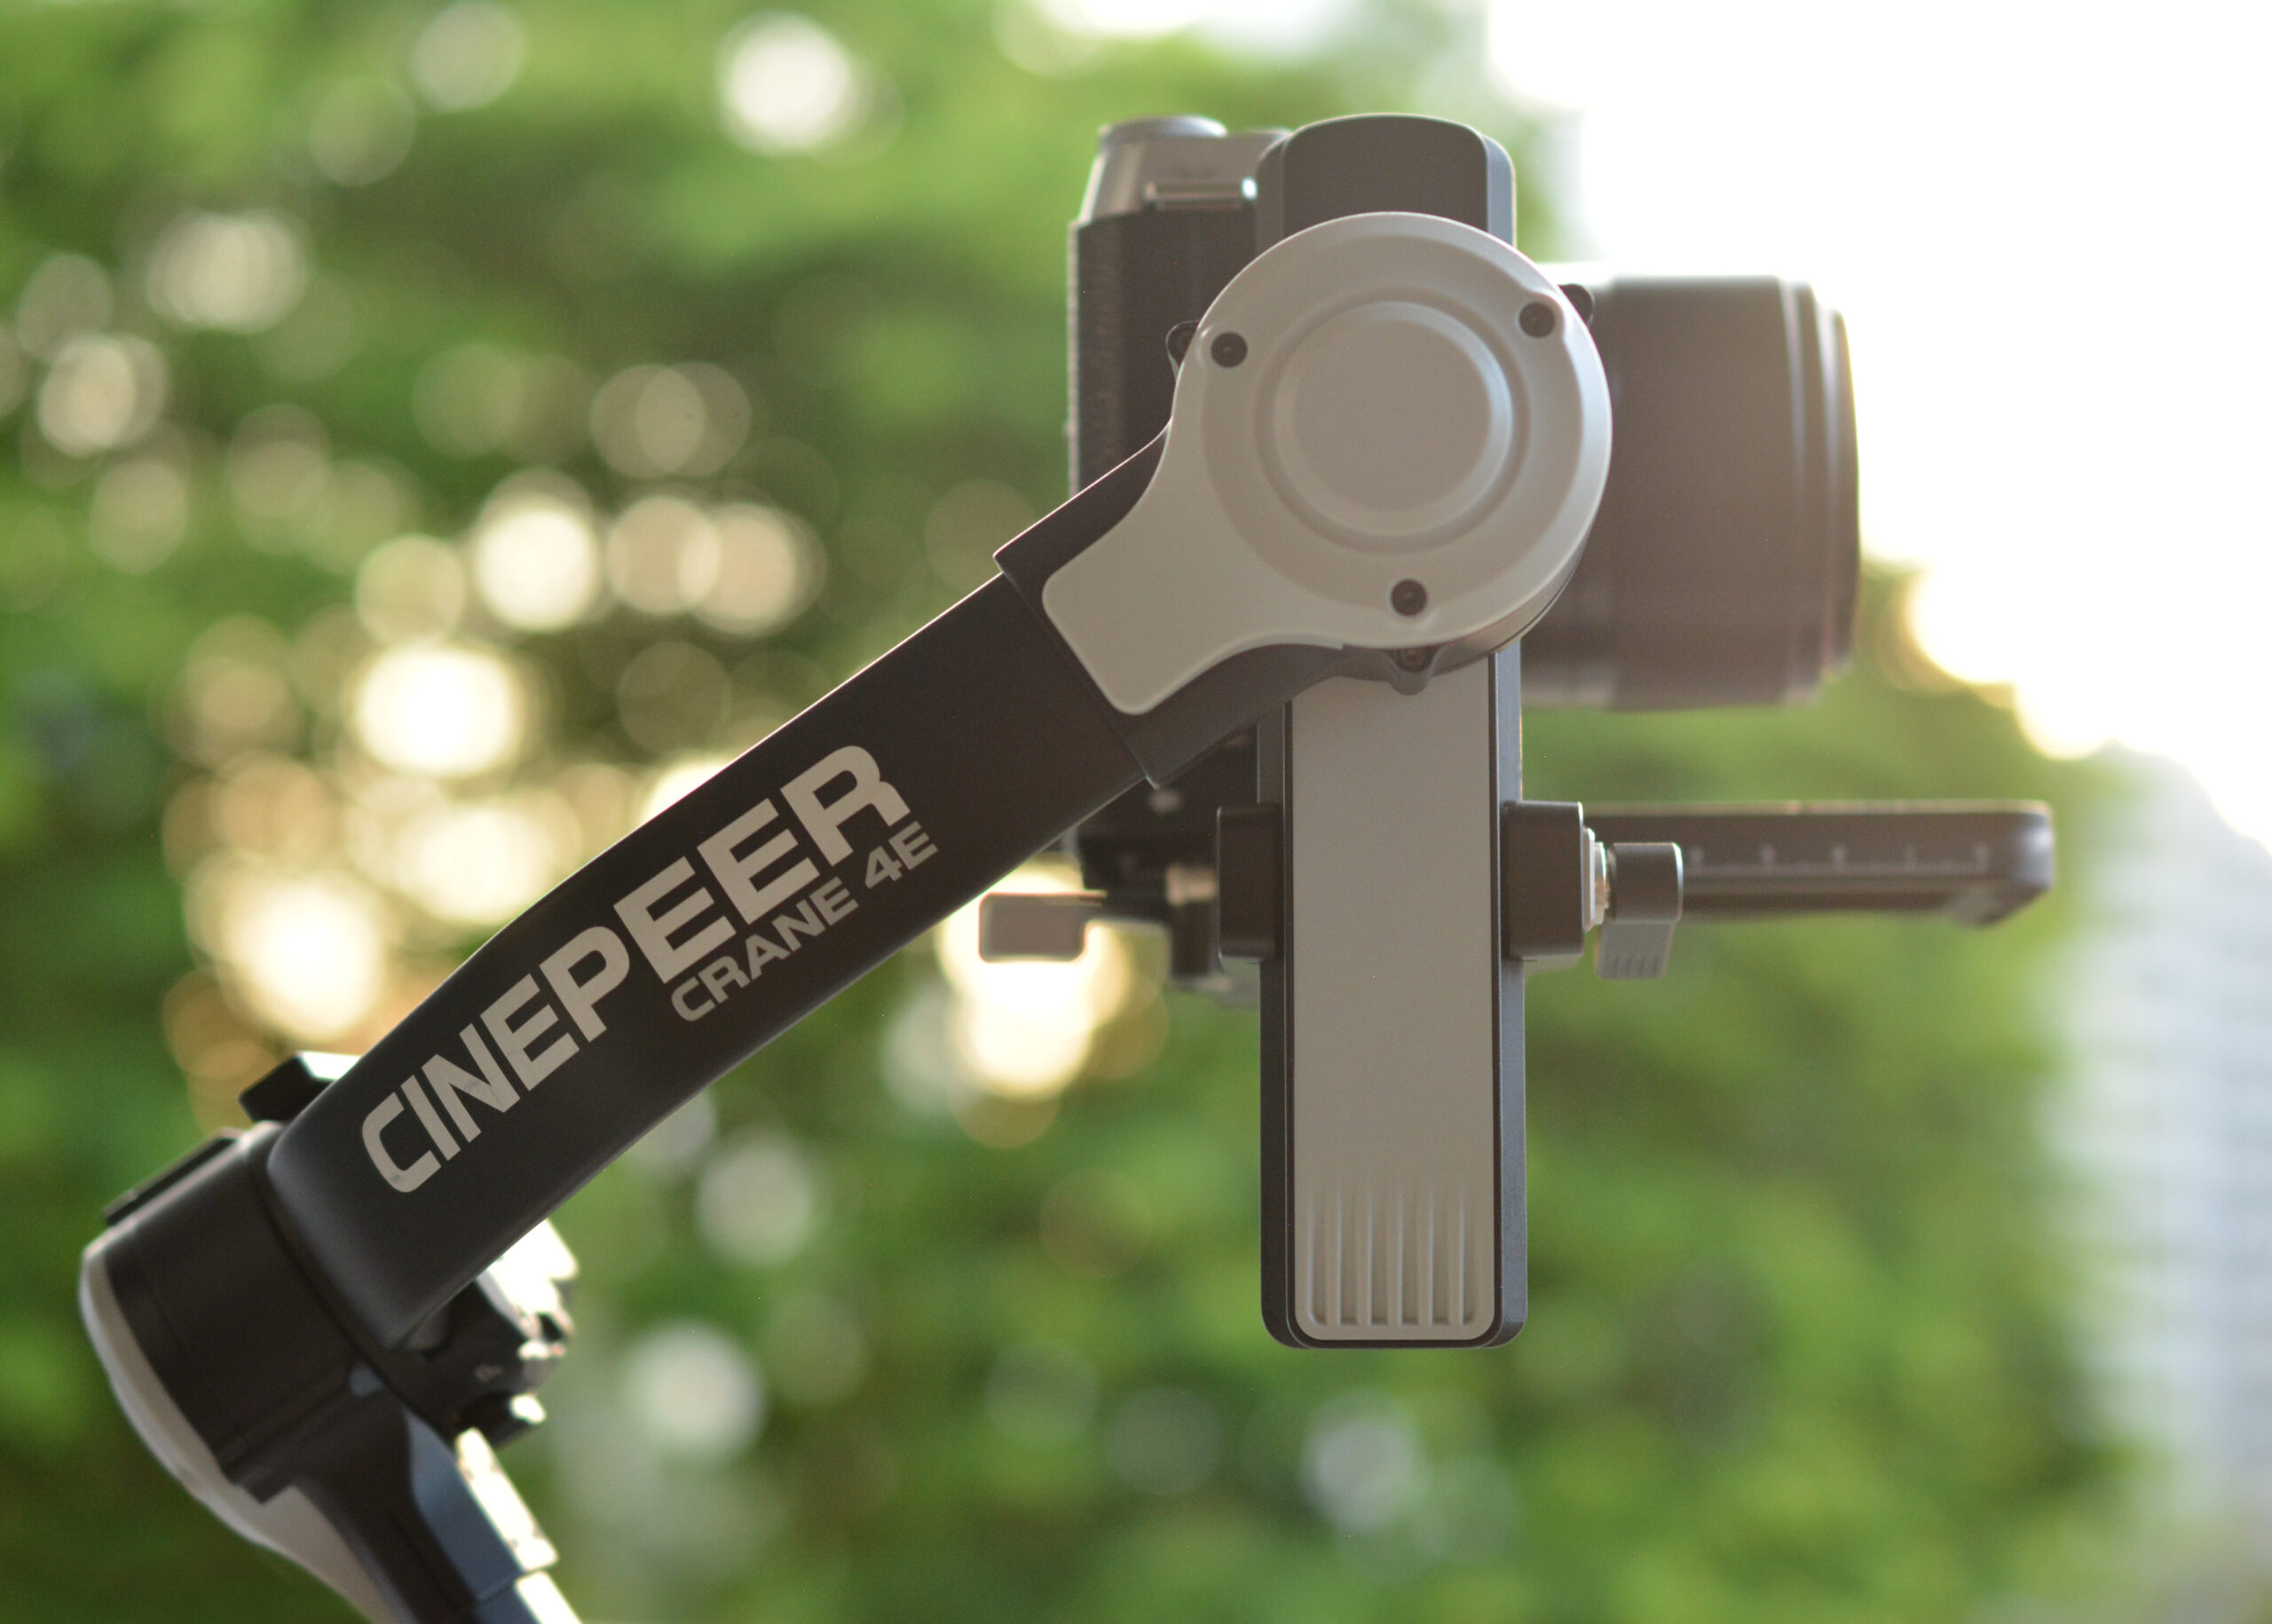
Zhiyun Cinepeer Crane 4E review
For full disclosure, Zhiyun sent me this gimbal to review, but I was not paid for this article, nor did Zhiyun have any input into its content. I like their products, and I have another gimbal – Zhiyun Weebill S – which I bought for myself last year. In my reviews I always try to be honest and objective, but if you have any questions or doubts, just let me know in the comments and I’ll be happy to address it. This review does have a couple of affiliate links, and a discount code at the end. If you use the links to buy the Cinepeer Crane 4E or any other Zhiyun products, I will get a small percentage, at no extra cost to you.
My history with Zhiyun
My first dance trailer was shot with a borrowed gimbal. Soon after, when I realised I was enjoying videography and would probably do more of it, I decided to purchase my own gimbal. I enjoyed using the borrowed gimbal – a Zhiyun Weebill S – so I got the same model. Interestingly, the Weebill S is still available new, although it was introduced nearly 6 years ago, and newer models have been released since (the latest being the Weebill 3S). The weebill, by the way, is a small Australian bird, which I think is a cute name.
Shortly afterwards, Zhiyun sent me the Cinepeer Crane 4E, which I’m reviewing now.
Weebill, Crane and Cinepeer series
I haven’t looked into the statistics, but my anecdotal understanding is that Zhiyun, along with DJI, are currently the leading gimbal manufacturers on the market.
Zhiyun currently has two main series of camera gimbals: Weebill and Crane (not counting phone gimbals, which I have no experience with). The Crane series – at least the latest models – have touchscreen, while the Weebills don’t (they do have an LED screen, but without touch functionality).
Then there is the Cinepeer series, which is a budget line. According to Zhiyun’s website, the Cinepeer series “builds on Zhiyun’s core performance while keeping quality high and costs affordable.” Both Weebill and Crane gimbals come in Cinepeer (budget) variants. For example the latest Weebill model, the 3S, has a counterpart called the Cinepeer Weebill 3E. Similarly, the budget version of the Crane 4 is the Cinepeer Crane 4E, which is the gimbal that I’m reviewing.
Comparison with Crane 4
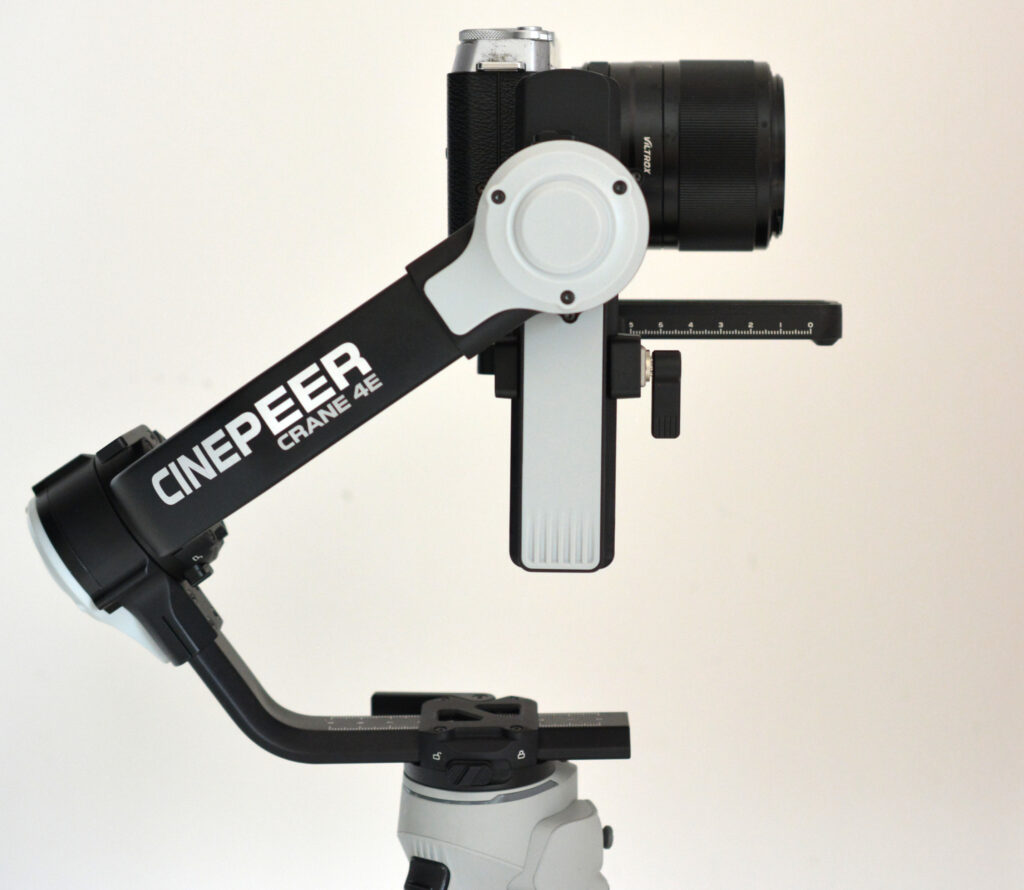
Despite being the “budget” version, the Zhiyun Cinepeer Crane 4E is not too different from its higher-end cousin, the Crane 4. This video by TechTok compares the two models. The most obvious difference is colour: the Crane 4 is all black, while the Cinepeer Crane 4E is part-grey – a sort of Imperial Stormtrooper look. I personally prefer all black, but it is what it is.
Aesthetics aside, the Crane 4 comes with a built-in LED fill-light and balance indicator lights – all of which are missing on the Cinepeer Crane 4E. However, I don’t see myself using these. In fact, I prefer to do without them, and save a bit of weight. Otherwise, in terms of features and load capacity, the Crane 4 and Cinepeer Crane 4E appear to be similar if not identical.
Comparison with Weebill 3S
Compared to the Weebill 3S which is the latest Weebill model, the Cinepeer Crane 4E is bigger, heavier and more expensive, but it also has more powerful motors and a higher load capacity. The Zhiyun website unfortunately does not specify the load capacities, but the Downloads page for each gimbal has a camera compatibility list which gives you some idea.
The Weebill series of gimbals, in my opinion, have enough load capacity for the vast majority of amateur videographers. For example, the Weebill 3S can deal with a full-frame Sony α1 plus FE 24-70mm f/2.8 lens, which is a serious piece of kit by any standards. However, if you wanted to use the same camera with, say, an FE 70-200mm f/2.8, you would need a more powerful gimbal like the Crane 4 or Cinepeer Crane 4E (check out this video, for example, where David Zhou is running some real heavy-duty setups on a Crane 4). But for most of us, the smaller, lighter and cheaper Weebills should do the job.
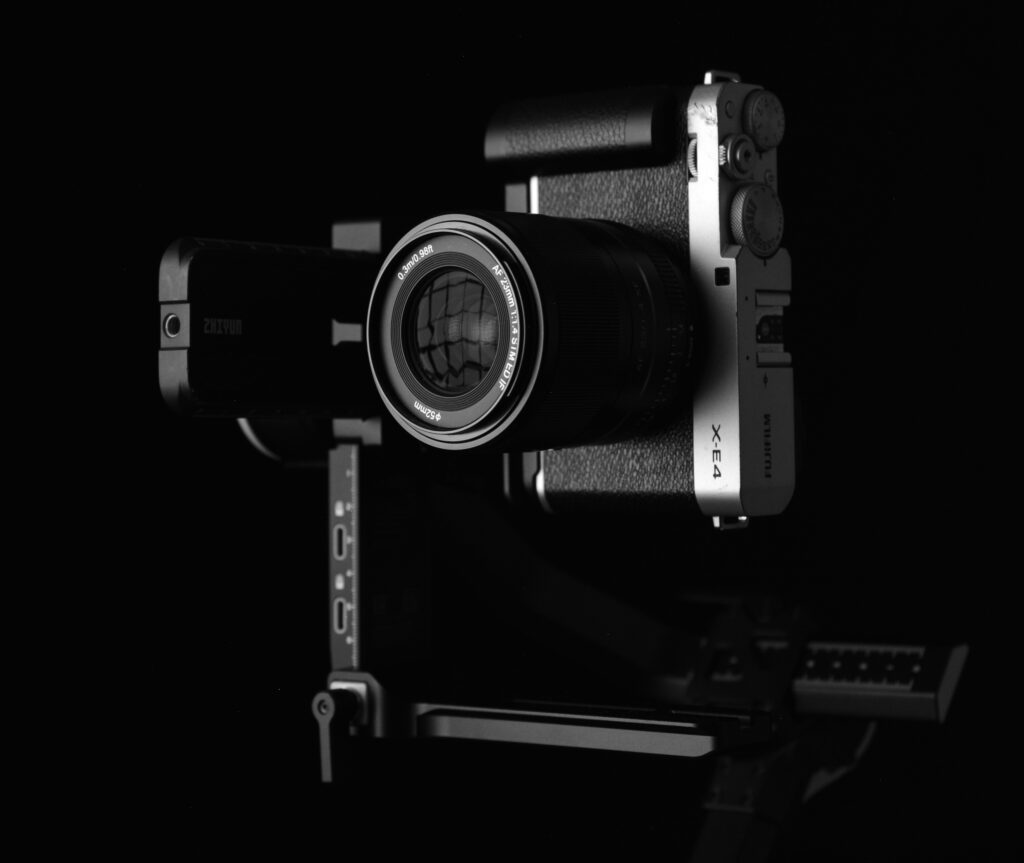
As for myself, I use a Fuji X-E4 with small primes (23mm f/1.4 and 50mm f/2) and a compact zoom (Sigma 10-18mm f/2.8). For such a tiny setup, the Cinepeer Crane 4E is frankly overkill. But that’s what Zhiyun sent me to review, so here we are. If you do need the greater load capacity, my review should give you an idea of what to expect from the 4E.
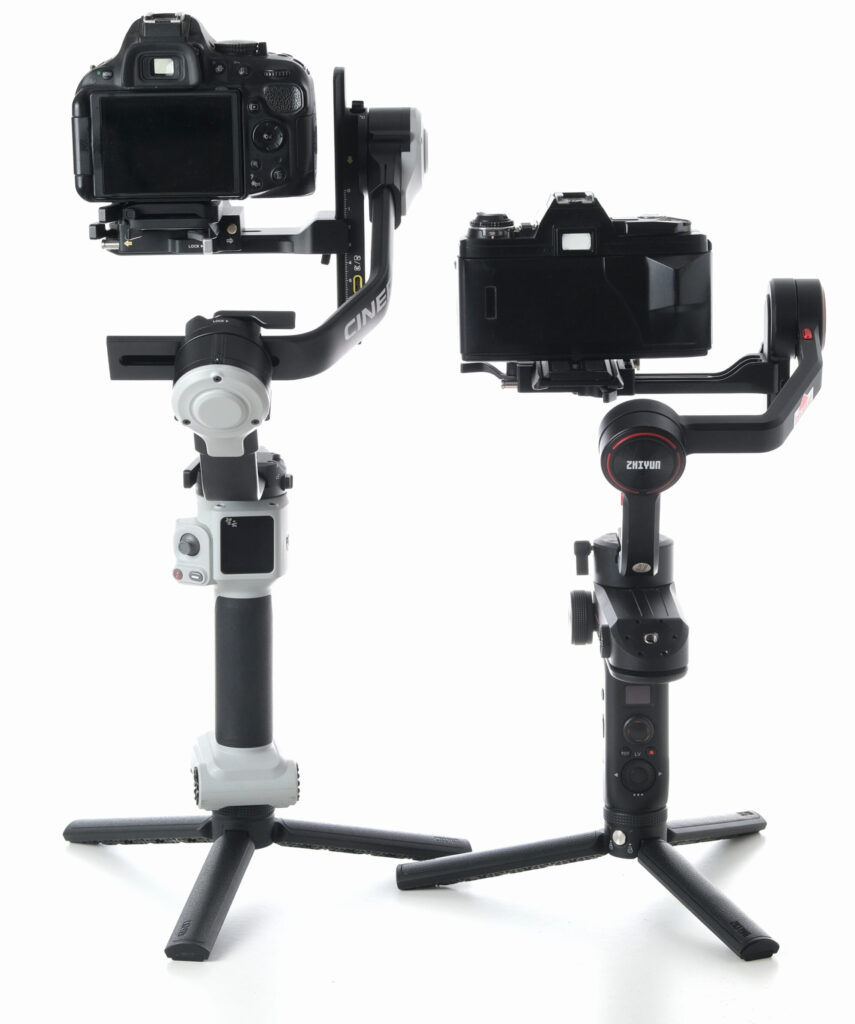
Having said that, if you have a compact setup like I do, and are in the market for a lighter gimbal like the Weebill 3S, much of what I say here still applies, because the Zhiyun gimbals from various series are not too different in terms of design, construction and features. If you want to dig deeper, this video compares the Cinepeer Crane 4E to the Weebill 3S and Weebill Cinepeer 3E. The photo below shows a size comparison between my Cinepeer Crane 4E (left) and Weebill S (right).
In the Box
The Cinepeer Crane 4E comes in a sturdy cardboard box with nice minimalist design, and foam inserts to hold all the parts in place. Zhiyun also sent me the MasterMove Accessories (sling grip and wrist rest) which are compatible with the Cinepeer Crane 4E as well as the Crane 4.
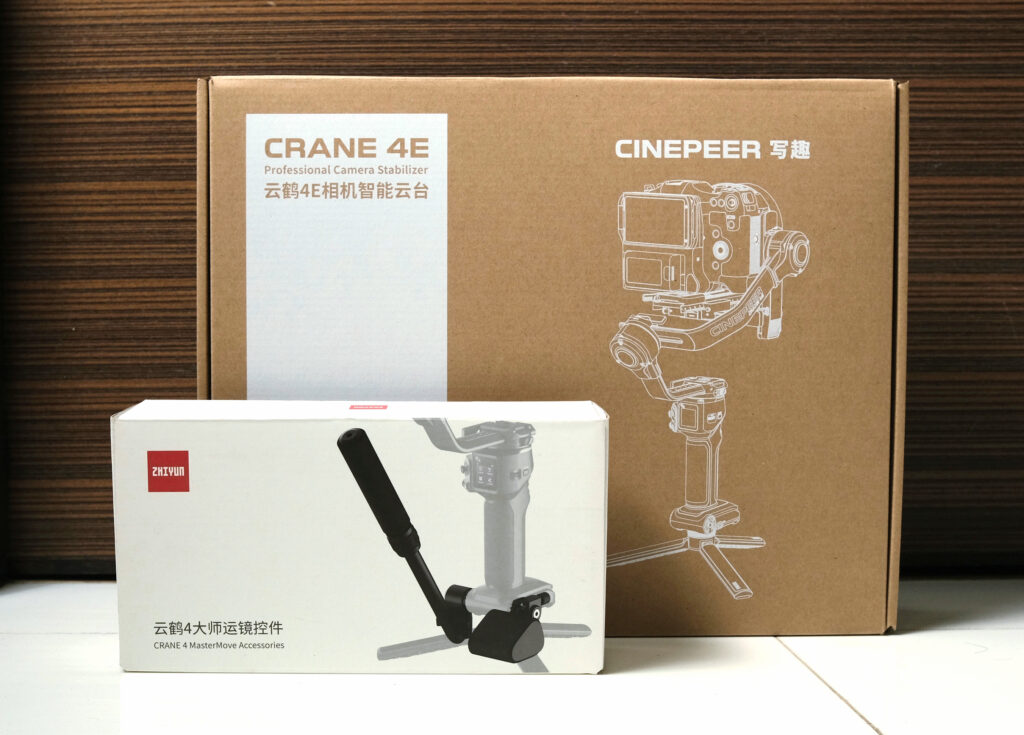
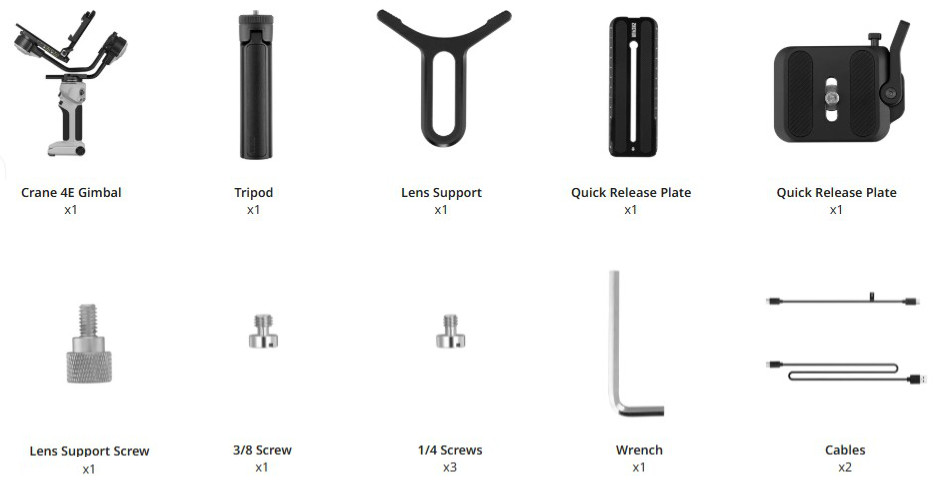
The Cinepeer Crane 4E comes with all the accessories you might expect (the photo below is from the Zhiyun product page, and not to scale). Unlike the higher-end Crane 4, there is no storage bag, but that’s fine by me because I anyway tend to carry gimbals in my backpack.
The tripod is super useful if you want to set the gimbal and camera down, either for static shots or simply to rest. I keep it attached to the gimbal at all times. I’m glad that despite being the “affordable” Cinepeeer variant, the tripod is included, because otherwise it would be another thing you almost certainly need to purchase.
The MasterMove Accessories, which have to be purchased separately, consist of a sling grip and wrist rest. They are adjustable – in the images below, the sling grip is lowered (left) and raised (right), while the wrist rest is tilted down (left) and up (right). Adjustment is fast and easy, just a matter of turning a locking ring (for the sling grip) or a screw (wrist rest).

The sling grip can be rotated left and right, depending on how you prefer to hold your gimbal. I think the accessories really do make a difference, especially if you are filming for an hour or more. The sling grip is particularly useful – almost essential – if you plan to use the gimbal underslung.
Construction
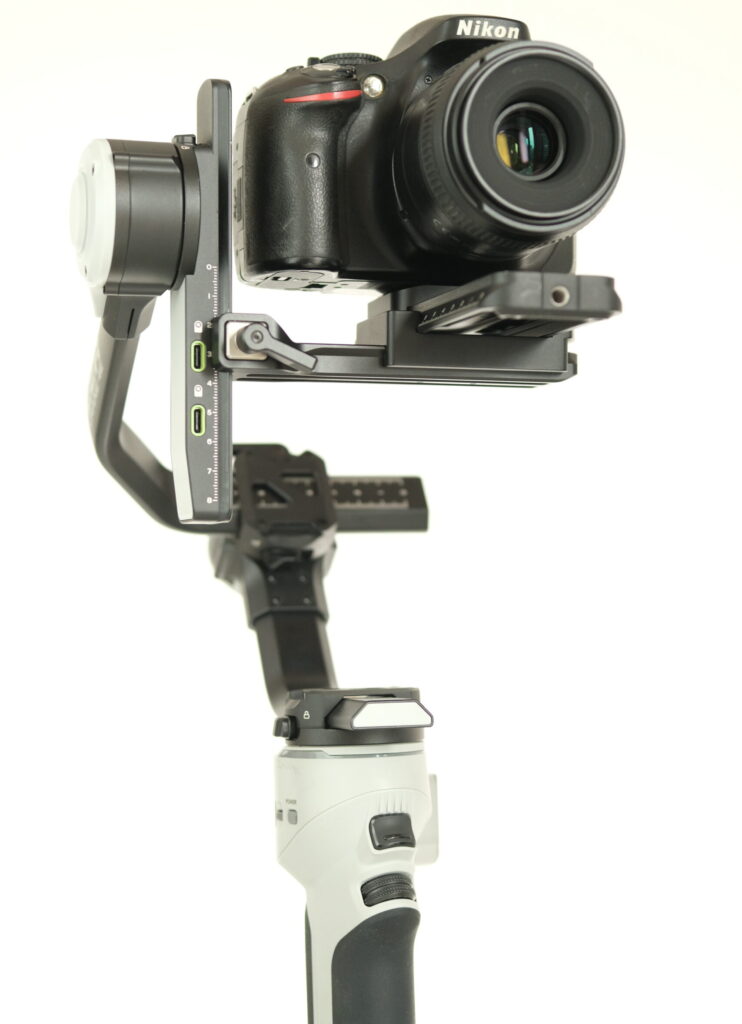
The construction feels really solid. The main column is made of high-quality plastic, with rubber grips. The rails are made of metal, with a smooth and premium finish. The arms are long, which allows you to mount large cameras, potentially with cages, mics and other paraphernalia. Given the quality construction and high load capacity, the gimbal is relatively light.
The Crane 4E is technically weather-resistant, not waterproof. But this video shows the gimbal being used in pouring rain, and even the touchscreen still works when completely wet, which is impressive.
Controls
On the back of the Cinepeer Crane 4E, there is an LED touchscreen, joystick and two buttons for video and modes.
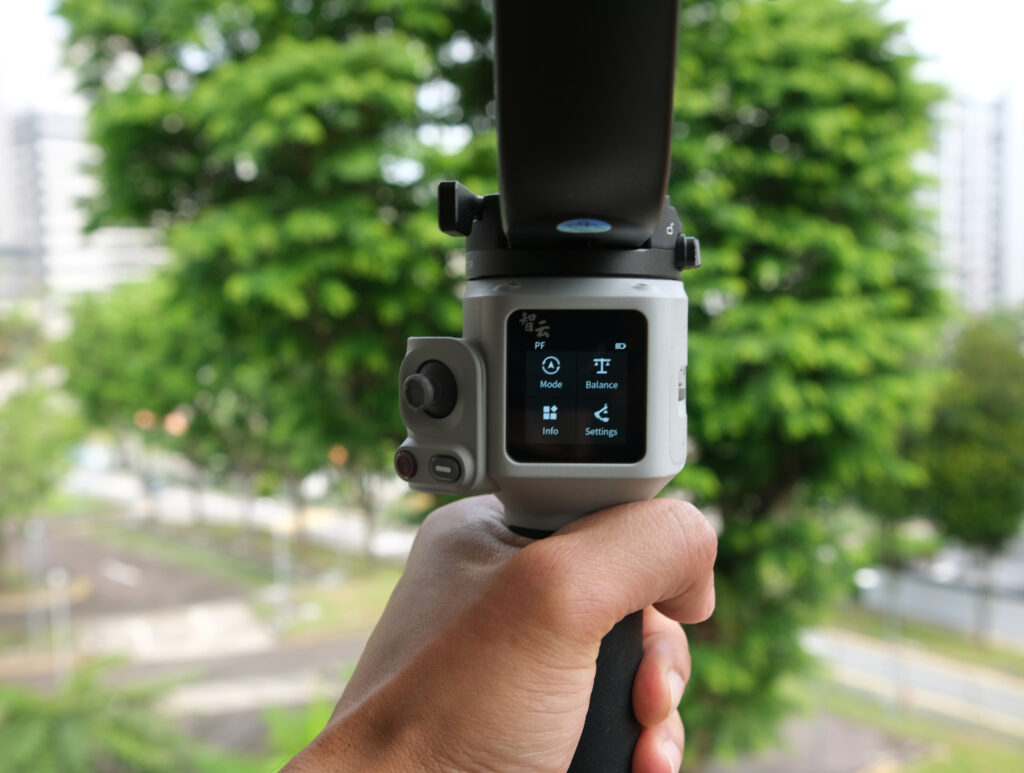
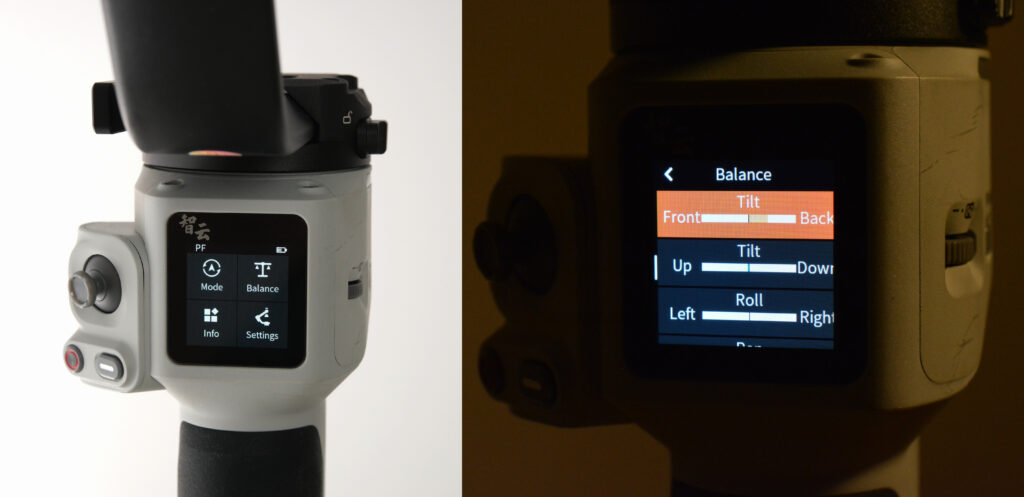
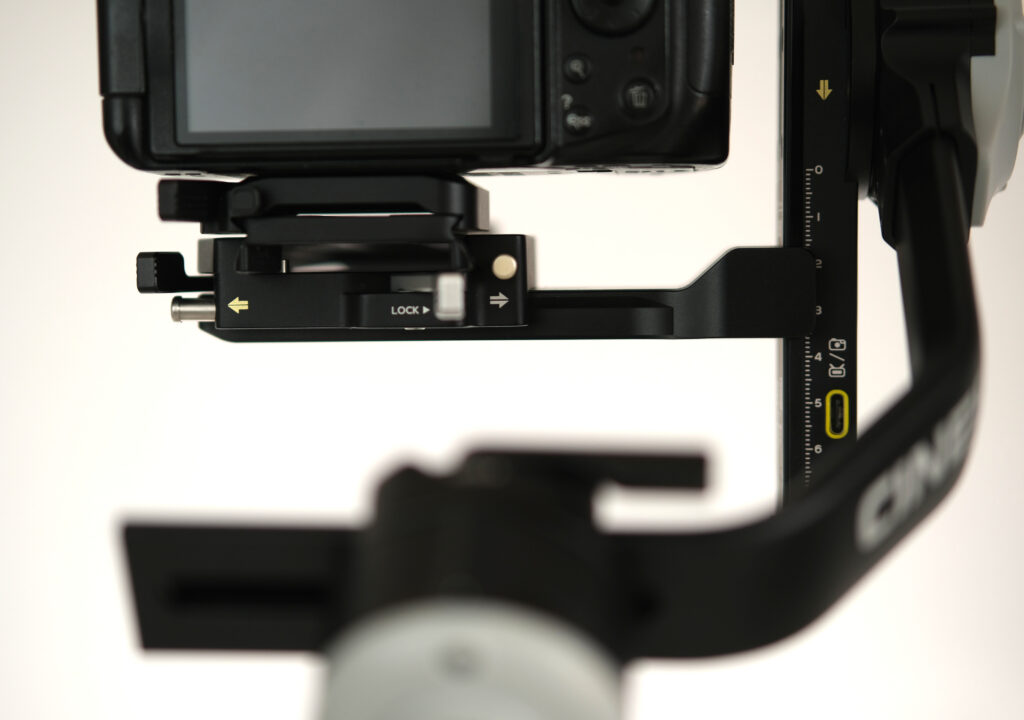
The touchscreen is bright and easy to see in daylight, as you can see from the photo above which was taken on a bright day. The menu is intuitive and easy to navigate. There are four main sections: Mode (for selecting different modes), Balance (to check if the gimbal is balanced), Info (language, device info and default settings), and Settings (for fine-tuning stuff like calibration, torque, smoothness, follow speed and also for customising some of the controls).
The images below show the main menu (left) and the Balance menu (right). In this case, the camera was unbalanced, which you can see on the tilt axis indicator.
At first, while using the gimbal, I would sometimes touch the screen inadvertently and switch to Chinese or whatever. Nowadays, before filming, I single-press the power button which deactivates the touchscreen. The joystick and the mode button, which are typically the only controls I use while filming, remain active.
The mode button switches between different modes (single-press to cycle between Pan Follow, Lock and Follow mode, and double press for POV, Vortex and Portrait mode). These modes are typical for modern three-axis gimbals, but in case you are not aware, they all change how the gimbal behaves. For example, in Pan Follow mode, which is what I use most often, the tilt and roll axes are locked, but the camera turns left and right horizontally in a panning motion. In Lock mode, all three axes are locked, while in Follow mode, the roll axes are locked, but the camera can pan and tilt.
The video button can be used to start and stop filming. You can also long-press to take a still photo, and half-press (on certain cameras) to activate auto-focus.
The video button is redundant with my camera, a Fuji X-E4, which doesn’t have a lot of video features and can’t be controlled from the gimbal (I need to use the controls on the camera itself). But with compatible cameras, listed on Zhiyun’s website, you can use the gimbal controls to not only start and end video recording, but also for other things like setting the ISO, aperture and shutter speed. Compatible cameras can be controlled either via USB-C cable (included) or Bluetooth. While in use, you may not need to touch the camera at all.
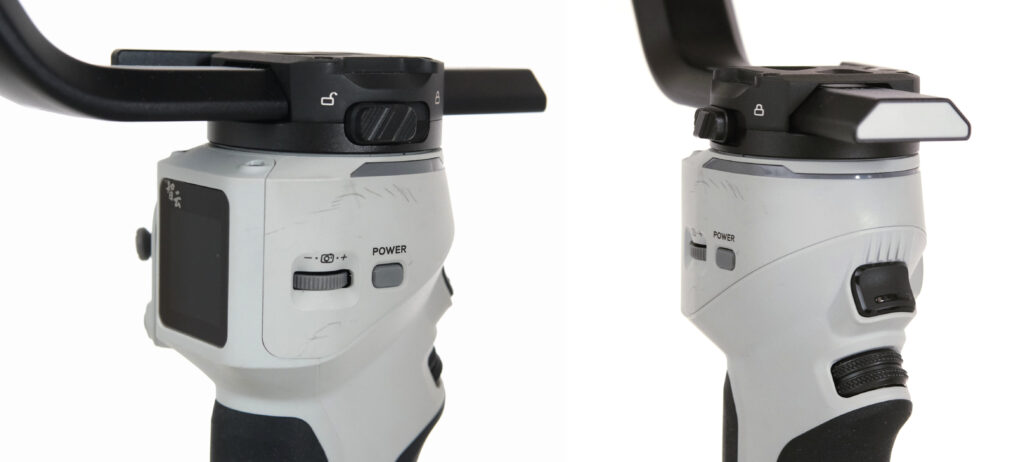
The images above show the controls on the right and front of the gimbal. On the right, there is a power button, and a control wheel which on compatible cameras can be used to adjust ISO, aperture and shutter speed.
On the front, there is a trigger, which I use frequently. If you are in any other mode, single-press reverts to Pan Follow, which is my most commonly-used mode. Double-press resets the camera position – level and pointing forward. Triple-press and long-press activate Selfie mode and Go mode, but I hardly ever use these.
The front also has an adjustment wheel which is located below the trigger and can be used to adjust ISO, aperture, shutter speed, focus and zoom (on compatible cameras), or to move the camera along different axes.
The functions allocated to the trigger and the two wheels can be customised in the settings.
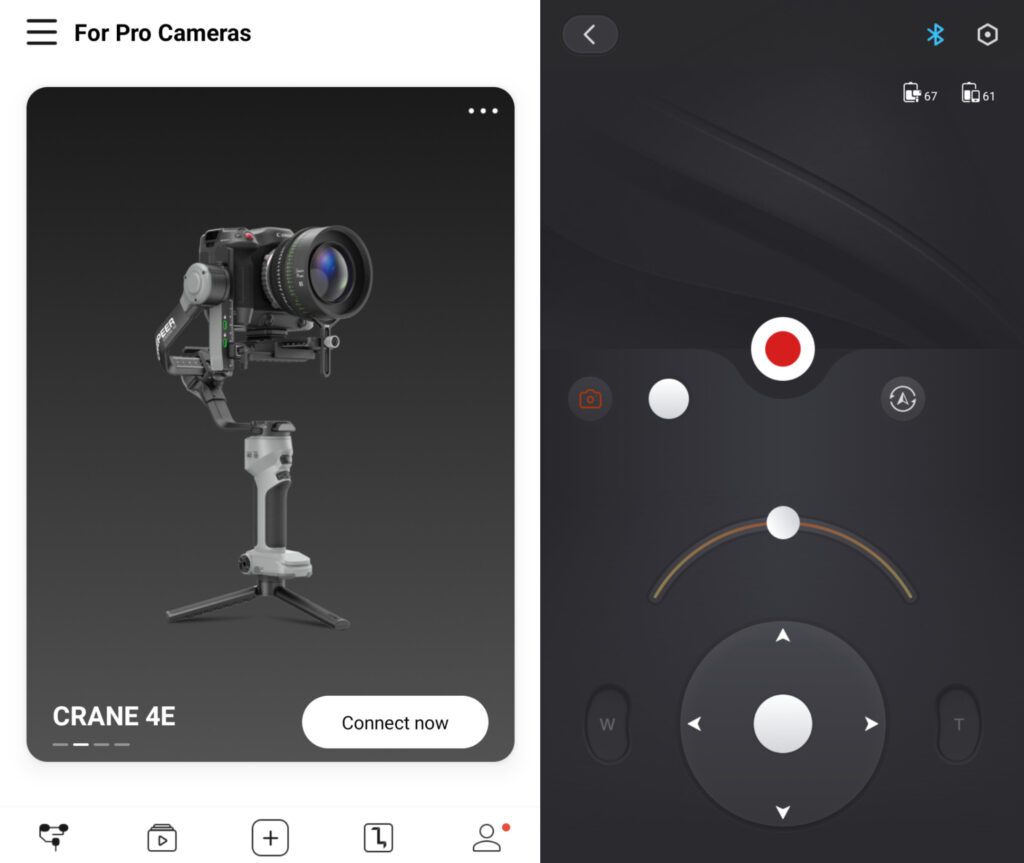
The gimbal can be controlled remotely via the ZY Play app. It has a virtual joystick with which you can move the gimbal from your phone, and control some functions of your camera (if it’s compatible).
Mounting and balancing
Mounting and balancing a camera on the Cinepeer Crane 4E is pretty easy if you’ve used three-axis gimbals before. The very first time I used a gimbal, it took me over an hour and multiple video tutorials, but now I can do it in 5-10 minutes, sometimes even on a bus or metro on the way to the shoot.
Most of the rails and other moving parts are locked by latches, which are faster than screws. The sliding axis-locks also feel robust, and are easy to locate by feel.
There are three plates you can use for mounting the camera. This wasn’t necessarily obvious from the manual, so I had to figure it out on my own.
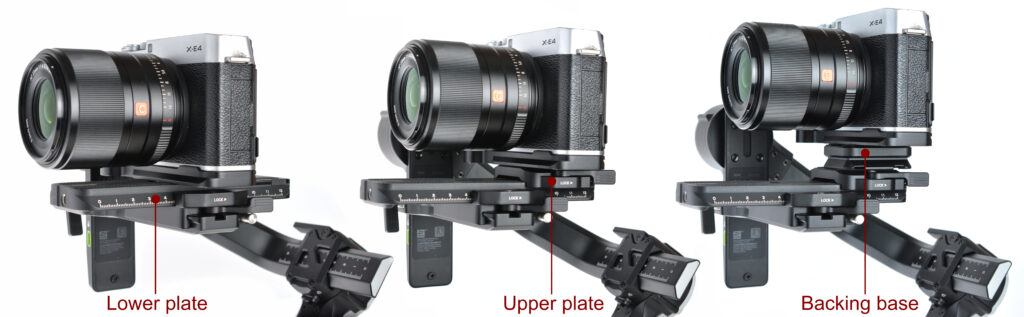
First, you can mount it on the longer lower plate (I believe it’s a Manfrotto long plate). The plate is secured to the camera using a screw, which can be tightened with the supplied Allen key, or just using a coin. The plate has a quick-release lever, so you can quickly detach the camera (plus plate) from the gimbal if necessary. However, if you then reattach the camera and lower plate, you will need to rebalance the gimbal – at least the tilt axis.
Second, you can mount it on a small upper plate (quick-release), which then slides onto the lower plate. The upper plate, like the lower, attaches to the camera with a screw. It also has a quick release lever. This is my preferred mounting option, because the lower plate remains in place, so when you reattach the camera and upper plate, gimbal doesn’t need to be rebalanced.
Finally, you can mount it on the backing base which screws on top of the upper plate. This can be helpful for cameras with bigger lenses, which need more clearance. My lenses, as I mentioned, are quite small, so I seldom use the backing base. The backing base is Arca-Swiss compatible, so it’s potentially useful if you need to take your camera off and mount it on, say, an Arca-Swiss tripod. But since it screws on to the upper plate (no quick release), detaching the backing base is a bit fiddly. You could of course detach the upper plate itself using quick-release, but then you lose Arca-Swiss compatibility.
If my description was too confusing, this video by Mario So might help.
Another useful feature of the Cinepeer Crane 4E is that the camera can be mounted vertically. This is great for Instagram reels, TikTok, and other mobile-friendly content. The image below shows the camera mounted in standard landscape orientation (left) and portrait (right).
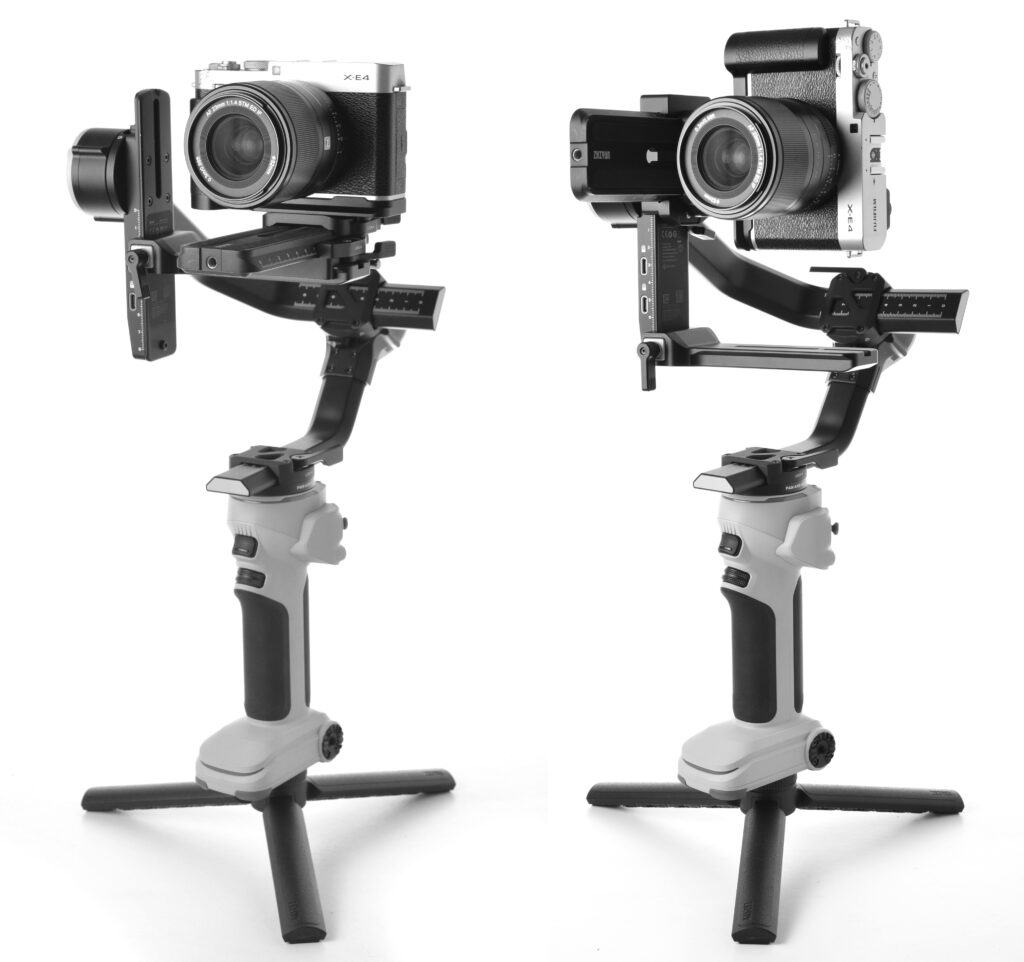
To switch to portrait orientation, you unlock and slide the leveling base off the level mount, and mount it on the tilt axis arm. The gimbal then needs to be rebalanced, but the whole operation only takes a matter of minutes. Full instructions are provided in the manual, and in this tutorial video.
Portrait orientation is not to be confused with Portrait mode. The former involves physically reorienting how the camera is mounted on the gimbal, while the latter is one of the modes available through the gimbal menu (no need to remount the camera). Portrait orientation gives you full functionality, with all the different modes at your disposal. Portrait mode is more limited, but it can be useful at a pinch, if you need vertical video and have no time to remount the camera.
In use
On shoots, the gimbal worked exactly as expected. It counteracts inadvertent camera shake, but responds to deliberate movements like panning. I mostly use it in Pan Follow mode, using the joystick to point up or down as necessary. In this video (screengrabbed below), you see my dancer friend Chiok doing an orbit manoeuvre with the gimbal.
As I said, the Cinepeer Crane 4E is built for heavy payloads, so even at the lowest torque setting, it handles my little Fuji X-E4 camera without breaking sweat. Any minor issues you might notice in sample videos are user error – I am learning how to use gimbals, and still have a way to go.
One advantage of an “overkill” gimbal is that if I change lenses, the gimbal works (within limits) without the need for rebalancing. This is not generally advisable as it puts undue strain on the motors, but if you are really pressed for time, and for short periods, it will do the job.
The battery is built-in. According to the specs page, it has a charging time of 2 hours and lasts for 12 hours, which is more than enough for most purposes. However the manual says that for the runtime test, the gimbal is “balanced and placed in the static status.” This presumably means that the gimbal was just sitting on a table. In real-world use, when the gimbal is being continuously moved around, it would obviously use more power, making the runtime shorter. That said, I used the gimbal for a nearly 3-hour-long shoot, and still ended with a healthy amount of charge left in the battery. If you have juice to spare, the gimbal can also be used to charge the camera via USB-C, which is a nifty feature.
My other gimbal, a Weebill S, has removable batteries, which I prefer over a built-in battery. Removable batteries are useful if you are are shooting all day long, at a wedding for example – you just bring some spare batteries with you. Also, as we know, batteries tend to lose their capacity after repeated charging cycles, so with a built-in battery, there is a risk that the whole device eventually becomes obsolete. But hopefully that will not happen for a long while – I guess only time will tell.
Minor issues
As you can probably tell, my impression of the Cinepeer Crane 4E is almost entirely positive. However there are a few minor things I noticed in use, which I will list out here.
Colour: This is purely a subjective and aesthetic preference, but I like the all-black look of the Crane 4 over the partly grey colour scheme of the Cinepeer Crane 4E.
Balancing: Overall, mounting and balancing a camera is fast and easy, but two of the adjustments – sliding the level mount on the tilt arm for vertically balancing the tilt axis, and adjusting the roll axis – are a bit stiff (the pan axis, by contrast, is super smooth). However my gimbal is still relatively new, so maybe they will loosen up with time. Also the level mount lock screw falls out if you unscrew it too far (you have to unscrew it a lot for this to happen, but still it’s something to watch out for).
Touchscreen and display: Right-swipe on the touchscreen (to go back to the previous screen) initially didn’t work for me – I had to use the back icon on the top left. But my gimbal was shipped with firmware v1.73, and when I updated to the latest (v1.76), the swipe issue was fixed.
Firmware can be updated in two ways: (a) by connecting the gimbal to a computer via USB cable, or (b) through the ZY Play app using a phone and Bluetooth. I used Bluetooth (had to restart the gimbal, because it didn’t detect at first), and the update from v1.73 to v1.76 took about 10 minutes.
Some of the messages that are displayed on the LED are not super clear, probably a translation issue. For example, during balancing, it says, “During the balance detection, please prevent the gimbal from the horizontal desktop.” However, this should be relatively easy to fix with a firmware update.
Markings: While on the topic of the touchscreen, I mentioned how I tend to disable it while filming to prevent accidental touches. This is done via single-press of the power button, but you have to read the manual pretty closely to know that this is an option, and most tutorial videos don’t mention it either. A little lock icon next to the power button would perhaps make this clearer.
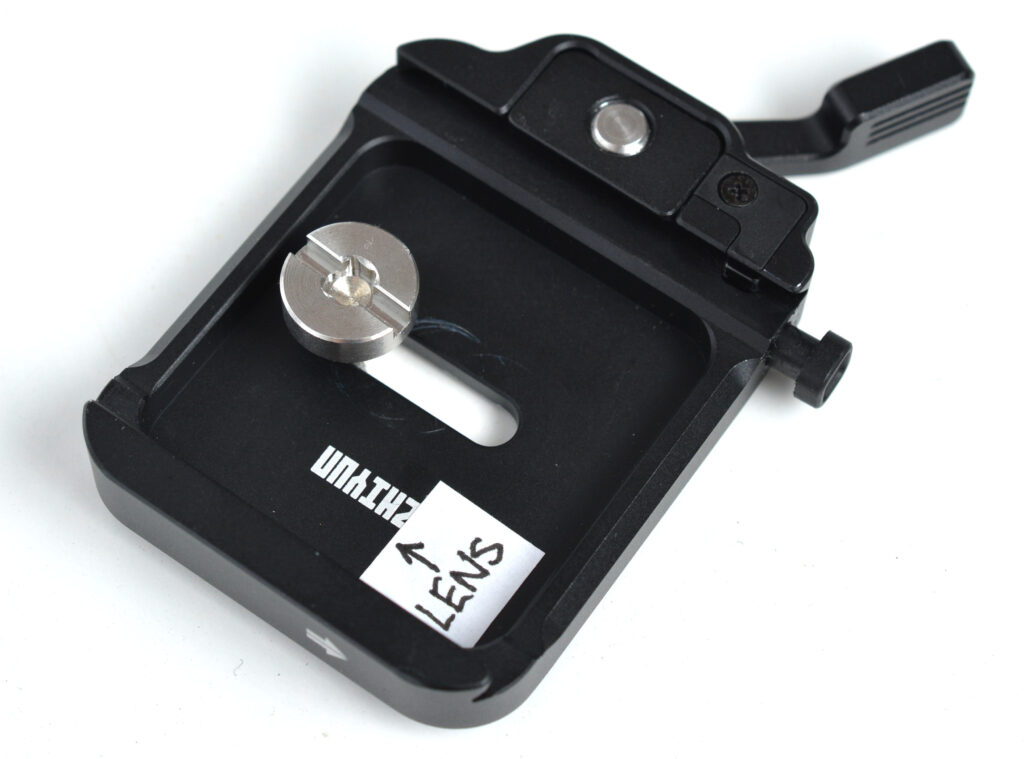
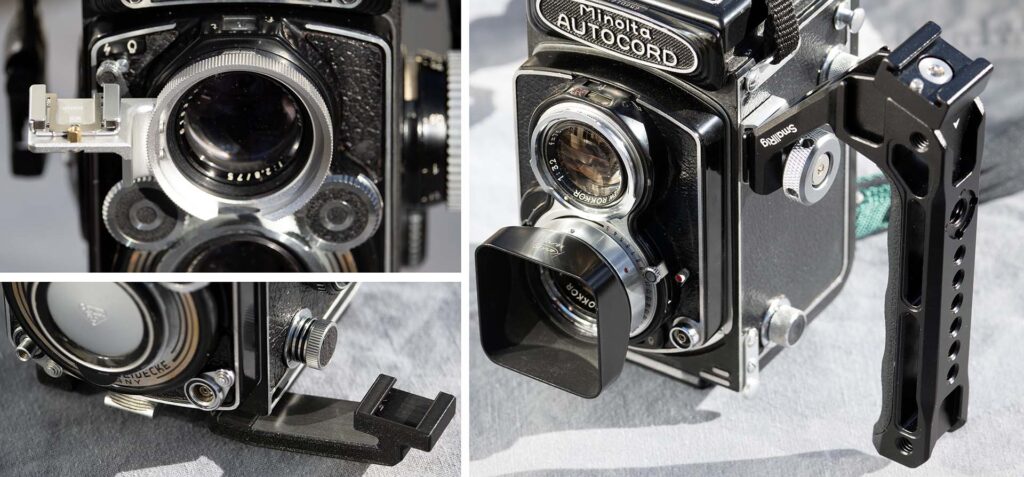
Similarly, it would be handy if the upper quick-release plate had a mark to show which way the lens should point, as this is one thing I always get confused by. But I fixed the problem by making my own indicator:
Resources: While the Cinepeer Crane 4E has a PDF manual, it can be a bit hard to follow, especially if you are new to gimbals. Zhiyun’s official YouTube channel has tutorials for the Crane 4, but not for the Cinepeer Crane 4E. Since the models are pretty similar, the Crane 4 tutorial is probably good enough, but this may not be obvious to a Cinepeer Crane 4E user who hasn’t studied the various models in depth. In any case, a dedicated tutorial would be most welcome.
Some information also appears to be missing from the official resources. For example, the Crane 4 video tutorial has helpful demonstrations of the various modes like Pan Follow, Lock and POV mode, but I don’t think it covers Portrait mode.
Finally, I don’t think the official resources mention that the roll axis can be balanced in two ways, either via the roll axis arm (which is the method described in the manual and video tutorial), but also by moving the leveling base to the left or right. This is something I discovered for myself, just by playing around with the gimbal. I tend to use the second method because my roll axis, as I mentioned is a bit stiff. The two methods also give you an additional degree of freedom. If you have accessories mounted to the right of the camera, you can push it all the way to the left using the leveling base, and then counterbalance with the roll axis arm.
However, none of these issues are dealbreakers; rather, I offer them up as suggestions for future improvement.
Final thoughts
In this article I tried to do three things: provide a photographer’s introduction to (a) videography, and (b) gimbals, and also (c) a review of the Zhiyun Cinepeer Crane 4E.
I’ve been enjoying my foray into videography. I find that some of my still photography skills are transferrable, such as looking for good light and compositions, and technical knowledge such as focal lengths and the exposure triangle. But it also forces me to learn some new skills, and poses different creative challenges. Using a gimbal is fun too, especially when you see how much difference it can make, going from shaky handheld footage to smooth, professional-looking takes.
As for the gimbal I reviewed, my own camera and lenses are very compact, so I lean towards the Weebill series. A gimbal like the Cinepeer Crane 4E (or its higher-end cousin, the Crane 4) is arguably overkill. But I do think the Cinepeer Crane 4E is an excellent piece of kit if you are using a relatively heavy-duty setup. The controls and ergonomics are top-notch, it has all the features we can expect from a three-axis gimbal in 2025, and given its load capacity and build quality, the gimbal itself is relatively light and nimble. There are some minor issues which I pointed out, but some of those are subjective, and none, in my opinion, are deal-breakers.
If you’re interested in purchasing this or any other Zhiyun product, feel free to use the affiliate links below. I will get a small percentage, at no extra cost to you. For more of my work, check out my Instagram. Thanks for reading.
Affiliate links:
• Cinepeer Crane 4E
• MasterMove Accessories
10% discount code: ZHIYUN10WSS (valid for both links)
Share this post:


Comments
Calum Davey on Zhiyun Cinepeer Crane 4E Gimbal Review – A Photographer’s Intro to Video and Gimbals
Comment posted: 07/05/2025
Comment posted: 07/05/2025
Carl Follstad on Zhiyun Cinepeer Crane 4E Gimbal Review – A Photographer’s Intro to Video and Gimbals
Comment posted: 07/05/2025
Comment posted: 07/05/2025
Warren A. Dennis on Zhiyun Cinepeer Crane 4E Gimbal Review – A Photographer’s Intro to Video and Gimbals
Comment posted: 07/05/2025
Comment posted: 07/05/2025
Brad Hurley on Zhiyun Cinepeer Crane 4E Gimbal Review – A Photographer’s Intro to Video and Gimbals
Comment posted: 07/05/2025
Comment posted: 07/05/2025
Comment posted: 07/05/2025
Comment posted: 07/05/2025
Louis A. Sousa on Zhiyun Cinepeer Crane 4E Gimbal Review – A Photographer’s Intro to Video and Gimbals
Comment posted: 08/05/2025
Comment posted: 08/05/2025