Almost every time I post some photos taken with my Leica M9 I have people asking me “is this straight out of camera”, or “what post process have you done to these” etc. This seems to be a common question with digital photography, especially with mine. I suppose this comes down to people trying to assess from my images what the camera and lens are responsible for, and what is being achieved in post process. The problem is, it’s a just a bit of a hard question to answer without going into lots of detail…
On this particular occasion, the images in question do give me a bit of an opportunity to talk a bit about a specific part of my low light post process when it comes to files out of the Leica M9 – so I thought I’d take the opportunity to go into that bit of detail. In actual fact, whilst the some of the problems I’m solving in my process are specific to the M9, this sort of approach can of course be used on any digital image, you’ll just need to experiment a bit.
The images in question were taken at a recent Beers & Cameras event that I held in a place called Hanbao, which is a new – and for want of a better word – ‘trendy’ burger and cocktail bar in my hometown of Worcester. I posted series of three photos on my Instagram that seemed to garner a great deal of interest in terms of how I had created them.
What’s interesting about these photos – at least the ones that I posted on Instagram – is that the interesting part of the process that I want to show you has quite a subtle effect. That said, I also took a few images on the same evening that were – at least in my mind – completely saved by the same process.
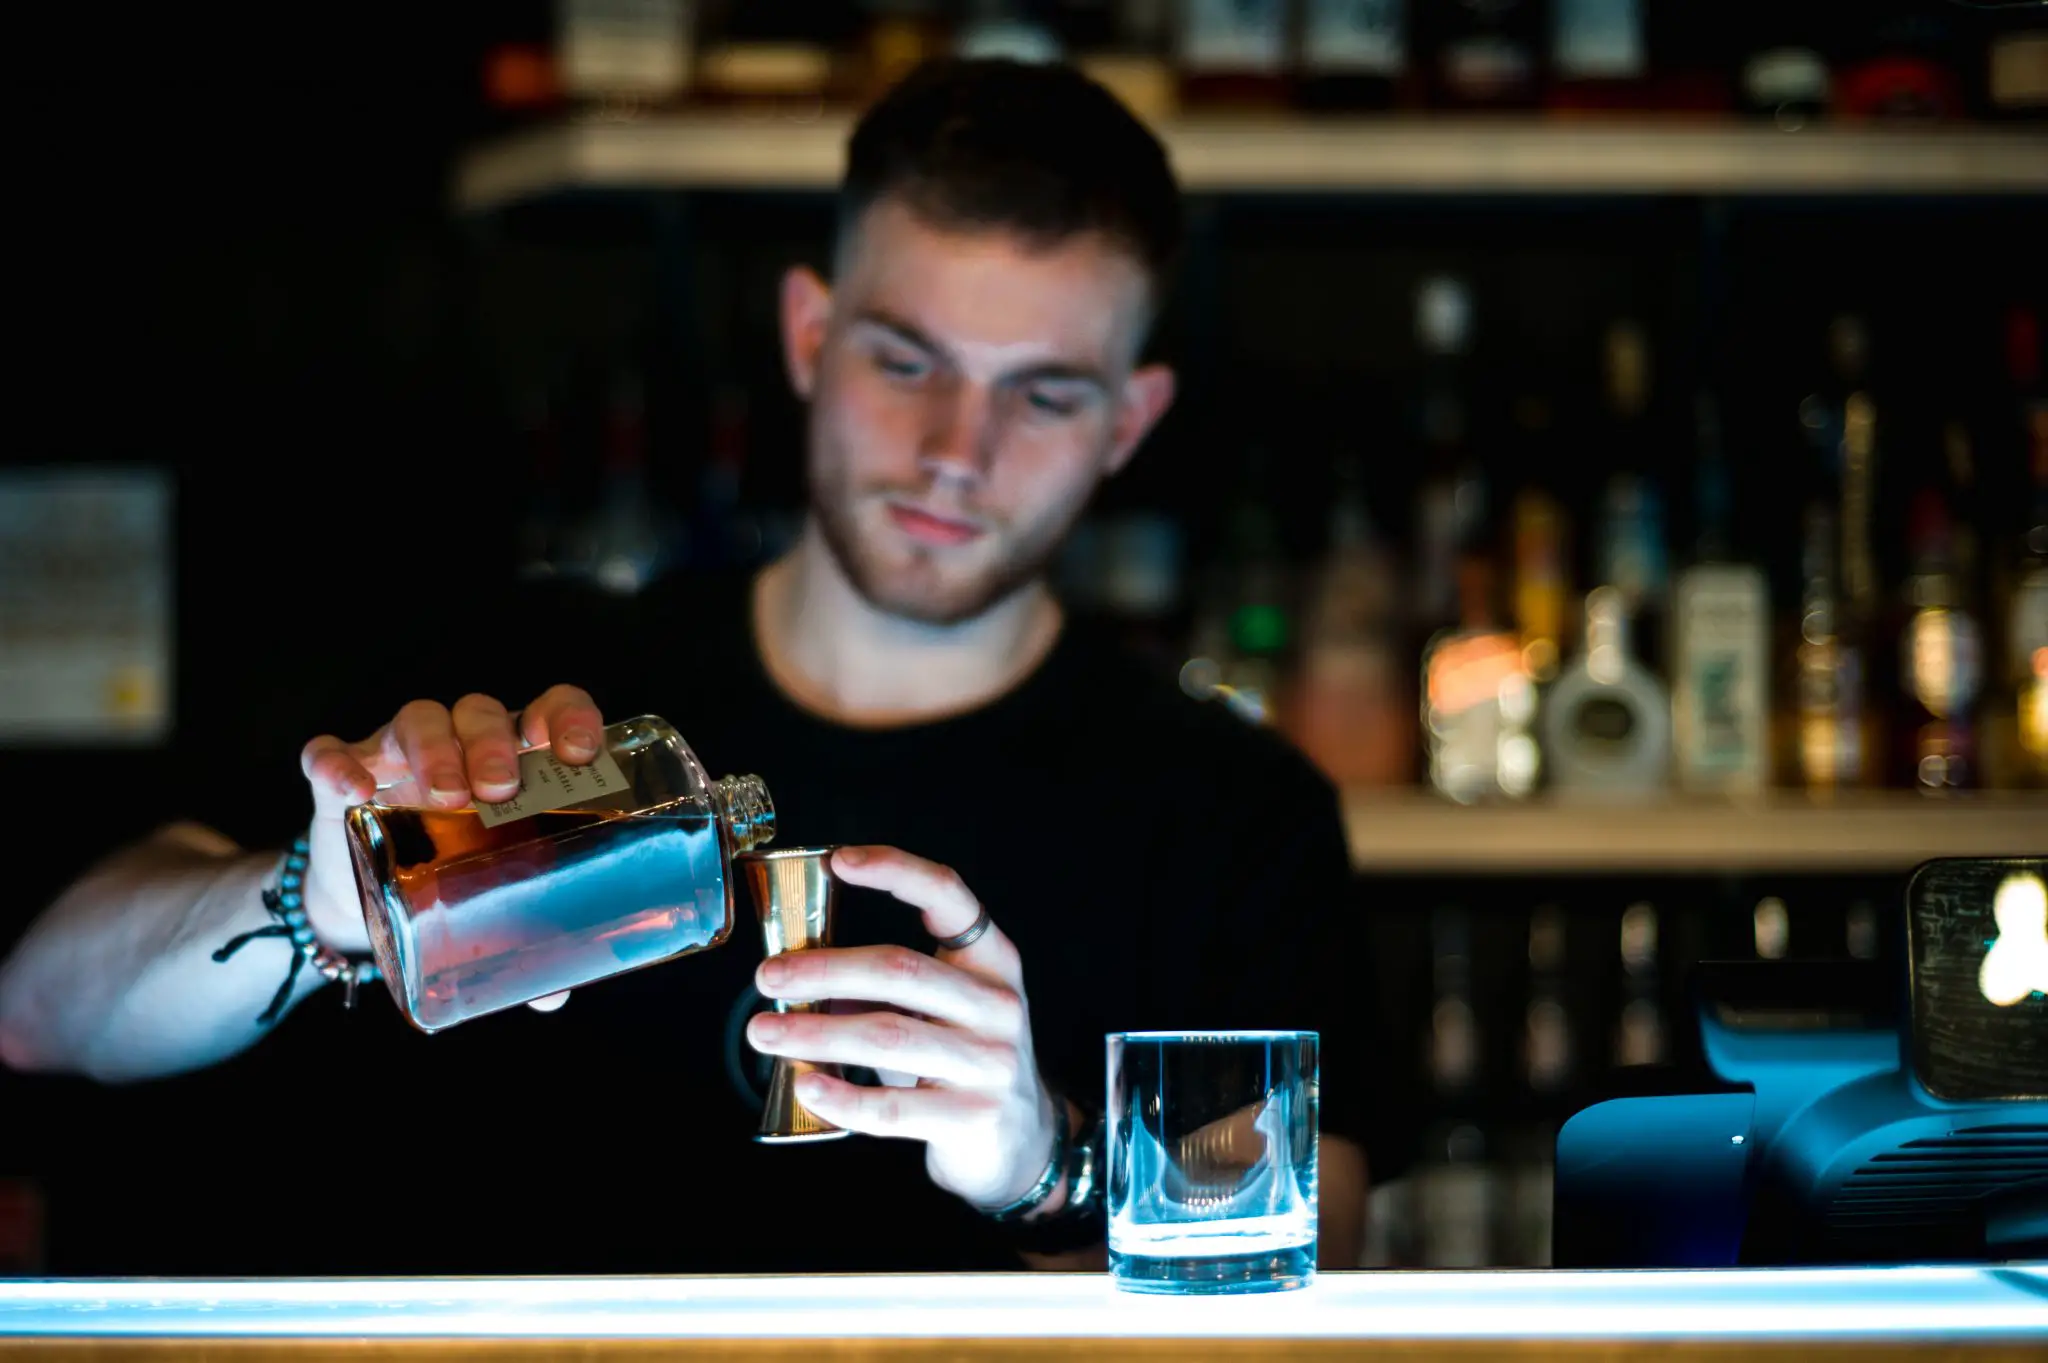
This first picture is the first of the images I shared on IG and shows a straight before/after of the post process I applied – If you slide the slider, you can see the before/after in action.
As you can see, I actually haven’t done that much really. Most of what makes this photo work is simply the light it was taken in! The main part of the process in achieving the final image was just a case of making adjustments to contrast. This is the easy bit I suppose – if you have good low-light, you are in a much better position than if you have bad low-light. The differentiation between good and bad low light probably comes down to tastes, but of me its always about how different colours of low light impact (mostly) on skin tones
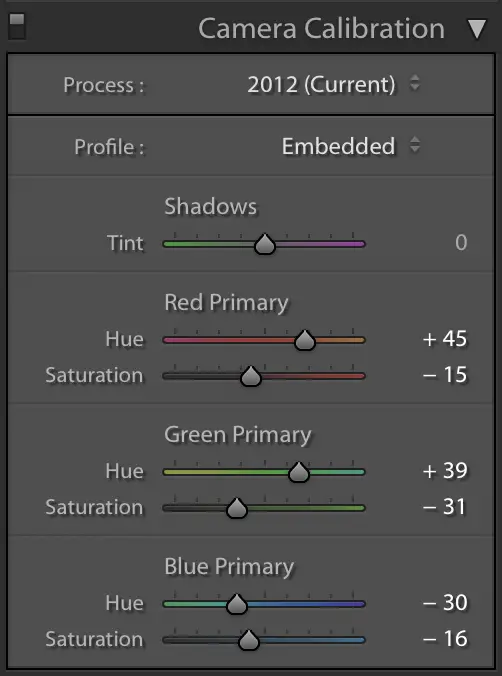
As I said, the light in these images is quite nice, but it isn’t perfect, especially when combined with the Leica M9, which has a habit of causing some mild but quite annoying colour shifts. To solve these colour shifts – and my issues with the colour of low-light – I use the “Camera Calibration” in Lightroom. This for me is often the final piece in the puzzle in getting the most out of any camera’s low light images.
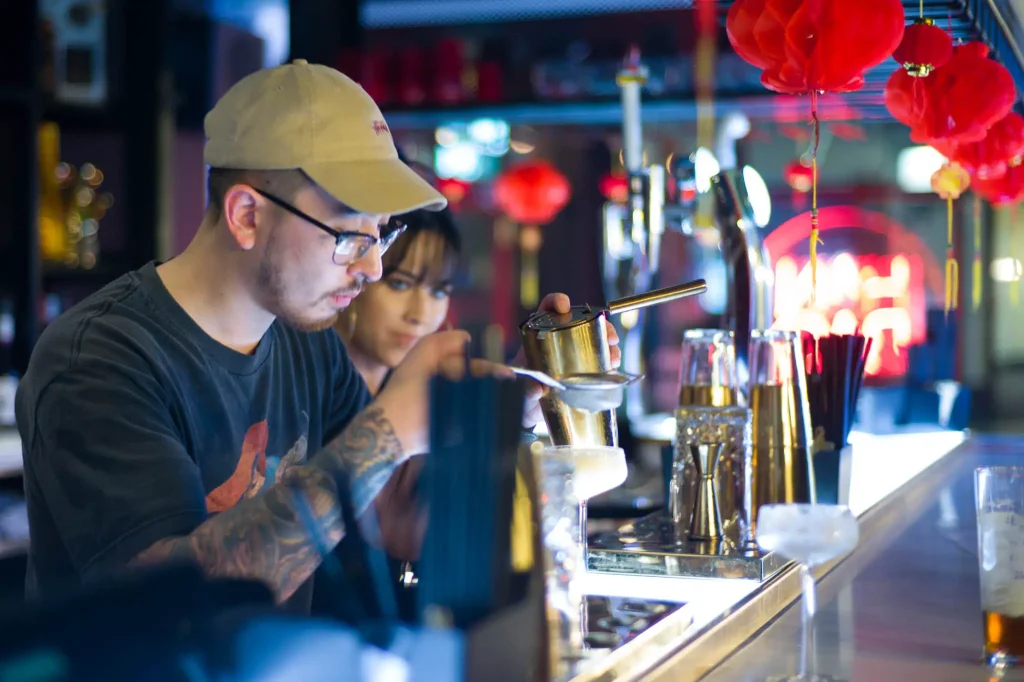
This following image is a before/after of my camera calibration tweak:


A subtle difference perhaps, but in my opinion almost essential. My first issue is visible in the chaps lips. Like the M8 – although not to the same degree – the M9 is quite susceptible to IR. This manifests in some magenta shift, especially in people’s lips. Unlike the M8 where the effect is almost too strong to deal with using camera calibration, with the M9 it seems quite an easy problem to fix.
The second issue, which is more a product of shooting in what I see as bad low-light is a sort of sickly almost green shift in people’s skin tones. In this image the issues I have are most readily seen in the face of the girl, and the back of the neck of the chap. It’s quite subtle, but it’s definitely there. Of course, an amount of this can be solved with white balance tint, but after a point, that sort of correction does more harm than good.
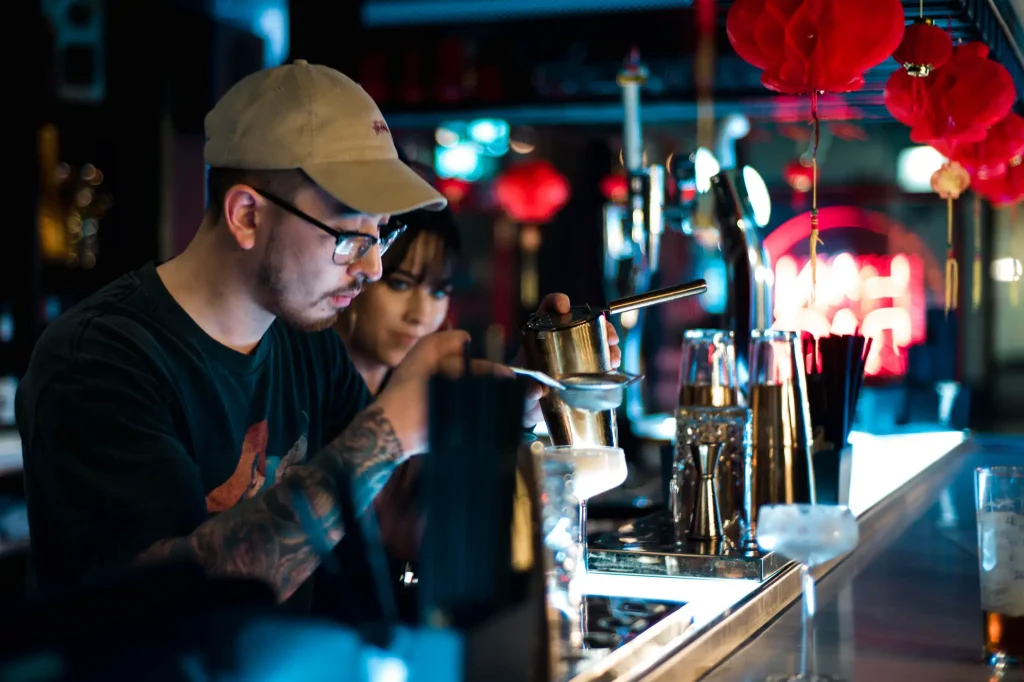
So that’s an image taken in what I’d call good or at leat OK low-light – what about one taken in bad low light? This next image was definitely taken in light that I think has the potential to ruin a photo. Just look how murky and horrible the before is compared to the after:
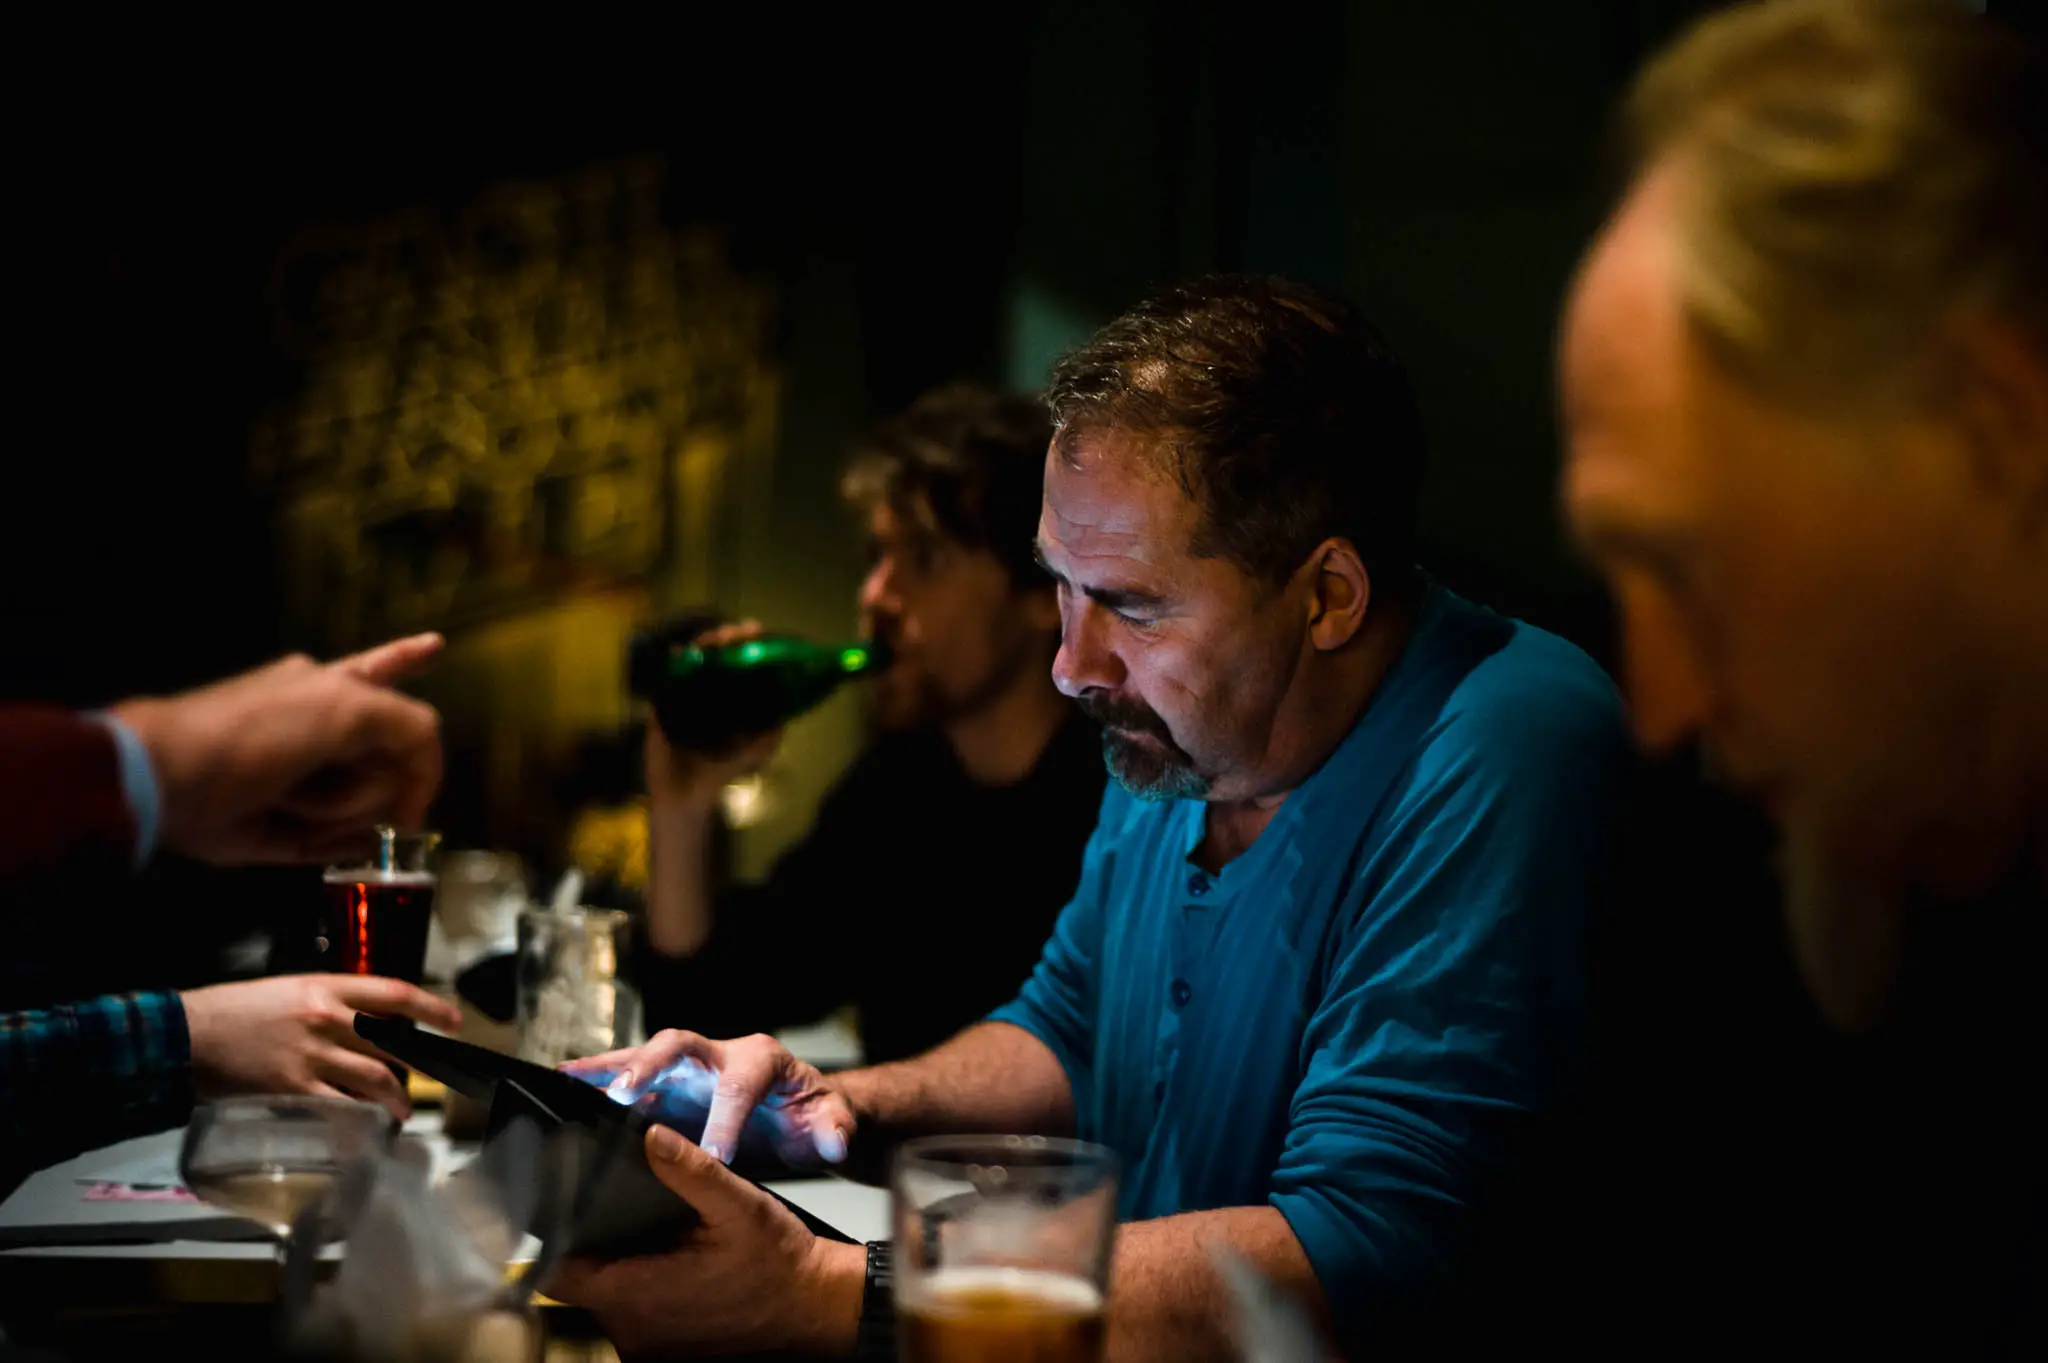
Again, most of this comes down to tweaks to contrast settings in lightroom, but look at how effective the tweaks to camera calibration are in this before/after:
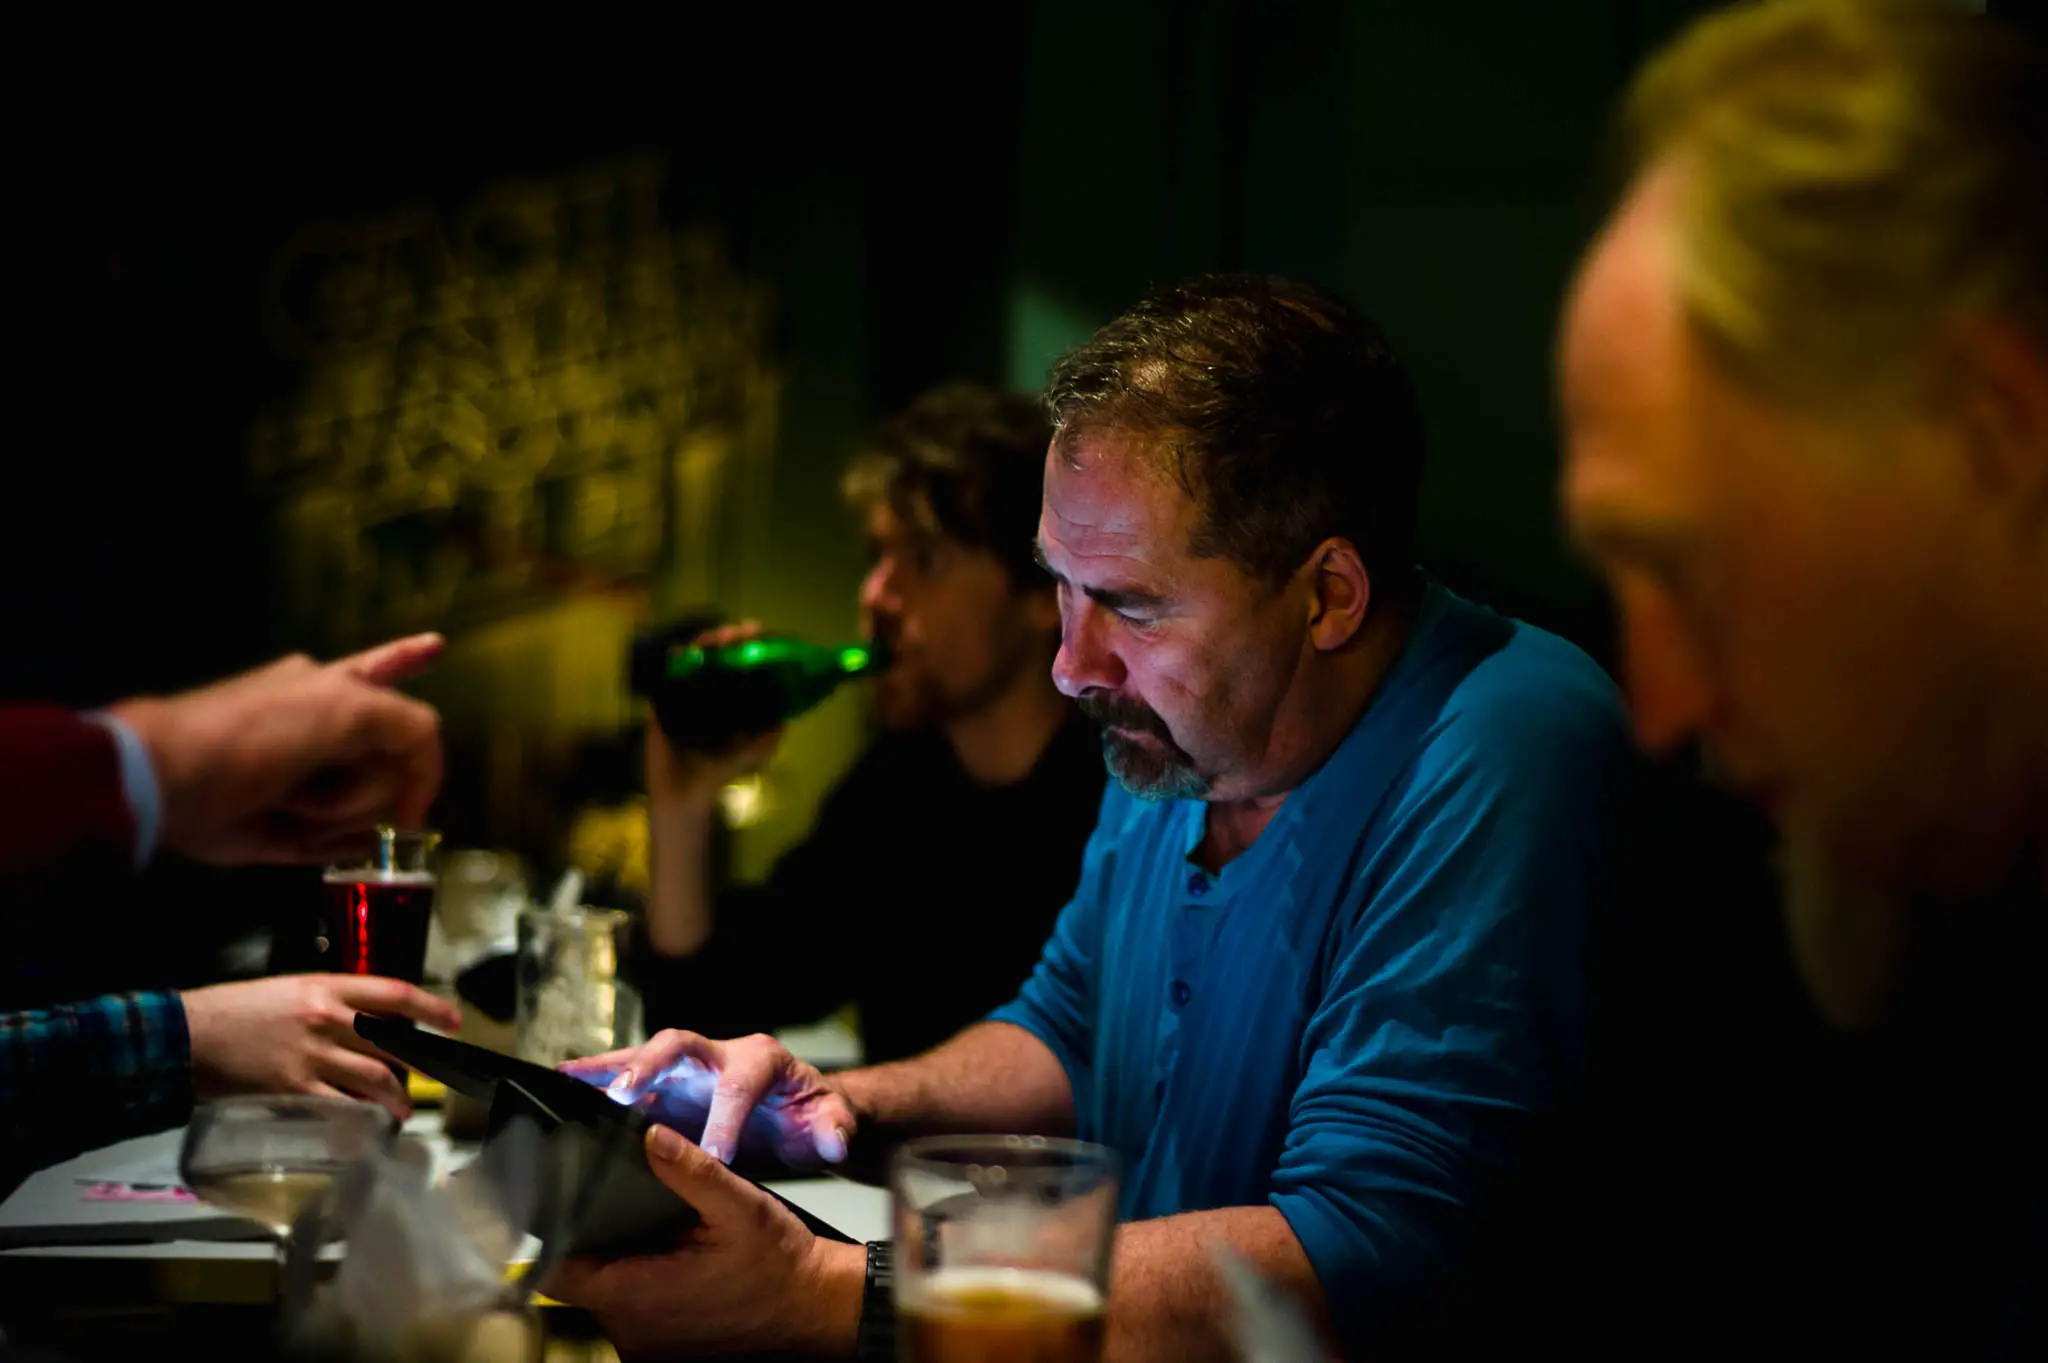
As you can see, I’ve managed to remove a load of magenta shift out of the main subjects face, but if you look at the out of focus guy in the foreground, and in fact the far wall, you will see a whole load of of the sickly green tint has been dealt with too. The result – combined with a fairly low-key approach to the exposure and contrast – is an image that I think has quite a nice cinematic feel to it.
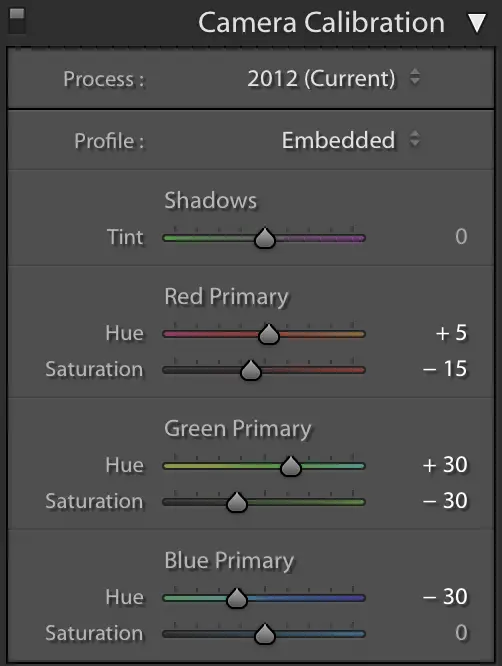
If you are interested in the exact camera calibration I used, the first image below is what I applied to this image, with the second image being a preset that I now apply to all images taken with the M9 in low light as a starting point. It’s worth noting that I switch from the “Adobe standard” profile to the “M9 embedded” profile – I just find the embedded profile gives results that are somehow less blotchy in skin tones.
So there we are, I hope that was a little more interesting to read than it was to write. As I said on Instagram, its not the sort of thing I would normally post about… Of course, you might not find these images – or what I have specifically done to them in terms of post process – to your taste, but hopefully if nothing else it will encourage you to play with that little often ignored ‘camera calibration’ box in the lower right of the settings panel in Lightroom. It was years before I discovered it, but now I’ve found it, I see it as key to me getting the results I like… especially with images taken in low light with my M9!
Cheers for reading,
Hamish
Share this post:


Comments
Frank Lehnen on An insight into my Post Process of colour images shot with the Leica M9 in low light
Comment posted: 10/02/2017
Comment posted: 10/02/2017
John Lockwood on An insight into my Post Process of colour images shot with the Leica M9 in low light
Comment posted: 10/02/2017
Comment posted: 10/02/2017
Comment posted: 10/02/2017
George Appletree on An insight into my Post Process of colour images shot with the Leica M9 in low light
Comment posted: 10/02/2017
I don't know what iso you were using; low light higher one usually mix crazily colors.
But in fact that's the patient way to get a better result.
Also adjusting color by color (luminance/saturation/hue) is often useful to calibrate excesses.
Even the global hue setting menu.
Comment posted: 10/02/2017
Comment posted: 10/02/2017
Dave Donnelly on An insight into my Post Process of colour images shot with the Leica M9 in low light
Comment posted: 10/02/2017
Comment posted: 10/02/2017
Alex Yates on An insight into my Post Process of colour images shot with the Leica M9 in low light
Comment posted: 10/02/2017
stefano giovannini on An insight into my Post Process of colour images shot with the Leica M9 in low light
Comment posted: 10/02/2017
Gypsy Frank on An insight into my Post Process of colour images shot with the Leica M9 in low light
Comment posted: 31/03/2017
Comment posted: 31/03/2017
Aghwotu Ovuoke on An insight into my Post Process of colour images shot with the Leica M9 in low light
Comment posted: 20/07/2017
Comment posted: 20/07/2017
Rich Bloomfield on An insight into my Post Process of colour images shot with the Leica M9 in low light
Comment posted: 22/06/2020