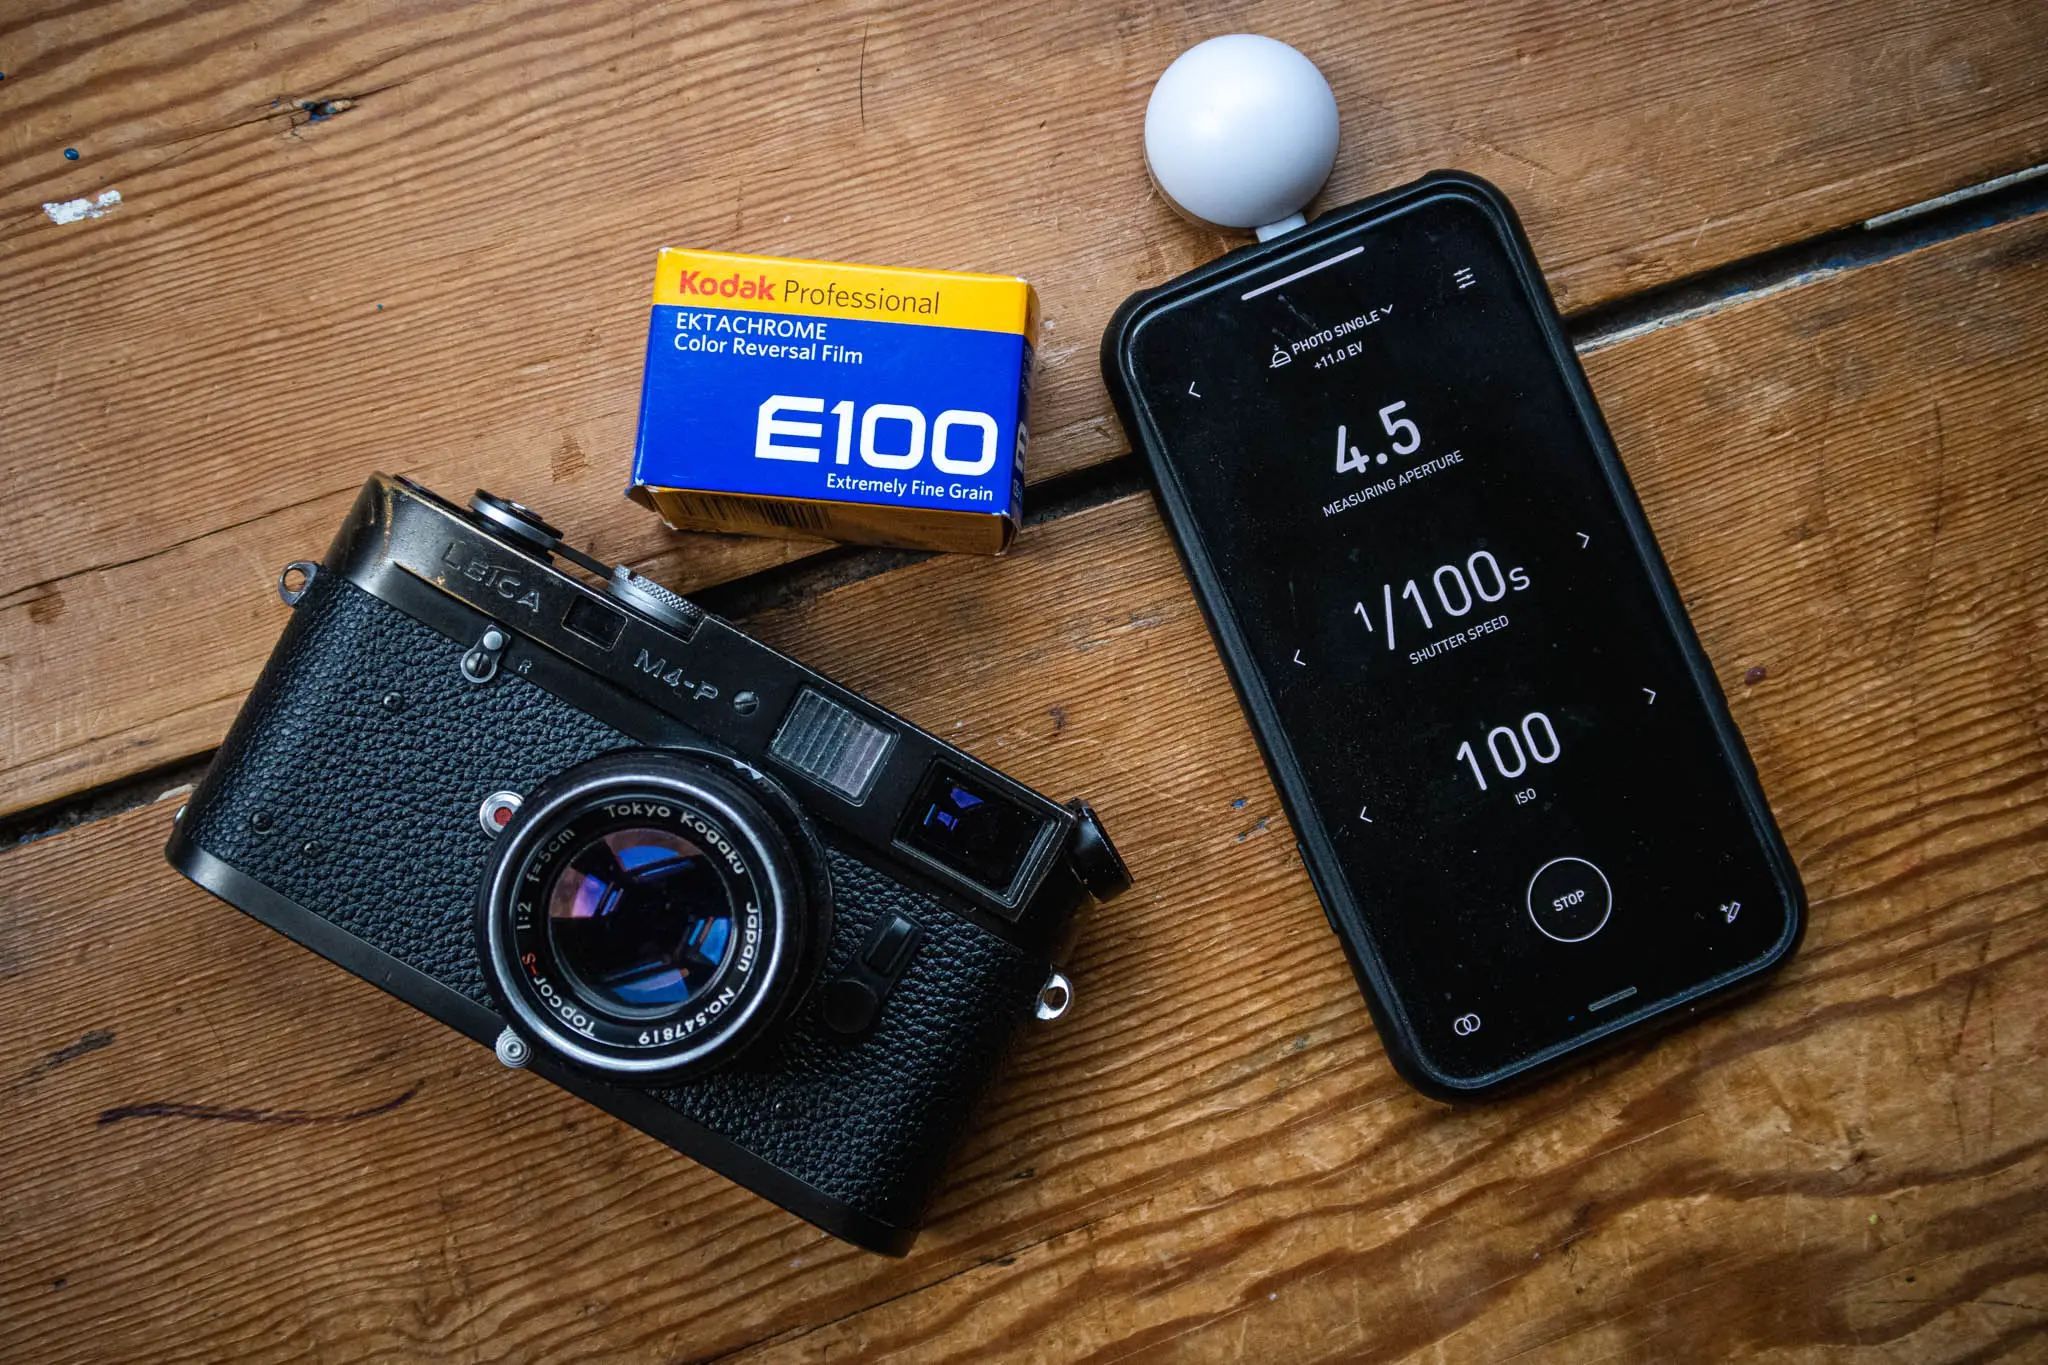
A chunk of my fourth roll of Kodak Ektachrome E100 was about experimenting with an incident meter. Even with the few rolls I’ve shot – and despite the mistakes and issues I’ve varyingly had – I’ve got to the point now that I now feel comfortable enough with E100 in the ways I normally shoot. That is to say, it no longer seems entirely alien. As such, I’m now in a place that it seems ok to begin to experiment a little with the hope of learning something more.
The desire to shoot with an incident meter comes from a couple of recommendations in the comments on the previous posts in this series. But actually, whilst there were loads of suggestions around the idea that I should try an incident meter, there was also one very fine suggestion that I should take notes as I shot. For the sake of this roll – at least for a small part – I took heed of both pieces of advice, and in doing so, I must admit, if learning is the main goal here, I do feel like I’ve achieved something!
Exposure is an interesting subject. The more you delve into it, the more its potential for complexity unravels. I’m aware of many of the methods, and conceptually understand what I need to do to get something out of at least a few of them – at least I think I do! The problem is, I’m quite lazy, so I often find myself sticking to a path of least resistance and even after trying other methods with success, I find myself falling back into my comfort zone and either use a process of guessing, reflective metering, or a combination of both.
Incident metering is often touted as being the most simple and reliable way to meter, but I often question this as it’s my view that it can lead to the exact same series of errors, just from a different angle. Literally. Whenever I’ve tried it in the past, specifically when I’ve shot higher-contrast landscape scenes, I’ve found a half decent reflective meter to give close-enough to what I need, with a lot less fuss. This usually leads me to conclude that sticking to reflective metering is best for me – at least with neg film. That said, my previous successes with the Konica Hexar RF could quite easily have cemented the technique for reversal film too.
As it turned out though, I actually really enjoyed incident metering this particular roll. I’m not entirely sure I’ve achieved anything more than if I’d just used a reflective meter, but because the incident meter requires me to think a bit (lot!) more – especially because it’s a break away from my usual technique – I feel like I’m positively impacting my learning curve in a way that sticking to what I know might not have.
Actually, I think that I’m going to find my metering technique tightens up in general if I stick to incident metering with Ektachrome E100. Because E100 will more brutally reveal my mistakes – and because I now feel like I’m using this as an opportunity to pull away from my usual techniques – the only real outcome is that I learn how to read the light better, or at least in a less lazy way – which can’t be a bad thing.
Incident metering – the basics
If you’re not already aware, the basic idea of incident metering is to take a reading of the light that’s landing on the subject rather than that being reflected off it. In most circumstances, the meter reading is taken with the meter between the subject and the camera with the meter facing away from the subject and pointing in the direction of where the photo will be taken from.

The majority of incident meters have a domed diffuser that sits in front of the light meter’s photosensitive cell. The reason it’s domed is so that it can take an average of the light landing on the subject. Like most subject matter the dome is 3D, so if the light is hitting the subject from one side relative to the angle of the camera, with the dome pointing at the camera at the same angle, the average of the light falling onto it is taken.
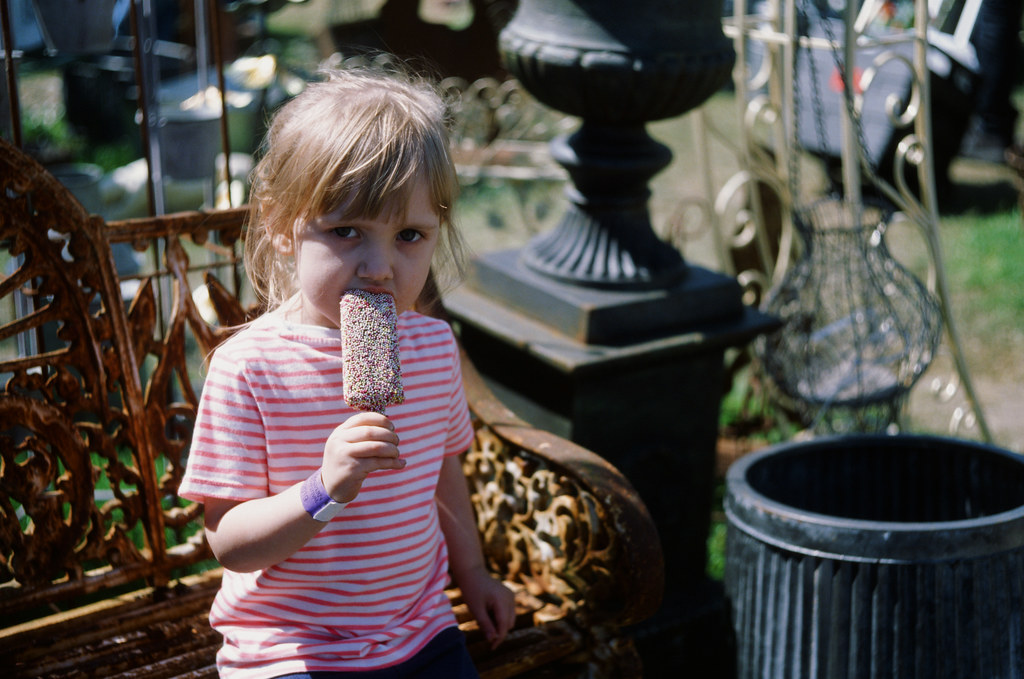
I took a couple of shots at the beginning of the roll that between them quite nicely demonstrates the potential benefit of incident metering. If I remember rightly, this first shot was a sunny-16 shot – she doesn’t pose often so I was a little flustered and just snapped – but I’m pretty certain I dialled in something close to sunny-day exposure. There’s not all that much wrong with this exposure as a whole, but you can see Norah’s face is quite shaded on the one side.
Since I was armed with my Lumu incident meter, what I should have done is use that. But I didn’t – as I’ve said was feeling rushed. If I had, I would have likely got a slightly better exposure for her whole face. It would have also been interesting to see how that would have impacted on the rest of the frame.
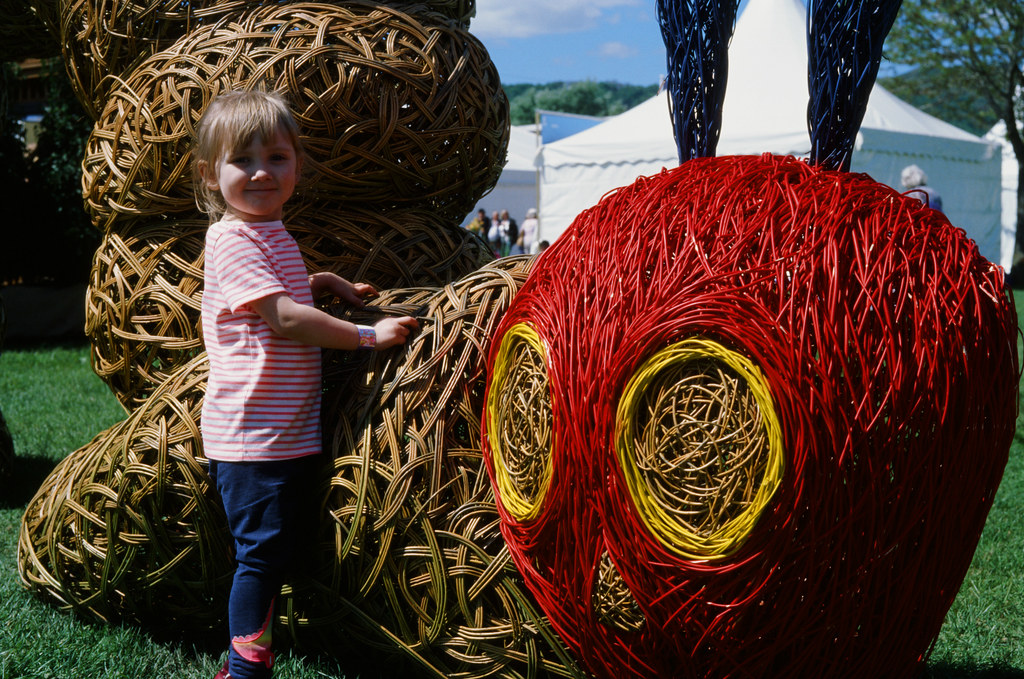
This occurred to me as we walked away looking for ice cream, so when I had another chance I took this shot with Norah as the main subject of the image using that method:
The dome of the incident meter has done its job of averaging the light landing on her face. Unfortunately, I can’t remember the reading as I forgot to note it down – again because I was out with the family. Regardless, this does somewhat highlight the benefit of 3D incident metering in a fairly basic usage case.
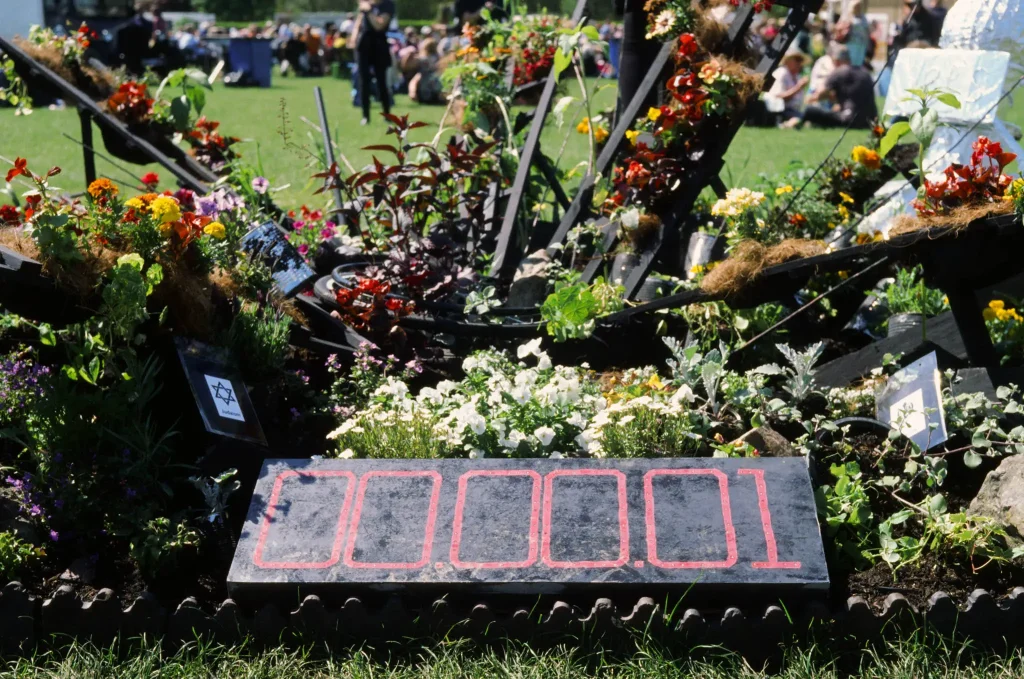
The rest of the shots from that day (and actually the majority of the roll) were of a little garden for the show that was put together by the school that Hannah works at and Connie goes to. They’re super-boring and, again, I shot them sunny-16 so are of no benefit to this post, but here’s one for you anyway:
Incident metering for higher contrast subject matter
On my next little outing, I was specifically on the lookout for some high contrast scenes. I get the basics of incident metering, but its when I’m shooting more landscape-type images with higher-contrast that I’ve found the idea of incident metering to be a little more involved than I’d like. This was a morning that I’d arrived at work a little early, so popped down to the river bank hoping to find something of a high-contrast subject to shoot. I found one too. Unfortunately, I can’t quite remember what I was thinking with regard to my exposure, and my note taking was a bit too shit to be useful. This is what I wrote:
Dappled light on path/bench
Shade reading 3.5 1/125 vs sunny-16 morning light
First shot 3.5 1/125
Second 11 1/125
Third reflected reading f/5.6
These are the shots:
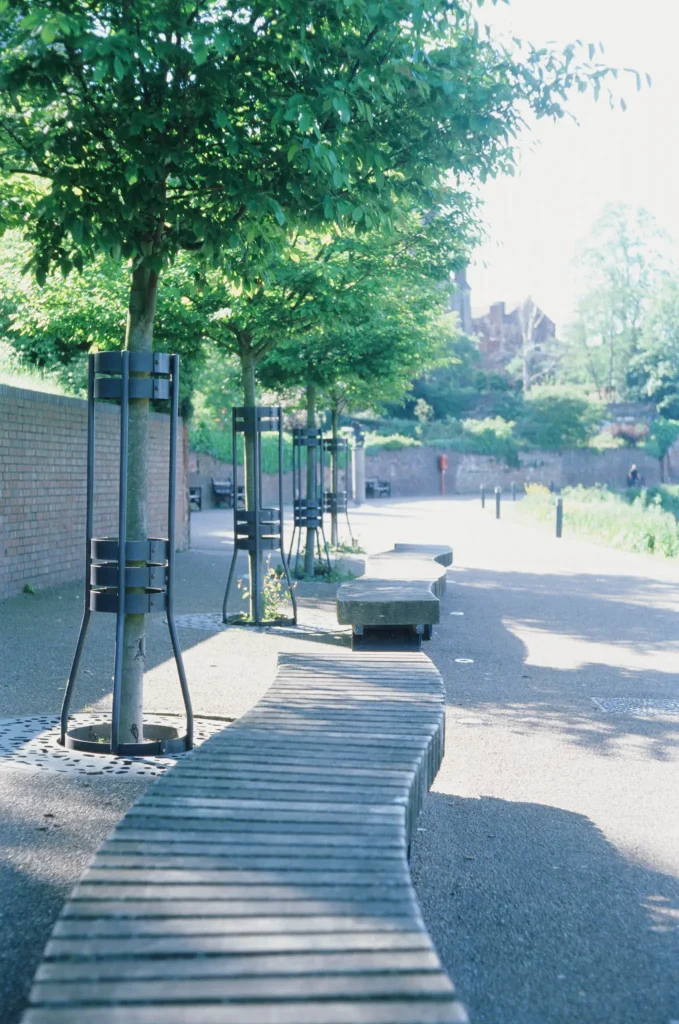
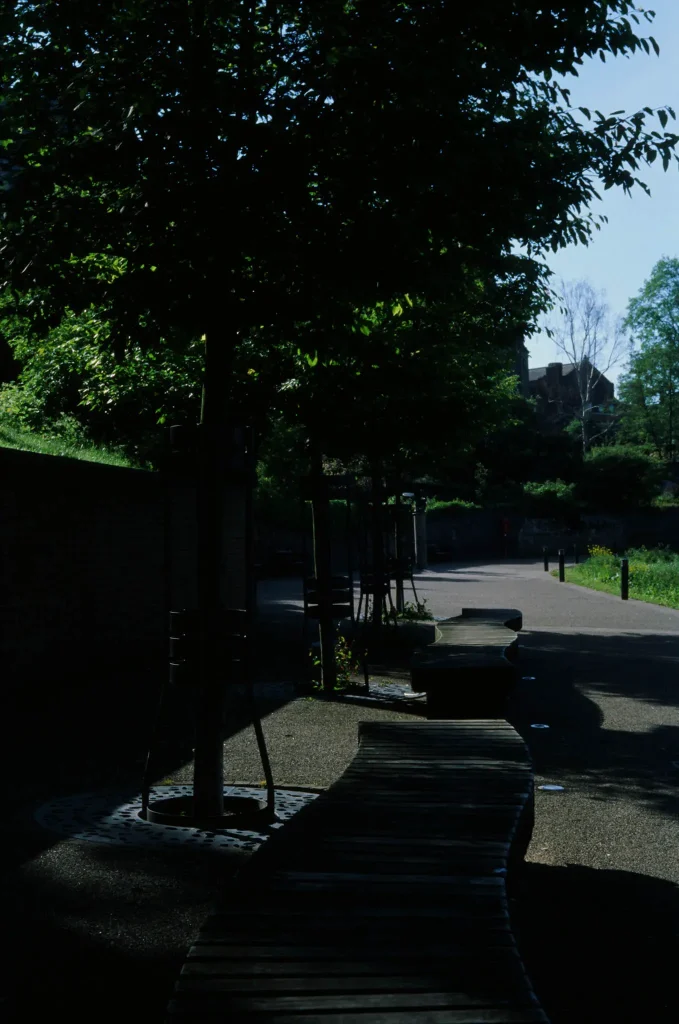
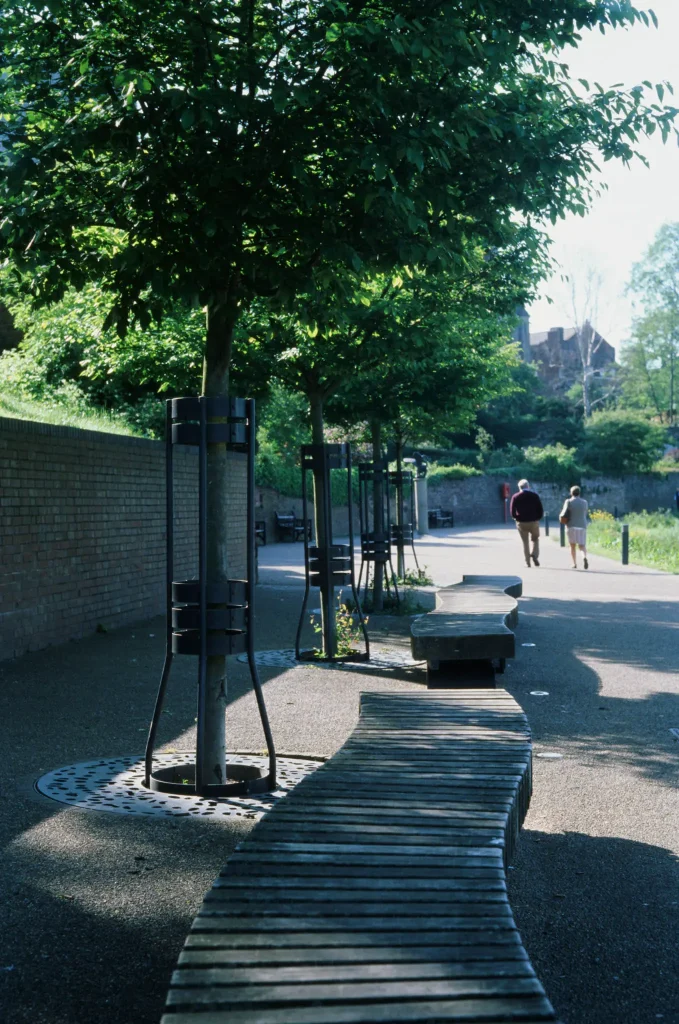
I dunno either…? I think I was maybe trying to ascertain the advantage of a reflective reading in these circumstances. The issue is, with no real subject matter (or in other words, a shit photo), it doesn’t really prove or show much beyond a badly incident metered image, a poorly judged estimate, and a reflected meter result that looks a bit shit… Let’s call this a failed experiment. Note to self: take better photos and make better notes! It’s interesting how the lessons here are not purely photography based… ha!
Despite my shit note-taking, since the rest of the roll was taken whilst out shooting with Jeremy and Fraser one evening, I did manage to get something useful. The benefit to my note taking of shooting with other people was that I was talking to them a bit about what I was doing at the same time, so remember more about what I was thinking.
This next image was the first shot I took. In terms of notes, I simply wrote:
Sun f/9 1/125
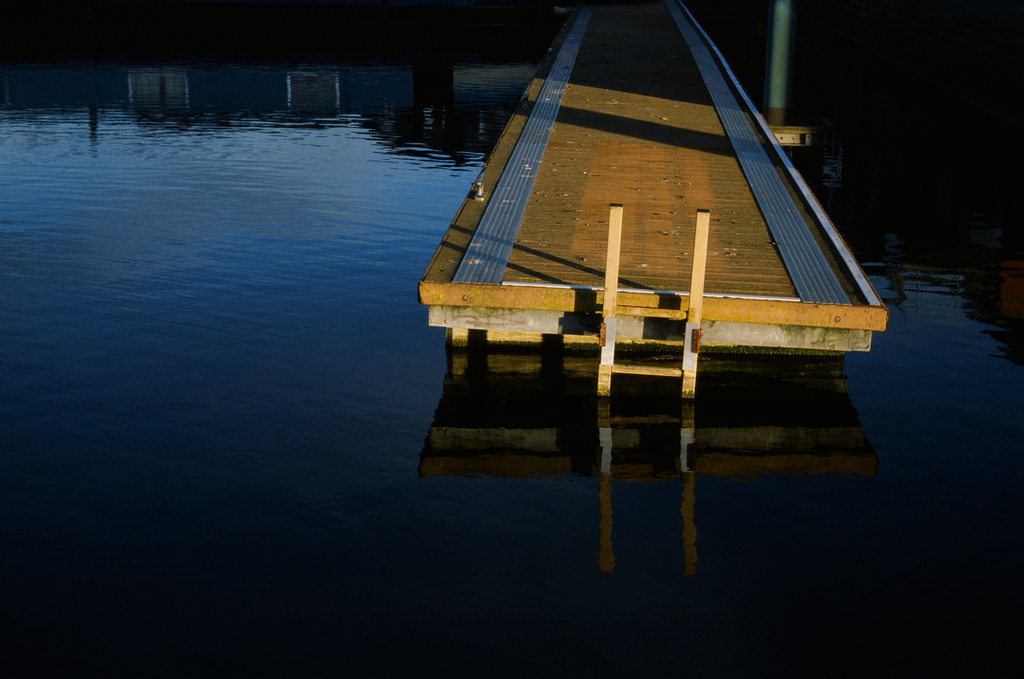
I remember waffling to Jeremy and Fraser about how it was my goal to take a photo of something in direct, evening sunlight. To do this, I told them, I just needed to take a reading with the incident meter facing the sun. Of course, this was only really the right thing to do because I had the sun pretty much directly behind me. i.e. the subject, camera and light source were on almost the same axis. Regardless, the result I got was exactly what I had hoped.
At this stage, I decided to do a comparison shot between taking a reading in the sunlight and taking a reading in the shade. The note I made was as follows:
Pilar thing – f/8 then f/2.8 1/125
This first image was taken at f/8, and with a slight change in the light between the first image and this, it represents a meter reading with the sun, camera and subject on almost the same axis. In fact, for my own shadow not to be in the frame, I had to hide in the shadow area you can see in the left-hand third of the image. I’m pretty pleased with the result – I quite like the slightly lower-key look to it, as it’s captured the evening light quite accurately – though admittedly, it’s not the most interesting image.
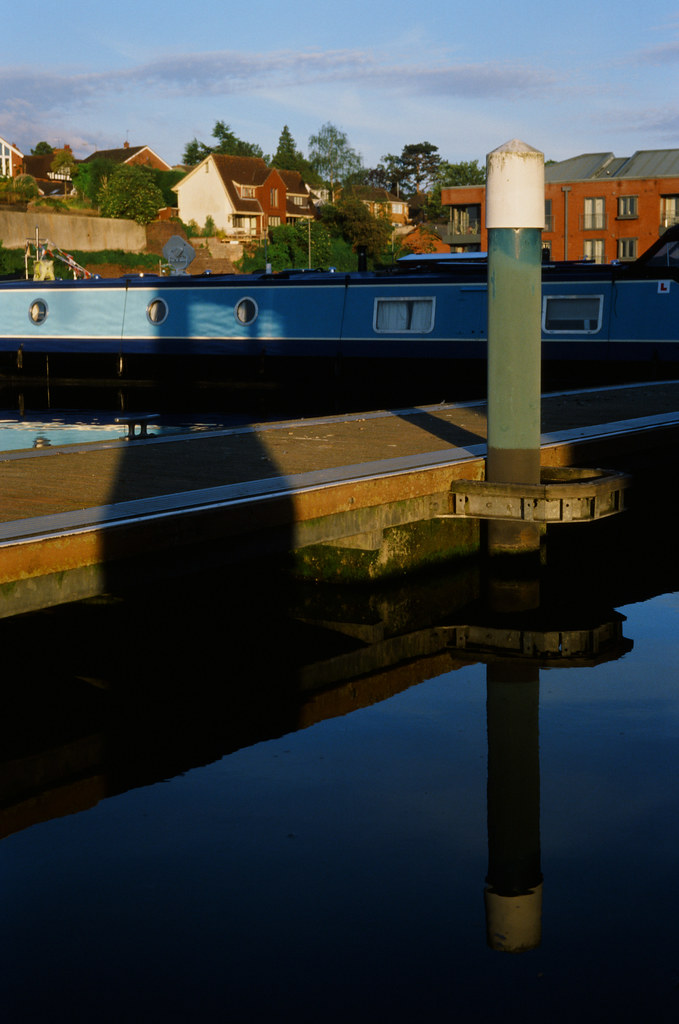
This next image was taken at f/2.8. This was just an experiment to see what would happen if I metered the shadow area. The result, as expected, was a blown out image.
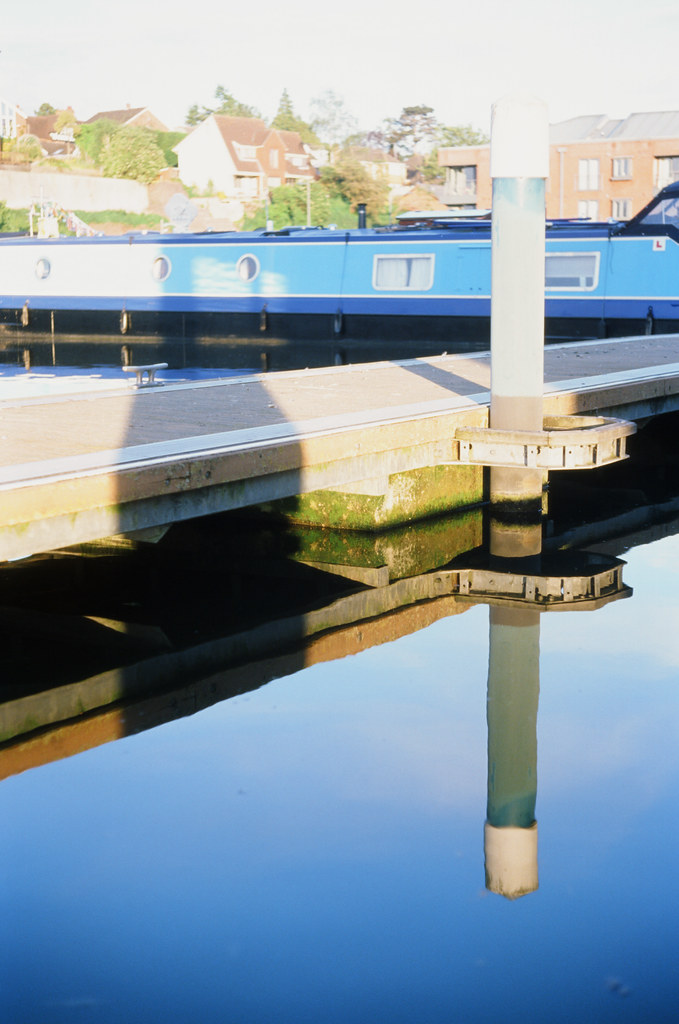
In hindsight, given what I now know about E100, I suspect f/7.1 or 6.3 might have resulted in an image with slightly more shadow detail and yet still retained good exposure across the rest of the frame. But, as I say, I’m happy with the result in the first image.
I then took two more images in a similar light with similar results:
I know which one of those two I prefer…
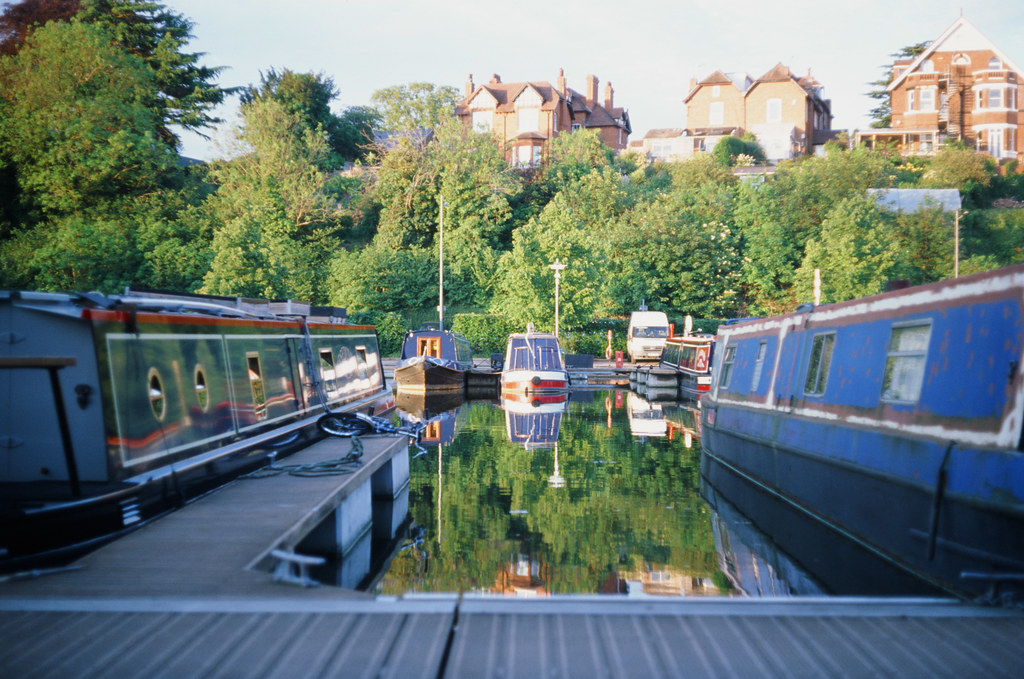
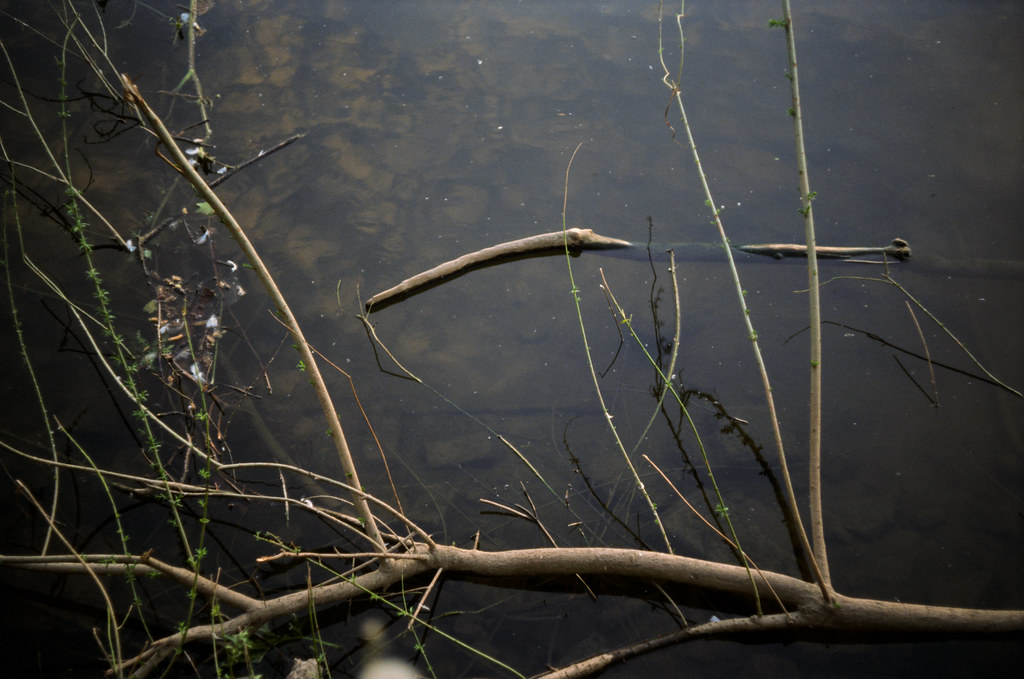
Moving on from there, I wanted to find a higher-contrast difficult scene where I could take an average of a couple of readings to attempt to get the best result. The notes were as follows:
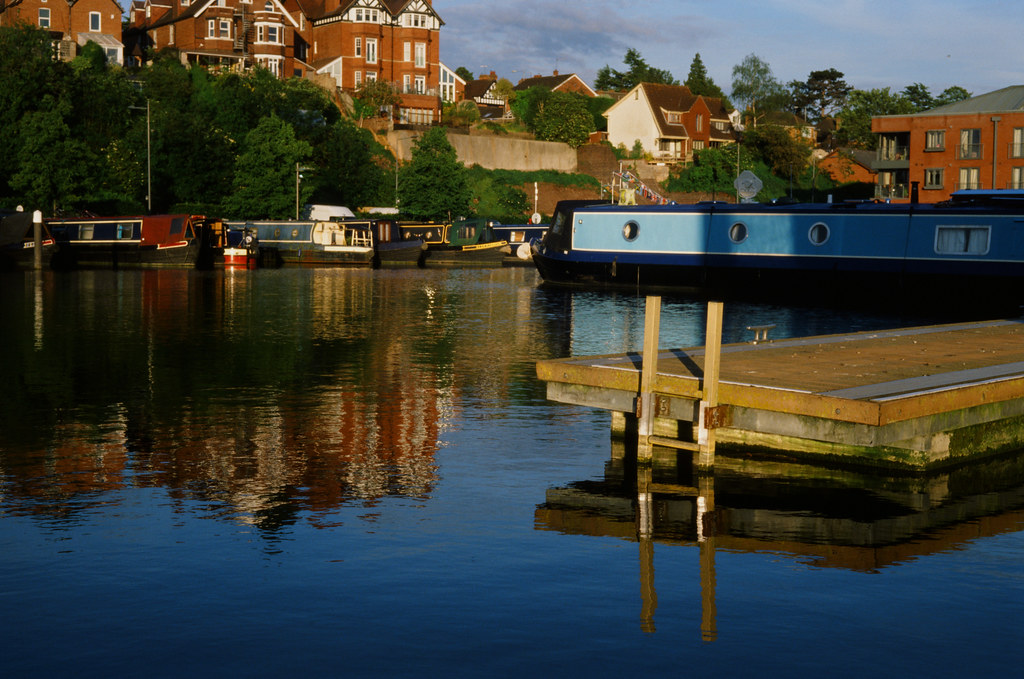
Sunlit boat through shaded boats
f/2, 6.3 then 4 – meter read f/2 in shade and f/6.3 in sun.
This first image was taken with a reading taken at arm’s length, facing myself, reaching out over the water in the foreground. I have essentially exposed for the boats in the foreground shadowed area. The result isn’t particularly attractive, I don’t think, with the background being fairly overexposed, and the foreground looking unpleasant. Sometimes, shadow areas need to stay in the shadows…
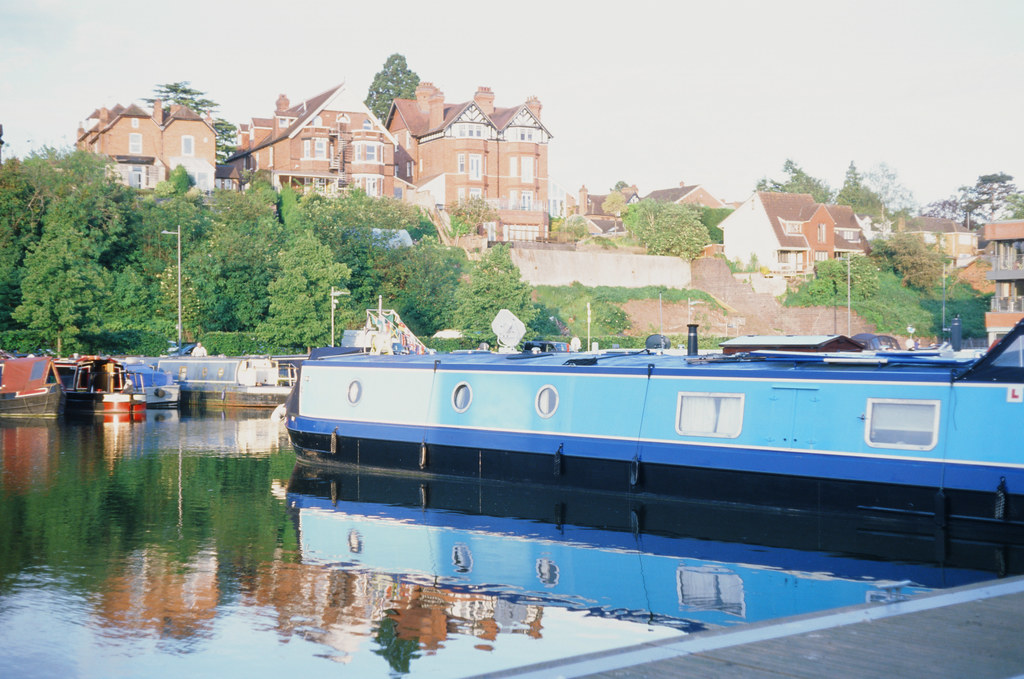
This next image was taken at f/6.3 – this was the reading I’d got with the meter on the same axis as the sun and the side of the boat/houses in the background. I knew this would way-underexpose the boats in the foreground, but I wanted it as a point of reference.

This final image was taken at f/4. My gut feeling was that I wanted to achieve some detail in the shadows, but that a lower-key outcome would work best for the scene.
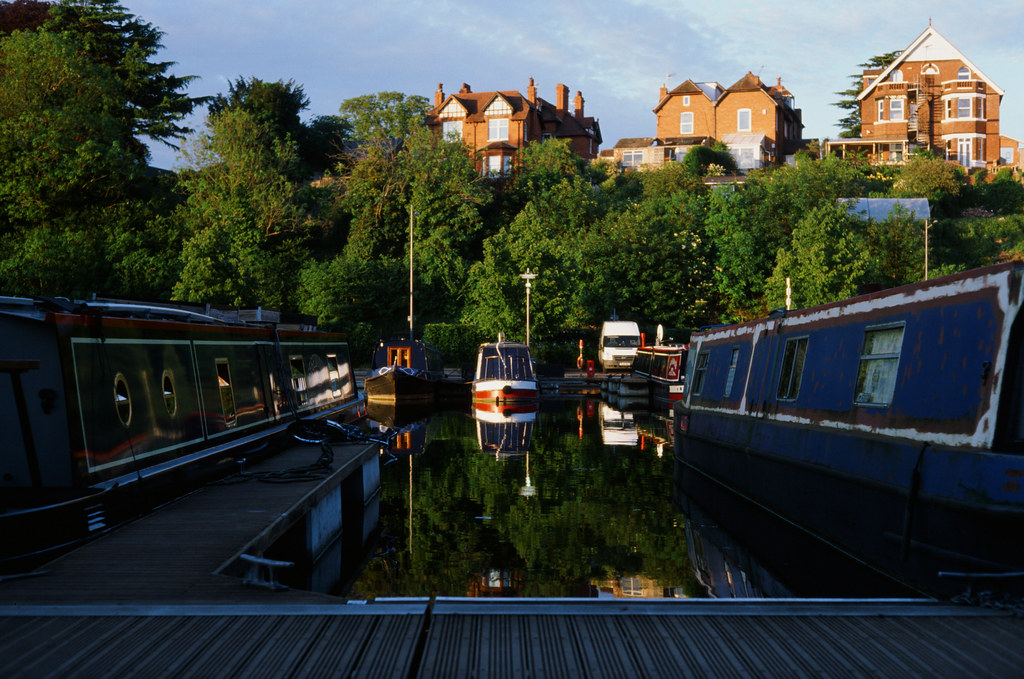
I’m really pleased with the outcome too. Though I must admit, I feel like this was thanks to a good chunk of luck as it was much else. My incident metering technique is far from refined, especially for scenes like this, and in this instance, the best result was based on gut feeling more than much else. But, importantly, this has certainly given me the confidence to experiment with this sort of technique a little more. I just wish I’d taken a reflective reading of this scene, even just for reference. Again, better note taking required!
If anyone has any tips on taking readings to average to increase my chance of repeating the above success with E100, then I am all ears!
Failing light (and brain)
From this point on, the light was beginning to fail, as was my brain and my note-taking. I had pretty much concluded that I’d got what I wanted for the benefit of writing this post, and with there being a lack of higher-contrast subject matter to now shoot, went into a lazy-brain mode.
Actually, thinking back, I remember making another mistake. Walking along the river with Jeremy and Fraser, we were all taking various meter readings and talking about them. For some reason, I saw it fit to take some of my readings with the meter pointing at the direction of the sun which was pretty much a 90-degree angle to the subject/camera axis. I wondered at the time why Jeremy had given me a funny look a couple of times… It’s this that makes this following note and photo redundant as far as the outcome goes – I can’t remember how I’d metered it and therefore what the note means…
Downriver 2.8 (read at 2.2)
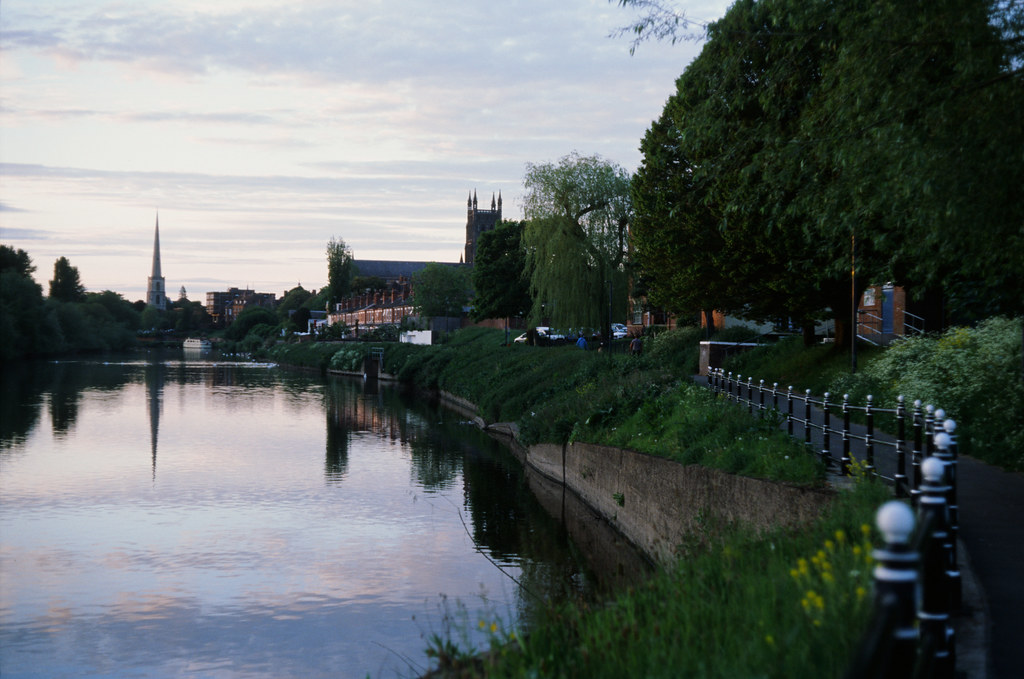
Still, the outcome is ok…
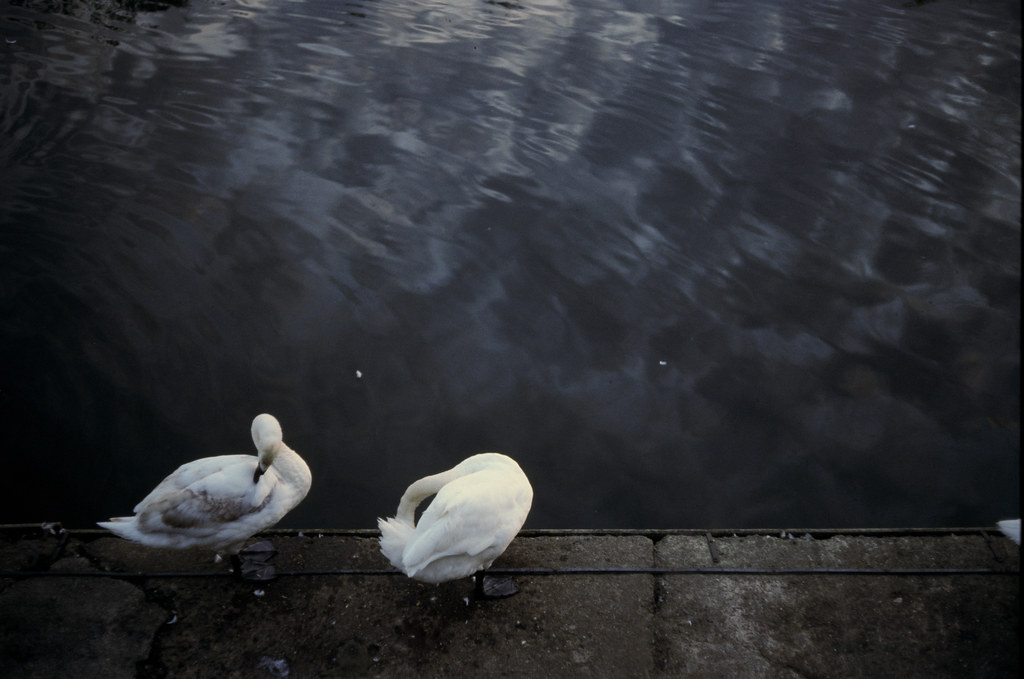
From then on, I was just shooting at 1/60th and f/2 as the light had failed and these were the best settings I could achieve. The results were a little underexposed, but with a post-process tweak, a couple of them came out quite nicely (though they are a little dull in terms of the subject matter).
The takeaways from this roll
I feel like there’s quite a lot I can take away from this roll. For a start, if I’m going to take notes, I think need to make more effort! Beyond that, it strikes me that incident metering does indeed seem to hold the potential to give me great results from Ektachrome E100, even with high contrast scenes.
I think it’s possibly quite evident that I’m out of practice when it comes to incident metering. As such, it seems that I’m apparently quite liable to forget the basic rules if my concentration drops, even just a little bit…
Finally, I now feel like shooting Ektachrome E100 has become about me refining my metering skills with different methods. I do feel like I know some of this stuff, but as I’ve talked about a few times on this site recently, practice is definitely key. Knowing an outline theory, and putting it into practice as someone who, relatively speaking, doesn’t have a great deal of experience with an incident meter took a lot more brain power than I thought it might. But, significantly, I do feel like the results I achieved when I did apply the brain power were amongst the better frames I’ve had out of this film so far!
More soon…
Words of thanks and recommendation
Finally, I just want to say a continued thanks to both Kodak Alaris and Duncan from Silverpan Labs. Kodak is supplying the film for this series, and Duncan is doing an excellent job at developing the films and giving me consistent results as well as useful and insightful feedback – this being a service he offers to all of his customers.
If you want to buy this film, I also recommend Analogue Wonderland as my chosen film supplier. They stock E100 here, but also supply something like 200 other films making the website interesting to explore as well as purchase from.
Finally, you can find all my photos taken with this film here, and see this whole series of posts here
Share this post:


Comments
Nigel Cliff on Kodak Ektachrome E100 – First Rolls Review – Pt3 – Experiments with an Incident meter
Comment posted: 10/06/2019
Comment posted: 10/06/2019
Mark on Kodak Ektachrome E100 – First Rolls Review – Pt3 – Experiments with an Incident meter
Comment posted: 10/06/2019
Comment posted: 10/06/2019
Terry B on Kodak Ektachrome E100 – First Rolls Review – Pt3 – Experiments with an Incident meter
Comment posted: 10/06/2019
Under many circumstances a reflected reading, which is an average for the whole subject, modified if necessary from experience of the type of subject and lighting, is more than capable. The "trick" with any meter is knowing when to deviate from the indicated exposure. After all, except with sophisticated matrix metering that try to understand what the subject may actually be, the meter has no idea of what the subject is it is being pointed at; it only reads brightness. Then the question is, is this the result we're after?
I've come across a number of web sites extolling incident meters as being more accurate, and in someways denigrating reflected reading meters in the process. But rarely does one find the reasoning behind why this might be so. In the early days of the cinema, an effective means of determining exposure was needed and with the introduction of the selenium exposure meter by Gossen in around 1933, this led to the successful Norwood Director incident meters. These were calibrated to the then movie stock to ensure that the highlights were not blown; hence the term "highlight meter" which gave a truer indication of their purpose. This aspect of incident meters needs to always be borne in mind: placed at the subject position (NOT a substitute reading) then the meter will indicate an exposure in preserving highlights, and with the meter dome, can accurately assess light reaching the subject from all quarters.
The incident meter relies on the ability to measure accurately the light reaching (falling upon) the subject, rather than the light reflected by it. This is the more accurate way to measure the level of illumination reaching, rather than the amount of light reflected by the subject e.g. with a bunch of flowers, red reflects less than green, and green reflects less than yellow or white. So, potentially, a reflected reading can't result in the colours retaining their respective levels of luminosity because it tends to average the levels of reflected light. With an incident reading, the exposure allows the subjects to retain their respective degrees of reflectance. This can often explain why, in specific circumstances, an incident reading can result in what might, at first blush, appear to be a somewhat underexposed slide i.e. a little denser than one shot using a reflected reading. The meters are basing their exposure for slightly different sections of a film's exposure curve.
Personally, it is my belief that most photographers new to slide film are likely to find a well-exposed slide using the reflective reading method preferable simply because it is based on the average reflectance of the subject. An incident reading will be based on ensuring highlights are not "blown", so is more tricky to assess the final result.
Comment posted: 10/06/2019
Comment posted: 10/06/2019
Comment posted: 10/06/2019
Comment posted: 10/06/2019
Comment posted: 10/06/2019
Comment posted: 10/06/2019
Comment posted: 10/06/2019
Comment posted: 10/06/2019
Comment posted: 10/06/2019
Comment posted: 10/06/2019
Henry on Kodak Ektachrome E100 – First Rolls Review – Pt3 – Experiments with an Incident meter
Comment posted: 10/06/2019
Comment posted: 10/06/2019
Mark on Kodak Ektachrome E100 – First Rolls Review – Pt3 – Experiments with an Incident meter
Comment posted: 10/06/2019
Comment posted: 10/06/2019
Comment posted: 10/06/2019
Comment posted: 10/06/2019
Comment posted: 10/06/2019
John Squillace on Kodak Ektachrome E100 – First Rolls Review – Pt3 – Experiments with an Incident meter
Comment posted: 10/06/2019
Comment posted: 10/06/2019
Peter on Kodak Ektachrome E100 – First Rolls Review – Pt3 – Experiments with an Incident meter
Comment posted: 10/06/2019
Armed with your insights I'm going to venture into Ektachrome E100 world with my M2 and a VC II shoe mount meter (B & H say it is a "ambient" meter) and get out of comfort zone of FP5 only with that camera.
Comment posted: 10/06/2019
David Hume on Kodak Ektachrome E100 – First Rolls Review – Pt3 – Experiments with an Incident meter
Comment posted: 10/06/2019
So - I actually just put my first roll of RVP100 through a new-to-me F4 and I love the matrix metering (I've sent that off as a 5 Frames to EM) Yeah - loving shooting a bit of E6. I plan to shoot it a lot more but I have not tried the Kodak. The other thing that E6 made you do in the day was be super sensitive to colour temp. Because that was totally out of your control for environmental stuff. So yeah - using a bit of E6 again has reawakened all those forgotten neural pathways that used to scope out the DR, look for the colour of the shadows etc. Great fun! Oh - PPS one thing that was really important as I recall was how a film dealt with colour in open shade. I recall that the Fuji Sensia/Provia was forgiving in keeping the shadows from going too blue. I only used to shoot Ektachrome in the Tungsten balanced form, and then I'd filter it for daylight if needed. But filtering was a bit of a pain because you'd lose too much light, which was scarce enough anyway working at 160 or 60 ASA. Cheers!
Comment posted: 10/06/2019
Comment posted: 10/06/2019
Joe Van Cleave on Kodak Ektachrome E100 – First Rolls Review – Pt3 – Experiments with an Incident meter
Comment posted: 11/06/2019
Conversely, with incident metering the meter doesn’t comprehend the reflectivity of various parts of the scene, so again the photographer has to intervene to decide what’s most important in the scene, exposure-wise.
Thank you for this ongoing series.
Louis A. Sousa on Kodak Ektachrome E100 – First Rolls Review – Pt3 – Experiments with an Incident meter
Comment posted: 11/06/2019
Comment posted: 11/06/2019
Kevin Lord on Kodak Ektachrome E100 – First Rolls Review – Pt3 – Experiments with an Incident meter
Comment posted: 11/06/2019
Andy Garton on Kodak Ektachrome E100 – First Rolls Review – Pt3 – Experiments with an Incident meter
Comment posted: 11/06/2019
Comment posted: 11/06/2019
Johnny on Kodak Ektachrome E100 – First Rolls Review – Pt3 – Experiments with an Incident meter
Comment posted: 11/06/2019
Comment posted: 11/06/2019
Leo Tam on Kodak Ektachrome E100 – First Rolls Review – Pt3 – Experiments with an Incident meter
Comment posted: 11/06/2019
GrahamHO on Kodak Ektachrome E100 – First Rolls Review – Pt3 – Experiments with an Incident meter
Comment posted: 12/06/2019
I used to shoot a great deal of 16mm cine Ektachrome for quick turnaround TV programs, before we had electronic cameras, and I would usually use incident readings which give consistent exposure between different shots.
For documentaries we would always use color negative film, but that required work prints, and color grading, etc, before making release prints.
I still have a box full of various Gossen, Weston, and Sekonic light meters all with incident attachments.
Transparency film was not only for projection. (I would also take, 35mm, medium format and 4x5 transparencies for publication) Publishers preferred viewing positive images for selection as they could quickly choose suitable images. For many years National Geographic magazine only used 35mm Kodachrome originals from which they made dye transfer prints that were then used to make color separations for printing.
What you see is what you get with transparencies. Color negative is of course ( regarded as) better for paper prints for display, though Cibachrome did produce dramatic prints directly from transparency.
Steve Ember on Kodak Ektachrome E100 – First Rolls Review – Pt3 – Experiments with an Incident meter
Comment posted: 12/06/2019
Could not agree more with Roger B re: "post-processing" and when it begins.
And, at the risk of getting caught in a crossfire between incident and reflected metering partisans, I would offer the following, from years of slide shooting - mainly with in-camera meters:
KNOW your camera's metering pattern - i.e., what portion of the frame it is giving the most importance to. You can wave handheld meters around till the cows come home, whether at your subject or at your camera, but I somehow think looking through the viewfinder gives the closest approximation of what your meter is ACTUALLY seeing.
It is then up to the photog - especially when shooting reversal film to decide what is supposed to be "dark" (or bright) in the photo and adjust accordingly. If you're shooting a dark-colored wooden bench in a shaded area of a park, unless you have a super-intelligent matrix meter, ASSUME the in-camera meter is going to artificially lighten such a motif to "average" tonality. Fine for negative film, over which we have more control in printing or post. UGLY - and mood-destructive - for slide film.
With certain in-camera meters, it's a mistake to include too great an expanse of sky in a landscape, as this is likely to render details on the ground miserably dark.
Also, there's nothing wrong with either zooming in - or walking up - to your scene's focal point and either holding the exposure or manually setting it, so nothing is getting fooled in a scene of wide dynamic range.
And, no matter how much wisdom I might think I have accumulated, I'd much rather bracket (easy with cameras offering AEB) and, if necessary, end up with 12 really fine exposures than be all over the map with 36 exposures showing no rhyme or reason or haphazard metering.
And, if that sounds like too profligate a use of a roll of reversal film, I feel that after doing this for a while, using, let's say a specific and repeated sequence of -1...0... 1, an awareness develops as to what adjustment is most beneficial to which motifs as well as how to modify the AEB values - i.e., upward or downward via Exposure Comp.
Reversal film has genuine dynamic range considerations that don't exist with negative types and it should be shot with that very much in mind to avoid a lot of crappy results that MIGHT have worked out with negative film.
Comment posted: 12/06/2019
Einride on Kodak Ektachrome E100 – First Rolls Review – Pt3 – Experiments with an Incident meter
Comment posted: 20/08/2019
Just remember that the metered reading represents your mid. With black and white film I meter for the shadows. With slide film I meter for the highlights and then add a stop or so of exposure. Depending on the latitude of the scene.