I’m ashamed to say it’s been many years since I developed a film or went near a proper darkroom. I say ashamed because from secondary school onwards photography was my passion.
I did GCSE photography at school way back in 1988 and managed to convince my parents that photography college was the way to go and that they should finance me. So off to Barking College of Technology I went and from there into a career in medical photography.
Then photography started going digital. I thought that was the end of it for film and drifted off into other hospital based professions.
Then, over the last 2-3 years I’ve rediscovered and reunited myself with my passion again, delighted to find what a following analogue photography now has.
Of course I kept all of the kit I bought years ago and have been up in the loft rooting out old cameras and darkroom equipment. However one piece of equipment has eluded me so far – a masking frame, without which printing decent prints can be a bit hit and miss in as far as keeping the paper flat and having any sort of decent border is concerned.
Unfortunately the loft gnomes still have this masking frame well hidden! So rather than spend hours hunting for it I had a look to see if I could just buy another one. At this point I discovered that new ones are quite expensive and even battered old ones on ebay were not cheap!
So I decided to work out if I could make something to do the same job at a fraction of the cost of what’s out there at the moment. What I came up with was essentially an adaptation of the humble photo frame.
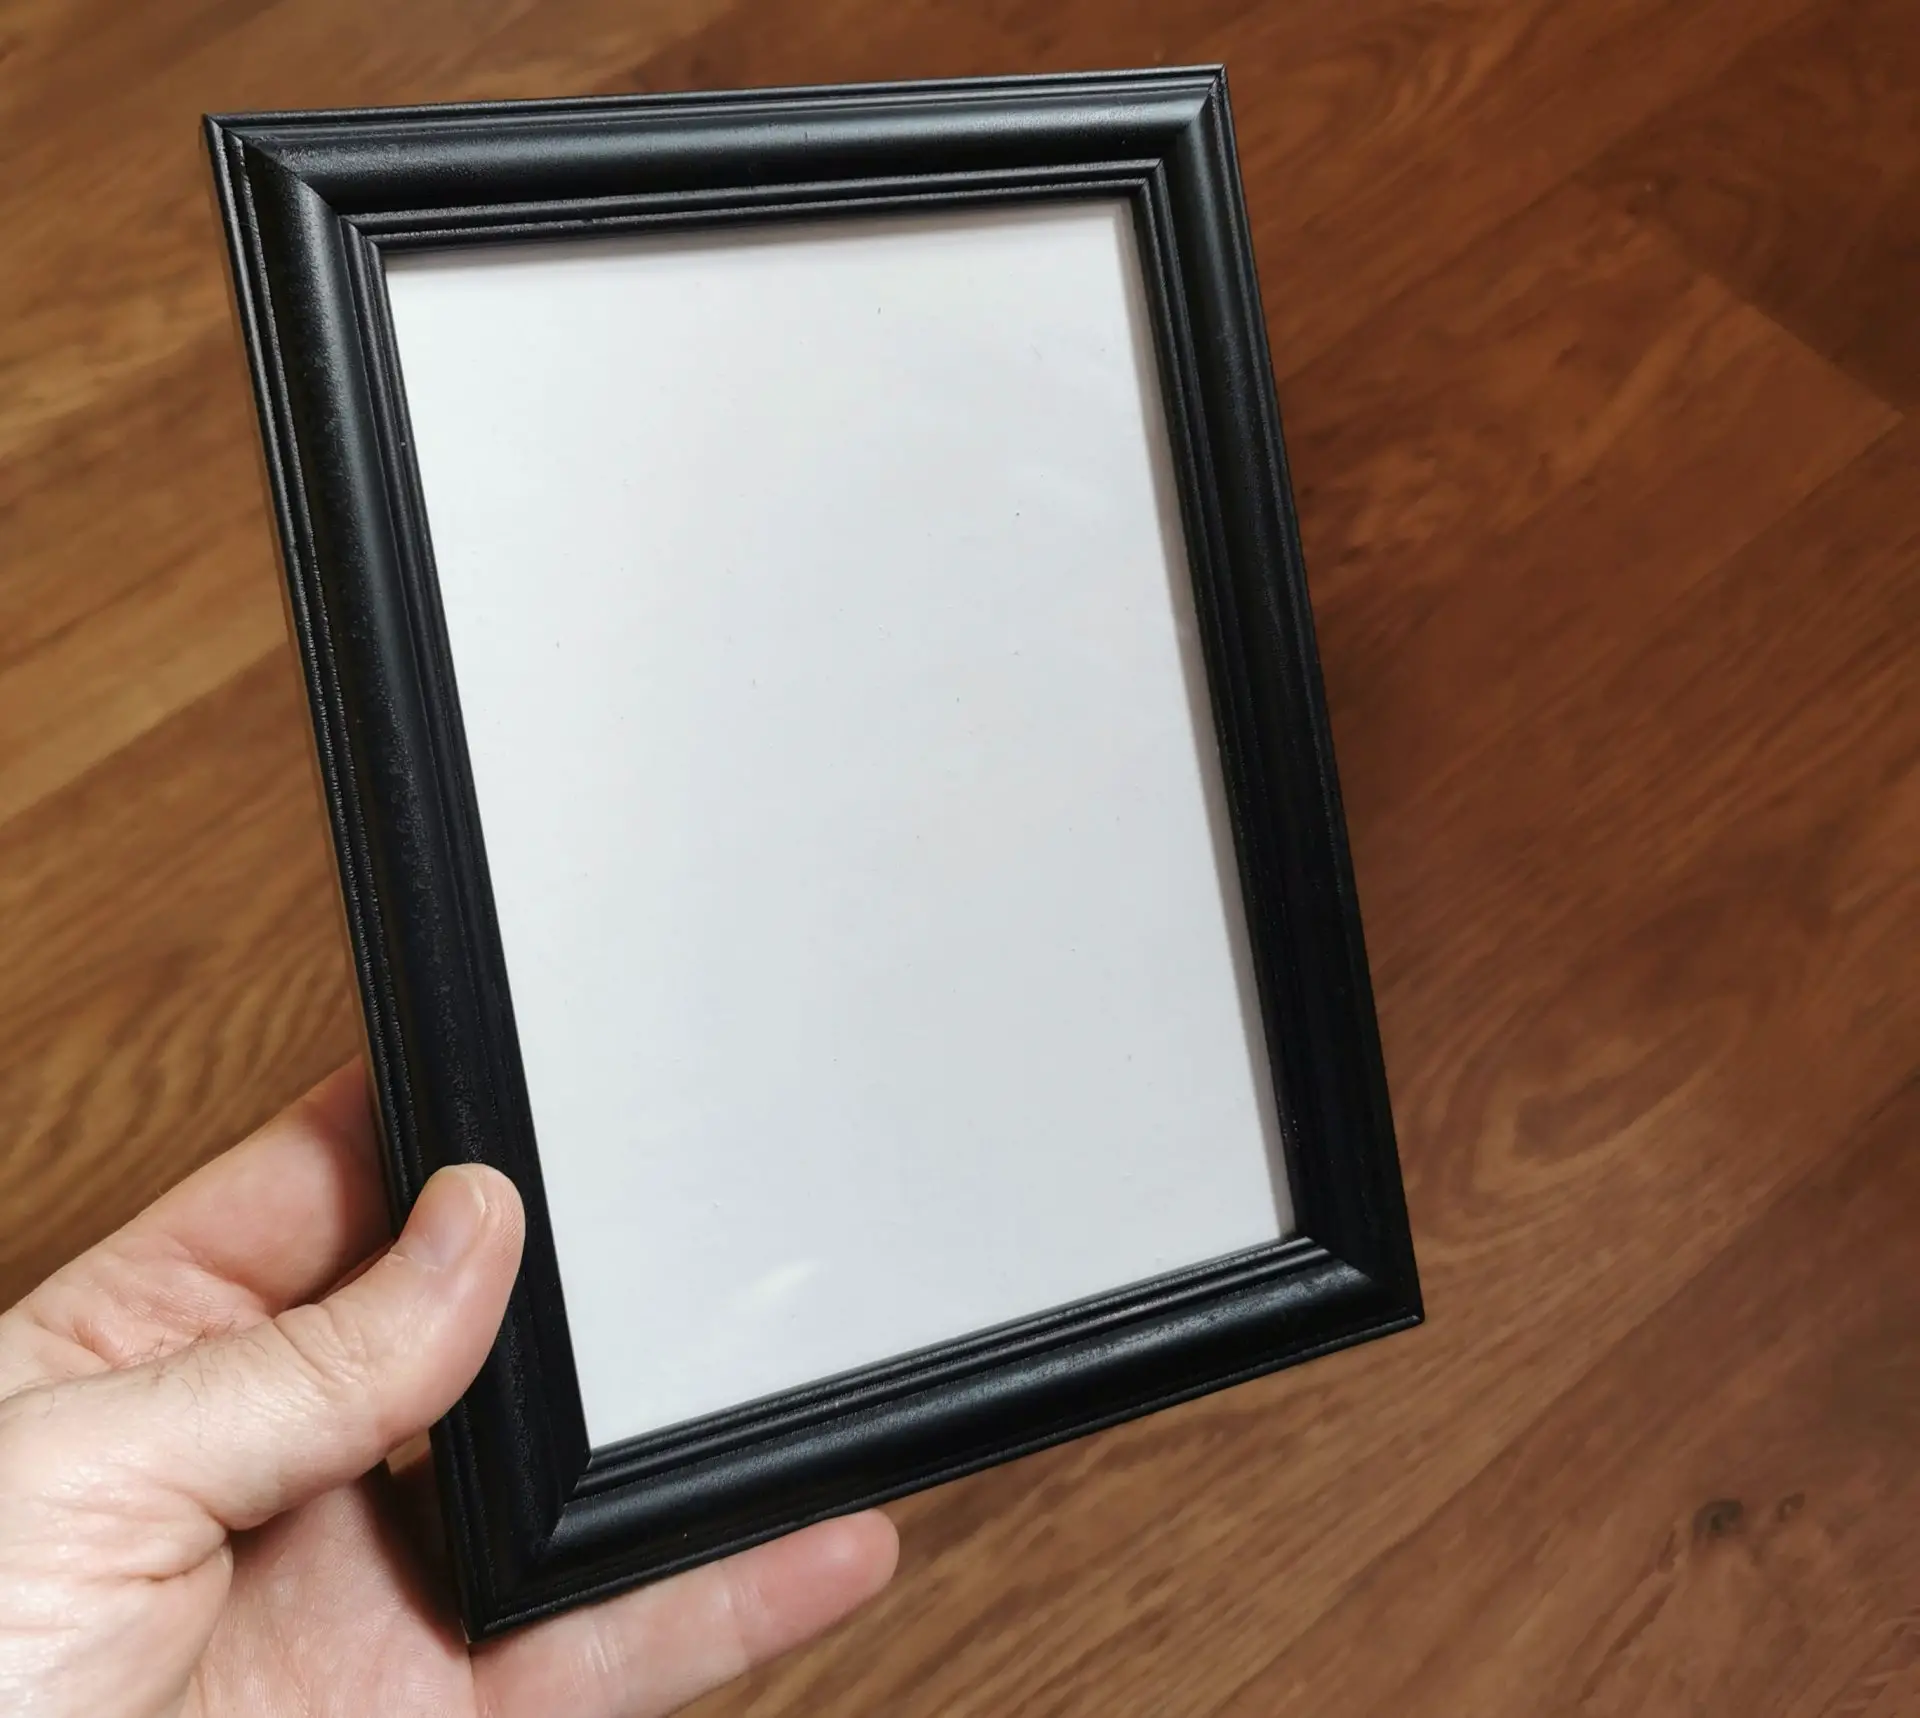
I have a box of 5×7 inch photographic paper so I managed to find a 5×7 photo frame in a charity shop for about 25p. I whisked up that bargain and, once home set about the work of converting it to a printing frame.
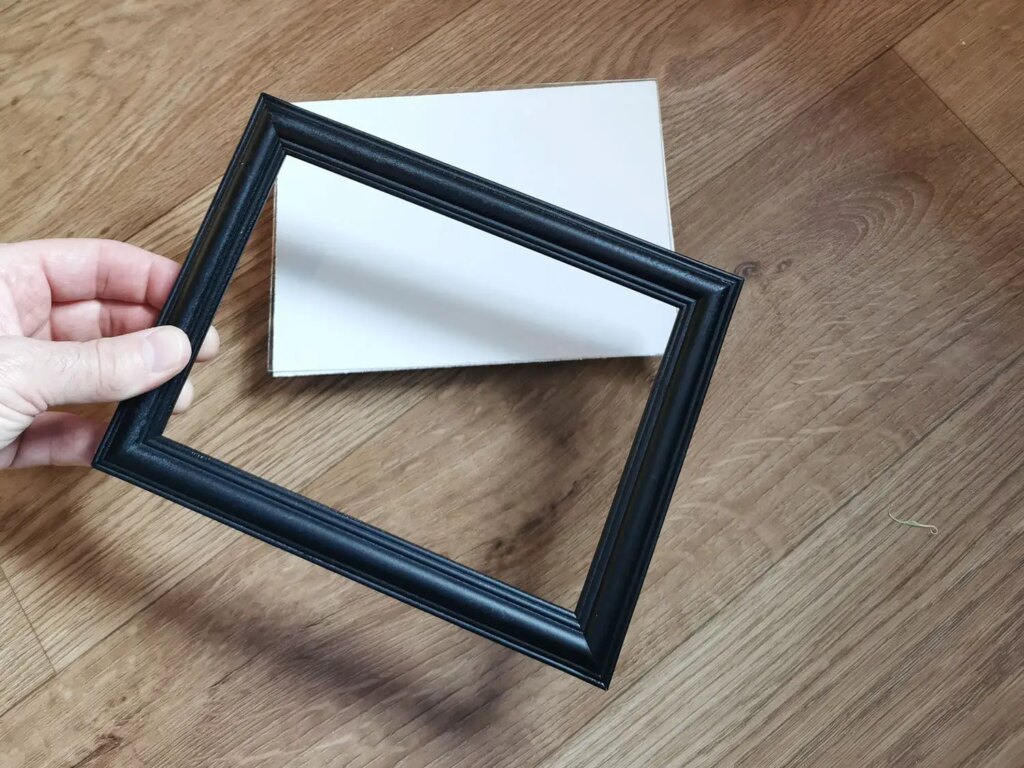
First step was to take out the backing and remove the flip-out stand. These are often just held on by a couple of bits of metal pressed into the wood. A little firm wiggling managed to get the stand free, leaving me with a 5×7 board. I put that to one side and focused my attention on the frame itself. It still had those little bendy pieces of metal in the back, which hold the backboard in when it’s being a photo frame. A pair of long-nose pliers was all that was needed to remove them.
One problem with the frame was that it was shiny gold. A short rummage in my garage turned up some black paint, which I used on the frame to reduce the possibility of light reflection off the edges of the frame. Another rummage produced some white paint and this was perfect for covering the surface of the back board, meaning the enlarger image could be projected onto it and seen clearly for focusing.
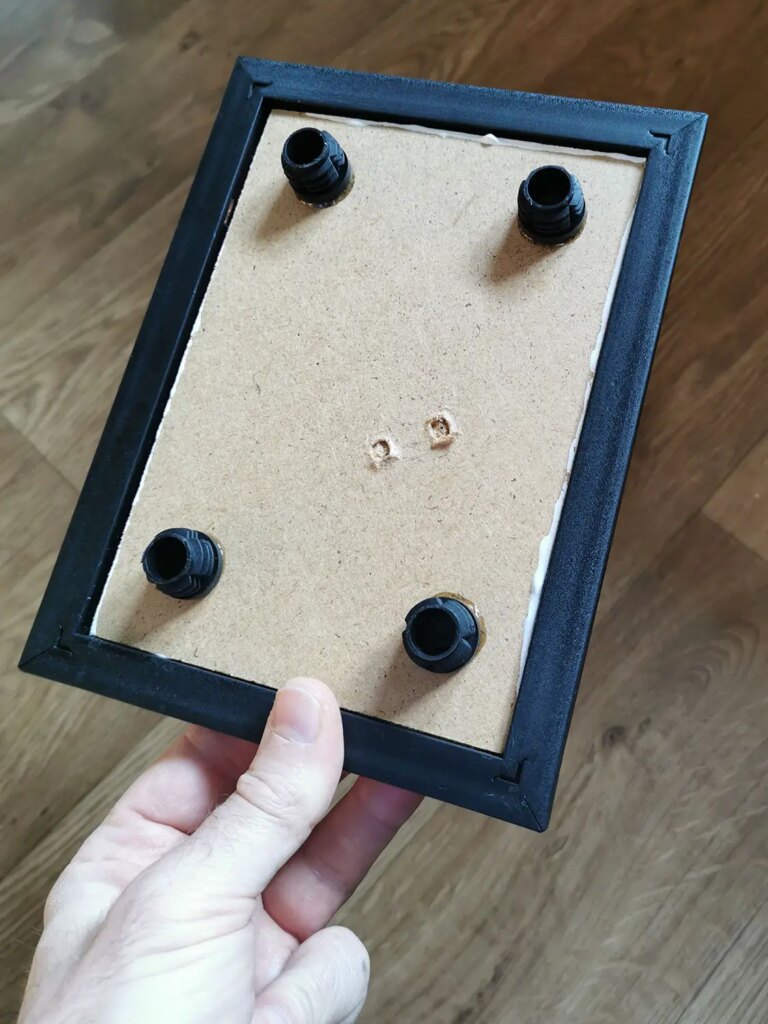
So now the backboard could be used flat on the enlarger base and the frame placed over it. The problem of course was that the frame had a recess that the board would normally sit into, held in place by those little bits of metal I’d just pulled out. With the backboard laid flat on the enlarger base it didn’t sit into that recess, meaning that the frame wouldn’t be in contact with the edges of any piece of paper laid on the backboard.
My answer was to attach some ‘feet’ to the rear of the backboard, lifting it up enough from the enlarger base so it could fit up into the frame’s recess. The feet were just some plastic insert caps that I bought for £1.20 in B&Q and then glued on with some ordinary glue that I found in – you’ve guessed it – the garage.
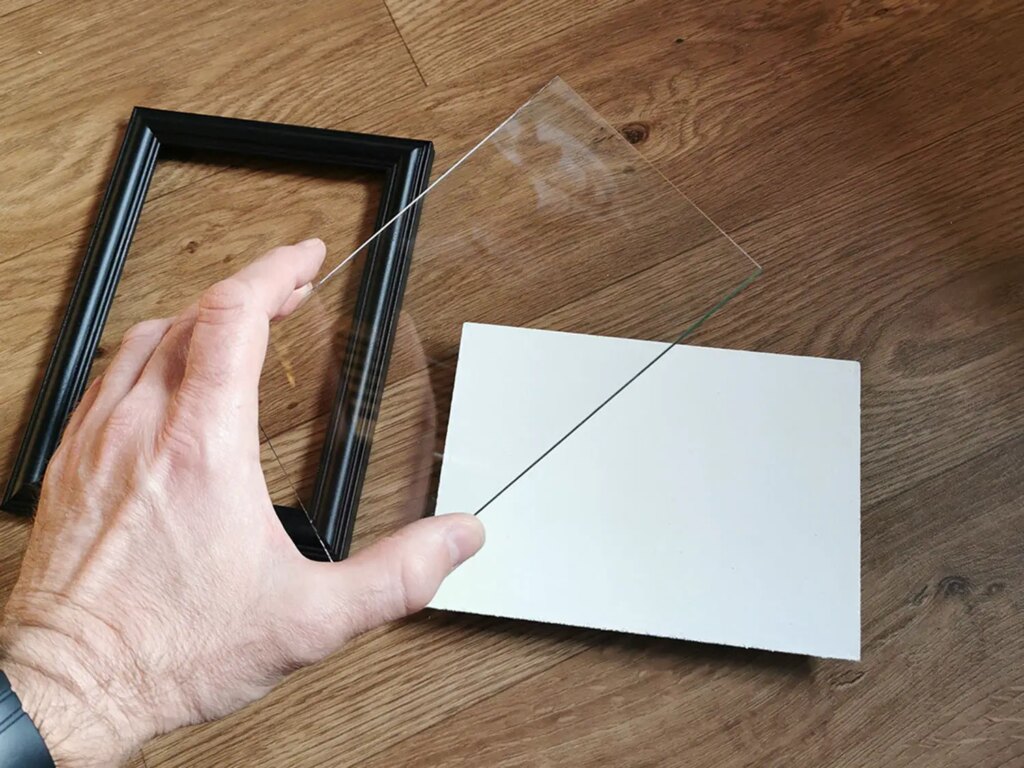
Taking out the glass I now had a printing frame that would keep my paper flat and give me perfect white borders on my prints. If I wanted to contact print any negatives then the glass could go back in. Not always practical for a 5×7 frame, given the length of a strip of 35mm negatives but it could work with a larger frame.
And there we have it – a cheap and easy to make photo printing frame!
As regards the cost of this mini-project I guess it’s best to say the whole thing can probably be done for under £5. I was lucky as I already had a few bits like paint & glue in the garage so my total cost only came to £1.45 (25p for frame and £1.20 for the ‘feet’).
I hope this has been useful, thanks for reading 🙂
You can find me on Facebook, Twitter and Instagram
Share this post:


Comments
Auntiemaryscanary on Low Cost DIY Darkroom Masking Frame for Analogue Printing – By Robert Willox
Comment posted: 12/05/2022
Terry B on Low Cost DIY Darkroom Masking Frame for Analogue Printing – By Robert Willox
Comment posted: 12/05/2022
I, too, was surprised at the prices being asked for proper printing easels but as with film camera prices I'm out of touch with today's prices, many of which I see as way over the top for a camera's intrinsic photographic worth.
Jay Dann Walker in Melbourne on Low Cost DIY Darkroom Masking Frame for Analogue Printing – By Robert Willox
Comment posted: 12/05/2022
Keep on visiting your local charity shops and look for bargains. Every now and then a bonafide enlarging easel turns up in our local "op shops". Most are priced very reasonably and at times are virtually giveaways, as the volunteer workers int hose shops seldom know what they are, though at times they go the other way and put ridiculously high prices on anything strange or unusual.
My best ever find (of several easels I've acquired dirt-cheaply from these shops) was an almost new Sawyer borderless 16x20" print easel I paid all of AUD$20 for. I recently turned down an offer for $200 for it, as apparently here in Australia they are as rare and difficult to find as large diamonds on Bondi Beach.
From Dann in Melbourne