
So despite having a number of cameras (all film) – three Leica rangefinders (don’t judge!), a Leica SLR, bought for a specific purpose, which I don’t use any more and will sell, a Rolleicord 6×6 TLR, an old 6×9 folder (also to be moved on), and as of this week an MPP large format 5×4 (possibly more on that in a future post) – I’ve long wanted to shoot panoramic frames, with a hankering for wide landscapes, pictures of tall stuff, and large family groups. In fact, that’s why I bought the 6×9, with the idea of cropping the top and bottom to make a wide negative – which didn’t work out for me, and I didn’t really get on with the camera.
Consequently, I dived down the on-line rabbit hole of internet research, looking for a panoramic solution that suited me. The “best” answer would be the famous Hasselblad Xpan or it’s Fuji badged equivalent, the TX-2 – but have you seen the prices?! (although the chap I bought my 5×4 from at a very good price – who’s apparently 80, and selling his gear off – has/had an Xpan on offer at a “bargain” £2800). Anyway, not for my wallet, and according to internet chatter, potentially dangerous as they feature a lot of unrepairable electronics.
Next up would be the swinging lens cameras, the WideLux – currently expensive used (although as 35mmc readers know, soon to be re-introduced, but at what price?); the Noblex – again only used, and also pricey; or the Russian Horizon – cheap-ish, but plasticy, and very lo-fi. Also, how reliable are those mechanical swinging elements in the longer term?
And so to the budget options; there are a number of cheapo plastic point-and-shoots available that utilise a mask to produce a negative that’s standard width – 36mm – but reduced in height – but not for me; I want a decent lensed manual control camera that gives me a bigger negative. There’s also the Lomography “Sprocket Rocket” that gives a longer frame, and also exposes over the full height of the film, including the sprockets (why?!) in a lo-fi all plastic body, with no controls, and a questionable lens.
After all of these rejects, I came across Chroma Camera, run by a chap called Steve Lloyd, who I’d previously briefly met at a 35mmc/Analogue Wonderland event held in Nottingham a few years ago. He makes a wide variety of 3D-printed cameras in all sorts of formats that have a common look and feel, and appear to be incredibly well designed and clever. One of his models is called the CubePan, and provides a 72 x 24mm image on regular 35mm film – i.e. double the width of a “regular” frame, and actually wider than the Xpan’s 65mm negative. Now here’s a machine that seems to fit all of my requirements – the ideal sized negative, a fully manual control camera (which I’m used to, if you look at at my list of other hardware), and decent glass (more on that shortly) at a price that although higher than I wanted/could afford, is still a much more attractive proposition than the alternatives.
The CubePan comes as a sensible sized body (similar width and thickness to my Leica M2, although a little taller), and a detachable lens cone with focusing helicoid, which has to be matched to the lens of your choice – in other words, you have to know in advance which lens you’re going to use/already have. Because of the greater image circle needed to cover the 72mm width of the pano frame, this can’t be a regular 35mm lens (and in any case requires an integral shutter), so has to be one for a large format camera (5×4 or larger) or a 6×9 roll film camera, which primarily means a Mamiya Press.
Being unsure of what lens I needed to buy, and finding eBay offerings varying enormously in price and condition, I noticed that Steve – at the time – had two lenses for sale on his site. Both were by Schneider Kreuznach in common Compur-Rapid shutters (that I was familiar with); both were “Linhof” branded – which according to internet lore indicated that the quality was the best of a potentially variable bunch; had been checked/tested by Steve; and importantly for me, at good prices. The other great advantage for me was that by buying a lens with the camera, I wouldn’t have to mount it to the lens cone, or calibrate it to the focusing helicoid – both necessary jobs, and allegedly quite simple, but about which I was uncertain. The only down-side with these two lenses was that they were both “press” versions (i.e. probably originally fitted to a Linhof Press Camera), and consequently not fitted for a shutter release cable.
Both lenses were a relatively fast – for their type – f6.3, one a 65mm (32mm equivalent on a “normal” frame or a 45 equivalent 90mm; I chose the latter, on the basis that I mostly shoot 35 or 50 focal lengths, and I felt that the other might be too wide for sole use; maybe I’ll regret this later, but lenses can be interchanged, providing additional lens cones and helicoids are purchased. As it happened, mine came with a small fault – the face plate rotated when the shutter speed was set, making it difficult to do so, but with Steve’s help I unscrewed the front element, and found a loose grub screw that solved the problem (although in doing so I snapped off the “B” time locking knob – of no consequence to me).
The CubePan body is beautifully finished, with a choice of colours for the top plate and grip. It has a smooth but slightly textured finish, and has no sign of printing artefacts or layers. As a body it’s actually very attractive, although arguably less so once the lens cone is added (a shorter focal length lens would entail a smaller cone, making the whole package better balanced visually). In fact the body looks more like it has been precision moulded, rather than printed – perhaps it has been, although that’s not my understanding.
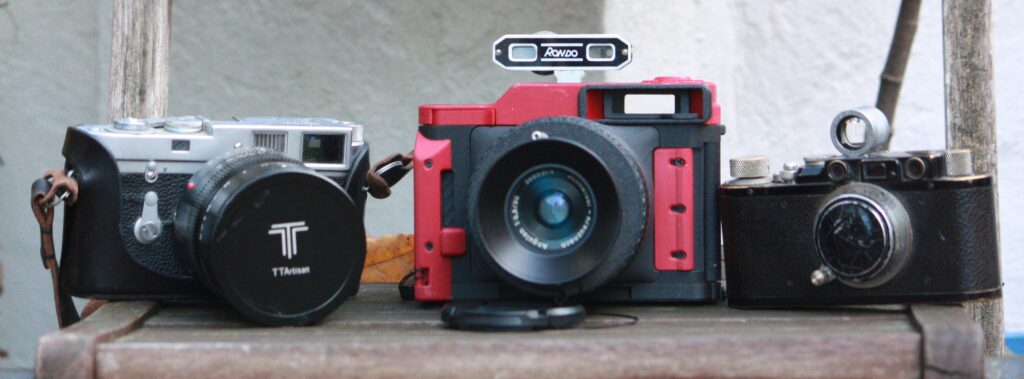
The height of the CubePan body compared with the Leicas is explained by the darkslide needing somewhere to drop into, and the quite large size of the lens cone, needed to accommodate the big image circle.
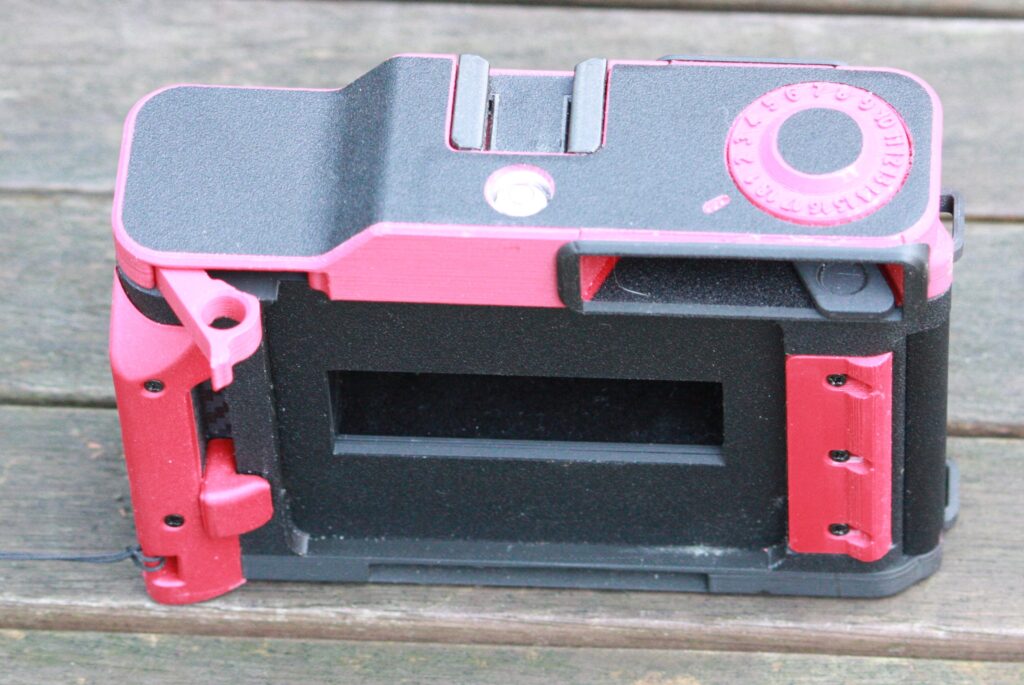
The rotating indicator is to the left of the film advance lever, and has to disappear and reappear twice for a full pano wind on. The toothed wheel that drives it, and engages with the film sprockets can be seen below.
As regards to weight, because of it’s size, the CubePan feels to be very light, weighing in at only 687 grams (24 ounces for those who don’t speak metric) with wrist strap, added UV filter, lens hood (I bought a “wide-angle” one, being unsure of the field of view) and lens cap – but not the rangefinder. This is only a little more than the tiny pocketable Leica ii, and significantly less than half the weight of the M2 with the large and heavy TTArtisan 50mm f0.95 pictured – admittedly, not my everyday choice of lens(!).
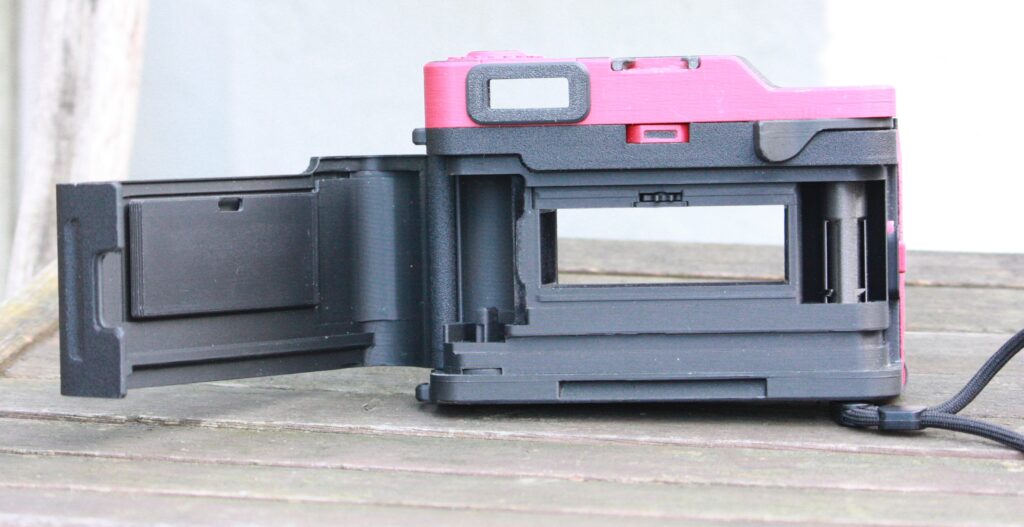
The CubePan features some quirky/very clever features. Looking at the front, the grip on the left incorporates a slider for an integral dark slide, which enables the lens cone to be removed and replaced mid-roll, with a slide catch for the cone on the right. I found this feature really useful, as when travelling, I put my (loaded) camera bodies in a small bag with my films, for airport hand search, and can carry the cone separately, along with the lenses for my other camera(s). Above the grip is a swing-out holder for the end of a cable release, putting it roughly in the position of a regular shutter button – of no use to me sadly – I have to operate the shutter release on the lens with the tip of of my middle finger, whilst holding the grip with the rest of my hand; sounds bizarre and uncomfortable, but actually it’s very natural and easy. On the upper right hand side is the glass-less “framefinder” – a replaceable insert (essentially an appropriately sized hole) providing a view of the scene matching the focal length of the lens – which works well enough for me. On the right hand side is a well-sprung catch for the film door, and both sides feature a loop for attachment of a wrist strap (provided), but peculiarly, one’s at the top and one at the bottom, precluding use of a neck strap – unfortunately.
The CubePan top plate has a cold shoe and I’ve just bought a rangefinder to sit in it (obviously uncoupled – focus distance still needs to be set separately on the focusing ring), and a circular bubble spirit level. On the left hand side is a frame counter numbered 1 to 18 which you must remember to manually advance after every exposure, there being no linkage to the frame advance. The base has a sprung button on the right to disengage the take-up spool for rewinding and a rewind crank on the left which pulls out to release the cassette, otherwise cleverly held in position by a magnet. There’s a standard tripod screw bush in the middle, along with a slot for an Arca tripod mount – something I’ve personally never encountered.
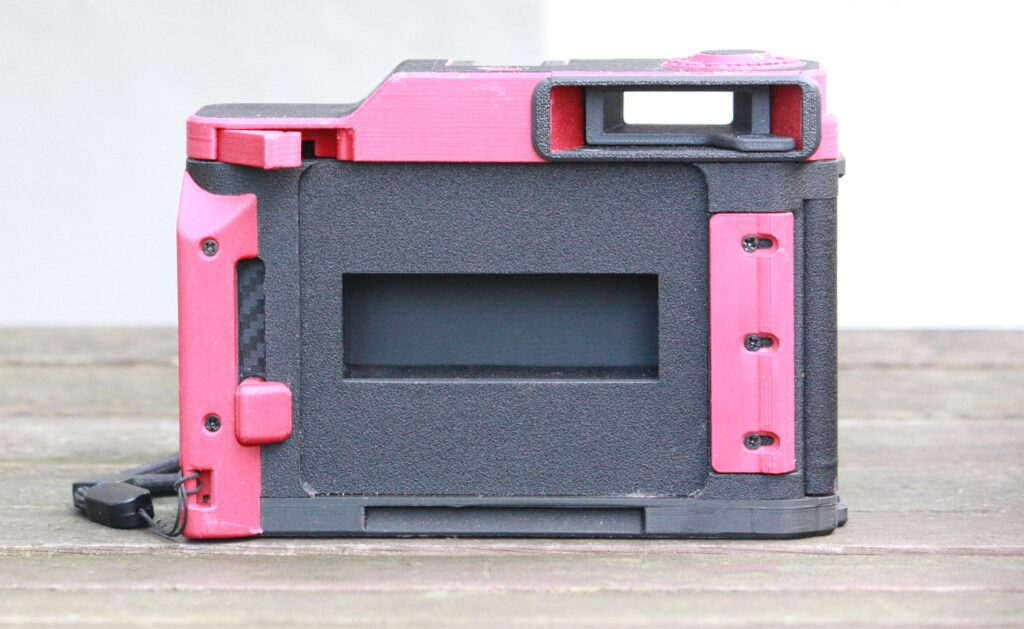
The rear features a moulded slot on the left of the door to hold a film box top; the web-site image (which must feature an earlier iteration of the camera – it seems all models are being continually revised and refined) shows a window in the rear door to view the cassette – a feature that I very much prefer, although to be fair, none of my other cameras have it! On the top right is a film advance ratchet lever which has a very short throw, taking about half-a-dozen operations to move on the full 72mm frame. Also present is an exceedingly clever and well thought out feature; the film advance is not connected to anything (these type of lenses are cocked with a separate lever on the shutter, not related to the film advance, so beware of inadvertent double exposure), but there is a toothed wheel internally which engages with the film sprockets, and rotates as the film is pulled through by the advance lever. This is connected to a visible wheel on the outside that has a flat side, coloured black; two revolutions corresponds to a full frame advance. Additionally clever – because my camera came with an internal mask for regular 36mm frames – one revolution of the wheel is the appropriate advance for a “normal” frame, and the top-plate film counter has click-stops between the numbers, enabling a 36 frame count. I was keen on the mask – which may have already been discontinued in the two months I’ve had mine – as I felt that I could travel with just the one camera. However, I’d have to rewind and reload the film to change the mask, and would be shooting regular size frames on a 90mm lens – and lets face it, I’ve other 35mm cameras and lenses.
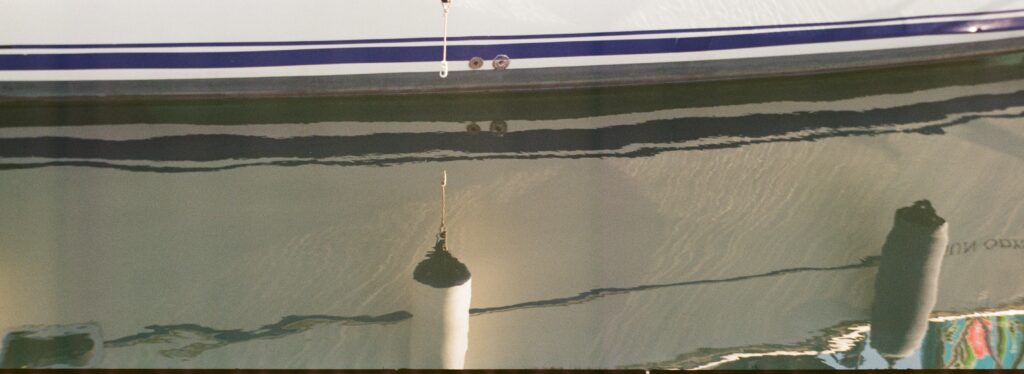
You can tell from what comes before that I’m pretty pleased with this CubePan purchase; it ticks the boxes for me. However, there’s one aspect that’s slightly less than perfect – and which you can see in most of the sample shots I’ve posted here, because not I’ve cropped them yet. The film path through the camera isn’t quite right right, even though it’s only out by about a millimetre – the frames don’t run straight down the middle, but are higher on the film so that the top of the frame almost touches the sprocket holes; the consequence is that when scanned (I have it done at a lab, including the B&W that I develop myself, as I don’t have the equipment), there’s a black line across the bottom of the scan, and the top of the scan is missing a tiny amount.
The other slight downside if you buy a CubePan is that the focusing helicoid needs to be calibrated once you’ve managed to mount the lens – although not for me, because Steve did it for me. The helicoid has a piece of white tape around it, sitting in a groove, and one end of the pleasingly short throw is marked as infinity. By default, Steve also provides indicators for 3, 6, and 10 feet, which I guess correspond to the one head/two heads/family group/mountain symbols commonly found on simple cameras. Unfortunately, he forgot that I also asked for 15 feet in addition, so I had to do it myself; fortunately, in common with all of his other cameras, a little ground glass screen is provided, but I found this tricky to use in practice (although your mileage may differ). A tripod and tape measure are needed, together with a moveable subject, but I found that accuracy was difficult to achieve, so I wasn’t able to reliably do it until after these sample shots were taken, when I utilised the magnifying loupe and head-covering focusing cloth that I’d just purchased to accompany my new large format camera.
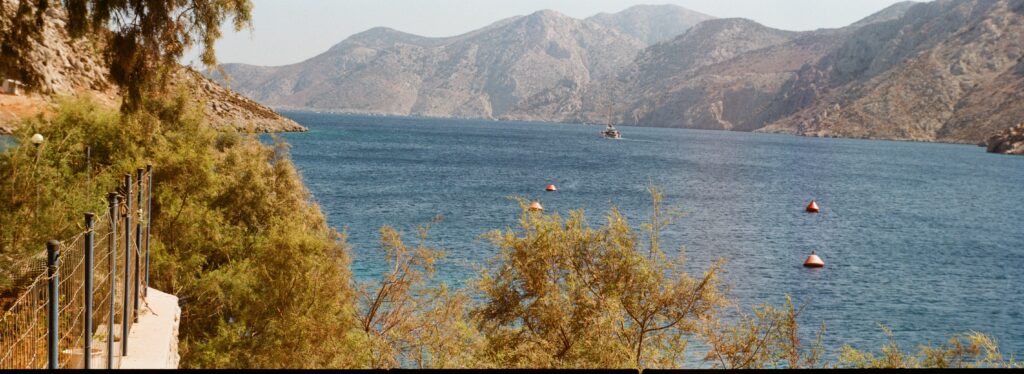
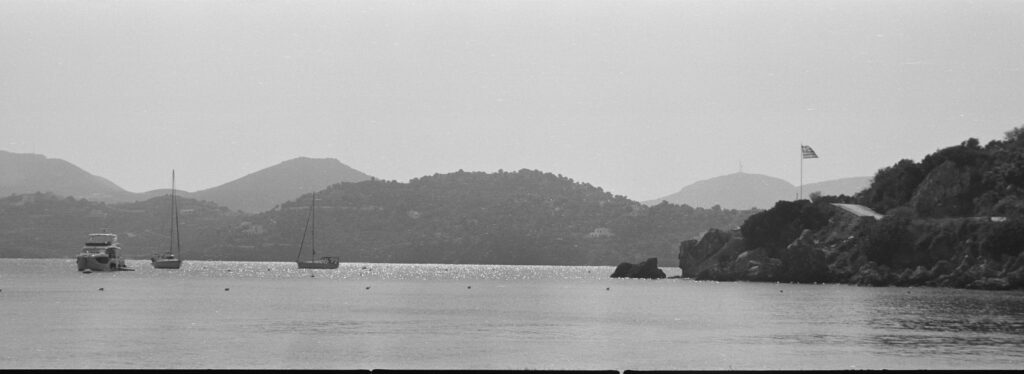
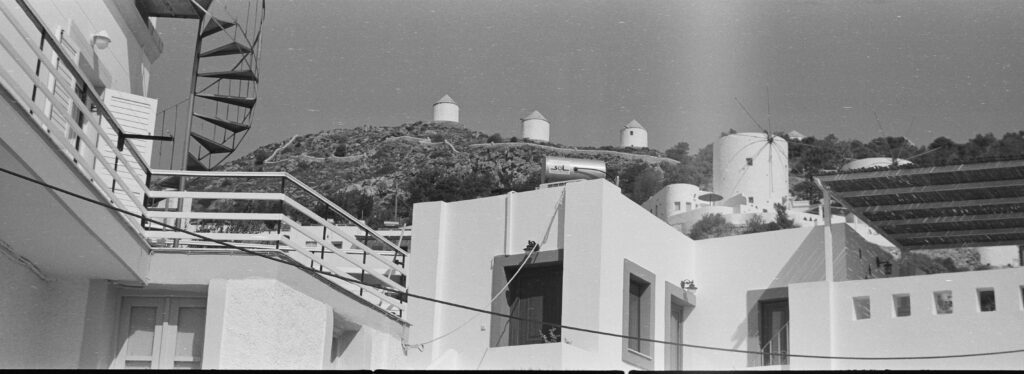
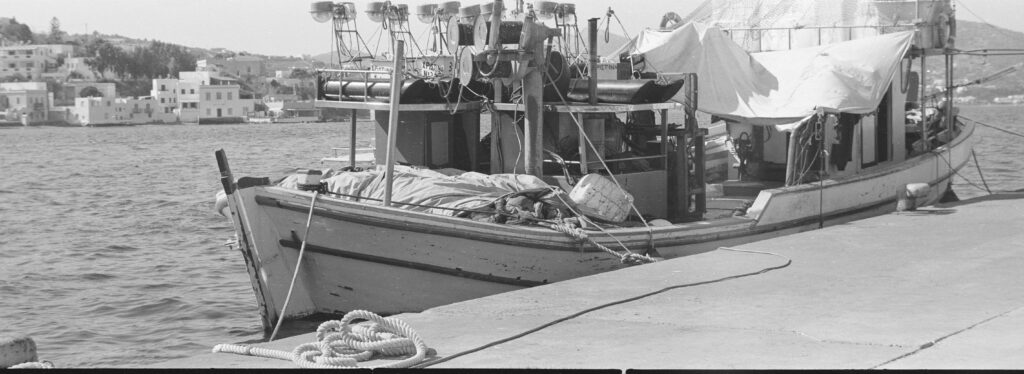
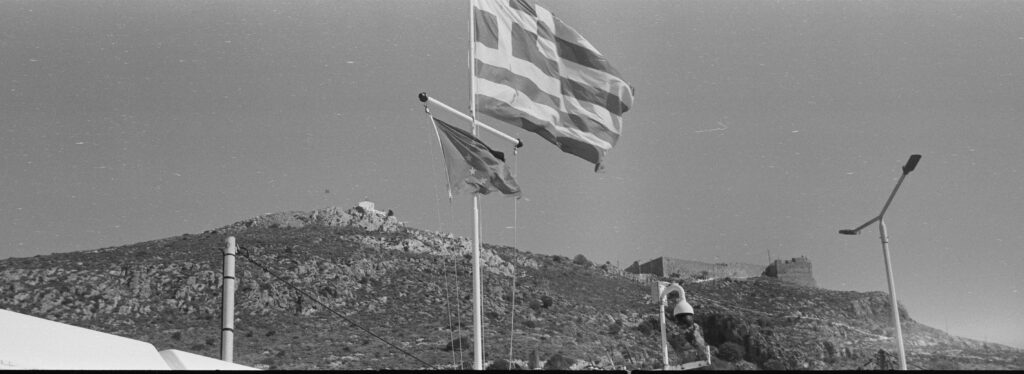
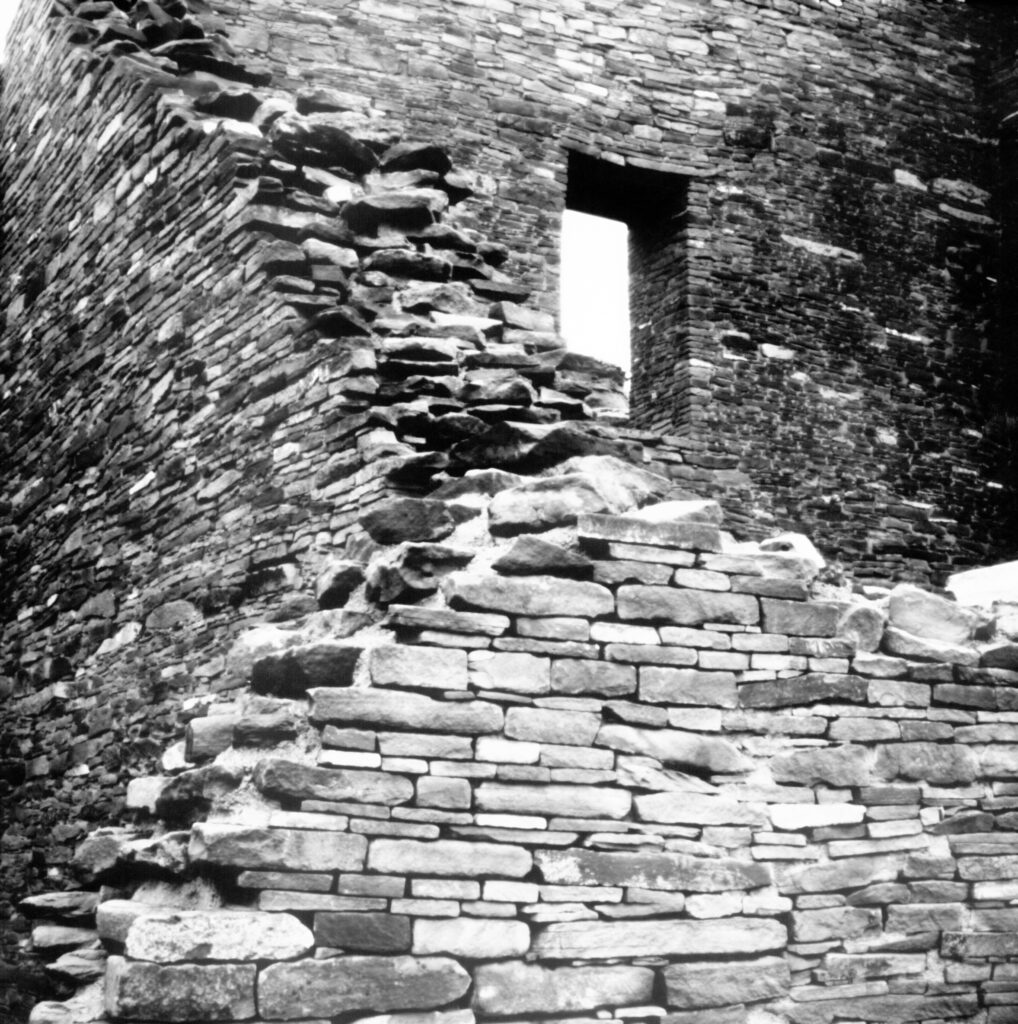
And so to the CubePan results. Thus far I’ve shot two rolls of colour – Kodak 200, the cheap stuff, not the Gold, which I prefer – and one of B&W, HP5 (heresy coming), an emulsion of which I’m not fond, but which I’d received as a gift, and was now out of date, albeit refrigerated; Kodak Double-X is my normal shoot. The majority of these were taken on a recent trip to Greece where we have a small boat (it’s nowhere near as posh as it sounds, trust me) – and where the HP5 didn’t exactly shine in the bright sunshine – and there’s one locally – the Humber Bridge (near the city of Hull in the north-east of England, and once the longest suspension bridge in the world). All of these were of course zone focused, and, because it was generally bright, with the lens well stopped down; depth of field with a lens like this tends to be fairly shallow, and with shots taken wide open at sunset I’ve missed focus (the cat for example), hence the more recent addition of a rangefinder and the intermediate 15 feet marking. Metering was with a Weston Euromaster hand-held meter or Sunny-16, and all of these are the SOOC scans with zero post processing, not even cropping off the black line at the bottom; I’m too lazy/uninterested/incapable of learning & remembering how to use complex software – although I will often crop and straighten horizons. Note that these are essentially snapshots (please don’t judge too harshly!) – repeats of many I’ve shot before on other formats, and largely taken with a view to testing and familiarising myself with the camera. Some were worse than the selection here, my frame spacing wasn’t always spot on, and I obviously didn’t always remember to wind on after shooting resulting in double exposures – standard rookie errors!


Share this post:


Comments
Simon Foale on Chroma Camera CubePan – A Review, and my Journey into Panoramic Photography
Comment posted: 15/12/2025
Comment posted: 15/12/2025
Chris on Chroma Camera CubePan – A Review, and my Journey into Panoramic Photography
Comment posted: 16/12/2025
I use the "Texpan" for these kind of shots... (Fuji GSW690/GW690 which I imported quite cheaply directly from Japan).
Being a Fuji Camera, the lens and rangefinder quality is simply astonishing...
Will come up with a post about my results soon...
Comment posted: 16/12/2025
Paul Taylor on Chroma Camera CubePan – A Review, and my Journey into Panoramic Photography
Comment posted: 17/12/2025
Comment posted: 17/12/2025
Jeffery Luhn on Chroma Camera CubePan – A Review, and my Journey into Panoramic Photography
Comment posted: 16/02/2026
Congratulations on getting it to work well! Panos are perfect for some subjects. I bought a 4x5 printed camera from TravelWell. I use a 65 super angulon. That camera has bubble levels. When the camera is level, all is well. I did a posting on it last year. Keep shooting!