Our daughter moved to Scottsdale Arizona, and my partner Amy and I helped her move her belongings with a large U-haul trailer from the Twin Cities. All this happened in middle of June, with COVID-19 cases still being reported across the country. We planned for a three day (two nights) drive to Scottsdale (about 1600 miles), and spent most of those days on the road and the rest in hotels sleeping.
On the way back, after we dropped off our daughter and the U-haul trailer, we decided to spend a little bit more time on the road, and explore Northern AZ, Utah and Colorado and some beautiful landscapes along the way. We had a chance to visit Northern Arizona (Sedona, Horse Shoe Bend (and Navajo Reservation, Antelope Canyon was unfortunately closed due to COVID-19)), Zion National Park and Bryce National Park, and many pretty sites along the highway. I thought it would be fun to briefly discuss the gear I brought and share some of the images.
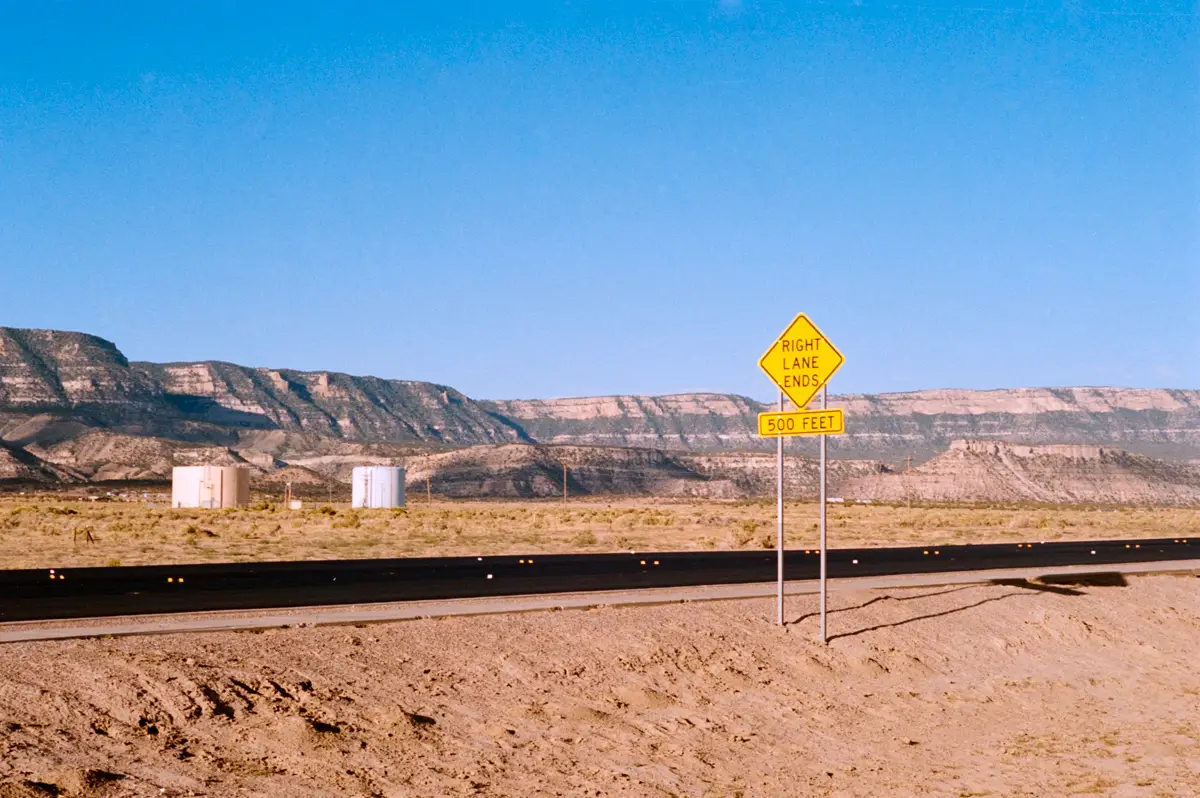
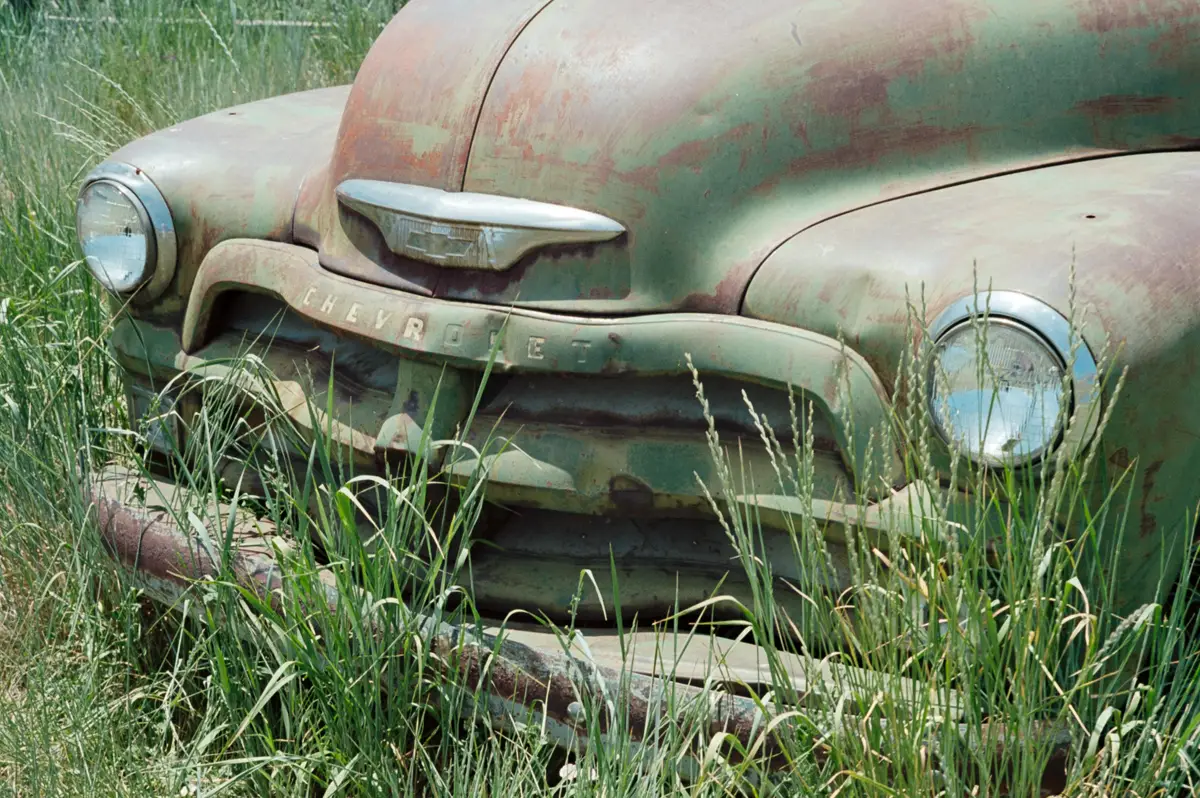
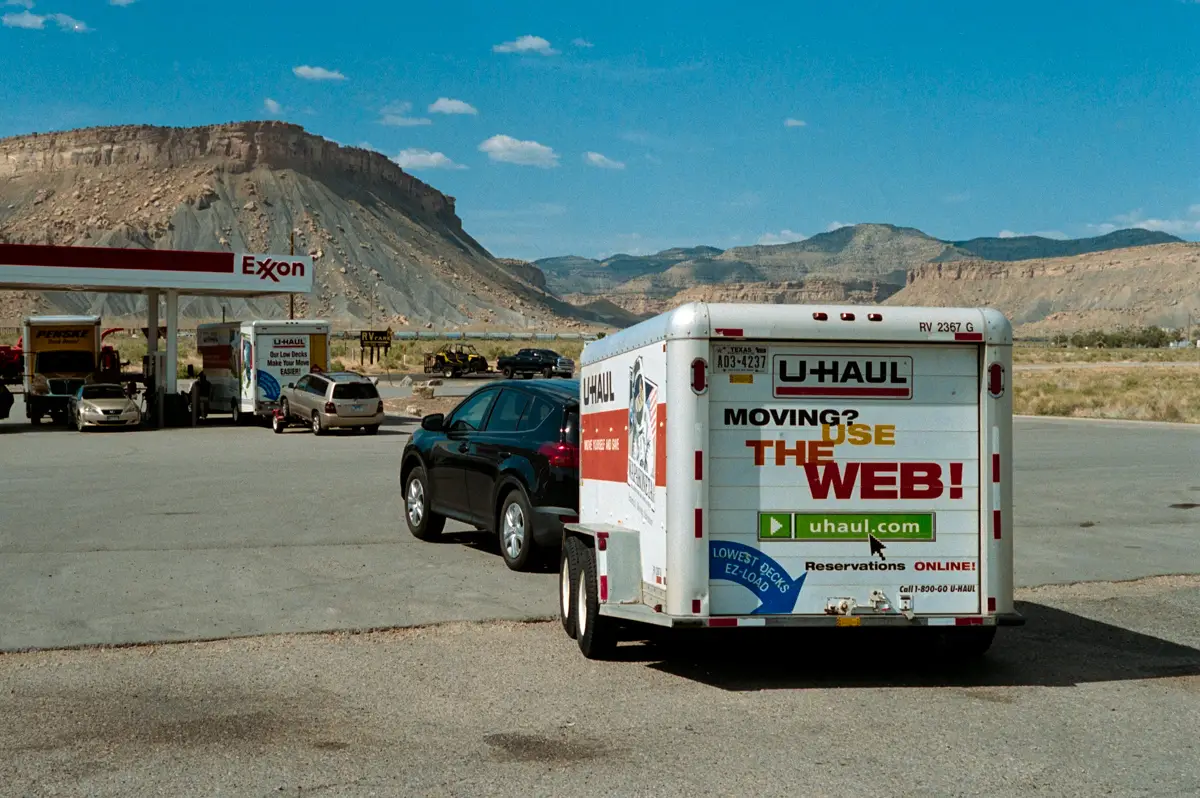 Our car and trailer after almost running out of gas, somewhere in Colorado, Portra 400 Leica M3 Summicron 50mm v3
The gear and the film stocks
As much as I have been into minimalism (see my recent post on this), I decided to bring 3 film cameras on the trip. In order to be truly minimalist, I maybe should have just brought one, but I wanted to be able to photograph both 135 and 120 formats and also be able to quickly change between the color and B&W. I also wanted to have some redundancy in case there would be a malfunction. So having said that, I think the gear was fairly minimal with regards to lenses (50mm on Leica, 28mm on Nikon FE, and 50/80mm on Hasselblad 500cm), but still not minimalist!
A quick change of film stocks is easy on the Hasselblad by simply switching the film backs (no need to finish roll). For 35mm cameras, this is obviously a different story. Thus, I thought two 35mm cameras loaded with different films were the way to go.
My double-stroke 1955 Leica M3 was loaded with 35mm color film (Portra 400 and Ektar 100) and a 50mm Summicron f2 v.3 and became my dedicated color 35mm camera on the road trip. I have not spoken much about this lens, but it is light, super compact, and probably one of the most underrated Leica 50mm Summicron lenses, and I simply love it. It’s glued to the M3 and my only other lens, a 90mm Tele-Elmarit, gets hardly used. (I have a larger portrait project in mind and hope that this will change!).
My Nikon FE (see my review of that camera here) were loaded with 35mm B&W film (Ultrafine Xtreme 400 and Delta 400, both pushed to 1600, both bulk loaded); my lens was my trusted 28mm Nikkor 2.8 (a great lens, also allows for quasi macro shots); this was my dedicated 35mm B&W camera setup for the trip.
With this setup, I had an opportunity to quickly between the two focal lengths and between color and B&W, color at 50mm focal length, B&W at 28mm, in 135 format.
The 120 format Hasselblad 500cm backs were loaded with Portra 400 (A16), Ilford FP4 and HP5. Lenses I used were the 80mm 2.8 and 50mm f4,
After having photographed almost exclusively black and white for the last 9 months or so, I thought this trip would be great opportunity to get back into color photography. While I usually self-develop my film, I decided to use a local lab (West Photo, Minneapolis) for my color development.
The images
Portra 400 35mm (C41 at West Photo, Leica 1955 double-stroke M3, Summicron 50mm v3)
I mostly used sunny 16 for my exposures, and tend to overexpose by 1 stop. The negatives were scanned with Nikon Z6 and a 105mm 2.8 Nikkor Macro lens, and converted via Negative lab pro in Lightroom Classic. I did have to do a lot of clean up in the skies, but otherwise, was happy with the negatives. West Photo is reasonable ($5 / roll film processed), and since I typically haven’t been shooting much color, lab development made sense. I used the Linear Deep tone setting most often for all color images, and the Kodak color profile. I did not change hardly anything else in most images except a slight contrast increase.
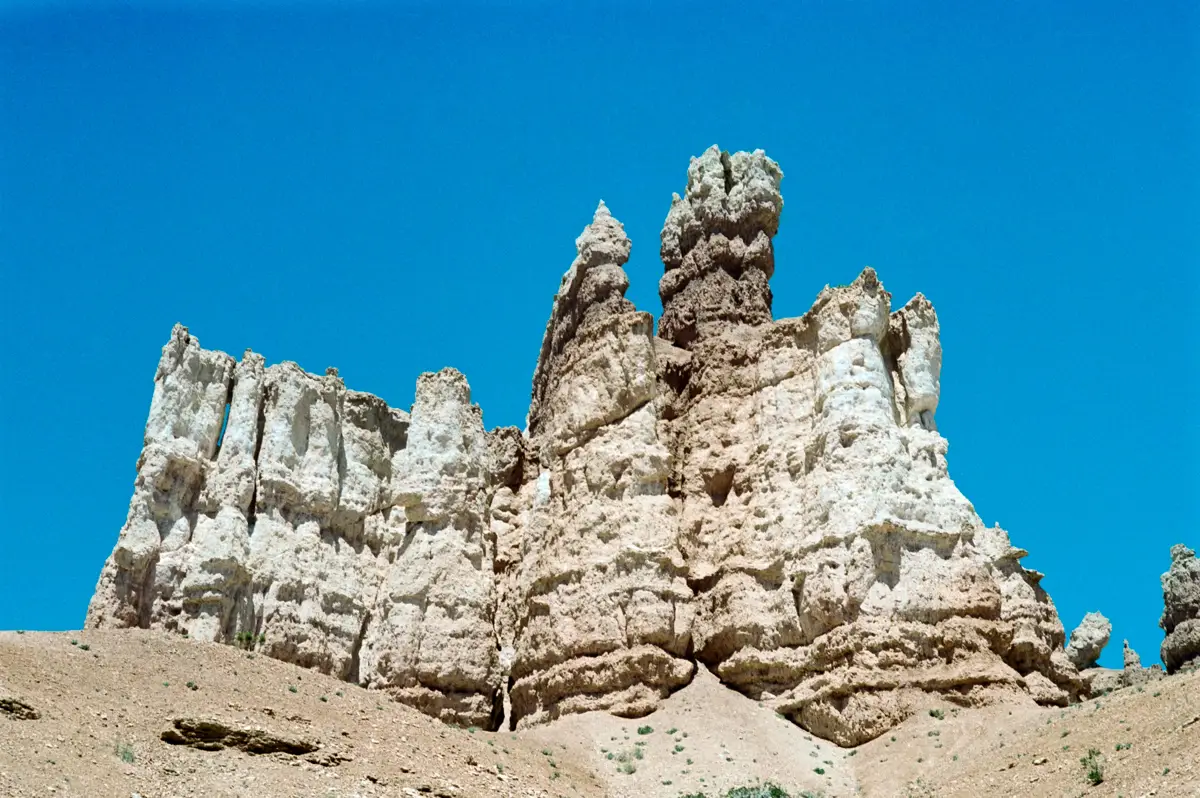
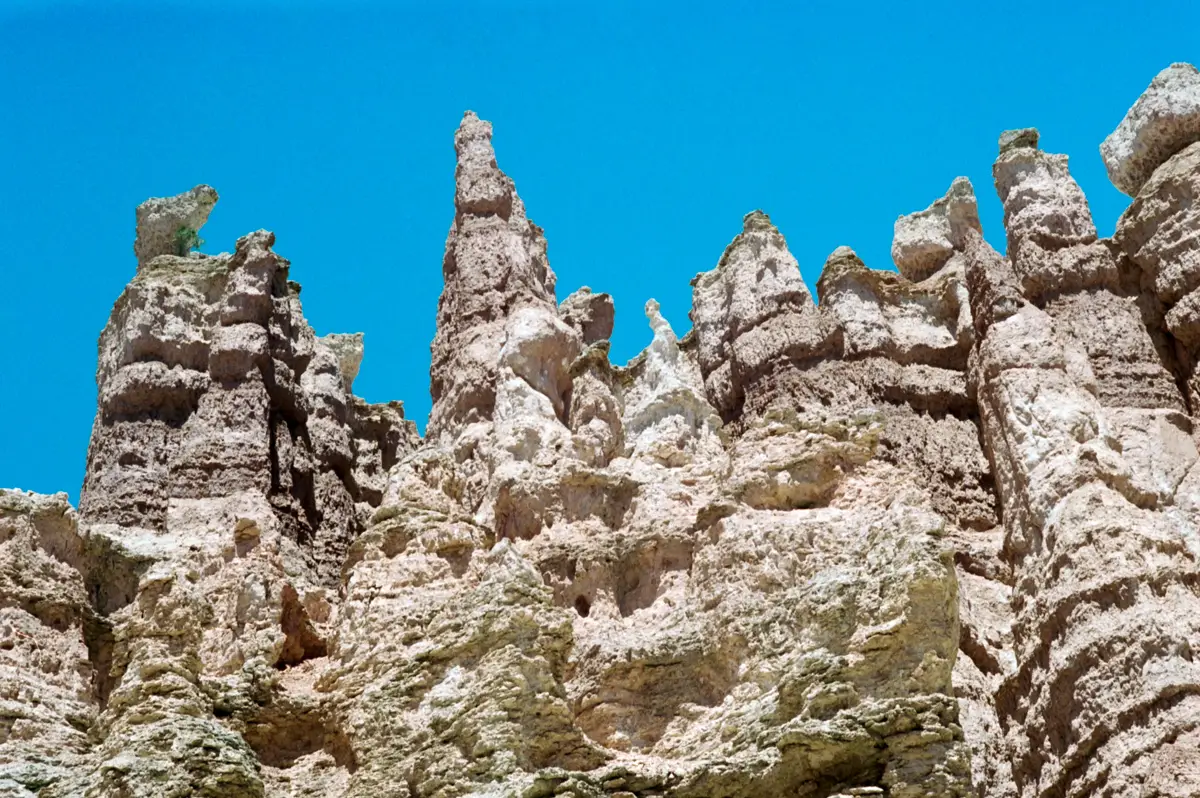
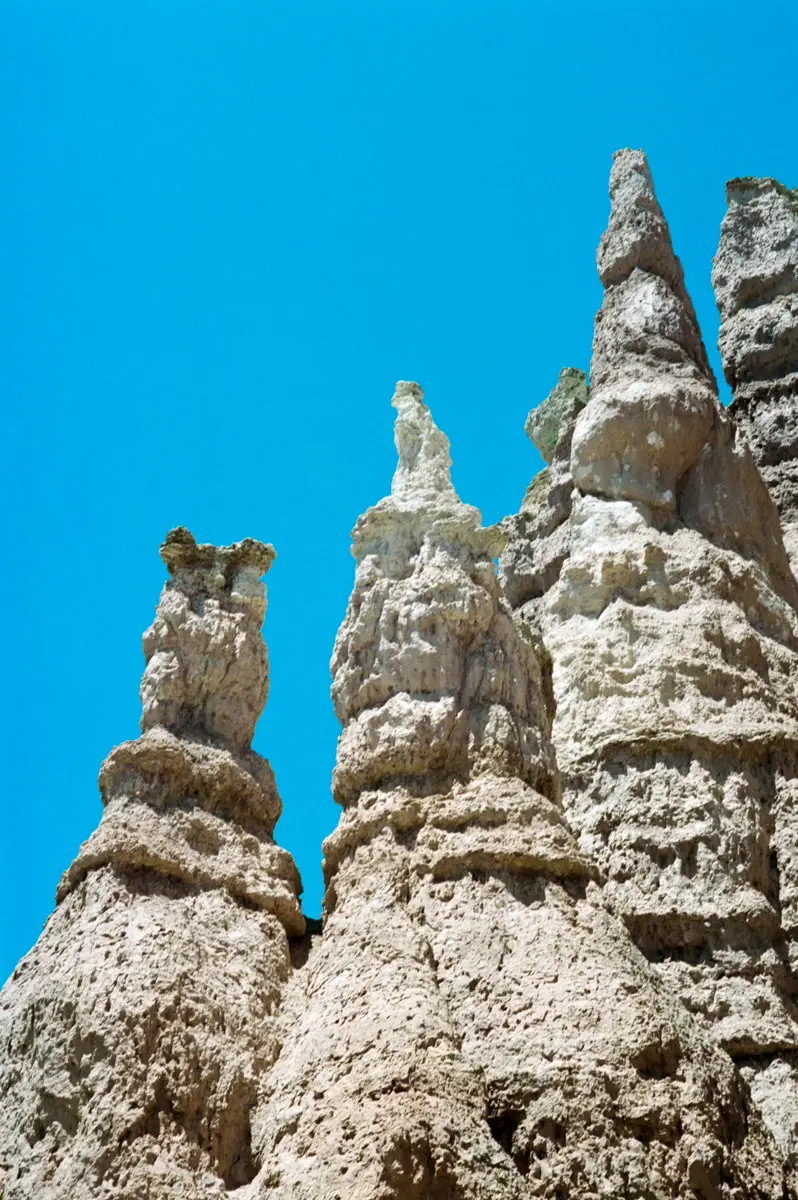
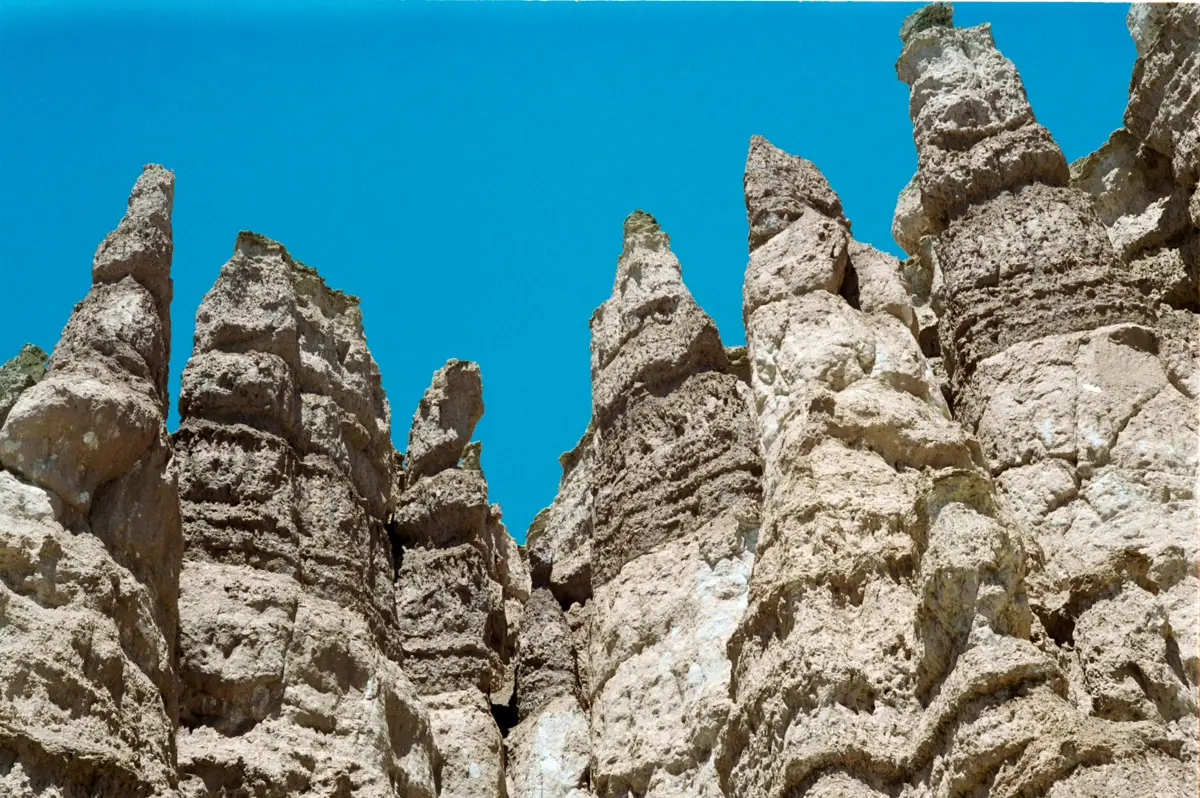
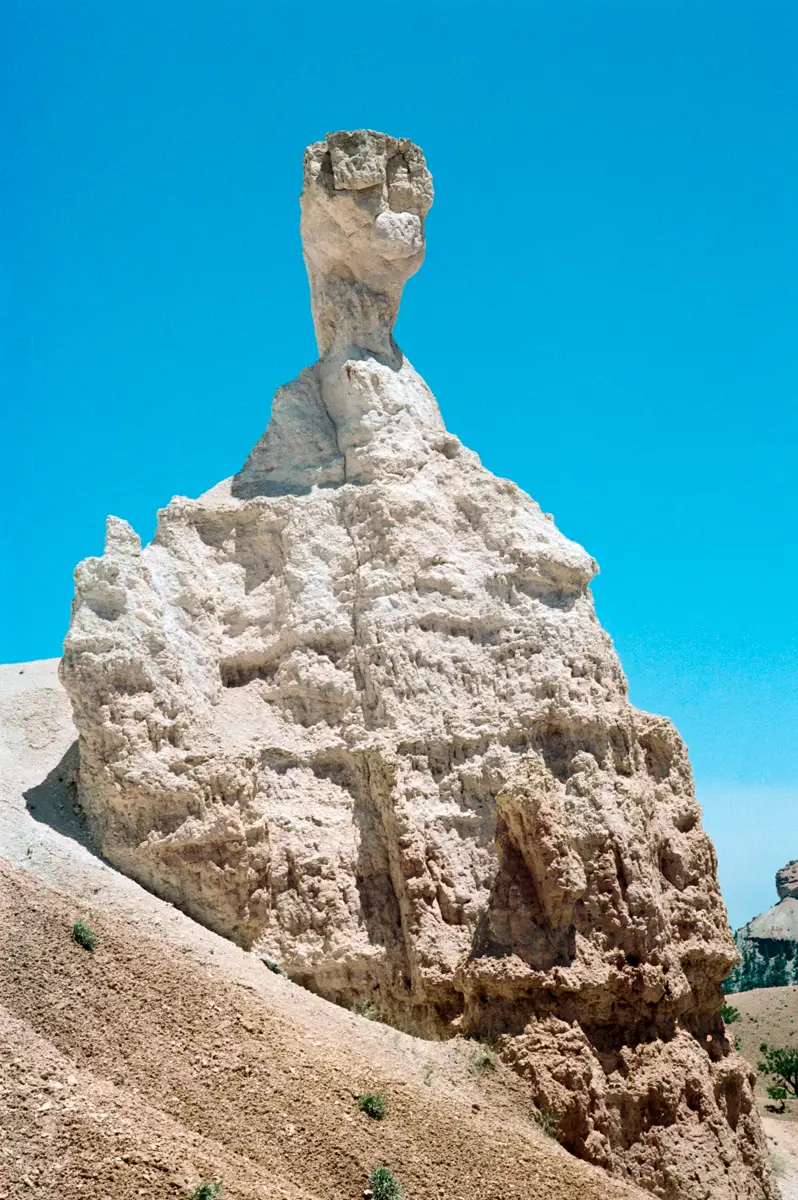
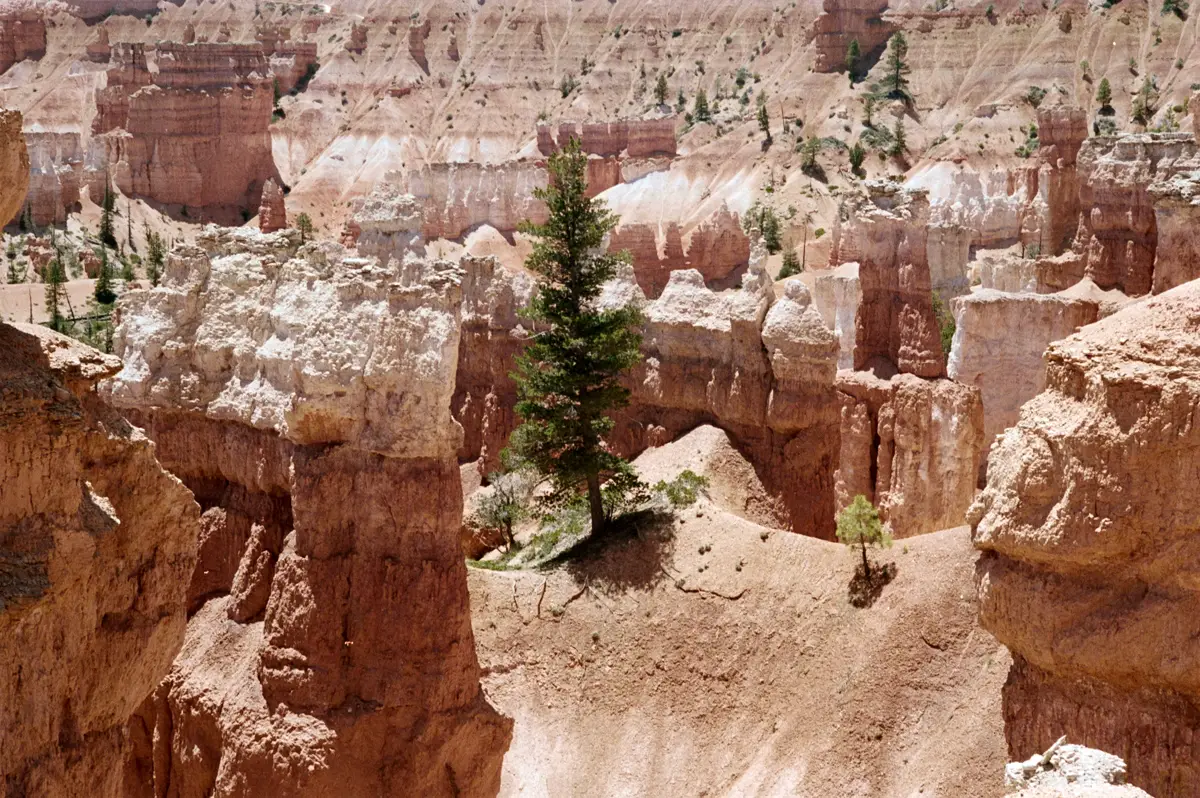
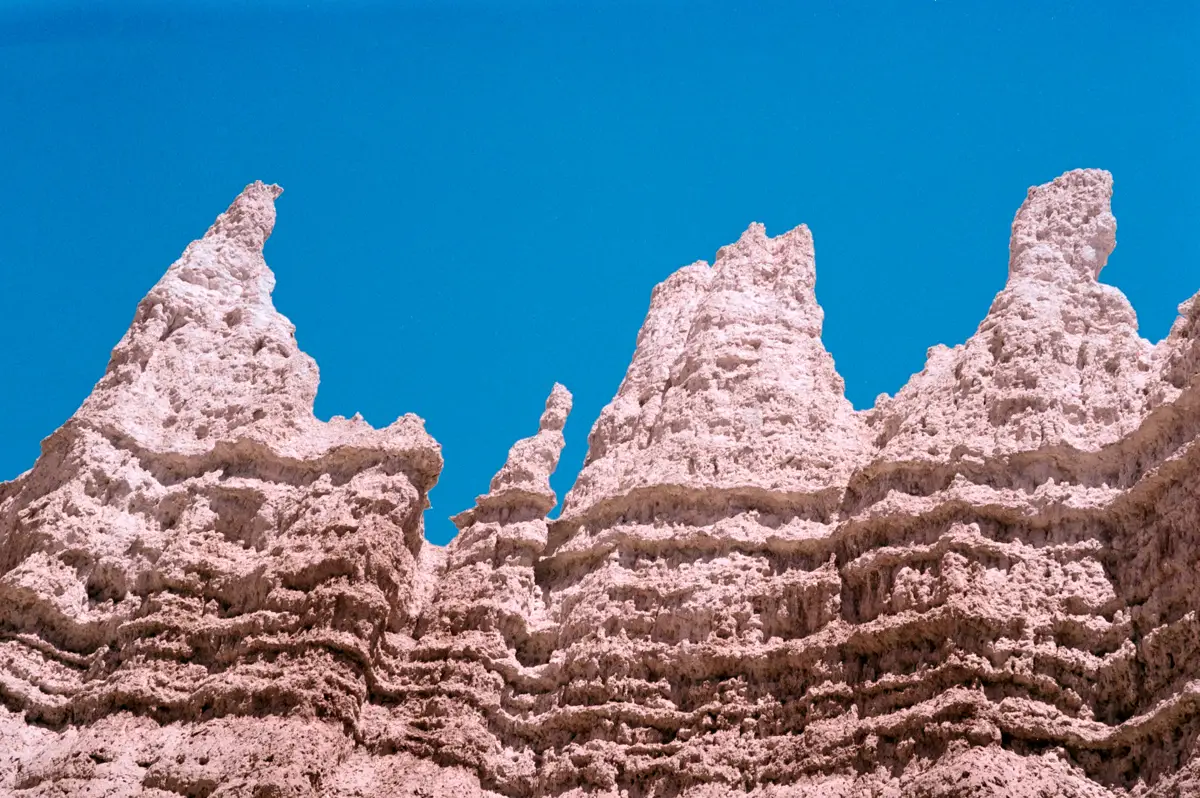
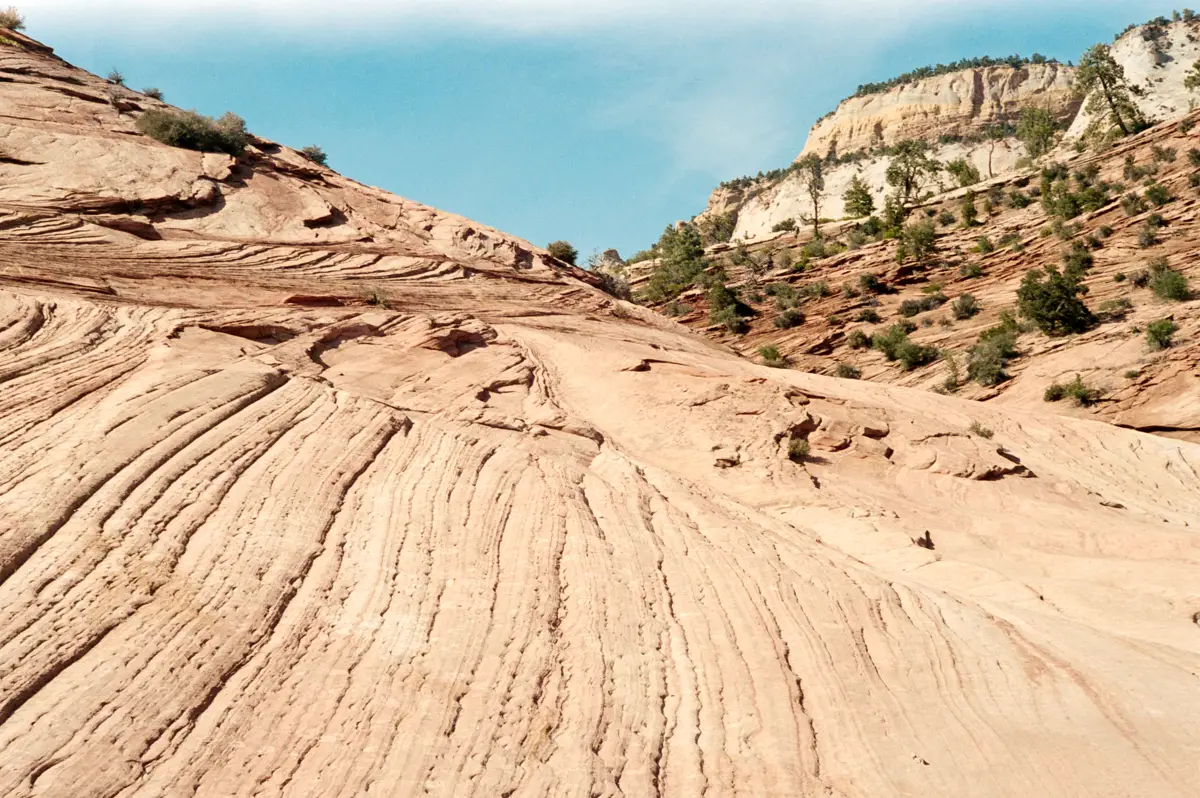
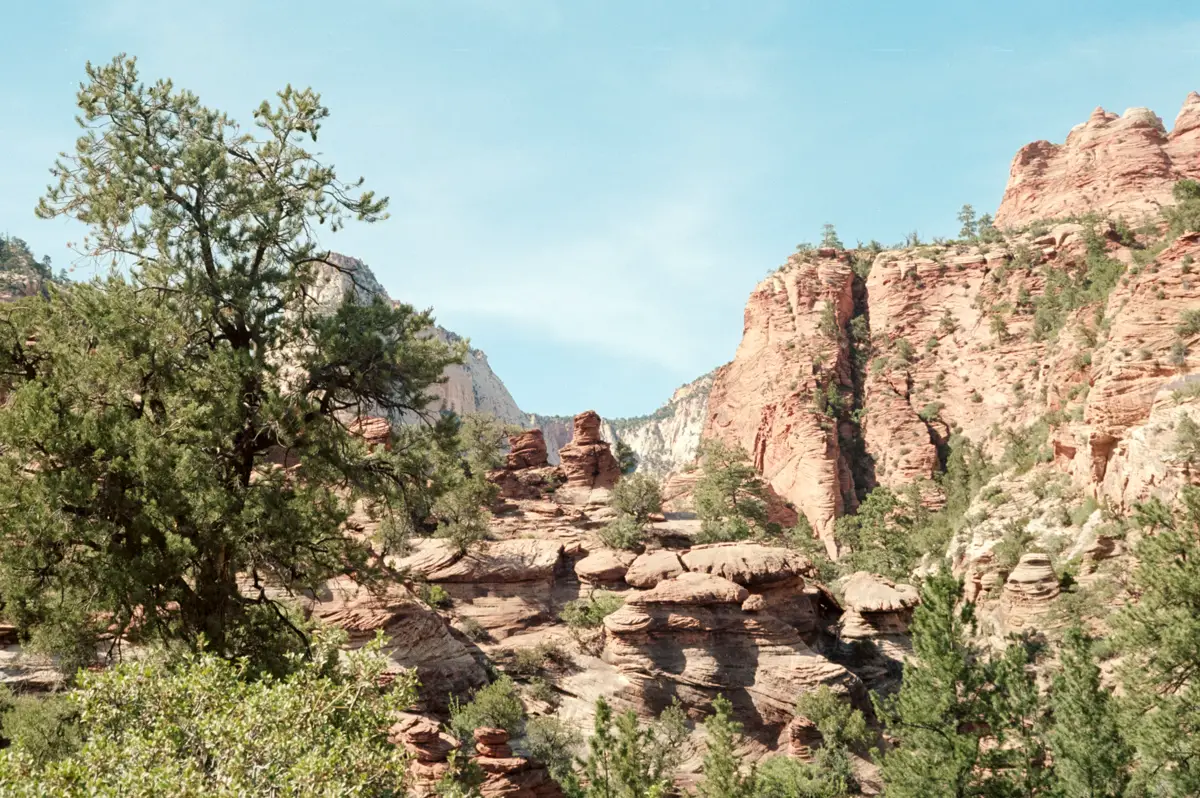
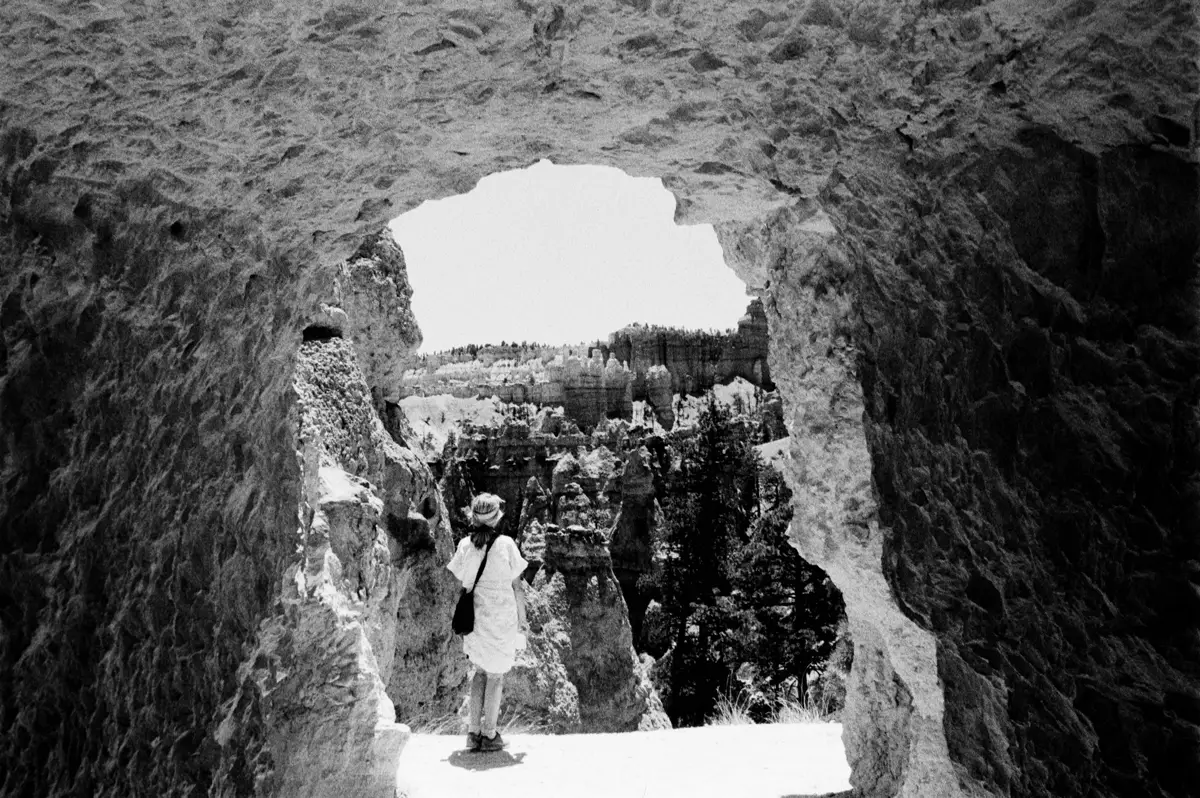
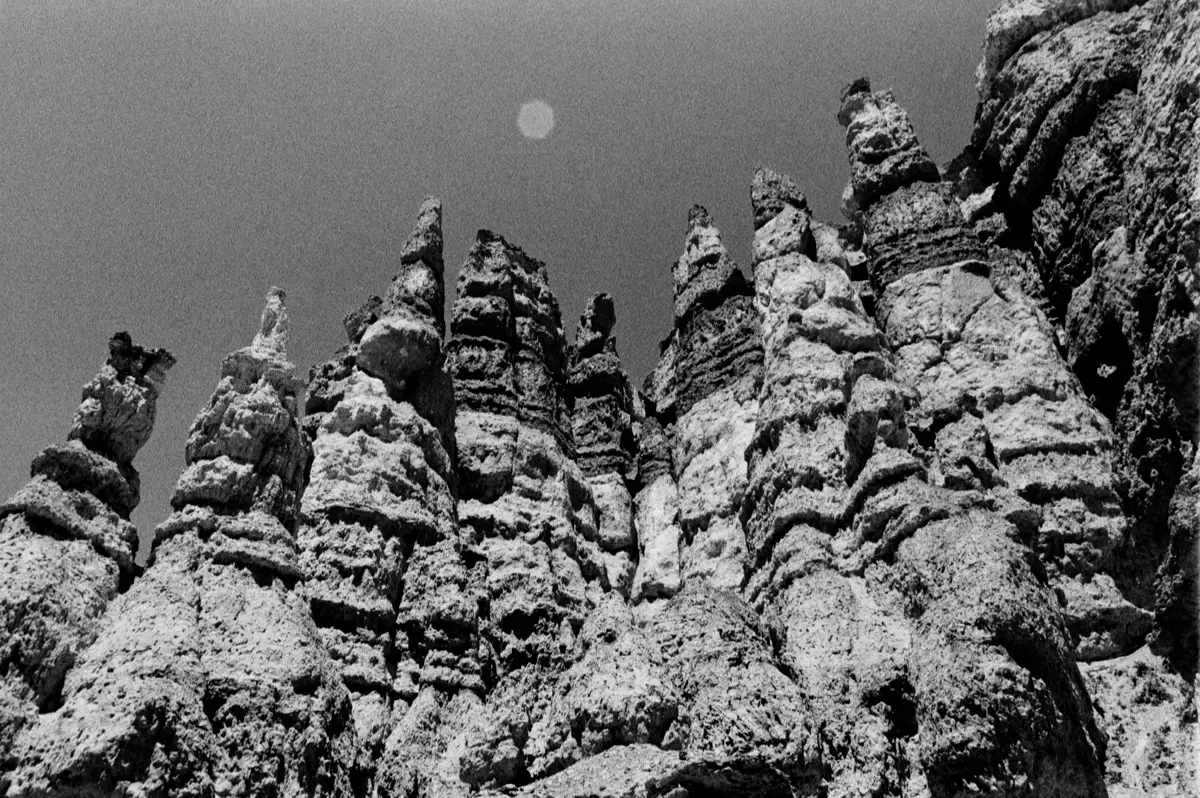
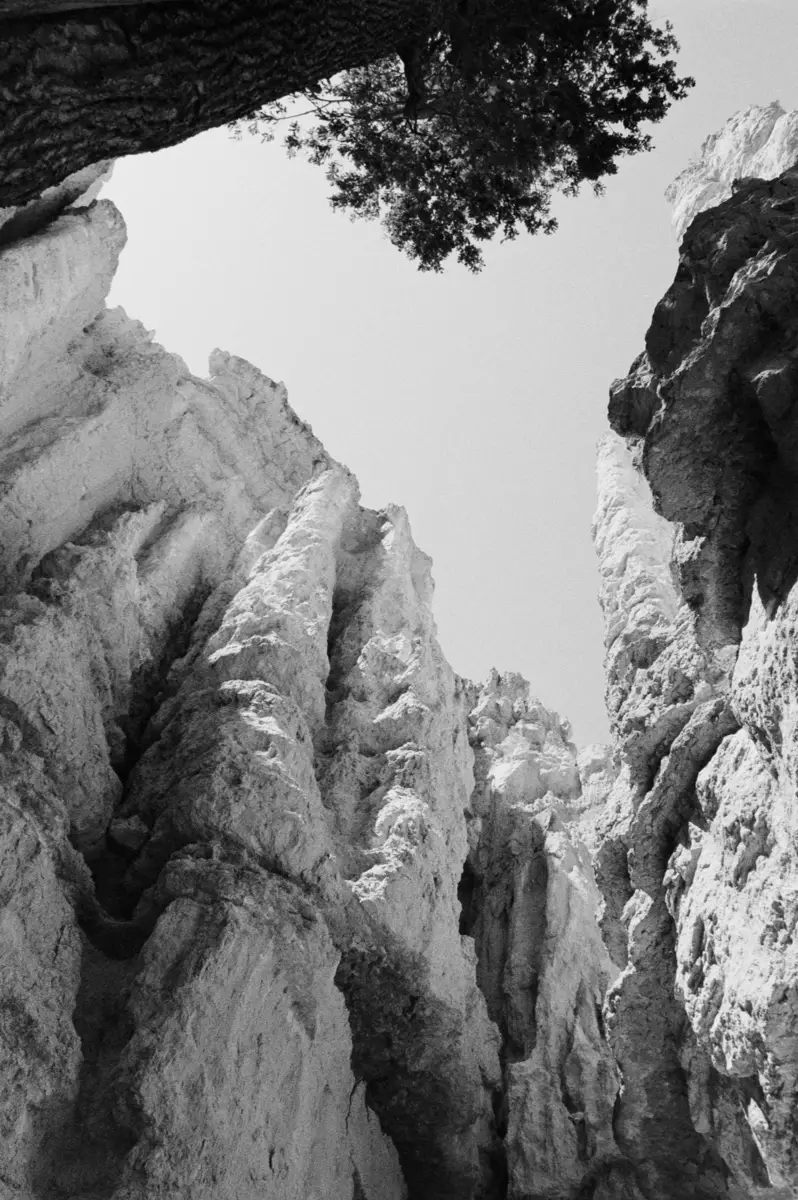
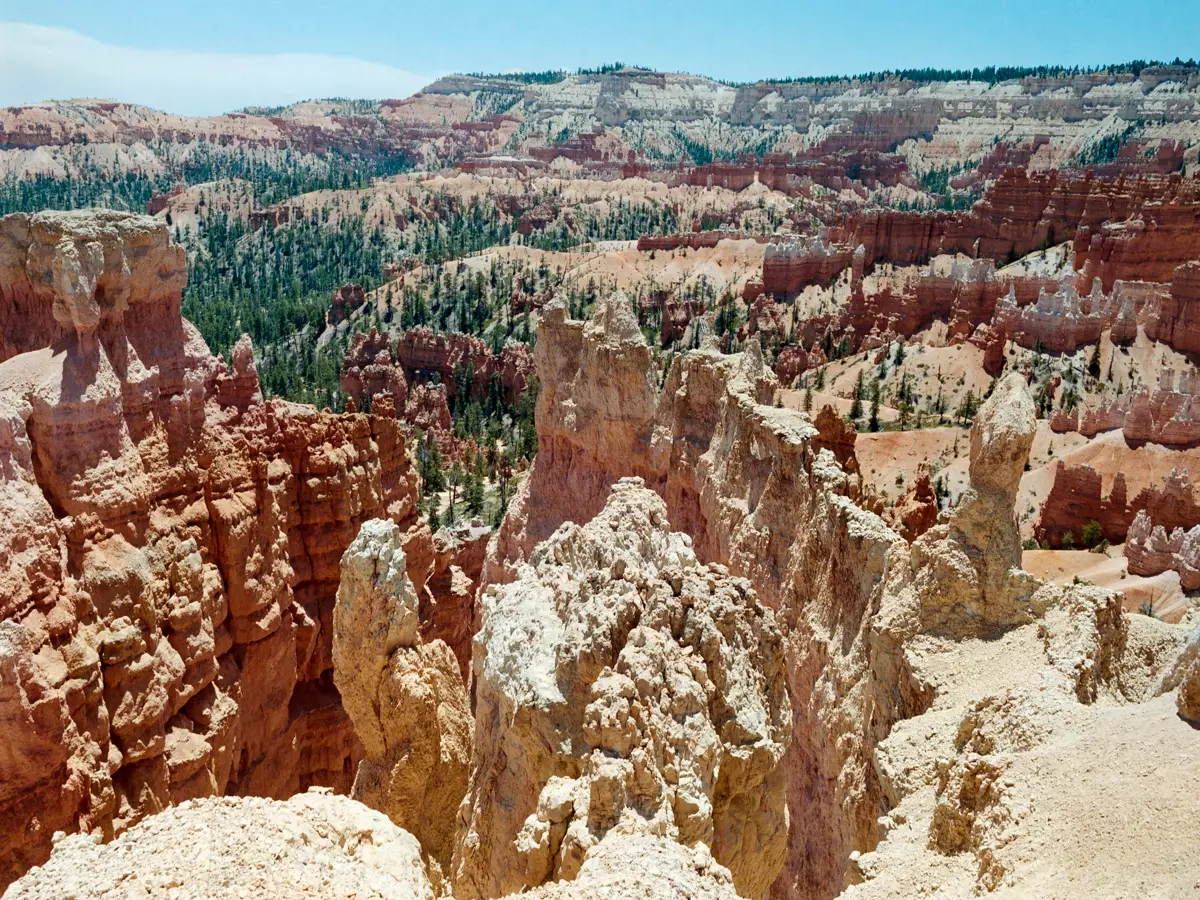
Bryce Canyon National Park, UT

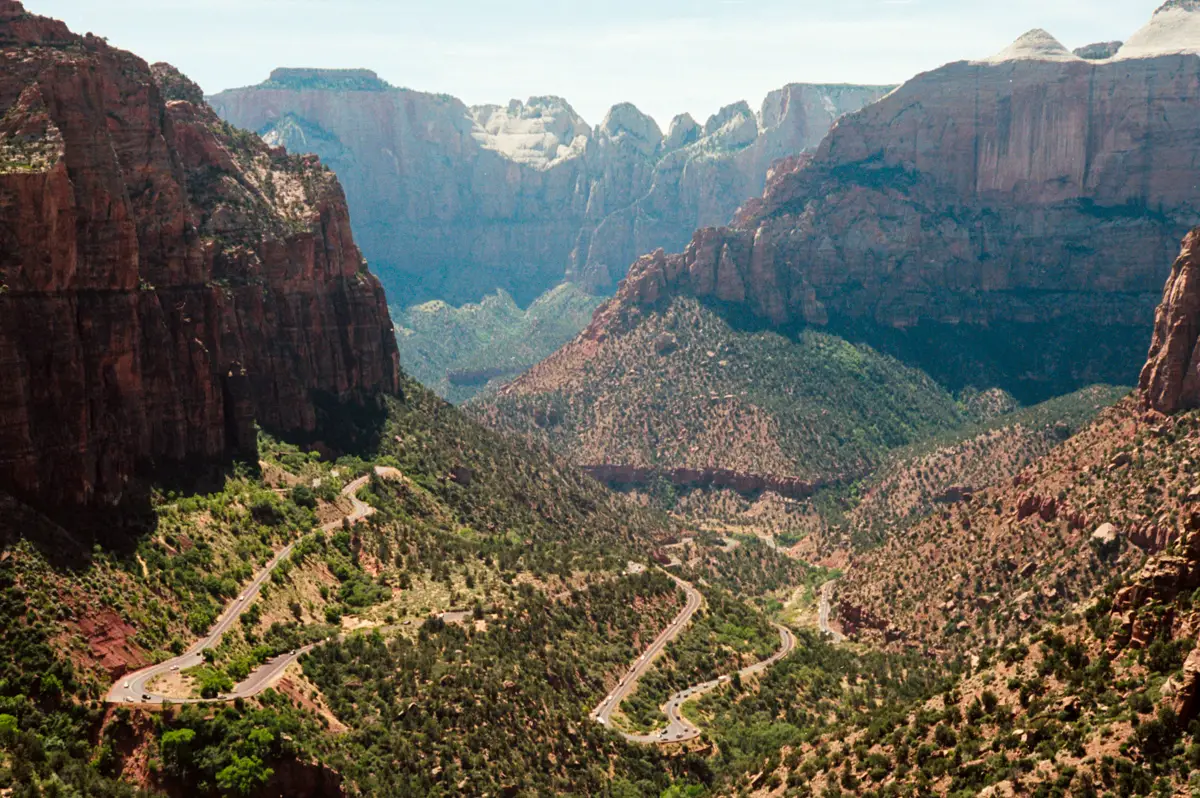
Zion National Park Area, UT

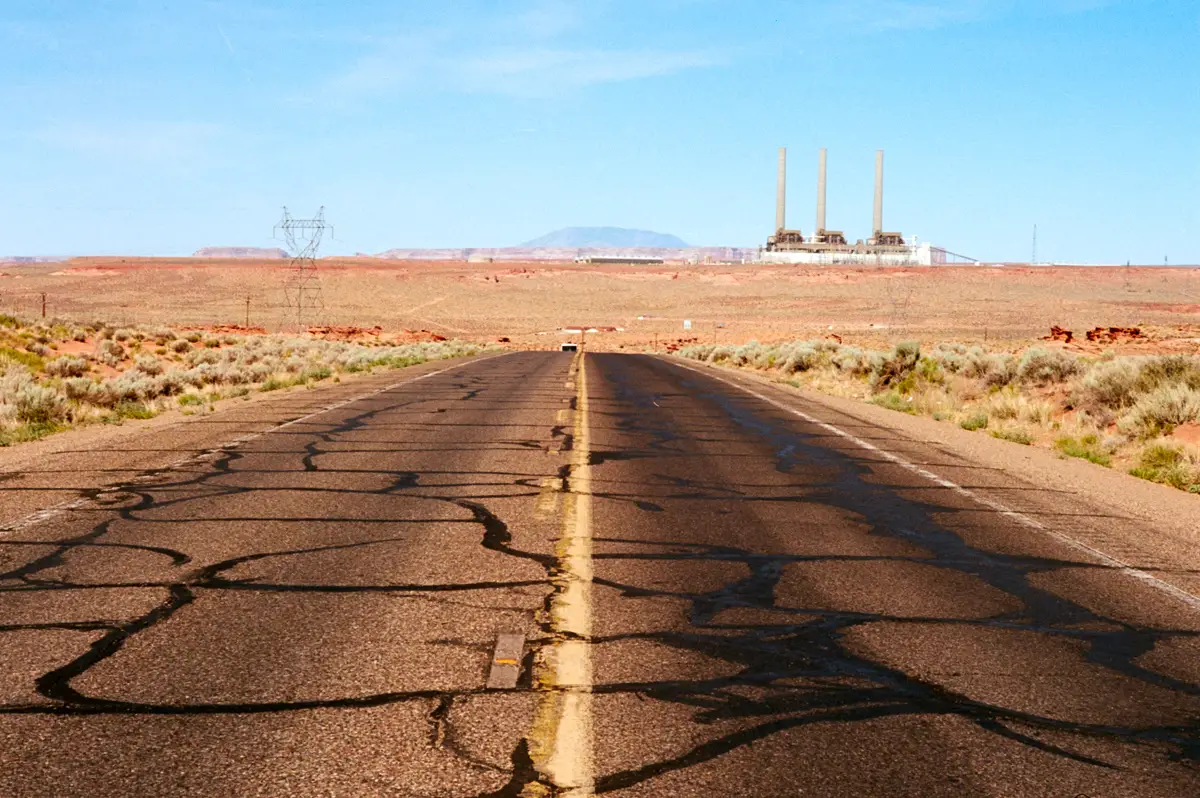
Keyanta, AZ (Northern Arizona, Najavo Indian Reservation):
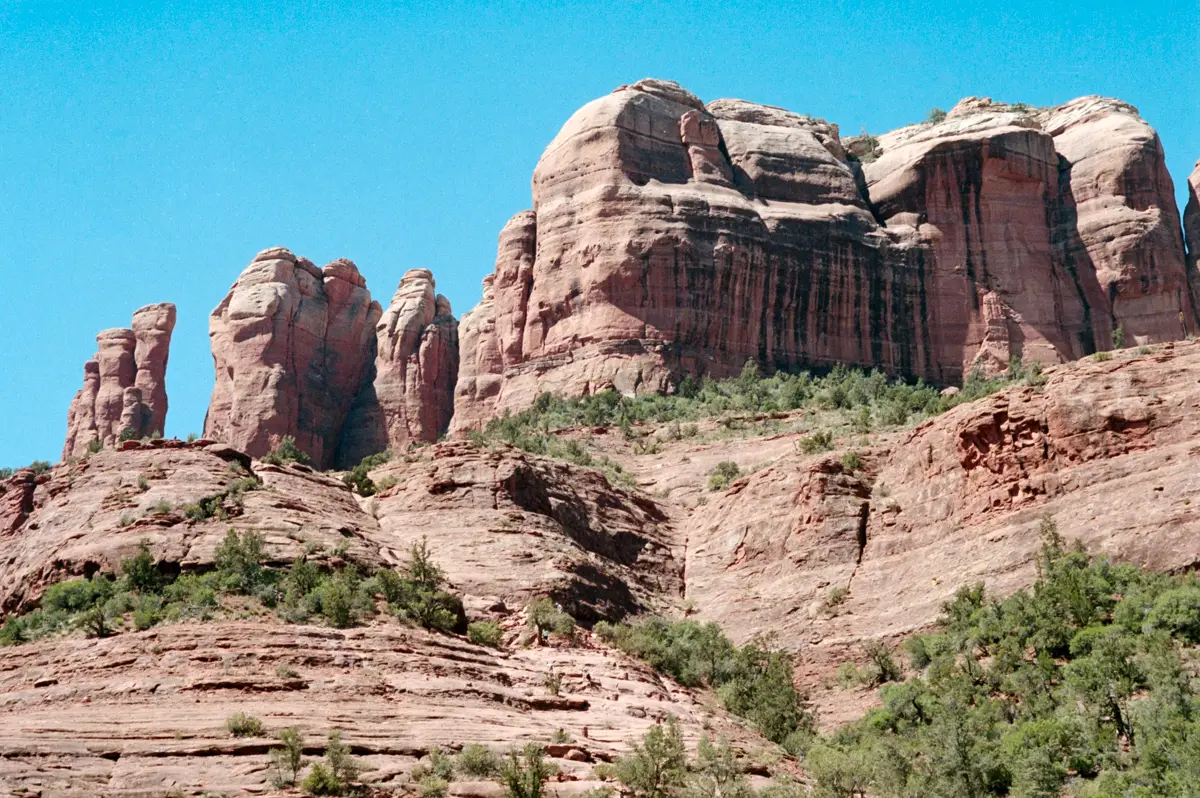
Sedona (AZ)
Ektar 100 35mm (C41 at West Photo, Leica M3, Summicron)
Same process as above.
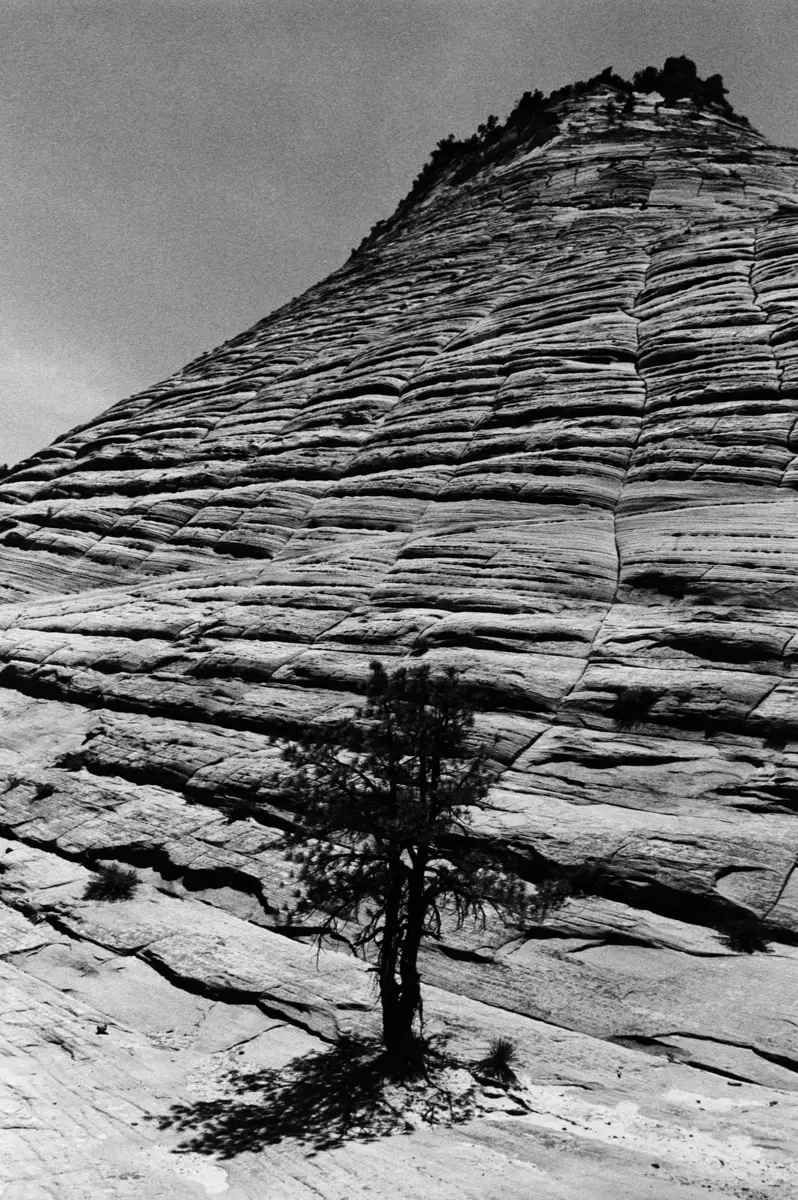
Zion National Park
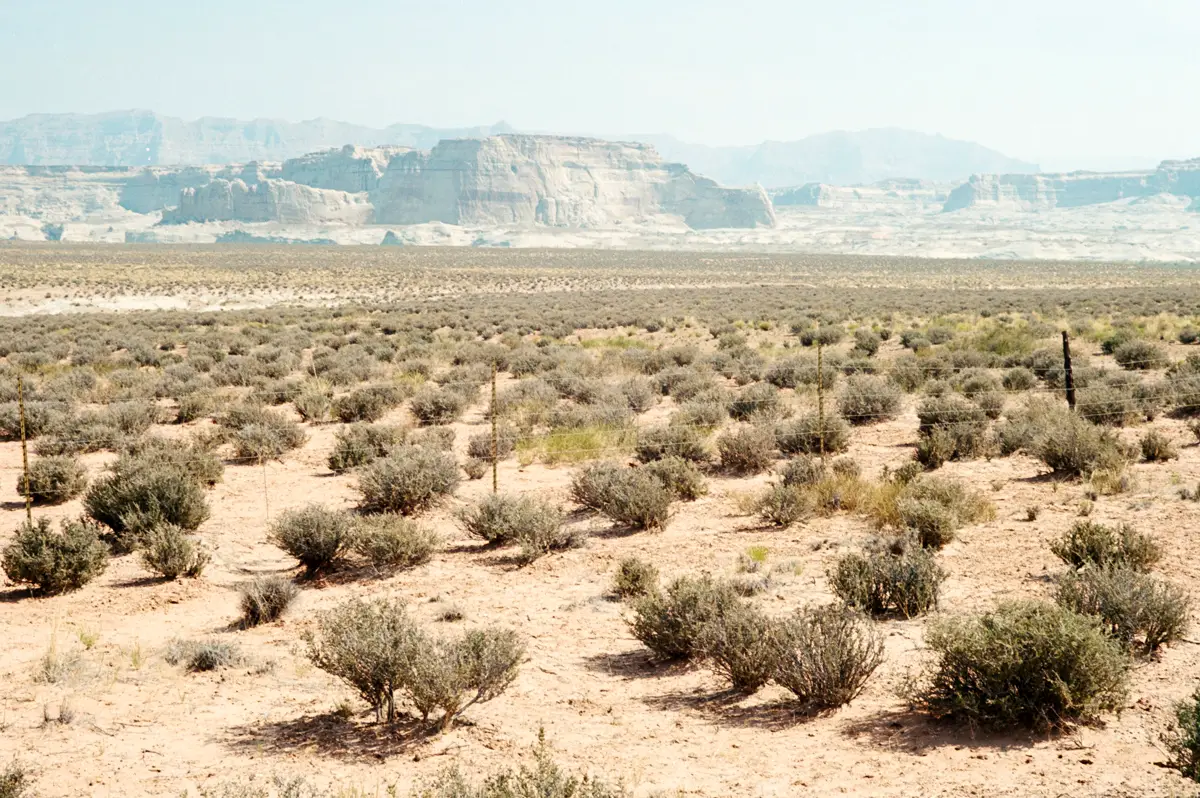
Northern Arizona (close to Antelope Canyon):
Outside of Zion National Park:
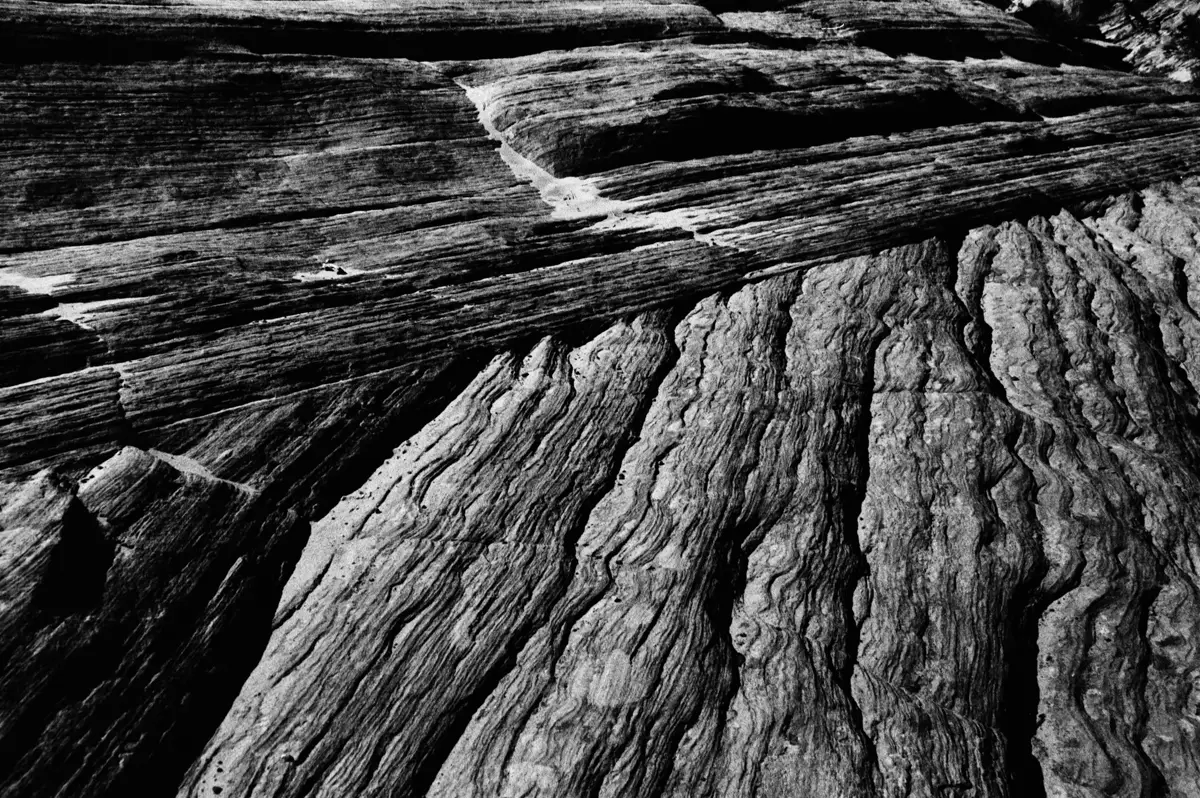
Delta 400 @1600 35mm (Nikon FE, 28mm 2.8, self developed in Ilford DD-X 1:4)
Developed in tank using Ilford DD-X and massive dev chart.
Bryce Canyon National Park, UT:

Ultrafine Xtreme 400 @1600 35mm (Nikon FE, 28mm 2.8 self developed in HC-110 Dil B)
Developed in Patterson tank, using HC-110 Dil B and massive dev chart suggested times. Personally I thought the negatives turned out a little thin, but this was easily corrected in post.
Zion National Park, Utah:

Outside of Zion National Park:
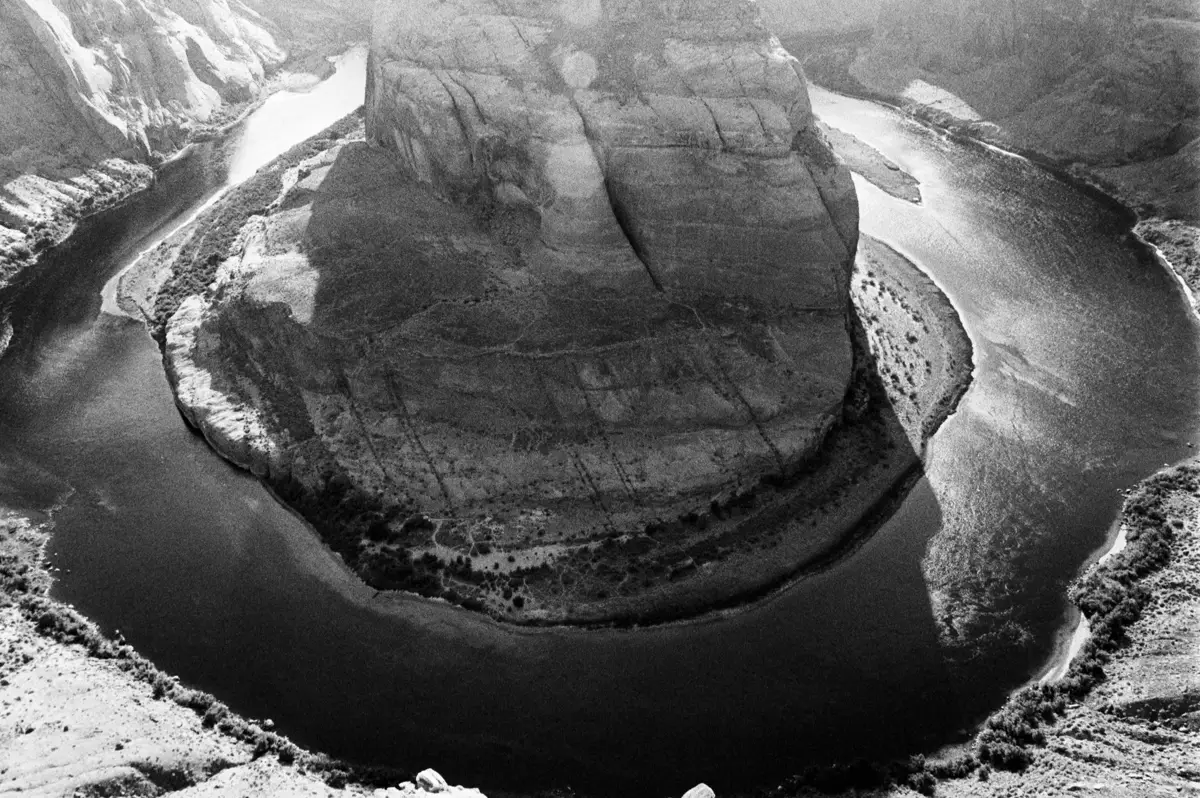
Horseshoe Bend, Arizona:
Portra 400 120 6 x 4.5 (C41 at West Photo, Hasselblad 500cm with 50mm and 80mm lenses, A16 back)
Developed at West Photo, similar processing as above.
Outside of Zion National Park, Utah:

Horseshoe Bend, Arizona: 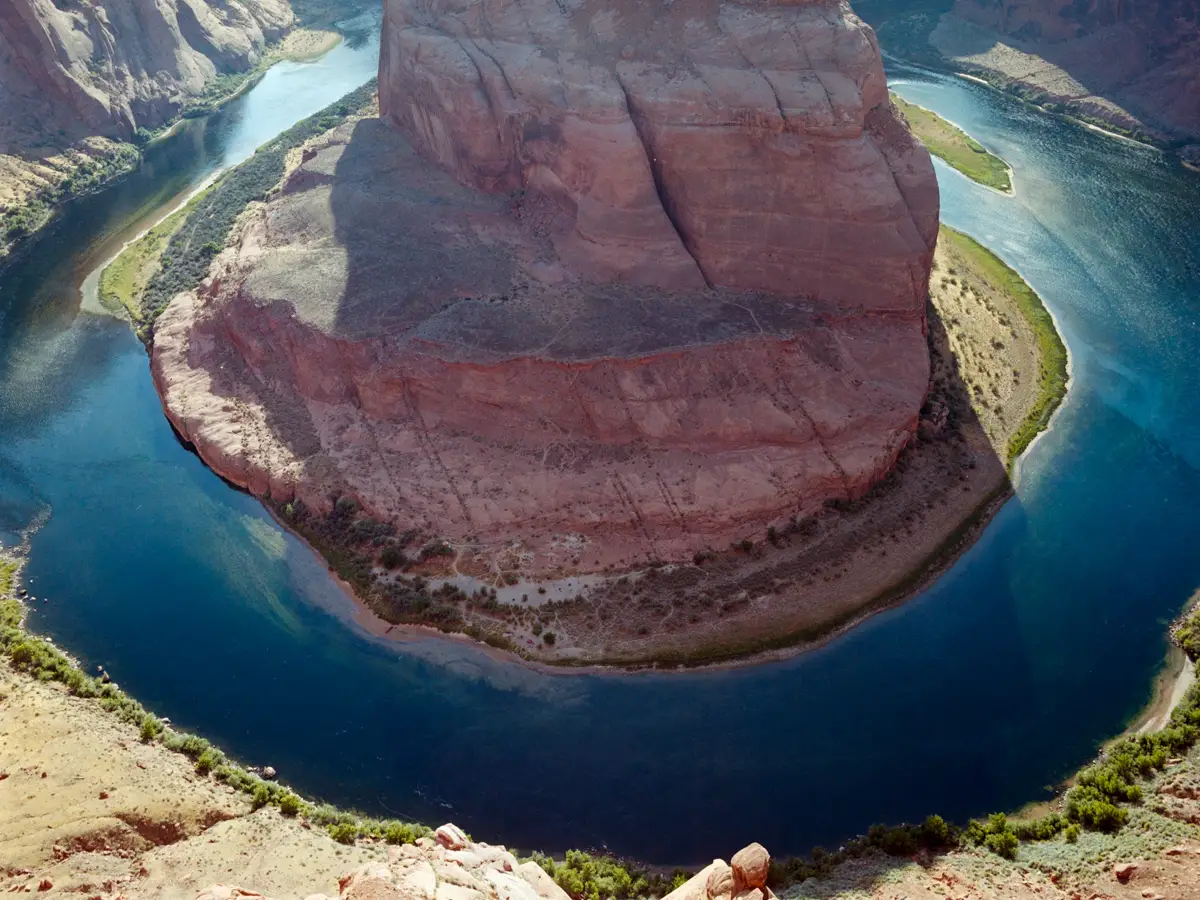
Bryce Canyon National Park, Utah:
Final thoughts
I absolutely love road trips. And can’t wait for the next one!
As much as I like the Hasselblad 500cm and its lenses rendering, I ended up using the M3 with 50mm Summicron f2 version 3 and FE with 28mm Nikkor 2.8 way more. There were a total of 8 completed rolls of 36 135 film versus only 1 completed roll of 120 and two partially exposed B&W films (2 Portra 400, 2 Ektar 100, 2 UFX 400 and 2 Delta 400). Medium format is fun, but the 35mm’s cameras ease of use with its ability to quickly get out of the car, grab the camera, take a shot, or bring it on (longer) hikes due to their smaller size and weight all seem to favor in my case the 35mm cameras. While the 120 6×6 or 6×4.5 negatives out-resolve any 35mm negatives, I am quite happy with the image quality from the 135 images and also plan to print some of those photographs in larger format. I only completed 1 roll of 6 x 4.5 Portra 400, and a half roll of Ilford FP4 and HP5 each. Basically, the medium format camera rarely came out of the car.
Would I do anything different with regards to the gear or film stocks on the next road trip? Yes, I might leave the medium format camera at home and only bring a 35mm camera (either the same setup or just one camera with two lenses, 28mm and 50mm).
Please let me know your comments below. I am particularly interested what your current or perfect travel road trip film camera set up is (including your favorite B&W and color films).
I always love to connect with other photographers, so feel free to connect with me via Instagram or my website.
Thanks, Hamish, for the opportunity to post another article, and thanks to all the fellow photographers for reading.
Share this post:


Comments
Malcolm Myers on Photographing An American Road Trip – By Daniel Sigg
Comment posted: 16/07/2020
Comment posted: 16/07/2020
BG on Photographing An American Road Trip – By Daniel Sigg
Comment posted: 16/07/2020
Comment posted: 16/07/2020
lasousa2015 on Photographing An American Road Trip – By Daniel Sigg
Comment posted: 17/07/2020
Comment posted: 17/07/2020
Comment posted: 17/07/2020
Comment posted: 17/07/2020
Lee on Photographing An American Road Trip – By Daniel Sigg
Comment posted: 17/07/2020
Comment posted: 17/07/2020
Comment posted: 17/07/2020
Comment posted: 17/07/2020
Kate Johnson on Photographing An American Road Trip – By Daniel Sigg
Comment posted: 17/07/2020
Comment posted: 17/07/2020
Christian Schroeder on Photographing An American Road Trip – By Daniel Sigg
Comment posted: 18/07/2020
thanks for this very enjoyable and informative post!
With regards to your images, I strongly prefer your black-and-white interpretation of the scenes. In my opinion, their gritty, contrasty look fits the – quite regular – patterns of the rocks perfectly. An elegant way to deal with the harsh sun in the midst of the day. I also like the wideness of your 28mm lens.
As you asked our travel set-ups: I recently spent some days at the countryside with my parents-in-law. That meant strolling around and lots of bicycling. My kit consisted of three different cameras: a portable medium format option (Plaubel Makina 67), a “serious” 35mm (Leicaflex SLR) and a “casual” 35mm camera (Ricoh point-and-shoot). I took most shots with the Leicaflex, roughly two rolls of Portra. Whereas these SLR-made images turned out as I expected them to do – so kind of business as usual –, the brave little Ricoh surprised with some meaningful (to me) portraits and family snapshots. By the way, I loaded the point-and-shoot with TriX. Especially with humans, black-and-white can give the photographs a certain severity, which I like. The Plaubel returned home without having exposed a single frame. I attribute this to a unconscious barrier in my head: if it is medium format, the scene should be really worth a medium format shot. So I’m ending up being too picky and always fall back to my 35mm options…
How to conclude? If I bring along only one camera, I will definitely end up using it (or I don’t take a picture at all, which is pretty unlikely). If I have a choice, I will stick to the comfortable solution.
Cheers,
Christian
Comment posted: 18/07/2020
Daniel Castelli on Photographing An American Road Trip – By Daniel Sigg
Comment posted: 19/07/2020
An interesting article. I can't shoot a decent nature photo to save my life, so I'm impressed by how you conveyed the openness of the west, and the sculptured rock formations. I'm a longtime admirer of the American artist Ed Ruscha, so of all your pics, the one of the car pulling into the gas station w/the UHaul is my favorite. What can I say?
I hope you're staying healthy at home and your daughter is fine. Scary times.
Comment posted: 19/07/2020
David Campbell on Photographing An American Road Trip – By Daniel Sigg
Comment posted: 20/07/2020
I apologize for sounding overly critical. Just wanted to pass along a couple observations. I see so little film imagery these days I guess I get carried away when I see it!
Please continue the good work!
David
Comment posted: 20/07/2020