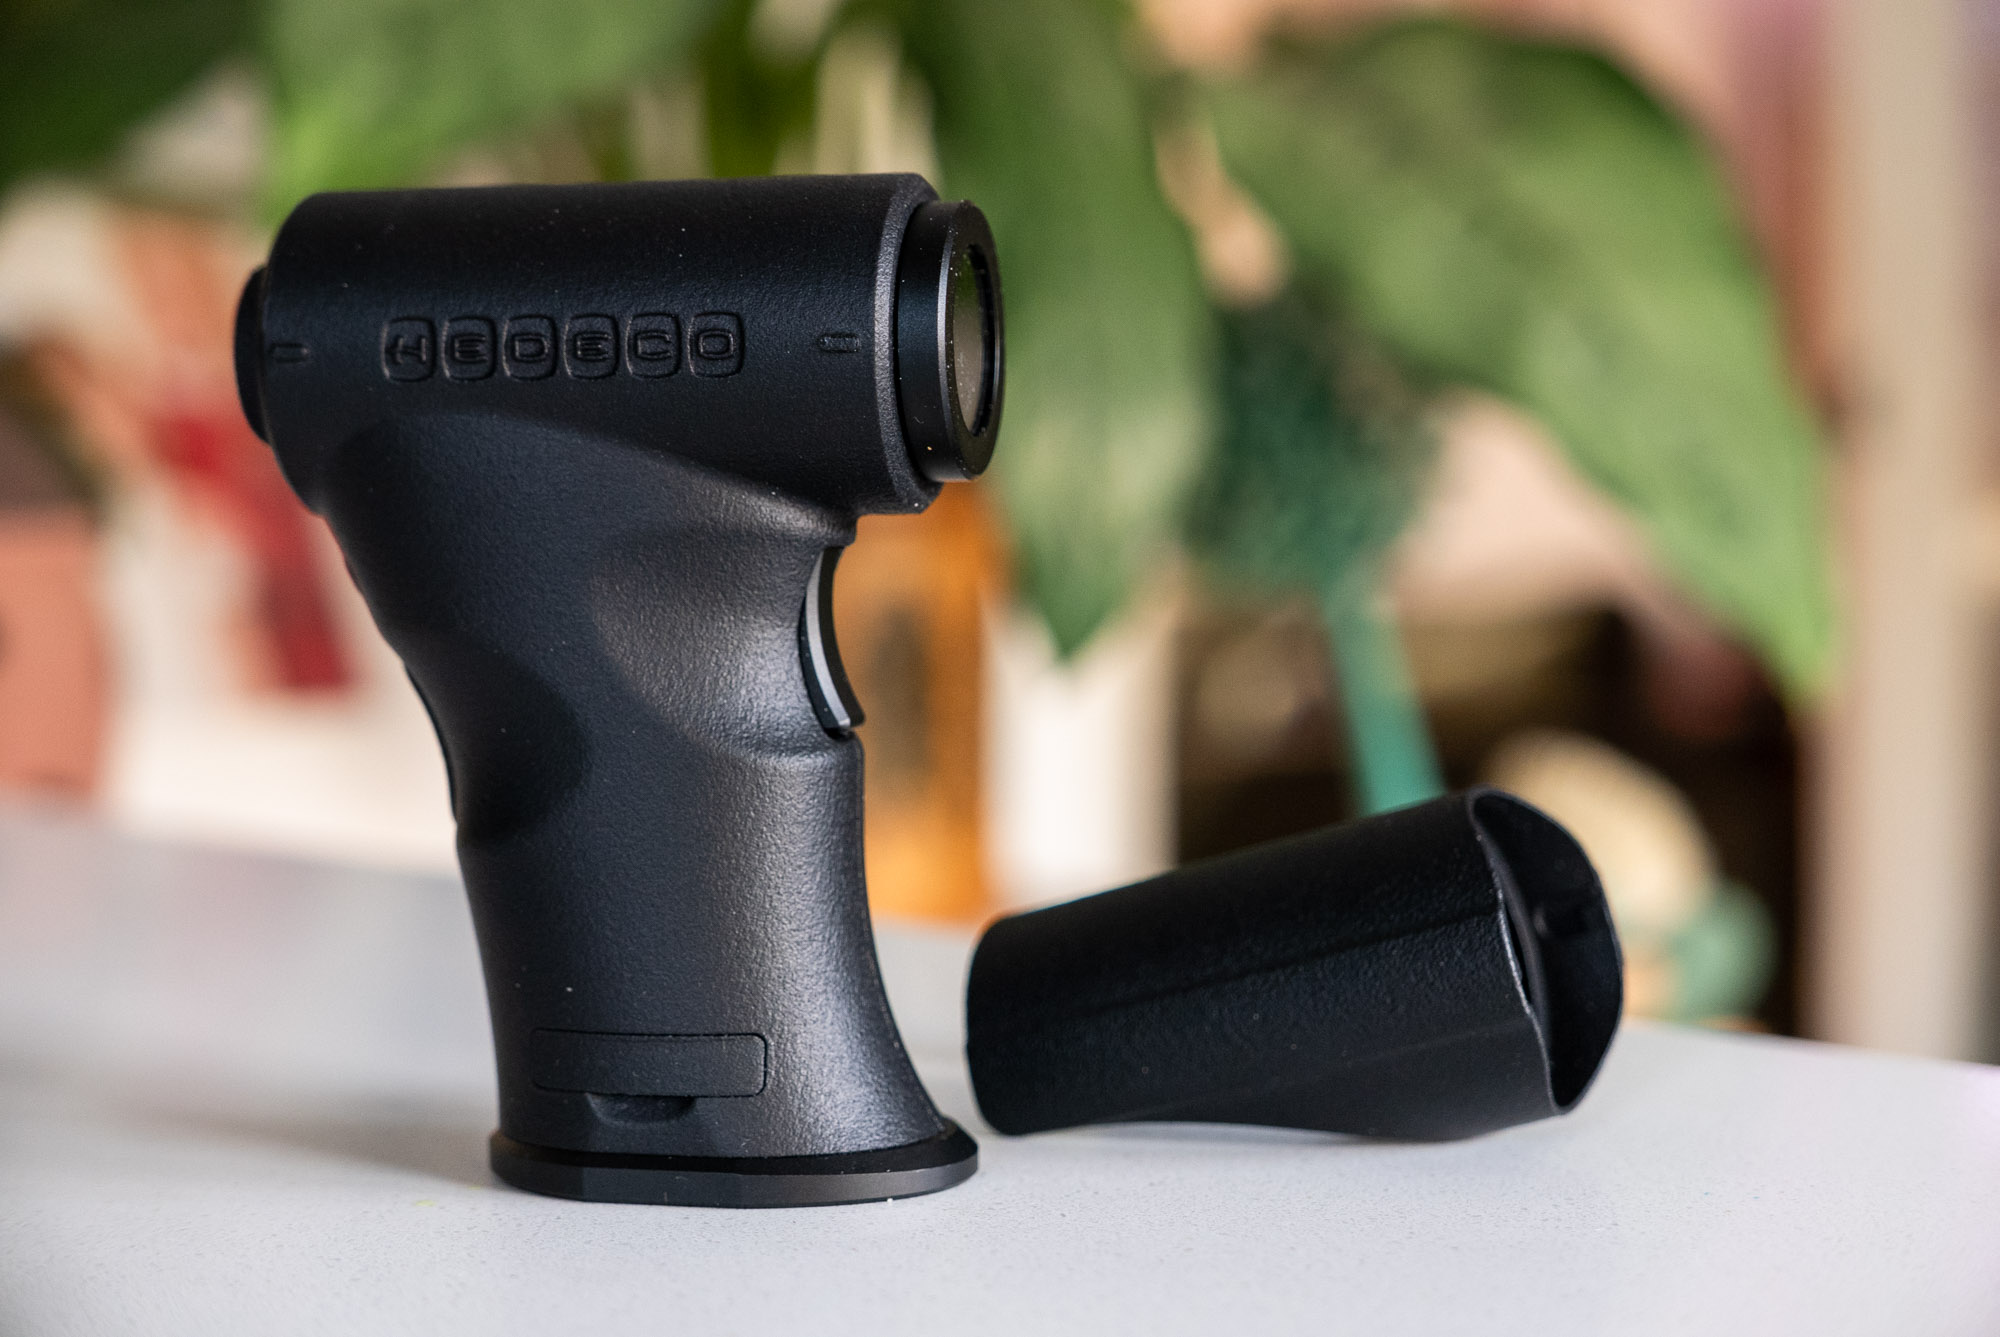
Hedeco have just launched a Kickstarter campaign for their new Hedeco Spot One spot meter. This is a brand new, compact sized, well featured spot meter that’s been designed to make spot metering a more viable option for those who don’t want to carry too much weighty kit, but without sacrificing much in the way of features. And the short time I had one for this review, it seemed to fit that bill very nicely indeed.
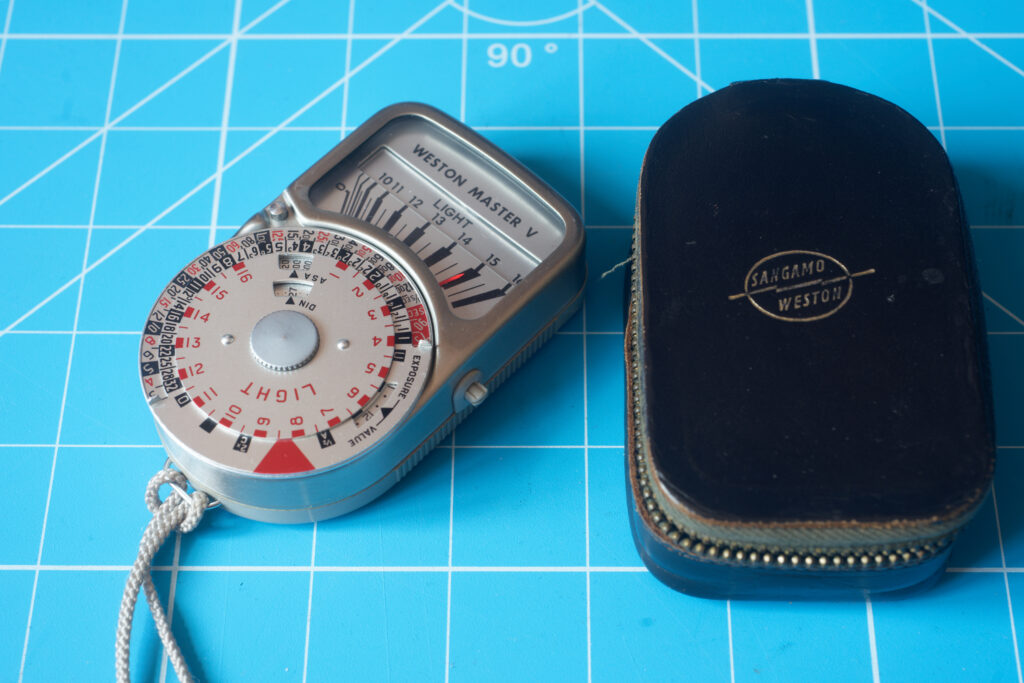
I have reviewed a spot meter before (the Reveni), and in that review I also noted that I am not a regular user of said meters. Conceptually, I love the idea – especially for more slowed down meticulous work, such as when shooting large format. The idea of setting up a camera, framing, focusing and then spending time calculating exposure based on how I might then develop the film just sounds like a wonderful experience to me. Unfortunately, I’m not that guy. I’m a happy snappy, mostly 35mm photographer… and that’s if I’m even shooting film, which as much as it pains me to admit it here, is a much more rare occurrence these days. None of that is to say I don’t appreciate the theory and indeed the kit that comes along with it. I have a Pentax Digital spot meter that I will never part with. I also have a couple of large format cameras. This kit essentially lies in waiting for when my life, and photography with it, slows down.
With that said, as when I reviewed the Reveni, I have enjoyed dipping into the world of spot metering. Just carrying the thing around, even alongside my digital Nikon Zf (which is my current carry-everywhere), I’ve found the process of taking a moment out to assess the scene and think about exposure really quite enjoyable. Actually, whilst I have no interest in doing the Reveni meter down, as it too is a great little meter, I have enjoyed the Hedeco slightly more, as it is just that little bit more comfortable to hold and use.
Hedeco Spot One Handling and feel
I feel I can say this without fear of upsetting Matt from Reveni too. His goal when he made his spot meter was to make the smallest spot meter. Talking to Johannes from Hedeco, he has told me his goal was slightly different. Whilst he wanted small and light, he was also keen to not in any way sacrifice the user interface or handling experience. The Reveni is a fiddly meter to use. The Hedeco, thanks to its form factor, is not at all fiddly. In fact, quite the opposite. Yet, despite this it still manages to be a lot smaller, lighter, and much easier to carry than my Pentax. It is probably actually almost the perfect middle ground between the Reveni and Pentax.
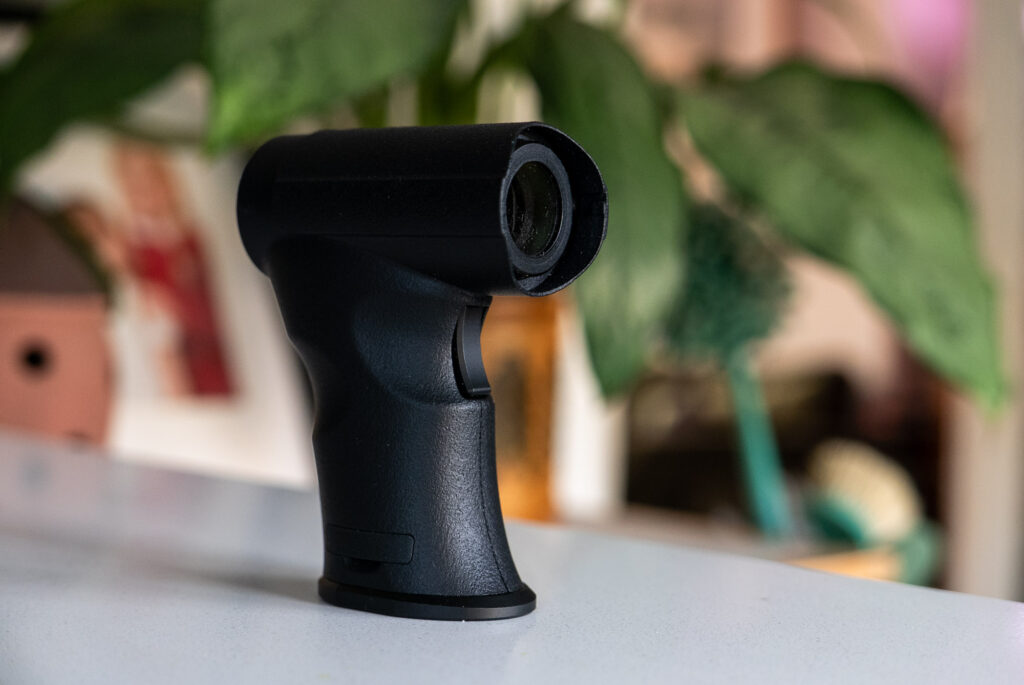
In terms of the build quality of the meter, it is very light weight, and is mostly 3D printed, aside of course from the optics. The trigger and base plate also appear to be made of metal. The quality of the print is absolutely superb, and overall, despite feeling light, it feels like it is well made with the seams and joins in the body being perfectly lined up.
The screen/viewfinder
The Hedeco Spot one, like almost all spot meters, is operated at eye level. There is a window on the back that you hold up to your eye and look through. The view through the finder is of the real world through a second window at the front. Inside the finder the screen is projected onto that view of the real world using a mirror or prism of some sort. With the view being 1:1, it’s also possible to use the meter with both eyes open which gives the impression that the reading is being projected onto the world in front of you in a similar way to how the Reveni meter works.
There are various options for turning on and off some of the data displayed within the finder, but it essentially comprises a metering scale across the top of the view, a spot/target in the centre, shutter and aperture settings lower left, ISO lower right and an EV reading lower centre.
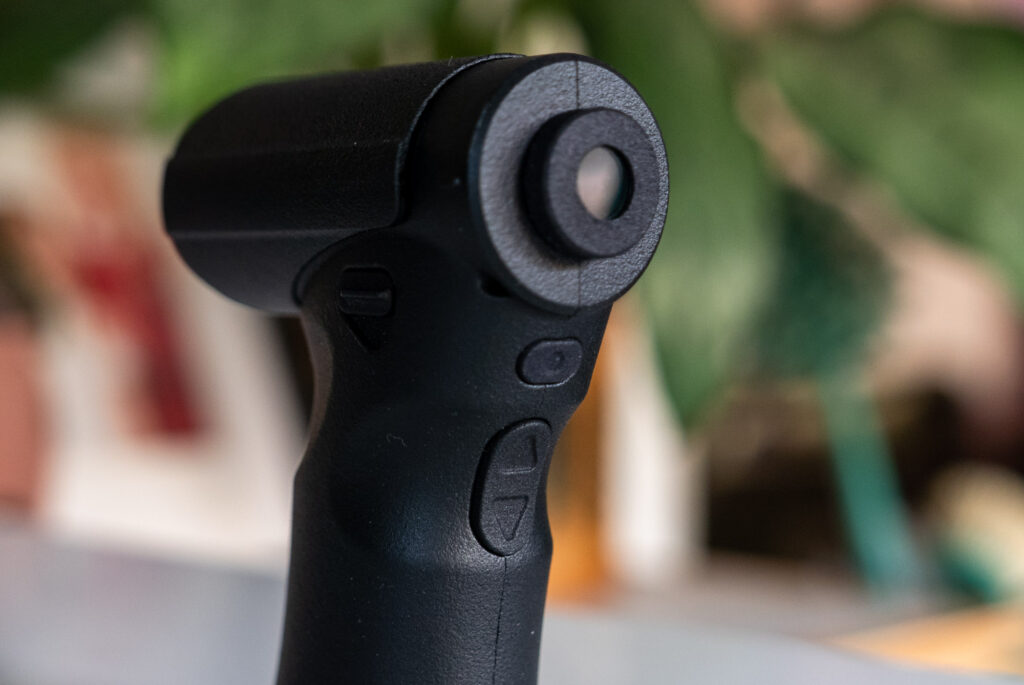
Buttons and switch
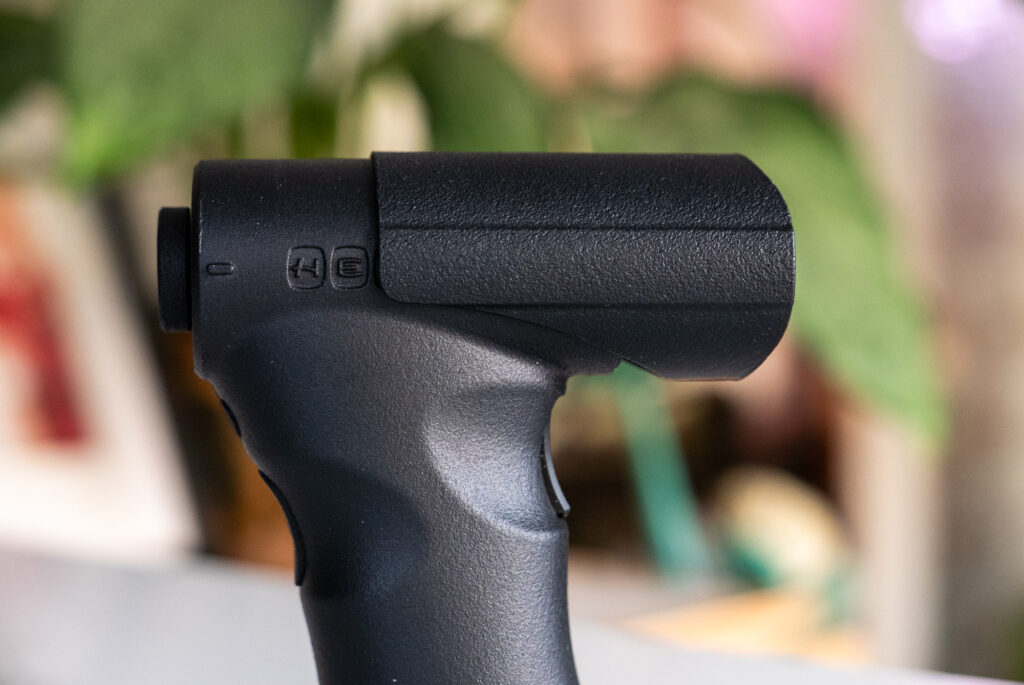
The Hedeco Spot One has a total of four buttons and one switch – all of which click with a satisfactory feel. On the grip there’s a metering trigger button (like on the Pentax Digital), and then on the back/top of the grip there are three more buttons. One for switching the mode and accessing the menu, and another two up/down buttons for changing settings and navigation around the menu. There’s then a switch on the side for activating/deactivating an ND filter which darkens the view through the finder, without impacting on metering. This is for use in brighter conditions as it enables the data displayed within the finder to be more easily visible.
The buttons all provide a user experience that feels incredibly intuitive. There was no user manual at the time of me writing this, yet I had no issue working out how the meter works within moments of picking it up.

The trigger on the front switches on the meter and activates the live readout. The top button is pressed to cycle through aperture priority, shutter priority and a mode where the aperture and shutter are locked together. In this latter mode, the EV is set/locked in and then reciprocal aperture and shutter settings can be cycled through. Whichever mode it is in, the up and down buttons are used to cycle through shutter and aperture settings.
A long press of the top button then enters the menu. Within the menu the trigger button either selects the menu item for adjustment with the up/down buttons or for more simple settings scrolls through the settings.
Menu options
Within the menu there are options for the following:
ISO – this allows the ISO of the meter to between 0.5 and 12800 in third stops.
Placement – this allows the meters readout to be offset, for example it can be set to -2 ev to take a reading for a zone III shadow (this is how I have mostly used it)
Resolution – this allows the meter to be set to work in full, 1/2 and 1/3 stops
Units – this sets the meter to display either -/+ zone or EV numbers along the scale at the top relative to the set aperture/shutter/ISO settings.
Min max setting – this shows or hides the maximum and minimum markers for an auto or manual mode for sweeping the meter around to establish the dynamic range of the scene. Johannes has told me that he has found he doesn’t really need this for his personal use, but thinks the auto and manual modes will be useful or appreciated by people who like to use a spot meter to assess a whole scene. I tend to agree.
Show/hide ISO – fairly self-explanatory, this shows/hides the set ISO readout in the display.
Show/hide shutter and aperture – also self-explanatory, this shows/hides the set aperture/shutter speed in the display
Show/hide live scale – again, self-explanatory, this shows/hides the bar graph/metering scale across the top of the view in the finder
Enable/disable EV coupling – this enables or disables the feature where the shutter and aperture settings can be locked together at a certain EV.
Calibration – this allows the meter to be calibrated. This is sort of similar to the ‘placement’ setting, but is to calibrate the meter rather than set where within the zone scale you wish to meter. It feels sensible to have both of these options to me! One to calibrate the meter either if it’s out or to adjust to taste, and then the placement setting for use during active metering.
Version – this shows the meters version firmware version.
All these options make for a meter that feels to me nicely customisable to the individual user. My only quibble is that in the pre-production version I have here the ISO show/hide setting seems the wrong way round. I have reported this to Johannes and he has confirmed that he is aware it might seem easy to misinterpret and is working on an alternative wording for the production version.
Hood and lanyard
The Hedeco Spot One also has two other features built into its design. One is a hood that can be slid forward on top of the meter to prevent extraneous light impacting the meter reading. The second is a little hole for attaching a lanyard or strap.
Battery
Finally, there is a battery compartment that holds a single CR2032 battery. I can’t comment on the battery life other than to say it hasn’t run out in the time I have been using it.

In the hand
The Hedeco Spot One fits very comfortably in my hand. The grip is angled slightly forward from top to bottom which makes it comfortable to hold up to my eye. Holding it for metering, three of my fingers wrap around the grip in a way that almost feels like it was moulded to my hand. My little finger then sits under the grip, my forefinger sits on the metering trigger and my thumb on the ND switch on the side.
Holding it for changing settings requires a slightly different – but actually barely less comfortable – handling experience. My forefinger stays on the trigger, but my thumb instead is lined up for the mode/menu button on the back as well as the up/down buttons below.
In both ways of holding it, all but the down button on the back are easy to find with the meter to my eye. The down button for some reason is a little more difficult to find, though I should add this doesn’t feel like a deal breaker and I am sure given more time I would get used to it.
Metering accuracy
Having played with the meter fairly extensively, I can say comfortably that I have no concerns about the Hedeco Spot One’s metering accuracy.
Final thoughts
As I have said, I am not a big user of spot meters. With that said, I have very much enjoyed using this one. My Pentax spot meter has the ‘Zone 6’ modifications to it which includes a little sticker on the top that allows you to just read a zone III (or any other zone for that matter) reading. Since this is how I tend to use spot meters, by pointing them at an area of shadow I wish to just about capture detail in, and then just setting my camera based on that, I have always appreciated the mod made to the Pentax. The Hedeco Spot One doesn’t require a mod, it just allows for the meter to be set to read a zone III reading. As such, for my type of use it works great for me out of the box.
Of course, there are lots of other ways to use a spot meter, and though I don’t use them this way myself, I am loosely aware of how people do use them. The Hedeco spot one covers at least all the ways I know that people wish to use meters like this. This would be great in a larger meter, but in a smaller, lighter, easy to carry meter like this, it feels really impressive to me!
In short, I am very impressed! The Reveni challenged the superiority of the Pentax digital meter in my world, this Hedeco Spot One meter takes that challenge a step or two further for me!
The Hedeco Spot One meter Kickstarter can be found here
Share this post:


Comments
Scott Ferguson on Hedeco Spot One Review – New Compact Spot Meter Launched on Kickstarter
Comment posted: 16/12/2025
Thanks for this, and count me as officially curious. As a relatively new photographer, I depend on a meter and I really like using a spot meter more than any other type. Isolating different parts of the frame and taking readings is great for shooting relatively stable situations like a landscape or a posed portrait. More often, if I'm shooting in a more dynamic situation, I'll look for something that approximates middle grey and take a reading on that and use that and shoot away using that as a general setting. I'm intrigued by your approach to look for Zone 3 and meter based on that, and may give it a try next time I go out! I'm on my 2nd Pentax -- the first one I got was the 'classic' Spotmeter V, which is a terrific meter, but a bit of an ungainly beast that I dropped so many time the exposure calculating dial came off. I was also limited in lower light situations because the window is not illuminated and in dusk or night conditions under about EV 5 it can be next to impossible to read. I now have a Pentax Digital Spotmeter that has illuminated numbers that show the EV and that works well day or night. It's smaller than the V, but not exactly small. It sounds like the Hedeco has and optical viewfinder with illuminated readout and is smaller than the Pentax Digital? Sounds pretty cool. Good to know about it.