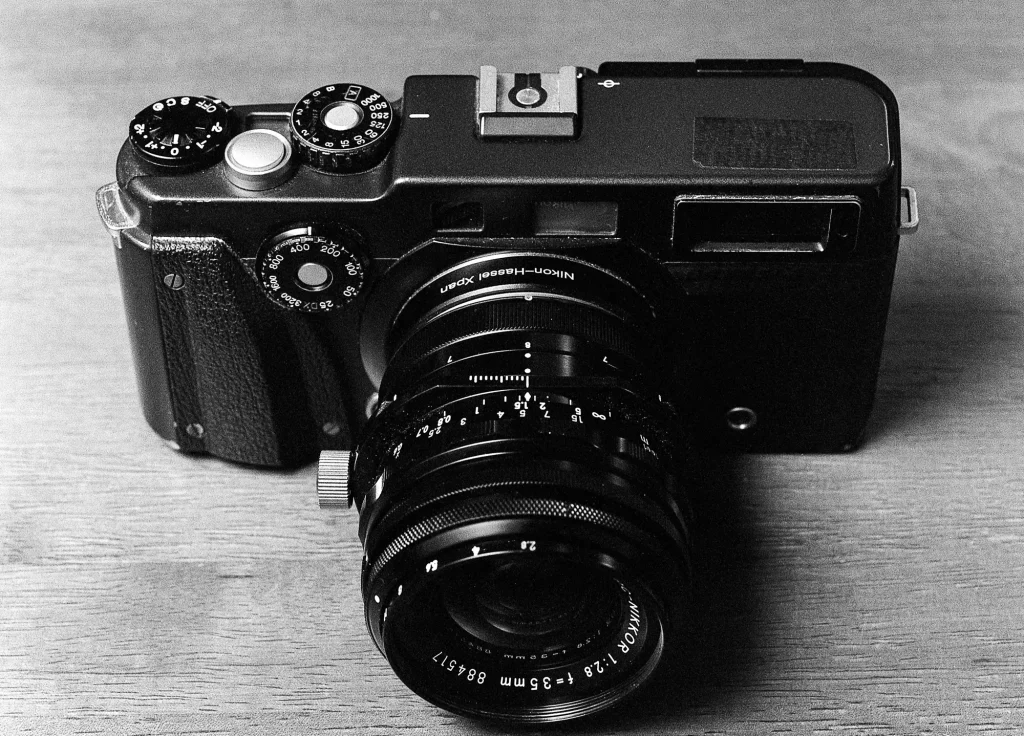
To cut to the chase, it is possible to shoot the Hasselblad Xpan with a 35mm f2.8 PC Nikkor, which will give you a wider field of view than with the standard 45mm lens. It’s a clunky set-up with a couple of issues, however it offers a lot of potential for great imagery. This review will discuss the advantages and drawbacks this set-up entails, my experience with it, and I’ll of course share some images that I have made using it.
This review is a follow-up/part 2 to an Xpan review I contribued to 35mmc earlier in the year. If you are unfamiliar with the Xpan, or have specific questions about the camera, check out that post. I had difficulty in keeping my previous review short, largely because I had so much to say about the Xpan. I am going to try to keep this shorter. So with that said, let’s have a closer look at what I call ‘FrankenPan’.
History
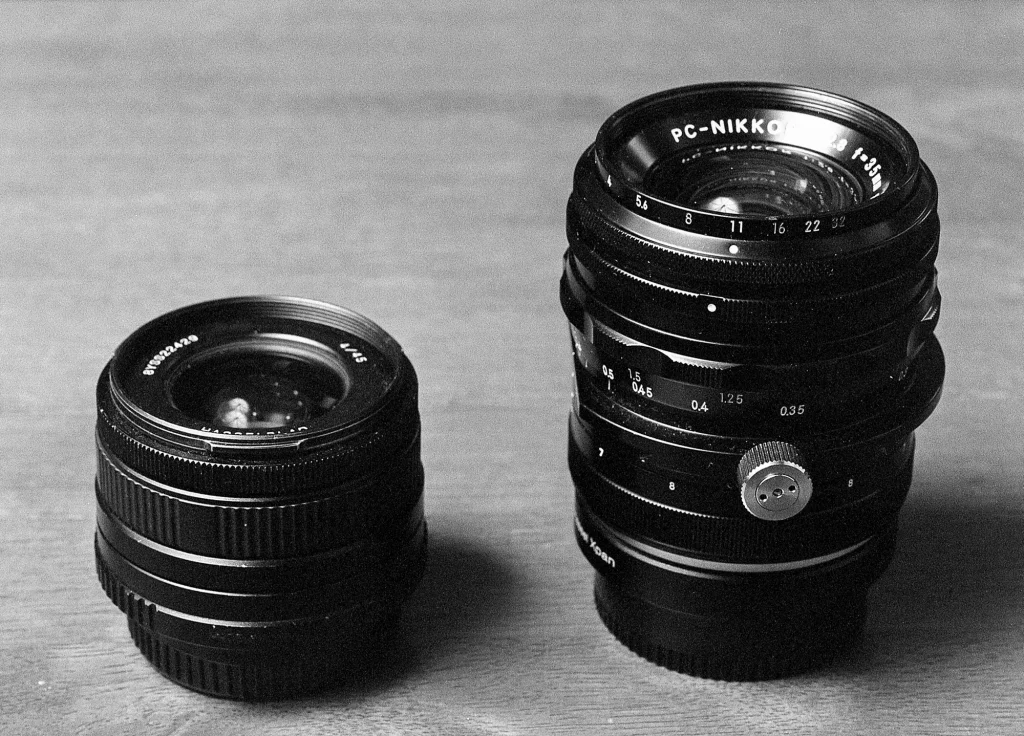
So first off – a little history. The Xpan was introduced in 1998 and went out of production around 2006. While the camera does have the option to switch between panoramic and traditional 35mm frames, its price and feature set make the camera a specialist tool for panoramic photography. As a result, it was not a huge seller, and Hasselblad (Fujinon) only ever produced three lenses for the camera: 30mm, 45mm and 90mm.
The camera is most frequently found with the 45mm as it is the most available, affordable and versatile lens. You can certainly find the 90mm lens out there for a reasonable price, too. However, it is the 30mm which is the elusive beast and will normally cost north of $US2500 and up to $3500 to own. OUCH!
Now, there are some half-way decent reasons why this lens is so expensive, which I could go into. But I would likely get lost talking about the 30mm, which is a fascinating lens in its own right. And that is not what this review is about. Suffice to say that it is a complex lens with a lot of glass in it and for many of us, myself included, roughly $3000 is a bit out of our price range. But there is an alternative…

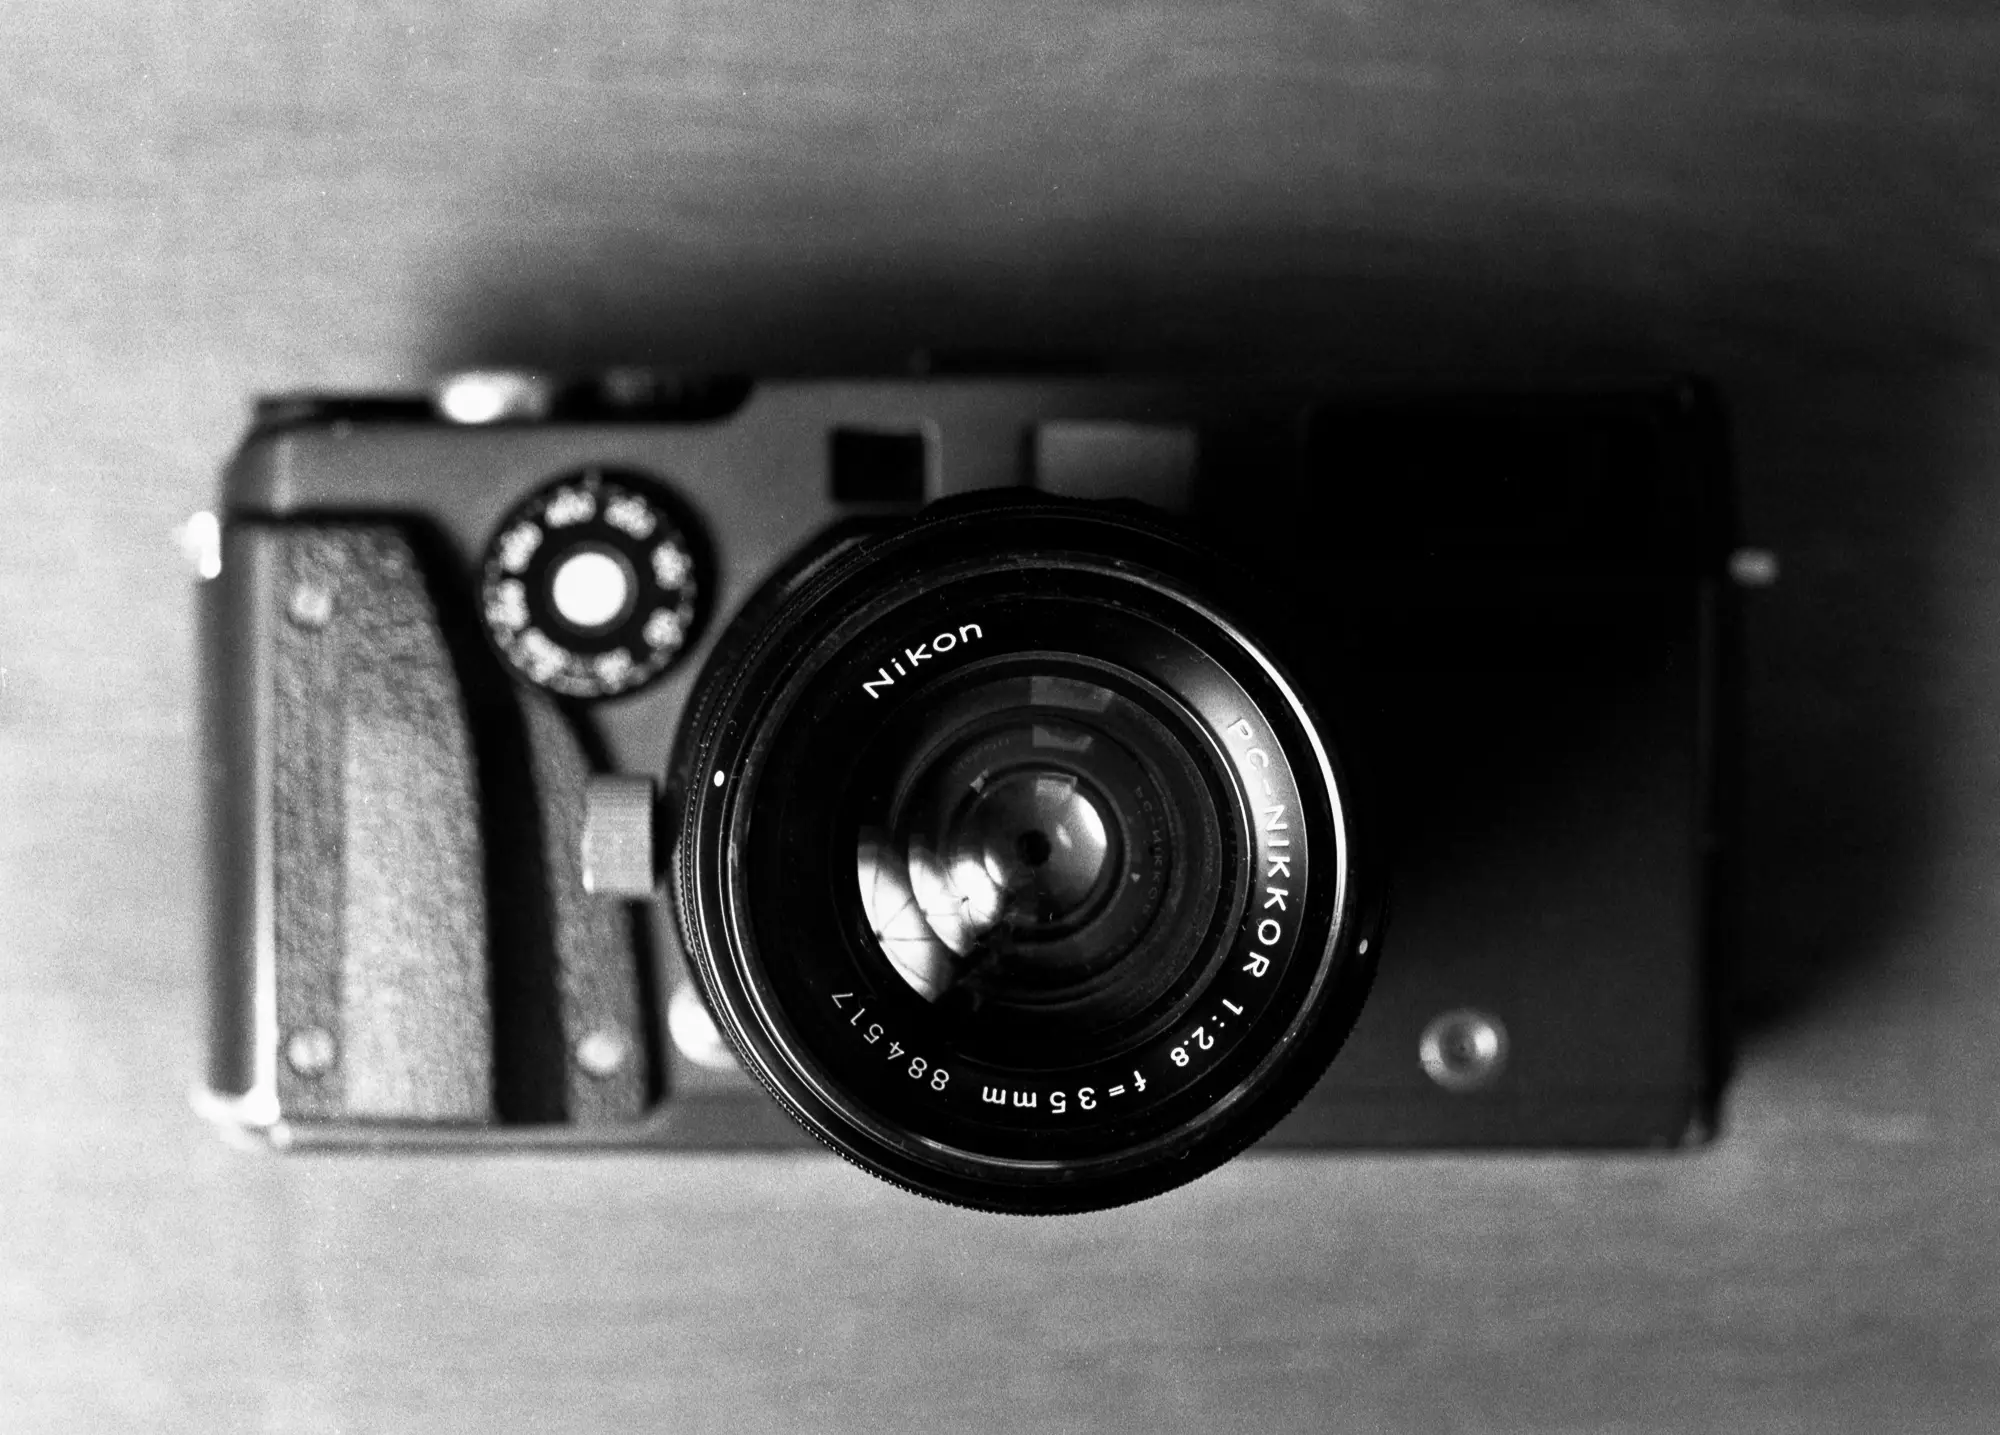
Enter the 35mm f2.8 PC Nikkor.
Tinkers toil; Handmade adaptors
So I am little hazy on the exact history here, but at some point in the mid naughties, a few Xpan users got together to figure out whether they could mount third-party lenses to their Xpan’s by producing machine cut adaptor rings. I guess they felt limited with only having three lenses. Maybe they were just bored. At the same time, they also started to test whether existing lenses for other systems could cover the 65mm-wide panoramic negative the Xpan produces. A whole bunch of machining and testing later, it turned out that the Nikkor 35mm Ff2.8 Nikkor was one of a few such lenses. And with their homemade adaptors, they could shoot it.
Perspective Control Lenses
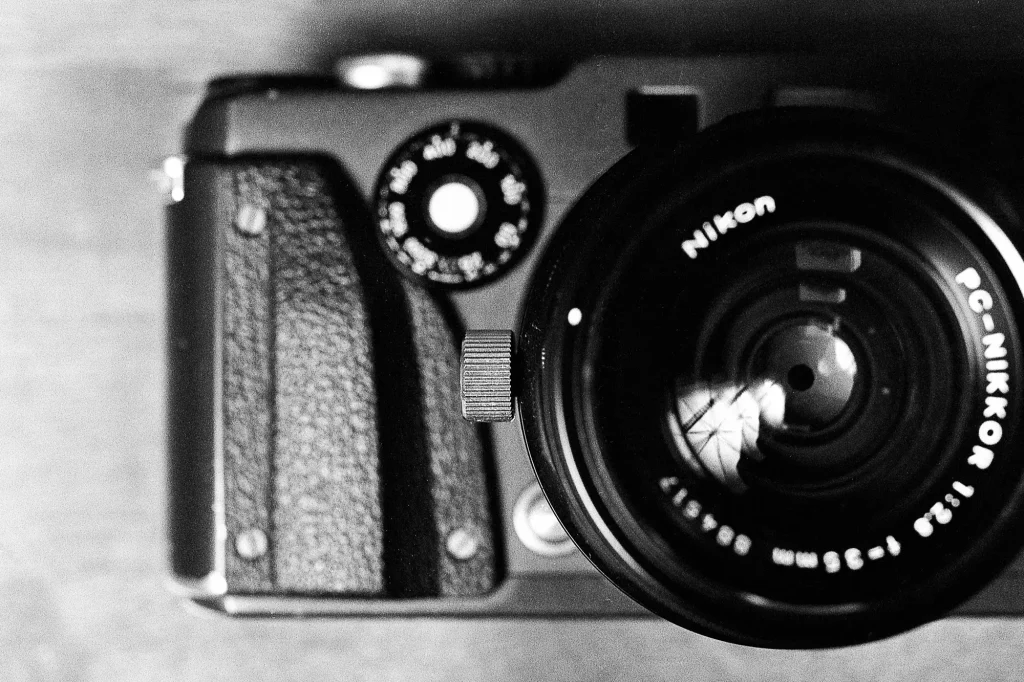
Most 35mm lenses don’t have an image circle wide enough to cover the 65mm wide negative the Xpan produces. Some medium-format lenses will, but their size precludes enjoyable handheld use with the Xpan. The 35mm perspective control (PC) lenses are the sweet spot because they aren’t too big and also produce a larger image circle. Of the PC lenses out there, the 35mm F2.8 PC Nikkor was considered the best for use on the Xpan: it wasn’t too big, it still had manual aperture rings, and it was sharp with an image circle wide enough to cover (almost) the 65mm Xpan negative.
For those unfamiliar with PC lenses, these are lenses that shift (and tilt in some instances) in a manner than replicates some of the movements of large-format view cameras. These are mainly used in landscape and architectural photography as a way of controlling straight lines or vertical elements like buildings, trees and mountains (hence ‘perspective control’).

An (almost as) wide-format negative
There is a teeny weeny bit of vignetting at the corners with this lens, which means that you have to crop your negativess slightly. As a general rule I am forced to crop the horizontal edge by a couple of millimeters, which means that you get a 24mmx62mm (instead of 24×65) negative. Your preferences, shooting style and film choices will impact on how much you feel you need to crop. Despite the slight aspect ratio change that cropping entails, I have exhibited images made with both this set-up and the standard 45mm lens and people don’t see the difference. It is still very much a wide-format negative.
Ergonomics
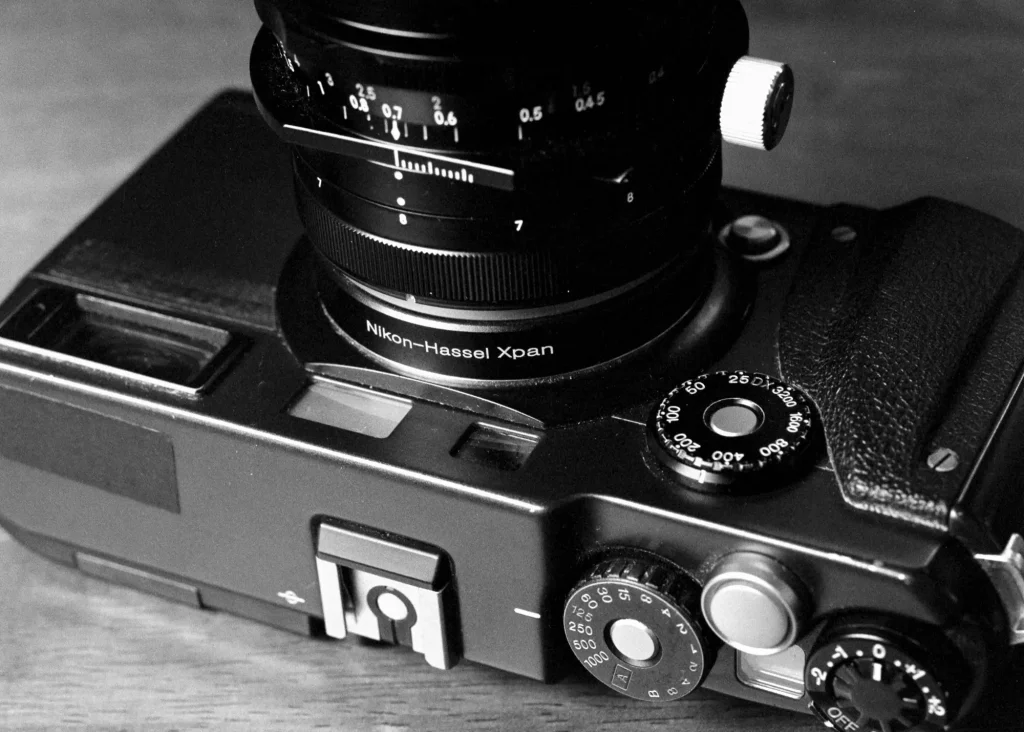
Be Warned: This lens changes the ergonomics and makes the camera bigger and front heavy. The Xpan takes on a kind of frankenstein-like appearance with the 35mm f2.8 PC Nikkor on the front. The lens is much larger than the Hasselblad 45mm and has a noticeable slr look to it, which looks out of place on the sleek styling of the rangefinder. The knob on the side of the lens barrel which allows for the cameras’ movements is also reminiscent of Frankenstein’s head, hence the moniker ‘FrankenPan’.
FrankenPan
A Chinese adaptor
Ok, so if you want to Frank up your Pan, this is what you are going to need. Obviously you’ll need an Xpan. You will also need a 35mm f2.8 PC Nikkor. They normally run around $US200-250 which is comparatively hardly a bank breaker. The last thing you’ll need is an adaptor with which to mount Nikon F-Mount glass to the Xpan. These adaptors are now made in China, probably where all third-party adaptors come from. They are available on ebay for around $30-$50. Mine came from China and I have never had any problems with it.
In fact, this is my second, as the first one I owned was purloined by an enterprising young Eritrean gentlemen while I was shooting documentary work in the north of France a couple of years back. In any case, I have found both copies of the adaptor to be well constructed with a tight fit and finish. They aren’t top of the line contructions, but they inspire sufficient confidence.
Does it actually work?
So it sort of works. Let me explain. The adaptor means the lens will mount, and by virtue of the Xpan’s TTL metering, it will meter also. But that is it. The lens is not coupled with the cameras’ rangefinder given it is a Nikon F-mount lens. Therefore, zone/scale focusing is your only option, which means you’re using the distance markings on the barrel of the lens. Noting the lens is a 35mm focal length, if you keep the lens at f11 and smaller, you shouldn’t have many focus issues, although I will extrapolate on my experience with this in practice in a moment.


The Framing Problem
Framing is the other tricky dimension to FrankenPan. Being a non-coupled lens, there are no framelines. Fortunately, the viewfinder’s native magnification is pretty close to the field of view produced by the 35mm f2.8 PC Nikkor. I say close, because it isn’t exact. Using the whole viewfinder gives the camera a bit of a point and shoot feel to it.
As an aside, soon after I first bought mine, I put it on a tripod and took a photo, and then took another photo through the viewfinder with my iphone to compare the difference. Ultimately, the result serves only to give you confidence that the native viewfinder is a decent approximation, and that you will still have to learn to live with some rangefinder slop. There is also a bit of parallax error up close as well, but it’s no biggie. Like with all things, you start to predict how it will see. Expect a few surprises early on, but nothing too dramatic.
I’ll move on to discuss my experience and the results I got with the camera now. Hamish has also tried this very combination and wrote a detailed FAQ on all the technical elements, which is certainly worth a read if you want some more information on how this works in reality.
Results. Experience. Verdict.
An ultra-wide perspective
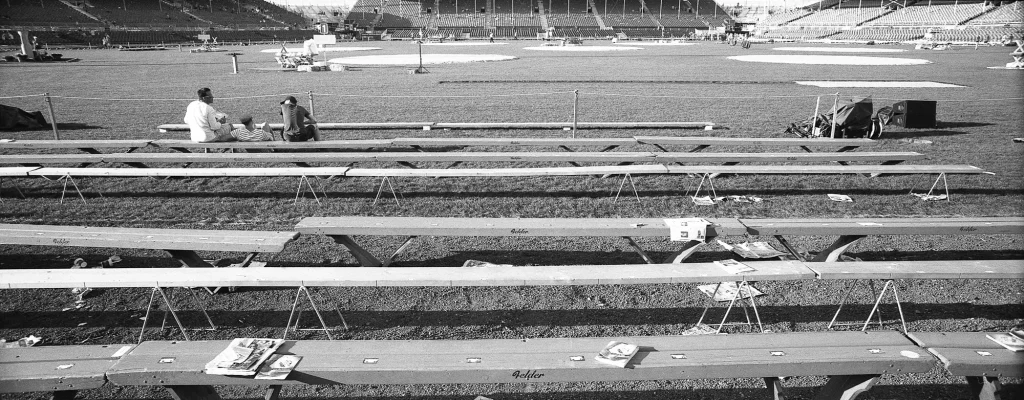
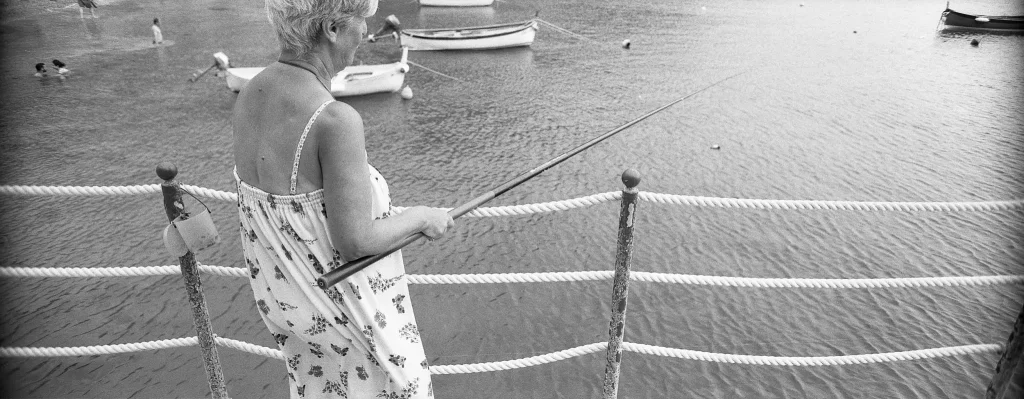
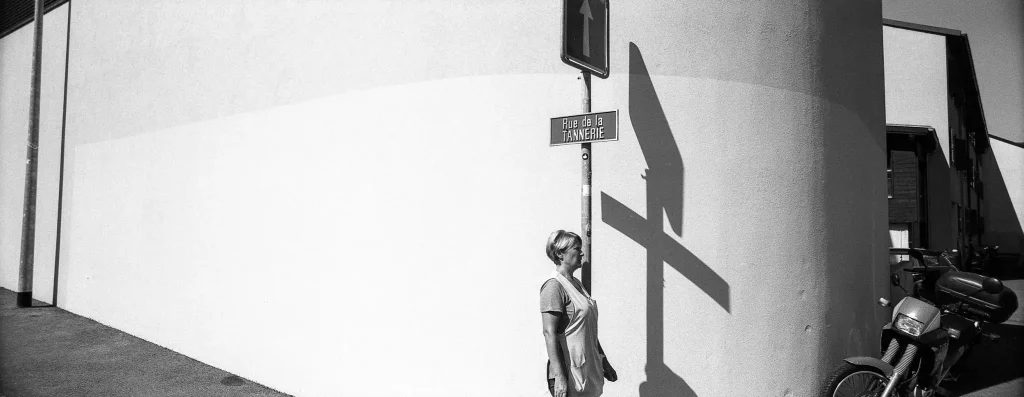
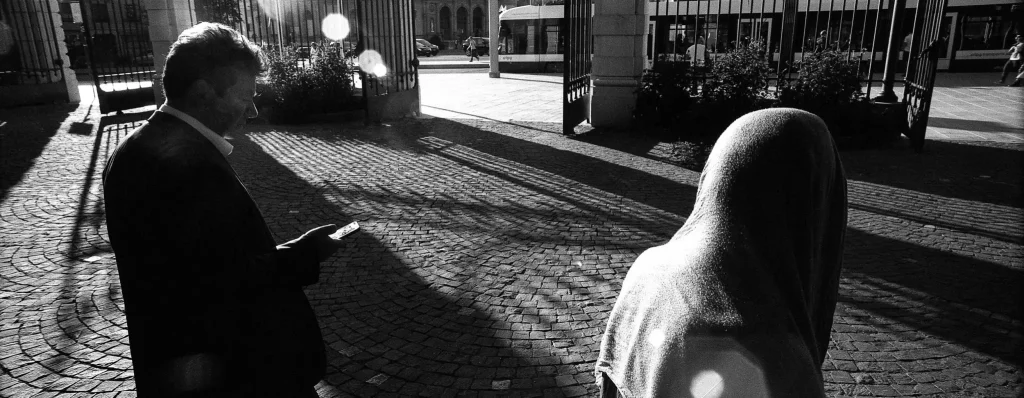
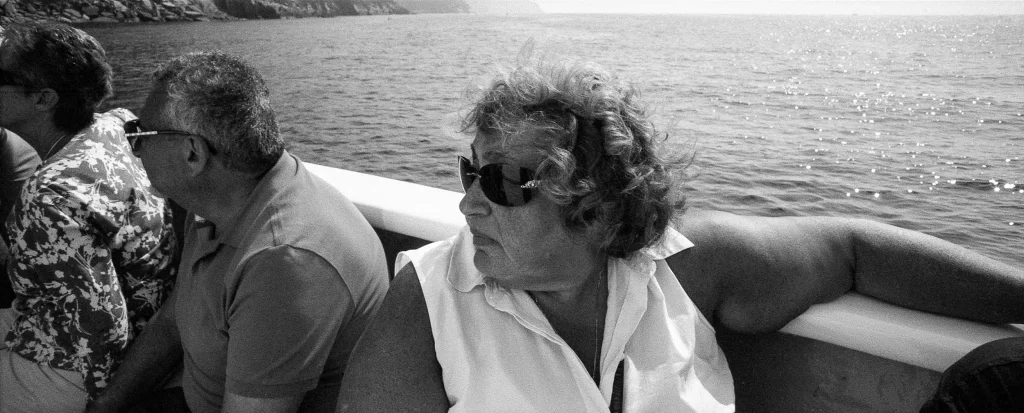
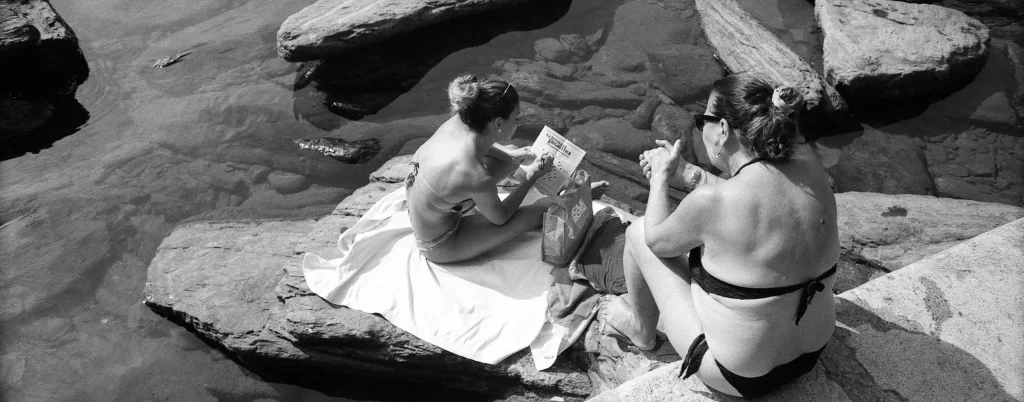
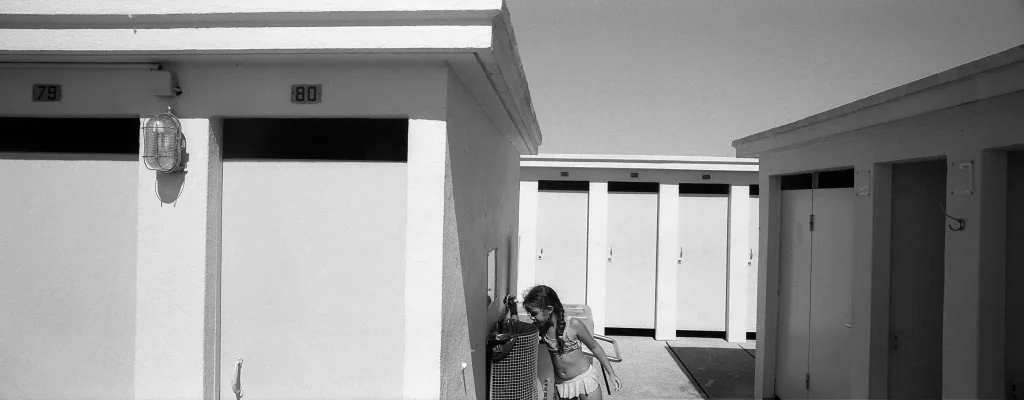
Well you can probably make your own assessment about how it sees by this point. The first thing I would say is that it produces a very wide angle of view. Factoring the 62mm negative (cropped for the vignetting), FrankenPan produces an angle of view roughly akin to a 19mm lens on the long edge. It is an ultra wide lens, in essence. Interestingly though, it generally doesn’t feel as wide as an ultra-wide normally would. I think this is because of the shorter vertical edge. If you think about it, you don’t get the corners. To my mind, FrankenPan is an interesting mix between a normal wide (ie, 35mm) on the vertical edge and an ultra-wide perspective on the horizontal edge.
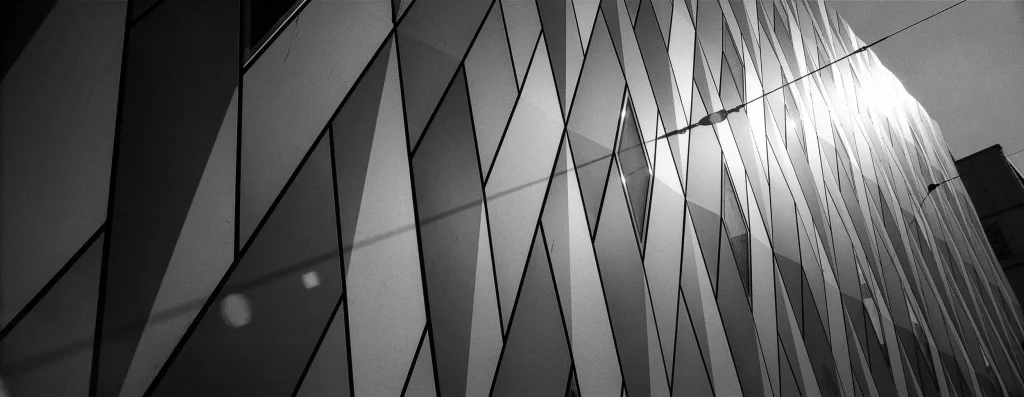
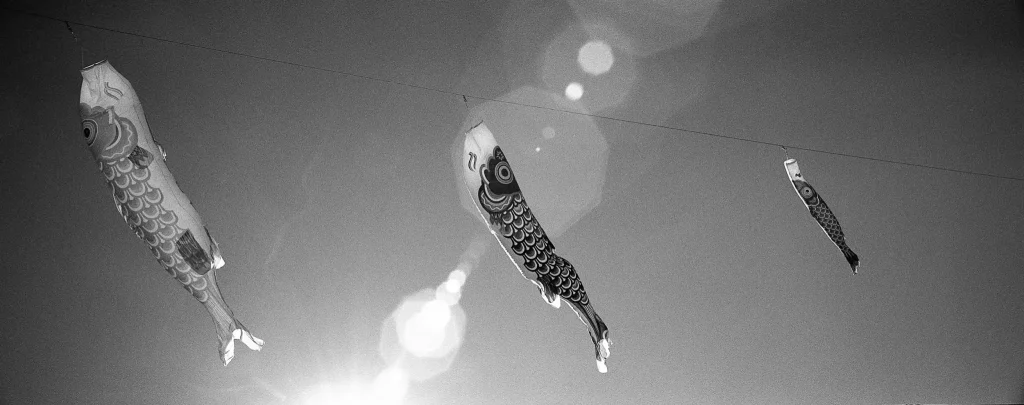
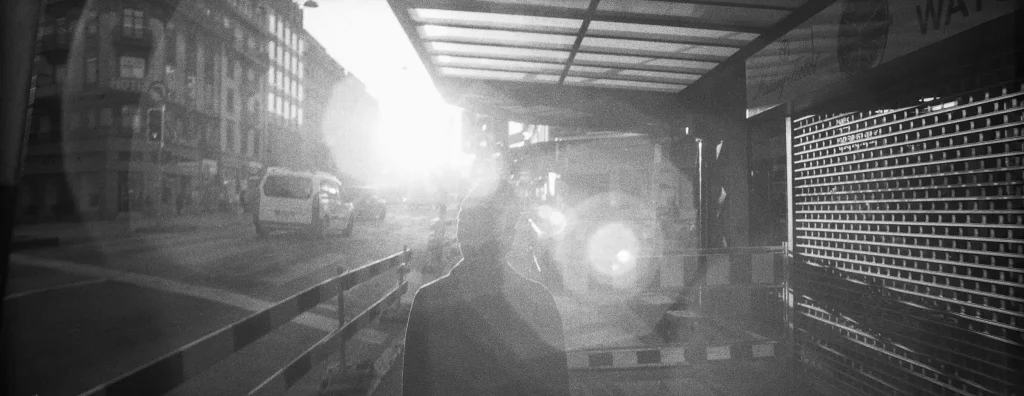
The standard 45mm Xpan lens produces a field of view roughly equivilant to a 24mm lens. So while FrankenPan is only a bit wider, it infact gives you a lot more field of view on the short (vertical) edge. This has been the noticeable difference between the lenses for me. As an aside, I have to say that I have been reasonably impressed with the sharpness of this lens, even at small apertures, ie, f11-f22. As you can see from some of the images posted, the lens will flare pretty dramatically though.

Panoramic… and up close
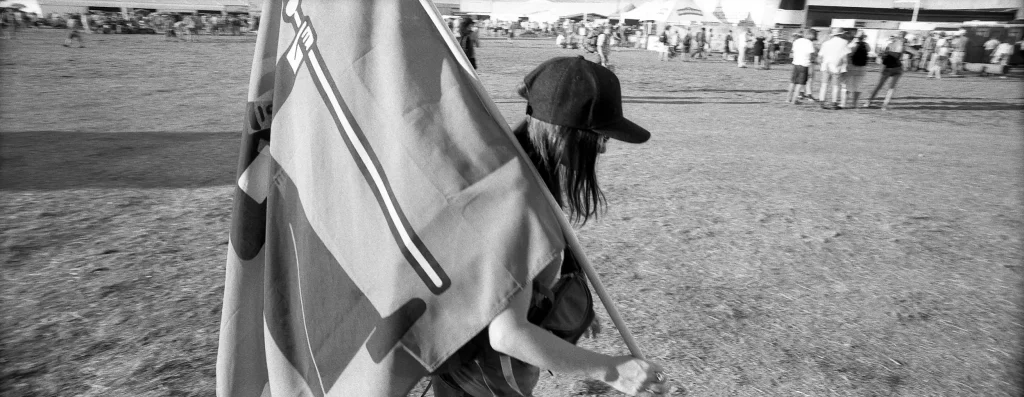
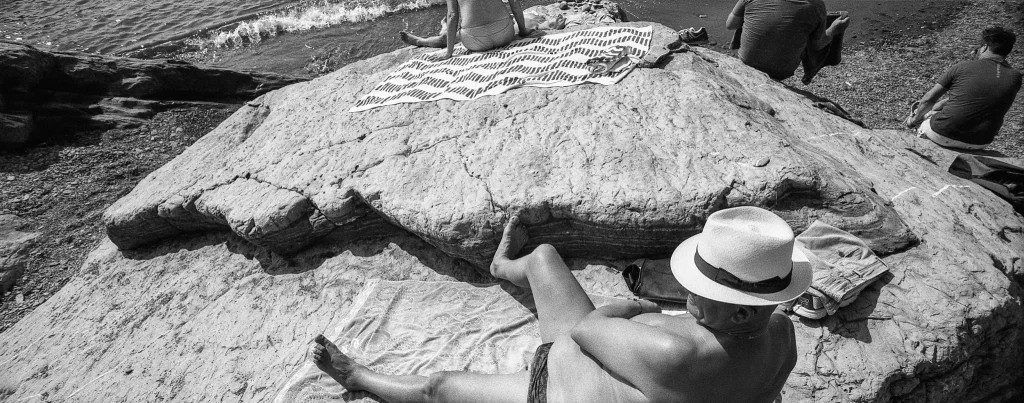
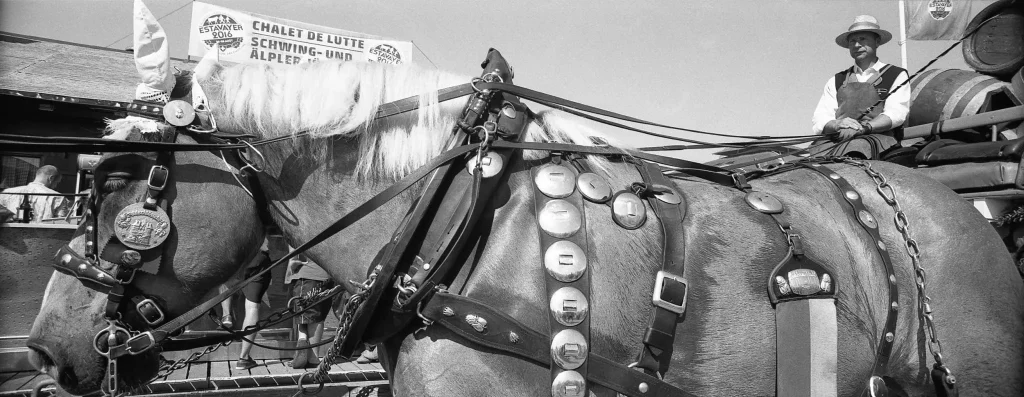
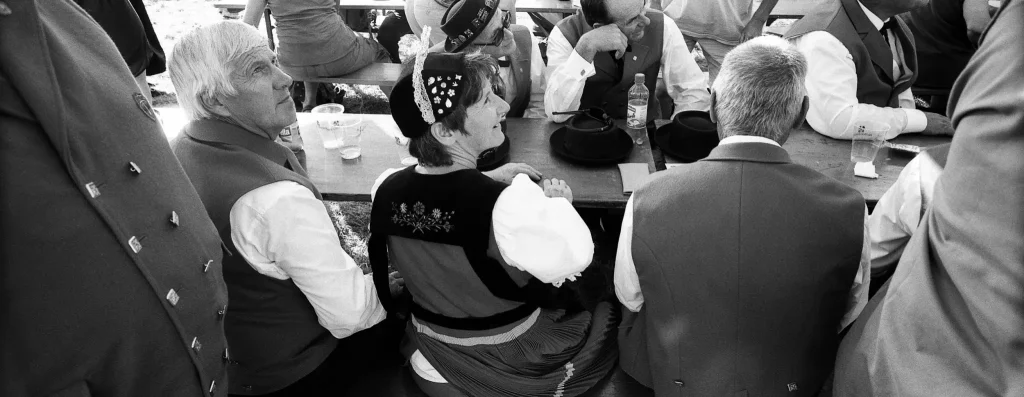
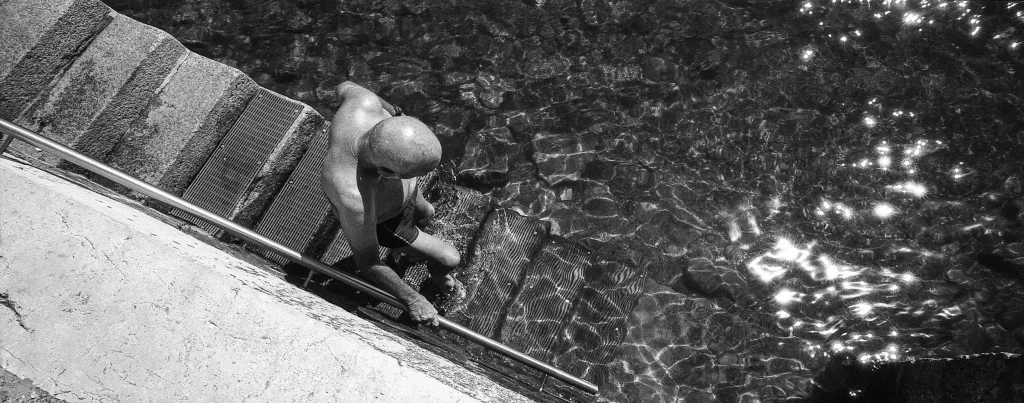
Like with all ultra-wide lenses, it takes a while to get into the swing of learning how to see with it. In my experience and for my style of shooting, it really demands that you get in close otherwise everything just appears boring and a long way away. Some photographers might be inclined to use the lens to capture wide open spaces, which I have done here and there. But for the most part, it was a ‘get in close’ or bust lens for me. And when I mean close, I mean within 2 meters.


This was the reason that I got this lens in actual fact. My experience with the 45mm ‘standard’ lens that comes with the Xpan was that it had a tendency to be a little blinkered. I know this sounds a bit contradictory given the wide format, but on the vertical edge, the 45mm is a bit limiting. I am used to shooting 35mm and 28mm lenses, which allowed me to get close and still drink a lot of a scene even when shooting in landscape orientation. With the 45mm, I found that when within 2 meters, I wasn’t able to capture enough of the person’s frame or the environment as I was used to. As a result, I started to step back. I got used to this point of view and even came to appreciate it, but when I learnt about the 35mm f2.8 PC Nikkor, I was excited about the prospect of being able to step in with my Xpan.
The inevitable learning curve
In truth though, I found it a hard lens to shoot with. It has a much more pronounced view than the 45mm that requires taming. I actually thought I would be fine with it, as I had spent some time shooting with a 20mm lens on a traditional 35mm camera and had found an equilibrium with that. But this was different again. The panoramic frame forces you to resolve all that information in the frame. Basically, if it’s in front of you, it will be in the picture. For street and documentary, it is hard to resolve everything quickly and photos can sometimes end up looking cluttered or unbalanced.


It is probably because I haven’t shot with it anywhere near as much as what I have with the 45mm, but I haven’t made as many ‘keepers’ with FrankenPan as what I have with the Hasselblad lens. Also when you miss, you really miss. Photos either work or they don’t, whereas there is a little more grey area with the 45mm.
The Focus Problem
So besides learning to tame the ultra-wide view of FrankenPan, the other main problem is getting the lens to hit focus. Now I know what you are thinking: “Dude – it is a 35mm lens. Put it at f11/f16. Put your focus 1.5 meters. Point and shoot”. Yeah, well that is all well and good, but it gets a little harder than that when you are within 1.5 meters. I am pretty good at judging the distances between 2 meters and 5 meters, or 5 and 8 meters. And for those types of distances, you can rely on scale focusing at small apertures.
But when the difference is between the .5 meters and .8 meters, it gets a lot harder. Judging those micro-distances is hard to do, and at that range, f11 and 16 doesn’t buy you that much wiggle room. Maybe .3 meters at best. And that is at best. I had a bunch of images that were slightly out of focus early on, particularly when I used FrankenPan to allow me to get really close in street scenes. Over time, I got a better at judging distances. I also have to admit that I occasionally forgot to move my focus point between shots, which was a problem I almost never had with the 45mm (probably because I was focusing with the rangefinder patch).


Eventually, I got better at focusing. I found myself reaching for f16/22 (rather than f8/11) and topping out at the slowest possible shutter speeds. I started to push Ilford HP5 to 1600 and beyond, which meant I got some pretty contrasty results depending on the light I was shooting in. Had I shot with Frankenpan for longer, I think I would have switched developers to something that might have preserved a smoother tonal profile.

A photographer’s dozen
I ended up having a lot of fun with the lens though. Among this experiment, I can point to a bunch of images that I am really fond of and which gave me the point of view that I was looking for. I have a tendency to put the camera really close to the subject, and this lens presented me with the ability to do this with the Xpan, albeit with the added challenge that this ‘work-around’ solution required in terms of focusing and framing. I found the process of learning to make photos with FrankenPan an enjoyable challenge. Like a treasure hunt, I guess.
There are a dozen or so photos that I love in particular (included in those I posted) that not only made the experiment worth it, but also serve as little clues and reminders as to how I could use this point of view some time in the future. I think that if you make a dozen or so images that you really like with a camera, then that is enough to consider it a success.


I don’t shoot my Xpan much anymore (it is basically a street/documentary camera for me). I only photographed with FrankenPan for about 3 months and I felt that I was just starting to get into a rhythm with it when I stopped. I would have liked to play with it a lot more. Writing this review makes me feel that my time was cut short with it. Hopefully I can play with it again in the future.


Conclusion
So, I can’t exactly say that I could recommend this lens/ setup. It is a peculiar beast, with what I feel is a pretty specific use. (You also might see a different usage for it). Hopefully, I have given you enough information for you to decide for yourself. You’ll need to be an Xpan shooter obviously. I guess I would say that if you have been curious about the 30mm, but simply can’t afford it, then perhaps it is worth consideration. Otherwise, meh.
You also kind of have to be an ‘enjoy-the-process-guy’ and be prepared to go through a learning curve with it. If you like to forage for mushrooms and make compost, rather than just pick cherries at the orchard, then this might be for you. As a wiser man than me once said, “If you don’t make your own fun, it’s just entertainment”.

Ok, so that is probably enough out of me. I promised to keep this short, and again, I have failed. Sorry about that. I have left some of the details out of this review, just to make it more digestable, so please ask me anything you want to know in the comments. Like all things, Hamish beat me to the punch a few years back with his write-up of the 35mm F2.8 PC Nikkor, you can check out his review as well (linked above).
If you want to keep abreast of my more recent photographic exploits (few of which involve the XPAN), check out my Instagram – @_calstewart__-. I also have some older project work undertaken with the XPAN on my website – calstewart.net – if that is of interest to you. Thanks for reading and as always…keep shooting.

Share this post:


Comments
Douglas Pulman on Hasselblad Xpan with a 35mm F2.8 PC Nikkor – A Users’ Review. Cal Stewart
Comment posted: 21/07/2018
I'm curious about the minimum focus distance, as you've said you struggled to nail the focus under 1.5m but quite a few look way closer than that, or is that just the ultra wide look? I still can't really get my head around how this works with out the image looking fish eye. The normal wide on the short edge and ultra wide on the long is a good way of looking at it though.
Anyway keep it up, what's stopping you.
Thanks for the good read.
Comment posted: 21/07/2018