
I’ve designed and 3D printed some film holders that work well with cut strips, and the models are free to download on Thingiverse.
It can be a faff to digitise your negatives with a DSLR and get good results. The negatives need to be held flat, but many people report getting ‘Newton’s rings’ interference patterns when they’re just weighted down directly onto a lightbox. Then there’s the light source itself — it’s hard to get a completely even area of pure white light.
Commercial Film Holders
There are a few film holders on the market now, not least Hamish’s pixl-latr that solves the newton ring issue by using a textured diffuser. You can also buy film holders that keep the film well above the lightbox to avoid Newton’s rings that way.
Either way, most are designed for scanning a complete film in one go after development, before it is cut into strips for storage. That allows them to use a pretty slick method to keep the film flat. The film is held at the edges by a long continuous slot on each side. Before and after the straight central section, the slots have an S-bend. The laws of physics mean that a curled film is forced to be flat. The downside is having several feet of film flailing around either side, attracting dust and potentially getting scratched. If you want to re-scan an image later, and the frame you want is at the end of a cut strip, then it won’t sit in the S-bend and there’s nothing to stop that end curling.
Commercial Light Sources
When it comes to light sources, I had been using a cheapo A3 light pad, wafer-thin and powered from USB. The light was pretty even, but with a slightly yellow cast. My research showed that the most highly-prized characteristic of expensive lightboxes is a ‘high CRI’ or Colour Rendering Index. The higher the number, the whiter the light. 90 is sort-of OK. 95 is good. 99 is available from some companies, but is eye-wateringly expensive.
3D Printed Versions
I’d recently been gifted a secondhand 3D printer, and I’d been using FreeCAD software to create my own designs. So, I set about designing a set of film holders for all the commonly-used frame sizes.
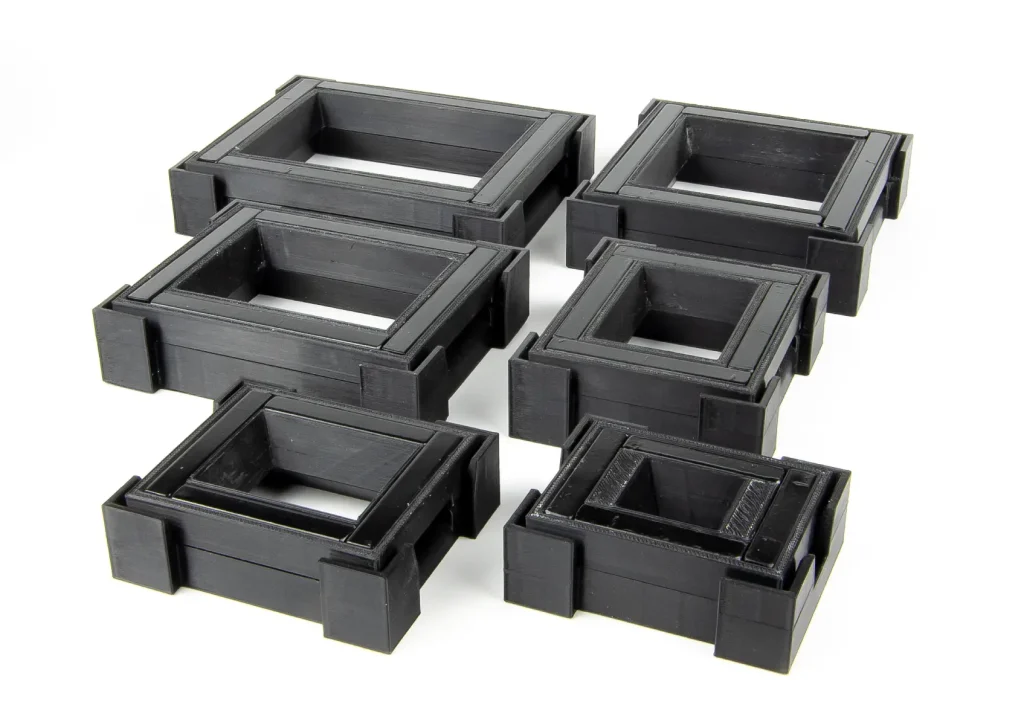
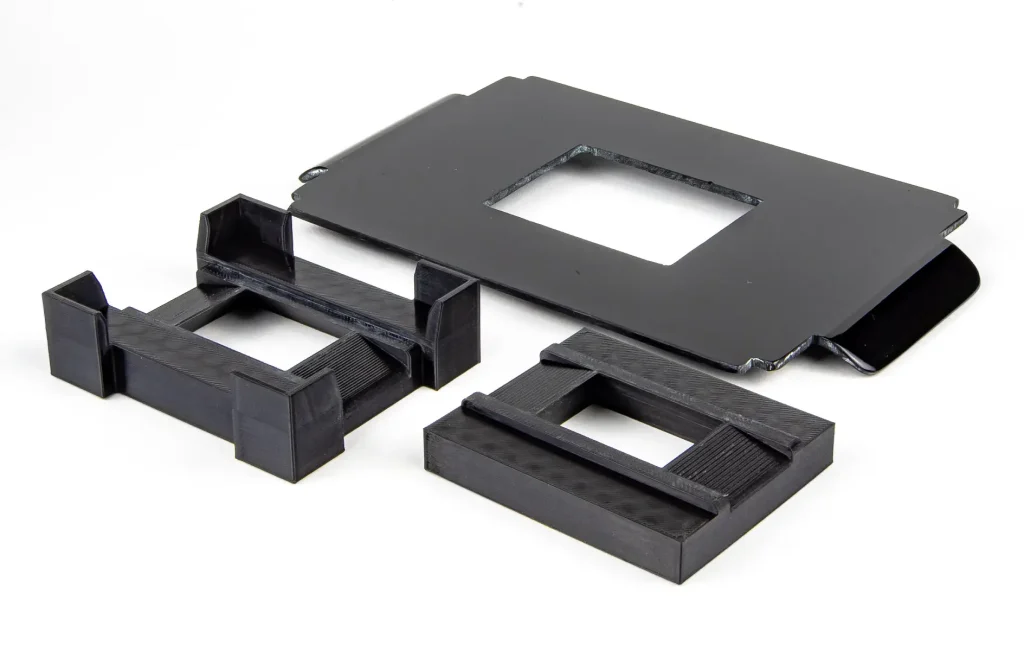
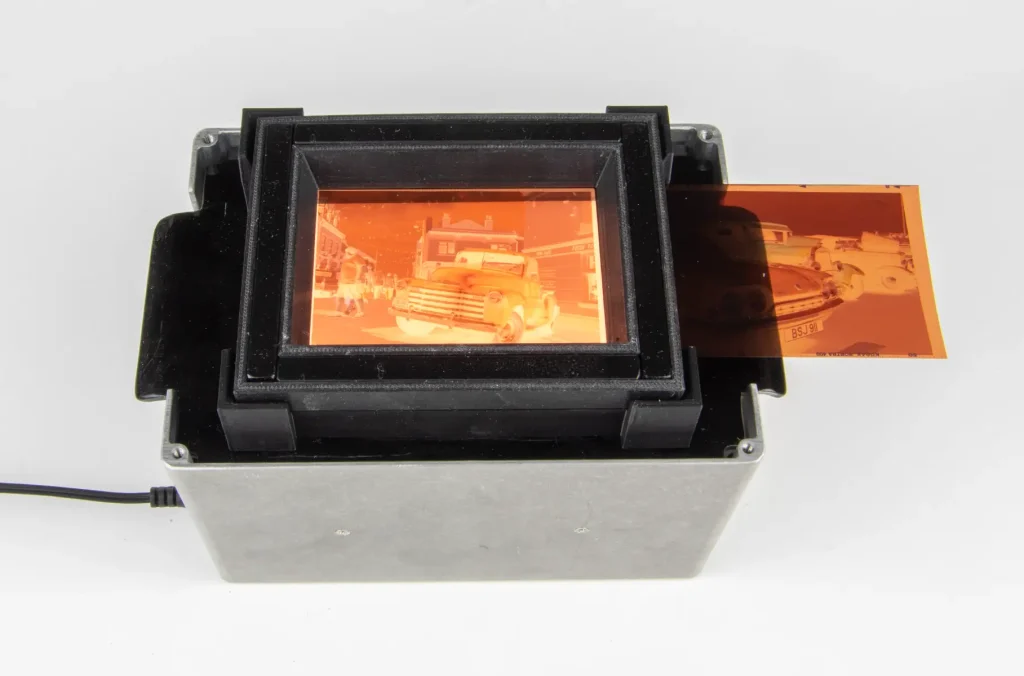
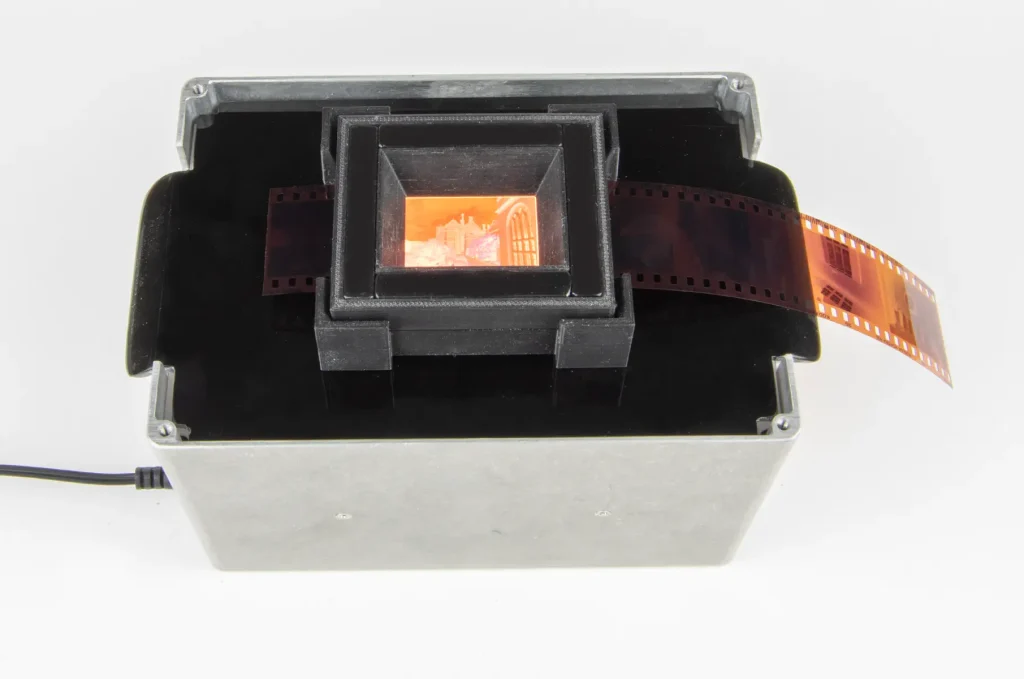
What I came up with is a two-part design that sandwiches the film between the top and the base. The negative is gripped all the way round — at the edges, and also in the thin gap between frames. Crucially the top part is weighed down with sections of 8mm square steel bar glued into a recess. I painted the steel bars black so they don’t go rusty.

The central aperture is fully chamfered above and below the ‘film plane’, to make sure it’s not in view or causing any unwanted reflections. I’ve glued each one of my bases onto a black plastic mask that fits onto the lightbox, but that’s optional. The tops aren’t attached to anything, so you just lift the top up, move the film along, and put the top down again.
Home-made Lightbox
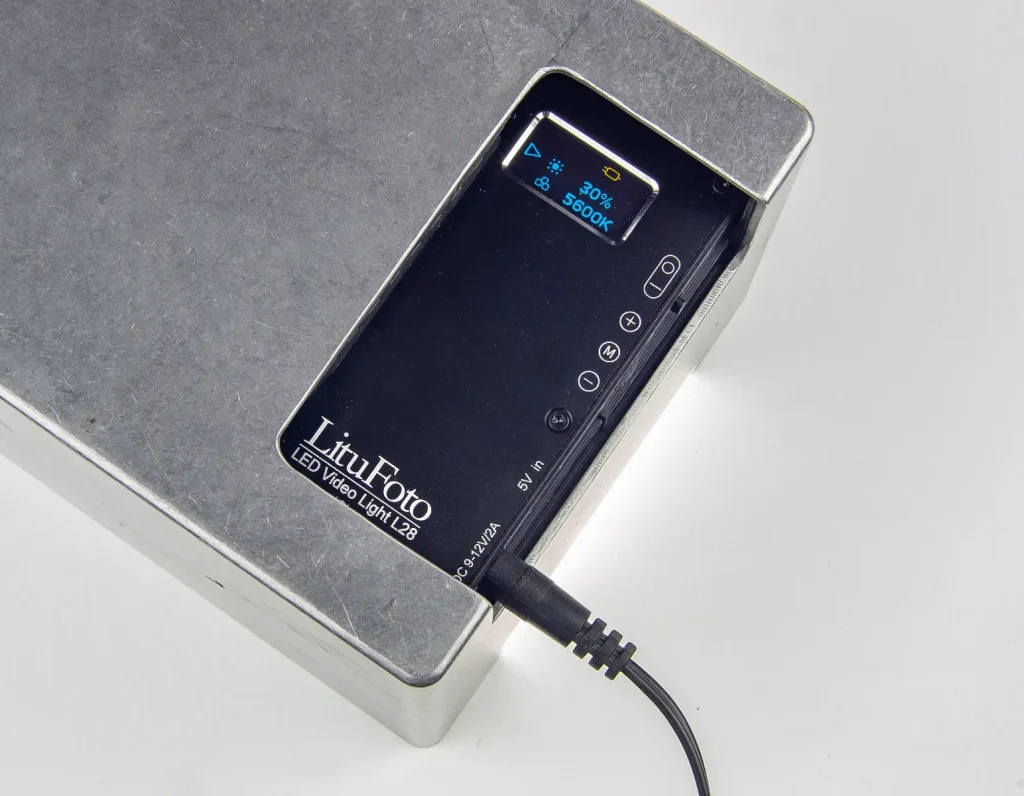
For the light source, I chose the LituFoto L28, which claims a CRI of 97 and a maximum colour temperature of 5600K. At about £60 it’s not too expensive, and at 159mm x 95mm I figured it would be just big enough to scan a 120 6×9 negative. I also ordered a 3mm thick sheet of Perspex™ Spectrum Opal as a diffuser and set about experimenting.

Initial results were not encouraging. When the L28 is on its 5600K setting, only half of the LEDs are lit so there are big gaps between them. With the diffuser less than 30mm above it, the individual lamps were still clearly visible. Doubling-up the diffusers (e.g. 15mm and 30mm) didn’t help. Only bringing the diffuser to 60mm above the light source solved that problem, but introduced another one — evenness. The edges of a 6×9 cm rectangle were slightly less bright than the centre. I found a solution by adding a ‘box’ of inward-facing mirrors above the light source, so it would appear to be infinitely wide. Further experimentation showed a vast improvement.
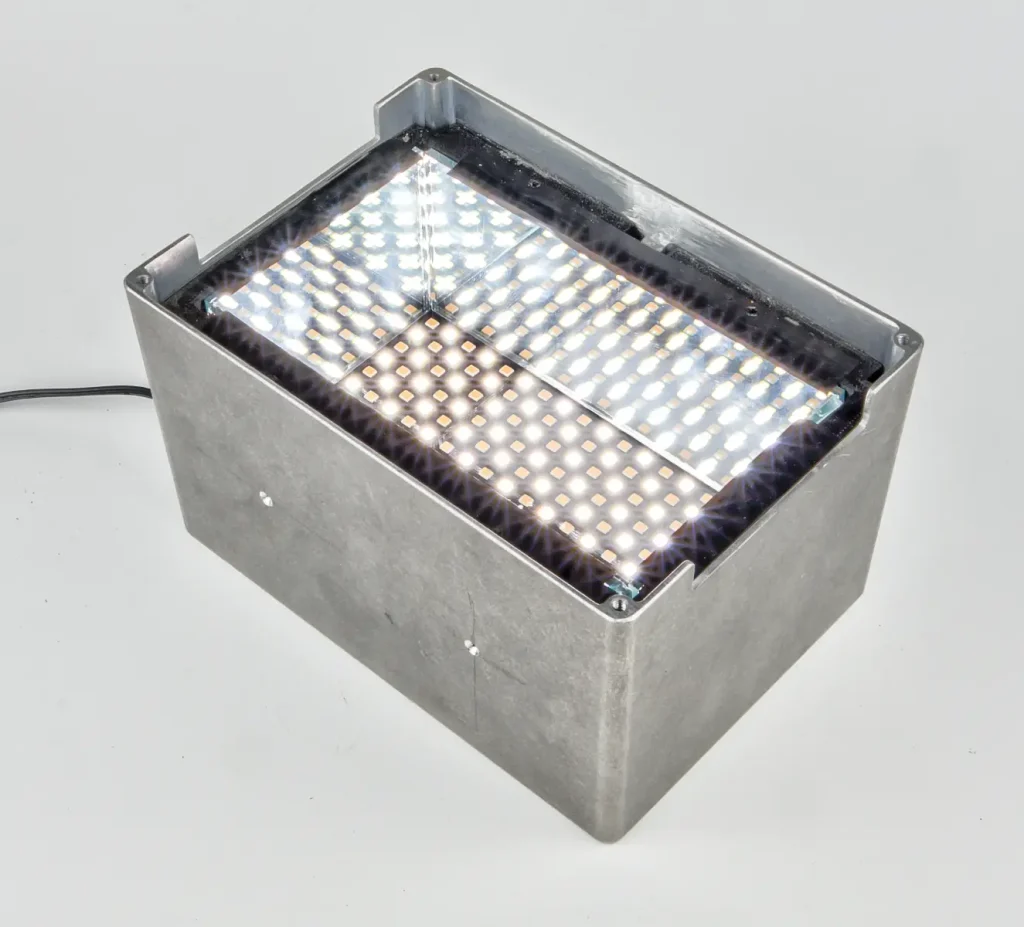
Now to find a suitable box to fit it all into. Hammond do a nice range of die-cast aluminium boxes, and the 1550F model is ideal. The L28 light source fits neatly at the bottom, and it’s just the right height for a 60mm high ‘box of mirrors’ below the diffuser. Only trouble is, the sides of the box are tapered out at about 1.3 degrees. After more design work in FreeCAD, I was able to 3D print some adapters to hold the L28 in the bottom of the box. They correct the taper and provide a precisely perpendicular surface to mount the mirrors on. The diffuser sits on top, and I made a cutout at the bottom to access the power input and controls.
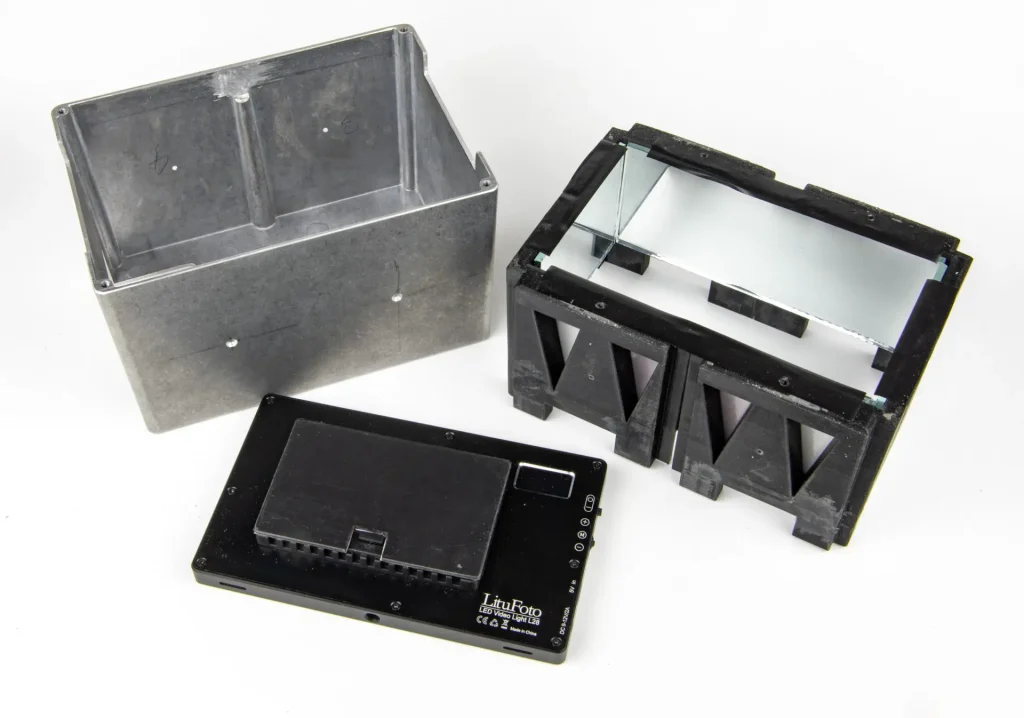
The sides of the box extend slightly above the diffuser, to positively retain the masks I made to mount the film holders on. The masks have extensions at either end of the film path, which bend downwards and ensure there are no sharp edges to scratch the film.
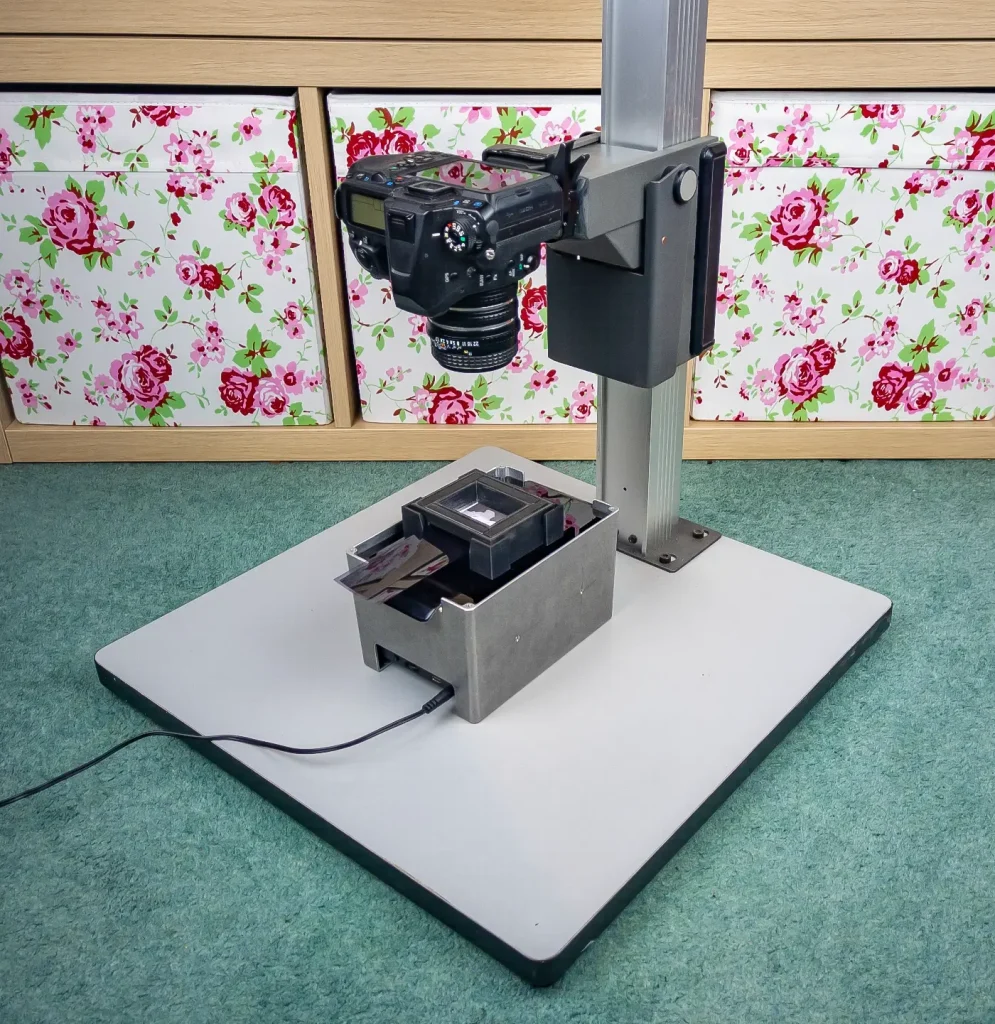
Copy Stand
Previously I’d been using a tripod with the head moved to the bottom of the centre column. It works, but needs a lot of space and takes a while to set up. I did some shopping around for a proper copy stand, and found they are unbelievably expensive. Enlargers however, are very cheap. Top tip: they’re almost exactly the same. After a bit of searching I was able to buy a fantastic second-hand enlarger here in Norwich, on an eBay auction. It’s a Jessops-branded LPL 6600, which is a large and very sturdy piece of kit, and it was only £32. I simply removed the enlarger head and fitted a quick-release camera mount in its place. That makes it the same as an LPL CS-5 copy stand, which retails for over £500. Go figure.
Complete System
The big copy stand means there is plenty of room to turn the light box through 90 degrees for film sizes where the longer or top edge of the frame is along the length of the film (6×4.5, 4×3, 6×6 from a camera like a Hasselblad):
Download Links
My 3D designs are available to download free-of-charge on Thingiverse:
Film holders: https://www.thingiverse.com/thing:4799636
They include the following sizes: 120 6×9, 120 6×7, 120 6×6, 120 6×4.5, 127 4×6.5, 127 4×4, 127 4×3, 135 full frame, 135 half frame, 110.
Box adapters: https://www.thingiverse.com/thing:4799613
Share this post:


Comments
Bob Janes on Designing a 3D Printed Scanning System for Cut Strip Negatives – By Stuart Jenkins
Comment posted: 22/04/2021
I've tried something similar built out of Lego bricks, but this is on a different level.
Comment posted: 22/04/2021
Terry B on Designing a 3D Printed Scanning System for Cut Strip Negatives – By Stuart Jenkins
Comment posted: 22/04/2021
Comment posted: 22/04/2021
Comment posted: 22/04/2021
Comment posted: 22/04/2021
Nick L on Designing a 3D Printed Scanning System for Cut Strip Negatives – By Stuart Jenkins
Comment posted: 28/04/2021
Comment posted: 28/04/2021
Peter on Designing a 3D Printed Scanning System for Cut Strip Negatives – By Stuart Jenkins
Comment posted: 06/11/2025
Comment posted: 06/11/2025