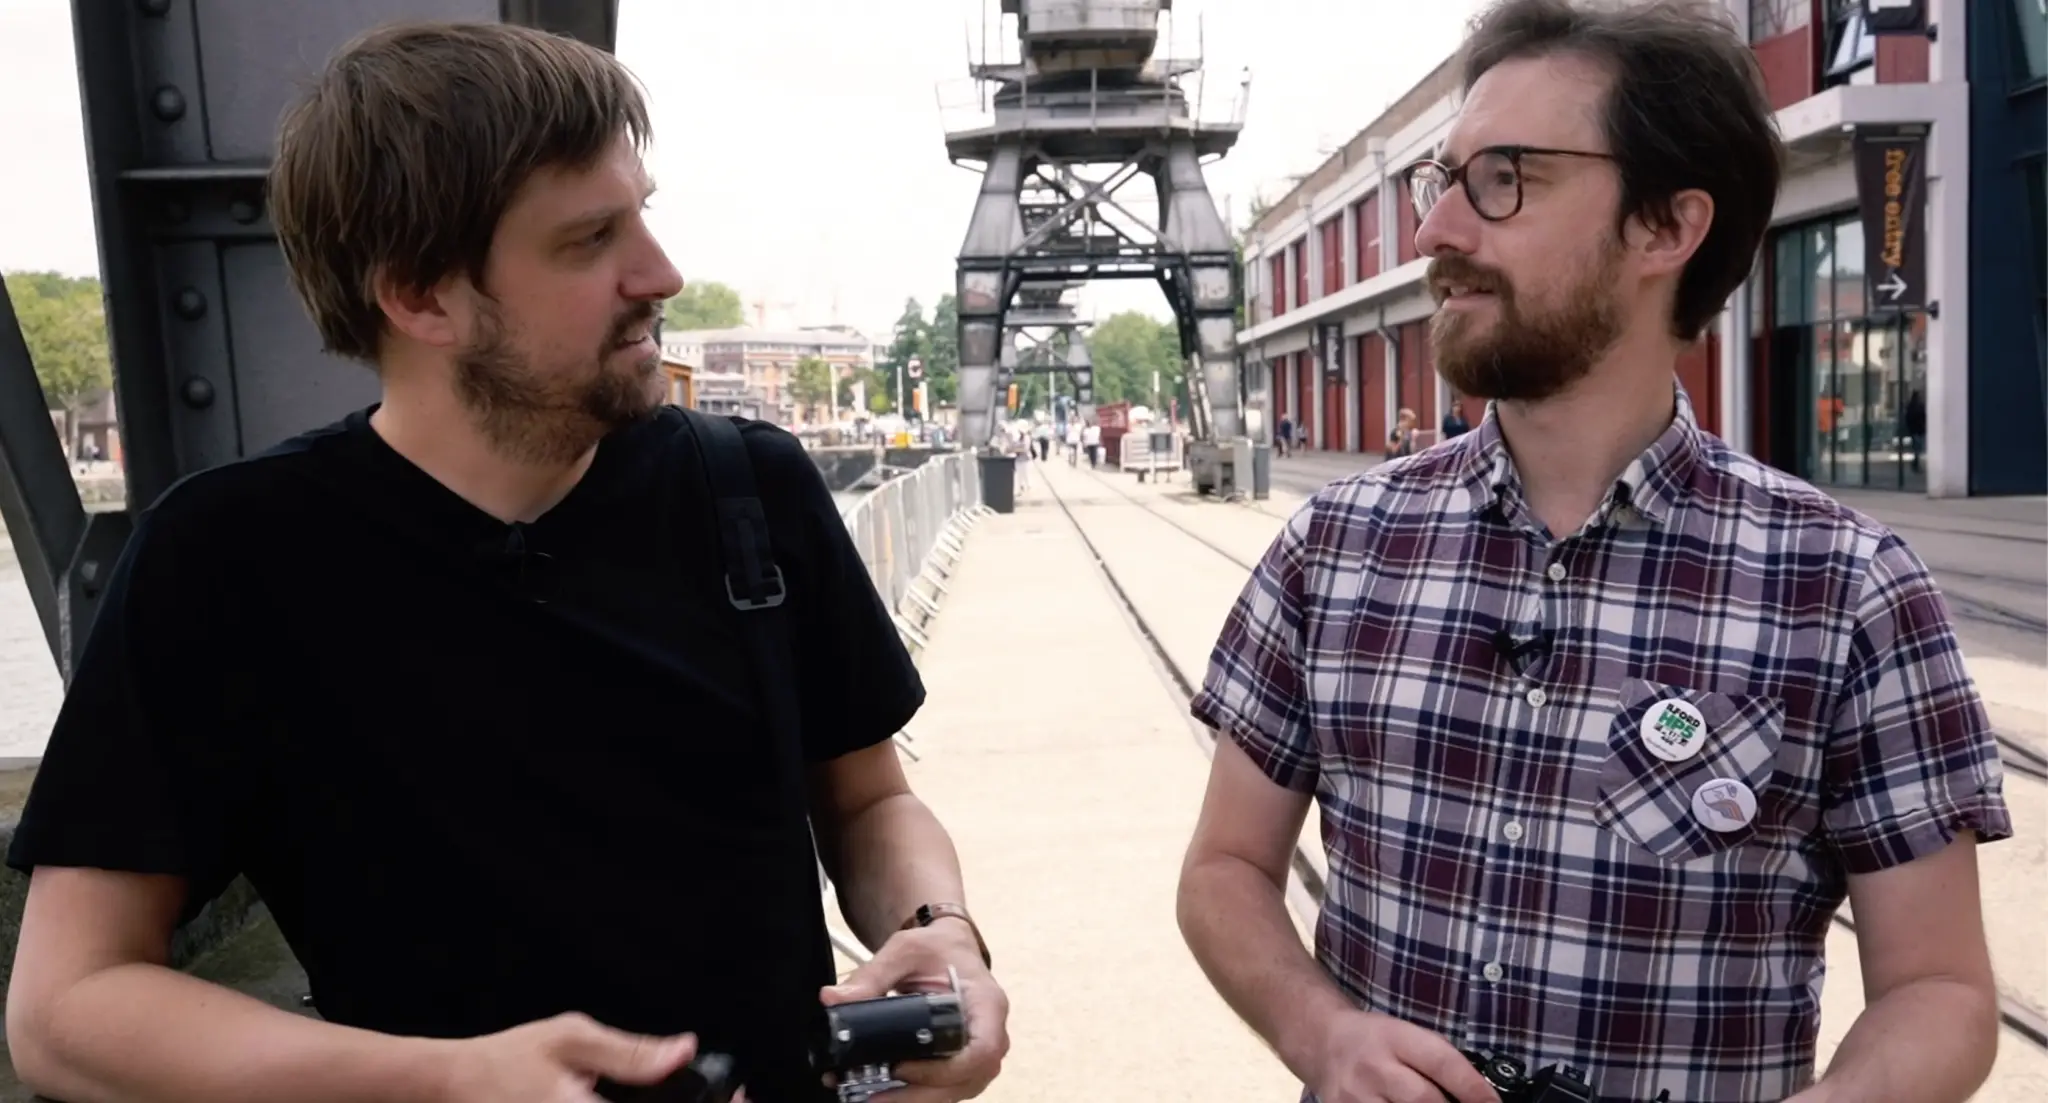
A couple of weeks ago I went down to Bristol to meet Duncan Gammon from SilverPan Film Lab. We’d met briefly at the photography Show in March, but since then I’ve started using his services to develop my film – not least the Ektachrome E100 I’ve been shooting lately – so I thought it might be nice to catch up properly. The plan was, I’d go down and meet him at his house (where he also runs the business). We’d then go for a bit of a walk around Bristol where we would shoot a roll of Ektachrome E100 and have a bit of a chinwag. Following that, we’d then go back to his and develop the rolls we’d shot. The twist in this tale is that I took Will, my cameraman from work, to film and record our chats and make it into a bit of a video.
In the video you can hear a little bit from Duncan about his road to setting up SilverPan Film Lab, listen to me and him chat a bit about our camera choices and metering for Ektachrome, see us wondering round Bristol, get a little tour of his lab, and a load of other random waffle as well. Just FYI, if you’ve not heard me talk on a podcast before, I should warn those with a sensitive disposition… I have a bit of a potty mouth.
You can see the video here:
The roll I shot to make the video also represented my 5th roll of Ektachrome E100 in this little series of posts documenting my first rolls with the film. As such, and as I’ve mentioned, we talk a bit about this in the video – though there are a few things I thought I might expand upon a little here as part of a written post, especially as I now feel like I am very much starting to properly get to grips with with this film.
Metering with the Gossen Digisix II
First things first though, I want to talk briefly about a new light meter. As me and Duncan chatted about when we first arrive in Bristol, for this roll I decided to try out a new-to-me light meter – the Gossen Digisix II. This Gossen is a very compact light meter that offers both reflected and incident metering. I’ll no doubt be reviewing it at some point, so I won’t go into too many details here, at least short of highlighting that this was its first outing and I was shooting it solely in the incident metering mode. As you’ll hear me mention in the video, this was my perfectly legitimate excuse for screwing up a couple of exposures. Again.
Of course, in reality, for various genuine reasons that I’ll get to later I did screw up a couple of exposures. That said, I’m reasonably happy that I’m starting to shoot at much closer to my usual success rate now, and not messing up so frequently entirely because I’m shooting reversal film.
Actually, I find that I’m now starting to think slightly differently about metering and exposure in general. I’ve almost completely managed de-train my brain from defaulting to toward erring for shadow metering when the light is more tricky, and am now – at least for the most part – thinking about what feels more like accurate metering for reversal film with slightly less mental effort. In short, now I’ve shot a few rolls I’m finding myself better able to predict the outcome and judge the scene accordingly.
Shooting at EI80
For reference, As an experiment, for this roll I was overexposing by 1/3 of a stop by setting the meter EI80. I need to play a little more, but I’m not entirely sure this approach works for me when shooting with a fully-manual camera. I feel like I might be better off metering at EI100 and then making judgement calls on a per-frame basis.
This is mostly how I shoot when I’m shooting neg film in fully-manual cameras. Whereas with an automatic exposure camera I tend to otherwise rate the film in a bid to override the potential mistakes the camera might make. Despite the exposure rules being slightly different, I feel like sticking to the same broader approach I take with negative film might work better for me longer term with E100 too. In saying this though, I’m quite aware that a little more experimentation is probably required.
The photos
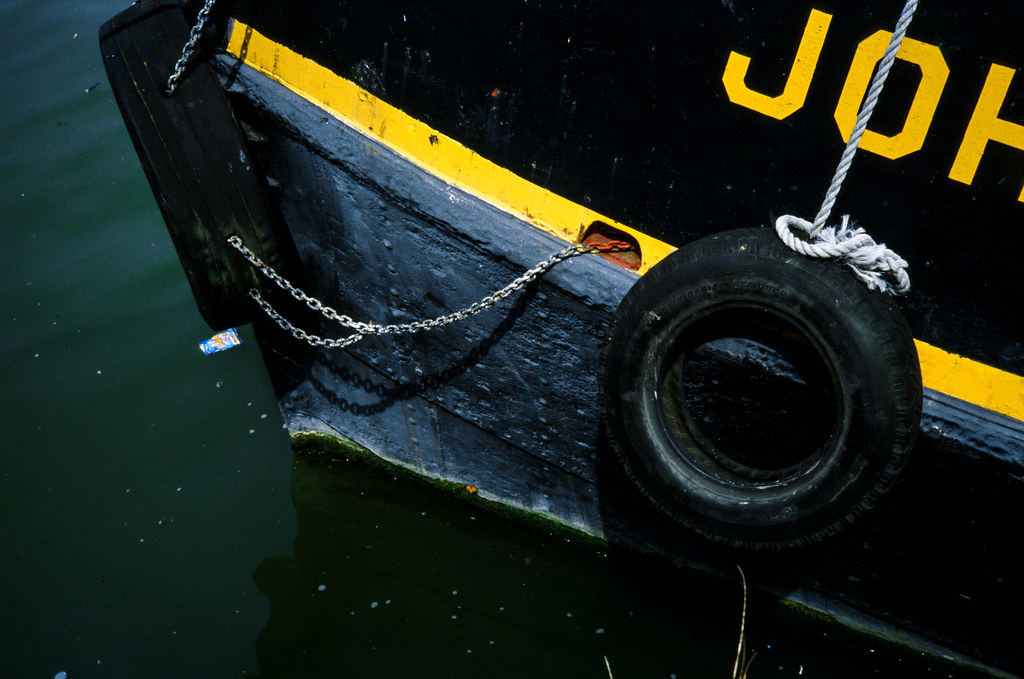
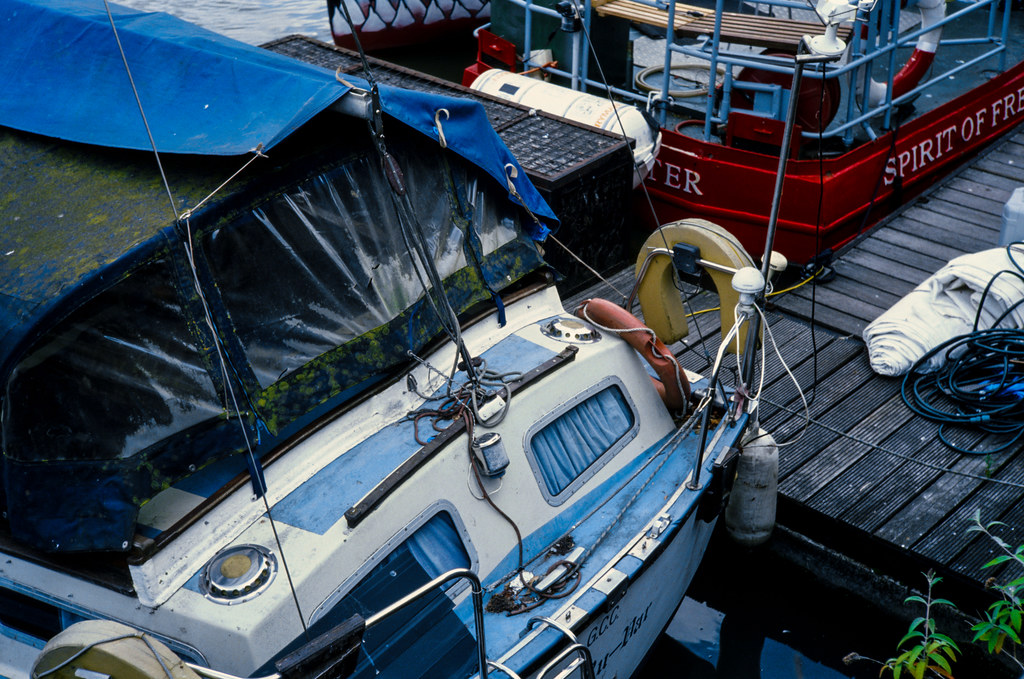
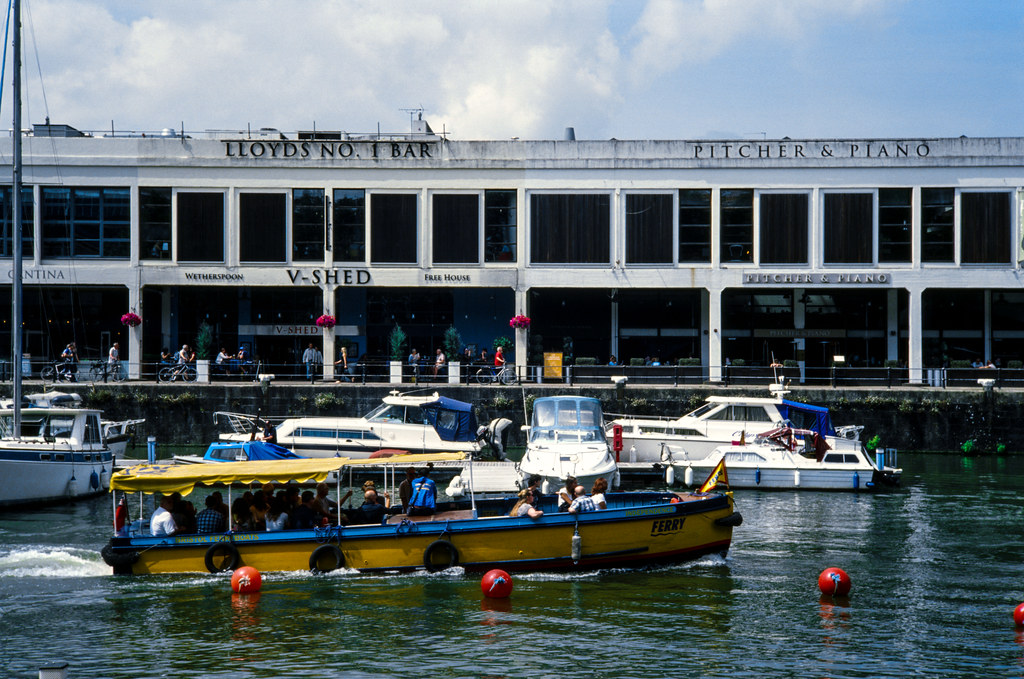
This first shot, I must admit, I’m very pleased with. This to me sums up a lot of what I’m finding that I really like about Ektachrome E100. Rich colours, strong contrast, and shadows that look like shadows. Duncan used a great word in the video to describe the look of reversal film, and that was “glassy” – that’s what I see here, and I love it. This is the image I exposed for, and I got it spot on. Very happy.
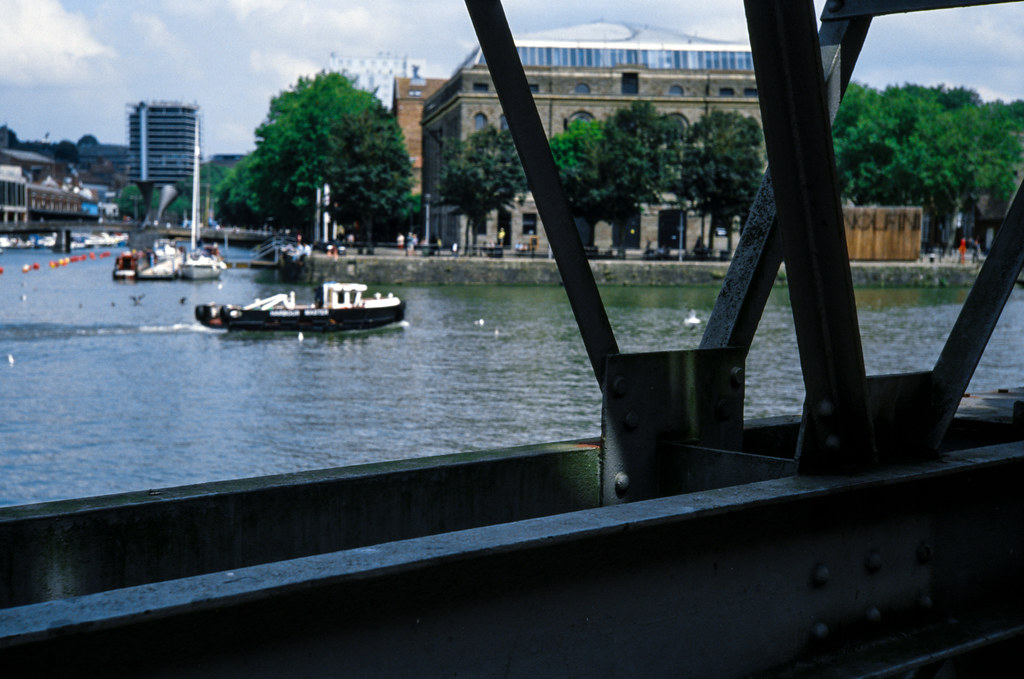
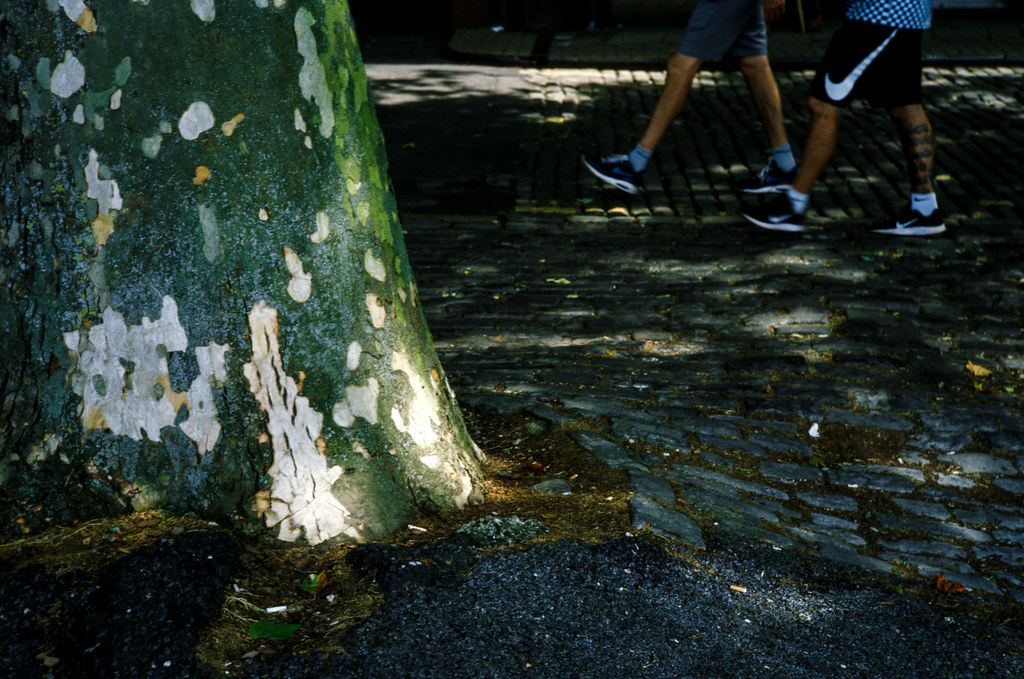
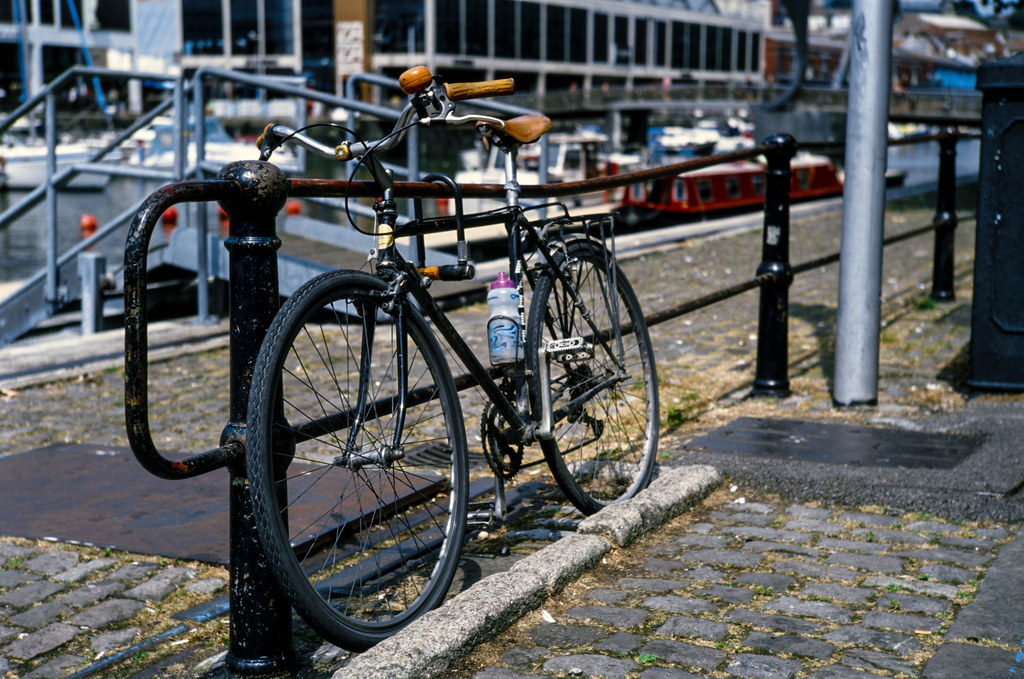
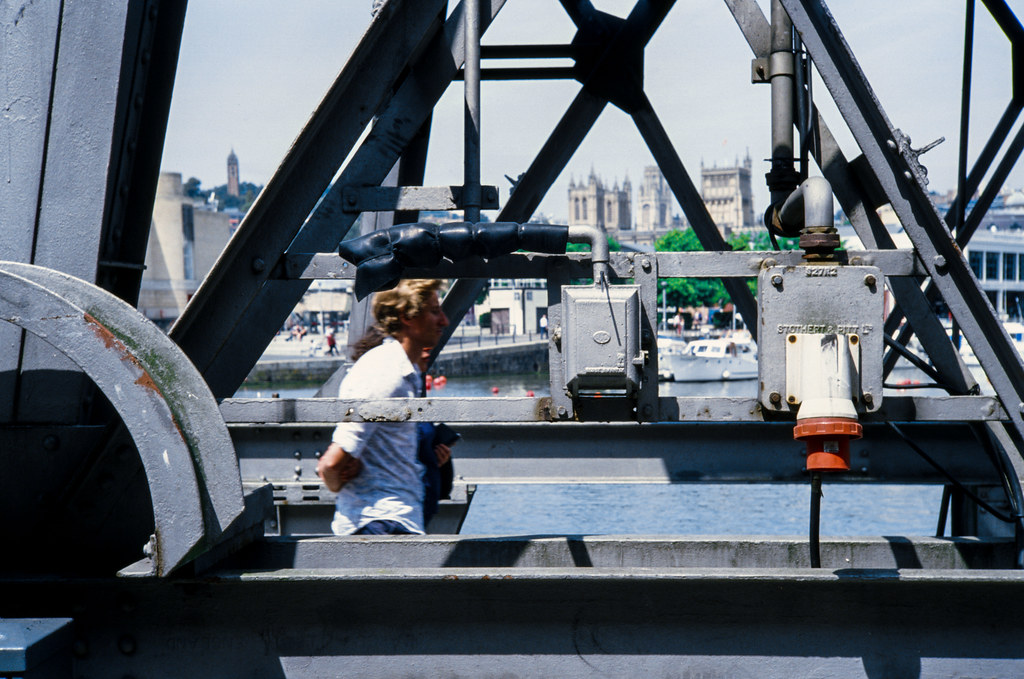
In the video, this next photo is the one that I refer to as being the first one that I felt might have some merit. Admittedly, it’s not life changing, but I’m quite pleased with it. The exposure was set for the background, but despite the foreground being mostly in shade, there is just about enough shadow detail for it to work. This might not seem like a big deal, but when I took the shot, I was very confident that there would be enough foreground detail for me to make the metal structure the subject and let the background fall to slightly out of focus. In short, the shot I had in my head is exactly what came out – this feels like a very positive place to be in with this film now!
Subtlety in the adages
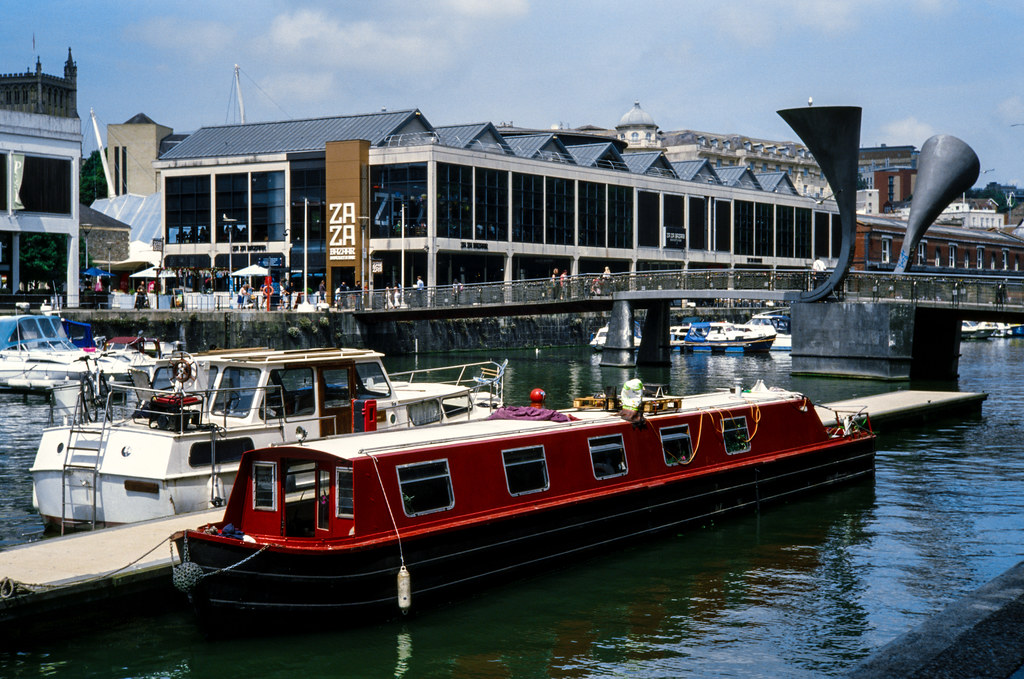
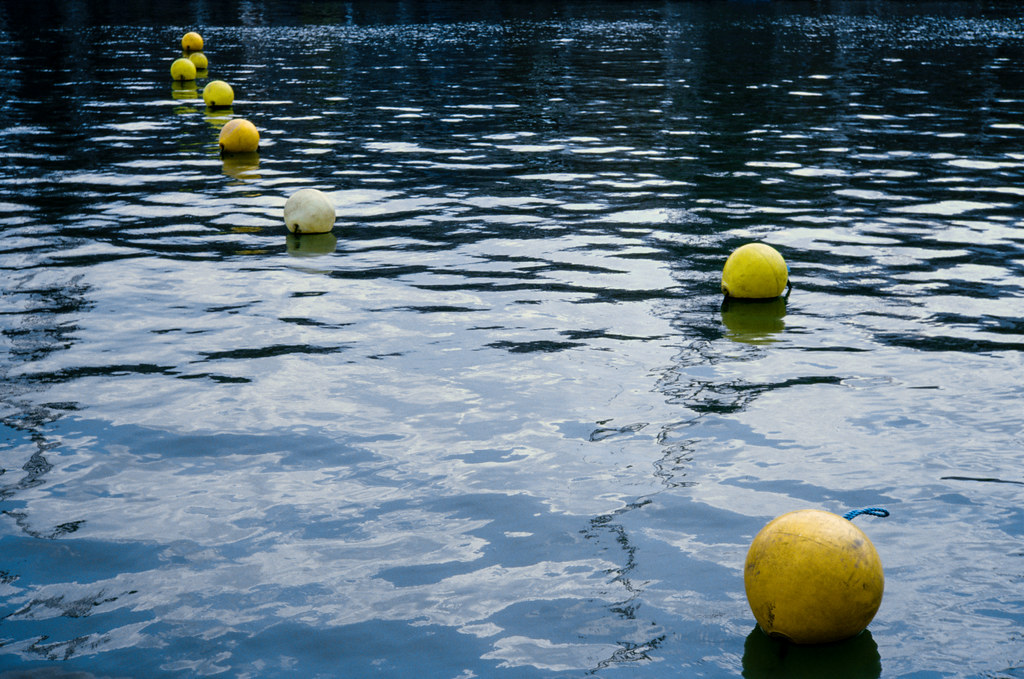
This next image was the subject of a bit of conversation in the video too. In the video I talk a bit about how I think the phrases “expose for the shadows” and “expose for the highlights” can lead to misinterpretation. To expand on that point slightly, if I was shooting the scene below with a negative film and an incident meter, I’d have likely taken a reading with the meter in the open shade. Whereas with Ektachrome E100, I’m taking readings with the incident meter in a sunlit area with the diffuser pointing to roughly where I’ll take the shot from.
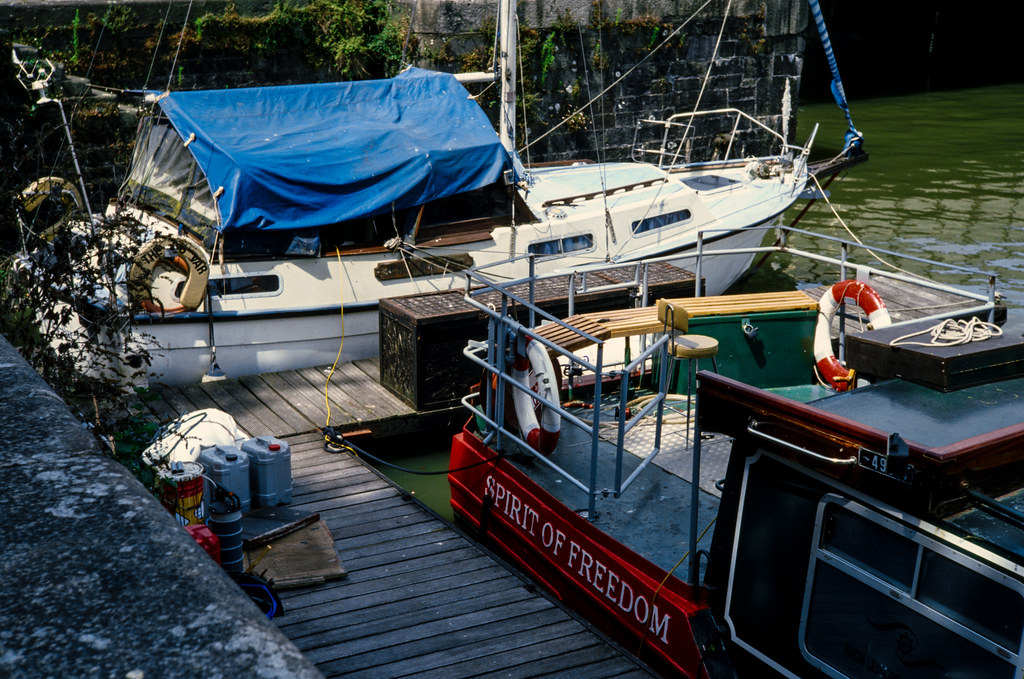
Shooting in these different ways will result in good exposure for both types of film, but with a slightly different outcome. With negative film the highlights are retained through the film’s latitude, and plenty of detail can be pulled out of the shadow areas within the frame. With E100 the highlights aren’t lost and the shadows just fall where they fall resulting in the contrasty images I’m growing to really love.
As I mention in the video, when it comes to shooting negative film, the phrase “meter for the shadows” sometimes seems to get translated into finding the darkest area of the frame and metering from there. This can work out ok with a few modern neg films – especially if you’re sending your film away and having a lab technician deal with colour shifts in the scan for you. I talk about this approach to “cheating” with neg film here.
As such, with people like me propagating this sort of approach as a good way to cheat your way to good results – and with others online touting as the way you’re actually supposed to shoot neg film – I think the phrase “meter for the shadows” can mean different things to different people who shoot in different ways… and that’s even before you get into the topic of what it means to people who use the Zone System and various Zone System derived methods. In short, the rules for shooting neg film are quite loose.
This looseness does not apply with reversal and the rule “meter for the highlights” – not even close to the same degree anyway. Of course, none of this will come as a surprise to many people reading this post – I was aware of the fact even before I picked up this film myself. But as I say in the video, there’s a subtlety that this adage doesn’t quite capture, and the key to good results is learning how that subtlety translates into practice. Fortunately, 5 rolls in – as I said earlier in the post – I’m starting to get a good handle on how that subtlety does translate into my photography… Though, I’m definitely yet to nail it every time, and that’s at least partly because I’ve not yet embraced the art of bracketing.
Remember to bracket
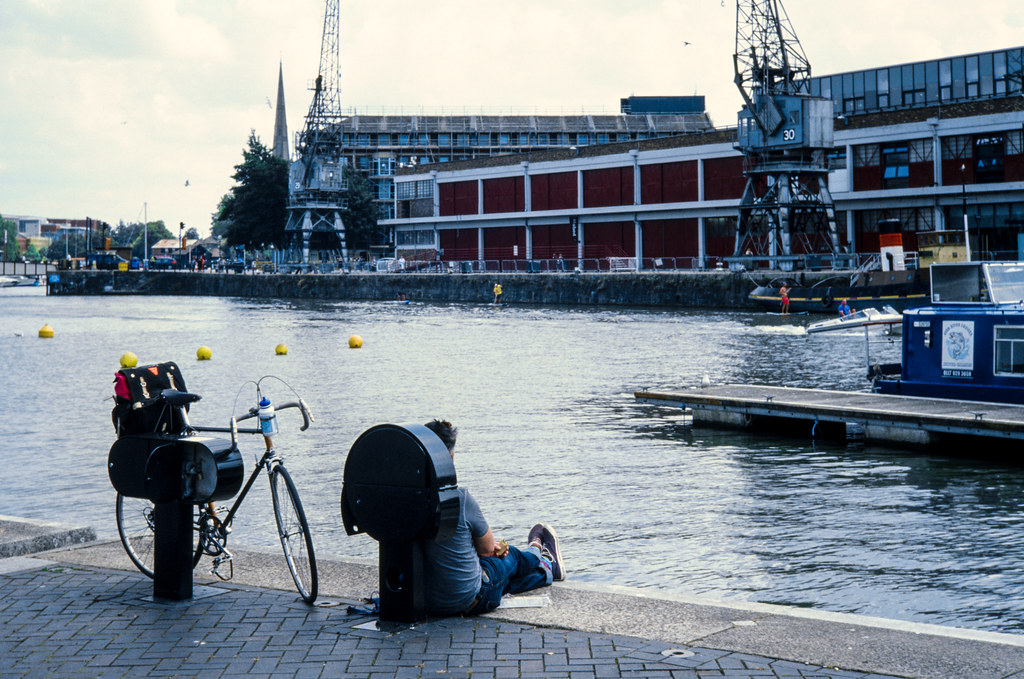
There are two tips that have been repeatedly given to me throughout this process so far. The first is to incident meter, the second is that when in doubt, it’s best to bracket. As is hopefully obvious, whilst ultimately I feel reflective metering suits me better, for the sake of my learning I’ve taken to following the first bit of advice. But, the second bit is yet to completely sink in. This next photo is definitely a good example of when I should have taken the time to bracket.
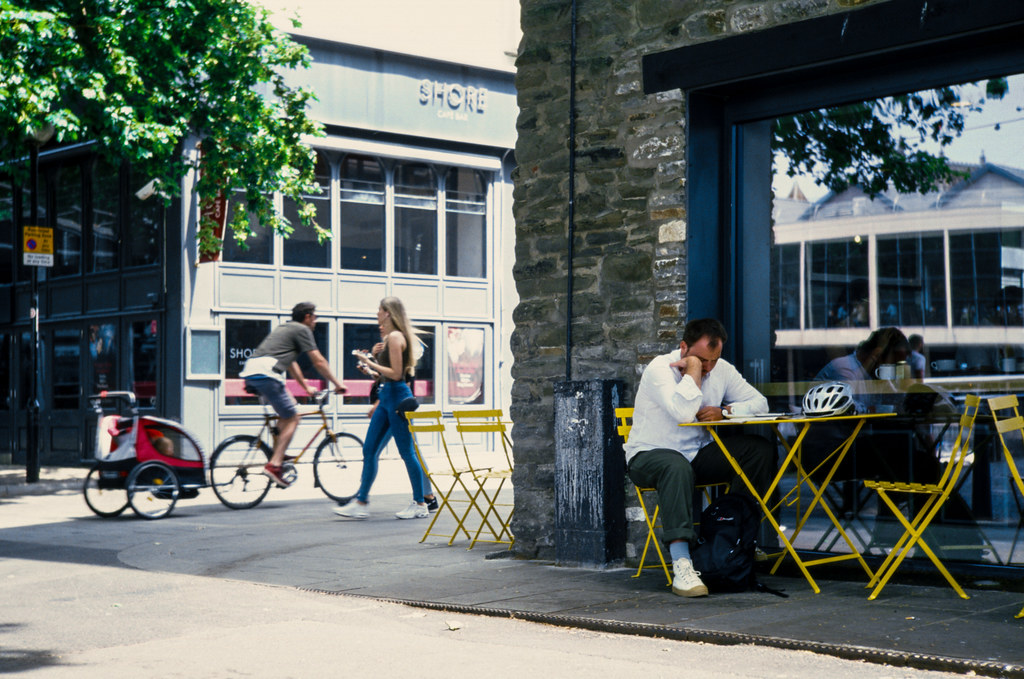
Whilst it’s a complicated scene, to me, this is an image of the man sat down reading – the man is the subject, and not so much the other people walking past, so I’ve largely exposed for him. That said, I think there would have been a better choice of exposure. Of course, me being me, I got cocky and guessed. I can’t remember the exact settings, but I went for something based off the exposures I used for these two previous shots.

I knew the second one was only going to be correct for the dappled light, so bumped the exposure quite a bit. As it turns out, I think I just gave it a touch too much juice. If I’d exposed even half a stop less, I think I would have retained just about enough detail in the shade, and not been so close to overexposure in the lighter parts of the frame. I might be wrong, but that’s the point isn’t it – if I’d just taken the time to take a second and even third shot at a different exposure values I would have multiple images to choose the best from. But I didn’t. Lesson, hopefully, learned.
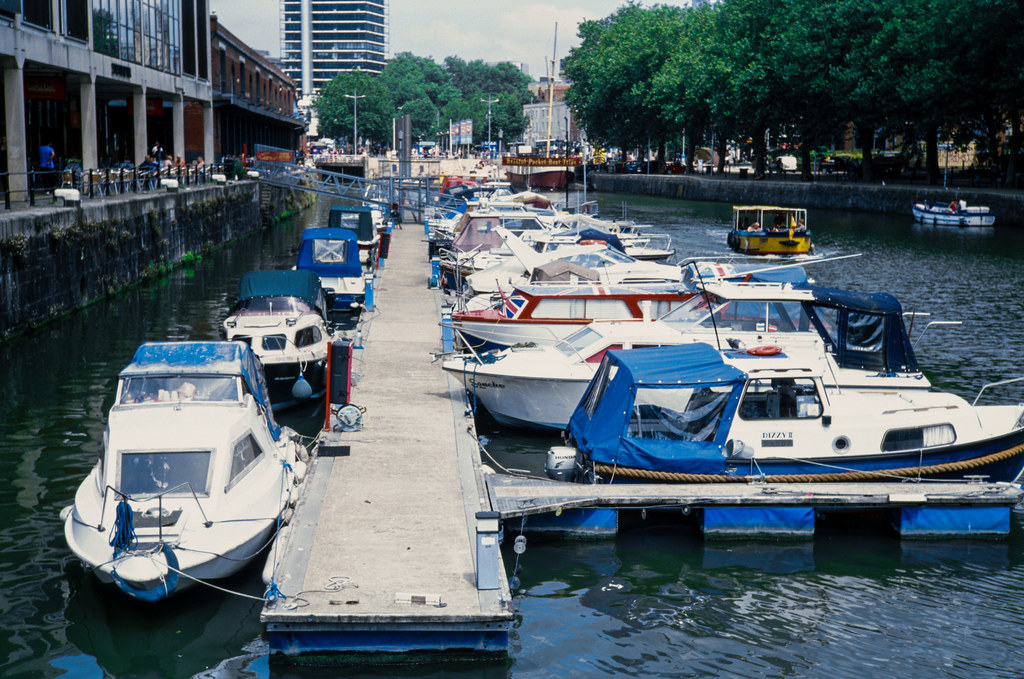
A couple of overexposures
As I said at the beginning of the post, I did properly balls-up a couple of times too. There were a couple of shots that the white boats reflected a bit too much light. I do wonder if this is a product of shooting at EI80, and if I’d been at E100, would I have got a better result? More experience will answer that question, but either way next time I’m in a similar situation I will dial back the exposure a tiny-touch, I think.
This shot of the runner was just a mistake. I had changed the exposure for a bit of cloud cover, was just ruminating over a shot near this location when the runner appeared, so I just snapped without the time to reset the exposure for the sun. Thankfully, it’s a crap photo regardless of the exposure, and actually, this is the sort of mistake that can happen to anyone, so I’m not too bothered.

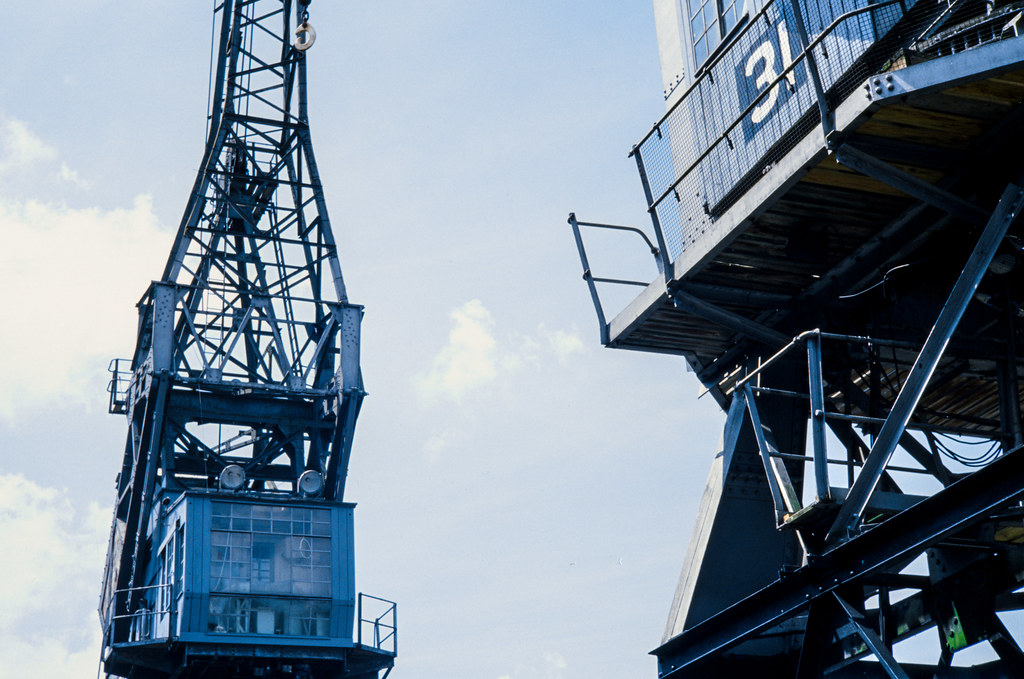
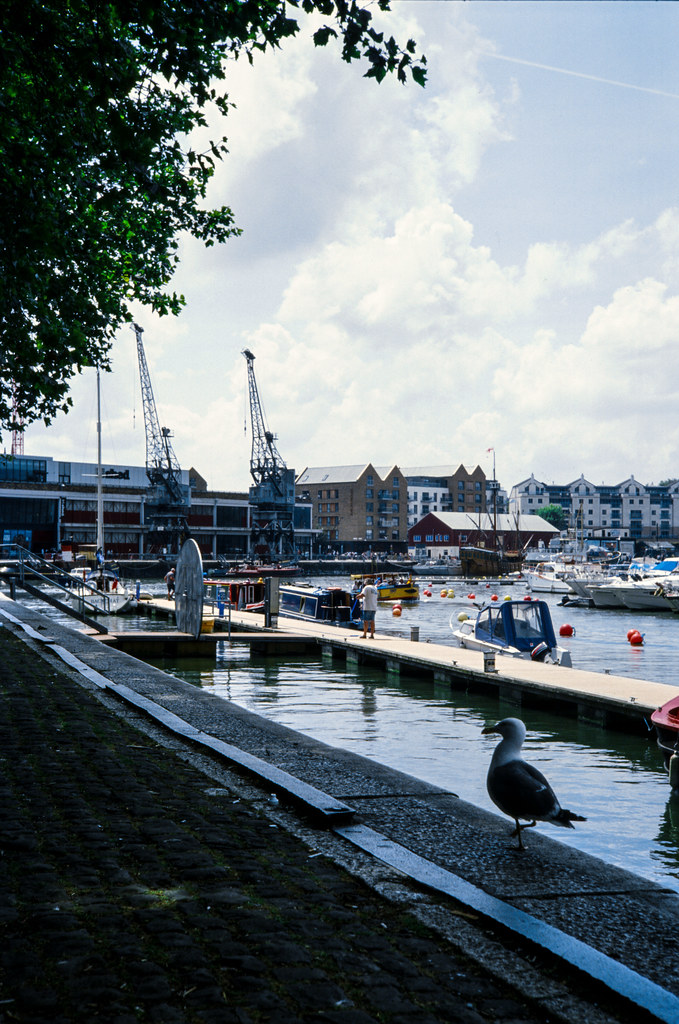
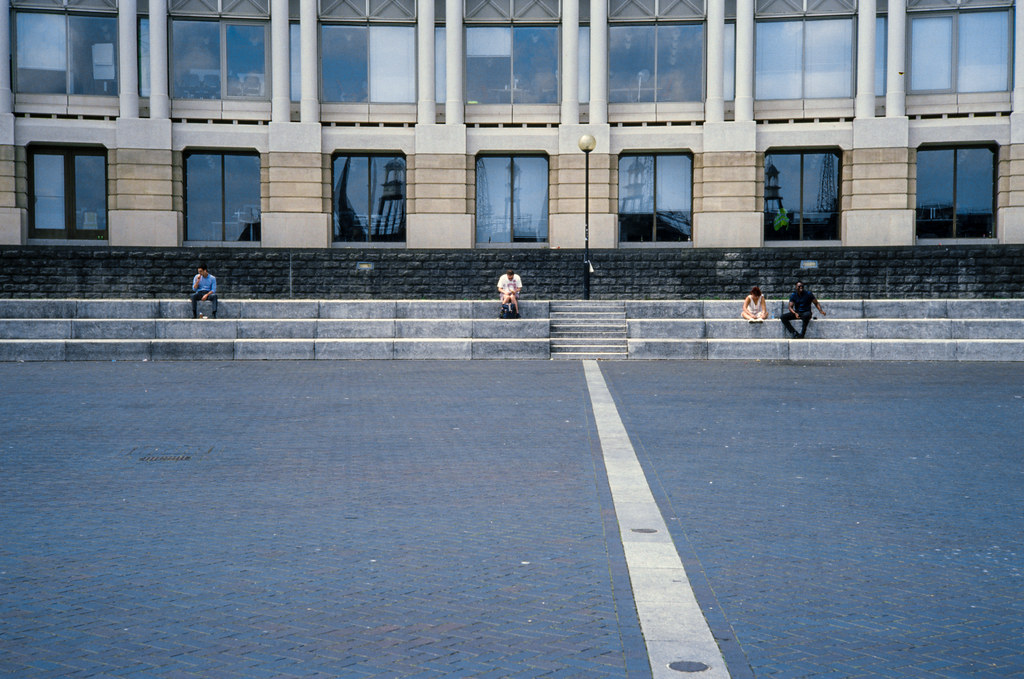
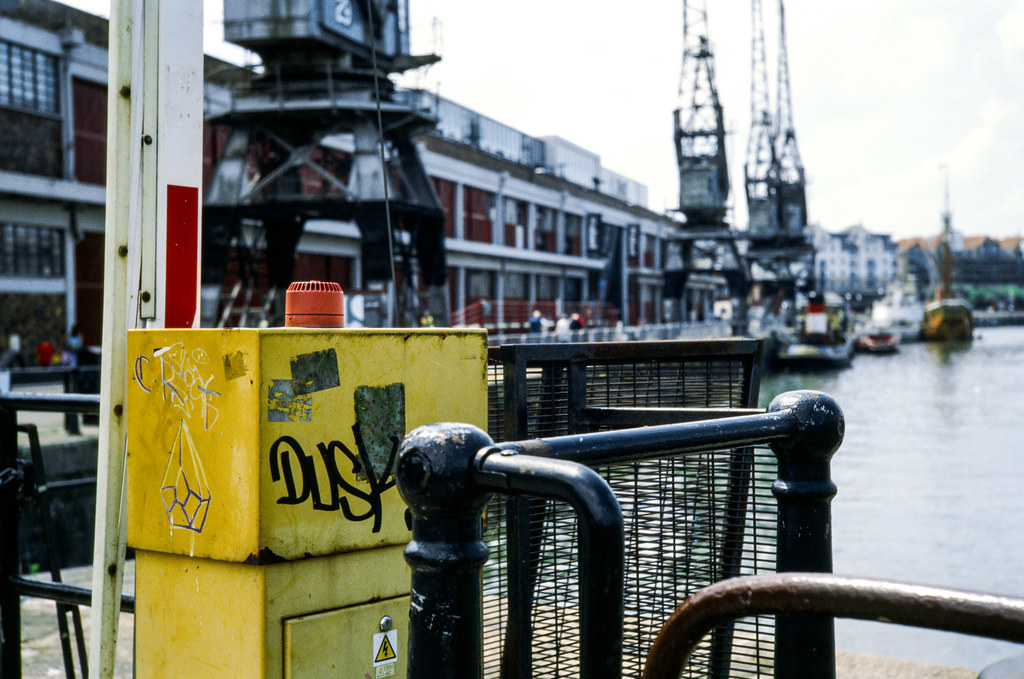
The final frames I want to mention specifically are the following shots of the cranes. When Duncan got in touch with me on the evening of our shoot to say the roll had come out ok, I asked if any frames were a bit overexposed. He mentioned the runner and the few shots of the cranes. I actually can’t remember the settings, so I can’t comment particularly specifically, but I suspect I was set an exposure that was slightly more appropriate for the shade I was stood in. The result was some slightly overexposed sky. Fortunately, I managed to pull something out in the scan, and I’m quite happy with the results.
A few more shots
It was a bit of a race against time to finish the roll, but I was still pretty chuffed with a few more of the shots I got. I haven’t got this nailed yet, but as I have laboured a bit, I definitely feel like I am getting to grips with E100 now!
Words of thanks and recommendation
Finally, I just want to say a continued thanks to both Kodak Alaris and Duncan from Silverpan Labs. Kodak is supplying the film for this series, and Duncan is doing an excellent job at developing the films and giving me consistent results as well as useful and insightful feedback – this being a service he offers to all of his customers.
Obviously, Duncan gets an extra thanks for his hospitality – cheers buddy, really enjoyed the day!!
If you want to buy this film, I also recommend Analogue Wonderland as my chosen film supplier. They stock E100 here, but also supply something like 200 other films making the website interesting to explore as well as purchase from.
Finally, you can find all my photos taken with this film here, and see this whole series of posts here
Share this post:


Comments
Pierre-Alix Favillier on Kodak Ektachrome E100 – First Rolls Review – Pt 4 – Bristol SilverPan Film Lab (incl. Video)
Comment posted: 22/07/2019
Ive seen people advocating rating it at 200, others to shoot it at 80, but I think what you conclude in the video, which is to expose it slightly for the highlights (or the light you like in the shot), whilst exposing negatives towards the shadows, and focusing on high contrast and saturated shots is the way forward with this film. This is pretty much what Matt Day advocated as well in his video on Ektachrome, and if in doubt there is no shame in bracketing a shot you really like if you are really unsure how the film is going to react considering the relatively narrow dynamic range in this case.
I hope that the Analogue Wonderland competition will give us some great results to look at so that everyone can learn a bit more about slide film in general but Ektachrome in particular!
Comment posted: 22/07/2019
Sam on Kodak Ektachrome E100 – First Rolls Review – Pt 4 – Bristol SilverPan Film Lab (incl. Video)
Comment posted: 22/07/2019
I'm slightly confused by the 'overexposure' thing. If you shoot a 100 rated film at 180 surely you're underexposing it (by almost a stop). Am I being stupid? (Quite possible). Is the E rating is something other than ISO?
Sam
Comment posted: 22/07/2019
Nick Lyle on Kodak Ektachrome E100 – First Rolls Review – Pt 4 – Bristol SilverPan Film Lab (incl. Video)
Comment posted: 22/07/2019
Comment posted: 22/07/2019
Sam on Kodak Ektachrome E100 – First Rolls Review – Pt 4 – Bristol SilverPan Film Lab (incl. Video)
Comment posted: 22/07/2019
Ashley Carr on Kodak Ektachrome E100 – First Rolls Review – Pt 4 – Bristol SilverPan Film Lab (incl. Video)
Comment posted: 22/07/2019
Comment posted: 22/07/2019
jon campo on Kodak Ektachrome E100 – First Rolls Review – Pt 4 – Bristol SilverPan Film Lab (incl. Video)
Comment posted: 23/07/2019
Comment posted: 23/07/2019
Terry b on Kodak Ektachrome E100 – First Rolls Review – Pt 4 – Bristol SilverPan Film Lab (incl. Video)
Comment posted: 29/07/2019
One issue you will come across with reversal film that you will invariably not encounter with colour negative film (because it is corrected at the printing stage, or in PP) is the tendency for slide film to be affected by shifts in colour temperature. I mention this as I'm seeing a tad of it here with a little blue shift. At high altitudes, or on sunny days, but with a subject in shade, or with medium to heavy cloud covering, the colour temperature rises. With slide films fixed colour response, any variation from the "norm", around 5,600K, will lead to these colour shifts. At the other end of the spectrum is the shift to red, the extremes of which are those glorious sunsets slide film is so good at. The reason why colour temperature meters existed is that prior to being able to digitally scan a slide, the slide was the end result. What you got is what you projected, so any necessary colour corrections had to be made at the time of shooting. Admittedly, more the realm of the pro photographer than the hobby amateur.
Seeing that you've acquired a Gossen meter, isn't it small, I suppose you're aware of the Exposure Meter Compendium, available in German and English, and which is available for free download from their site. I've included the link for those who may wish to learn a little more about metering modes etc. https://gossen-photo.de/en/exposure-metering-compendium/
Comment posted: 29/07/2019
Comment posted: 29/07/2019
Comment posted: 29/07/2019
Video: Chatting to Ashley Carr in a Carpark in Stourport - 35mmc on Kodak Ektachrome E100 – First Rolls Review – Pt 4 – Bristol SilverPan Film Lab (incl. Video)
Comment posted: 26/08/2019