I have been a reader of this blog for quite a few years. I must have stumbled upon it around the time I was getting into film photography and was working through decades of photographic gear to determine what my starting point would be. Since then I have discovered that what attracts me to film photography is as much about the photography as the joy of exploring all the different engineering approaches to the same basic principe, and very much the tinkering that goes along with it. Rarely have I thought I would ever try to contribute to the vast body of knowledge and thought that is collected on this website. Honestly, my life and my photography are not nearly interesting enough for that. And even if it would be, I tend to focus on documenting family life, and given the reasonably strict privacy policies that we maintain there aren’t many pictures that could be shared.
But just tinkering along, I came up with something I haven’t really seen before. Not here, nor elsewhere, and so I decided to give sharing it here a try. Perhaps adding some value to the small but wonderful world of analog photography.
TL;DR
This article shares the design for a working model of a reasonably fast 3d printable, scalable, and fully mechanical spring powered large format leaf shutter camera with flash sync. It fires reliably around 1/60th of a second. This article features images showing it adequacy below.
Where It Started
This all started a few years ago when I thought it would be nice to do some indoor 8×10 paper negative photography. I got to buying a studio flash and a nice 240 mm Dagor barrel lens and I experimented with it for a bit on 4×5, only to conclude that the project really needed a proper shutter to overcome the hassle of having to work with a lens cap in a dimly lit room. Unwilling to invest the resources needed to find a reliable second hand shutter that would fit the lens, I thought i could perhaps 3d print one.
But those of us who have an interest in the intersection between 3d printing and photography know that I was about to learn that that 3d printed camera’s rarely have working shutters. They are either pin-hole cameras eliminating the need for a shutter, or they adapt shutters to 3d printed bodies. The only exception I could find quotes the designer to be unwilling to share its designs.
Being new to 3d printing, having no great ideas, and being unable to find any existing models that I could take from the shelve, I was quick but correct to conclude that diy-ing a shutter was beyond my technical abilities. I had looked a bit at guillotine shutters, but eliminated them for the lack of elegant examples, its lack of flash sync, and its cumbersome form and operation. Motivation faded and so the project went dormant soon after.
Where It Started Again
But skills can be learned, and slightly more user friendly printers can be bought. And a few years later having done all sorts of photography related printing projects, and having seen this interesting example for low-iso media by a person called Gregoire Merien, i decided to give it another go.
Merien’s design is great. It really offers a smoothly operated leaf shutter with overlapping blades. I guess I could have made it work for paper negative photography, but didn’t want to depend on a microcontroller and ideally I wanted it to be usable for film as well. So instead i contemplated if I could in some way make it spring operated instead of servo powered, and ideally a lot quicker. The project really stayed in that phase for quite a while because of one particularly thorny problem. I could easily think of ways to move the shutter lever in one direction to open the shutter. But not how I could make it move in the opposite direction to close it shortly afterwards.
But after a while of fiddling with Merien’s design and a brief moment of clarity it was revealed to me that a shutter doesn’t have to move both ways. At least not as long as you have two shutters. One to start the exposure, and one to end it.
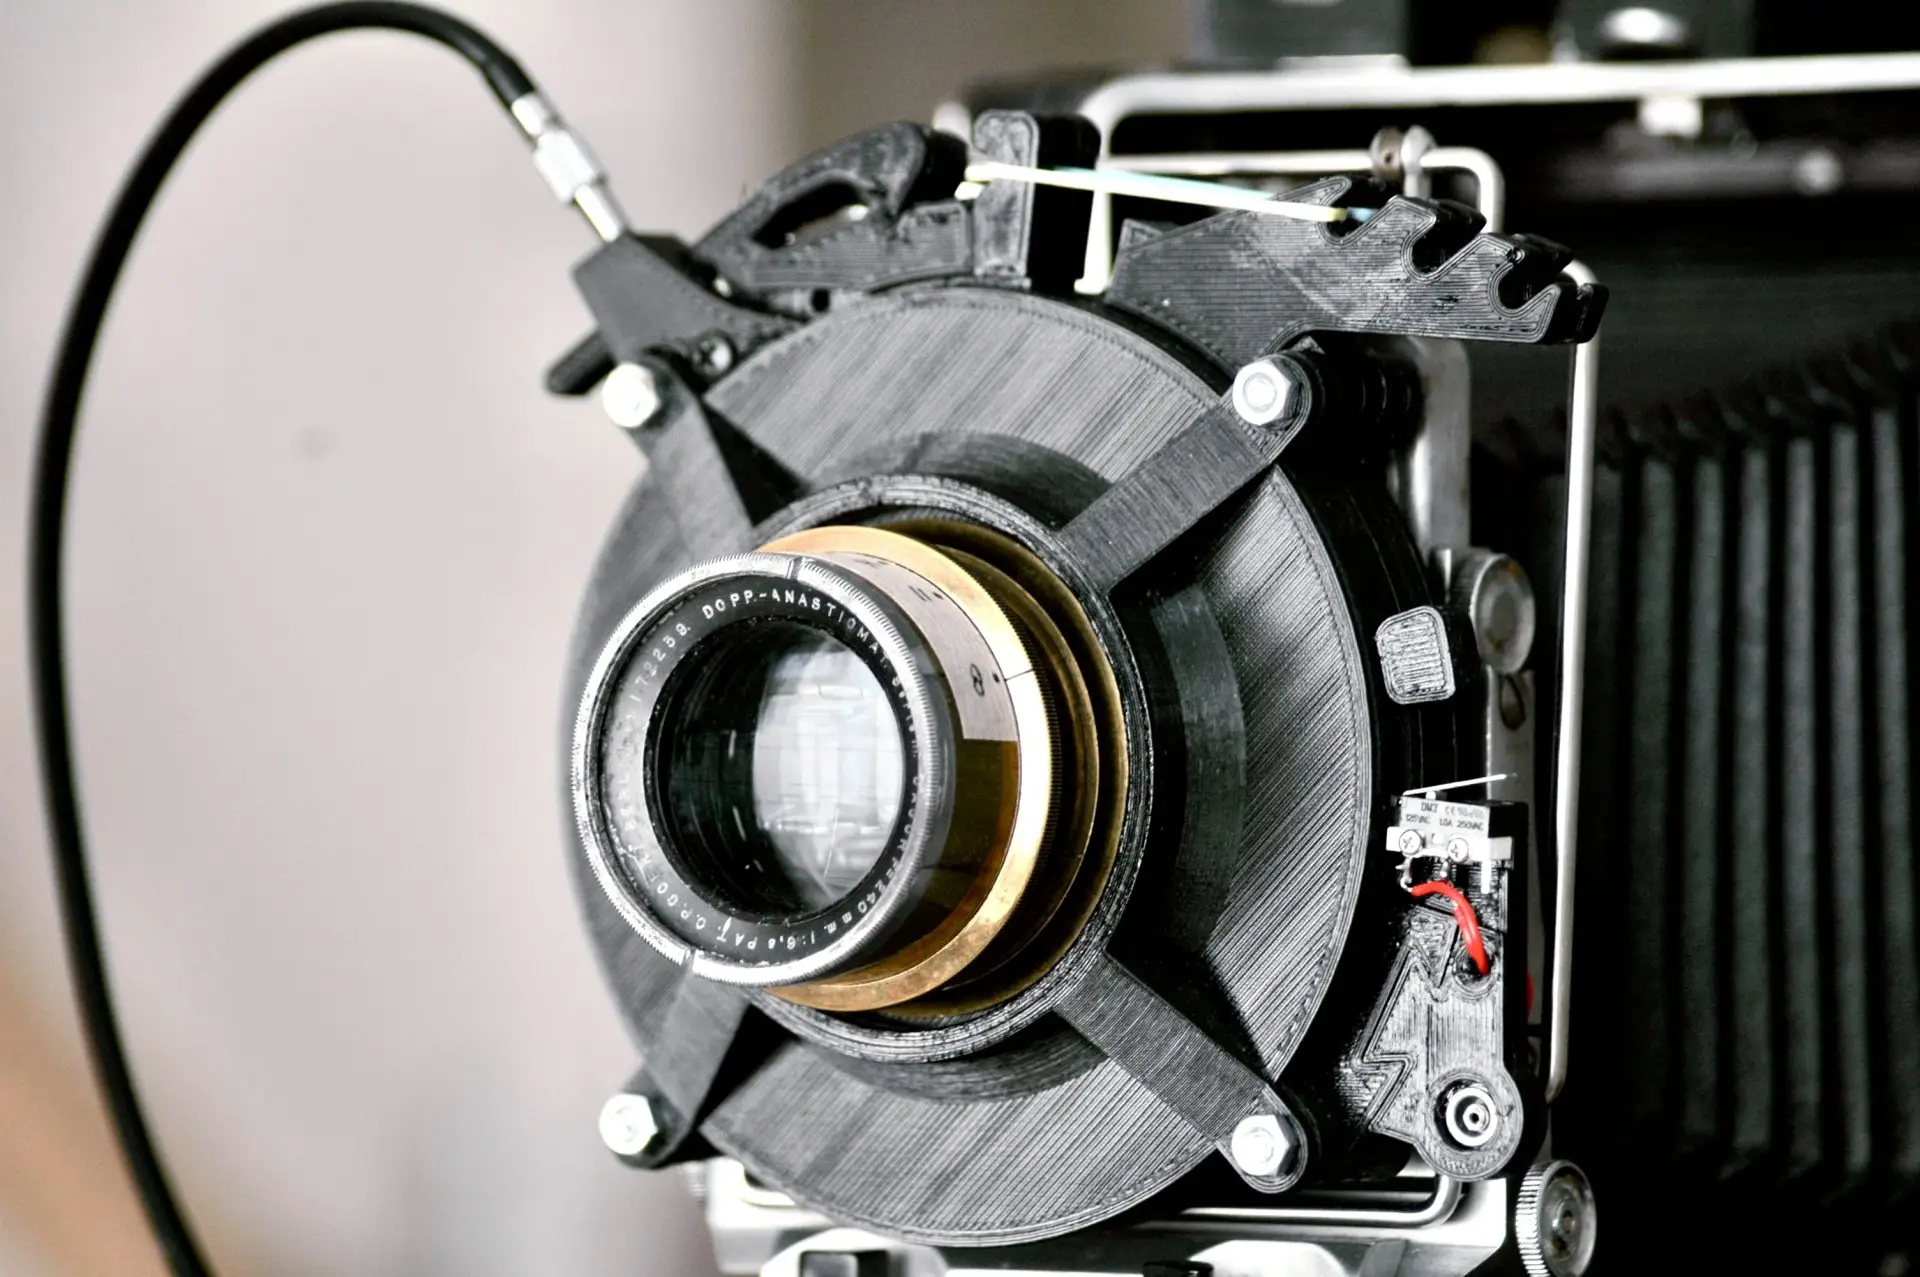
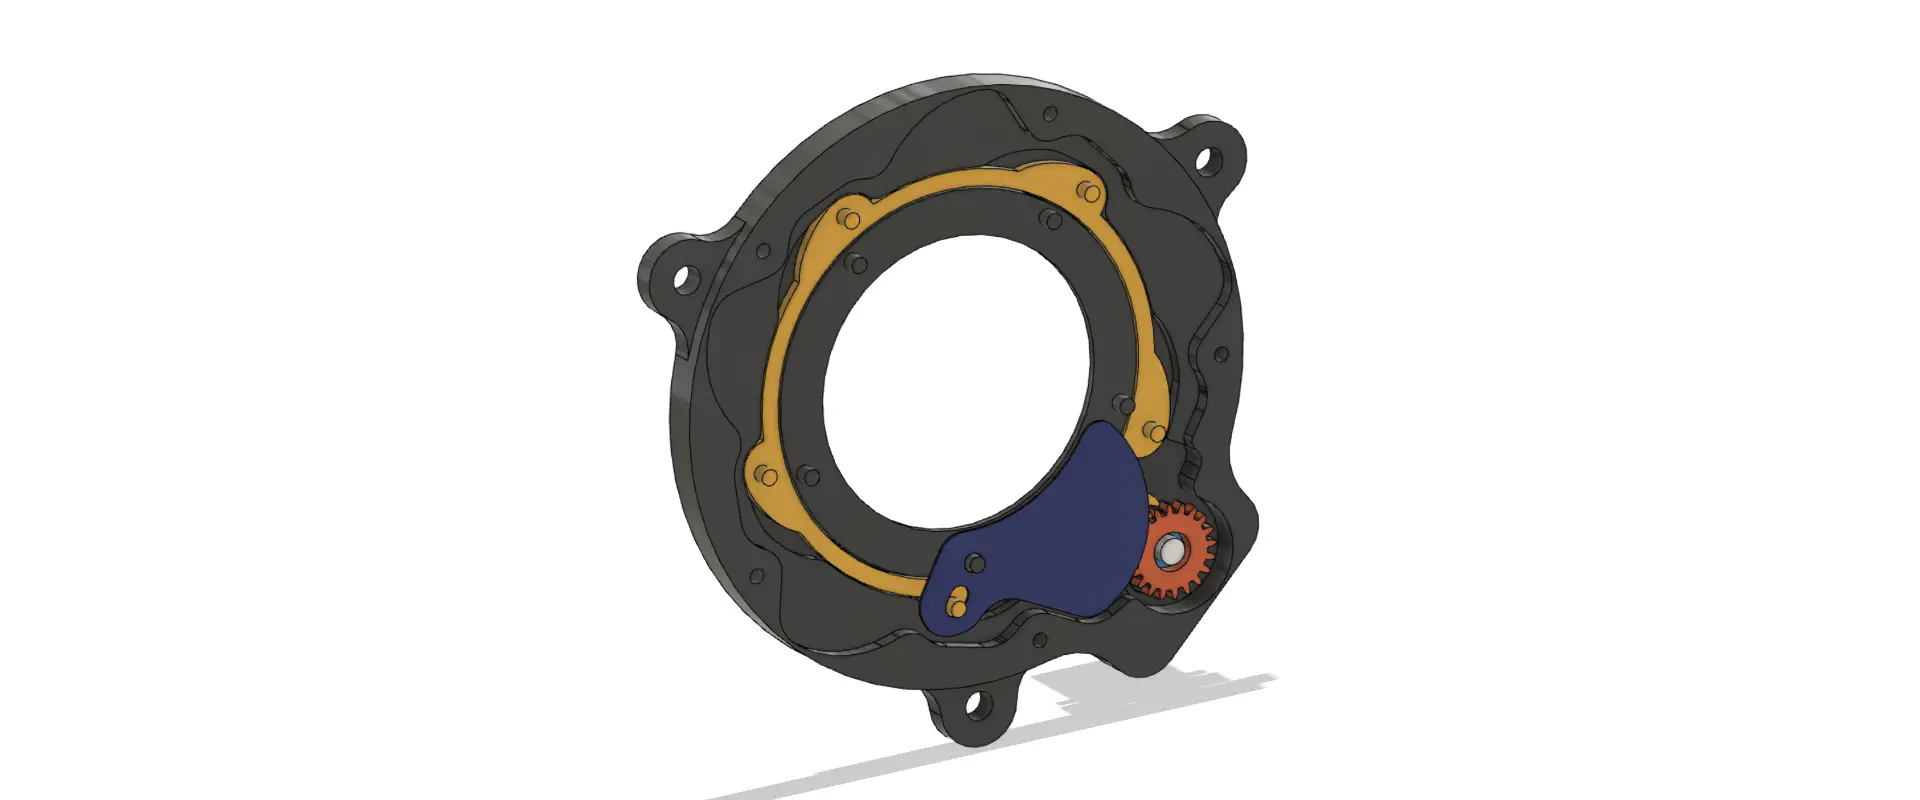
Where It Comes Together
I was quite exited by this idea. So I started adapting Merien’s design and from that moment on things went rather smoothly towards a working prototype. It is basically a stack of four main parts. A lens mount, two shutters, and a camera mount. The shutter release fires the front shutter, that opens the aperture. When it is fully opened it triggers the flash and releases the second shutter. The second shutter closes the aperture. The shutter can be cocked again by moving both levers back to their starting position. A link to a detailed description the model files can be found below.
Limitations
1. A perfect leaf shutter opens and closes its blades instantly, and its blades are fully opened during the entire exposure. This design isn’t perfect in that respect. It functions at an inverse of the ideal. The blades are opening and then closing during the entire exposure, and is only fully opened for the briefest possible time. The extent to which this influences the final exposure seems to depend on the diameter of the rear lens element, and the excess coverage of the image circle beyond the negative. Both determine just how much time the shutter blades are partially in view during the exposure.
2. A perfect shutter is also completely light-tight when it is closed, and that is another one of it’s flaws. The blades are just a little bit transparent and because they are relatively thick there exists a small crack between the first and the fifth blade. The leakage should however be very slight compared to the magnitude of the actual exposure as long as the medium is not exposed to the shutter unnecessarily long.
3. A perfect shutter also offers a range of fast and slow exposures. Though this design can probably offer shutter speeds a bit higher then 1/45th to 1/60th, I don’t think it can do much slower ones without complex modifications or using additional electronics.
I expected the shutter to produce quite serious vignetting because of the first flaw, and wasn’t sure about how big of an influence the second flaw was. I wasn’t really sure if the shutter would be useful in a situation without actually needing to flash. But firing the shutter was so satisfying, and some quick measurements indicated that I could achieve reliable and consistent exposures. So I decided to test it with film regardless of any reservations. At that point the design was still a bit finicky, but I was pleased enough with the actual results to develop it a bit further and to believe it may be useful to others as well.
Given that I am certainly not a genius, the lack of other functional fast shutter designs might of course just mean that nobody really cares, instead of it being a problem that hasn’t really been solved yet. But getting past this possibility, I do personally think it can be a great tool for experimenting with large format photography on a budget, to revive other dusty barrel lenses, or to enable using unusual lenses for which available shutters don’t really fit the bill or are too costly. I also think the design could be scaled down for use on smaller format (3d printed) camera’s. And even if there isn’t an audience for any of that, perhaps it inspires people to come up with more ideas.
Real-World Testing
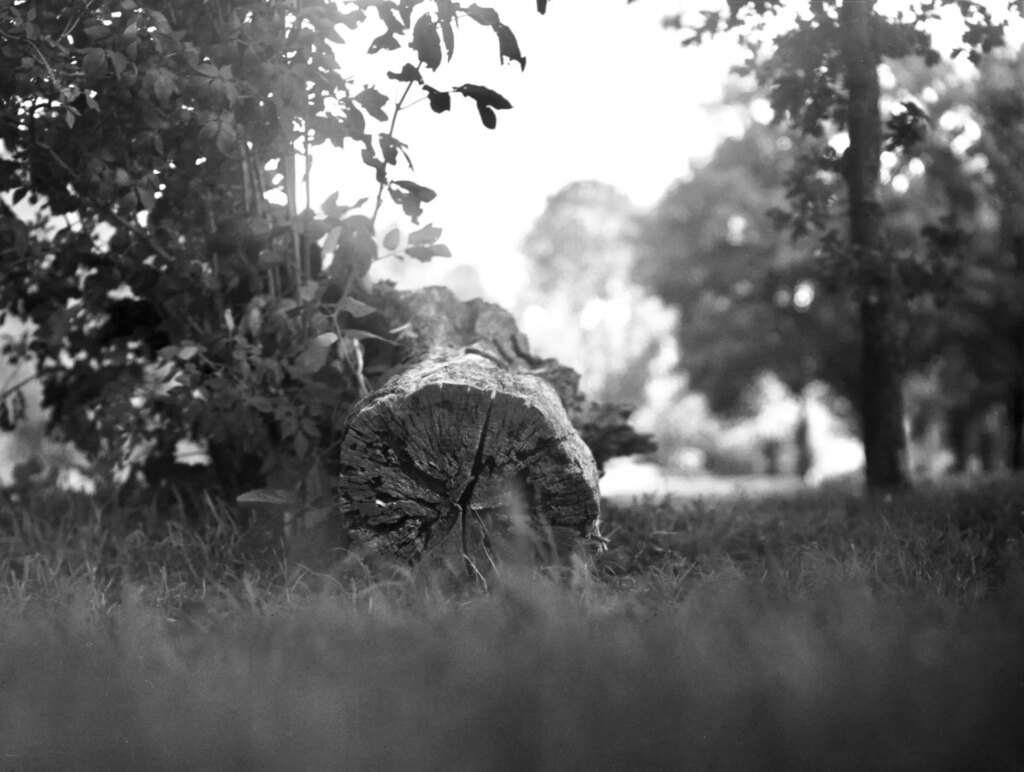
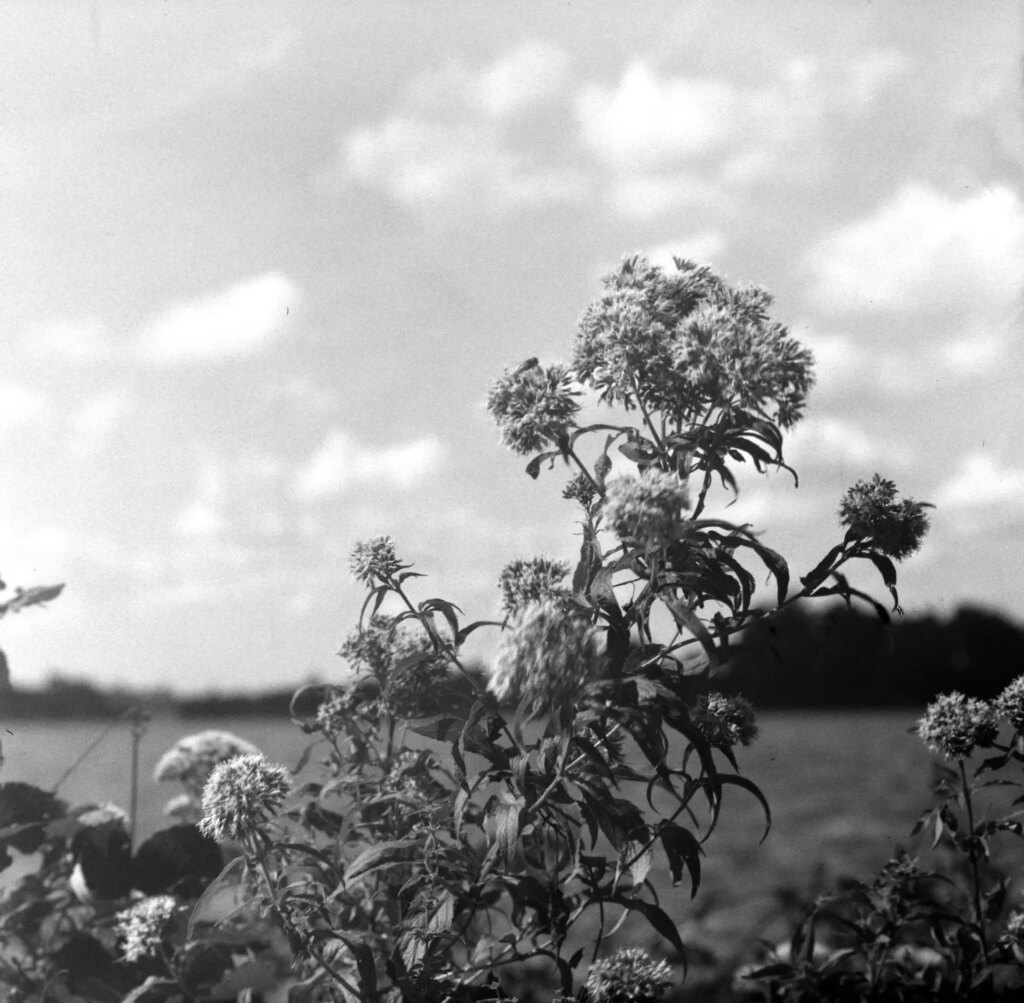
Of course I felt I couldn’t really submit an article here without including some proof. So I decided to make some modifications to my Tower Press camera for focussing and framing with the Dagor outside and go out to capture… something. I mentioned the amount of photography I do of things that are not family members is next to nothing, and if there is one focal length I somewhat understand it is the 35mm equivalent. So I left my comfort zone by a wide margin and shot some floral subjects with an 80mm equivalent lens on a camera that basically too heavy for me.
I think that before we get into the results we need a brief word on the flawed methodology of my experimental setup. All images were shot on a pack of Kodak Tri-X 320 that expired a decade ago, that probably wasn’t stored properly, and that I accidentally but briefly exposed at least partially under the safe light in my darkroom before loading them. Also being an 8×10 lens, most of the vignetting due to the shutter being ‘in transition’ would occur outside of the crop.
Perhaps a brief apology to the community of really serious large format photographers is in place as well. I imagine that many of you are drawn towards the medium because it enables much greater levels of technical perfection and attention to detail. I apologise for my approach to these test shots violates the the care and ambition that requires. Besides my rough handling of the negatives prior to exposure, I have shot these images without a proper tripod, I put little effort in aligning the lens, I didn’t verify the aperture values of the lens are and haven’t compensated the exposure for close up shots.
Nonetheless I do hope the pictures below illustrate what the shutter can do regardless of its flaws. Though esthetics are subjective, I do feel that at least part of it also supports my claim to creative and artistic modesty.
Test Shots
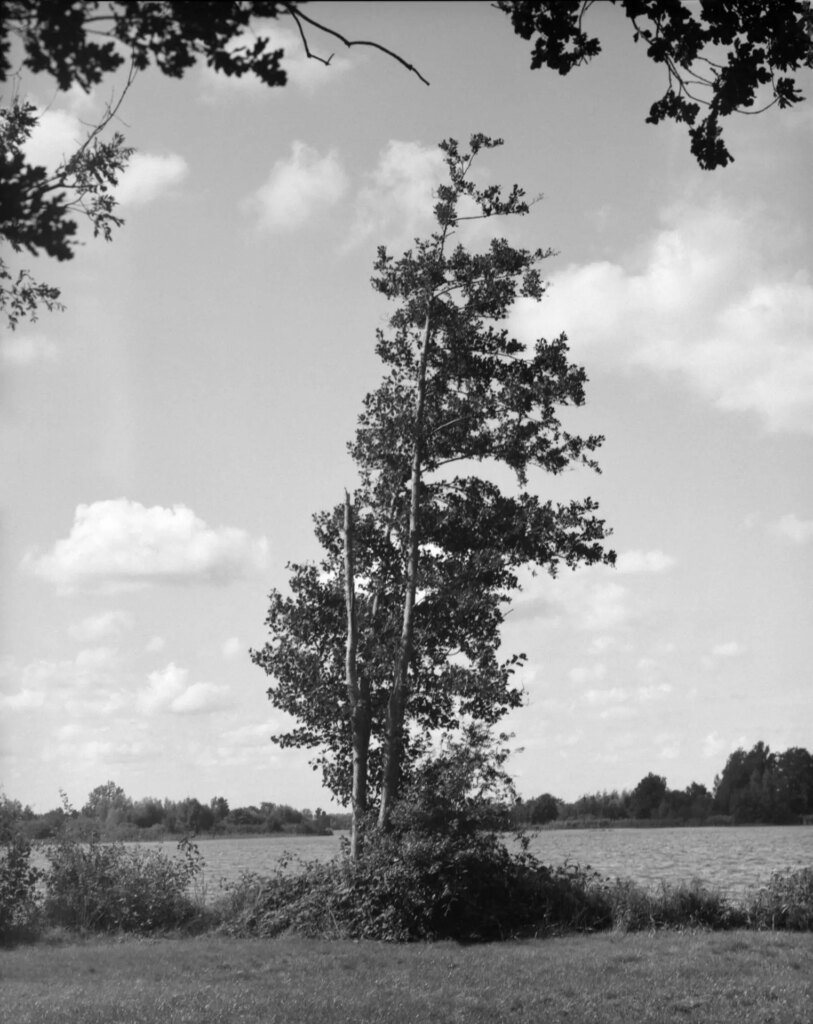


Where It Ends
To be honest, I don’t think I will grow attached to any of these pictures. I had a fun time taking them, but I don’t really like any of them. But I do feel that they proof that it is actually a reasonably adequate shutter, that may just fit the needs of some other photographers. Or be a starting point for other to develop their ideas; quite possibly people with much greater artistic and engineering skills
For those who want to check it out I have uploaded the model here in a STEP format for other to use and adapt. Its description comes with additional details on its construction and with quite a bit of further reflection on its technical shortcomings and possible future improvements. Whether I will make these improvements myself I don’t know. The shutter is good enough for my needs, and I have to start thinking about building the rest of an 8×10 camera. So I do encourage anyone to share it, take it, adapt it, change it, review it or develop it further.
If I can be of any help to keep it going, please leave a comment here or at Printables.com.
Share this post:


Comments
Keith Devereux on Developing and Shooting a 3D Printed Large Format Leaf Shutter
Comment posted: 25/09/2023
Comment posted: 25/09/2023
Julian Tanase on Developing and Shooting a 3D Printed Large Format Leaf Shutter
Comment posted: 25/09/2023
All the best, and good luck !
Comment posted: 25/09/2023
Murray on Developing and Shooting a 3D Printed Large Format Leaf Shutter
Comment posted: 26/09/2023
Karen McBride on Developing and Shooting a 3D Printed Large Format Leaf Shutter
Comment posted: 26/09/2023
I hope some day to give it a go but I have no 3D printing skills yet…
Thanks for sharing all the info.
Karen
Alasdair Mackintosh on Developing and Shooting a 3D Printed Large Format Leaf Shutter
Comment posted: 14/10/2023
And more importantly, you are demonstrating what's possible with a 3D printer and a lot of patience and hard work. Knowing that it's possible to make new adapters and components to keep old equipment going is a great boost to the hobby. Well done!
Eric Wang on Developing and Shooting a 3D Printed Large Format Leaf Shutter
Comment posted: 11/02/2024
Yongfei Lin on Developing and Shooting a 3D Printed Large Format Leaf Shutter
Comment posted: 08/01/2026
Comment posted: 08/01/2026
Comment posted: 08/01/2026