Human vision is sensitive only to a small part of the entire colour spectrum. Infrared photography allows us to visualise reflected light that is otherwise invisible to us and opens another dimension for photographers to experiment with. The following outlines my experience getting started with digital infrared and the results that ensued.
Most if not all digital camera sensors are capable of “seeing” infrared light. If you put a filter on your digital camera’s lens and shoot a scene with sources that reflect infrared (e. g. leafy trees), you’ll find that it will produce results. Chances are that you’ll require much long exposure times and focusing (automatically or manually) will be nearly impossible. This is because most digital include a hot mirror, which prevents infrared light from reaching the sensor. The reason for this is simple: infrared light results in photos taking on a reddish hue. Removing this filter is necessary to make handheld infrared photography practical because it greatly reduces exposure times, though at a cost. Without a hot-mirror:
- Regular colour photos will require introducing an infrared cut filter to stop infrared light from hitting the sensor.
- Autofocus performance will suffer and, in some cases, not work at all.
- Images taken with a camera without a hot mirror may display lightly coloured blobs in the centre of the photo though some lenses are better than others in this regard.

The conversion process
A few companies offer infrared conversion services but it’s also possible to do this yourself. I can only speak from experience converting my Nikon COOLPIX A, for which I followed Life Pixel’s tutorial. DSLRs and cameras with in-body image stabilisation are likely more difficult due to their added complexity, and would recommend doing some research on the camera you’d like to convert to see if you’re up for the process before diving in. Assuming you decide to proceed with the conversion process, here are a few tips I can offer:
Use good tools
Small screws used to keep cameras together often strip easily. Be sure to use good quality and correctly sized screwdrivers. I’d recommend a precision screwdriver set, preferably one with ESD protection.
Be organised
Use a project tray to keep things sorted. You’ll be managing tiny parts and flimsy bits that you could easily lose in the conversion process. An anti-static tray is especially useful as it will protect sensitive electronics.
Use a spudger
Use a plastic spudger to reduce the risk of scratching or otherwise damaging components. It’s especially useful for gently disconnecting the many ribbon connectors in most cameras.
Don’t shock yourself!
If your camera has a built-in flash, beware of capacitors. Touching them or nearby circuitry could result in a nasty shock.
Expect imperfection
Be aware that alignment of parts will be affected the minute you start fiddling with the camera’s internals. There’s a good chance that you introduce focus shift or ruin focus altogether. Sometimes lenses are seated with spacers between it and the body. Be sure to include these in exactly the same place and orientation when re-assembling.
Work in a clean environment
When working on the inside of your camera, be sure to do so in an area with minimal dust. Clean your work surface with a damp cloth and keep the windows and doors closed. You might even want to consider wearing latex gloves and a face mask.

Converted camera in use
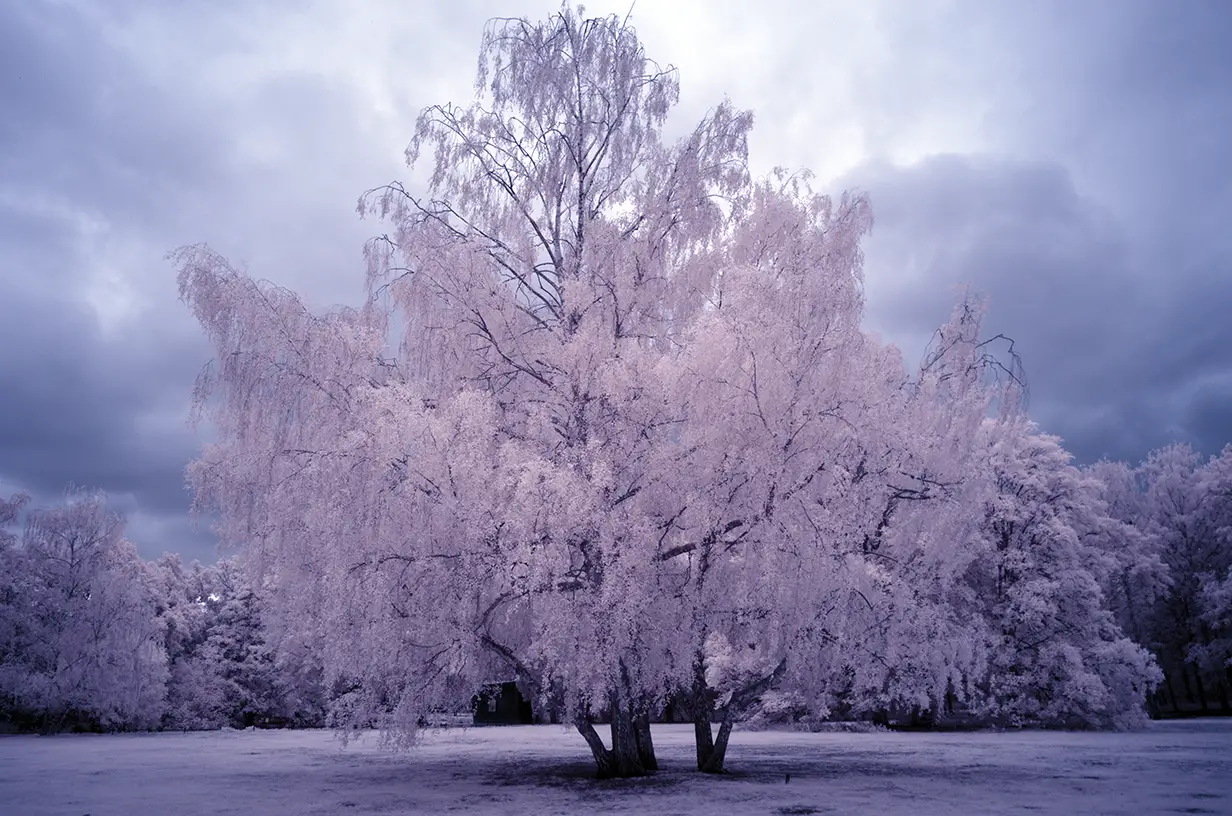
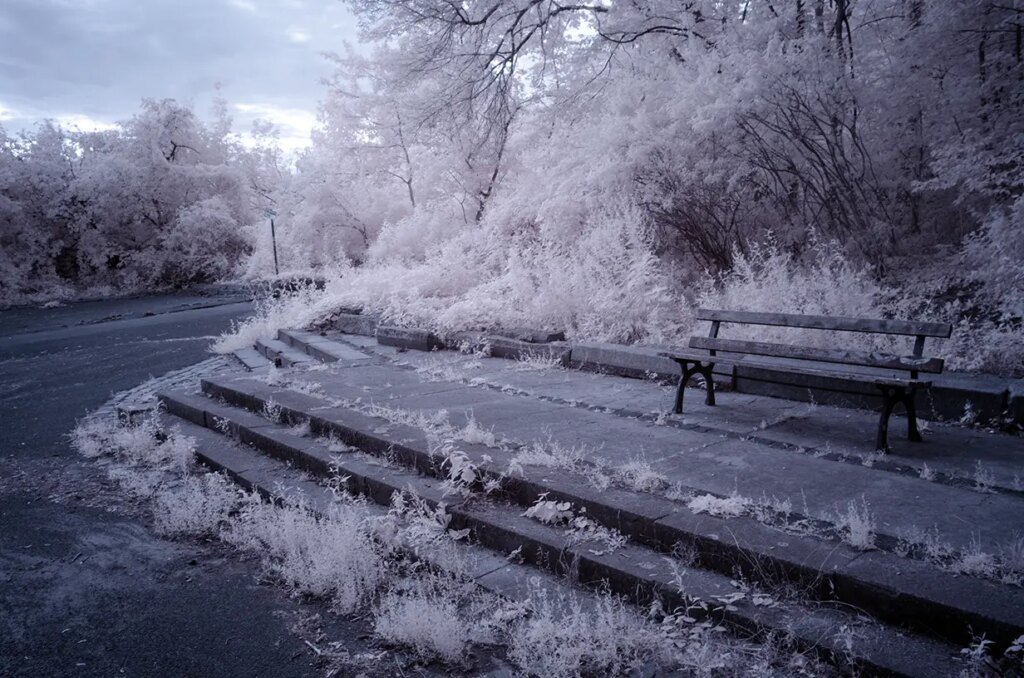
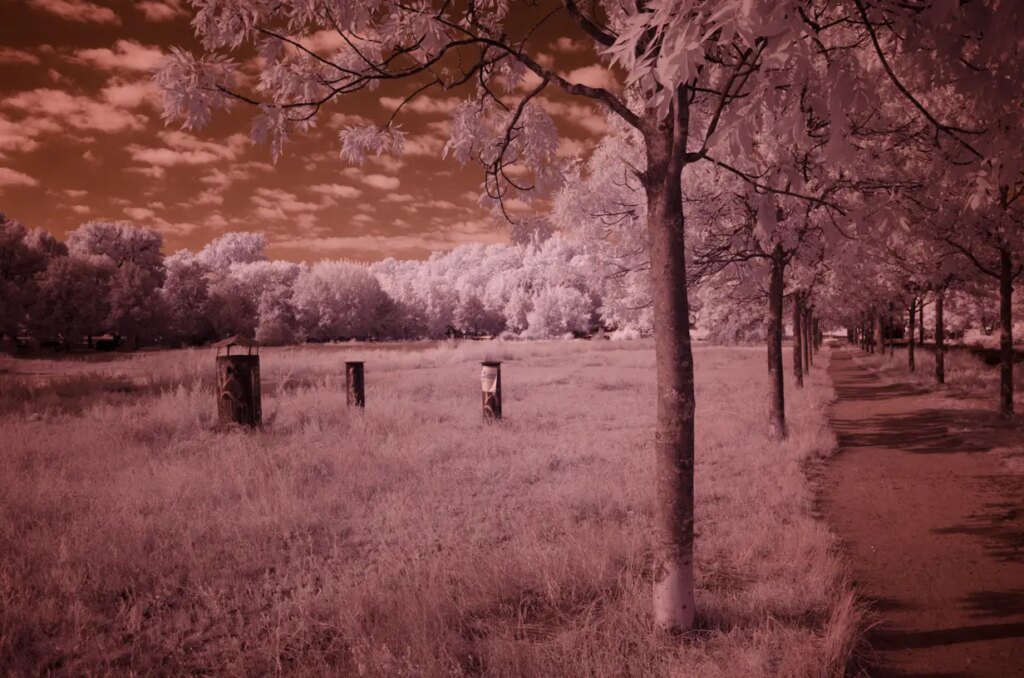
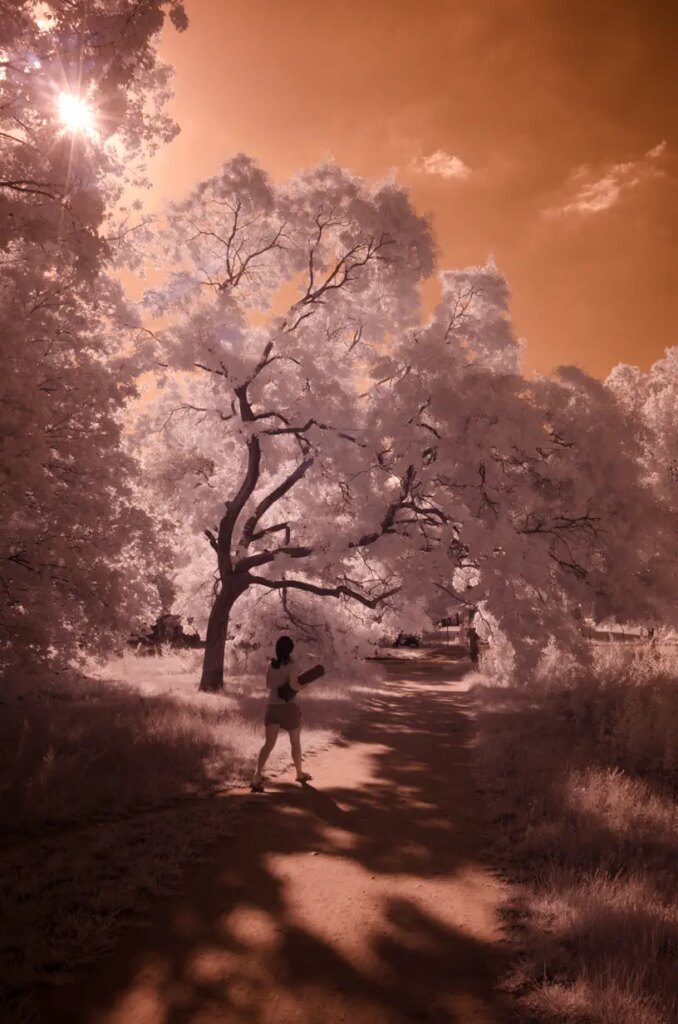
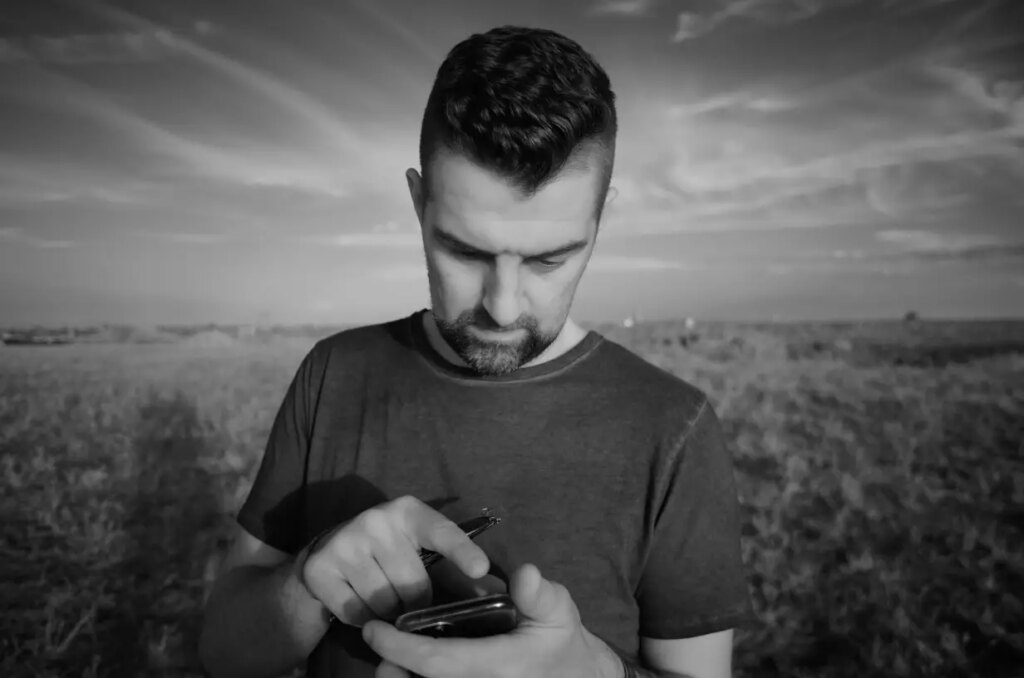
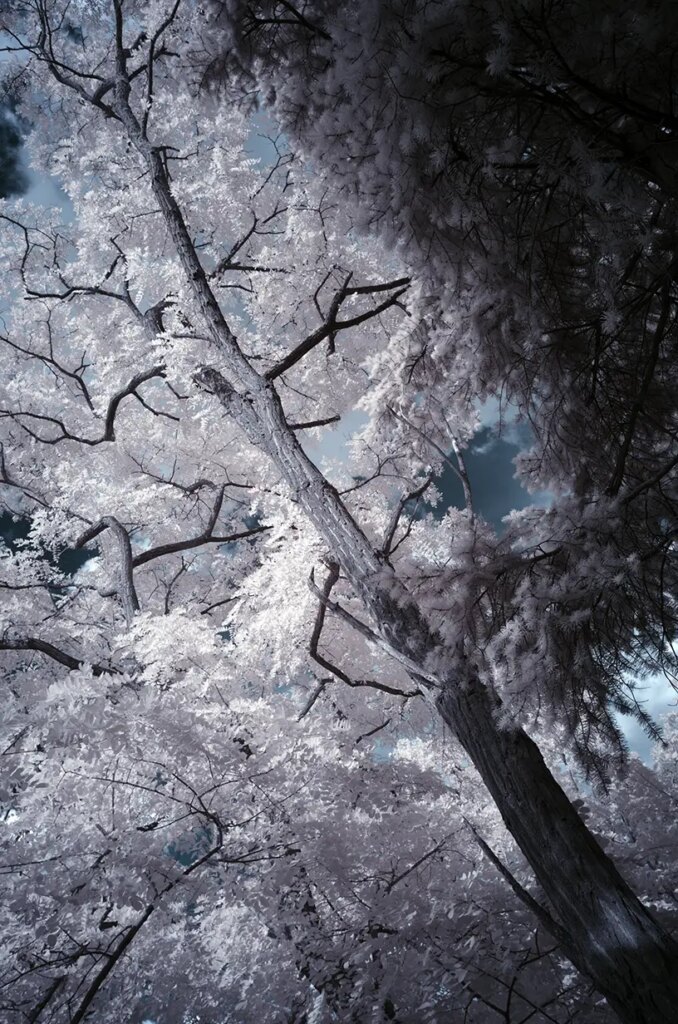
Once converted, you’ll notice that images taken with the camera have a reddish hue. This is the result of the sensor interpreting the near-infrared part of the spectrum. For straight out-of-camera results, try setting your camera to shoot black and white JPEGs. In my experience, landscape and portraiture provide the most interesting results. For example: cloudy skies and foliage become extremely contrasty; and people’s skin takes on a milky smooth texture, and emanates a subtle glow.
Colour infrared photography requires a bit more work depending on the look you’re going for. Personally, I prefer like to simply swap blue and red channels, which typically results in an otherworldly appearance. Furthermore, the use of glass filters to limit which part of the spectrum is captured makes it possible to produce more extreme effects, such as emulating Kodak’s long discontinued Aerochrome.
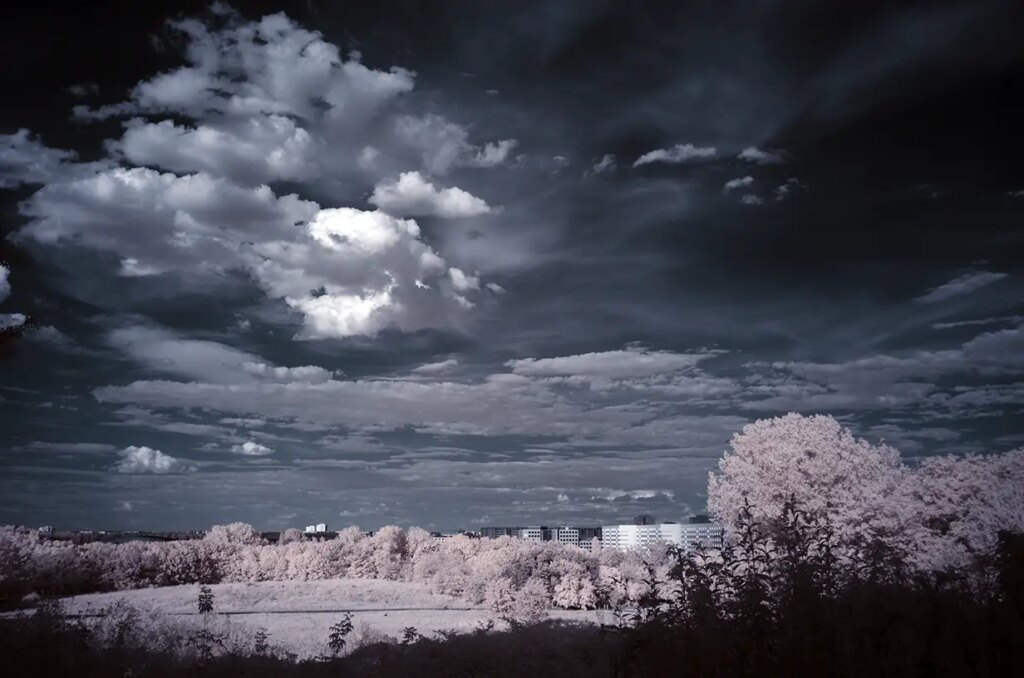
Examples
Conclusion
Unfortunately, there aren’t many cameras on the market that are designed to do infrared photography out of the box. Sigma’s SD-1 and SD Quattro include easily removable filters, but aren’t all that common. Chances are you’ll need a donor camera and either do the conversion yourself, or have a third party do the conversion for you. Exploring the infrared spectrum has rekindled my interest in landscape photography, whether black and white or in (false) colour. As such, I believe the risk of conversion is worth the ability to explore this part of the colour spectrum that was otherwise invisible.
Share this post:


Comments
Alex Hazuki on A Brief Introduction to Digital Infrared Photography – By Matthew Patey
Comment posted: 27/07/2022
Comment posted: 27/07/2022
Comment posted: 27/07/2022
Comment posted: 27/07/2022
Dan Mountin on A Brief Introduction to Digital Infrared Photography – By Matthew Patey
Comment posted: 27/07/2022
Recently, I returned to Infrared. I purchased and converted a Lumix DMC-ZS8 myself. The results have exceeded my modest expectations! I’m still more partial to monochrome, but now, I can experiment with full spectrum color!
My conversion included epoxying a filter ring to the lens barrel. I’m screwing in a 720nm IR filter for infrared. If I do want to return to “normal”, i’ll just screw in an IR Cut filter. Since mine is a full spectrum conversion, I think I’m gonna try experimenting w/ ultraviolet too and get a 365nm UV filter too!
I compliment you on your conversion! It’s nice to see I’m not the only convert!
Comment posted: 27/07/2022
Paul Trantow on A Brief Introduction to Digital Infrared Photography – By Matthew Patey
Comment posted: 27/07/2022
Comment posted: 27/07/2022
Edward Noble on A Brief Introduction to Digital Infrared Photography – By Matthew Patey
Comment posted: 29/07/2022
Comment posted: 29/07/2022
John Hillyer on A Brief Introduction to Digital Infrared Photography – By Matthew Patey
Comment posted: 29/07/2022
How is this done, Sigma manuals only refer to removal of the Dust Filter, there is no mention of IR. I have both these bodies so am especially interested.
Can you clarify please ?
Comment posted: 29/07/2022
Comment posted: 29/07/2022
Eric on A Brief Introduction to Digital Infrared Photography – By Matthew Patey
Comment posted: 29/07/2022
Comment posted: 29/07/2022