
No love lost
You see, my return to film photography was not because of my love of the media. Quite the opposite: I hate film. It has always handicapped me: I could not shoot in near dark, I could not fix my errors, I never knew the results until a few days later, I never had enough film on me. The random shake could ruin the shot, spoiled developer or sudden change in my tap water temperature could ruin film and so on, and on and on. Each emulsion has its own quirks and very often I would have in my camera the roll of film ill-suited to what I wanted to shoot at the moment.
My final brush up with film came when I decided to digitize those old slides and negatives of mine. Despite all of the above I certainly wanted my film send-off ceremony to be worthy of my hundreds and thousands of shots accumulated over the years. I had to digitize them right.

What can be easier than taking a picture of the piece of film?
On the surface, it looked very easy: get a lens, get a film folder, get a light. I was cocky-sure about my approach as I did a lot of slide copying in the past. From ORWOCHROM to ORWOCHROM , or from ORWOCHROM to ORWO NC21 to color prints – I did it all. I even had all my old hardware: DIY stand circa 1980, couple of primes, the old M42 bellows, and venerable Praktica LTL3 film camera.
All I needed was to replace the film camera body with the digital one. It was all simple and easy until it was not. It took me few shots to realize that neither German CZJ Pancolar 1.8/50 nor Russian Industar 61LZ 2.8/50 lenses were up the task. Those were very good primes, but they perform really poor at 1:1 scale. My digital captures were not as good as my slides in front of me. The corners were blurred, the shape of film grain in the corners was elongated compared to the grain in the center, and there was a significant light fall-off. I quite reluctantly started my quest for better capture.

Approximately at that time I joined the FB group “Digitizing film with a digital camera” which was eye-opener for me. The more I read the forum, the better I realized that I was dealing with the quite a few complex engineering problems.
- The most obvious one was very shallow depth of field (DoF) when working at 1:1 scale. That left literally no wiggle room to components’ misalignment.
- The deterioration of image quality towards the frame corners. The only remedy for that is employing the lens with the known good flatness of plane of focus a.k.a “true” fixed-focus macro lens.
- The quality of illumination – color- and uniformity-wise, the backing light needed to have the smooth Sun-like spectra.
- The mechanical rigidity of the setup – unlike the negative strips, inserting and removing mounted transparencies disturbed scanning rig badly enough to force one out of focus.
- The fifth component was a right pieces of software to manage the flow of images
- The sixth and apparently the most important piece of the puzzle was a lot of patience and dedication to see the job thru.
There are so many way to scan a film
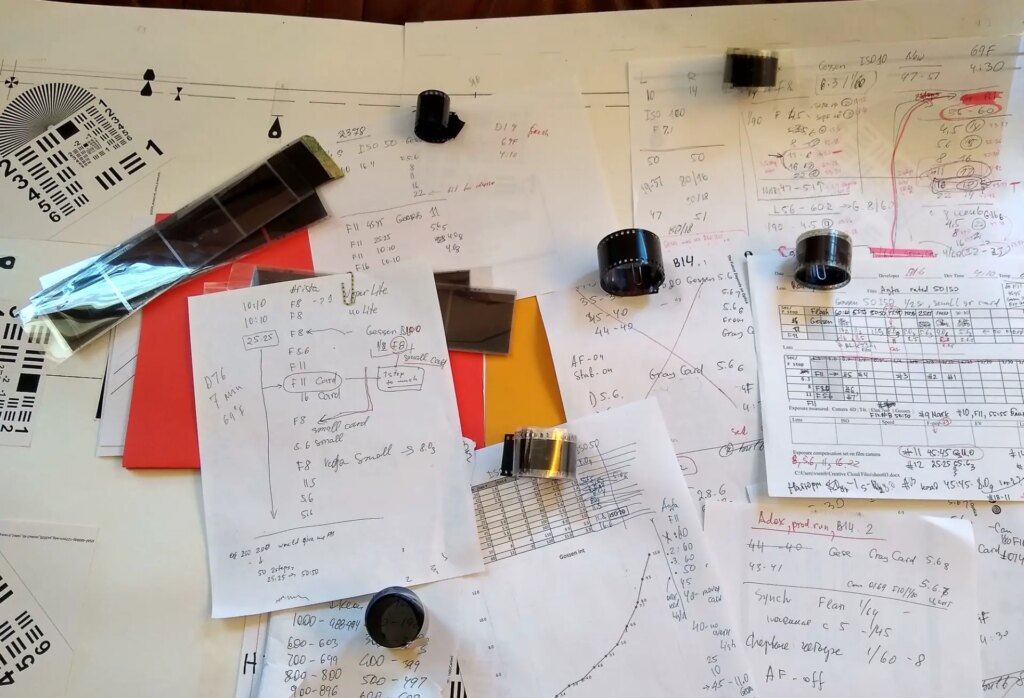
For the last two years I ended up collecting much more pieces of scanning equipment than I can possibly employ. I wanted something simple to operate and cheap to build. It was sort of brain fog which kept me browsing eBay all day and night. Blame it on the long Covid… to say it figuratively. And fog, it was very real at some point, read on!
The secret sauce
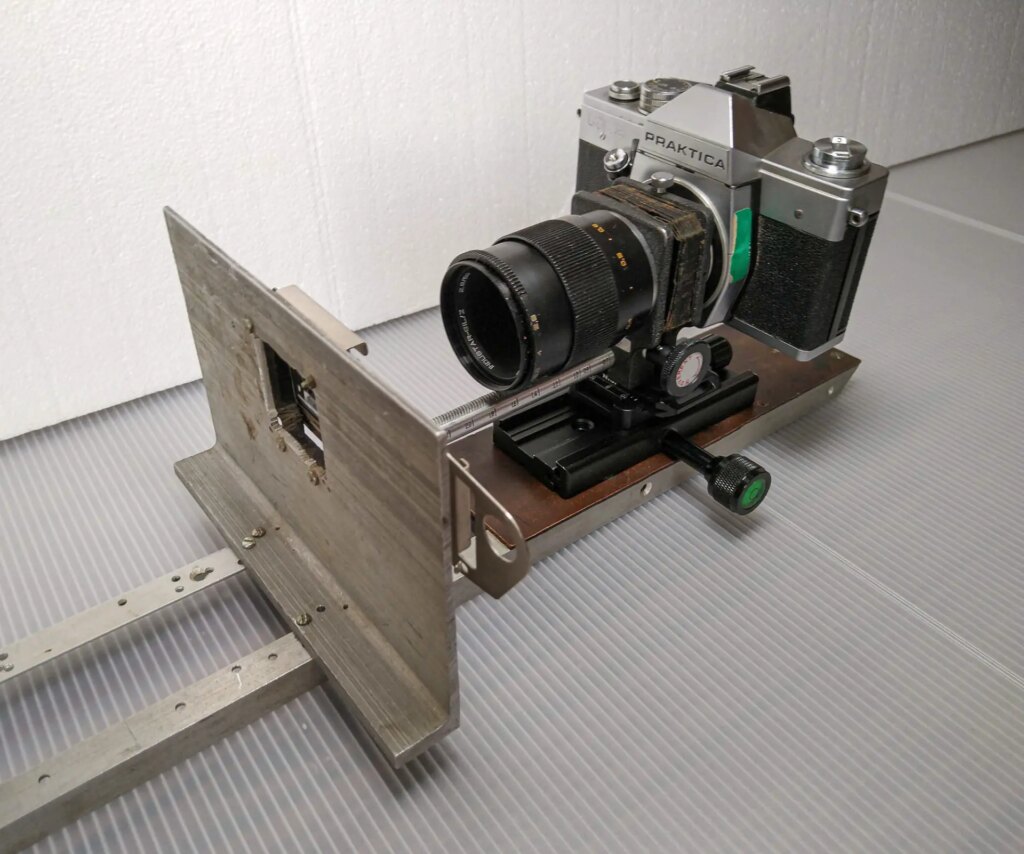
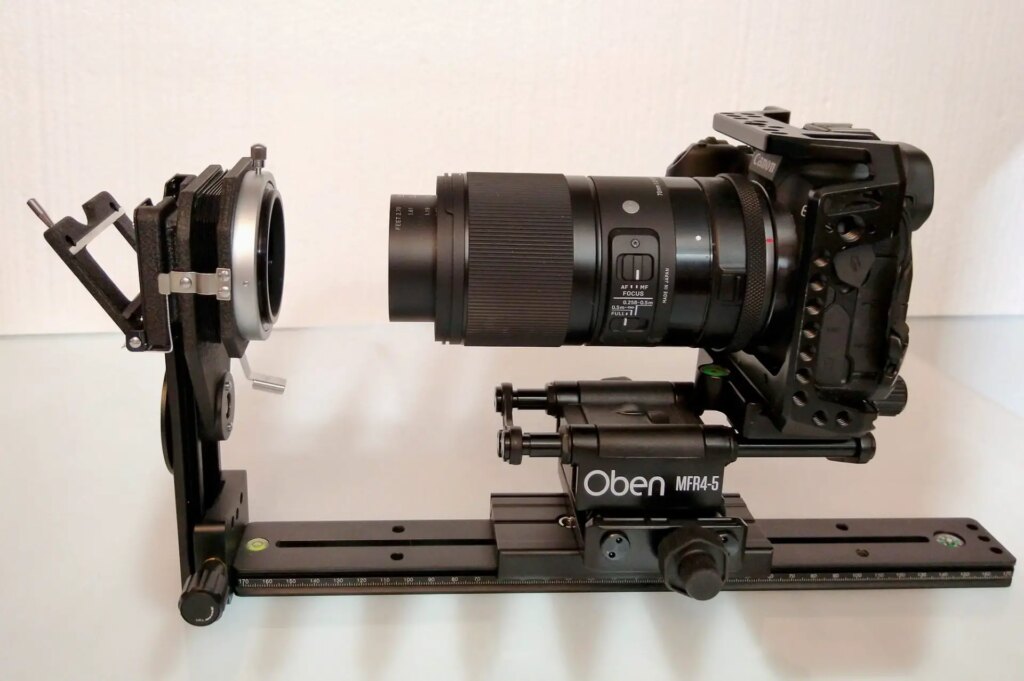
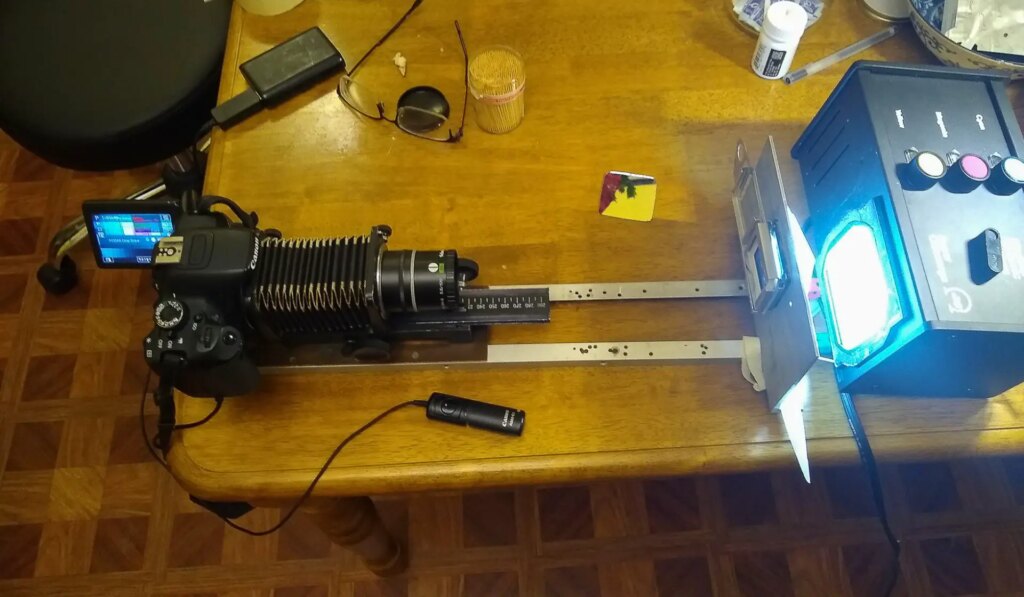
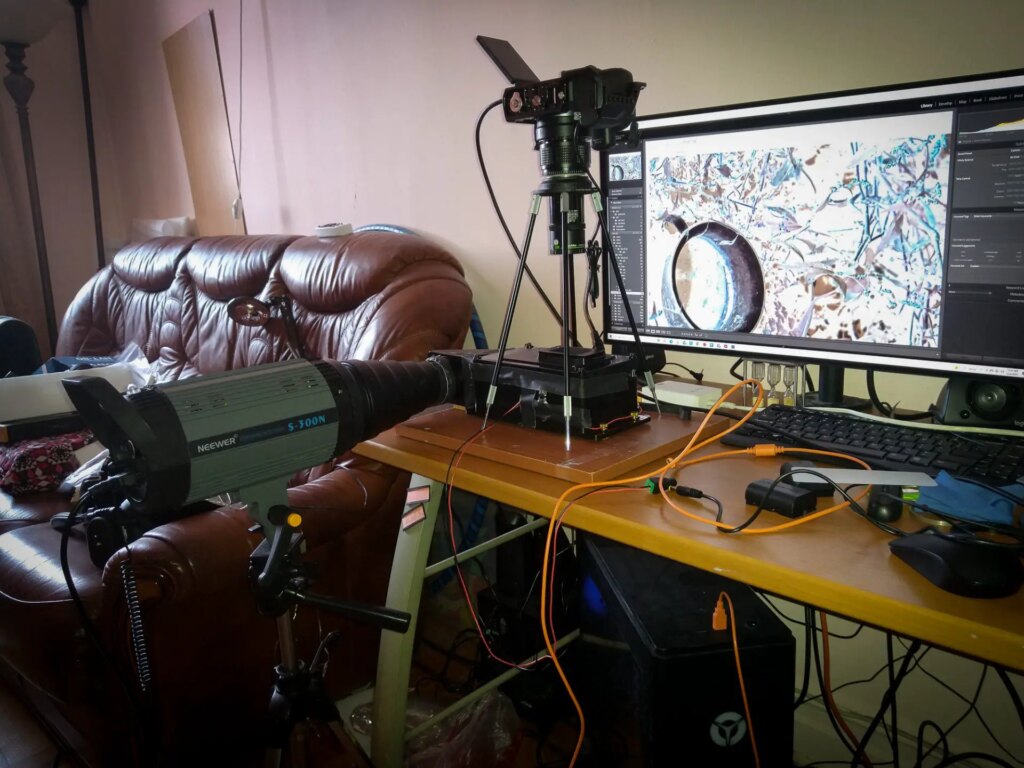
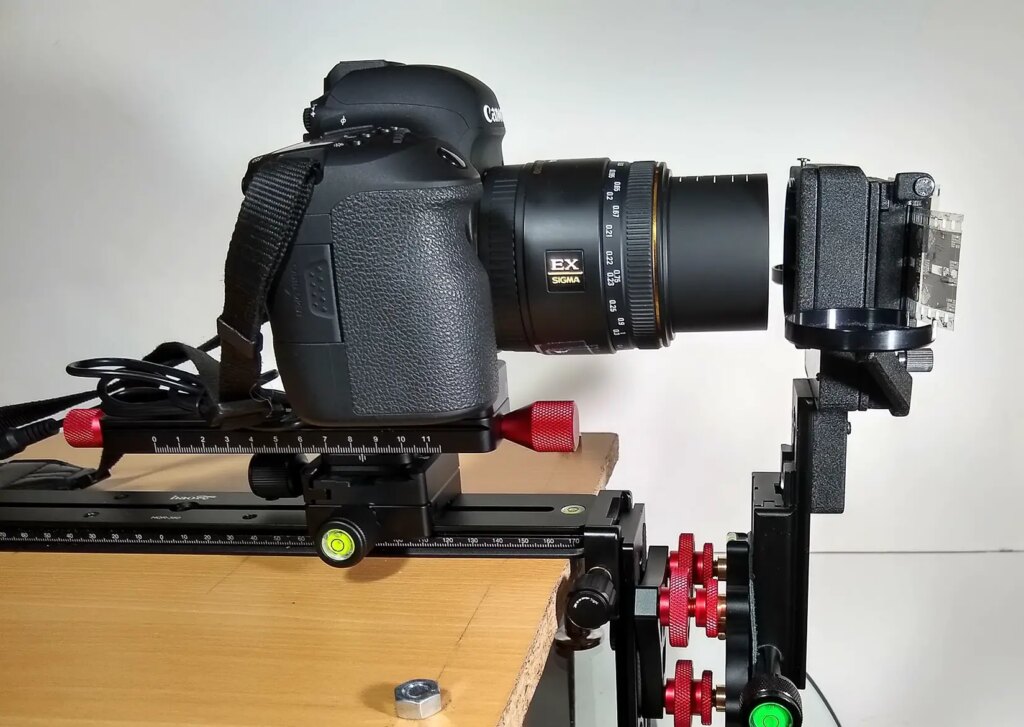
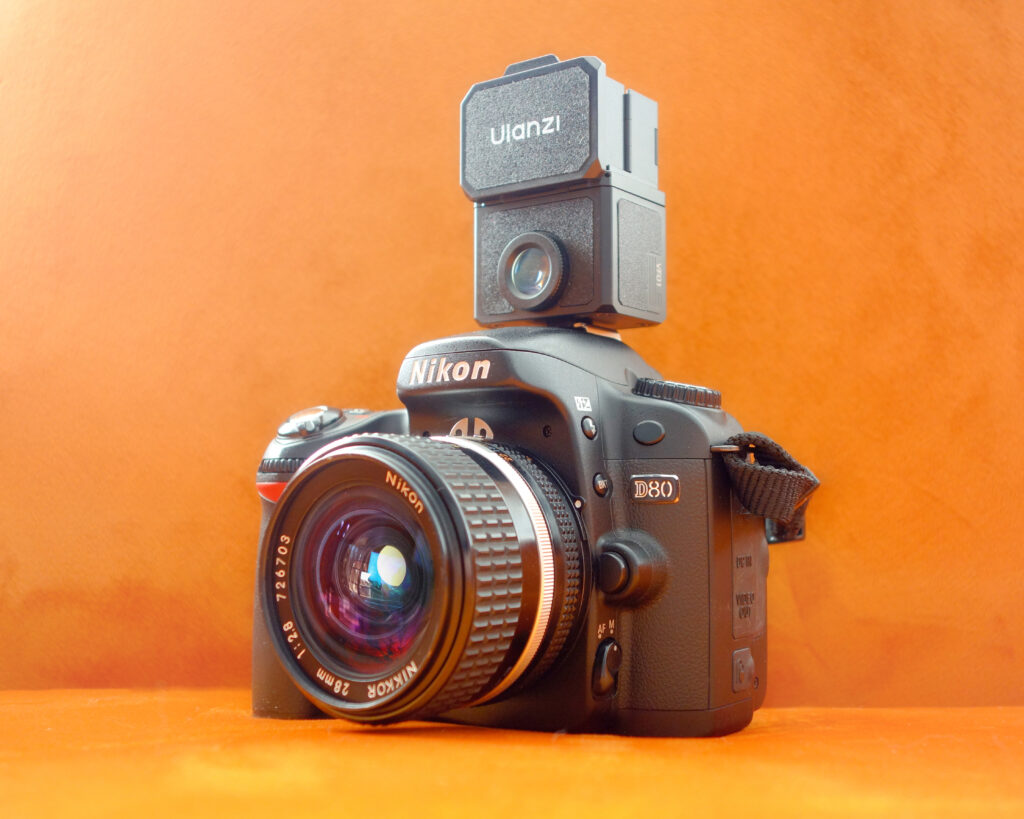
Pretty early in my endeavors, it became obvious that I needed one more extra piece: a good “test target” to train all the pieces of equipment and fine-tune the capture process. The first thing I discovered was that having a sensor, film and lens in geometrically correct positions was not an easy feat. The camera and lens are pretty heavy by themselves and the way they are typically mounted creates noticeable forward lean. Pictures above tell the story. The components would buckle under their own weight. The push and pull experienced by the film holder while the film is advanced could easily break the alignment and centering – all of which require constant adjustments of the moving parts. Constructing mechanically-sound copy stand or a scanning rig is an art by itself.
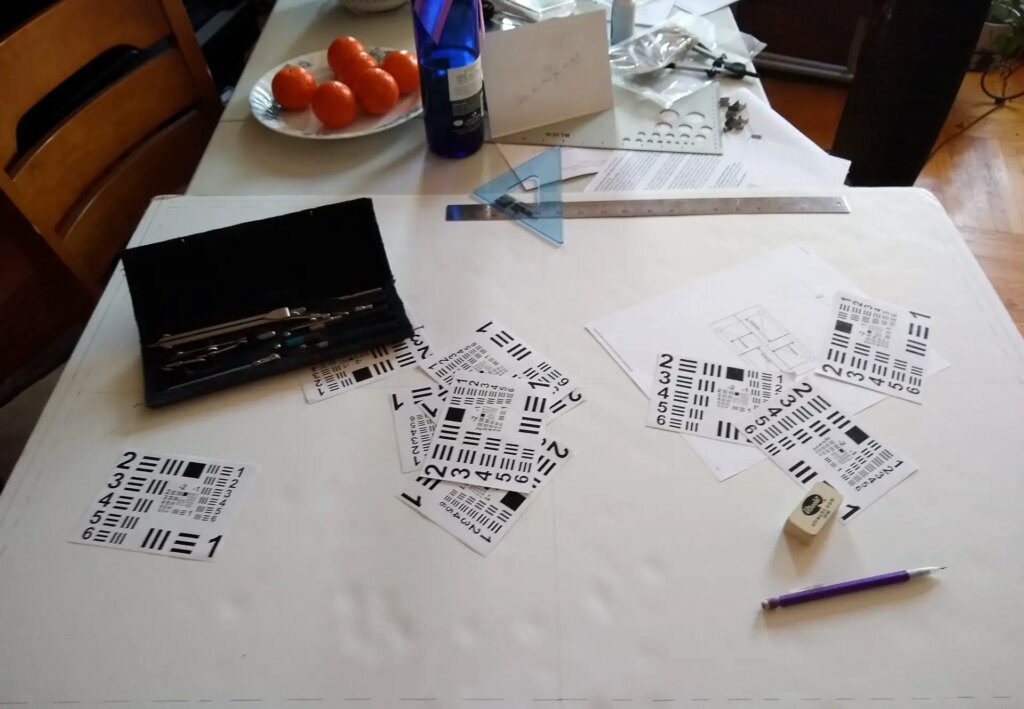
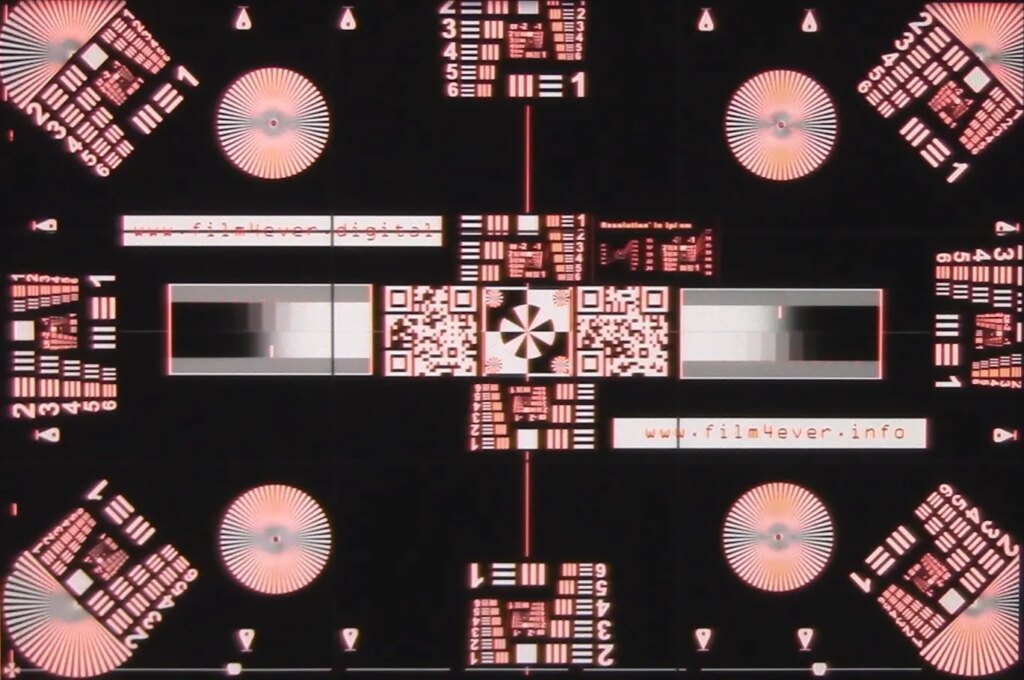
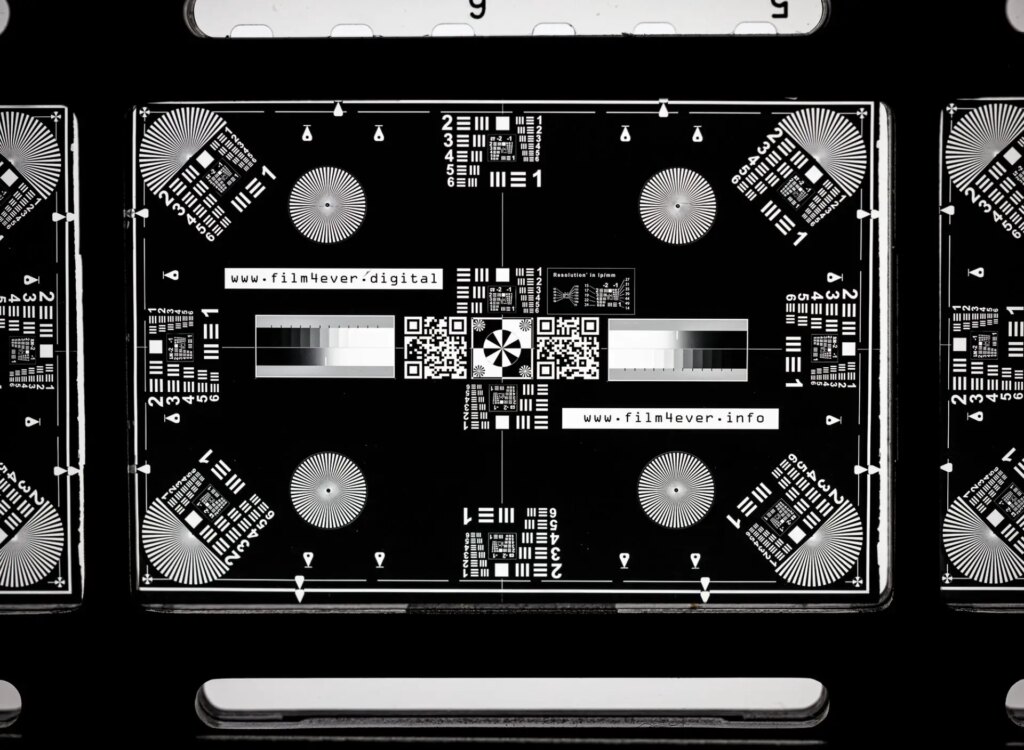
Anyway, it became obvious that the good test target should have clear mark-up pointing to the boundaries of a frame and be made in a way that any perspective distortions caused by misaligned holder, lens and camera are easy to spot. Target should have plenty of hi-contrast, hi-resolution elements to help control the sharpness across the frame. Film test target should be cheap enough to be disposable, come dust, scratches and fingerprints eventually wear it out.
At first, it did not even occur to me to look if any targets like that were readily available on the market. I decided I was film photographer experienced enough to make such a target myself over the weekend or two. Again, I had all the equipment necessary except the film. What could be easier than to grab some high contrast, high resolution film, draw some patterns on the piece of paper, and take a picture with any 35 mm film SLR camera? And voilà – that will be it – the minor technical issue is solved and a handy little instrument is mine to use.
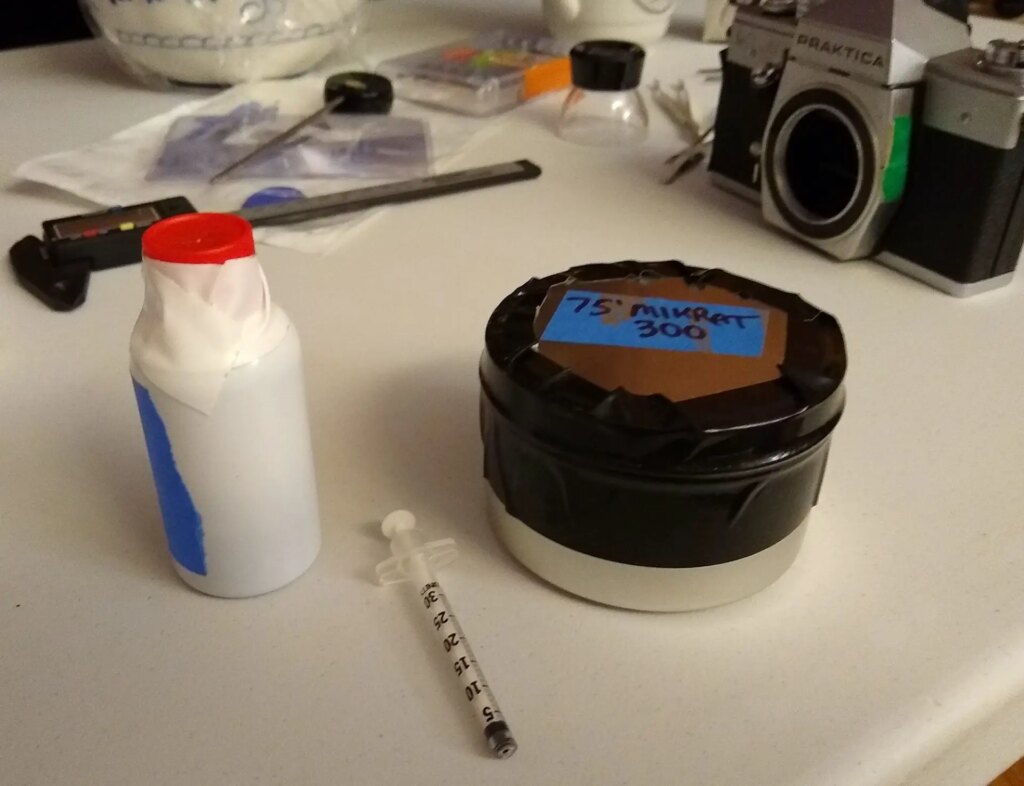
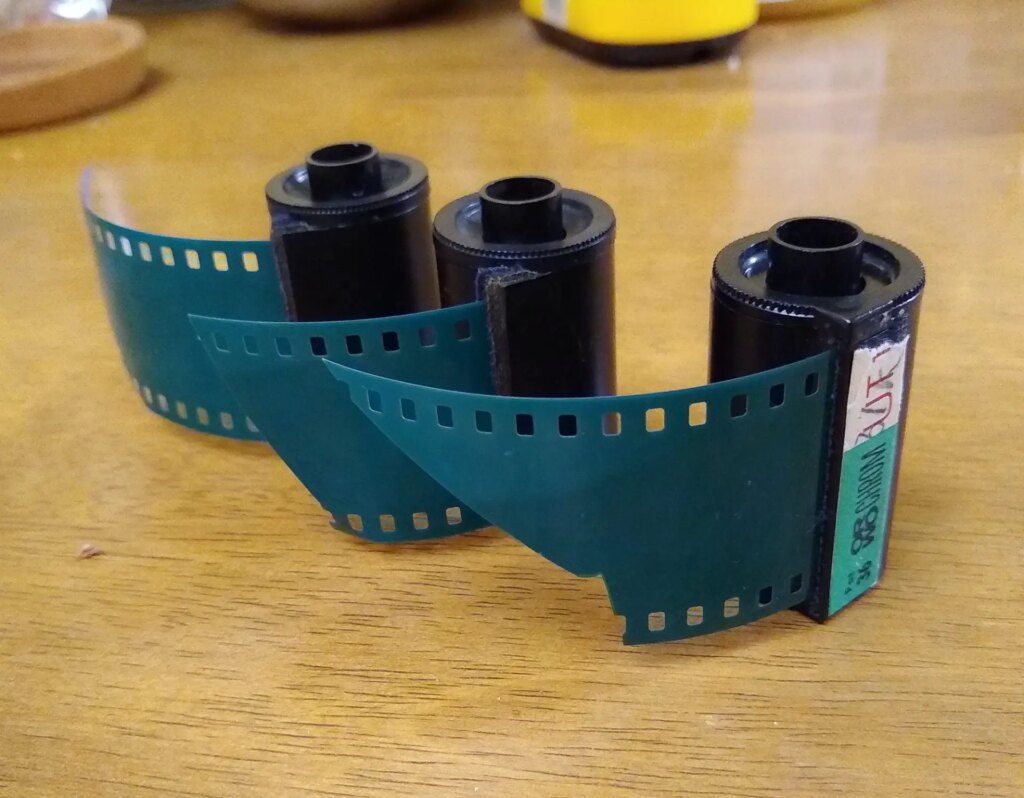
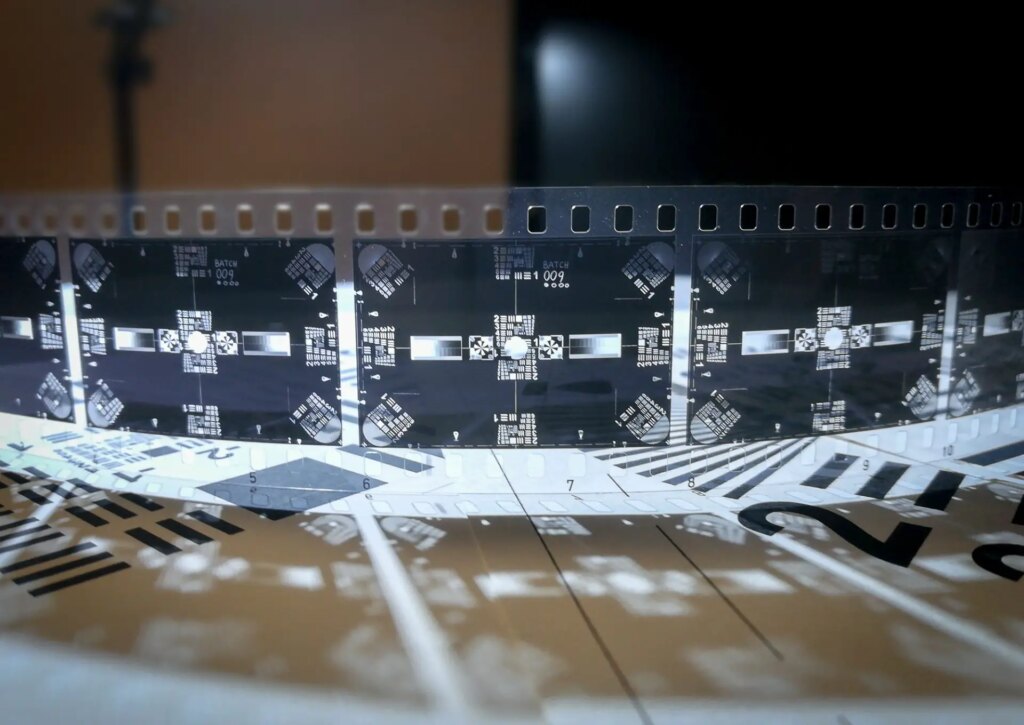
Mikrat-300 – the film from the galaxy far-far away
It was approximately 15 years since I last approached the film counter at B&H Photo-Video store in NY. On my not so frequent visits I have just noticed that the famous conveyor belt system with hundreds of green baskets once flying over the patrons’ heads has been hidden under the counters. The workforce has diversified. The the film counter in particular was shrinking in size losing away its many glow-in-the-dark glass-door refrigerators. It got relocated to the less prominent place in the store. The bored salespeople looked like they were sent to man that counter as if a local judge sentenced them to a community service. I would just smirk at them and go to the second floor to play with another digital marvel from Nikon or Canon. Certainly in December of 2019 I had no idea whatsoever what film stocks were still available. I also had no idea what particular stock I would need for my little exercise except that it should be some sort of technical film.
Coincidentally at the time I frequented “Shooting expired film” forum on FB and while I was skeptical about all these wonderful stories about the marvelous treasures hidden in 30 years old rolls, it gave me an idea. The only stock I knew for sure would work fine for me was “Mikrat-300” – the stock I used a lot back in the old days when I was a scientific fellow in R&D institute. At the time, I had to make the nice XY charts with fancy curves depicting the behavior of some single crystals under the irradiation. Mikrat was a beautiful emulsion: extremely good resolution – 300 lp/mm and very high contrast. The stock originally was used to archive and duplicate the printed matter, line drawings and alike. By the pure accident one of the frequent contributors to the FB group just announced that he acquired 300 meters of expired Mikrat-300 from overseas. I was first in line and immediately ordered 30 meters to be shipped to me by Priority mail so I can play with it during Christmas holidays.
Drawing the test chart was remarkably uneventful. I just printed some patterns from the internet on my laser printer and glued them to the school project foam board while my family was making the table on Christmas eve.
Remembering that Mikrat was quite low ISO film I just shot a very long clip test covering everything from ISO 1 to ISO 400. I decided right away to go with D-19 developer which was available in the powder form and would give me plenty of contrast. Knowing the film was very fine-grained to begin with and of low ISO, I was not concerned about D-19 making the grain an issue. The price of the developer was a bit steep – like $18 per 1L, but I thought I would need to process a maximum of 5-6 rolls including all tests, so I did not want to buy raw powders and all other sorts of lab paraphernalia.
I processed the first roll of Mikrat and of course it was heavily fogged, not even evenly. No wonder — after been manufactured at TASMA in 1985, film survived (hopefully in total darkness) the Gorbachev’s Perestroika in 1986, the dissolution of Soviet Union in 1991, Y2K scare in 2000, Iraq war in 2003, and the film cameras becoming dinosaurs.
Infectious development
But did the complete failure of my test stopped me on my tracks? I already caught the film bug and a failure was not an option. Fog? There was a benzotriazole for that! Taking advantage of my NYC residence I took a subway trip to the Adorama and brought home a bottle of benzo. Few milliliters of 0.1% solution and lower (15 C) developer’s temperature did reduce the fog noticeably. My test pattern was becoming nicer and clearer. But I needed a truly transparent base… what if I try Farmer’s reducer in its superficial form which removes equal amounts of the silver from all dense and transparent parts of a negative? That will remove the fog like it was the layer. Given the nature and the actual purpose of the negative, clearing the darks (the black bars on the original chart) or just making them transparent looked like an unintended but desirable advantage.
In order to actually deal with the fog removal at film roll scale I needed a more suitable tank. I ordered a couple of 60 years old Bakelite tanks from Latvia – the personal favorite from my youth. Those tanks featured reels with just one grove (vs two in any regular Patterson or AP reel). That allows for easy unspooling of the wet film from the reel, examining it, and easily spooling the film back to continue processing or to proceed to next bath. The idea was to incorporate fog removal in the test target’s manufacturing process.

The Premonition
It was February of 2020 when eBay sellers based in China started delaying shipment of various goods citing the extended holidays and inability to return to office. Approximately at the same time someone on FB forums mentioned Adox CMS 20 II Pro film. It was basically sort of a complaint about how hard it was to shoot and develop CMS stock and get good half-toned negatives. I never heard of that stock and out of curiosity just Googled it. Can you get excited by reading manufacturer’s data sheet? I did get excited, taken aback and just gasped realizing how beautifully that stock would serve my needs. While the film was out of stock at B&H I placed the order for a few rolls – given especially to the fact that it was one of the cheapest stocks available – just US$6 a 36 exp roll. In a couple of weeks – somewhere by the end of February – I found the carton with Adox dropped on my doormat.
The very first run with Adox CMS sent my remaining roll of Mikrat to the bottom of the cupboard. The new stock was beautifully sharp, high-contrast and completely free of fog. Per data sheet it had 800 lp/mm – the resolution I knew I would never be able to utilize, but certainly was nice to have. Being on a PETA base, it was transparent, the emulsion was very thin and hard to damage. It was a sheer pleasure to just hold on to this film.
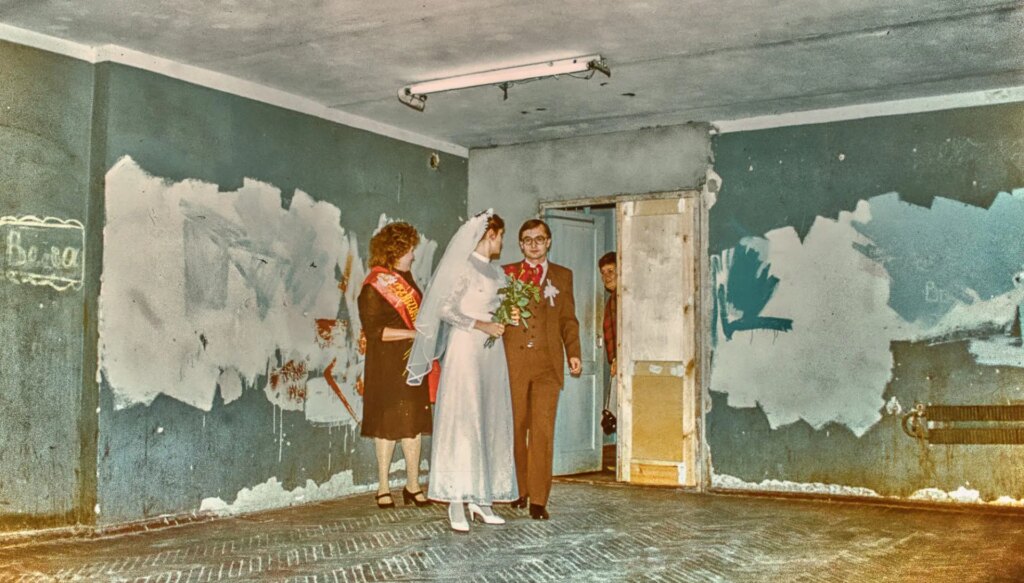
I believed I was about to produce a couple of rolls of targets and finally forget about the whole thing as I forgot about other things I did in my past photo life – like shooting the “flashing news” reports about engineers and scientists from my R&D institute sorting out frost-bitten cabbages at state storage facilities during “subbotniks” or …
But something else was brewing. While I was collecting more and more pieces for film photography – the beakers, thermometers, stopwatch – the streets of New York had suddenly changed – they become deserted and some folks started wearing masks and gloves.

The morning crowds filling the subway cars somehow receded. On March 13, 2020 I was told to stop coming to the office. I considered that as a gift of three hours of personal time per day which otherwise I would have spent commuting to work.

US Air Force makes groundwork
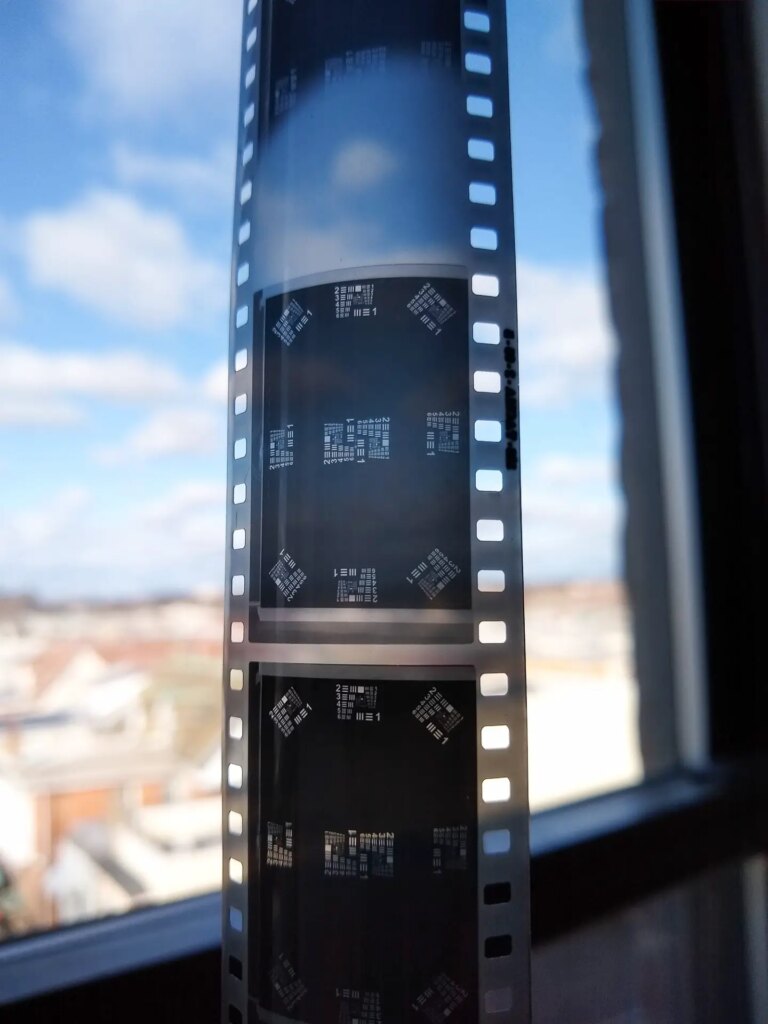
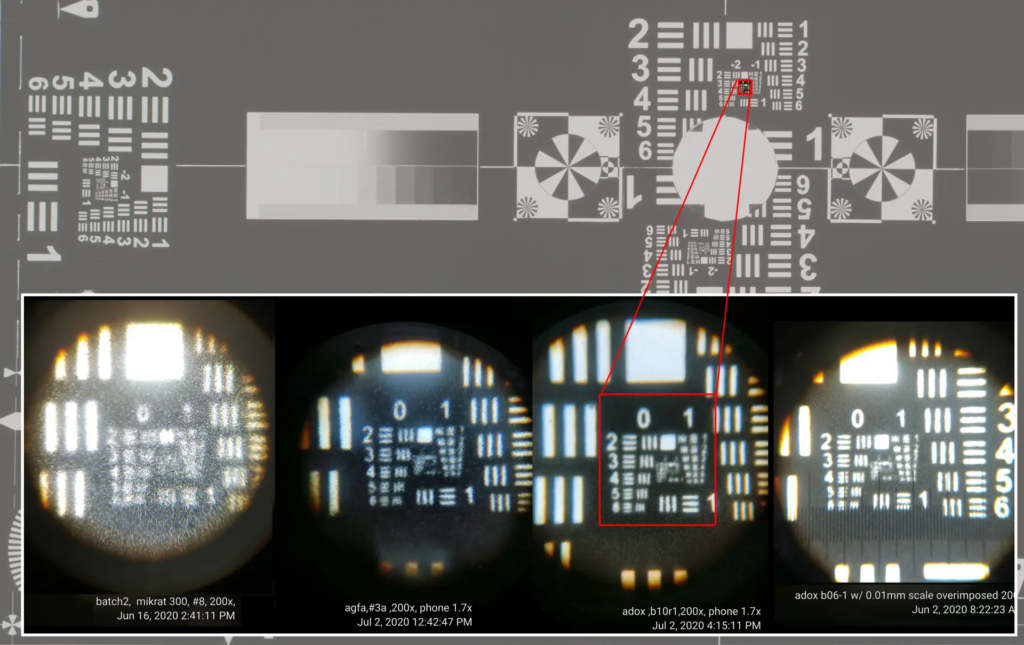
Anyway, the test targets were coming out fine and now I needed them to be as sharp and as fine-detailed as possible. I decided to use a 100 mm fixed focus lens to have more uniform sharpness across the field. With the high-resolution film in hand, it was very tempting now to employ USAF 1951 power resolution charts to the fullest. The US Air Force developed those charts in 1951 with the advent of very-high-flying spy planes. They quantified a rather subjective notion of resolution where film grain and lens’ aberration converged to confuse the human operators. The ease of use made the USAF 1951 pattern the de-facto standard in measuring lens and film resolving power in optics and photography.
Transparent USAF 1951 chart is what I wanted to implement with my test targets. Industrial-strength test targets get manufactured using micro lithography – the thin layer of chromium metal in hot, gaseous form get deposited on the glass substrate in a deep vacuum. Typically 5×5 cm square of glass has single full fledged USAF 1951 pattern. It is a very good instrument to measure lens’ resolution near the center of the square. The run of the mill factory-made targets have resolution of about 240 lp/mm and cost a couple hundreds (!) US dollars a piece.
The numbers do matter!
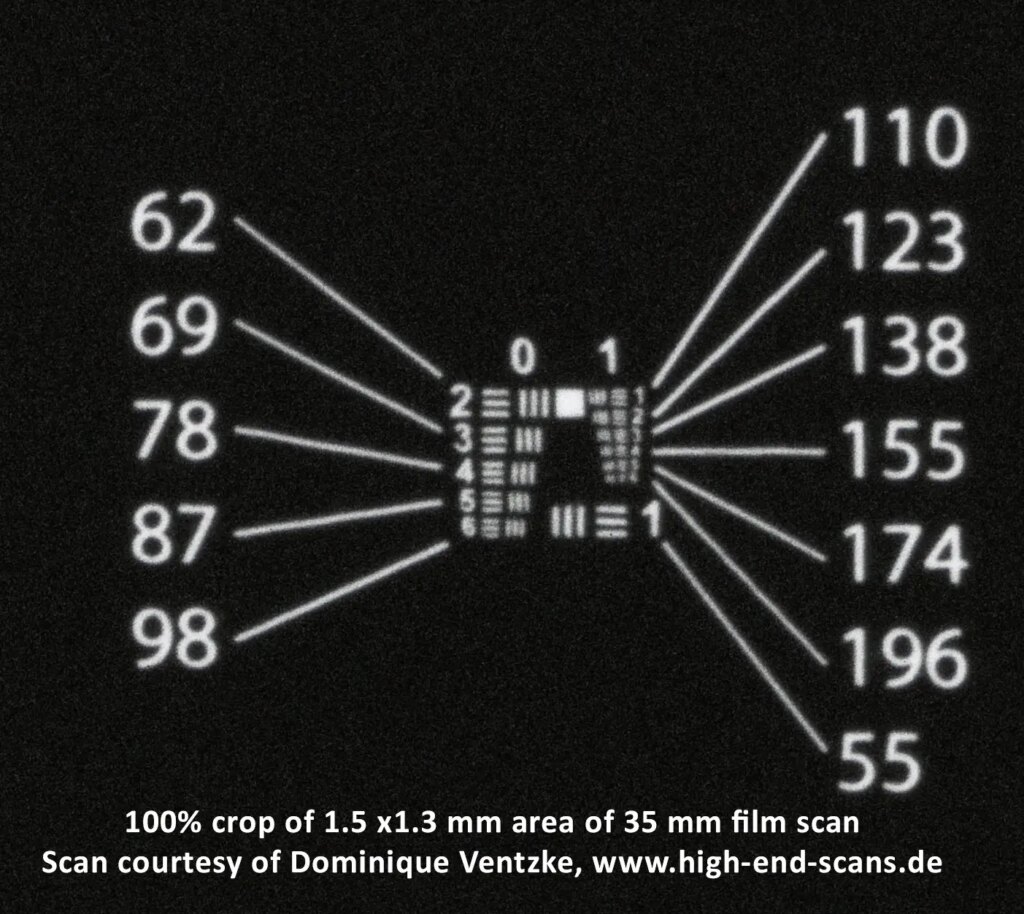
But from the point of view of the camera scanning, those industrial strength targets are pretty much useless. On one hand, a film shot with a regular good lens would rarely exceed resolution of approximately 80 lp/mm. On the other hand, the major issue of film scanning with a digital camera is that the lens should exhibit a plain field of focus when used at a magnification around 1:1. Only a handful of lenses allows for that. It was clear that test target to be useful should allow to judge the quality of lens across the frame in one single shot – without having to move the precious glass slide up and down, left and right.
In fact, the solution to the problem is obvious – let’s place multiple USAF 1951 patterns in all the crucial parts of the frame. For each part we would have the last resolved element number. Thus we can measure the lens resolution at different locations across the frame at once. “Group zero, element three !” one would whisper to themselves in delight and $400 dollars spent on a new macro lens will no longer look like a fancy way to waste the money.
After all, I found myself in familiar R&D mode. I needed to combine together different inputs: the sharpest F-stop for my 100mm lens, the optimal density and contrast for the Adox negative and convey that into the power settings for my strobes and the development time and concentration of my film developer. My camera now worked hard under the control of the intervalometer (and eventually it did brake down under the heavy load).
While I was perfecting my techniques based on the feedback from the early adopters, I was fielding more and more requests for the targets themselves.
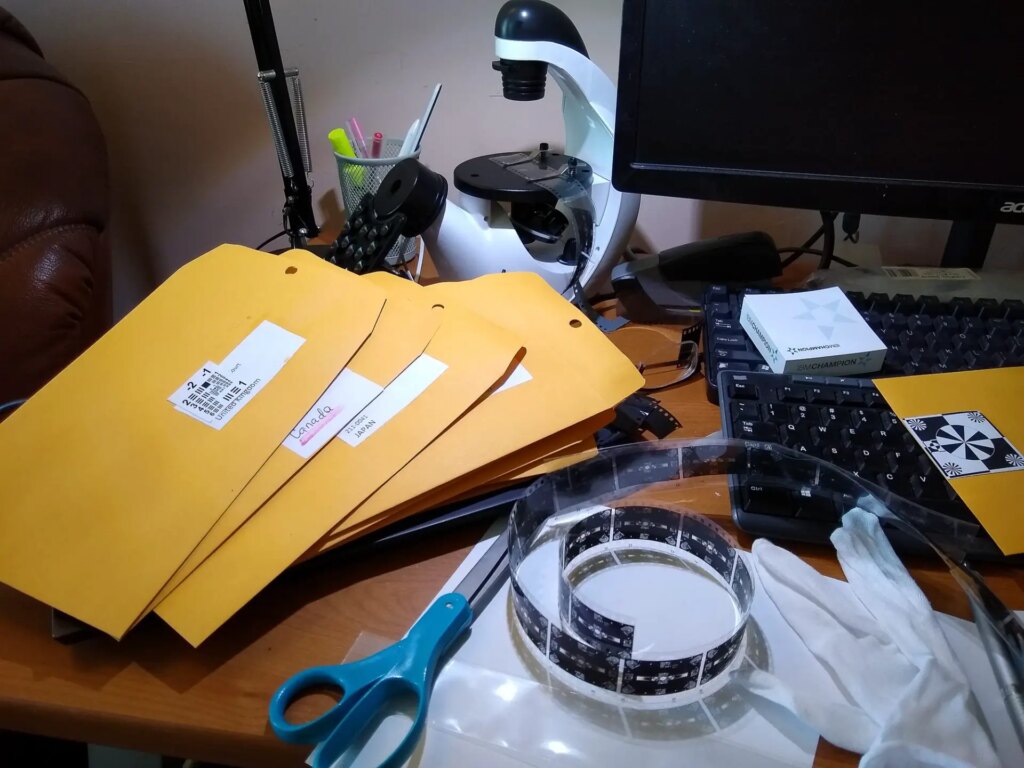
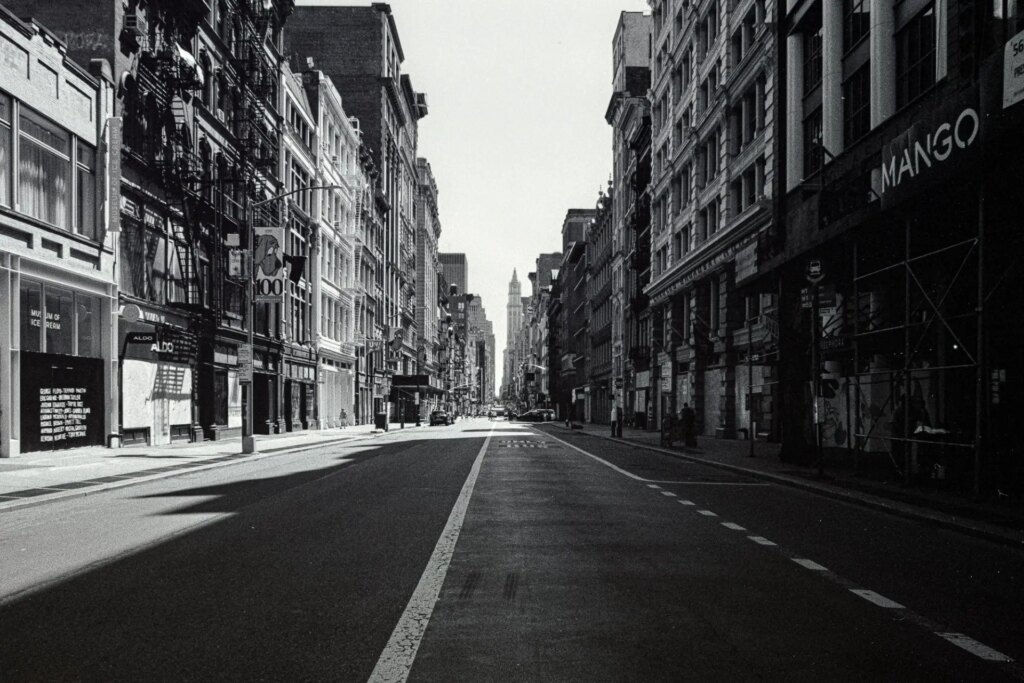
In June 2020 I found myself regularly walking completely deserted streets of NY to drop another bunch of the envelopes at the Post Office. It was surreal – bright summer Sun, blossoming trees, almost no cars and very few masked human figures avoiding each other like a plague 😉 . Here is Broadway @ Prince Street…
… and here is Times Square at 4 pm on 06/14/2020.

Though some photographers did find the use for the deserted Times Square as a free, neon-lit backdrop with some split red light.


The Vlads Test Target is born
Approximately at that time the design of Vlads Test Target got finalized. On the advice from the folks who helped me evaluate one generation of targets after another, I added extra Siemens stars to the target. While the bulk of the chart was printed on large format printer, the groups/elements which were of the greatest interest to the scanning public had to be printed separately.
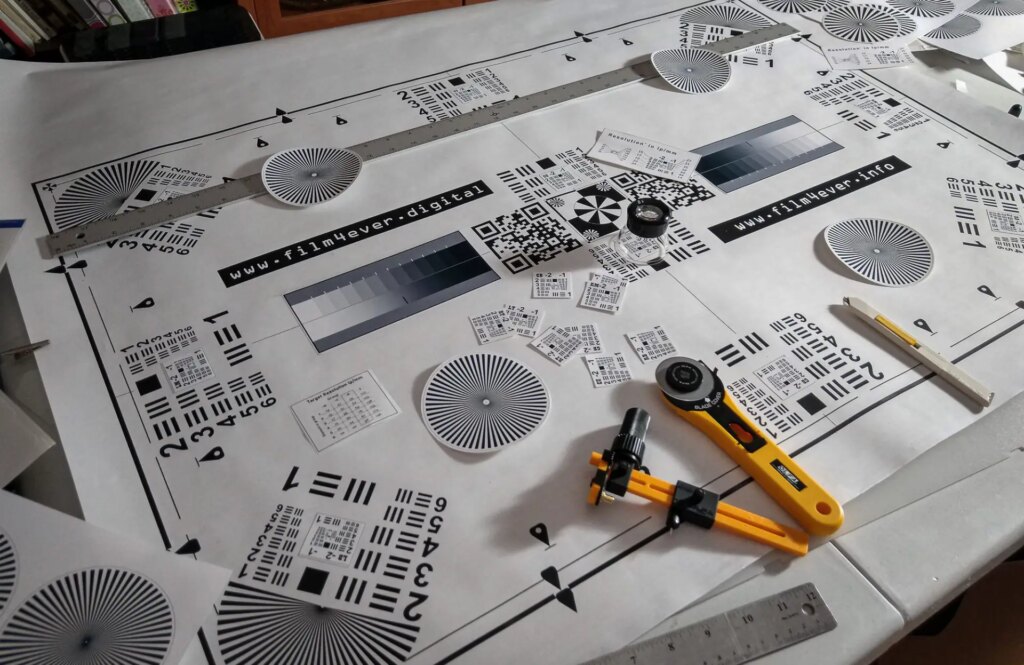
Having four Siemens stars in four quadrants makes it very easy to ensure that the whole frame is indeed in focus. With Focus Peaking feature most cameras have these days, one can observe how stars become red – all at the same time – and that guarantees that the film’s plane and the sensor are in the perfect alignment.
And that’s how the now ubiquitous Vlads Test Target was born and the rest is history.
P.S. The Vlads Test Targets are available at these fine web stores: in UK at pixl-latr.com, in EU at kamerastore.com, in USA and worldwide www.etsy.com/shop/SilverKnits . Visit the complete parts catalogue to see all the targets Vlad now offers.
Share this post:


Comments
Arne Heeringa on Zen and the Art of Camera Scanning or The Brief History of Vlads Test Target – by Vlad Serebryany
Comment posted: 30/07/2022
Great to see you here!
Comment posted: 30/07/2022
Bob Janes on Zen and the Art of Camera Scanning or The Brief History of Vlads Test Target – by Vlad Serebryany
Comment posted: 30/07/2022
Optics are are wonderful thing.. :-)
Comment posted: 30/07/2022
Comment posted: 30/07/2022
Vlad Serebryany on Zen and the Art of Camera Scanning or The Brief History of Vlads Test Target – by Vlad Serebryany
Comment posted: 30/07/2022