I’m beginning this article in early August 2025. I first started thinking about large format somewhere in 2024 and began watching various YouTube videos that covered the cameras and their use. I was influenced by videos from Tod Korol, Kyle McDougall and (oddly enough) Matt Osborne. I guess by January of 2025 I was actually visiting eBay in search of various cameras. I know that I looked at Wista, Graflex, Linhof and Horseman. For one reason or another nothing really grabbed me. Some were too expensive. Some were 3D printed and I felt that a 3D printed body would be flexible and that I felt I wanted rigidity. In February I found a Nikon 150/5.6 lens on eBay and the $379.99 (USD) seemed reasonable based on what I’d been paying for other lenses (both new and old). So, I ordered the lens despite not having decided on a body.
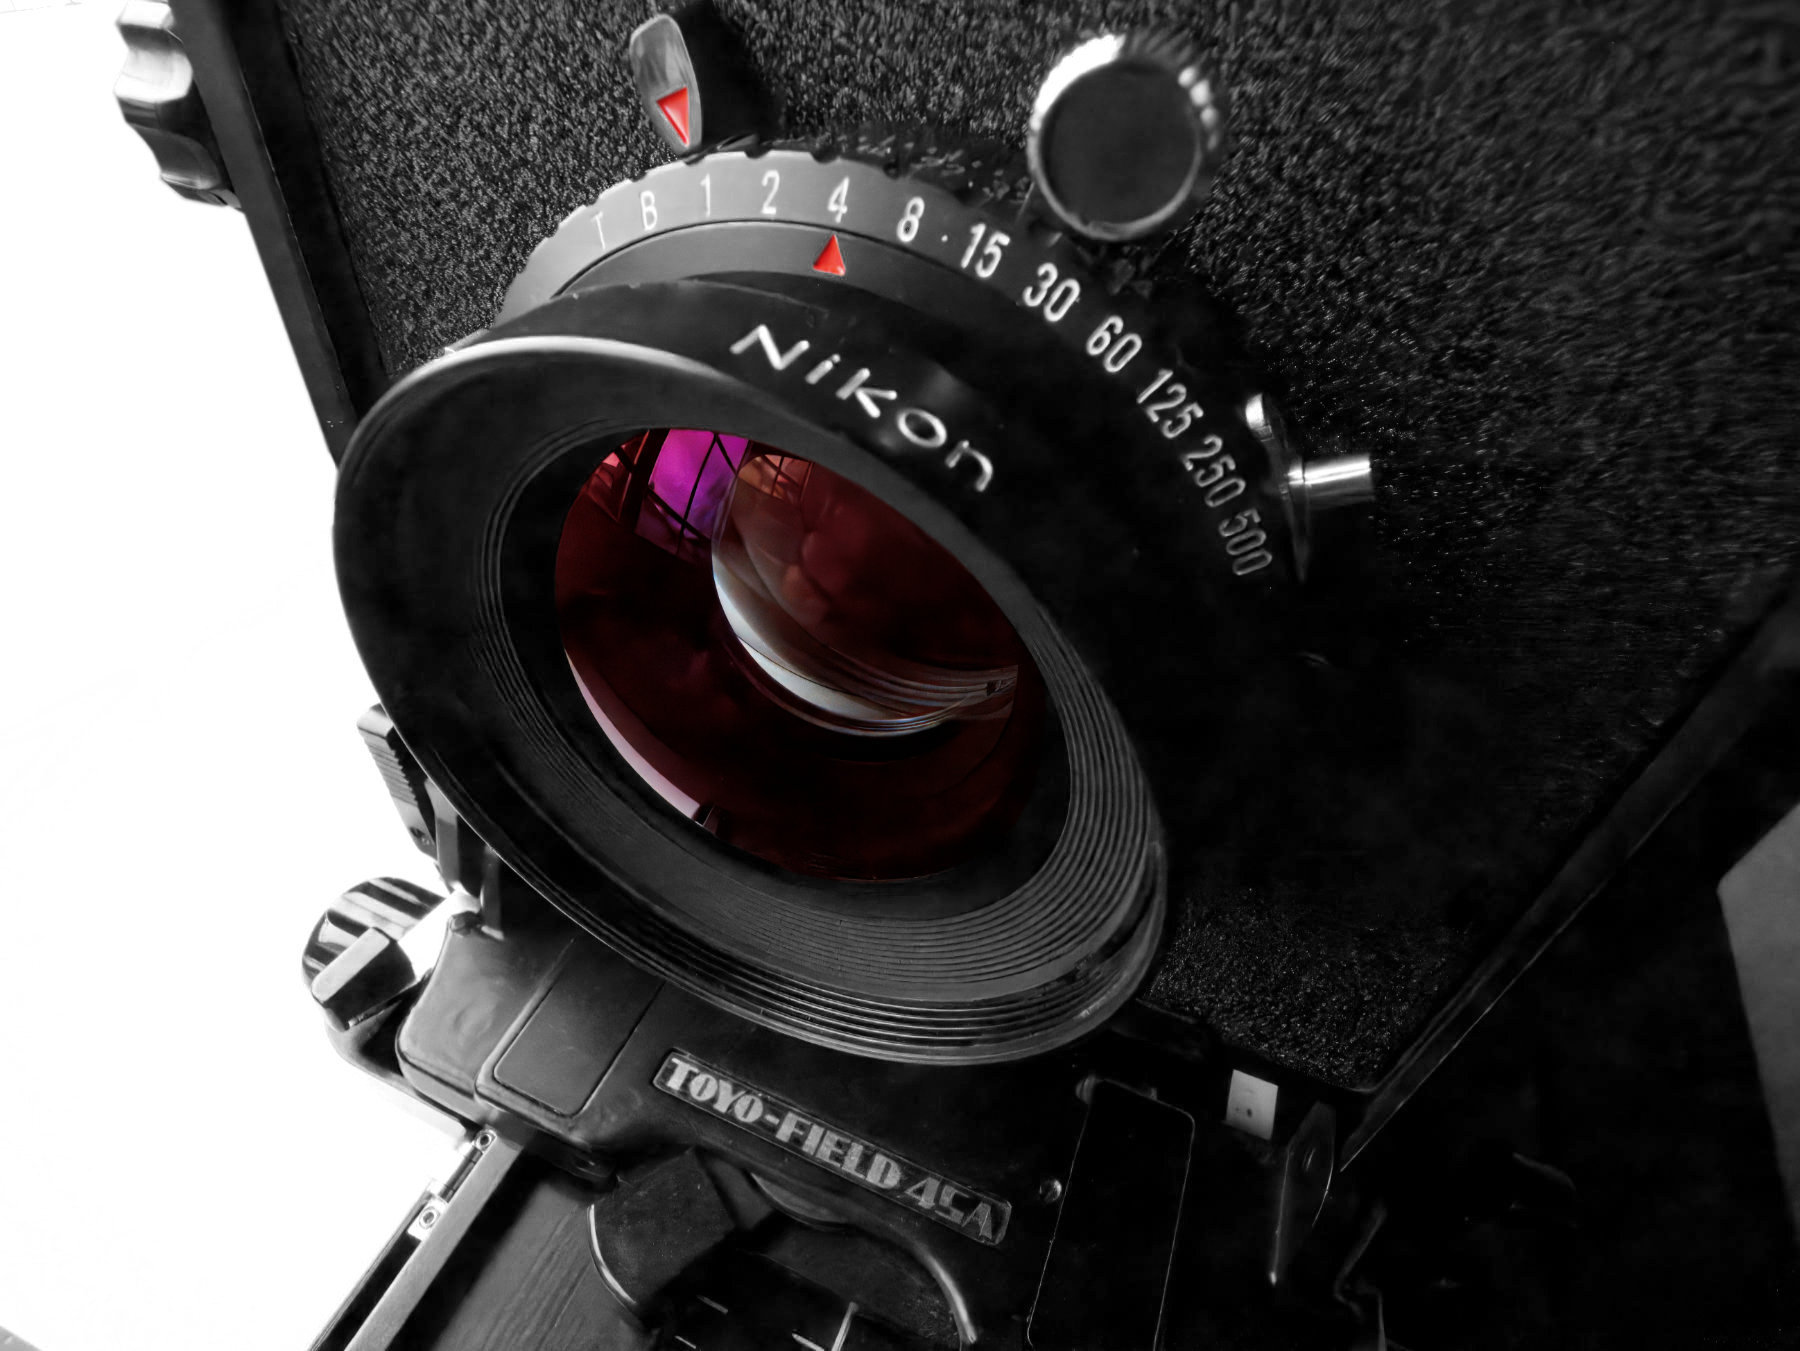
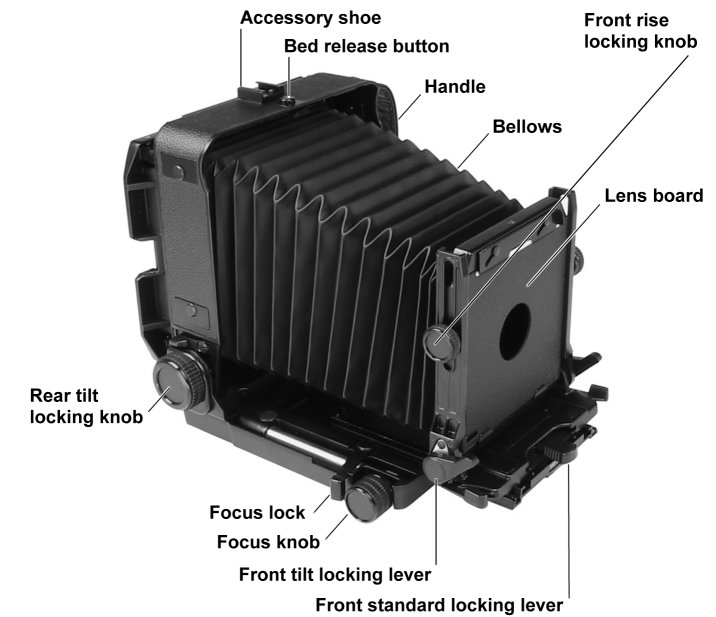
A week after I ordered the lens, I visited my friendly, local film camera candy store (aka: Blue Moon Camera) and came home with a Toyo 45a for which I paid $800. The Toyo is an all-metal construction – well, almost all-metal. The bellows are paper.
As it turns out the lens board that came on the Nikon lens didn’t fit the Toyo. A quick 24-mile trip back to Blue Moon allowed me to leave with a properly sized lens board with the lens mounted. Removing the lens from the lens board isn’t a big deal although you need the right tool. My supply of watchmaking tools and home repair tools didn’t include the correct spanner.
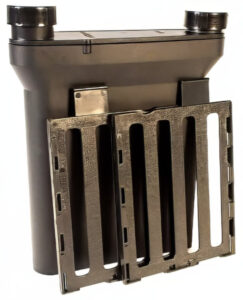
Having a camera body and lens isn’t quite enough when you’re talking about film. I needed some sheet film. Using my favorite online supplier (the one that starts with an “A” and which has a “Z” in the middle) I opted for fifty sheets of 4″ x 5″ Fomapan 100. This selection wasn’t so much about my knowledge of Fomapan as it was about the price per sheet when compared to Tri-X. I had also decided that sending sheet film out for processing and scanning would be problematic. By early 2025 I had been successful with developing (and scanning) both black and white and color 35mm film, and I figured doing 4 x 5 sheets would be pretty similar. However, 4 x 5 sheets don’t fit in the Amsco daylight tank that I was using for 35mm film, and I decided to try using the Stearman Press SP-445 tank. The tank will handle four sheets at a time.
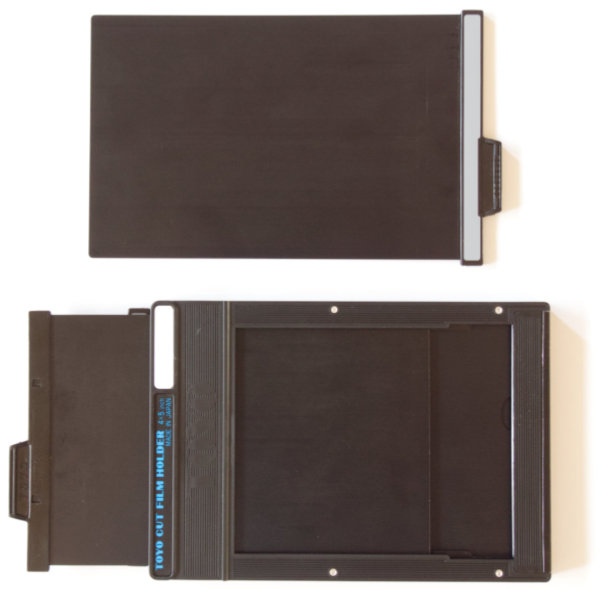
I also realized that I was going to need film holders. Rather than try to find used holders online, I decided to order a set of two new holders from Toyo. While it appears that Toyo is no longer making cameras, they do still have a supply of inventory and I picked up a pair. Each holder will load two sheets of film. Following exposure of the first sheet you need to reinsert the dark slide, remove the film holder from the camera to focus for you next shot and then flip the film holder over so the second sheet can be exposed. The Toyo dark slides have a black strip along the top of one side and a light gray strip on the opposite side. This allows you to keep track of which sheets have been exposed (as long as you remember to flip the dark slides in a consistent manner). Consistency is key in successful large format photography!
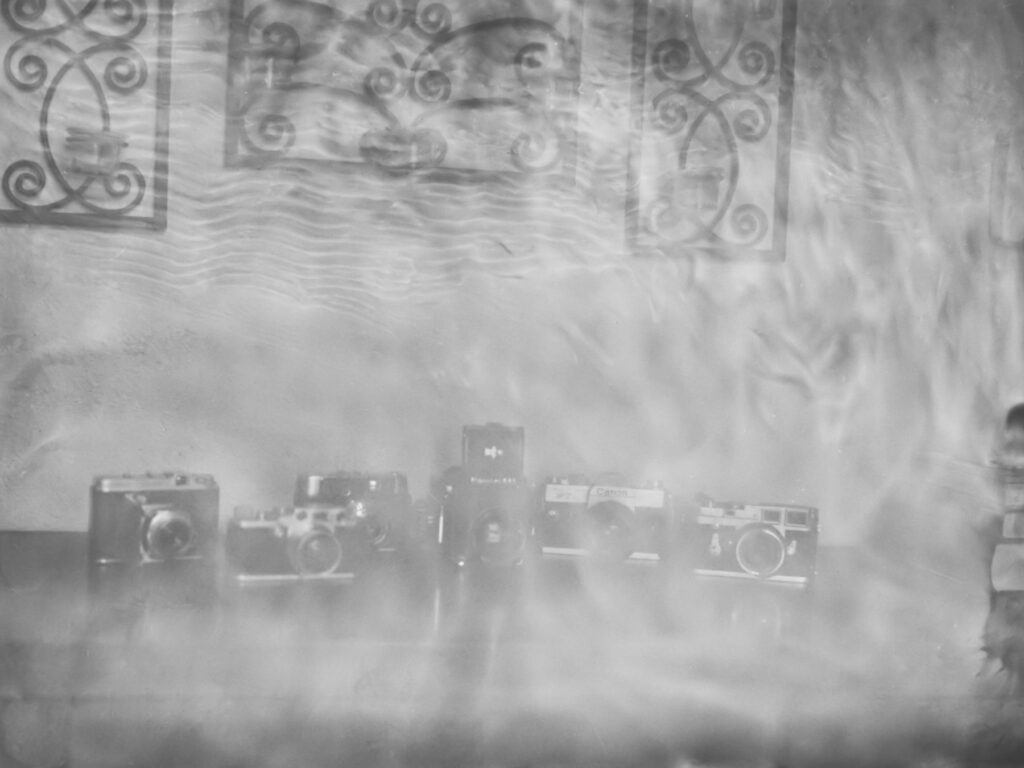
The calendar was now into late March and I thought I might be ready to take a shot. I mounted the camera on a sturdy tripod and arranged a few film cameras on a dresser in my bedroom and opened the curtains wide to catch the morning sun. I metered using my Sony a7R3, focused the Toyo (with the lens stopped down and without using a loupe) and pressed the shutter. Pulled my film holder and closed the curtains to darken the room. Then in my walk-in closet, I loaded the Stearman tank and went out to the garage.
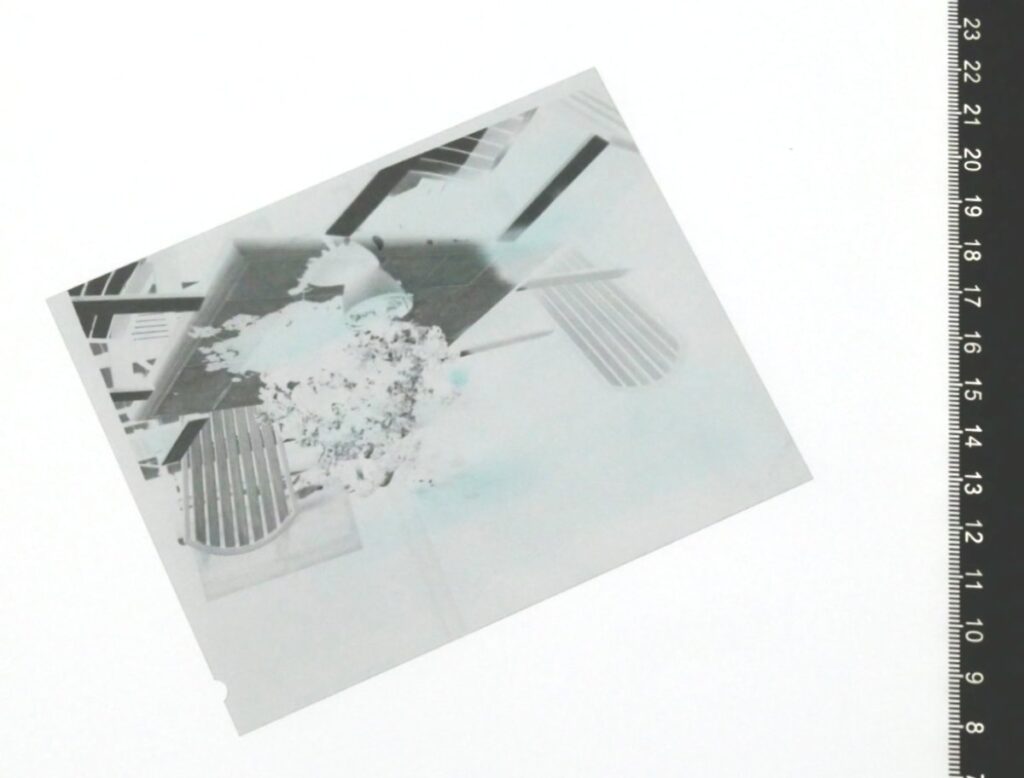
Since I’d had good luck using the Cinestill Df96 monobath for HP5+ and Tri-X, I assumed it would work on the Fomapan. It didn’t. After going through the development process, I was pretty disappointed with my first shot.
The good news was there was an image on the film. The bad news is evident.
I asked around and decided that the Df96 monobath wasn’t likely going to do the trick, so I ran back to Blue Moon and picked up some Kodak chemistry. I don’t recall mixing D-76 from powder 50 years ago but the process was relatively easy. I did also end up picking up some brown plastic gallon jugs to store my mixed developer and fix. I also picked up a gallon glass jar to do the mixing.
I also decided that the way I illuminated the first attempt for scanning was ad hoc and purchased a real light tablet.
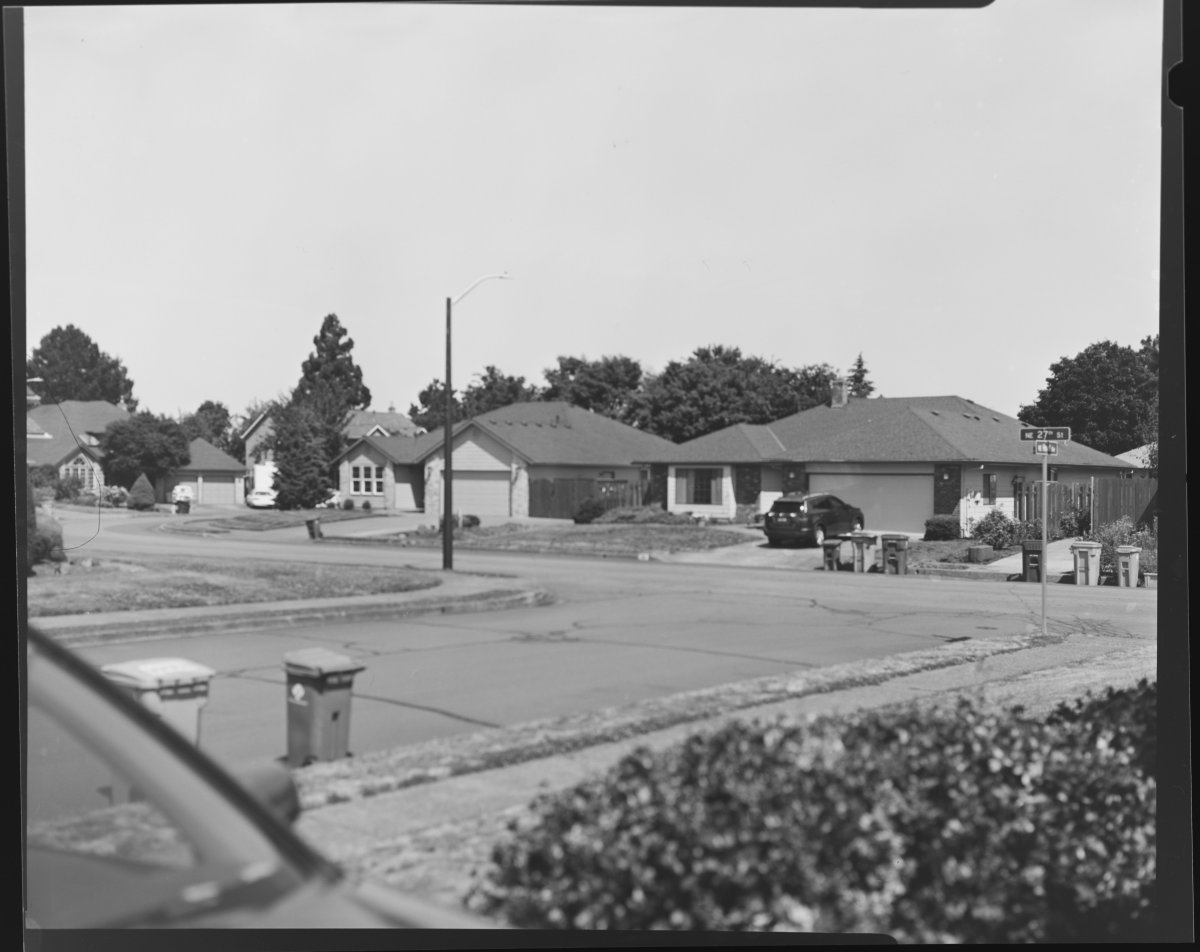
Calendar is now around early July and I figured that I’d take some outdoor test shots around the yard before driving up to the mountain for some real photographs. So, I set-up the tripod just outside the garage and pointed the camera at a house across the street and only exposed two sheets.
Using the freshly mixed D-76, Kodak Indicator Stop and Kodak fixer I developed the shots. While the 6.5 minutes of development time was fine, I didn’t stop or fix long enough resulting is some blue on the negatives. Luckily the blue disappeared when I converted the color raw file to monochrome.
These first test shots were on the soft side. It seems that when I originally got the camera, I decided that I needed to clean the ground glass. I took it apart to clean the back and separated the glass from the Fresnel lens. Having had some help determining that this was a possible problem I verified that the Fresnel and ground glass sandwich was assembled correctly and facing the right way in the camera. I shot the neighbor’s house again. This time I actually focused with the lens wide open and used a little Bausch + Lomb 4x loupe. I also used a specially purchased sheet of dark cloth to use as a dark hood over my head while focusing. These shots were also soft.
I believe the above was exposed for 1/60th second at f/8.
It was suggested that perhaps my little B+L loupe would better be replaced by something larger. Another few dollars to Amazon for a larger loupe.
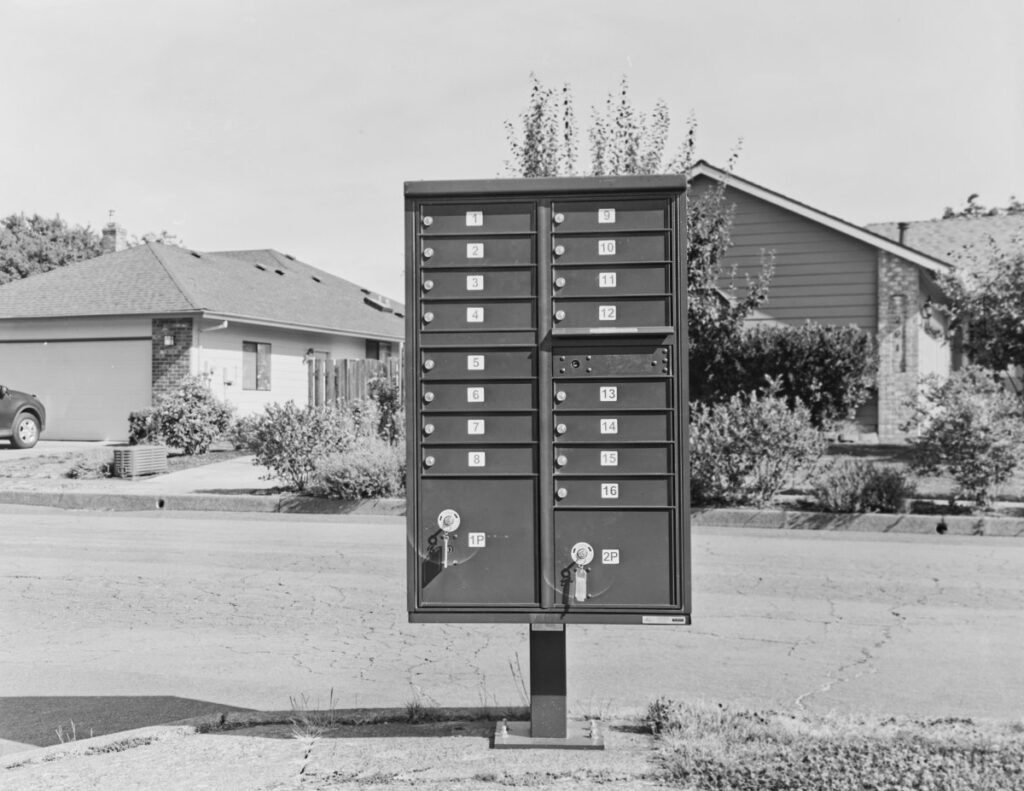
In an effort to shoot something closer with text, I decided my next test would be of our neighborhood mailbox. I have been using my Sony a7R3 set to ISO 100 in aperture priority to get an approximate shutter speed. I think this mailbox shot was exposed for 1/30th second at f/32. Focusing was wide open using the big loupe. I was happy with this one. I’m not doing a great job of recording my exposure data (the Toyo doesn’t write EXIF to the film).
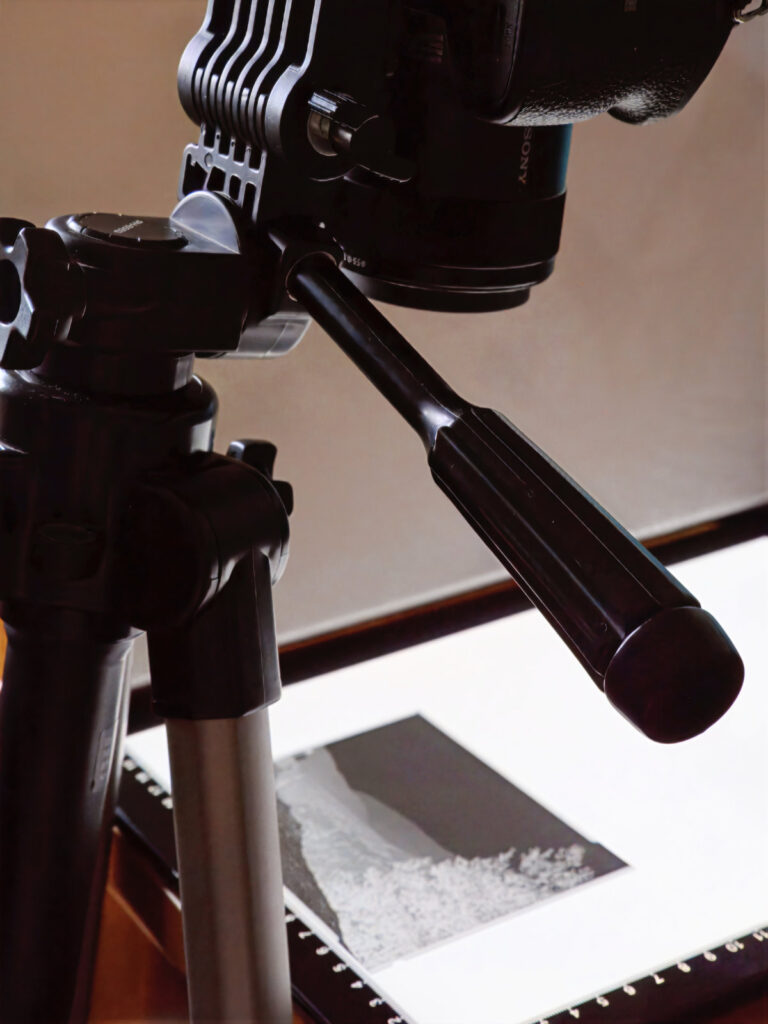
The scanning process seems to go relatively well using the HSK A4 light pad and my tripod mounted a7R3. The 4 x 5 sheets dry flat hanging in my garage and lay flat on the light pad and the focus highlighting does a good job of letting me know I’m getting a good shot with the macro lens. Ideally I’d have a better configuration to ensure that the sensor plane is parallel to the light table/negative plane.
Time to head up the mountain for four exposures of real photographs. Tuesday, 29 July dawned sunny and bright with an estimated afternoon temperature of approximately 90 degrees Fahrenheit (or 32 degrees Celsius) and my wife was having lunch with a friend and wouldn’t miss me.
There are a couple of spots where I like to shoot the mountain. On my first shot I forgot to stop down after focusing. I think I need a sequenced checklist. The dark cloth that I use as a hood while focusing blows all over the place in windy conditions. I may attach a piece of Velcro to the cold shoe location and to the dark cloth for future shoots.
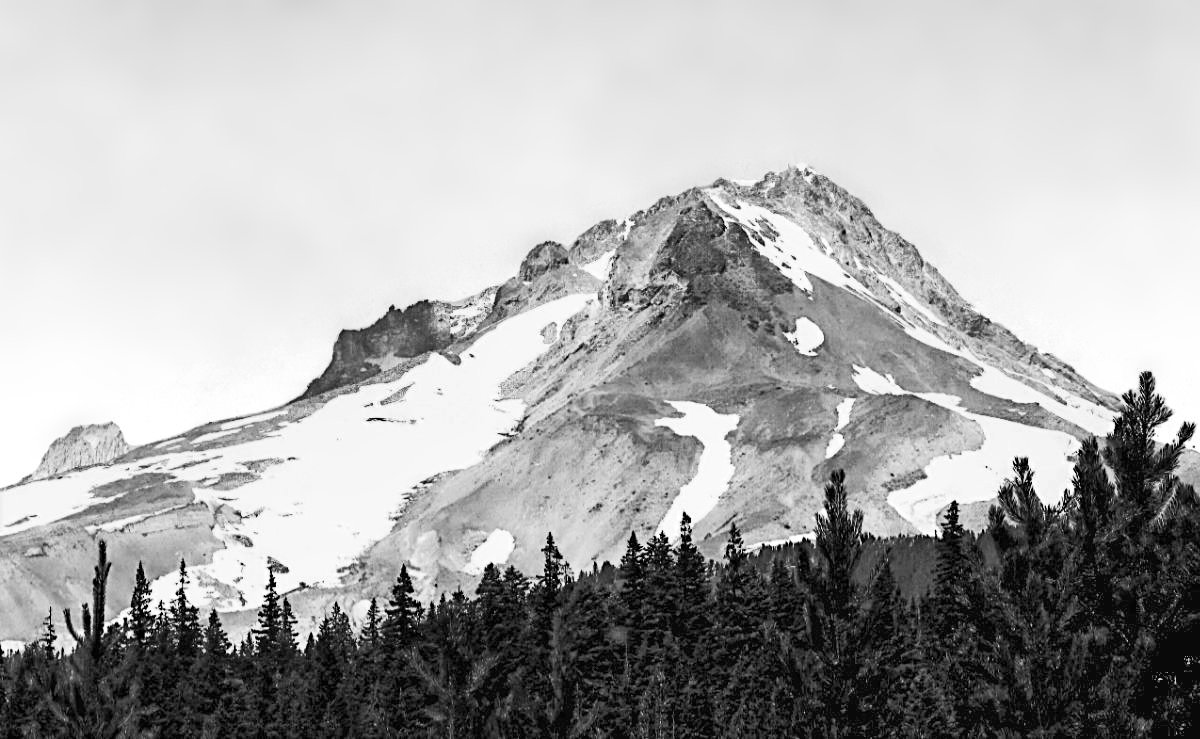
I finally got a shot of the mountain taken from the White River Sno Park (no snow there in July). If you look at the lower left of the slope you might be able to see the chair lift towers at Timberline Ski Resort. The lodge at Timberline was used for the exterior shots of the lodge in the 1980 film The Shining.
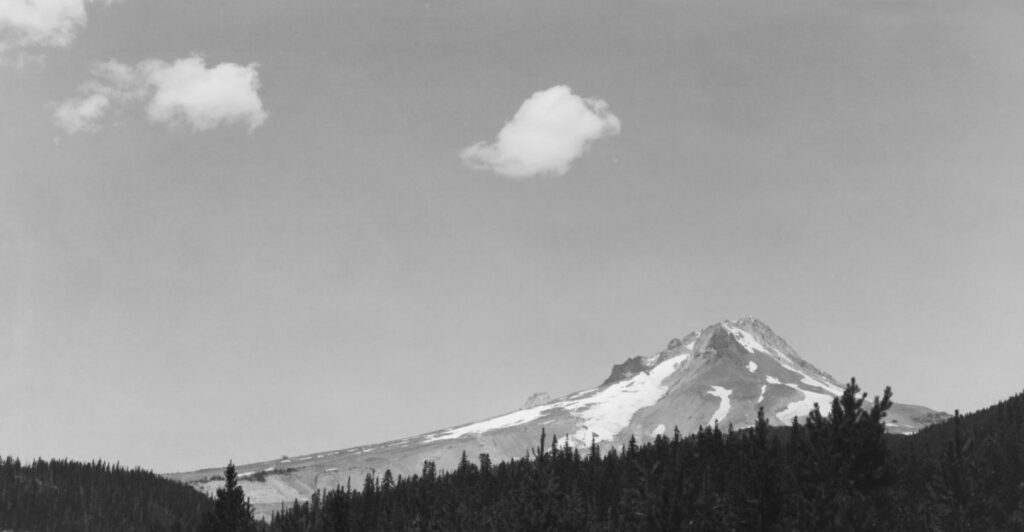
In my efforts to share these 4 x 5 images I have predominantly used the full width of the 5″ frame however I have discovered that the combination of the detail captured by the film and the 42mp resolution of the camera used to scan the negatives allows me to use a tighter crop and show more detail without posting huge files. This next image is a tighter crop of the above. 4 x 5 sure captures the detail!
Summary
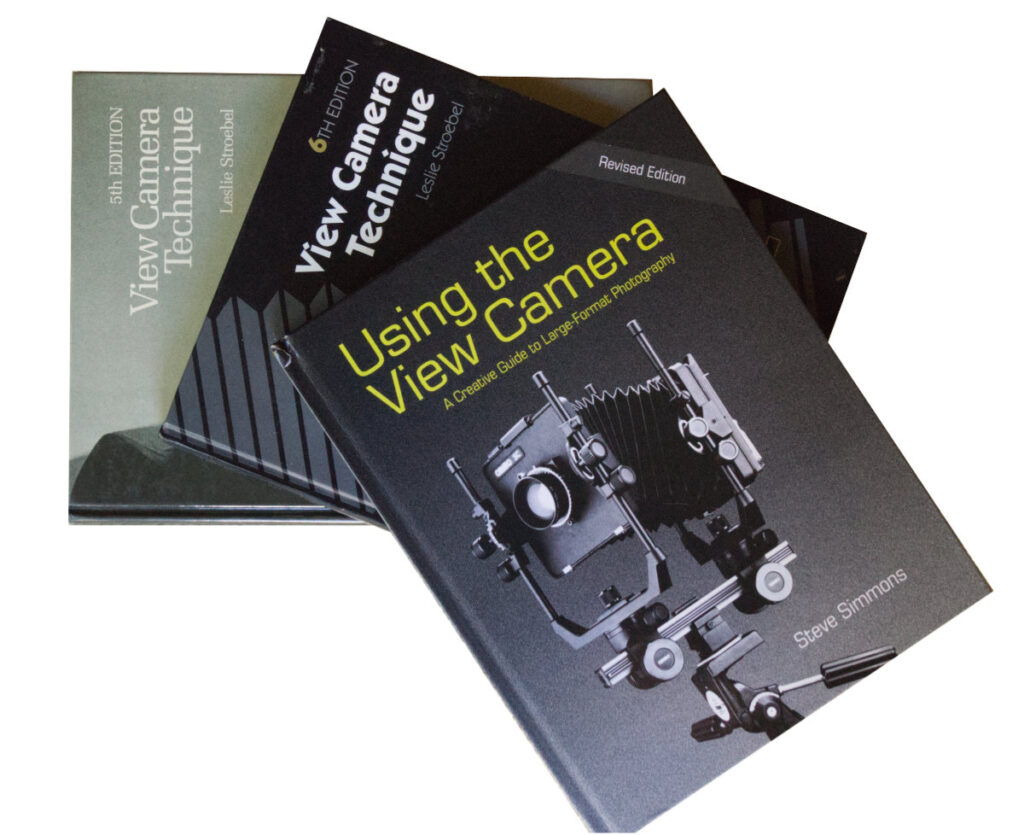
Between forgetting to close the aperture after focusing, not stopping down after focusing, forgetting to pull the dark slide before shooting, forgetting to re-insert the dark slide after shooting, I think I’ve probably made every mistake in the book. Anyone thinking about large format will find a wealth of information in the following titles: Using the View Camera by Steve Simmons and View Camera Technique by Leslie Stroebel (5th, 6th or 7th edition).
It has been a long process, and the journey is the reward (or so they say). I found that I needed quite a bit more than a camera and lens. In the six months that I’ve been fooling with this, I have in fact shot other things and have taken several short local trips. My wife and I drove down the Oregon coast to northern California to visit Redwoods National Park. I took the Nikon FE along on that trip. I don’t see myself ever shooting the Toyo on a trip. Of the fifty sheets of Fomapan, I’ve taken 15 exposures and wasted 3 sheets but I’m planning to shoot the rest.
I also left the big Carson loupe behind up on the mountain. They are relatively inexpensive and all I seem to do is spend money in search of photographic Nirvana. Hopefully this article will answer a few questions for anyone who has been on the fence on large format.
Share this post:


Comments
Eric Rose on Slowly stumbling into large format
Comment posted: 05/09/2025
Eric Rose on Slowly stumbling into large format
Comment posted: 05/09/2025
I loved your article, please keep us updated on your adventures!
Eric
Comment posted: 05/09/2025
Comment posted: 05/09/2025
Comment posted: 05/09/2025
Jalan on Slowly stumbling into large format
Comment posted: 05/09/2025
Comment posted: 05/09/2025
Tony Warren on Slowly stumbling into large format
Comment posted: 06/09/2025
I used Foma 100 very successfully with Rodinal, a developer that is so convenient and economic, and seems to last forever.
The goof you didn't mention is exposing the same side of the slide twice. I must say one of my best results came this way.
Good to read about your positive experiences.
Comment posted: 06/09/2025
Geoff Chaplin on Slowly stumbling into large format
Comment posted: 06/09/2025
I'm envious of your developing tank, I've always used open trays in absolute darkness. If you can give pyro developer a try, but you won't get the full benefit until you make wet process prints - even if only contacts.
Not taking the Toyo on a trip - shame on you!! But I suppose you've got mountains by the back door. I took an 8x10 to Venice ...... together with two assistants, so I can actually sympathise.
Gary Smith on Slowly stumbling into large format
Comment posted: 06/09/2025
I might take the Toyo out on longer trips but it would certainly be nice to have assistants.
I will probably make a sequence check list.
Jeffery Luhn on Slowly stumbling into large format
Comment posted: 06/09/2025
Development:
1- I have a Yankee tank that's designed to take 12 sheets, but I've loaded an additional 12 sheets, totaling 24, by loading two sheets in one slot back to back. It's not the easiest tank to load, but once it's loaded you can turn on the lights because the tank is light tight.
2- Another way to process up to 12 sheets at a time easily is to do them in open trays. The Anchor company makes glass bread pans that work great. The edges of the pan get slightly more narrow at the bottom to aid in the release of bread loaves, and this is ideal for processing 4x5 sheets because the film never touches the bottom of the pan. The technique involves 4 pans. First is a water bath. You carefully put each sheet into the water face down one by one. Once they're all in, you carefully take the bottom one and place it on top. Always deal from the bottom of the deck. When the sheets are fully wet and slippery, move the sheets, one by one, into the developer. Careful never to let the corner of the film strike another sheet. Continuously dealing form the bottom of the deck, you keep the sheets in constant motion. Because the development time can be inconsistent due to the time it takes to start and stop development, using diluted developer with longer times is recommended. D-76 at 1:1, HC-110 at dilution H, or Rodinal at 1:50 works fine. After development proceed to stop and fix with the same technique. I prefer this approach with small batches up to 12 because the bread pans don't need as much solution as a 56 ounce Yankee tank. Rodinal is the cheapest developer. About $1 a batch.
Note: Mix your solutions with distilled water to avoid grit. All public water systems have grit and the constant agitation with gritty water will result in scratches!
Bringing more film with you: I have 36 holders and of course I never shoot all of them on one trip, but I have shot more than 20. It's a lot of work to shoot LF in the wild, so I want lots of images. Besides my three dozen holders, I have two Grafmatic backs that hold six sheets each. These holders are a very clever invention! With my WillTravel 4x5 with it's 65mm lens and two Grafmatic backs, I can bring the whole kit in a tiny shoulder bag.
I hope you find these comments useful. KEEP SHOOTING!!!! It gets to be second nature after a while!
Jeffery
Comment posted: 06/09/2025
Comment posted: 06/09/2025
Comment posted: 06/09/2025
David Pauley on Slowly stumbling into large format
Comment posted: 06/09/2025
Comment posted: 06/09/2025
Ibraar Hussain on Slowly stumbling into large format
Comment posted: 06/09/2025
Thanks for detailing Your whole journey and process - I still don’t feel I’ll be able to do what you did - and your results are fantastic
I usually look at Matt Osbourne when drunk on a Friday night ;)
Comment posted: 06/09/2025
Alexander Seidler on Slowly stumbling into large format
Comment posted: 06/09/2025
Comment posted: 06/09/2025
Simon Foale on Slowly stumbling into large format
Comment posted: 07/09/2025
Comment posted: 07/09/2025
Jeffery Luhn on Slowly stumbling into large format
Comment posted: 10/09/2025
I've pasted in a link that's a short overview of the benefits of view camera movements.
https://www.opticsforhire.com/blog/scheimpflug-principle/
In general, a little correction goes a long way. Way back in 1970 when I was a student at Laney Trade School in Oakland, our brilliant instructor, William High, gave us a 'data sheet' for every assignment. The assignments for view camera movements were numerous.
In short: The front lens standard controls depth of field and the back film standard controls perspective. Other than table top product photography, it's rare to use anything but the slightest movements on both standards. For landscapes, a couple of degrees of downward tilt of the lens board gives you depth of field from near to far, especially when stopped down. It's common for first time users to make radical lens and back movements, often throwing mountain tops and sky into super fuzziness. What a mess! Just a couple of degrees of downward lens tilt and a single degree of backward back tilt will allow the planes of these standards to intersect, all be it in the far virtual distance. That's adequate. Reversing the approach will make a cityscape look like a miniature model train layout. Cute, but not very practical. In closing, don't go overboard. The scheimpflug principle says that the film plane, the lens plane, and the area of selected focus need to intersect. In my opinion, far away from the camera is preferred.
Comment posted: 10/09/2025
Michael Jardine on Slowly stumbling into large format
Comment posted: 15/09/2025
The Carson loupes are great for negs on a lightbox, but I found a Silvestri 4x (on which you can swap the translucent bottom for an opaque one) to be superior for focussing the beast.
Thanks for the links to the great YouTube videos by the way, which have me planning excursions which won't be kind to my back and shoulders, and best of luck to you!
Comment posted: 15/09/2025