F-Stop Printing in the Darkroom

By Ian Whitney

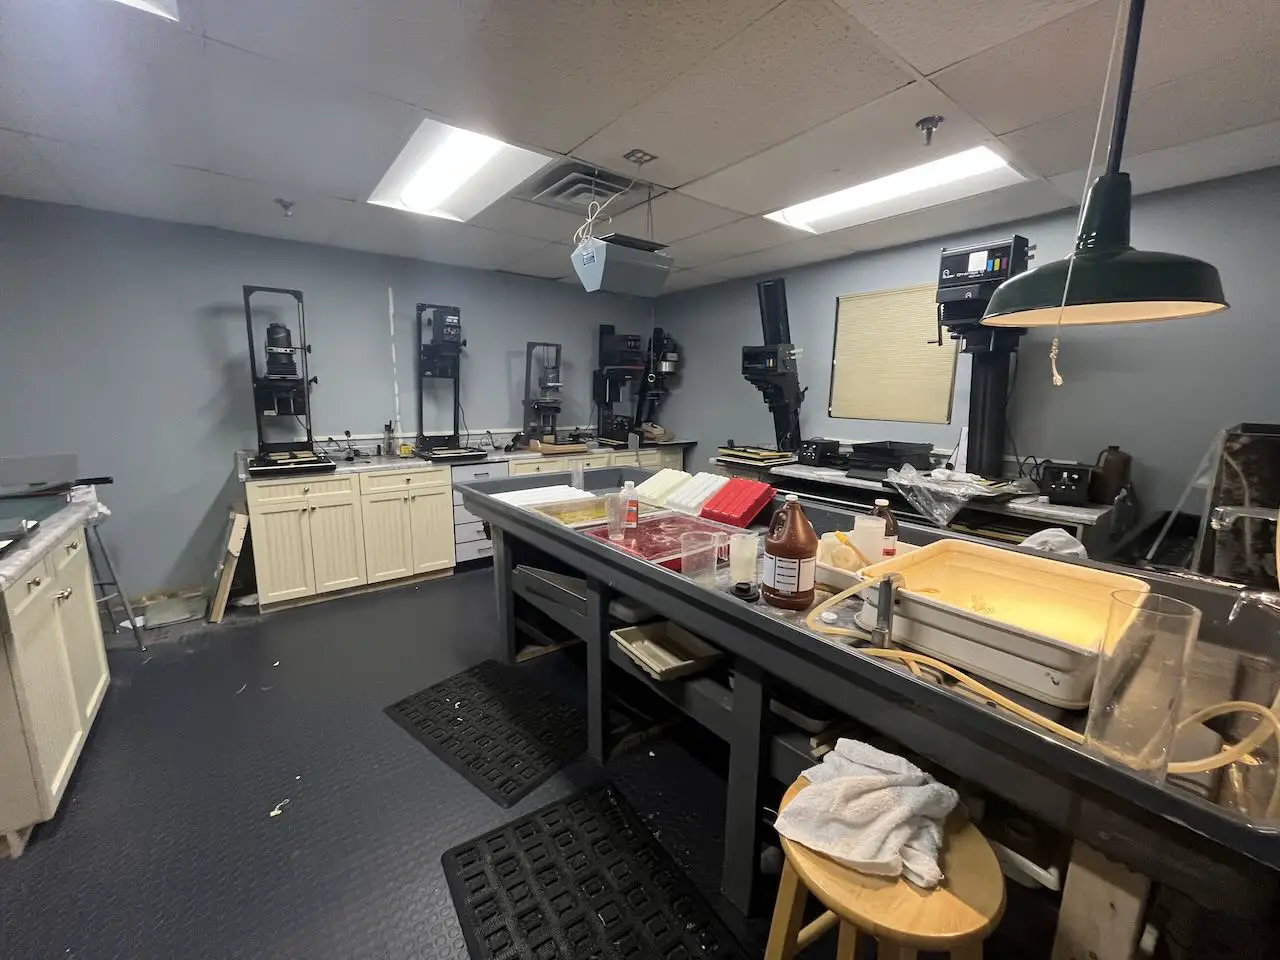
Although I scan all my negatives so that I can share photos online, I prefer to make prints in the darkroom. I find it to be an engaging technical craft that provides endless things to learn.

Recently, thanks to a few YouTube videos, I learned about f-stop printing and the technique’s biggest champion, Gene Nocon. It didn’t pique my interest enough to spend over $700 on the timer that the videos were plugging, but enough that I grabbed a copy of Gene Nocon’s book Photographic Printing via a inter-library loan.

What is F-stop printing?

The basic idea of f-stop printing is to control your print exposure the same way you control the exposure of the original negative — by doubling or halving the light. When taking a photo I can double the light by opening my lens a stop or by doubling my exposure time. Or I can halve the light by doing the opposite. If a whole stop is too much I can fine tune things by adjusting by a partial stop.

Frequently in the darkroom we ignore this approach of doubling and halving light, instead choosing to increase exposure by a set amount of time (usually 5 seconds). While going from 5 to 10 seconds does double the amount of light, going from 10 to 15 only increases the light 1.5 times. This lack of consistent halving & doubling can make it hard to a create print at a new size, with new paper or on a new enlarger.

Compared to the usual darkroom approach, f-stop printing lets you make your print the same way you made your negative — by halving and doubling the light. As a result print making is easier and more consistent, even when paper, enlargers, etc. change.

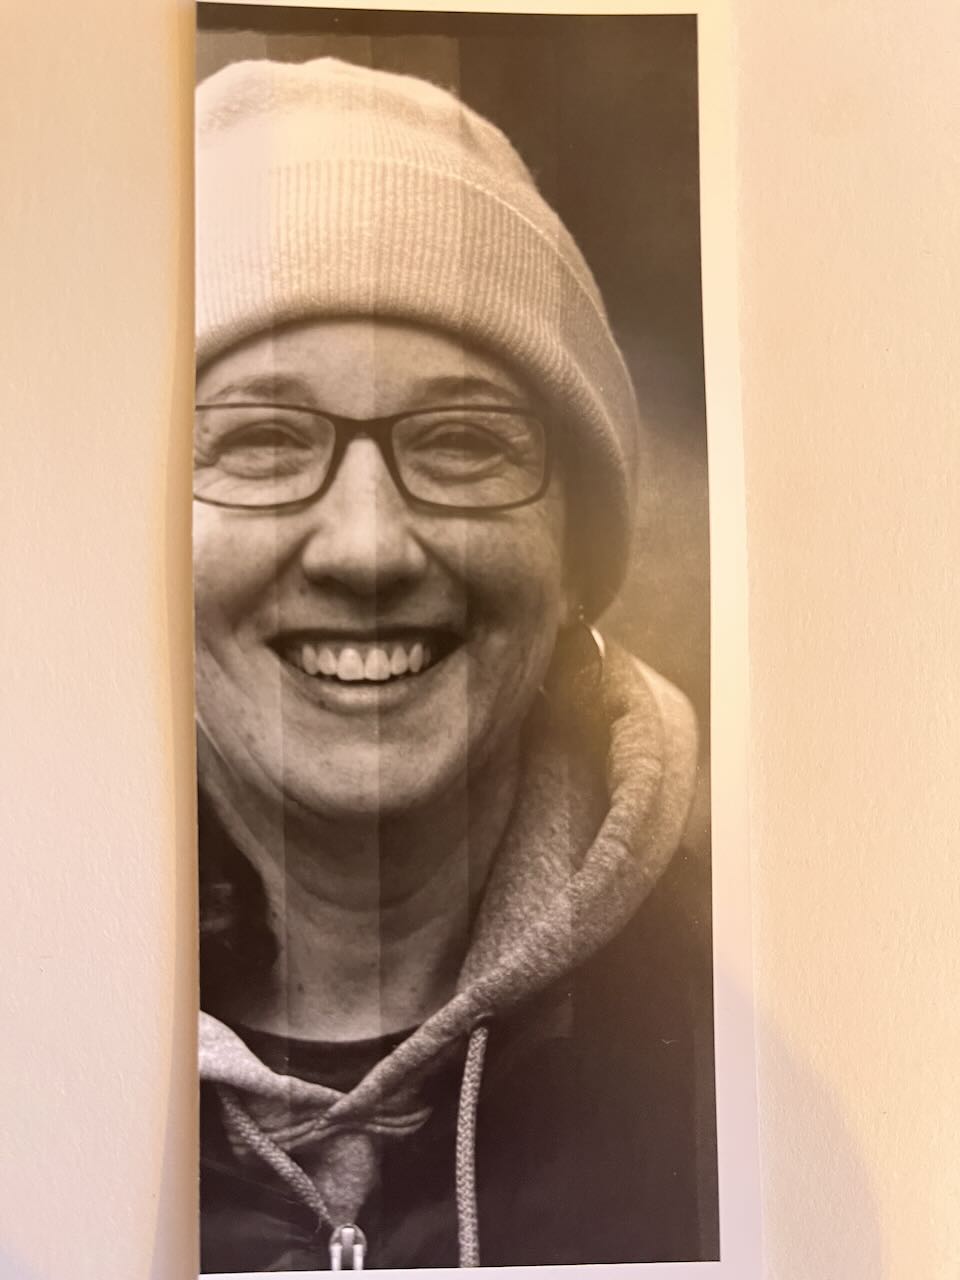
An illustrated example should make this clearer. I wanted to do a print of this photo:

A black and white photo of a woman wearing a sweatshirt, knitted hat and glasses.

To make a basic test strip I used doubling amounts of light by doubling my exposure time: 5/10/20/40 seconds. Specifically:

  • Expose the entire paper for 5 seconds
  • Cover one 1/4 of the paper and expose for 5 seconds
  • Cover 1/2 of the paper and expose for 10 seconds
  • Cover 3/4 of the paper and expose for 20 seconds
A picture of a developed test strip with 4 bands of different exposure. The lightest is labled 5 seconds, the second strip is labeled 10 seconds, the third strip is labeled 20 seconds and the final strip is labeled 40 seconds.
5/10/20/40 test strip

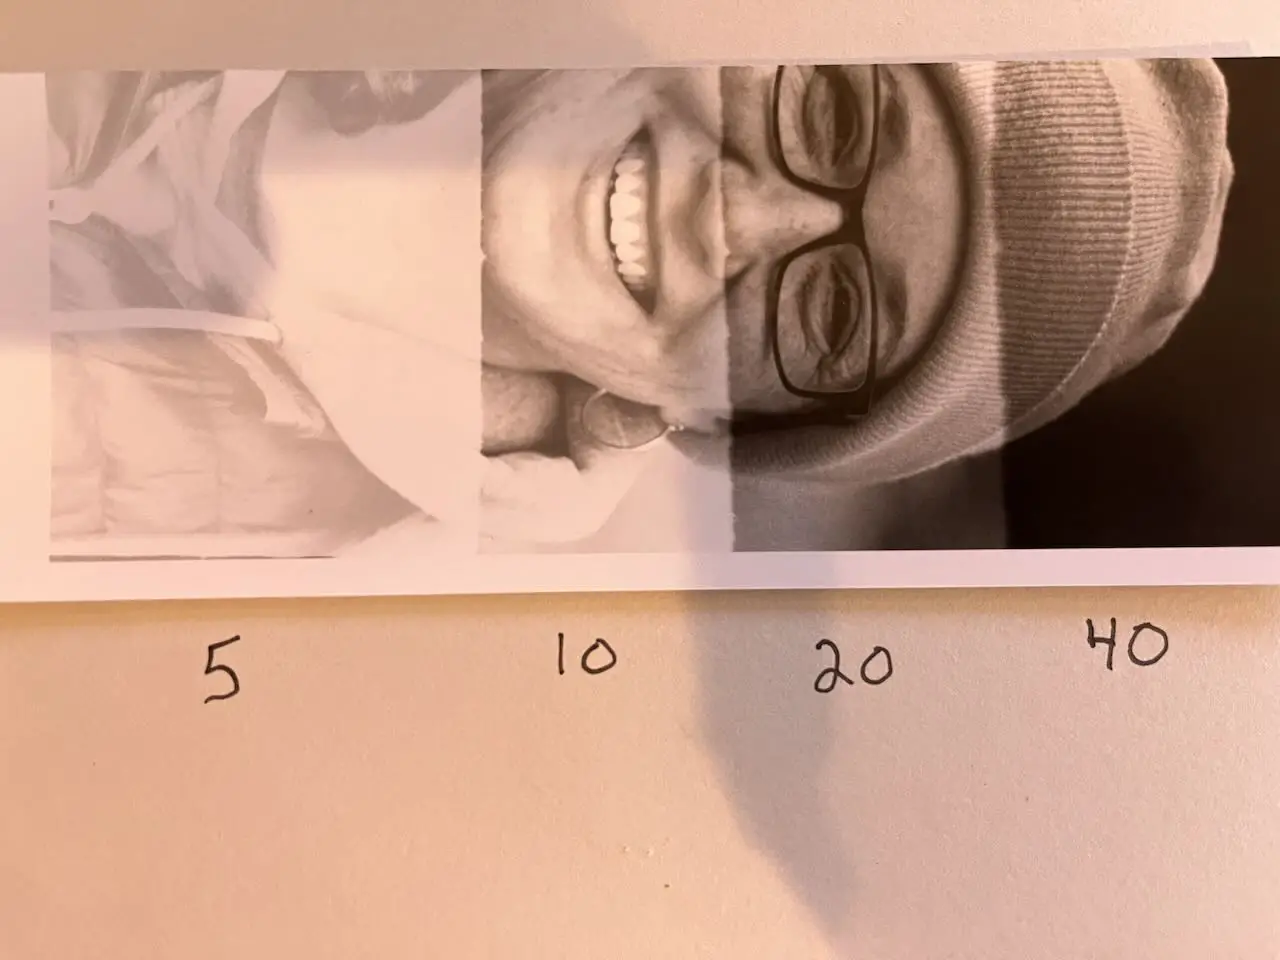
The 20 second exposure seems fine for my base time (it looks too dark online, I realize. It looks better in person). But her hat is too light at 20 and too dark at 40.

You’ll frequently find that the correct exposure lies between two of the full stops. In which case you can adjust by using partial stops, just as you would do with your camera. Nocon provides a table of 1/4 stop timings. A sample of which looks like:

Full Stop 5 10 20 40 80
+1/4 5.9 11.9 23.8 47.6 95.2
+1/2 7.1 14.1 28.3 56.6 113.2
+3/4 8.4 16.8 33.6 67.3 134.6

F-stop Timings with 1/4 stops

So I made another test strip of 1/4 stops between 20 and 40 seconds.

A black and white photo with five strips of different exposure going from lightest to darkest.
quarter-stops between 20 and 40

Back to that $700 darkroom timer for a minute. The nice thing about it (and other f-stop timers like it) is that they have all these timings programmed in. So I could set the timer to start at 20 seconds and then have it increase by 1/4 stop for each strip with a simple push of a button.

But you can do f-stop printing without a fancy timer. I wanted to see all the quarter stops between 20 and 40 so I:

  • Exposed the entire paper for 20 seconds
  • Covered 1/5 and exposed for 3.8 seconds (bringing the second strip up to 23.8)
  • Covered 2/5 and exposed for 4.5 seconds (bringing the third strip up to 28.3)
  • Covered 3/5 and exposed for 5.3 seconds (bringing the fourth strip up to (33.6)
  • Covered 4/5 and exposed for 6.4 seconds (bringing the final strip up to 40)

Based on this I decide to burn in the hat and background 3/4 of a stop over my base exposure.

Not going to lie, that is a bit fiddly. Which is why people make f-stop timers.

Why Those Numbers?

A question that I had before reading this book is why are the times so odd? Shouldn’t they look like this?

Full Stop 5 10
+1/4 6.25 12.5
+1/2 7.5 15
+3/4 8.75 17.5

F-stop printing with the timings I’d expect

After all, the math makes sense. 10 is double 5. 15 is double 7.5. Etc. In the technical-heavy final chapter to his book Nocon explains his numbers. I won’t reproduce the entire thing here but it has to do with him starting at a 1 second base exposure and doubling from there: 1, 2, 4, 8, 16. These are all exponents of 2 (i.e., 1 is 20, 2 is 21, and 4 is 22). From there he does quarter stops (i.e. 21.25). The resulting numbers are too small to be useful enlarger exposure times so he then multiplies the whole thing by 5. He wraps up his explanation with the delightful sentence

I have already explained why arbitrary values of time prove to be confusing.

Gene Nocon, Photographic Printing

Advantages of F-stop Printing

Considering the fiddly (or expensive) aspects of f-stop printing, why would you do it? It makes reproduction across different enlargers/papers/sizes a lot easier and consistent, saving both time and money.

Here’s the printing map for my photo

A photo of a piece of notepaper with a rectangle drawn on it. A curved line bisects the rectangle. The lower section is labeled "Base" and the upper section is labeled "+3/4"
Printing map

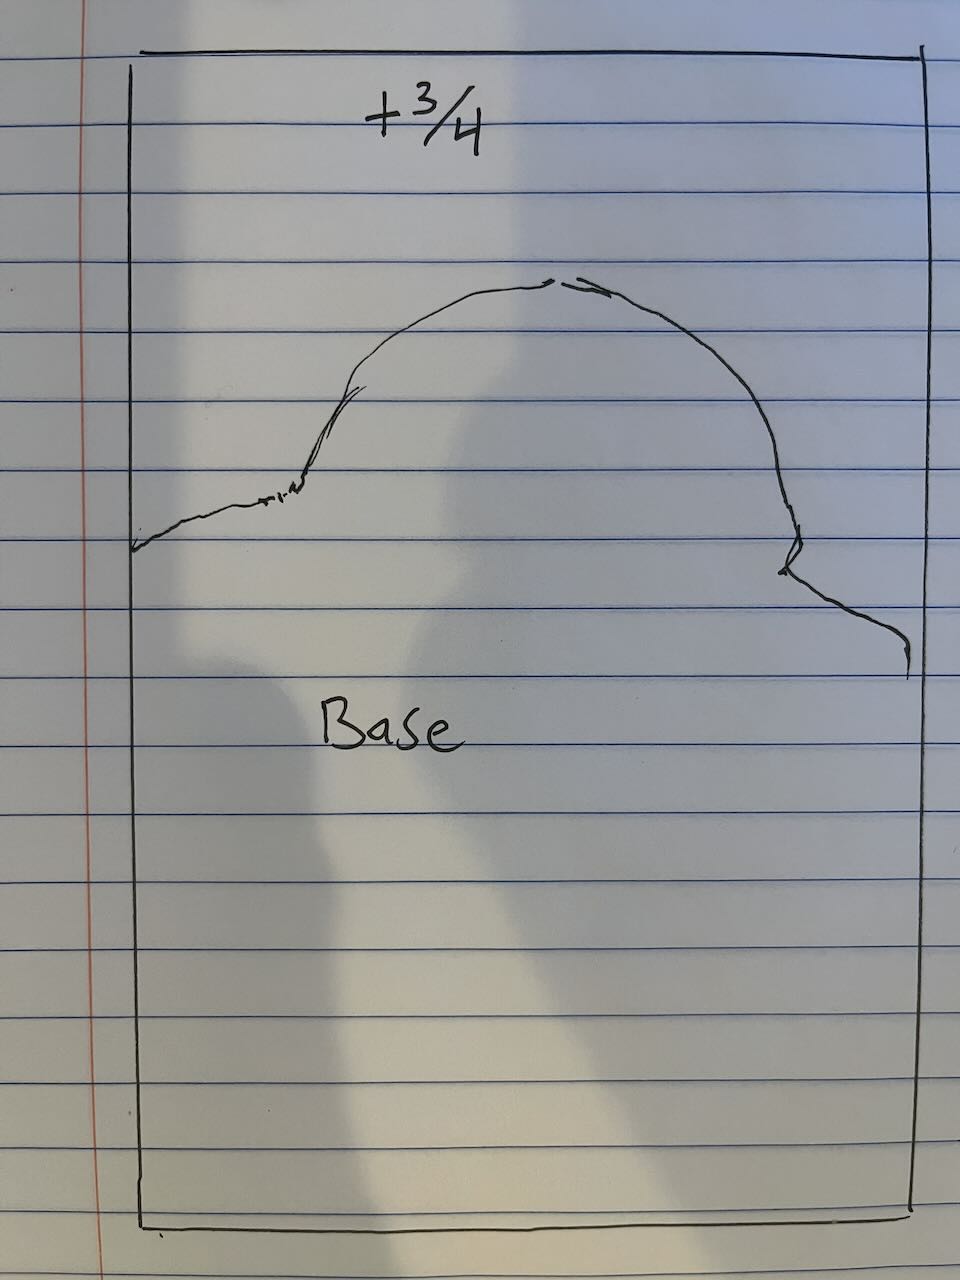
My tests show that most of the print looks fine at my base exposure. One section needs to be burned in for 3/4 of a stop. Now, when I want to make a new size of the photo I just need to determine that base exposure and I’ll know exactly how long to burn and dodge.

For example: if my base exposure for a 5×7 print is 14.1 seconds then I know that my burn-in section needs 23.8 seconds of light (3/4 of a stop over 14.1).

When I change the enlarger height for a new paper size I might find that my new base exposure is now 33.6 seconds. But my burn-in section is still 3/4 of a stop higher. So I know that my burn-in gets 55.6 seconds. No need to do more test strips. Neat!

If you use a light meter in the dark room you can easily determine your new base exposure by taking a light reading with the original enlarger height and a reading with the new enlarger height. That will tell you how many stops of light you’ve lost and you can adjust your base exposure accordingly. Or you can make a new test strip and dial it in that way.

Learning More and Wrap Up

Gene Nocon explains all of this better than I do. There’s a video of him discussing the approach on YouTube. And if you’re able to find a copy of his book I recommend it. It’s full of helpful tips, even if you’re not interested in f-stop printing. Nocon was an engaging, down-to-earth, and economical writer.

The book Way Beyond Monochrome also discusses f-stop printing and provides tools to control your exposure in 1/6th of a stop increments. They also provide a tool to convert a common GraLab-style timer to f-stop printing. This book is easier to find than Nocon’s and covers a ton more subjects, but I found Nocon’s work easier to read and enjoy.

Thanks for reading! There’s more to read over at https://photos.ianwhitney.com/ and I have more photos on Flickr. I suggest this album, since that’s where I keep the photos I really like. You can also follow me on Mastadon at @[email protected].

Share this post:

Find more similar content on 35mmc

Use the tags below to search for more posts on related topics:

Contribute to 35mmc for an ad-free experience.

There are two ways to contribute to 35mmc and experience it without the adverts:

Paid Subscription – £2.99 per month and you’ll never see an advert again! (Free 3-day trial).

Subscribe here.

Content contributor – become a part of the world’s biggest film and alternative photography community blog. All our Contributors have an ad-free experience for life.

Sign up here.

About The Author

By Ian Whitney
Mostly analog, mostly black and white. There’s more to read over at https://photos.ianwhitney.com and I have more photos on Flickr. I suggest this album, since that’s where I keep the photos I really like. You can also follow me on Mastadon at @[email protected].
View Profile

Comments

Michael Zwicky-Ross on F-Stop Printing in the Darkroom

Comment posted: 02/02/2024

Thank you for an interesting and informative article. It's a long time since I did any wet photography but I certainly covet your dark-room!
Reply

Leave a Reply

Your email address will not be published. Required fields are marked *

Ian Whitney replied:

Comment posted: 02/02/2024

It's not all mine. Imagine having that much space! I'm a member of a local community darkroom.

Reply

Leave a Reply

Your email address will not be published. Required fields are marked *

Ken Rowin on F-Stop Printing in the Darkroom

Comment posted: 02/02/2024

It is probably me and my sloppy technique, but even when I reprint the same negative at the same size on the same paper, it is ever so slightly different from the original. So, I always have to do another test strip anyway to get the exact same results. I looked at this a few years ago and decided that another expensive piece of equipment wasn’t going to save me time or money. Guess you can’t teach an old dog new tricks.
Reply

Leave a Reply

Your email address will not be published. Required fields are marked *

Roger replied:

Comment posted: 02/02/2024

Just to mention, there are steady voltage variances powering our homes throughout the day from PG&E. Also, fluctuations occur WIiTHIN the home… I have kitchen lights that flicker when the refrigerator activates. I suppose air conditioning would create spikes as well. The pg&e fluctuations would probably be the largest continuous voltage inconsistency. This could account for enlarger performance variations on different days. I wonder how bulb color temperature would be affected with voltage differences. Especially for Variable Contrast paper exposure

Reply

Leave a Reply

Your email address will not be published. Required fields are marked *

Eugen Mezei on F-Stop Printing in the Darkroom

Comment posted: 02/02/2024

Once you have found out the apperture that delivers the sharpest enlargment, why would you change that instead of adjusting the time so you can work at that apperture? Time you have enough, it is not that the subject would run away. (Yes, I know at some point you have reciprocity failure. Still, you can adjust for that, but not pricipially work with apperture adjustment.)
Would this be a better technique, be assured we would use this beginning latest from the 1930s upward.
Reply

Leave a Reply

Your email address will not be published. Required fields are marked *

Ian Whitney replied:

Comment posted: 02/02/2024

Is there a part of the article that suggests changing the enlarger aperture? I don't see that I ever suggested it.

Reply

Leave a Reply

Your email address will not be published. Required fields are marked *

Graham Orbell replied:

Comment posted: 02/02/2024

Ian, the way I interpreted your article is that you are advocating changing the enlarger lens f stop. You say that you can double the light by opening the lens by 1 f stop which of course is correct but not standard practice to control print exposure. . Normal established practice is to stop down the enlarger lens 3 stops to its ideal f stop. So an f2.8 lens would be best optically at f8. F2.8 is ideal for viewing and focussing. But what about all the other f stops on the enlarger lens. Well if you are making a print that requires a lot of dodging and burning using your hands or those little bits of cardboard on the ends of bicycle spokes you will likely need more time than f8 provides. That’s when to stop down to enable more time. Also if you want to correct perspective by tilting the easel you will require more depth of field by using a smaller f stop. You are on the right track making your test strips using the standard technique I was taught at our school camera club 70 years ago. As far as using your images on line. If you have already printed them you can often get better results for on line use by scanning or photo copying a print rather than scanning the negative. This is because you have probably done some dodging and burning on your print that would be difficult to reproduce with a computer. Of course scan negatives that are not going to be printed.

Reply

Leave a Reply

Your email address will not be published. Required fields are marked *

Ian Whitney replied:

Comment posted: 02/02/2024

You may be thinking of this line, "When taking a photo I can double the light by opening my lens a stop or by doubling my exposure time. Or I can halve the light by doing the opposite." But I'm talking about taking the photo there, not making a print. Everything I mention in the darkroom is done by adjusting time.

Reply

Leave a Reply

Your email address will not be published. Required fields are marked *

Gary Smith on F-Stop Printing in the Darkroom

Comment posted: 02/02/2024

It has been so long since I've done any darkroom work but one thing I know for sure is that's an awesome darkroom! Mine was squeezed into a 6' x 10' bathroom with my enlarger sitting on a board on the back tank of the toilet. I was only 18 and the ability to have a darkroom in my parent's basement was amazing.
Reply

Leave a Reply

Your email address will not be published. Required fields are marked *

Ian Whitney replied:

Comment posted: 02/02/2024

It's a nice place to work. But I take no credit for it. It's a local community darkroom that I'm a member of.

Reply

Leave a Reply

Your email address will not be published. Required fields are marked *

Gary Smith replied:

Comment posted: 02/02/2024

I need to find one!

Reply

Leave a Reply

Your email address will not be published. Required fields are marked *

Ibraar Hussain on F-Stop Printing in the Darkroom

Comment posted: 02/02/2024

Been a few years since I dismantled my darkroom and sold everything but your informative and enjoyable article has rekindled my love for it
Thanks
Reply

Leave a Reply

Your email address will not be published. Required fields are marked *

Gary Smith on F-Stop Printing in the Darkroom

Comment posted: 02/02/2024

Perhaps I should look into "community darkrooms" in my area. It would make film more attractive.
Reply

Leave a Reply

Your email address will not be published. Required fields are marked *

Gary Smith replied:

Comment posted: 02/02/2024

I hadn't even considered this as an option until reading this article and your reply Ian. Last night I did a search locally (Portland, OR - USA) and found a couple. One is a "limited membership club" that is full. They host several open opportunities per month which were also fully booked when I looked. The other was a county arts council offering. I haven't fully investigated costs but the club's membership is pretty steep and you'd have to be doing a LOT of film/printing to make it worthwhile. But there does seem to be local possibilities!

Reply

Leave a Reply

Your email address will not be published. Required fields are marked *

Ian Whitney replied:

Comment posted: 02/02/2024

Good luck! I was super happy when I stumbled across my darkroom here in Minneapolis.

Reply

Leave a Reply

Your email address will not be published. Required fields are marked *

Mark Riddle replied:

Comment posted: 02/02/2024

When I first opened this article, I thought, “Hmm that darkroom is nice.” It was then that I finally recognized it. I’ve spent a number of hours at Praxis.” Thanks for the detailed article.

Reply

Leave a Reply

Your email address will not be published. Required fields are marked *

Ian Whitney replied:

Comment posted: 02/02/2024

Apparently Dave just bought 9 new enlargers?!?! Maybe I'll run in to you there.

Reply

Leave a Reply

Your email address will not be published. Required fields are marked *

Joe Van Cleave on F-Stop Printing in the Darkroom

Comment posted: 03/02/2024

For my uses, I find the traditional test strip in fixed time intervals to be quicker for arriving at the optimal print exposure, especially if you keep your enlarger lens at its optimal aperture and enlarger head height set for a standard print size.
Reply

Leave a Reply

Your email address will not be published. Required fields are marked *

Michael Scott on F-Stop Printing in the Darkroom

Comment posted: 03/02/2024

Hi, I have been using F-Stop printing since I came across it in early 2020 (see my post here https://www.35mmc.com/19/03/2020/enjoying-and-learning-in-the-darkroom-by-michael-scott/) and now use it almost exclusively. It works with colour printing too in terms of controlling the correct time exposure, though not of course the colour balance between the colour filters. I have seen the new F-Stop darkroom timers but they are so expensive I’m not sure they are worth the cost. I use a fantastic app on my iPhone https://www.digitaltruth.com/apps/f-stop/ which takes the headache out of the simple exposure time changes.
Reply

Leave a Reply

Your email address will not be published. Required fields are marked *

Ian Whitney replied:

Comment posted: 03/02/2024

Nice article! Thanks for writing it. "Working in a darkroom is a continuing learning experience" is definitely true.

Reply

Leave a Reply

Your email address will not be published. Required fields are marked *

David Hill on F-Stop Printing in the Darkroom

Comment posted: 03/02/2024

This is a great method. It’s not new or revolutionary— this is how I was taught to print 50 years ago—it’s just good solid darkroom practice. And guides like the DigitalTruth app make partial stop calculations a breeze. Like others here I take issue with the term “f-stop printing” because f-stop is a lens setting (aperture to focal length ratio), not a time setting. I acknowledge however that you didn’t coin the term. And the term does imply “doubling exposure with each stop” in a way that “time-stop printing” wouldn’t accomplish. So be it. We’re stuck with it. Thank you for writing about it and bringing attention to the technique in this forum.
Reply

Leave a Reply

Your email address will not be published. Required fields are marked *

Roger replied:

Comment posted: 03/02/2024

I agree about the name ‘f-stop’: let alone that that lens stop designation #’s get smaller as the aperture lets in more light, but even if you compensate for that that fact, the numbers don’t progress equally. I used digital truth app as a guide, and filled in an excel spreadsheet with their quarter stop times. The resulting sheet is in the format of the one shown in Way Beyond Monochrome, but I limited this diy guide to quarter stops. Digital Truth suggests that it is difficult for the human eye to discern smaller increments less than 1/4 stop. This spreadsheet is 2 pages long, & font is adequately large enough for dim viewing conditions above my Lucky timer, illuminated with a 2watt LED light. There is a small curtain protecting enlarger paper from fog risks.

Reply

Leave a Reply

Your email address will not be published. Required fields are marked *

Ian Whitney replied:

Comment posted: 03/02/2024

Weirdly I never thought about the naming confusion. Good point!

Reply

Leave a Reply

Your email address will not be published. Required fields are marked *

Roger replied:

Comment posted: 03/02/2024

Forgot to mention that the 2watt light is a RED colored Christmas Ltght

Reply

Leave a Reply

Your email address will not be published. Required fields are marked *

Harry Harrison on F-Stop Printing in the Darkroom

Comment posted: 08/02/2024

That Youtube video stays well clear of the maths but I think that the maths is the key to understanding the point of F-Stop timings, the video makes it all seem so complicated. Just as an example your ‘Nocon’ test strip print receives exposures of 20, 23.8, 28.2, 33.6 and 40 seconds, so 1/4 stop intervals. The crucial thing about this sequence (and all F-Stop sequences whether they are 1/2 stop, 1/3 stop, 1/6 stop etc.) is that each subsequent exposure is a constant multiple of the one that came before, for 1/4 stop that multiplier is 1.19. So this gives an equal proportional exposure increase between each step of 19%.

Looking at the seemingly more logical sequence in your other example of 10/12.5/15/17.5/20 then……

10 to 12.5 is obviously a 25% increase but…
12.5 to 15 is a 20% increase
15 to 17.5 is a 16.7% increase
17.5 to 20 is a 14.2% increase

So consequently the steps are not even in terms of actual exposure increase and get smaller as more exposure is given, towards the darker side of the test print if you like.

That factor of 1.19 is fine for general use with a calculator in the darkrom but more precise numbers are required if you intend to enter them in a spreadsheet and copy across and down to make a reference table, so:

1/2 stop 1.414213563. Square root of 2
1/3 stop 1.259921051 Cube root of 2
1/4 stop 1.189207115 Fourth root of 2
1/5 stop. 1.148698355 Fifth root of 2
1/6 stop 1.104089514. Sixth root of 2
Reply

Leave a Reply

Your email address will not be published. Required fields are marked *

Harry Harrison on F-Stop Printing in the Darkroom

Comment posted: 08/02/2024

Can I recommend the humble Sharp Elsimate EL-240SB calculator, or most likely any of the Elsimates since I have one that's 40 years old that does the same. There is a barely documented feature that they call 'Constant Calculation' and it is the default, with other calcualtors I think you have to switch it on using a key sequence. It works with addition and subtraction as well as multiplication and division but we need it here for multiplication.

So, for 1/4 stop increase first enter 1.189 and multiply that by anything, lets say 10 secs, press '='. The answer is (of course) is 11.89, a quarter stop more exposure, press '=' again, you get 14.16, another 1/4 stop so half a stop more etc. etc. But that '1.19' is still stored until you clear it or switch off the calculator so enter a different time, 8 secs say, and press '=', up comes 9.52 and you are into another sequence for a different base exposure. In the darkroom this is an incredibly easy way to calculate 1/4 stop exposure times and unlike a phone app there are no worries with backlighting and actually it's much quicker to use.

With a calculator a muliple of 1.26 gives 1/3 stop increments, 1.41 for 1/2 stop.
Reply

Leave a Reply

Your email address will not be published. Required fields are marked *

Leave a Comment

Leave a Reply

Your email address will not be published. Required fields are marked *