Continuing to Learn C-41 Developing – A Learning Journey By Holly Gilman

By Holly Gilman

I promised a couple of commenters on my last article that I would share some of the “normal” images from my first batch of C-41 developing. Now that I’ve also shared some results from my experimental dance developing I thought I would follow through on that promise.

For those that haven’t read that first article, essentially I tested my C-41 developing on an expired roll of film despite knowing that it would likely be fogged due to the age of the film. I just wanted to make sure that my developing produced an image and was relatively even, which I personally think it was.

Agfa Optima 200
An example from that first roll.

However, when I pulled up the folder with those rolls in it, to remind myself of what went through that batch I realised that only 1 roll from that whole set could be considered “normal”. A roll of Ektar on 120 film. So that’s where I’ll start this article but I’ll also share some examples from my other rolls further down.
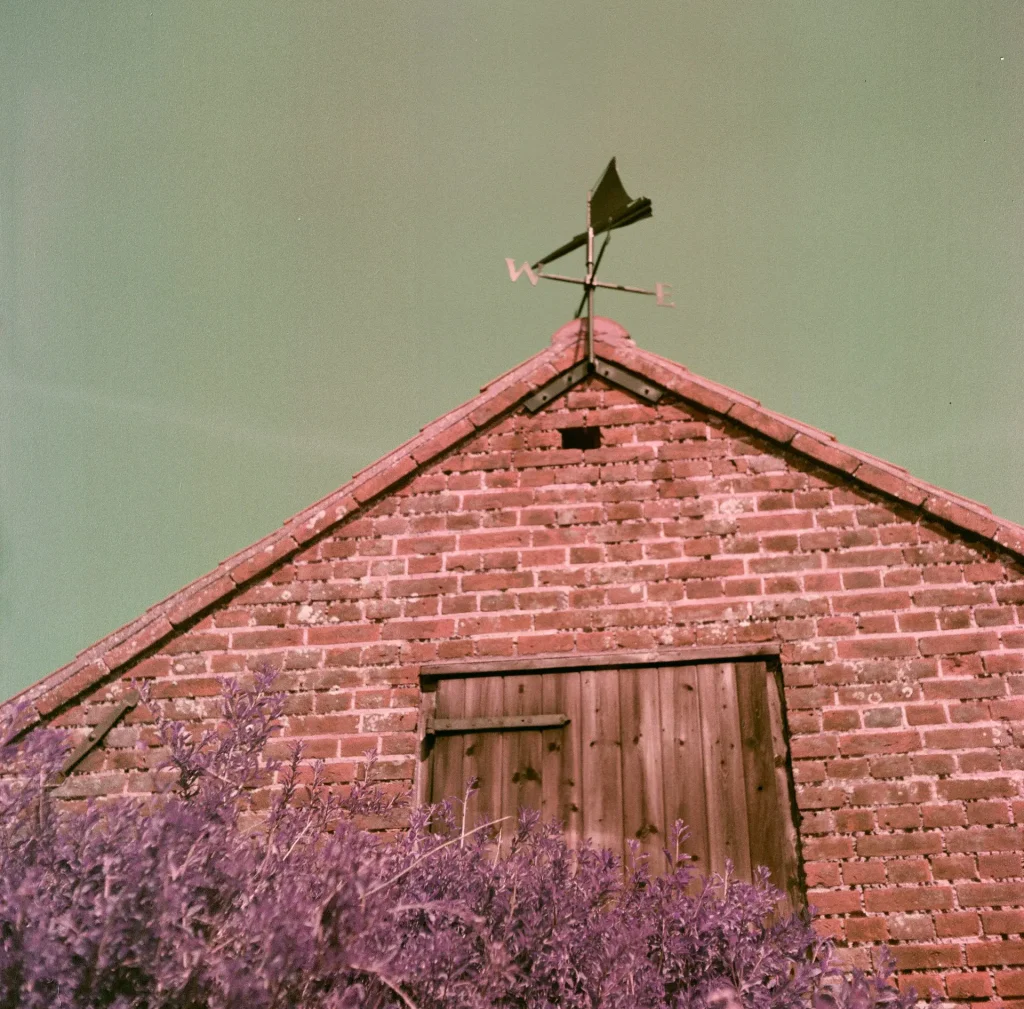
Ektar on 120

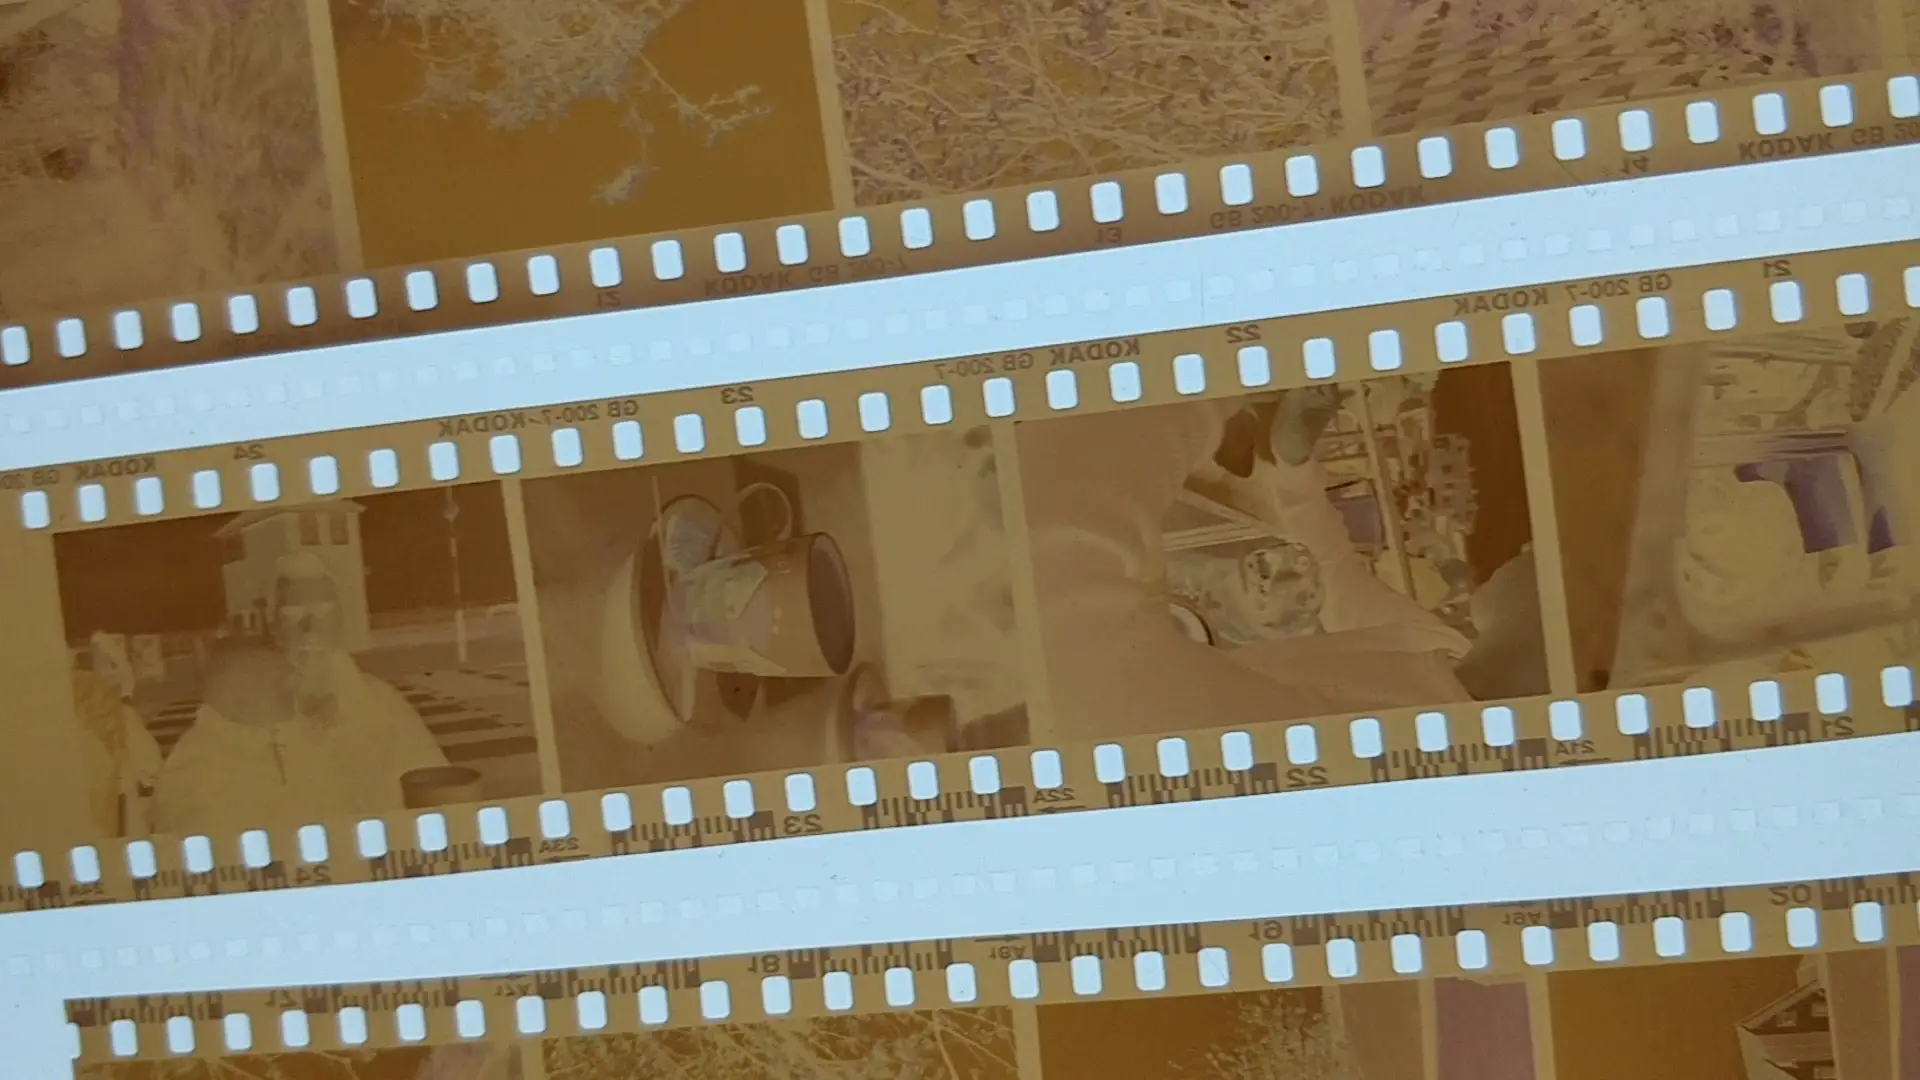
A note that whilst I developed all of these rolls, they were scanned by Take It Easy Lab as I’ve still yet to learn to convert colour negatives (and don’t have neg lab pro but that’s a whole other story).

Overall, I’m pretty pleased with the results from home developing, the only issue on this roll relates to the fact that I have been trying super close focusing with a heavy TLR and I either haven’t nailed the focus or the shutter speed is too slow for handheld with the bellows extended that far. In other words, nothing to do with the developing itself.
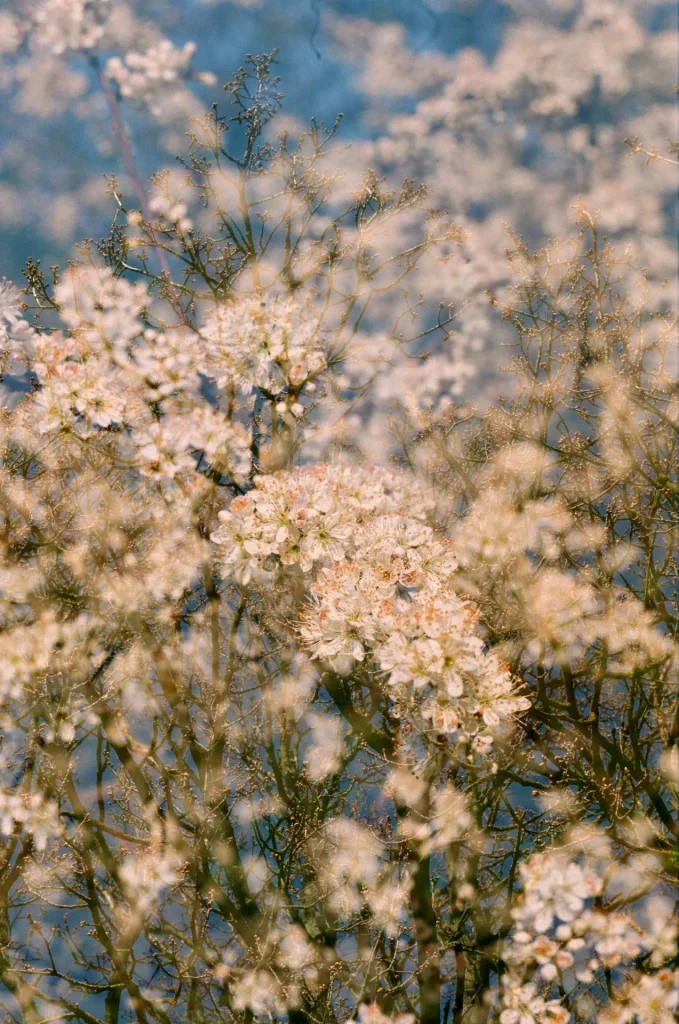
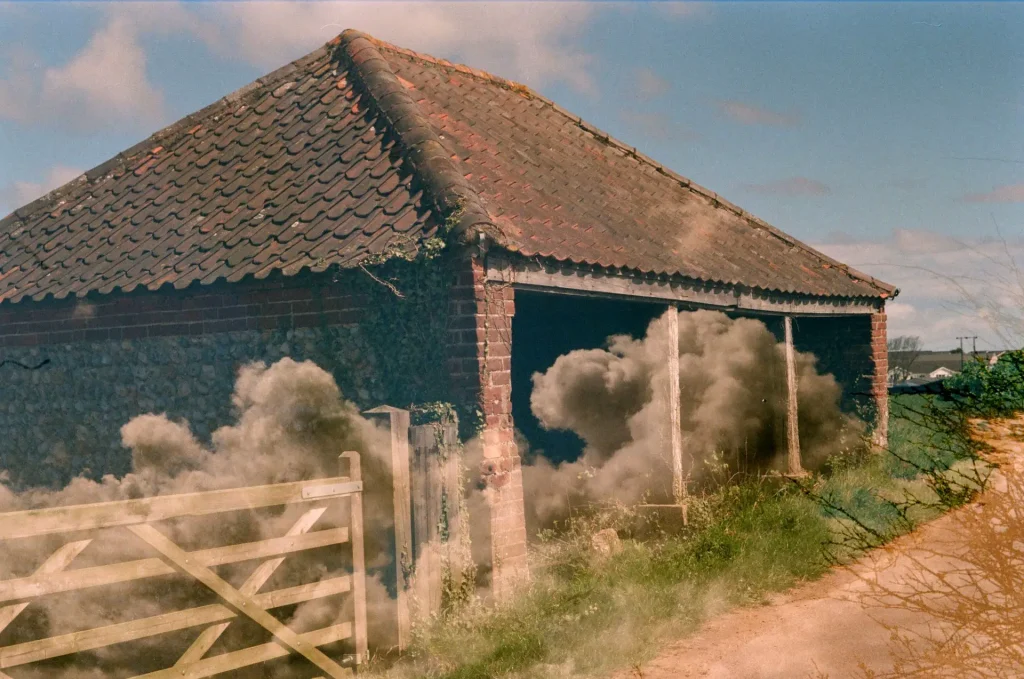
Ektar 120
Close up example
Ektar 120 example
Ektar 120 example

Lomochrome Purple

So this was my first ever roll of Lomochrome Purple, on the package it recommends good sunlight but this first roll was shot in early Spring so some sun but not strong sunlight. I’ve also placed an example which I did not develop myself below as a comparison but I would like to note that I think the better results relate to the fact that the second image was shot in glorious July sunshine rather than being too much about the developing. I had that roll developed by Take It Easy Lab so I wouldn’t expect any differences in the scanning.

Lomo Purple Example from first roll
Comparison Shot
Comparison Shot

Double Exposures on Fuji 100

This roll of film was shot as part of the double exposures model in the Shoot It With Film Insiders group. I’d always been a bit disheartened with my attempts at double exposures in the past but this group really helped me to understand how it can be done effectively and with some element of control.

I’m certainly not saying these are the best examples of double exposures but they are from that first experimental roll which has lead to some deeper exploration.

Fuji Double Exposures Example
Example from double exposure roll

Kodak Ektar + Creative Filters

There are a few “straight” images on here but the majority of the roll was shot using one or other of the prism filters that I’ve recently acquired.

You may have noticed that this roll of Ektar is far punchier and saturated than the 120 roll I shared above and I think that comes down to the weather conditions when shot. The 120 roll was shot on a slightly more overcast day whilst this one was shot in glorious sunshine.

Ektar and creative filters example
Another creative filter example

Yodica Pegasus and Dubblefilm Jelly

I’ve grouped these two together because they are very similar in that they are pre-exposed rolls of film. I’ve not shot either of these before and notice that one roll seems to have more pronounced colour shifts than the other. I’m pretty certain that this is a brand thing rather than relating to my development. It’s likely an aesthetic choice of the brand for that particular roll.

Dubble Film Jelly Example
Yodica Pegasus Example

Conclusion

So there we have it guys, essentially a full batch of C-41 film. I say essentially because there are in fact 2 more experimental ones which were processed in this batch but which I haven’t finished working on. Maybe I’ll share those later on.

As I mentioned in my first article, these were all developed using Belini Foto chemicals. I wasn’t massively impressed with the user experience for that and I’m currently in the process of trying Tetenal’s version – let me know if you’d like me to share my thoughts on the two types in a later article.

Have you tried Belini and Tetenal? What are your thoughts? And do you have any recommendations for other C-41 kits?

You can see more of my day to day work on Instagram or my portfolio on my website. If you’re interested in some of my experimentation then you can see more on my YouTube channel.

Share this post:

Find more similar content on 35mmc

Use the tags below to search for more posts on related topics:

Contribute to 35mmc for an ad-free experience.

There are two ways to contribute to 35mmc and experience it without the adverts:

Paid Subscription – £2.99 per month and you’ll never see an advert again! (Free 3-day trial).

Subscribe here.

Content contributor – become a part of the world’s biggest film and alternative photography community blog. All our Contributors have an ad-free experience for life.

Sign up here.

About The Author

By Holly Gilman
I am exploring, experimenting and working out what sort of photographer I am. I am on a learning journey and you can follow that journey on instagram and on my learning log.
View Profile

Comments

Dave Walker on Continuing to Learn C-41 Developing – A Learning Journey By Holly Gilman

Comment posted: 02/12/2021

Some nice results there! I've recently done a whole load of C-41 rolls using a Unicolor powder kit, which is what's inside the FPP C-41 kit you can get on Analogue Wonderland. I'd never mixed powder chemicals before, but they all dissolved easily enough and I had no issues. I did about 4 rolls per session, about a week apart. This week I stuck a couple of "dud" rolls in that I wasn't expecting much from, because the chemicals were about 4 weeks old now. I kept them in brimmed brown glass bottles and didn't notice any deterioration through that timescale. I'm going to stop now, though! I think I got 6 rolls of 135-36, 7 rolls of 135-24 and a roll of 120 from this batch. I used the TCS-1000 immersion heater in a mop bucket to keep the temperatures about right, which was straightforward enough.
TLDR: I can recommend the Unicolor/FPP C-41 kit!
Reply

Leave a Reply

Your email address will not be published. Required fields are marked *

Holly Gilman replied:

Comment posted: 02/12/2021

Thank you! I will look into that brand. Is the TCS-1000 heater the Cinestill one? If so I use that on an old paint bucket which is the perfect size for the bottle of chemicals :) I found Tetenal better than Bellini for using the chemicals efficiently but the process of developing with the Bellini was easier than the Tetenal because you don't have to continuously agitate for Bellini.

Reply

Leave a Reply

Your email address will not be published. Required fields are marked *

Dave Walker replied:

Comment posted: 02/12/2021

Yes, the Cinestill heater! I had mine for about a year before I finally tried it out, I'm ashamed to say. It certainly makes it easier just to set it at the right temperature and walk away for half an hour while your chemicals get nicely warmed. I have used Bellini 6-bath E6 and that's a bit of a juggling act, but I got great results.

Reply

Leave a Reply

Your email address will not be published. Required fields are marked *

Bob Janes on Continuing to Learn C-41 Developing – A Learning Journey By Holly Gilman

Comment posted: 02/12/2021

I always read your colour processing articles with great interest - I've not dipped my toes in the water yet, but I have got myself a Cinestill C41 kit and some rolls of Kodak Ultramax (I've also got some old expired rolls of APS film that I might try to develop) - I'm probably going to want to build up a backlog of film before I try my first film... I'm a bit perturbed by all this talk of heaters - I was planning on being a cheapskate and using a kettle and digital thermometer to do the temperatures.. Am I going to regret that?
Reply

Leave a Reply

Your email address will not be published. Required fields are marked *

Holly Gilman replied:

Comment posted: 02/12/2021

Thank you, I'm glad you find them interesting! I don't think you will have issues in not using a heater if you have the digital thermometre. I knew when I started that I would want to try slide as well and I think it would be hard to slide without a heater, plus at the time the extra expense didn't seem too bad (i.e. before I left my job to become a struggling artist haha). I've not used the Cinestill kit but I didn't like their slide one I have to say. Just go for it, it's not really harder than black and white, just the temperature thing ultimately

Reply

Leave a Reply

Your email address will not be published. Required fields are marked *

Dave Walker replied:

Comment posted: 02/12/2021

Hi Bob, I don't think you'll have any trouble with a kettle and a thermometer, provided your water bath has enough mass (water) not to drop in temperature too quickly. To be honest, it's only the developer than calls for precise temperature control. Provided that's good, and you've done a pre-wash at the correct temperature, then you don't need to worry about the blix or wash water. If you use stabiliser, that can be at room temperature. I have done C-41 AND E6 with the hot water bath method, before I got the immersion heater. It wasn't as hard as some people try to make out.

Reply

Leave a Reply

Your email address will not be published. Required fields are marked *

Richard Politowski on Continuing to Learn C-41 Developing – A Learning Journey By Holly Gilman

Comment posted: 02/12/2021

One has to be careful when comparing "results" (prints or scans) from color negatives. Unlike slide film, color negative film is ALWAYS subject to an "interpretation" by the scanner or printer. Contrast and color balance variations (especially somewhat extreme ones) can be, and often need to be, adjusted to produce a reasonable product. Extremely expired film, extremely non-normative chemistry, or some of today's special effects color negative films will probably still show their "true colors" after correcting them into some technically "reasonable" range. Otherwise, really skewed negatives when reversed without "correction" would show near monochromatic results. There is really no "standard" interpretation of a color negative except in the subjective eyes of the beholder.
Reply

Leave a Reply

Your email address will not be published. Required fields are marked *

Holly Gilman replied:

Comment posted: 02/12/2021

Very true which I think is why I'm struggling so much with converting my own. It's also why I made sure to mention that all of these were scanned by the same place because it gives it some small amount of consistency :)

Reply

Leave a Reply

Your email address will not be published. Required fields are marked *

Dave Palumbo on Continuing to Learn C-41 Developing – A Learning Journey By Holly Gilman

Comment posted: 02/12/2021

Thanks for sharing these!

On the subject of scans, I've tried a lot of different conversion methods for color including: lab scans, Silverfast, Negative Lab Pro, and even got into shooting with blue gels and building photoshop actions to correct. Earlier this year I tried the Grain2Pixel plug-in and it's my easy favorite. Free to use if you have Photoshop, fairly straightforward, and best matches how I want my images to look. Worth a look if you haven't tried it yet
Reply

Leave a Reply

Your email address will not be published. Required fields are marked *

Holly Gilman replied:

Comment posted: 02/12/2021

I've recently had to uninstall my copy of Photoshop because it was so old it was very glitchy. I'm now on the light version of photoshop lightroom. Absolutely fine for black and white conversions but I haven't yet managed colour and Neg Lab Pro doesn't work on this version!

Reply

Leave a Reply

Your email address will not be published. Required fields are marked *

Alan Jones on Continuing to Learn C-41 Developing – A Learning Journey By Holly Gilman

Comment posted: 02/12/2021

If you use the Tetenal kit: **Add the chems TO pre-warmed distilled water** I repeat **Add the chems TO pre-warmed distilled water**

Don't be a muppet and do what I did - carefully measure and mix the 'Part 1', 'Part 2' and 'Part 3' chems together, THEN add distilled water - at ambient temp.

...Then process 3 rolls of Portra holiday snaps with a water bath and sous vide - and find they all come out like Lomography's finest.

Painful.
Reply

Leave a Reply

Your email address will not be published. Required fields are marked *

Holly Gilman replied:

Comment posted: 02/12/2021

HAHAHA, warning noted!

Reply

Leave a Reply

Your email address will not be published. Required fields are marked *

Alexander Seidler on Continuing to Learn C-41 Developing – A Learning Journey By Holly Gilman

Comment posted: 03/12/2021

I like your photographs.
C41 is very easy and patient in my opinion, so there is no need for dancing :-)
Except maybe you like dancing,.
Reply

Leave a Reply

Your email address will not be published. Required fields are marked *

Holly Gilman replied:

Comment posted: 03/12/2021

Thank you - yes I do like dancing hahaha

Reply

Leave a Reply

Your email address will not be published. Required fields are marked *

Peggy on Continuing to Learn C-41 Developing – A Learning Journey By Holly Gilman

Comment posted: 19/12/2021

I am impressed, I have never been very successful with c41 or e6. I don't take enough to justify the cost. And the belief chemicals I tried went off very quickly compared to black and white. Also affinity photo has an offer on right now and that has a colour inversion setting which could be used on scanned images.
Reply

Leave a Reply

Your email address will not be published. Required fields are marked *

Leave a Comment

Leave a Reply

Your email address will not be published. Required fields are marked *