This post is intended to focus more on my slow journey into large format photography and hopefully give some insight to those who are “large format curious” like I was a year ago (and still am!).
When I woke up on one of the last days of my Honeymoon in late August 2022, I was not expecting to get an email saying I had won a YouTube Giveaway. I remember going to breakfast with my wife in our hotel in Oslo, Norway, and asking her “So you remember how you said I can’t buy anymore cameras? Well what if I told you I just won one…”
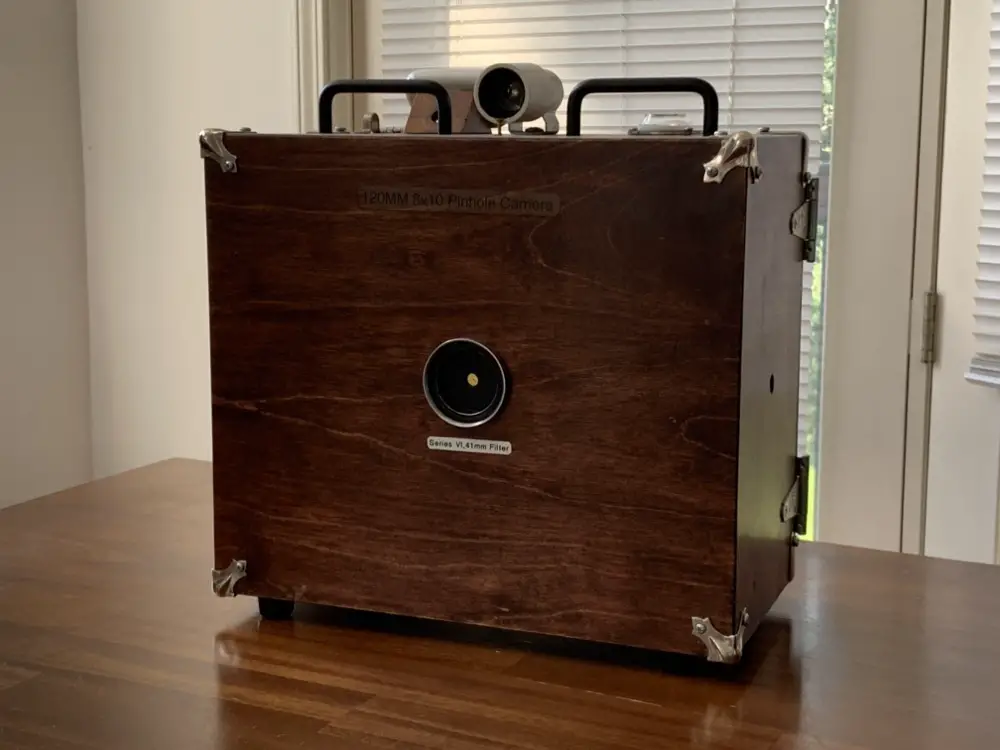
The camera I had won was a 8×10 Pinhole camera Mat Marrash posted about in this video. I had been “large format curious” for a while and figured it was worth a shot entering the giveaway. After some back and forth emails I got the camera in the mail and Mat had graciously thrown in the remainder of a pack of FPP Mummy 400 for my first exposures.
I knew the next step was to get a film holder so I set out to eBay. I knew Large Format was expensive; and that 8×10 being the largest of the formats was even more expensive. But. I was not planning on used film holders starting at $80-100 per holder. Up until now the most I’d spent on a film camera was $45. I recognized there was no way around this so I took a month or so to find one at a low enough price that I’d be willing to pay.
I then had to prep an area to load the film holder. I don’t develop at home so I did’t have a makeshift darkroom already setup. I found a pair of blackout blinds at the local thrift store (perks of living in Alaska, land of the Midnight Sun) and hung them around the doors of my downstairs bathroom that has no windows. After watching a few YouTube videos on how to load film holders I felt confident enough to not totally screw it up and gave it a shot.
Once the film was loaded I had to wait for the right day, lighting, and scene to expose my first compositions. We had a more overcast winter than normal in my part of Alaska and I spent weeks waiting for a sunny day that never materialized. Finally I pushed through my anxiety about it and pulled the tripod out to shoot my exposures. I had read previously about the Pinhole Assist app for iOS and can confirm it was incredibly helpful with getting the exposure time right. I went out on a partially overcast day and just took two pictures around my house.
I unloaded the film and sent it off to State Film Lab for processing. I’ve been using them since I first stated shooting film in 2019 and would recommend them to anyone looking for a lab. State doesn’t scan above 4×5 so I had to source the scans some other way. Thankfully I had recently been linked in with a friend of a coworker who shoots film and develops and scans at home. He only has the capabilities to develop 4×5, but his Epson V850 has the capabilities of a full flatbed scan for 8×10.
I went to his house one Saturday in January after I got the scans back and we plopped them into the epson and waited the nearly 10 minutes it took to scan at 3000dpi (6000dpi actually froze his computer). The 1.8GB TIFF files the scans produced bogged down my 6 year old MacBook Pro to the point that the first thing I did was export them immediately to JPEG to make a somewhat reasonable file size. After editing them to my liking I went through a few iterations of exporting at lower quality to reduce the file size, I finally settled on taking a screenshot to have some form of photo to easily share.
Below were the two results.
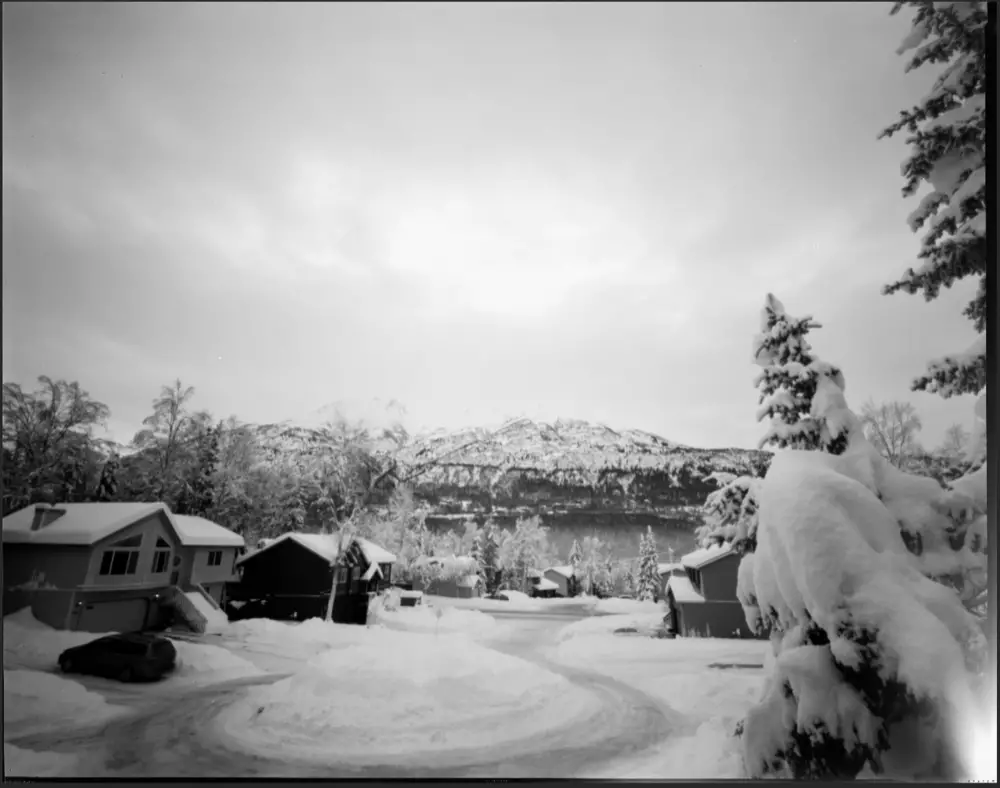
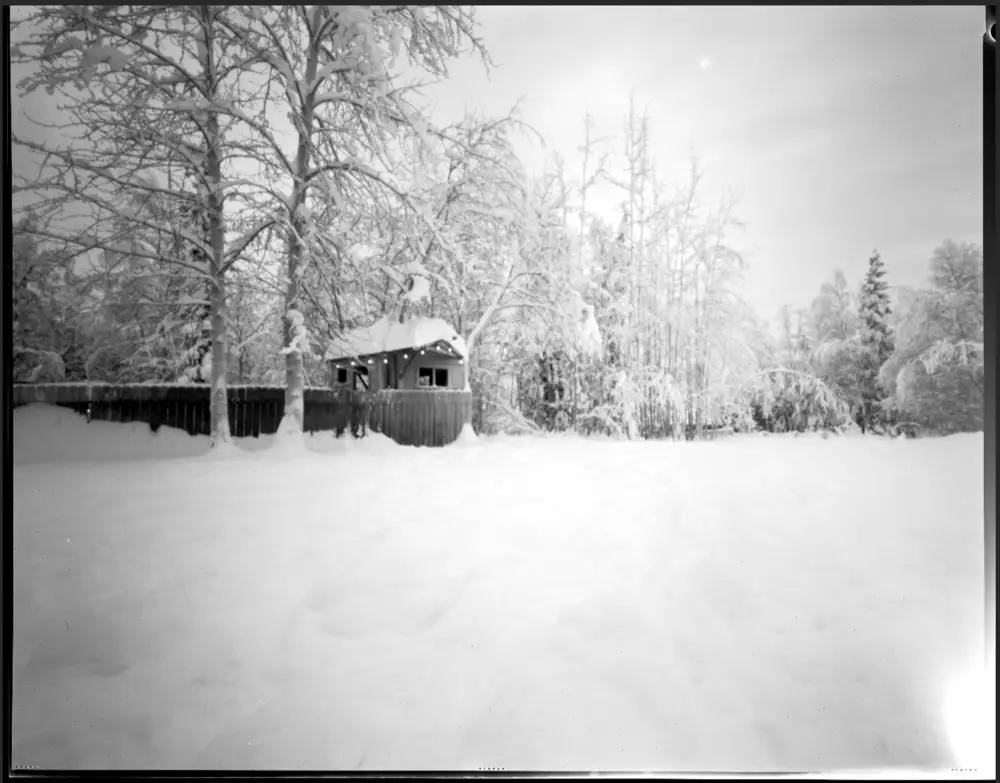
My first thoughts were twofold: 1) it took a lot of work on the computer to get to a manageable file that I could share. A lot more than my normal photo flow. 2) The shots look good, but they’re not fully crisp. Large Format photography is heralded for its ability to store large amounts of detail due to the giant negative size. But with pinhole, as Mat points out in his video, everything is in focus while nothing is in focus. There’s detail to the image, but it’s not the crisp detail I was expecting.
In all honesty I was pretty downtrodden at this point. I had spent a relatively decent amount of time and money (more than I normally spend on 135/120 film at least) to produce two images that although were interesting, especially taking into account the pinhole aspect, did not live up to the expectations I had in my head.
And so the pinhole camera was placed on the shelf; it’s beautiful woodwork blending into the wooden bookshelf, waiting to be used again at a later time.
Simultaneously as I was getting my negatives back and going through the scan process for the 8×10’s, I was gifted appx $350 from a family member “to advance my photography passion”. It was a very generous gesture, and one I sat on for months while I contemplated what to do with the money.
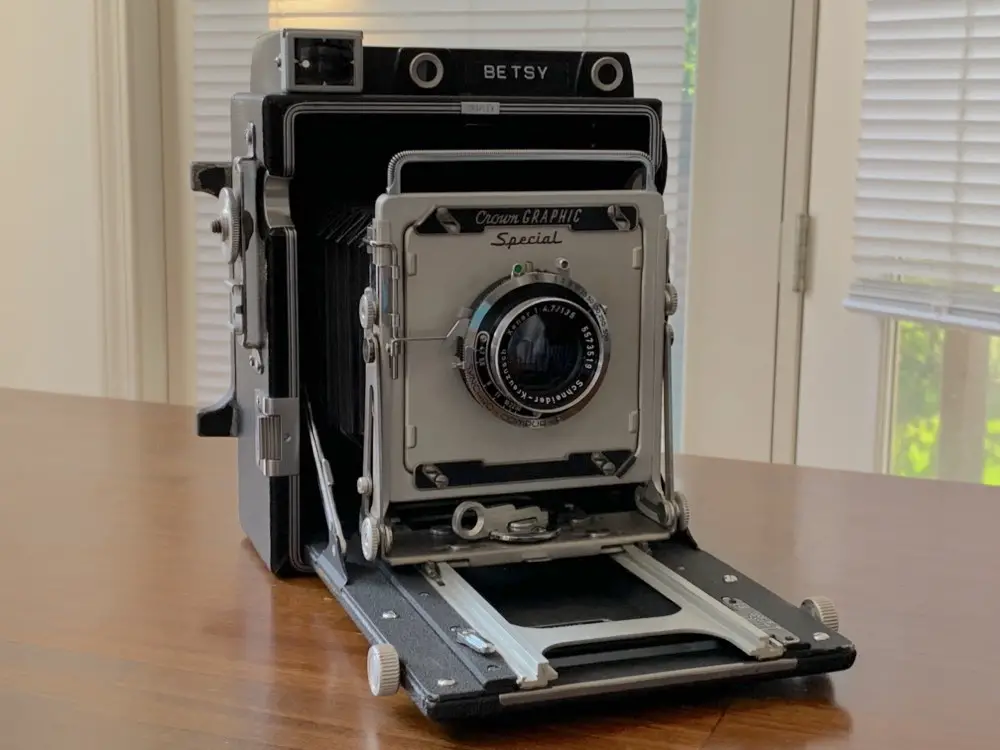
I can’t recall what it was, but something prompted me to start to looking towards using the money on a 4×5 camera. I had remembered from my 8×10 research that nearly everything for 4×5 is significantly cheaper, and the money I had allocated could go potentially towards getting something with a real lens on it. I weighed this against purchasing a wide angle for my Fujifilm X-T30 digital camera, and ultimately thought I’d get more use out of a 4×5. So I hopped on eBay, searched a couple of weeks, researched the camera on YouTube and other sites, and eventually ended up purchasing a Graflex Crown Graphic Special. The camera was bundled with 6 film holders (one was damaged in shipping) and a flash bulb.
I shared the news with my bud who had helped with the 8×10 endeavor and he offered to gift me some sheets of Ilford Delta 100 for my first test shots. After waiting for the right lighting, I finally found the scene I wanted to capture as my first image: a portrait of my wife and dog. Eventually I found two more scenes to complete my first test shots. I went to my friend’s house again in early June and watched eagerly as he explained the development process in more detail to me as he went through the steps and developed my film. After the final rinse he pulled them out of the developing tank and he happily revealed successful negatives. I left for the day as the negatives dried and he scanned them to me later that night. Although the files were large, I found a manageable flow in Photoshop and spent the next couple of days tweaking them as I saw fit.
Below are the results.
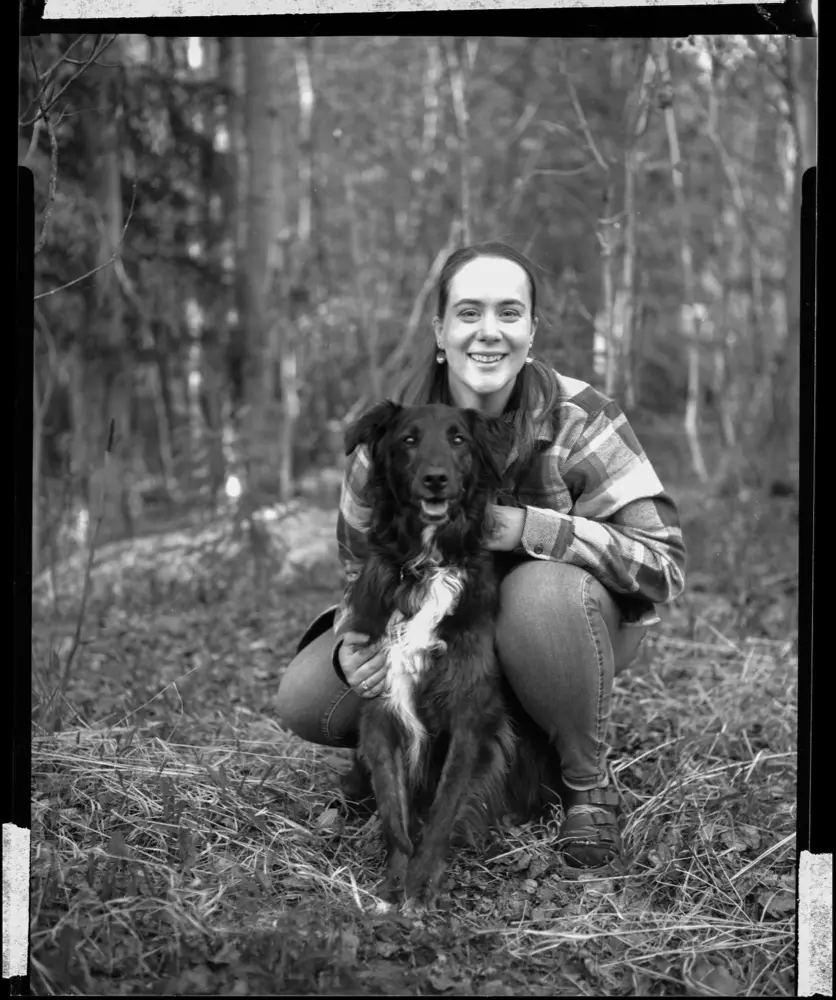
I was so excited. This was the level of crispness and detail I had been looking for from Large Format. The shots were just what I wanted, and other than the unexpectedly narrow depth of field at wide open f/4.5, produced the results I was expecting.
I’m honestly not surprised it took me almost 9 months to get my first 5 frames on Large Format. The act of taking a photo itself is a longer process than it is on a Medium Format or 35mm, so why shouldn’t the process for getting to those shots take just as long? I recognize that I did go slower than many others’ journeys, but balancing this aspect of photography with the other parts of the hobby (and the rest of my life) was about as fast as I was willing to go.
My final thoughts to the “large format curious” reader are don’t be afraid to fail, don’t get married to a camera you don’t love, and feel free to try things. I went in with higher expectations on the pinhole than I should have, so I felt a bit let down when after more research into pinhole photography the results are about what I should have gotten. The process was a return to an older style of photography that may make its way into my workflow in the future, but for now I’ll stick with 4×5. Most Large Format equipment will hold it’s value unless you completely destroy it, so even if you purchase one camera, if it’s not for you, look to trade it or re-sell it and try something else. For me, an 8×10 field camera was out of reach monetarily, but the 4×5 was at the right price point.
All in all I’m thankful I won the 8×10 pinhole first, stumbled through it, then found the 4×5 Crown Graphic. It makes the journey that much more memorable and meaningful.
Thanks for reading.
–Charlie Bierwirth
Share this post:


Comments
Wendell Cheek on My First 5 Frames on Large Format – And How it Took Me 9 Months to Get Here
Comment posted: 04/10/2023
Comment posted: 04/10/2023
Bill Brown on My First 5 Frames on Large Format – And How it Took Me 9 Months to Get Here
Comment posted: 04/10/2023
In everyday use I think 4x5 gives the sweetspot for detail and cost per image and file size. My best to you in your journey.
Comment posted: 04/10/2023
Kevin Frassel on My First 5 Frames on Large Format – And How it Took Me 9 Months to Get Here
Comment posted: 04/10/2023
Paul Quellin on My First 5 Frames on Large Format – And How it Took Me 9 Months to Get Here
Comment posted: 05/10/2023
Comment posted: 05/10/2023
Khürt L Williams on My First 5 Frames on Large Format – And How it Took Me 9 Months to Get Here
Comment posted: 08/10/2023
Comment posted: 08/10/2023