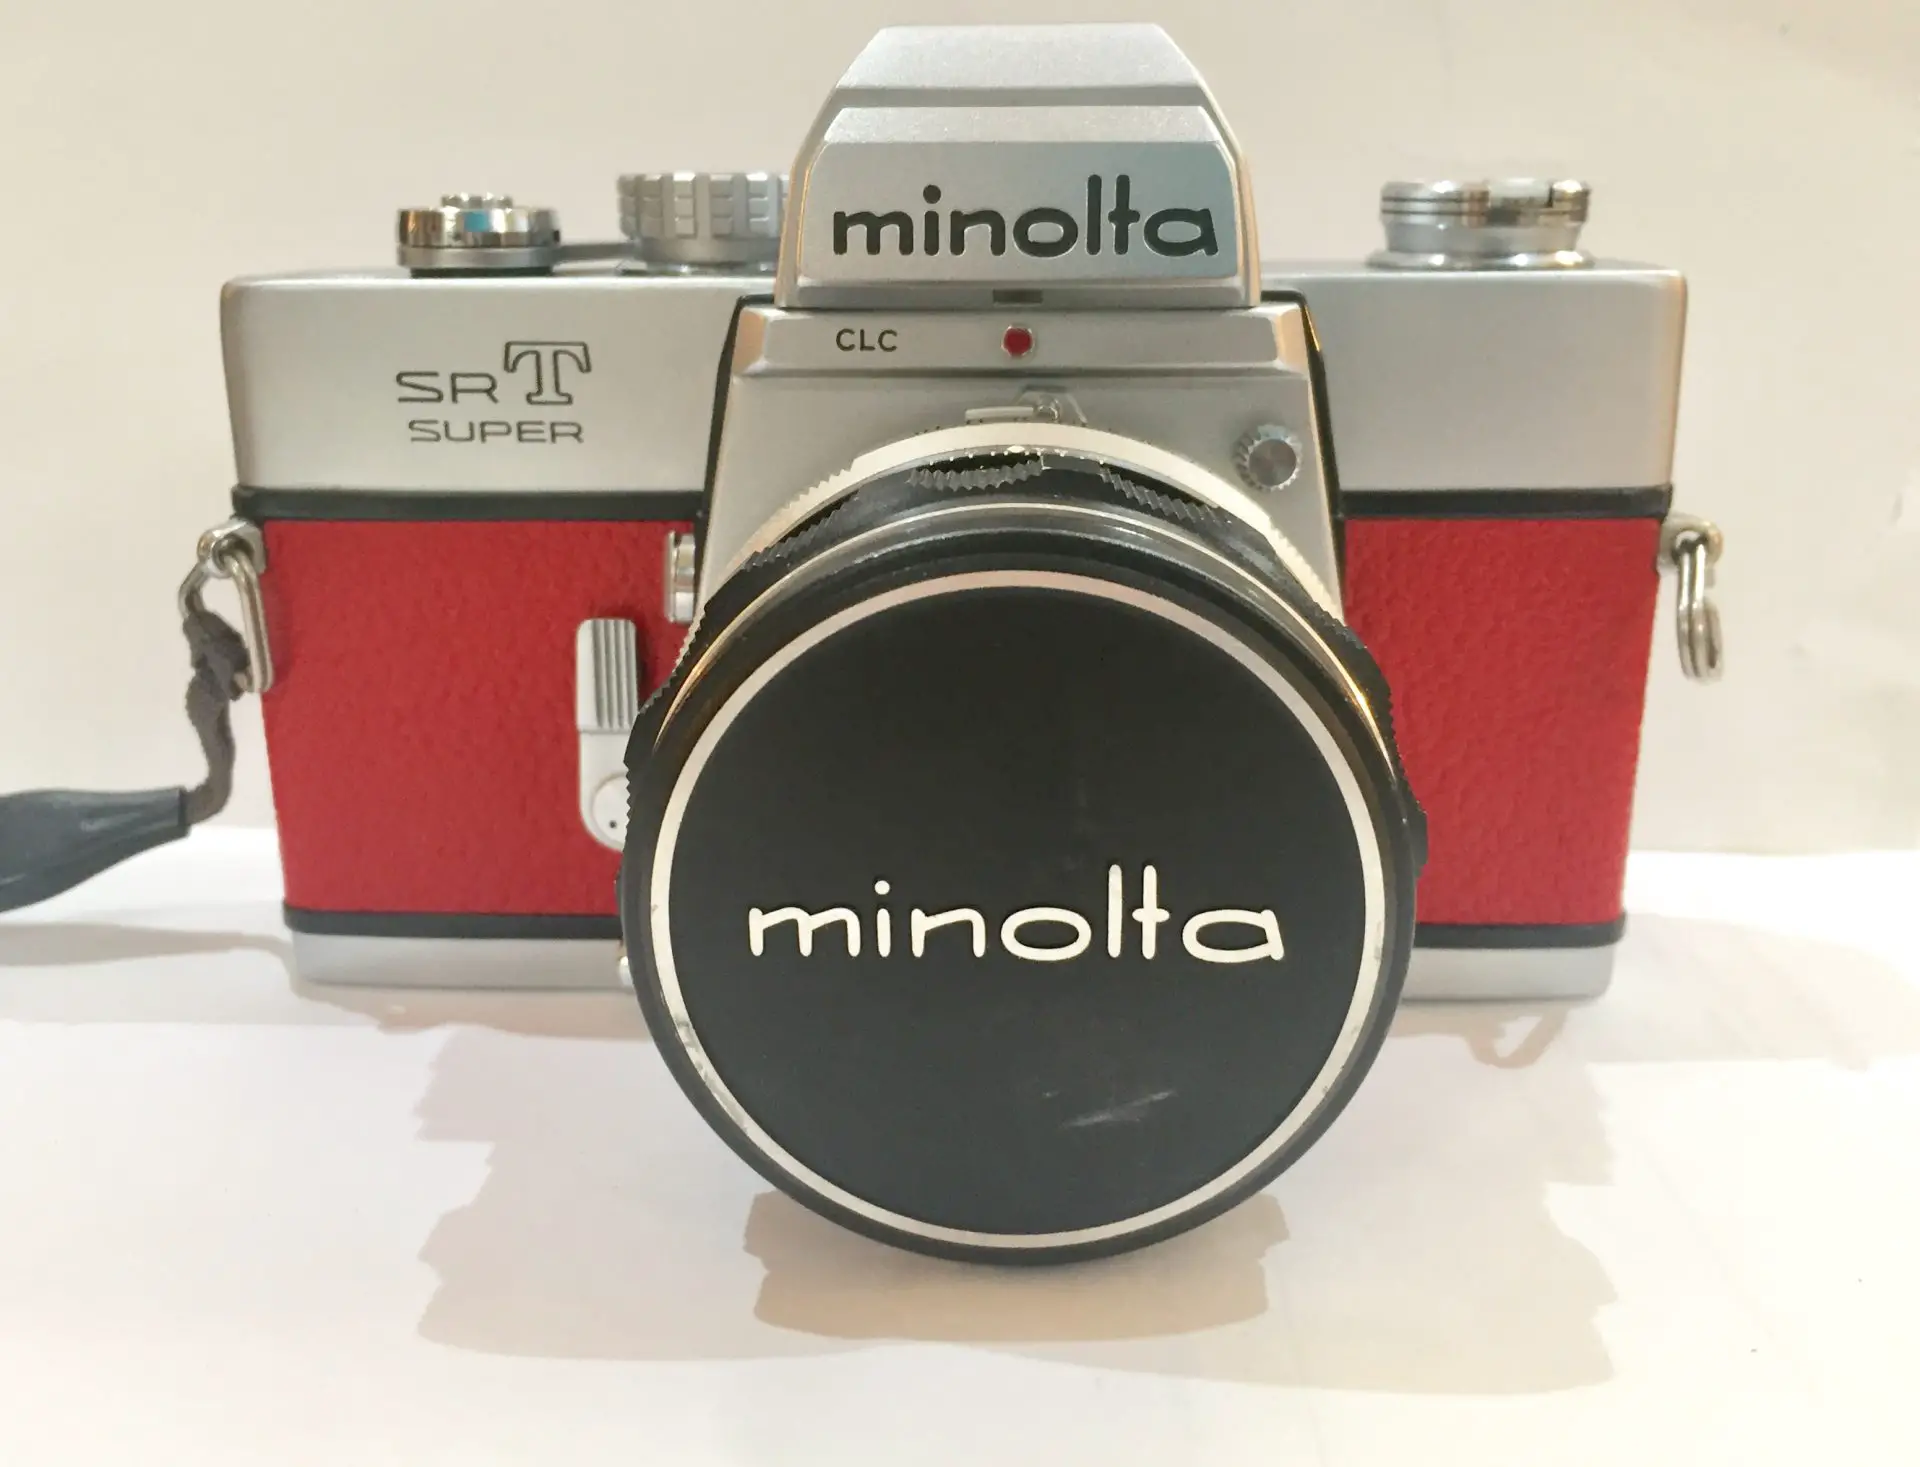
I’ve started seeing more photos of vintage cameras with their leather covers replaced, and to me they often look great. Other than a few useful flickr posts and some short videos, there aren’t many articles that cover the how and the why, and fewer still that discuss the troubles and the costs of doing this yourself. It’s perfectly achievable with no prior experience, and MUCH harder than I expected. I’m not sure I will do it again in a hurry. Hopefully this tale of re-covering my Minolta SRT Super will help you make up your own mind about whether or not it is worth it.
Background
The first Minolta SRT I ever touched was loaned to me by my father-in-law. It was heavy and fully manual and I left it unused in my cupboard for months until the day I accidentally ran out of batteries for my Canon EOS 300 (a very basic camera but my first SLR and one that I know well and enjoy shooting). I was slightly anxious about whether I could use the Minolta effectively but stuck for other options, so it came out with me and from the first frame of the cheapest Fujifilm Superia I had in the fridge, it just worked. I deployed the Sunny 16 rule to moderately good effect and had a great deal of fun. The sounds! The feel! The comments from people! I loved it.
The experience of shooting those first 36 frames sold me on the benefits of a fully mechanical SLR that could withstand 30 years of disuse and work perfectly when required. That is amazing. Plus, when I looked online, the Minolta SRTs were cheap compared to every other camera of the same era, and they have great Rokkor glass. They’re not a fancy prestigious brand, but I now own six SRTs – some to use, some to keep, some to lend out or give to my kids when they’re older. My father-in-law’s is safely back in the cupboard (for now), but for the SRTs I’ve purchased they were sufficiently cheap that I’ve not felt too worried about taking the bottom off and having a look inside, as well as replacing the light seals myself. Those two activities have been really fun.
Minolta SRT Resources Online
Searching around online I’ve found a few excellent sites about Minolta SRT cameras – the Rokkor files site, how to take apart the lenses, the SRT service manual. The videos on taking apart Rokkor lenses are amazing and have inspired me to try – a future project. In the meantime, however, my Minolta SRT Super has become my favourite camera to shoot with. I’ve cleaned it up (following Japan Camera Hunter Bellamy’s excellent guide) and fixed the light meter – what else could I do to respect and reinvigorate this great camera?
Why Do This?
There are good reasons to replace camera covers. For me, I purchased this lovely camera very cheaply from someone who hadn’t used it in decades. I thought that updating the leatherette covers would make me want to take it out more, make it more desirable and appealing to the people I was shooting (mostly my kids, but also family and strangers), help protect the body and increase the grip for easier handling. I also just thought it would look cool and be fun. The idea was as simple as that.
What I Used
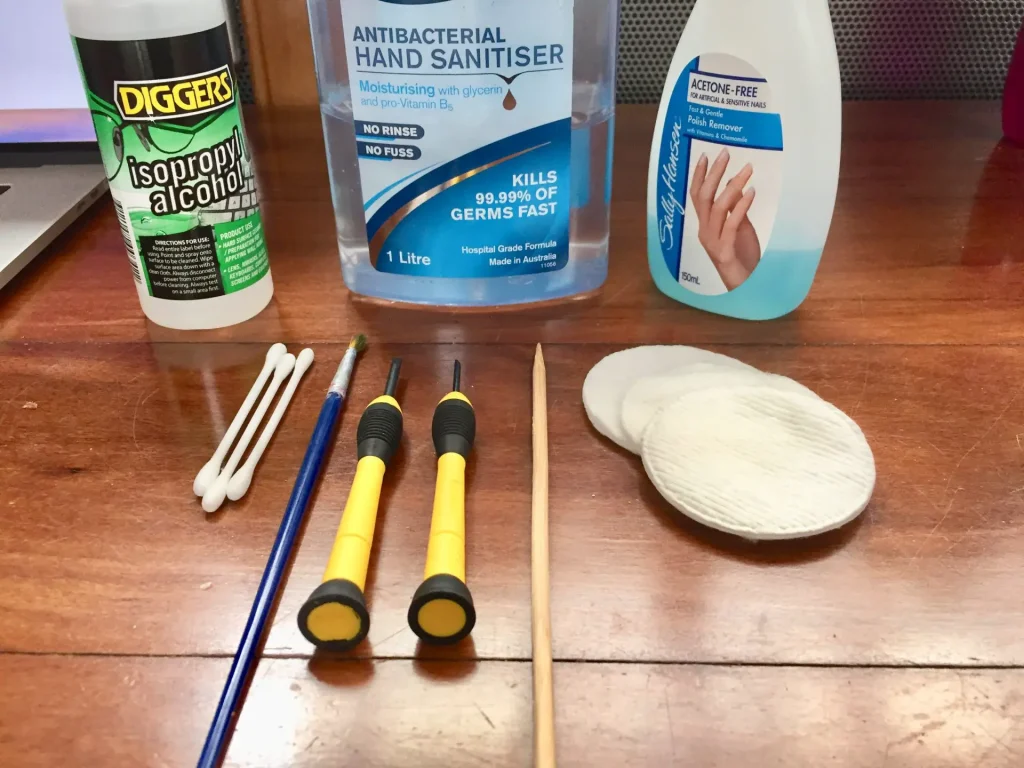
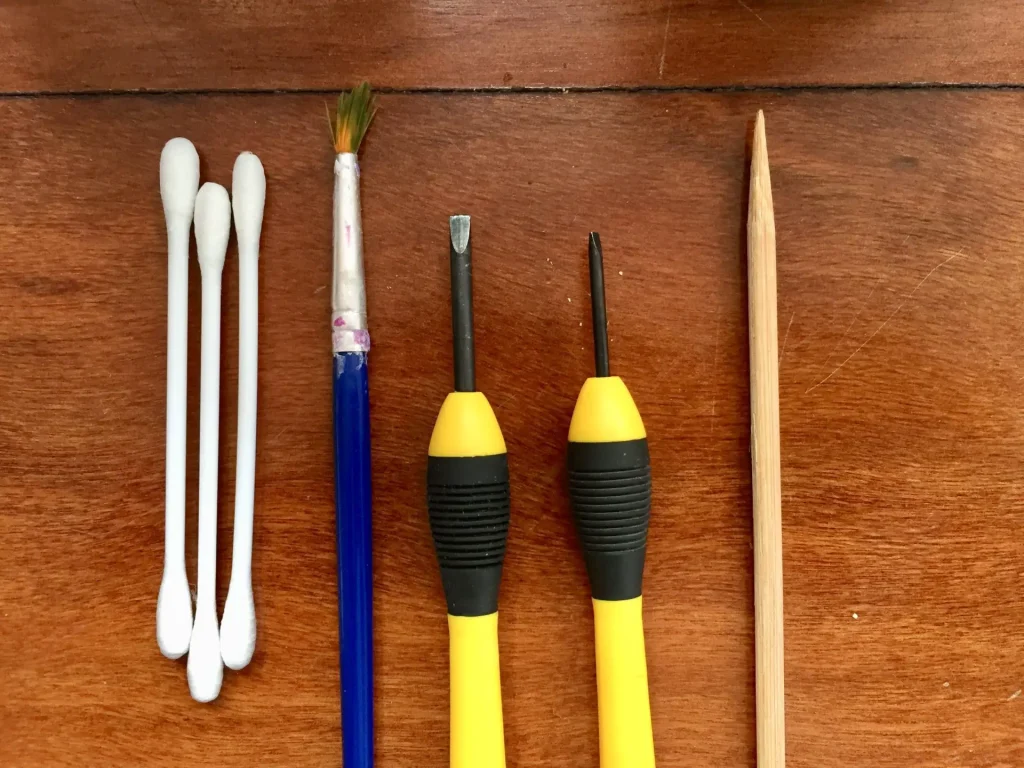
- A small flat-bladed screwdriver or similar
- Some bamboo skewers
- Some cotton-tips
- 99% isopropyl alcohol
- Non-acetone nail polish remover
- Alcohol-based Sanitising hand rub (e.g: Aquim, Purell)
- A small paintbrush
- Cotton wipes
- Time
- Patience
- Resilience
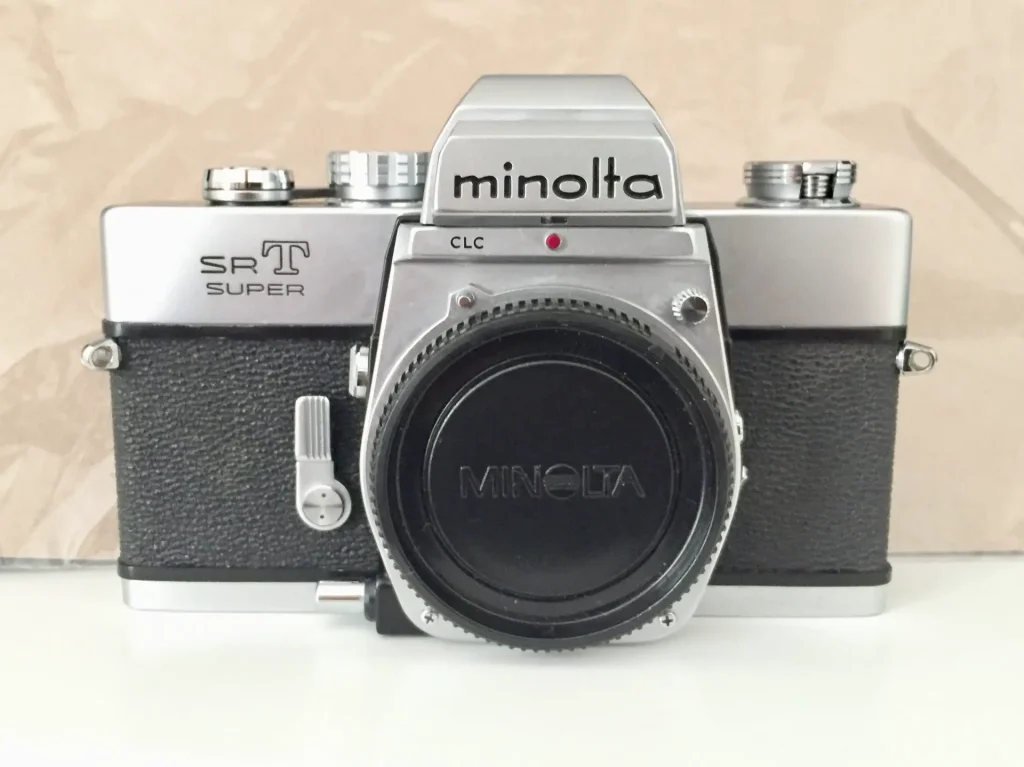
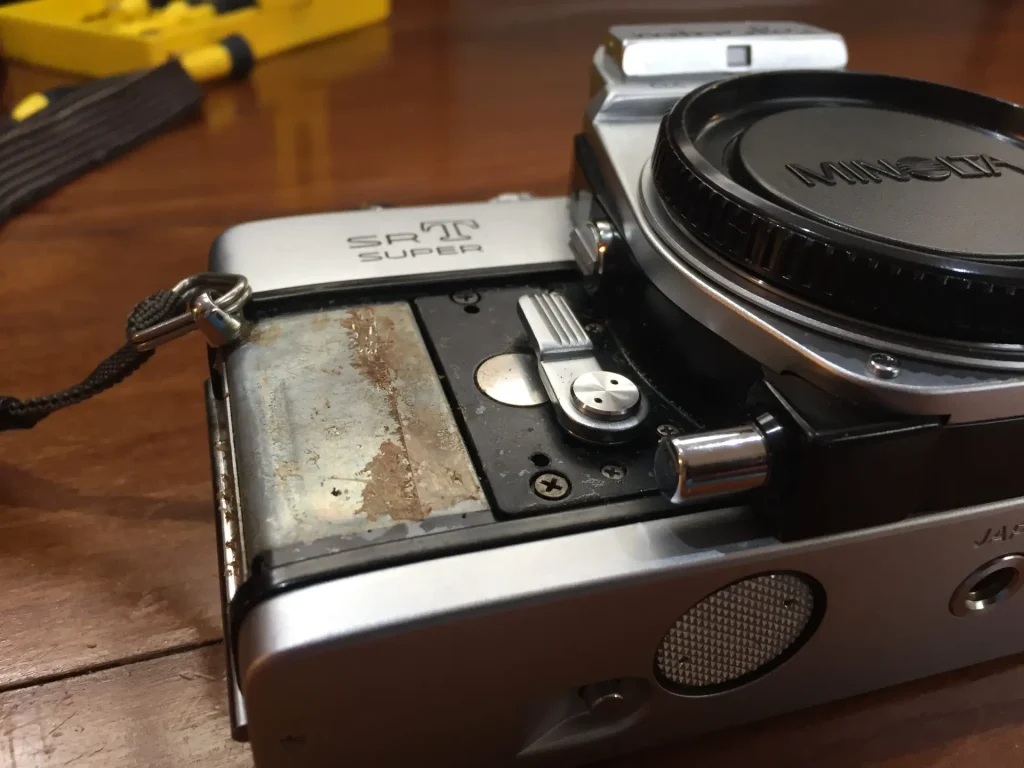
Step 1: Remove the leatherette
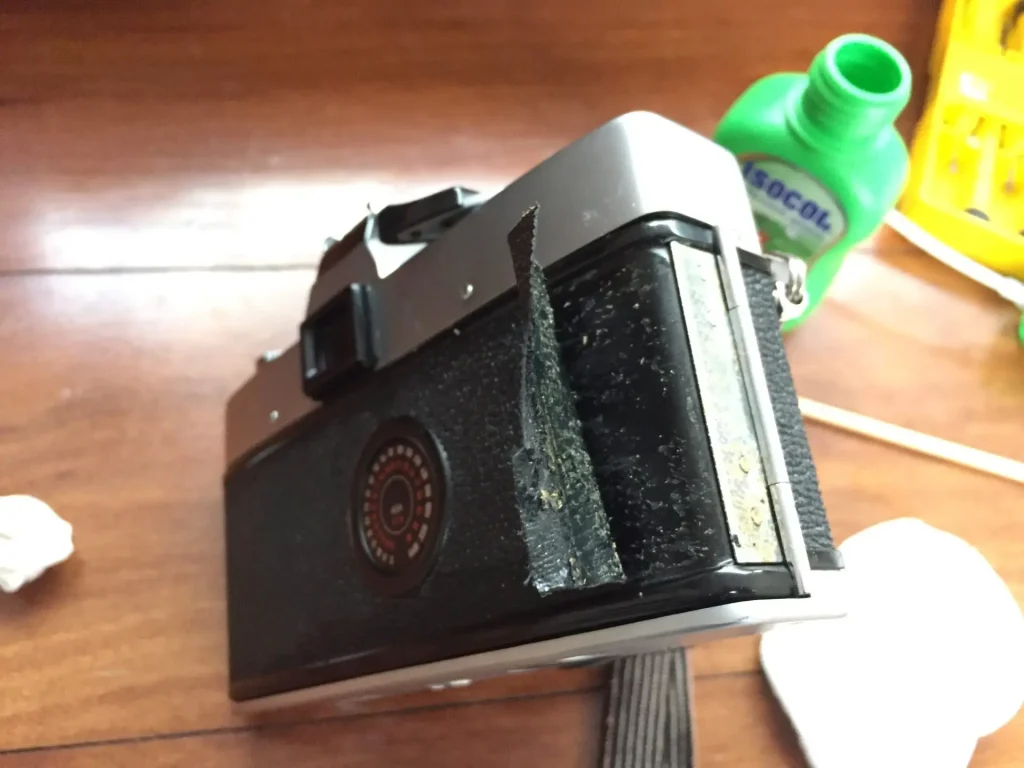
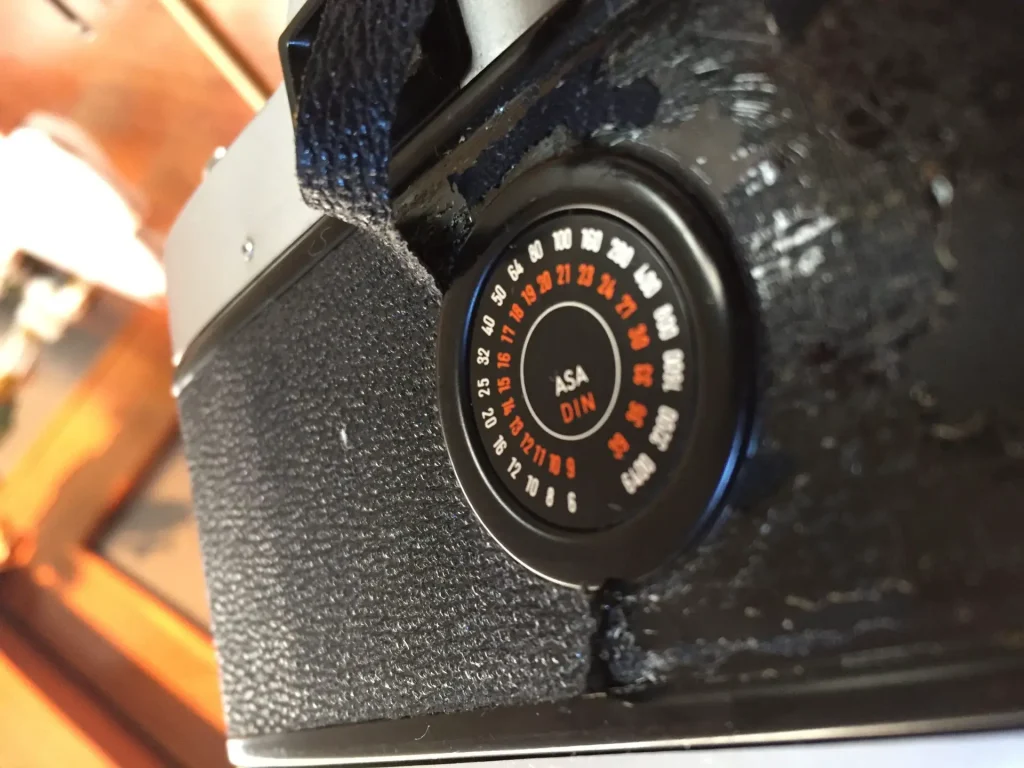
I used the screwdriver to pull up one edge of the leatherette, and gently worked at it until I could grab an edge to pull. On the back, mine was much more firmly adhered than I expected and it took several hours to get the whole thing off without severely scratching up the back. It requires a combination of a gentle touch and very firm pulling. I used the isopropyl alcohol to try to dissolve the glue – this did not work well but might be worth attempting if you try.
Almost immediately after starting, and for the next 3 hours over three sittings, I very strongly regretted starting this project. My camera’s leatherette was not only in good condition, it was strong and would have lasted another 30 years if I hadn’t mucked around with it. Large patches were so firmly adhered to the back that I had to chip away at it, millimetre by millimetre, with the screwdriver and bamboo. There were periods of time when I felt panicked. I really thought that I might never, ever get it clean. Once started, however, you’re committed. Thank goodness the front side of the camera was much easier.
Step 2: Remove the glue and gunk
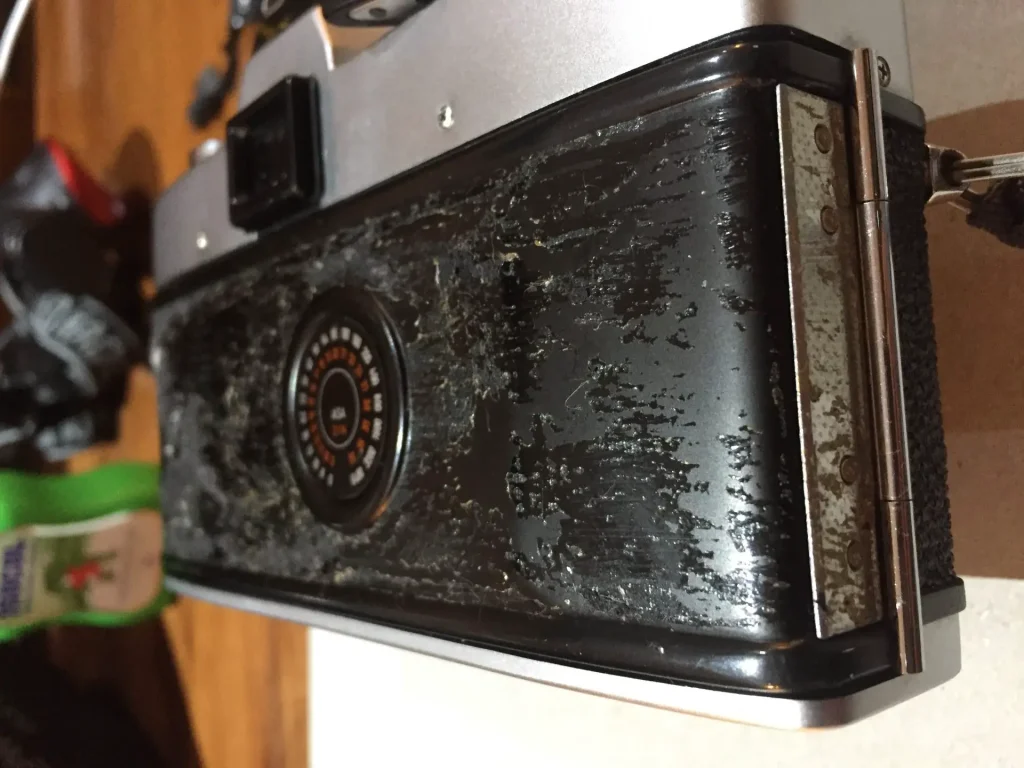
There are surprisingly few suggestions on how to do this online – the assumption is that you will do whatever it takes, and there are no perfect solutions. More assertive ideas range from paint thinner to sandpaper (!), both of which can obviously damage a camera badly. Reading between the lines of most posts I had assumed the leatherette would come off quite cleanly. How very, very, wrong I was.
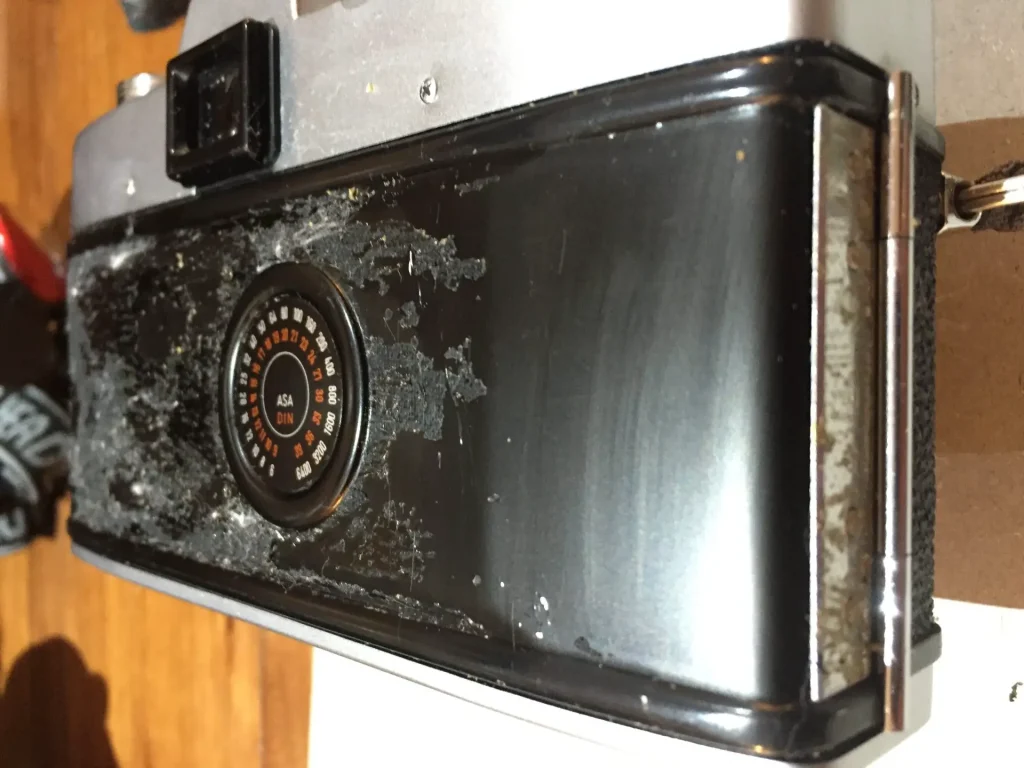
It took me another 2 hours to clean off all the glue. I found that acetone-free nail polish remover, applied to a cotton wipe and rubbed on the glue gently but persistently for 5 minutes would get a 1cm area clean. The first minute of rubbing nothing happens, and then it starts to clear. Later I went back and used the screwdriver and bamboo to pick at the very tough bits. At least I was starting to get somewhere now, but hours later and regret about the whole project was still prominent. I kept thinking to myself that for the sake of a cosmetic improvement and some fun I had run the risk of totally messing up my favourite camera – potentially ruining it.
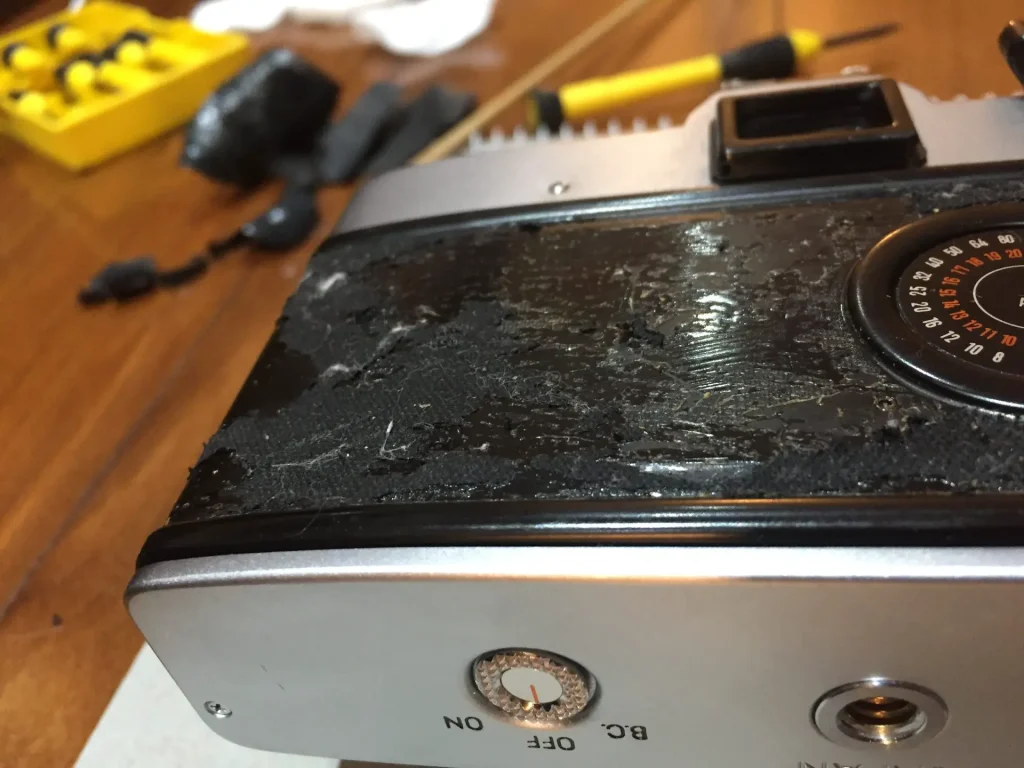
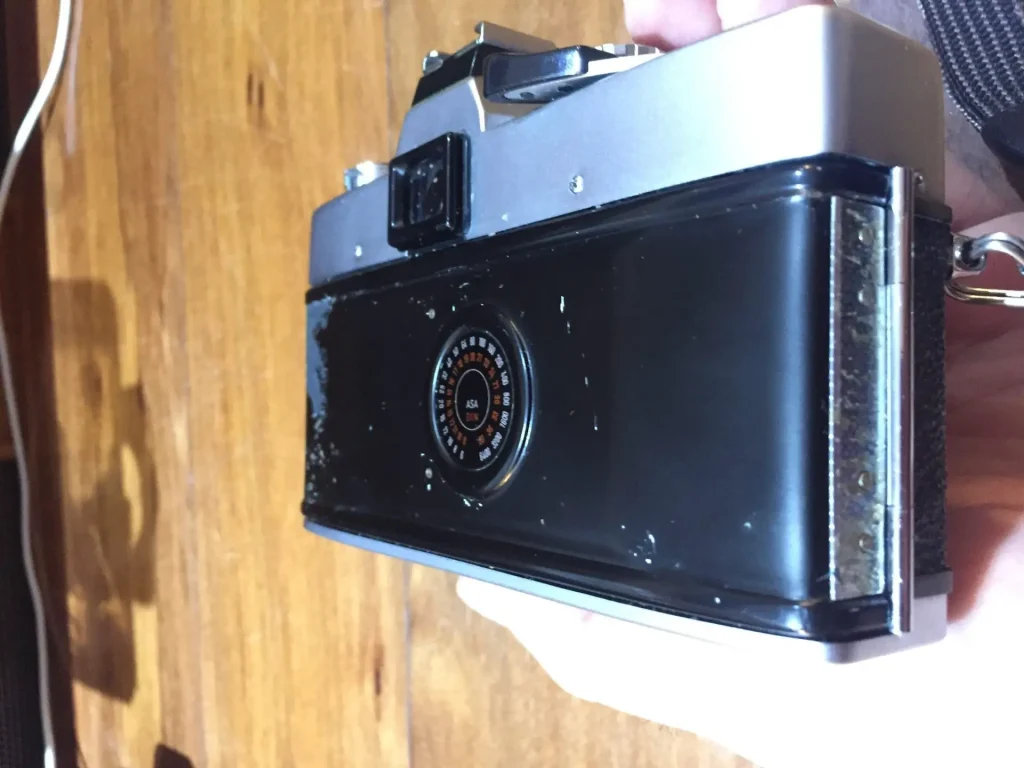
Step 3: REALLY clean it all up
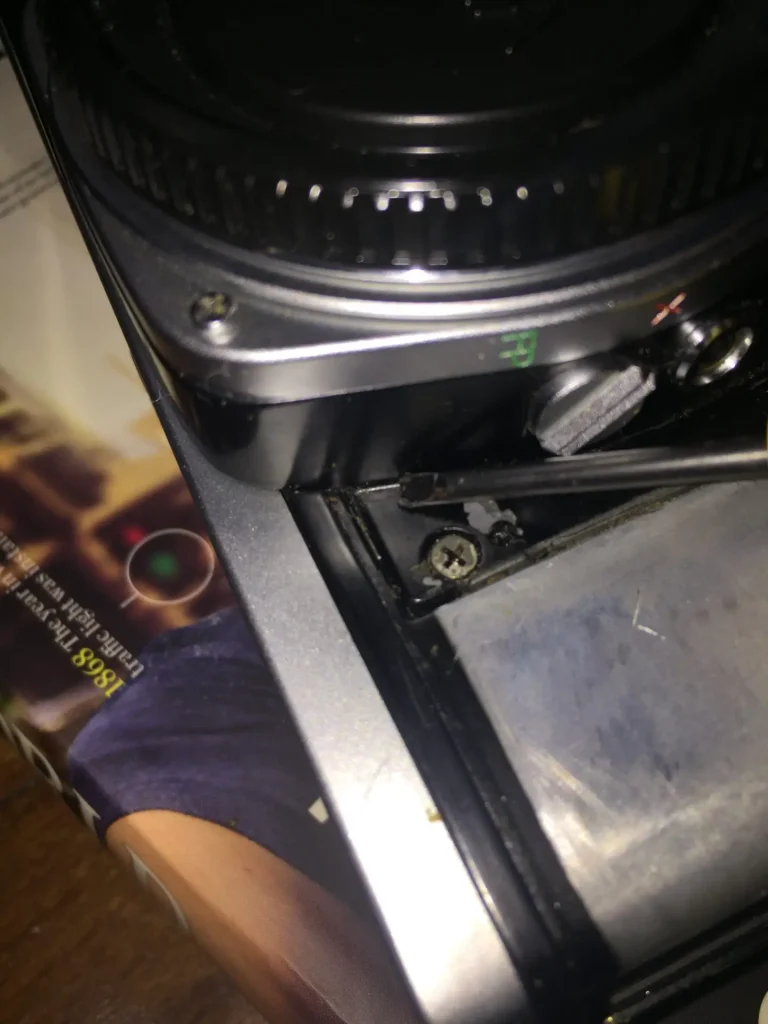
It took another hour to get all the cracks and corners absolutely free of glue residue. This again took a delicate combination of screwdriver, fingernails and bamboo. This was the first time I started to enjoy myself a bit, because I could see that I was going to make it. The camera would be clean and would not be ruined.
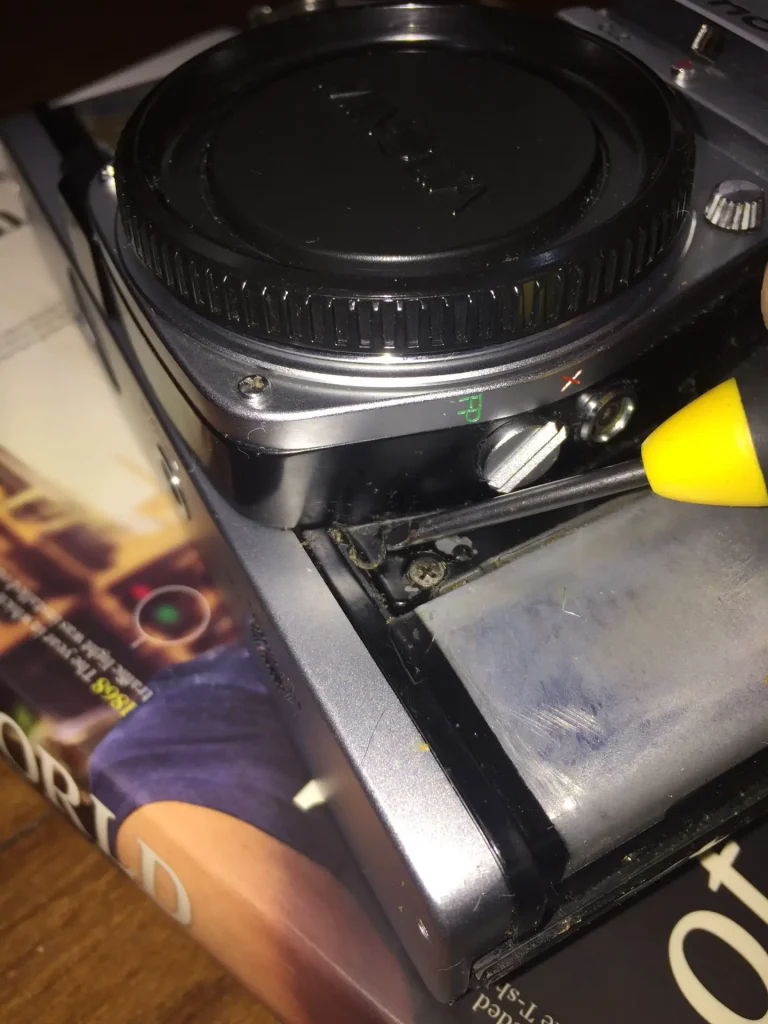
Step 4: Apply the new cover
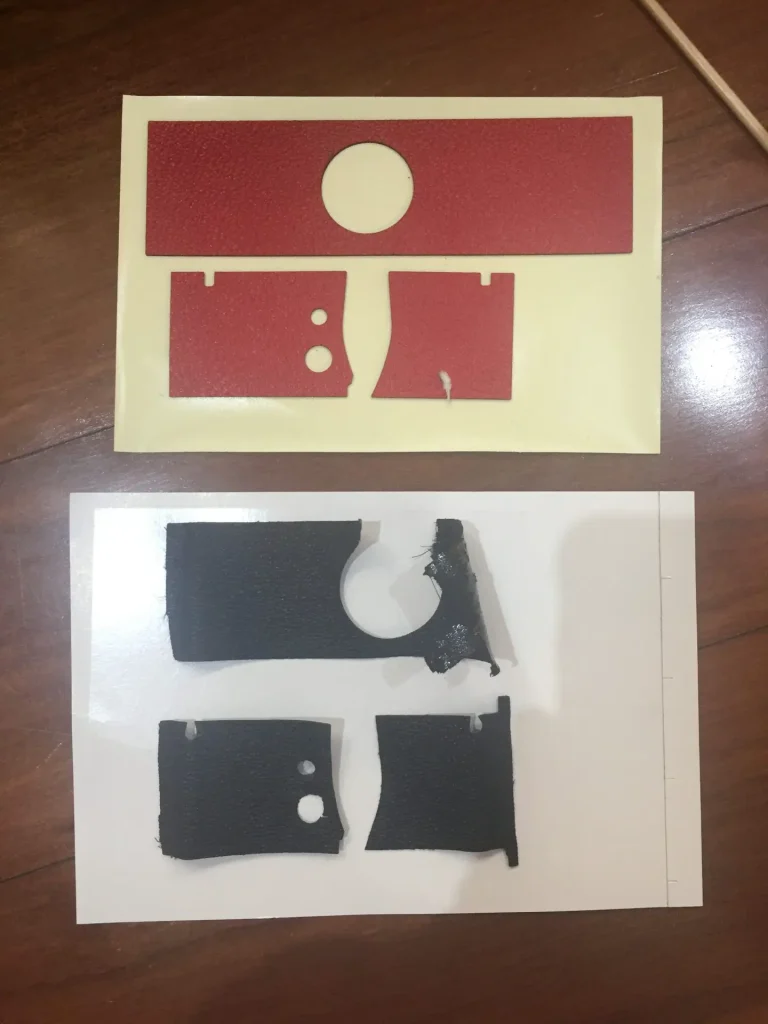
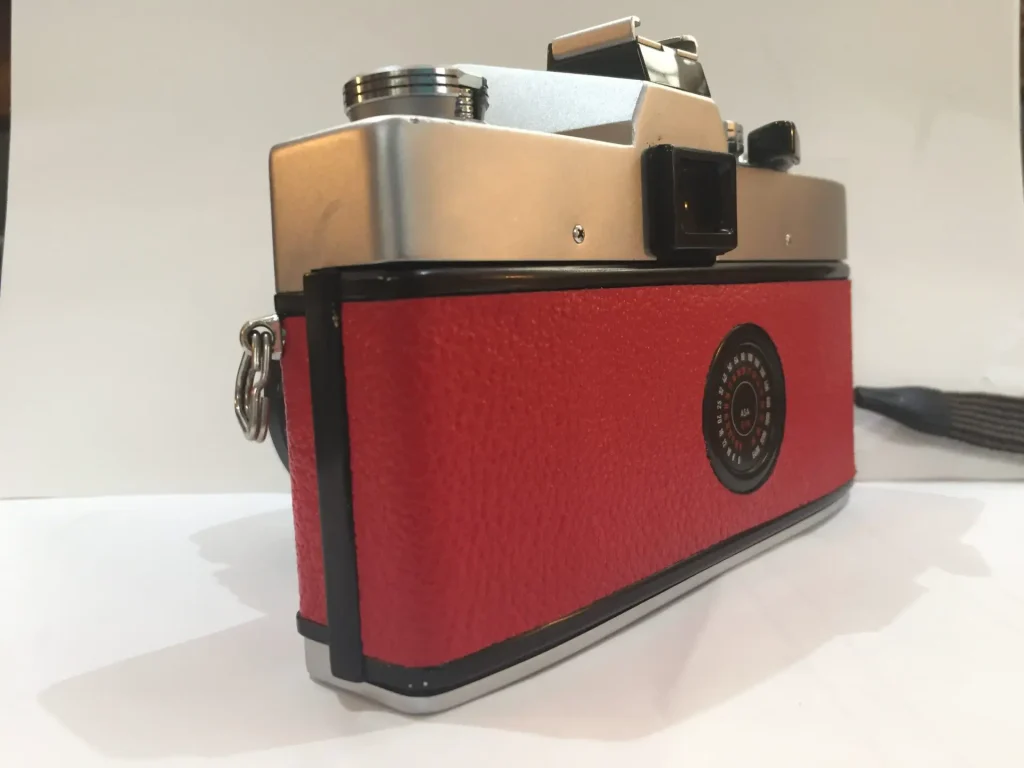
I purchased my covers from Hugo Studio. They had a great range and I was very happy with the service and shipping. They also matched my camera perfectly, as expected.I put some sanitising alcohol hand rub on the back of the covers before applying them. This is recommended, and I found it an ESSENTIAL step. One of the guides I read online (not the one from Hugo Studio) recommended just putting hand sanitiser around the holes, but when I tried this the first time I had to pull the whole cover off the camera immediately as the main part of the cover stuck, in the wrong place. Another heart-sink moment after all the hours I’d put in. Having said that, putting the covers on was pretty easy – definitely the easiest part of the whole thing. I used the bamboo sticks to push the corners in and stretch it slightly, applied pressure, and it stuck! I left the whole thing to dry over night and … done. Finally!


Post Adventure Thoughts and Regrets
I actually don’t regret doing this, but I do still feel shaken up by the experience. My biggest mistake was starting the project with so little appreciation of how difficult it was going to be and the risks to the camera. My lack of preparation is completely my fault – nothing online promised otherwise but I had assumed it would be fun and easy. I would use Hugo Studio again for covers – they did their part perfectly. The camera now looks amazing and feels great. I will definitely shoot it more and have fun doing it. It’s made me feel even more fond of the camera, like we’ve both survived something tricky. I will do it again. With the benefit of experience, however, I won’t do it again in a hurry. It is a serious undertaking. I’m sure you knew that already – and now I do too.
Good luck out there : )
Christopher James/ Insta: @filmplusdigital / Web: 35mm.photo.blog
Share this post:


Comments
Terry B on A slightly troubled tale of replacing vintage camera leather – by Christopher James
Comment posted: 06/02/2020
I purchased the exact same camera, extremely cheaply, a couple of years back to add to my collection. (I'd used an XD-7, and which I still have, for a number of years in the early 1980's.) The SRT-Super really is a fine example of an all mechanical TTL metering camera, with a large and bright, full information viewfinder. I'd suggest readers/collectors seriously follow your link to the Rokkor Files. Minolta was one of the so-called "Big Five" which embraced Canon, Nikon, Olympus, and Pentax. They actually made their own lenses at the time and which were highly regarded, especially in the UK.
Comment posted: 06/02/2020
Comment posted: 06/02/2020
Comment posted: 06/02/2020
Comment posted: 06/02/2020
Comment posted: 06/02/2020
Comment posted: 06/02/2020
Jon on A slightly troubled tale of replacing vintage camera leather – by Christopher James
Comment posted: 06/02/2020
Comment posted: 06/02/2020
Sciolist on A slightly troubled tale of replacing vintage camera leather – by Christopher James
Comment posted: 06/02/2020
His YouTube channel -
https://www.youtube.com/channel/UCBNcopU34d_pGsKTvRzHcsg/videos
Comment posted: 06/02/2020
JimSangwine on A slightly troubled tale of replacing vintage camera leather – by Christopher James
Comment posted: 06/02/2020
Comment posted: 06/02/2020
Eric Norris on A slightly troubled tale of replacing vintage camera leather – by Christopher James
Comment posted: 06/02/2020
Comment posted: 06/02/2020
Scott on A slightly troubled tale of replacing vintage camera leather – by Christopher James
Comment posted: 06/02/2020
I've used re-covering products from cameraleather.com with great success, but their web-site seems to be in transition, and not working at the moment.
Sad, because they have a material called "Grip-Tac" that looks like gray or black leather but is actually a heavily textured rubbery stuff that makes the camera incredibly easy to hold on to.
Thanks for the tip about Hugo Studio. I'll give them a try for my next project.
Oh, and unfortunately, real acetone is the most effective glue-remover. But you have to be careful since it will remove anything it touches including paint. And I work with it outdoors, so as not to breathe the fumes.
Comment posted: 06/02/2020
Comment posted: 06/02/2020
Comment posted: 06/02/2020
Mike Eckman on A slightly troubled tale of replacing vintage camera leather – by Christopher James
Comment posted: 06/02/2020
Comment posted: 06/02/2020
Dan J Castelli on A slightly troubled tale of replacing vintage camera leather – by Christopher James
Comment posted: 06/02/2020
The completed job looks good. You described many of the techniques someone would use for refinishing a fine piece of furniture.
A couple of years ago, my wife & I visited Ireland. I had just obtained a 'like-new' Leica M4-P and it decided to join us to the Emerald Isle. We flew from Boston to Dublin. Cleared customs, and found a place to eat breakfast near our hotel. I unpacked the M4-P over my eggs and sausage, and a big hunk of the leatherette came off in my hand. Damn. The camera shed most of the leatherette from the front. I used a mini-roll of duct tape that I always travel with to cover the exposed metal and secure the remaining pieces. The tape held, but the camera looked like crap. It even elicited a comment from an artist I was photographing: 'this guy's the real thing, look at his 'effin' Leica, all taped up!' Back in the US, I took the cowards way out - I ordered a new leather covering from an outfit in Vermont and sent the camera out to be repaired by a Leica specialist. It came back in about 2 weeks all spiffed up and looking good. We figured the harmonic resonance from the flight loosened the already dried-out glue and the camera just shed it's skin like a snake. I guess it isn't uncommon with the M4-P bodies.
Comment posted: 06/02/2020
Comment posted: 06/02/2020
D Evan Bedford on A slightly troubled tale of replacing vintage camera leather – by Christopher James
Comment posted: 07/02/2020
Comment posted: 07/02/2020
E. Woods on A slightly troubled tale of replacing vintage camera leather – by Christopher James
Comment posted: 07/02/2020
https://ericlwoods.com/2018/08/12/vintage-camera-diy-part-2-reskin-for-contax-ma-quartz/
Comment posted: 07/02/2020
Comment posted: 07/02/2020
Howard Maryon-Davis on A slightly troubled tale of replacing vintage camera leather – by Christopher James
Comment posted: 07/02/2020
(Pentax Spotmatics, Rollei 35S, Olympus Trip, Nikon F2, etc etc and the worst part of the job, as he says, is removing the old covering and glue. I do not struggle with it anymore because I use an adhesive solvent, marketed as "Sticky Stuff Remover" which you can get at good hardware shops. it literally dissolves the glue, and you clean up with cotton buds and a scraper (I use an old credit card as a scraper - you can cut off a piece for tight corners). I can do a spotmatic in under 20mins with this. A tip. If the camera has a self-timer lever on the front, set it to half-way and you will find it much easier to fit the front panel leather around it.
Victor Villaseñor on A slightly troubled tale of replacing vintage camera leather – by Christopher James
Comment posted: 07/02/2020
Looks great! just think it trice next time :P for the looks might not be worth it!
Huss on A slightly troubled tale of replacing vintage camera leather – by Christopher James
Comment posted: 07/02/2020
Within 15 minutes the camera skin bubbles up into soft gooey goop which is very very easy to scrape off. The clean off the exposed metal surface with a rag dabbed in a bit more of the stripper until is completely clean.
You HAVE to wear gloves when you do this as the stuff is caustic. But it works very very well and makes things super easy.
An example of this type of product:
https://www.lowes.com/pd/Klean-Strip-Kwik-Paint-and-Varnish-Stripper-1-qt/1000659649
I have since recovered a bunch of my cameras because it is fun and makes them unique. With the Leicas the skin was crumbling off. With the others, well, just wanted to. The upside is these new covers are very easy to remove if you later decide to make them boring black again...
https://flic.kr/p/2fHyae6
https://flic.kr/p/2bs1TzP
https://flic.kr/p/2a2JFtJ
https://flic.kr/p/LcMNr7
https://www.flickr.com/gp/39133227@N08/w3x9Q2
https://www.flickr.com/gp/39133227@N08/u3h7Ju
fab on A slightly troubled tale of replacing vintage camera leather – by Christopher James
Comment posted: 17/05/2020