I’ve been shooting film since the late 90s; my father bought me a quirky little National 35 when I was thirteen. But I started darkroom printing just a year and a half ago, in autumn 2018. What took me so long? Two misconceptions, mainly – that it’s expensive, and that it’s difficult.
In fact, it turns out that setting up a basic darkroom need not be expensive. In this, the first of a five-part series on printing black-and-white photographs in a darkroom, I want to illustrate just how cheap it can be – how, through a combination of eBay deals and some dubious hacks, I built a makeshift but fully-functional darkroom in a small flat for a grand total of £92.50… and how you can too (clickbaity but true!)
In Part 2, I’ll try to show that basic printing is not difficult either, and so much fun that it should probably be illegal. Finally, in Parts 3, 4 and 5, I’ll cover some intermediate techniques including geometric timing, localised test strips, split grade printing and local manipulations (dodging and burning). All five parts focus on traditional black-and-white printing on silver gelatine paper; I won’t go into colour printing or alternative processes. And I’ll focus on 35mm, although some of what I say here also applies to medium- and large-format.
But first, we need a darkroom. So let’s get started on Part 1, also known as…
Printing for millennials
I use millennials as shorthand, of course. What I mean is printing for people like me, that is, people who are willing to spend a little money on the hobby, but not a lot. People with limited space, living in rented flats. People, perhaps, with lifestyle and career choices which entail frequently moving flats, or even countries. In short, Part 1 is mostly for people in the two blue areas of this Venn diagram:
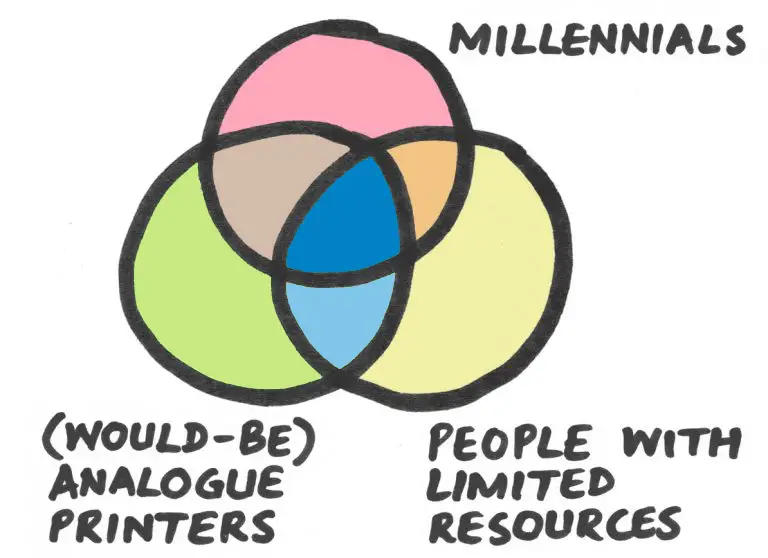
I suppose Printing for people with limited resources who may or may not be millennials but who have an interest in analogue printing would be more accurate, but somehow it’s less catchy as a title.
Preliminaries
Why I wrote this piece
When I was starting out, I read a lot of books and articles on how to set up a darkroom. I found them informative, but also intimidating. Author after author described elaborate and expansive layouts, with floorplans to match – a ‘wet side’ and a ‘dry side’, expensive light-proofing, dedicated plumbing and ventilation, equipment lists running to several pages. Others were openly discouraging. A Guardian article advised:
Don’t bother with home wet printing unless you have the space to create a ‘proper’ darkroom … Any attempt to produce photographs in your bathroom or kitchen is sure to end in domestic disharmony.
But it doesn’t have to be this way. In The Education of a Photographer, Leo Rubinfien describes visiting Garry Winogrand in the 1970s:
I went to Garry’s apartment, which was small and dark, and I was astonished to find his enlarger crammed into an alcove in the second bedroom, between the bed and the wall. He would darken the room, and stand there and expose a big stack of prints, then take them down to the darkroom in the art department at the university and develop them in the communal trays, in which lots of students were doing their work at the same time.
. Honoré Daumier (1863)")
The further back you go, the crazier it gets. In the early 1900s, Frank Hurley, official photographer for the Shackleton expedition, set up a darkroom in an Antarctic hut. And in the 1850s, Nadar, satirically portrayed in the lithograph above, developed collodion wet-plates in mid-air while soaring above Paris in a hot-air balloon. By comparison, a 21st-century flat sounds like a cakewalk. We’ve got this!
A darkroom is like a gas
A darkroom is like a gas – it expands to fill the space available. In the 1970s and 80s, many darkrooms were built in garages and basements, but that’s a luxury which those of us who live in small, rented flats can rarely afford. But the good news is, like a gas, a darkroom can also be compressed. My enlarger takes up just 0.2 m² on a sideboard, and is a nice conversation piece to boot. All my other stuff fits into the small cupboard below; I just take it out for printing.
Also like a gas, a darkroom expands to fill the budget available (largely thanks to that other kind of GAS). The budget can also be compressed – but up to a point, and with some compromises.
Three disclaimers
First, my £92.50 figure is my total set-up cost for darkroom printing. It does include shipping costs, but does not include (a) consumables (photographic paper and chemistry), (b) common household items which I already had (scissors, cardboard, empty wine bottles…) and (c) costs of developing equipment (since we’re talking about printing, not development). My developing equipment cost just £16.50, all of it new, but maybe that’s a story for a future article.
Second, unless you get very lucky, a makeshift £92.50 darkroom won’t be a perfect darkroom. If you’re the kind of person who winces at the thought of drying prints with clothes pegs or using a 3-element enlarging lens, look away now.
I’ll be the first to admit that my set-up comes with certain inconveniences. I’m sure I’d print even more regularly if I could just waltz into a custom-built darkroom and get to work, rather than having to spend ten minutes before each session light-proofing the room, taking out trays from storage and so on. But then again, if printing required a spare garage and several hundred pounds worth of equipment, I wouldn’t have started at all.
Third, I am not an expert! I’ve been printing for about eighteen months, so I’m an enthusiastic novice – at best. But I read a lot, practise as much as time allows and try to learn from other printers. In fact, I’m writing this series not just to share my experience and approach, but also because I hope to get feedback from other printers – beginners as well as experts – and thus learn some new things.
TL;DR
But what if you’re not interested in darkroom printing? Skip the rest, if you will, but I can promise you that the Inspiration section at least will be worth your while. We may not all be darkroom enthusiasts, but we can all marvel at human ingenuity.
If printing ever does pique your interest – on reading Part 2, for example – the TL;DR from this part is that you can most likely set up to print for under £100, in a small flat with no dedicated darkroom space.
But for that, we need to work, as far as possible, with what we have. We have to be creative, and source equipment as cheaply as we can. We need, perhaps, to make do without certain things, and improvise the rest. In short, we need to focus on…
The essentials
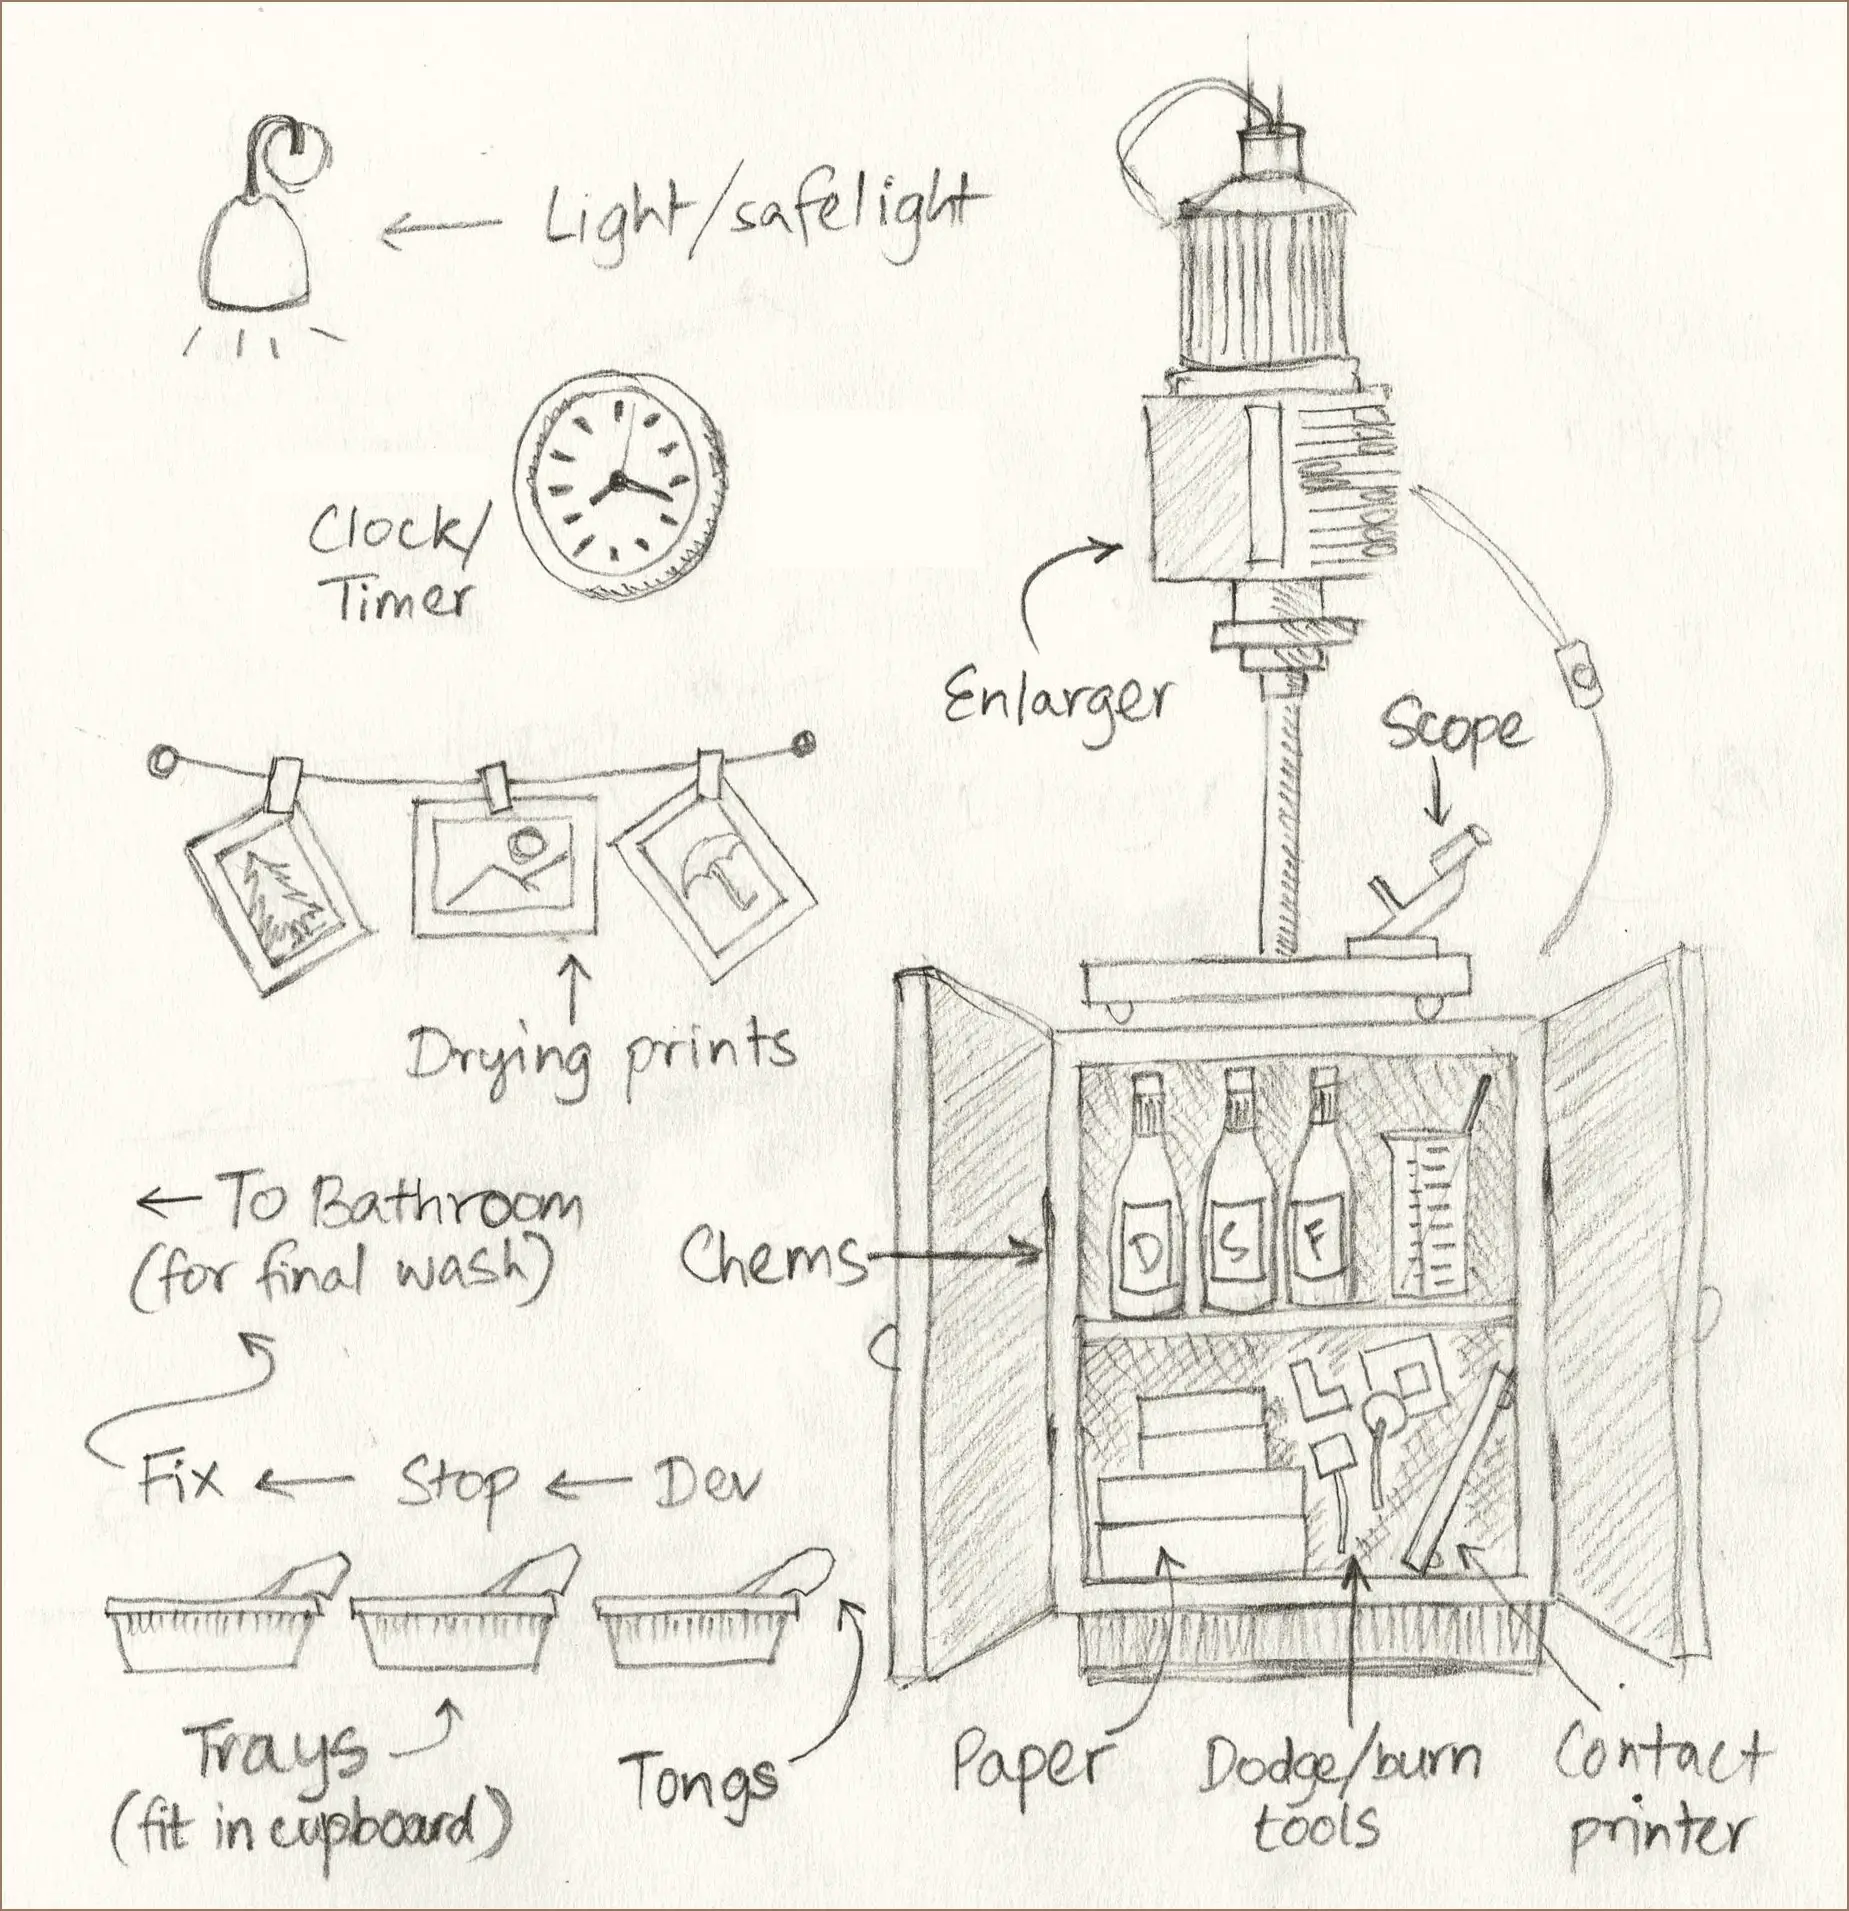
Printing is fundamentally simple. An enlarger shines light through a negative, projecting an enlarged image onto photo-sensitive paper. After a controlled exposure, that paper is immersed in a sequence of chemicals – developer, stop bath and fixer – which reveals a positive image.
Paper and chemistry
My set-up cost, as noted earlier, excludes consumables, i.e. photographic paper and chemistry. I won’t talk much about paper and chemistry in general, mainly because I haven’t tested enough types to form an informed opinion. But just for completeness, this is what I use:
- Paper: Ilford Multigrade Resin-Coated (Pearl 8×10″) and Fomaspeed Variant 311 (4×6″)
- Developer: Ilford Multigrade (more recently Adox Adotol Konstant, but the jury is still out on that one)
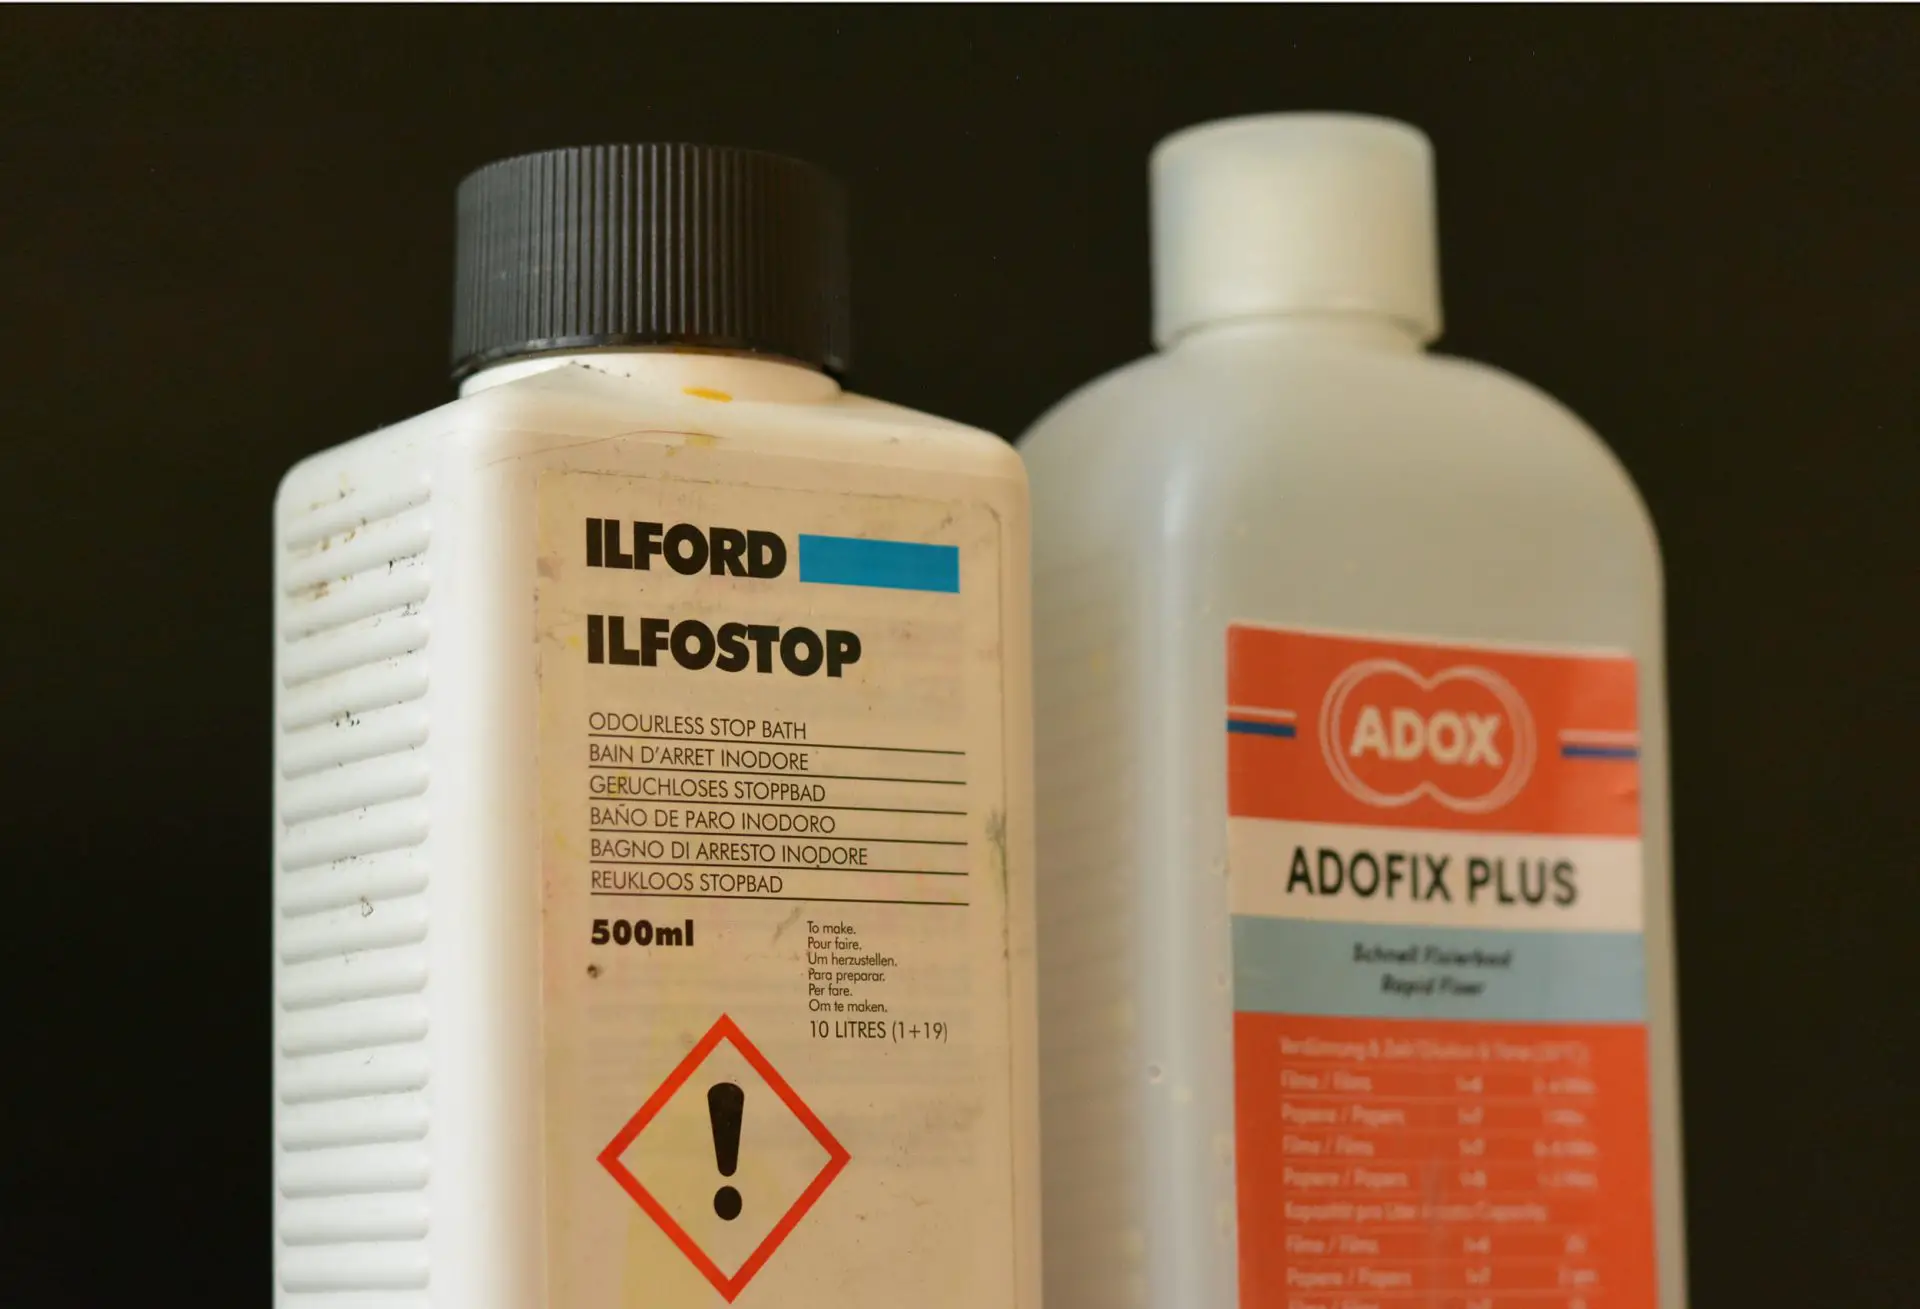
- Stop bath: Ilford Ilfostop
- Fixer: Adox Adofix Plus
I’m happy with these, but as I say my experience is limited. I chose them mostly because they are popular and easily available.
Hardware
Other than paper, chemistry, and a few common household items (see below), this is all you really need to print black-and-white photographs:
- A dark room (which need not be a dedicated space, see below)
- An enlarger
- A timer (which can be improvised, see below)
- A safelight (which can also be improvised, see below)
- A graduated vessel
- Three trays to hold chemicals
- Tongs to manipulate the paper while processing
You also need some form of ventilation in the darkroom (even if it’s just opening the door and stepping out for fresh air at regular intervals). And you need another tray or basin, ideally close to running water, to wash the prints – but this need not be inside the darkroom itself.
The darkroom
The good news is that, because photographic paper has relatively low sensitivity, a darkroom for printing need not be truly dark. (A darkroom for film developing is a different story, but that’s why changing bags were invented.) What this means is you don’t necessarily have to invest in blackout curtains, paint the walls black or construct an underground bunker deep inside a secret mountain, as some sources recommend (OK I made the last one up).
Zero-cost light-proofing
A windowless space, like a hallway, bathroom or large closet, can be light-proofed in minutes. I’ve also printed in my friend’s room which has a large window, hanging a thick bedsheet over the curtain-rod and taping the edges to the wall (though we were limited to printing at night because the arrangement did not satisfactorily block daylight). Other useful light-proofing materials include bin-bags, rugs (for light leaks under doors), cardboard and newspaper (several sheets taped together are surprisingly good at blocking light).
These are just general principles; without knowing your circumstances, it’s hard to make more specific light-proofing recommendations. Just do your best, and then…
Do a test
When setting up a darkroom, I don’t aim for perfect light-proofing. The key is to make the space as light-proof as you can, and then test.
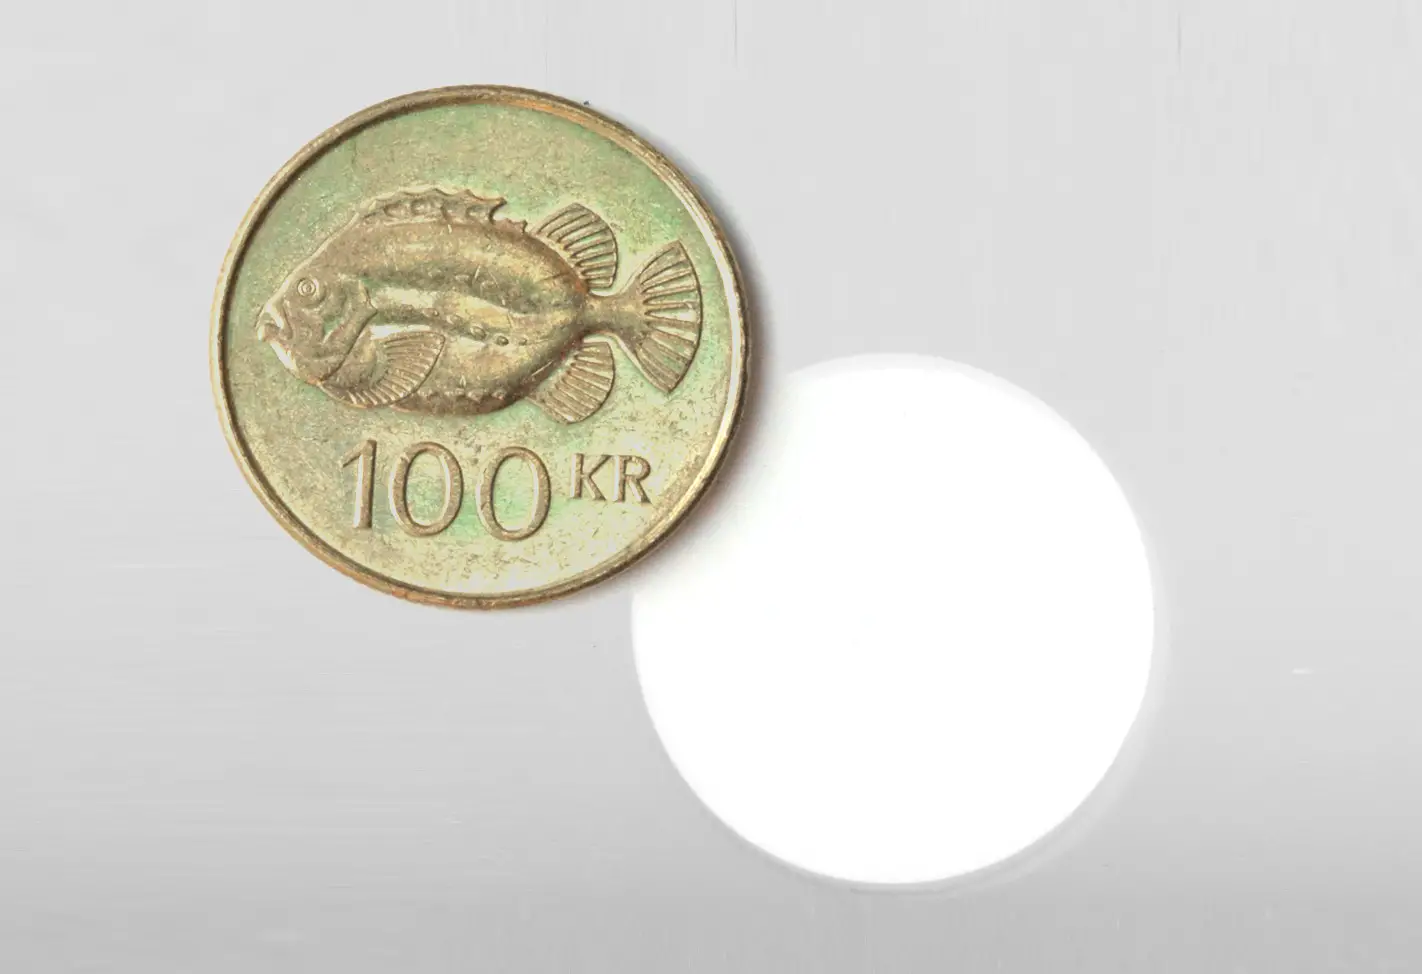
With only the safelight on, take out a small piece of photographic paper. Put it on the table, immediately place a coin on it, and leave it for 20 minutes. Listen to music, meditate or take a nap (light from your phone-screen will, of course, ruin the test). W Eugene Smith used to watch television, covering the screen with a safelight filter. But I digress.
After 20 minutes, process the paper as usual, but covering each tray to make sure the paper is protected. If the room is light-proof, the piece will be pure white. Otherwise, the outline of the coin will show up as a white circle against a grey background.
In that case, turn off the safelight and try again. If the new test paper is white, your safelight is the culprit (see below). If it’s still grey, keep trying until you find the leak. It’s better to find out at the start. Otherwise you spend time and paper making your first print, only to find out your efforts were all in vain (I speak from bitter experience).
Strictly speaking, the coin test is not 100% reliable. Nevertheless, being lazy, this is what I use, and it works for me. If you want to do it by the book, the Ilford website has a more rigorous test.
My darkroom
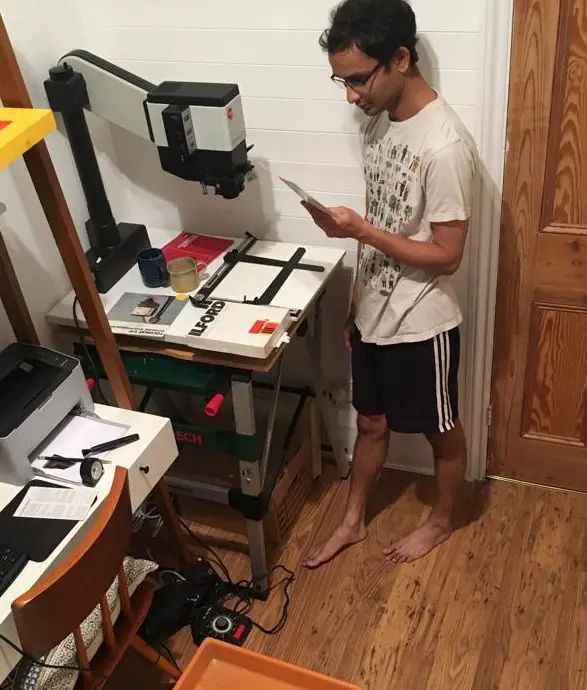
I can’t tell you how exactly to set up because I don’t know your situation. What I can do is show you the darkroom I set up in the hallway of my girlfriend’s flat.
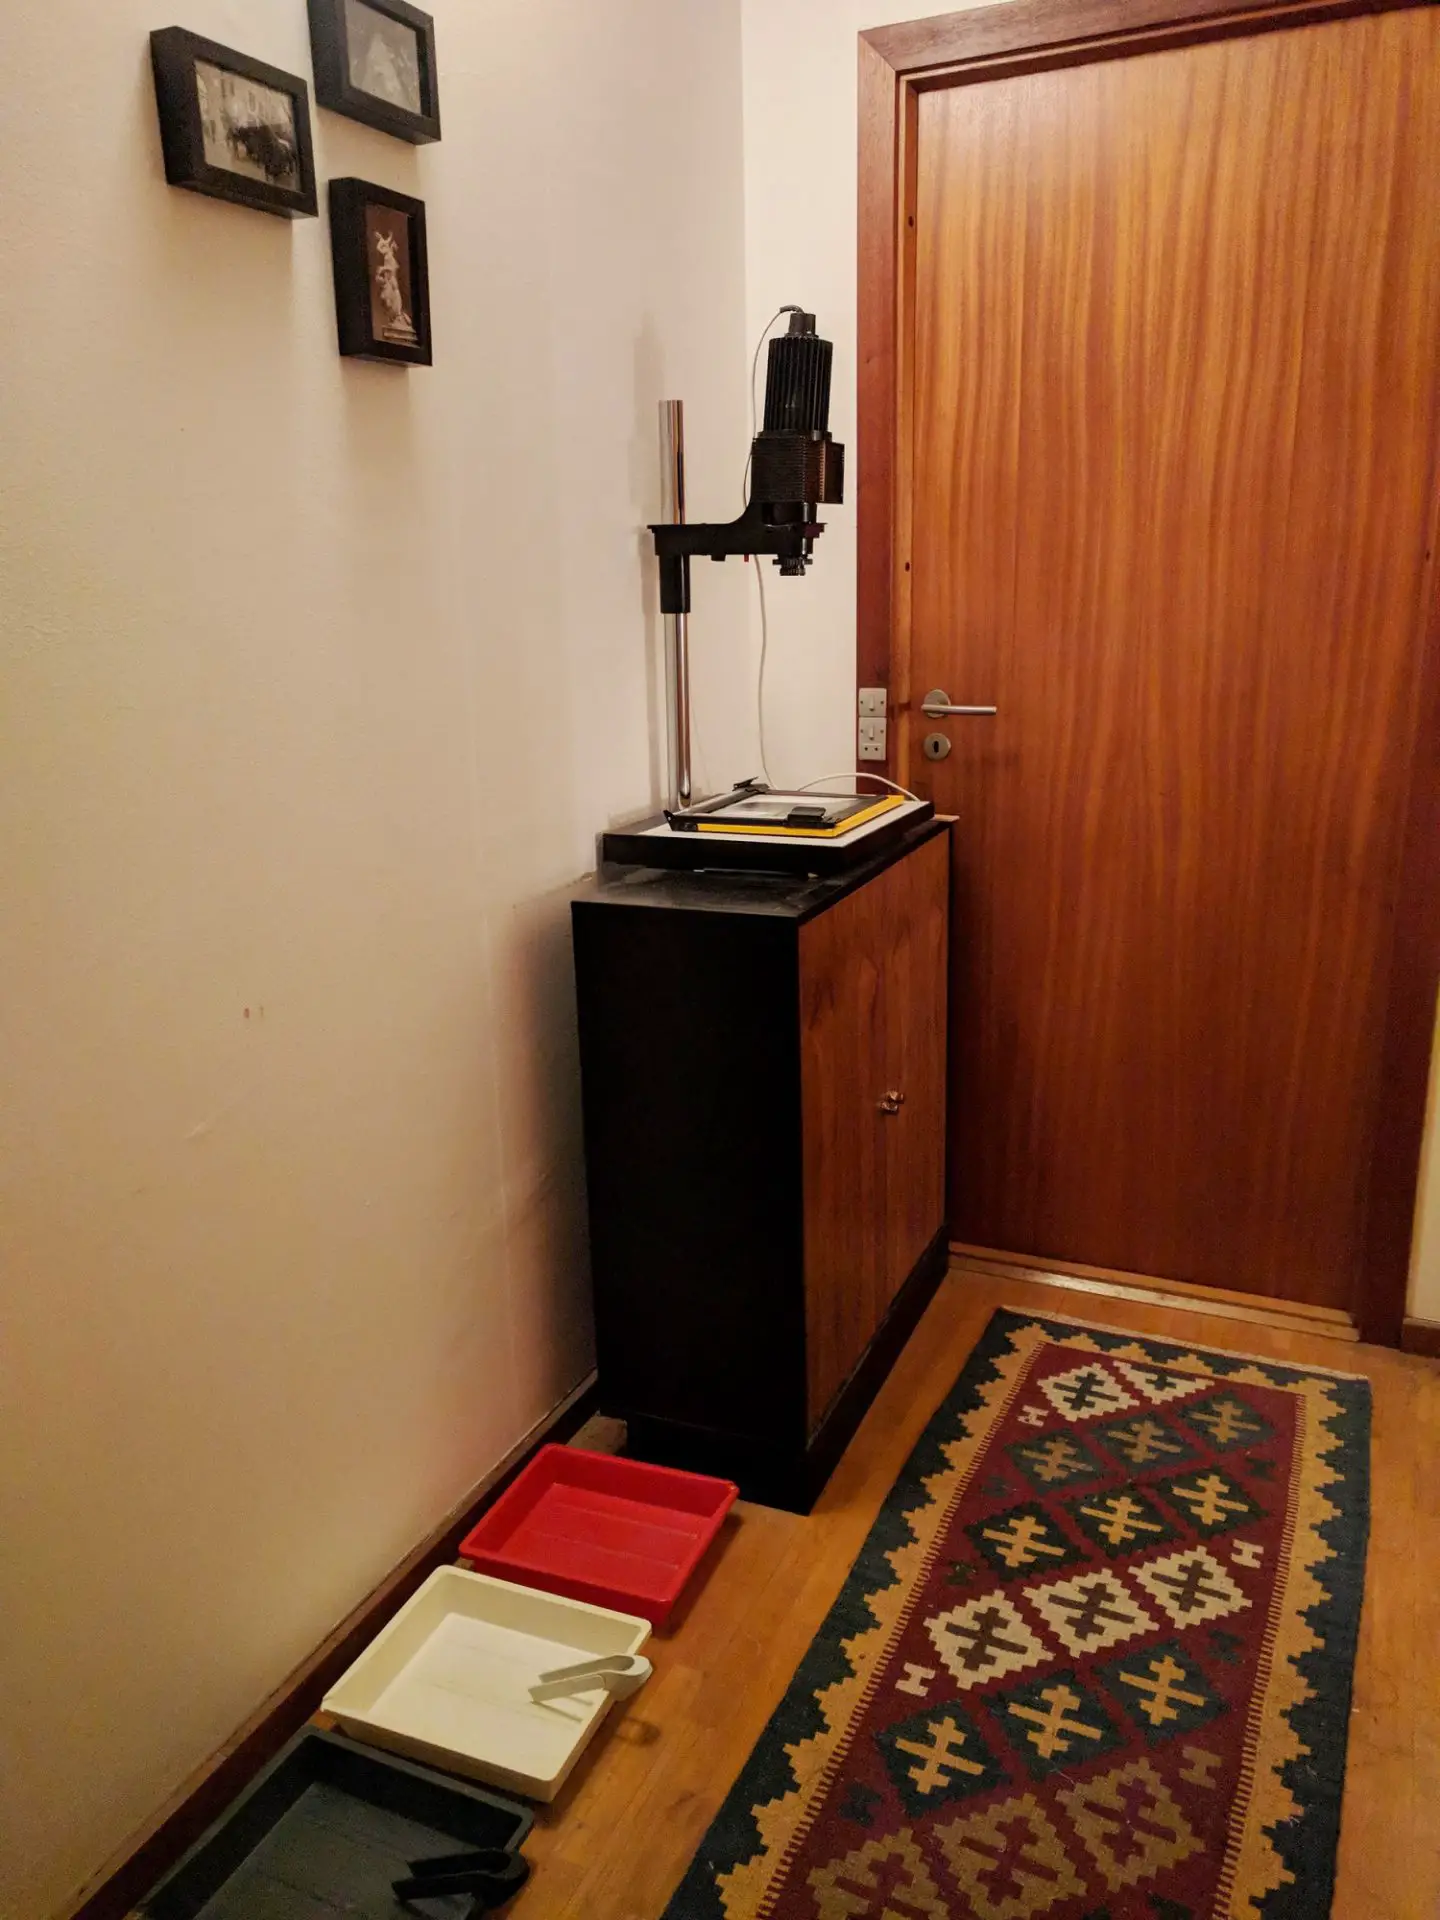
The chemicals, paper, trays and other accessories live in the cupboard under the enlarger; I just take them out for printing. The IKEA frames behind the enlarger display some of my prints. There is a bathroom just off to the left, where I can wash my prints in the basin.
A few months back I posted this photo to my Facebook darkroom group, and other members suggested keeping the trays on newspaper to protect the floor, or on an ironing-board to raise them to a more convenient height – both good ideas. (I went with newspaper; I quite like agitating the trays as I sit on the floor, like a prospector panning for gold.) Someone else commented, “Where there is a hall, there is a way,” which is now my official hallway-darkroom motto.
The enlarger
At this point in the proceedings, it is customary to take a deep dive into the merits of condenser versus diffusion enlargers, uncovered versus glass negative-carriers, and other such minutiae. I won’t. First off, these have been discussed to death in innumerable books and forum threads, whereas our focus here is to get up and running (printing!) as simply and inexpensively as possible, not spend hours wrestling with the paradox of choice. (However, if you do want to research enlargers, James Ollinger’s Beginner’s Guide to Enlargers is a good place to start.)
Second, choice is often illusory. In the January 1981 issue of Popular Photography, David Vestal did a painstaking scientific comparison of condenser and diffusion enlargers – a polarising if not inflammatory issue among darkroom printers (yes, we need to get out more). Vestal’s conclusion?
The prints looked so much alike that neither I nor Popular Photography’s editors could tell by looking at them which print came from which enlarger head. We had to look up my notes to find out.
My advice, unless you’re printing professionally (in which case why are you reading about £100 darkrooms?!) is to get a cheap working enlarger. Or even a scrap enlarger, if you think you can get it working again; they are simple machines. Sell it and upgrade later if you want to, and when you have a better sense of what you want.
Well. Get a cheap enlarger, but not just any enlarger. There are two main considerations.
Negative size
First, the enlarger must suit the negative size you want to print. I print 35mm, so I got one with a 35mm negative-carrier and a 50mm lens (rule of thumb: the lens should have a focal length longer than the diagonal of the film).
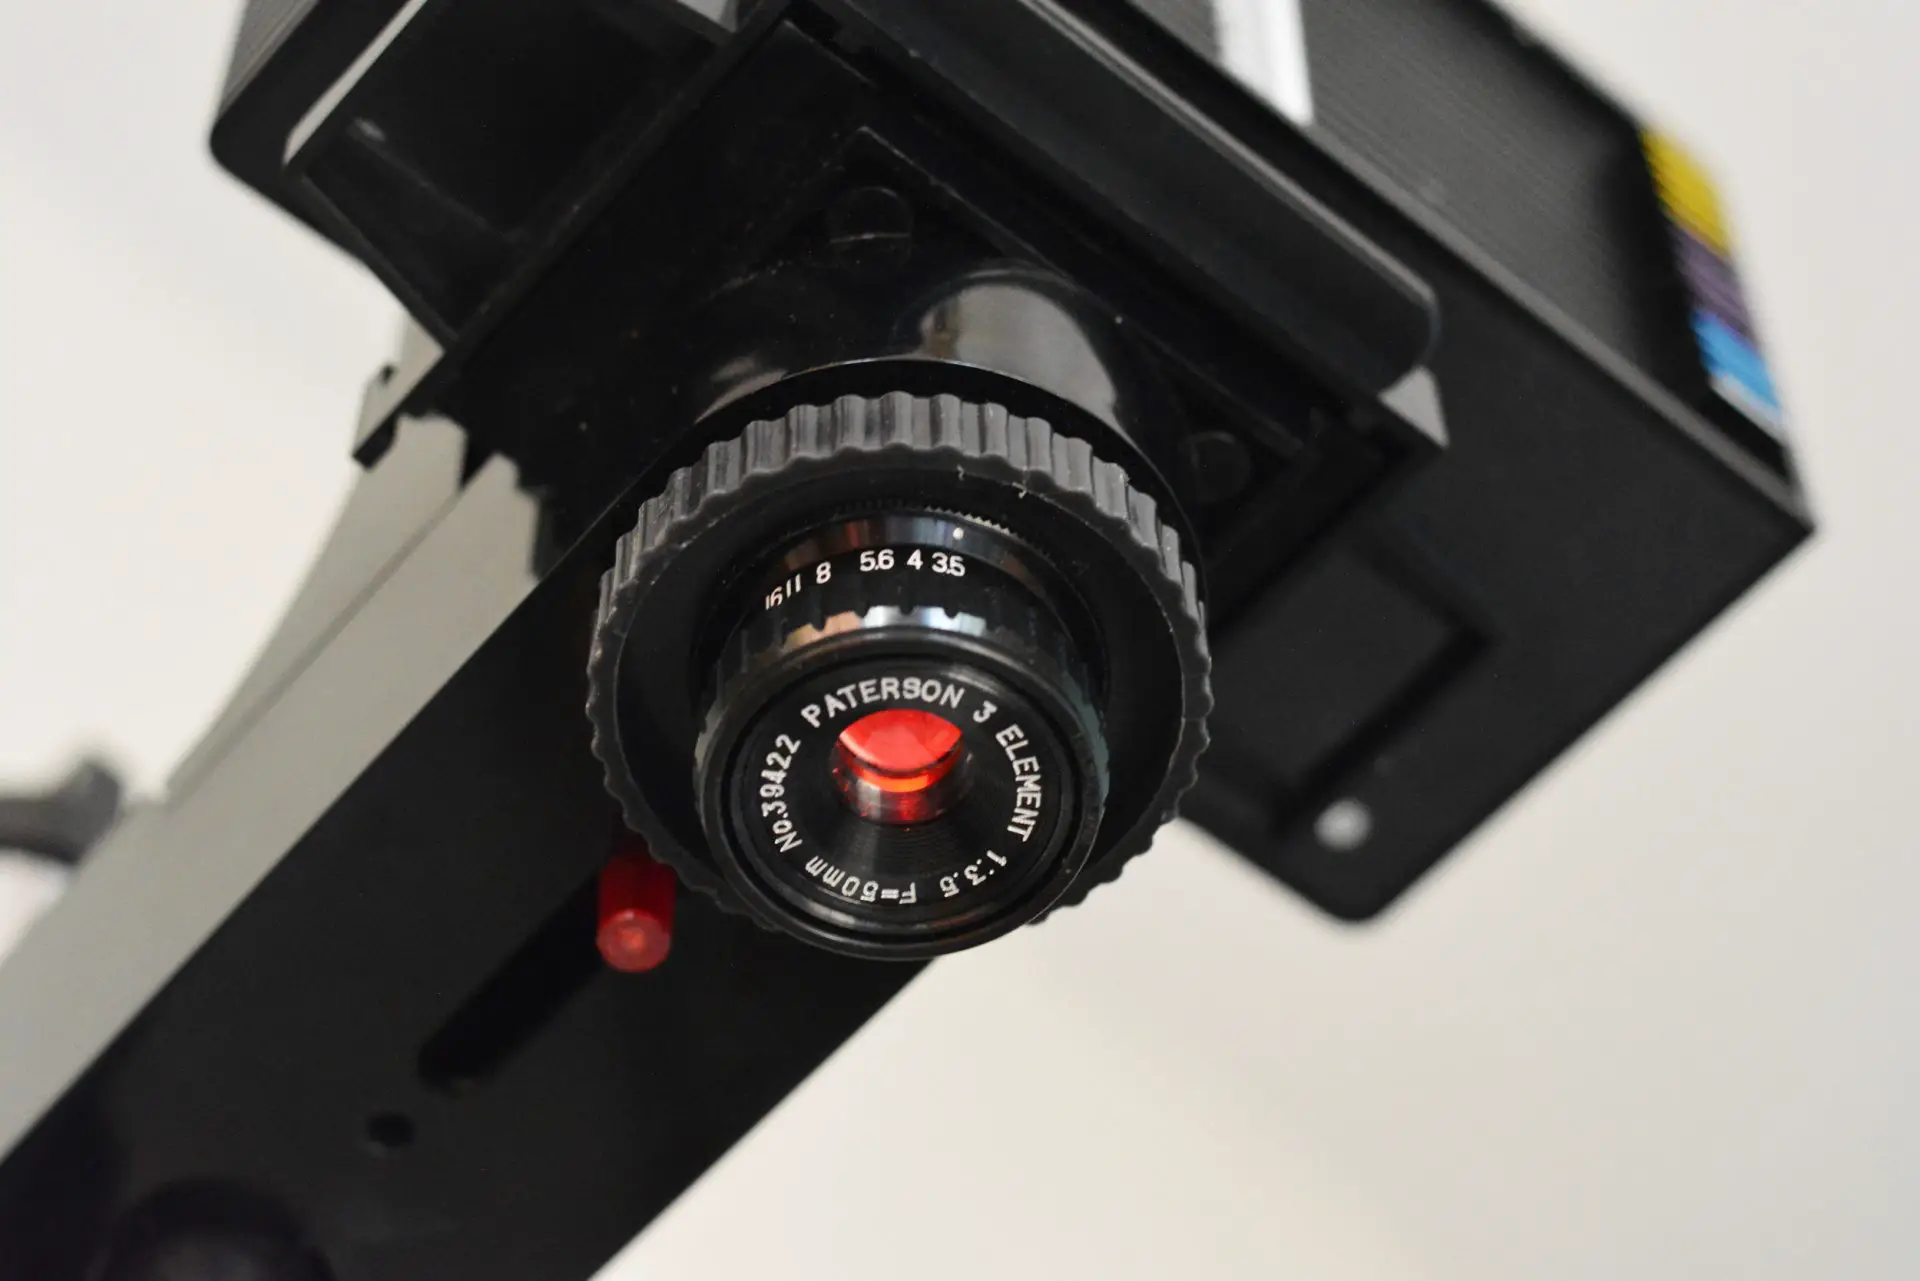
My enlarger came with a basic Paterson 50mm f3.5 lens. I’ve also printed with my friend’s Leitz Focotar 40mm f2.8, and seen prints made by a professional printer with an El-Nikkor 50mm f2.8. These are both very highly-regarded lenses and almost certainly better than my Paterson, but I haven’t done a direct comparison. I’m happy with the Paterson for now, but I may upgrade someday if I’m convinced that it will produce an obvious improvement in 8×10″ prints (by ‘obvious’ I mean ‘obvious to a normal person’, not ‘obvious if you scrutinise corner-sharpness with a 5x loupe’).
Filters
Second, I recommend some form of filtration. I go into this in more detail in Part 2, but by using filters in combination with variable contrast paper, you can print at different contrast grades on the same type of paper. (The alternative is to buy a different pack of paper for each contrast grade… or relinquish contrast control altogether.)
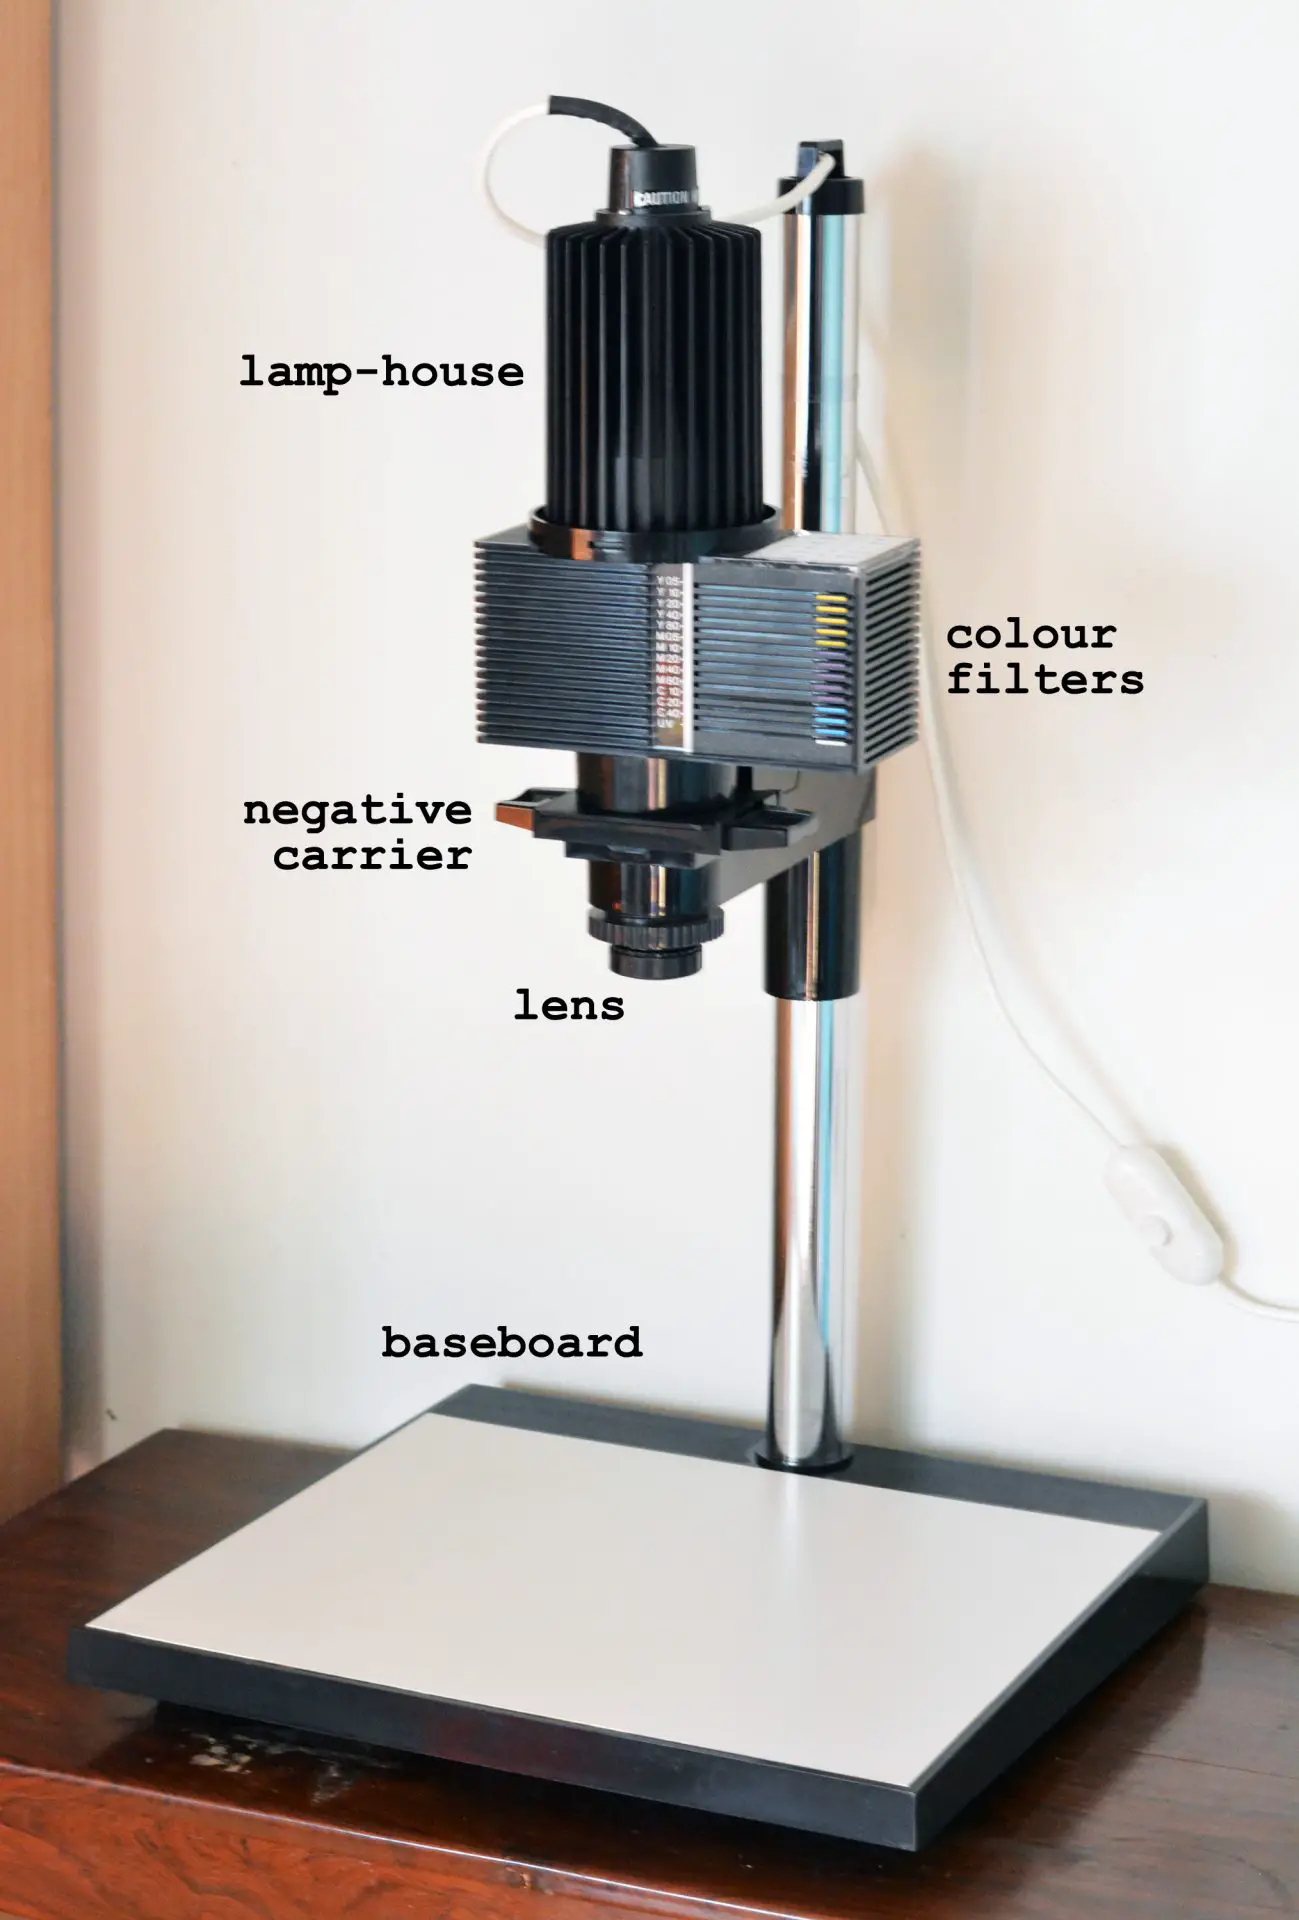
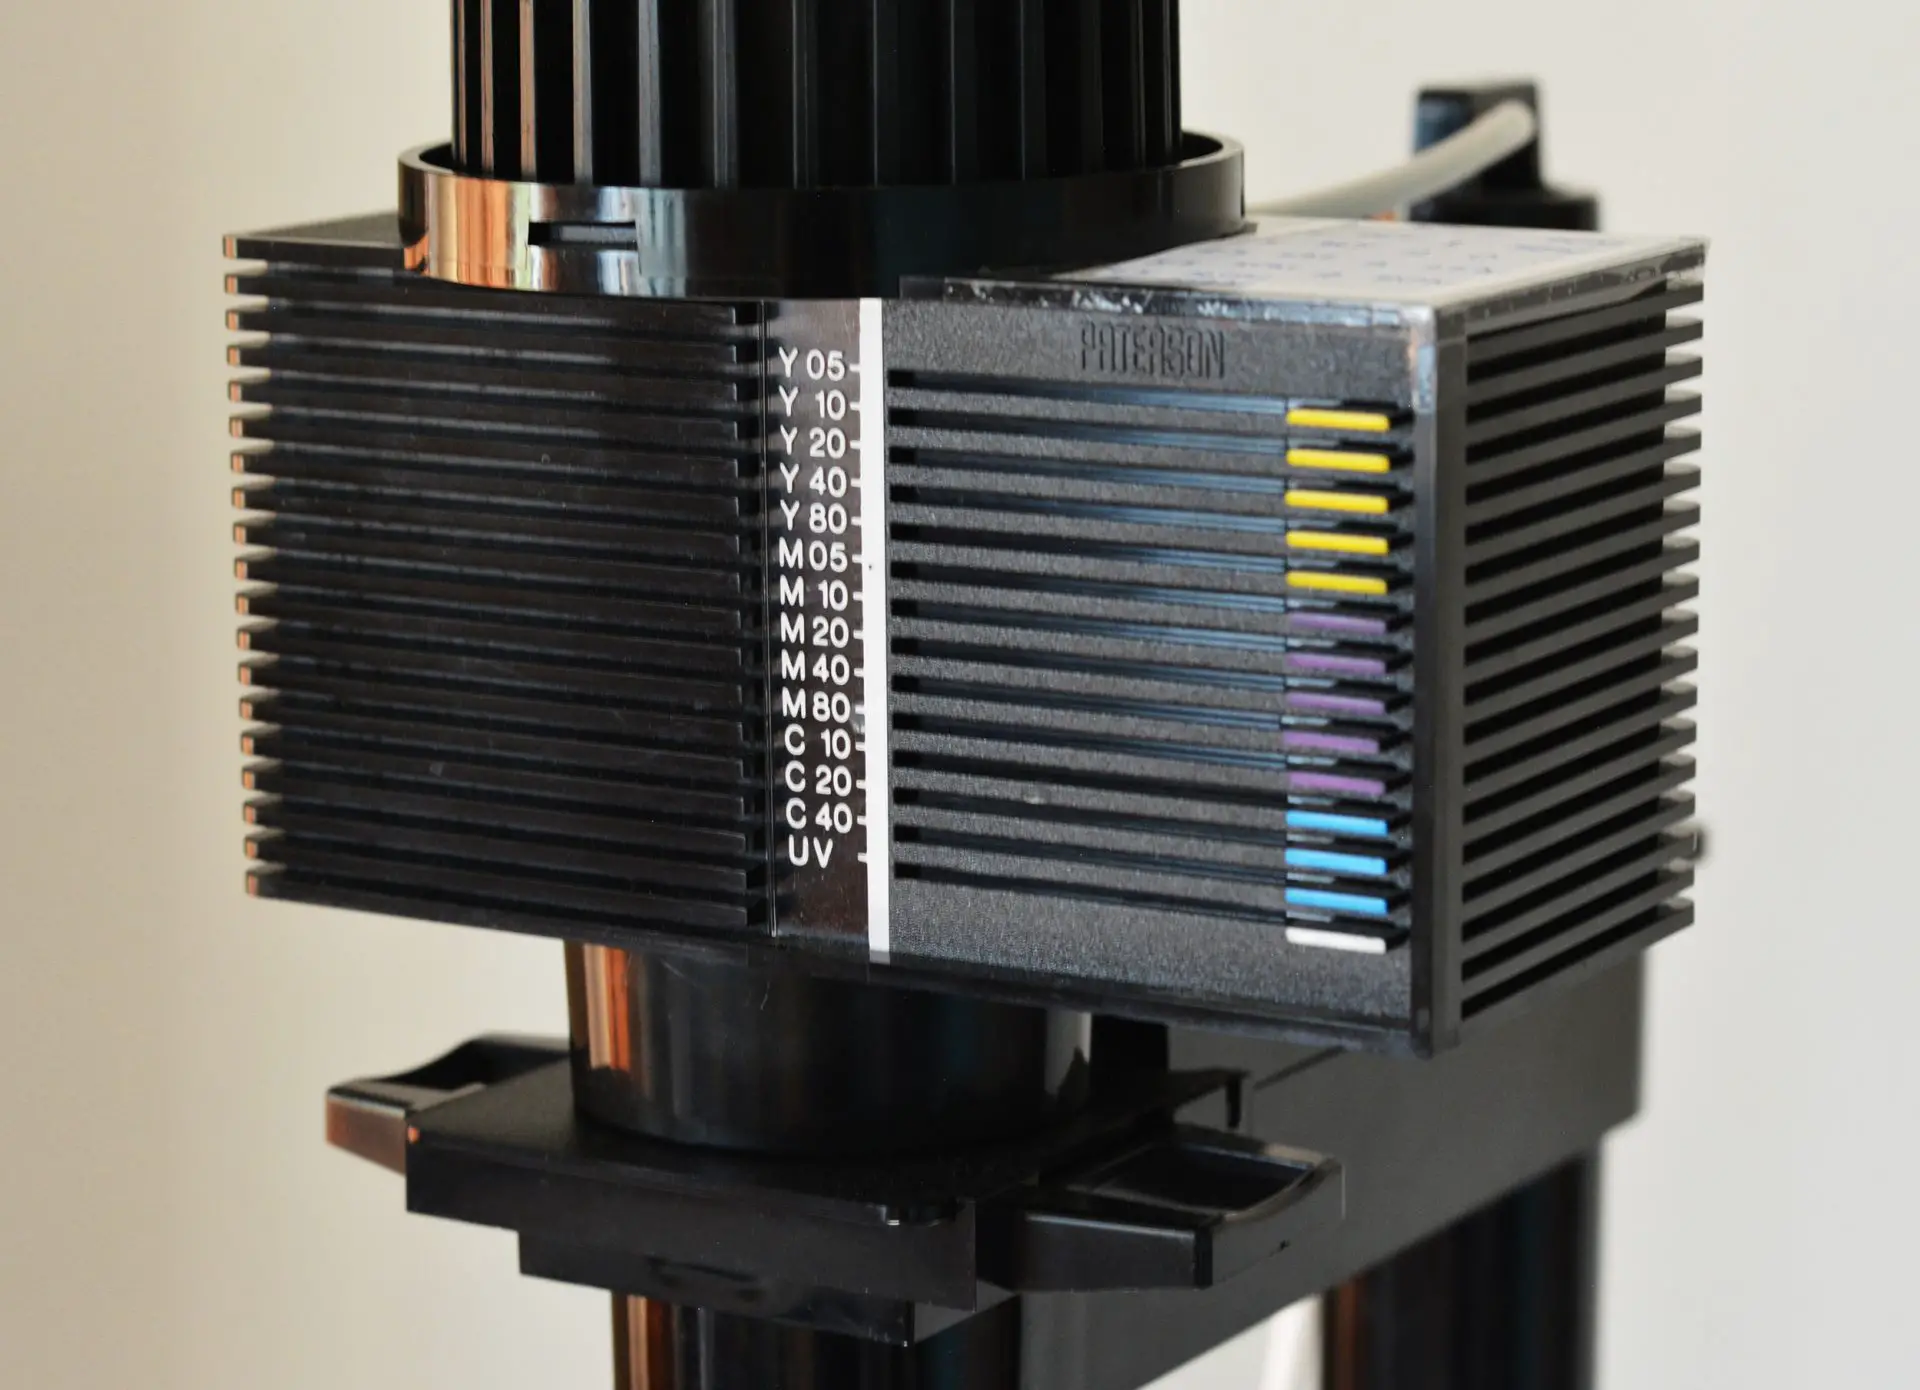
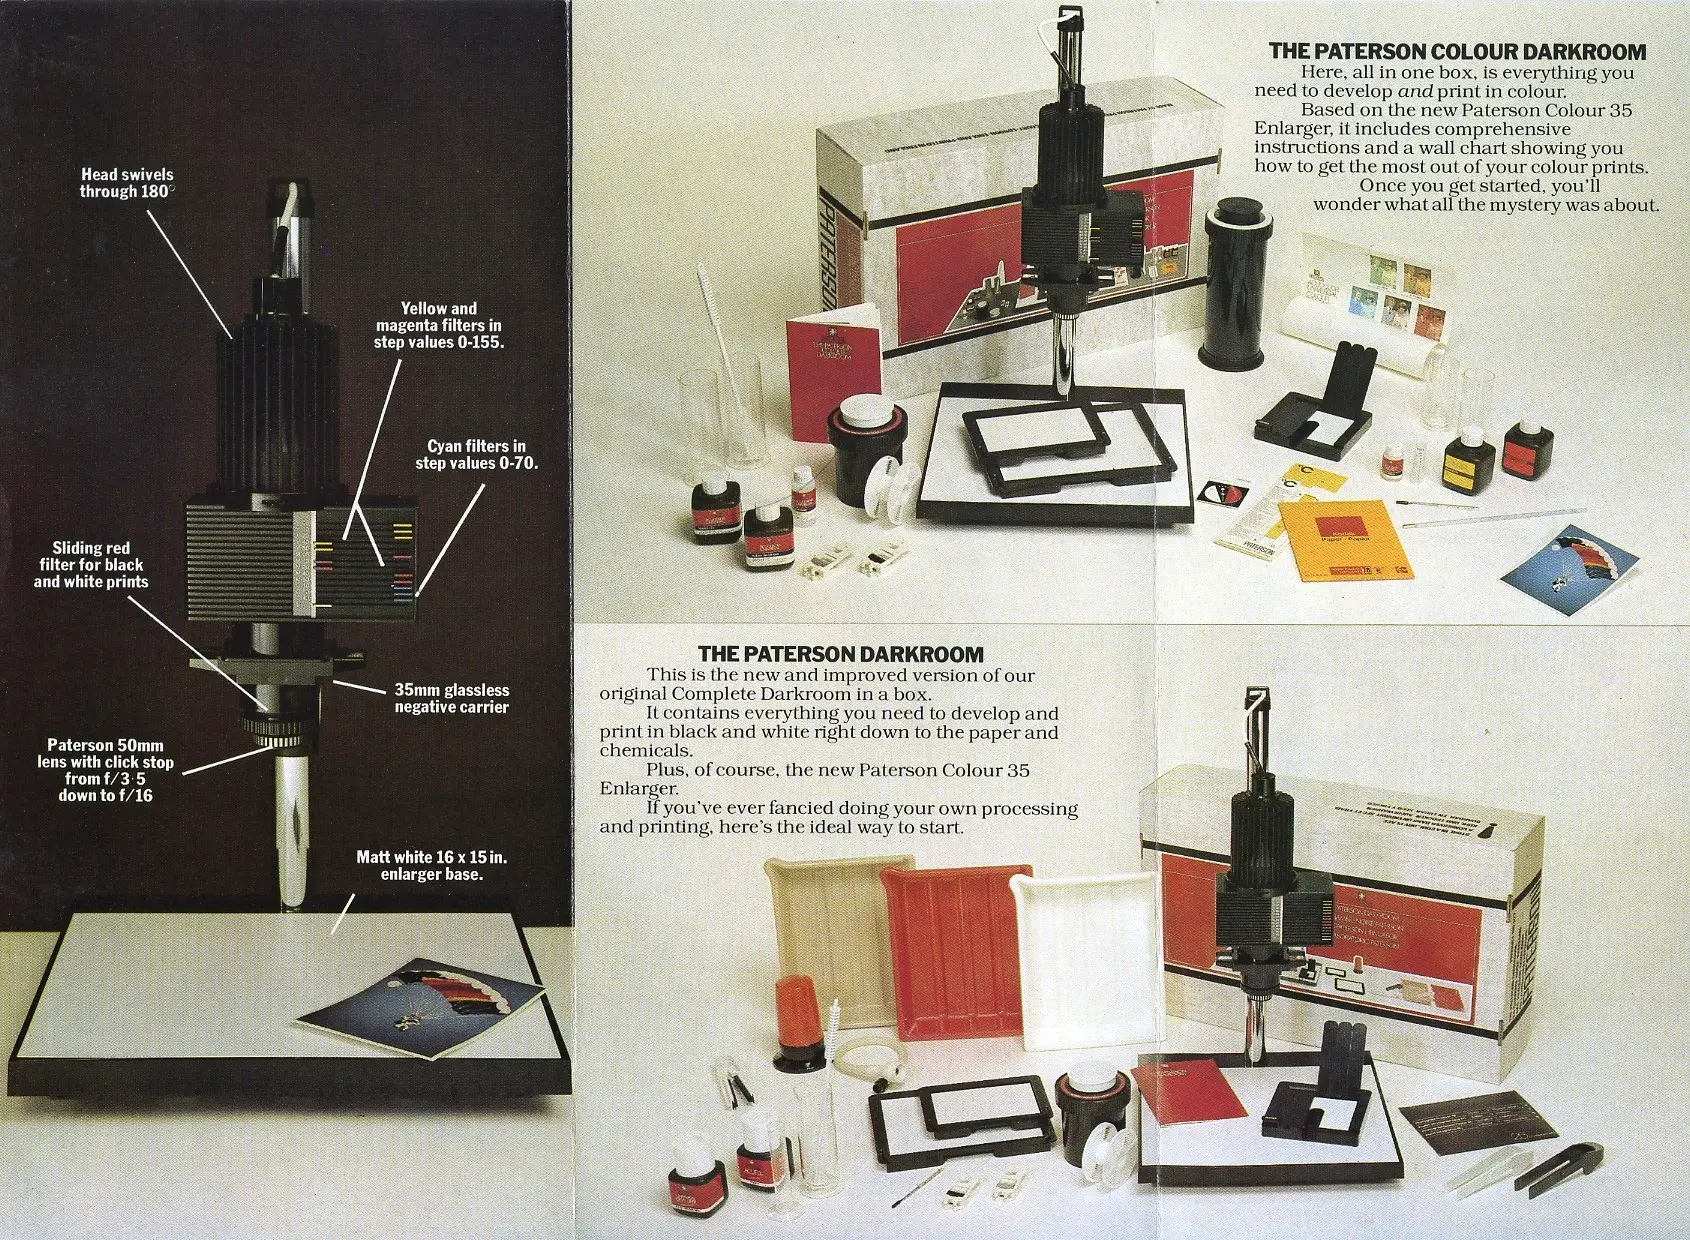
Mine is a colour enlarger. It has colour filters (technically a ‘dichroic filter head’) which, conveniently, can also be used for contrast control in black-and-white printing. Yellow filters reduce contrast and magenta filters increase it.
My enlarger also has a highly convenient red filter, which lets you view the projected image on the paper without exposing the paper (which is insensitive to red light). This makes it a cinch to position the paper accurately.
Some black-and-white enlargers have multigrade filters for variable contrast. If not, a basic set of Ilford multigrade filters can be bought new for less than £10 – but check first for compatibility with your enlarger.
Sourcing equipment
When I decided to try darkroom printing, I did some research and ultimately got myself a Paterson Colour Darkroom kit off eBay. It cost £71 including postage, and came in its original albeit slightly weathered box. It was missing a few of the original items, but it did have an enlarger (the most crucial component!), graduated vessel, trays and tongs. The only essentials it didn’t include are the timer and safelight (more on that below).
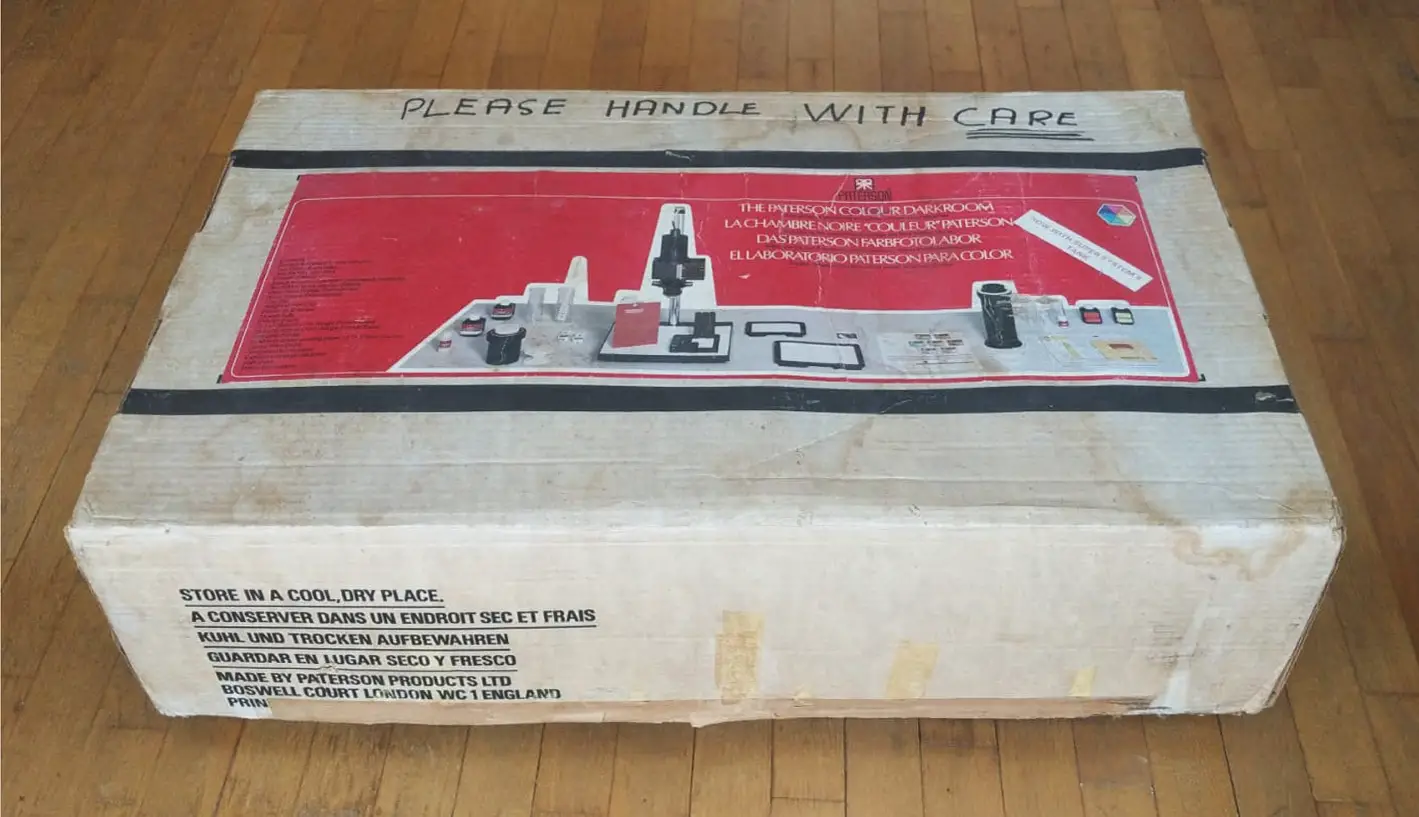
I see these Paterson kits come up about once a month on eBay UK, and they sell for around the same price as I paid for mine. So I’d say I got a decent deal, but not a once-in-a-lifetime deal… which means you can, too.
The Paterson is an entry-level kit from the early 1980s, targeted at the amateur market. I’ve also used my friend’s top-of-the-line Leitz Focomat V35, which is superior in every way.
Still, the Paterson works for me – and costs a fraction of the Leitz. Most other brands (Durst, Beseler, Omega, Meopta…) are equally good if not better. Gumtree, Facebook marketplace, workplace message-boards, flea markets, thrift stores and older relatives’ attics are all good hunting-grounds (of course, the usual used-equipment-buying warnings apply). I’ve also heard many stories of people getting enlargers for free, from retired photographers or (sadly) college darkrooms being closed down.
If you come across a good deal on an enlarger but are unsure if it fits your needs, just Google it, or post a question on one of the many darkroom-related online forums or Facebook groups. And if your enlarger doesn’t come with trays, tongs, etc., those are available on eBay too, at very reasonable prices.
Improvising the rest
As I said, my Paterson kit did not include two items which are in my ‘essentials’ list (see above), namely a timer and a safelight.
Timer
Dedicated darkroom timers can be connected to the enlarger. You pre-set the time you want to expose for, and the enlarger switches off automatically.
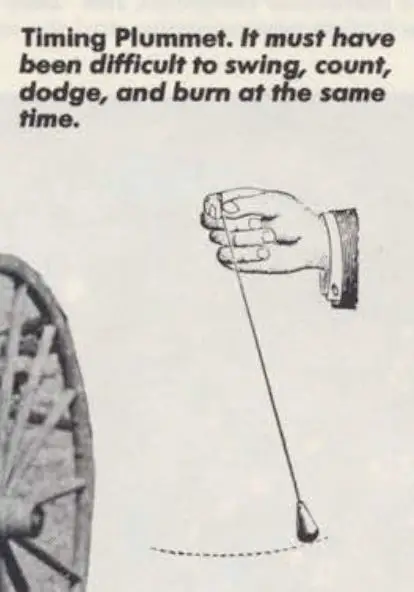
You can buy a used timer, or even make one, which I might try someday. Or if you’re lucky, your enlarger may already come with a timer. Mine didn’t. Instead I just use an ordinary analogue clock with a second hand. My enlarging times are seldom longer than 30 seconds, so I mentally count the seconds as I enlarge. Listening for the ticks is easier than watching the second hand, especially if I’m making test strips (see Part 2) or dodging/burning (see Part 5). If you don’t have a ticking clock, you can even use a simple metronome app on your phone – just keep the screen facing down.
Initially, counting seconds seemed a bit daunting on top of everything else, but I found it soon became second nature (though I am bad at multi-tasking in general). It may not be as precise as using a dedicated timer, but the difference between, say, 15 seconds and 15.5 seconds is 0.05 stops, which is imperceptible to the naked eye. Besides, I recently learned that counting seconds is what Ansel Adams used to do – and what’s good enough for him is good enough for me.
Safelight
Black-and-white photo papers are insensitive to amber and red light, but not all safelights are ‘safe’. Faulty safelights may leak yellow or white light which fog the paper. On the other hand, many light sources are effective safelights although they are not marketed as such.
Luckily, safeness is easy to test, using the ‘coin test’ described above. You can use any amber or red light, so long as you test it this way. My first safelight was a phone flashlight covered by the red filter from a pair of 3D glasses, propped up on a shelf.
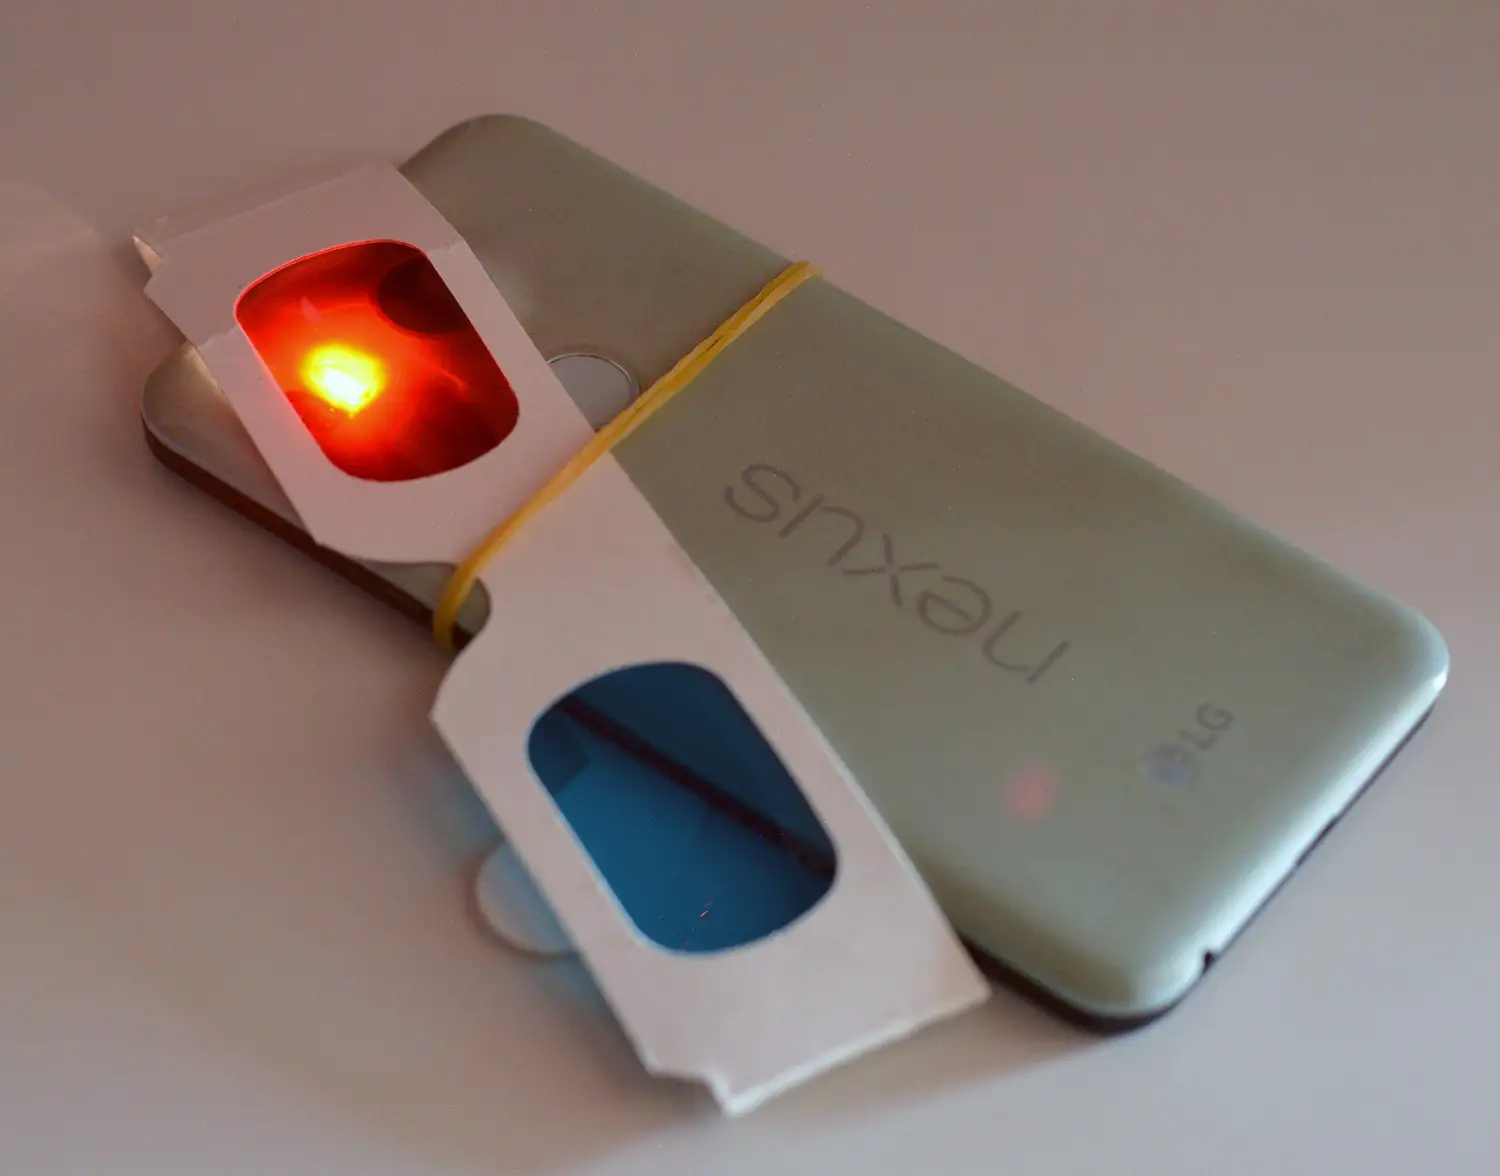
When I posted this photo to my Facebook darkroom group, it generated a good deal of amusement. Some kind people even offered to send me a spare safelight for free. I had to explain that I was not in dire need; I just wanted to see what I could get away with.
The phone light was however quite dim. A safelight need not shine with the power of a thousand suns, but it does need to be bright enough to let me read and write notes (see Part 3). So next, I switched to red LED bicycle lights.
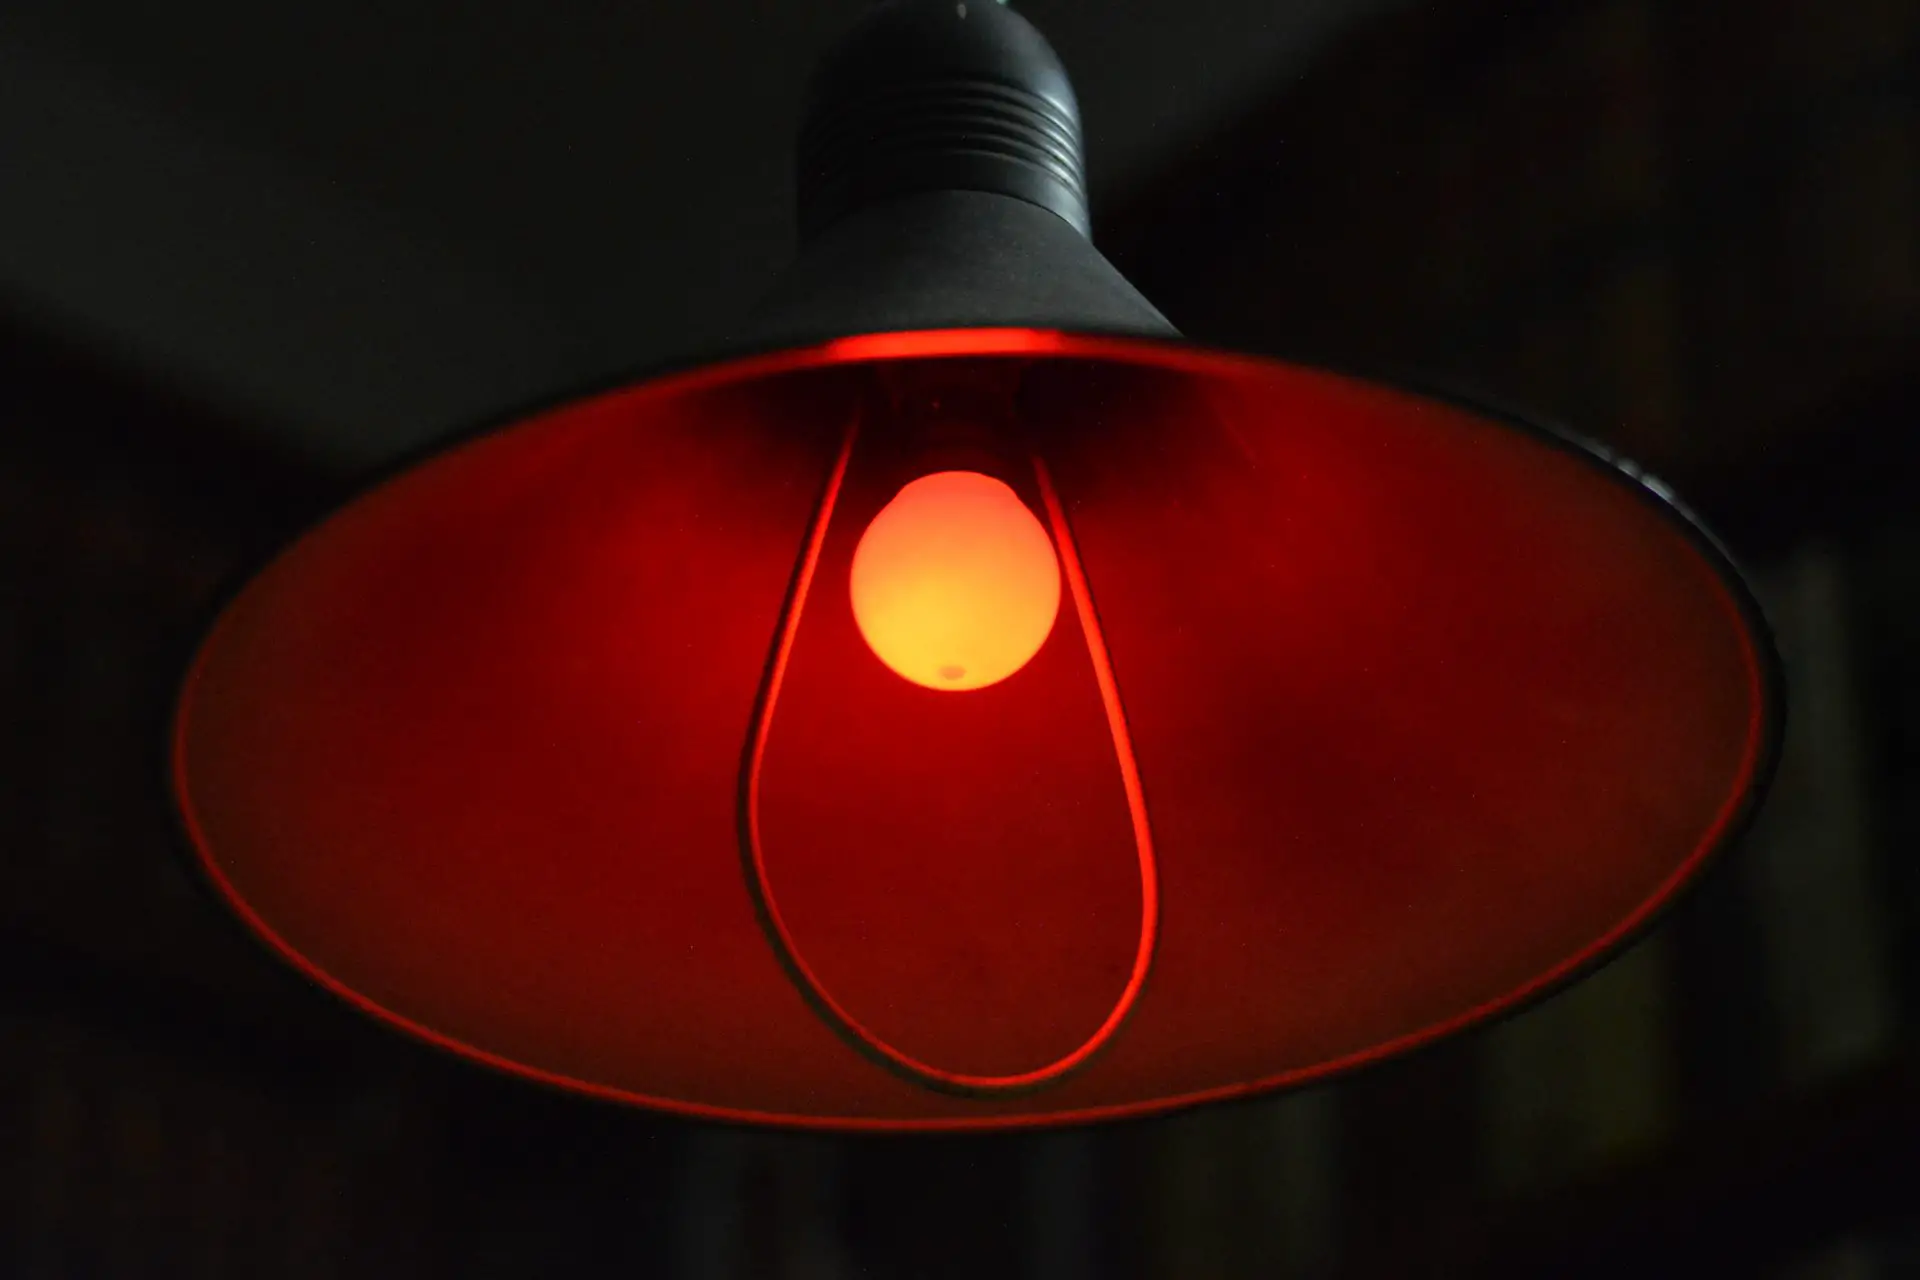
With time I got tired of having to go down and take lights off my bike every time I wanted to print, and finally I bought a 15W red bulb for £2 (bringing the total to £73). When I want to print, I simply swap out the regular lightbulb for my red bulb.
Nice-to-haves
The list of nice-to-haves is longer than the list of essentials – as in the darkroom, so also in life.
I’ve limited myself to three, but there’s all kinds of other stuff you could buy. Some, like squeegees and compressed-air blowers, are cheap. Others, like drying cabinets and densitometers, can be quite expensive.
Easel
My enlarger came with a baseboard, but not an easel. For a couple of weeks, I was printing on paper placed directly on the baseboard, covering the margins with rulers or books to make borders, but then I tired of it. A proper easel lets you position paper more accurately and securely, and the easel blades help a lot with borders (I’d say this is a nice-to-have bordering on an essential). I got my easel on eBay for £9.50 including shipping (bringing the total to £82.50).
Grain focuser
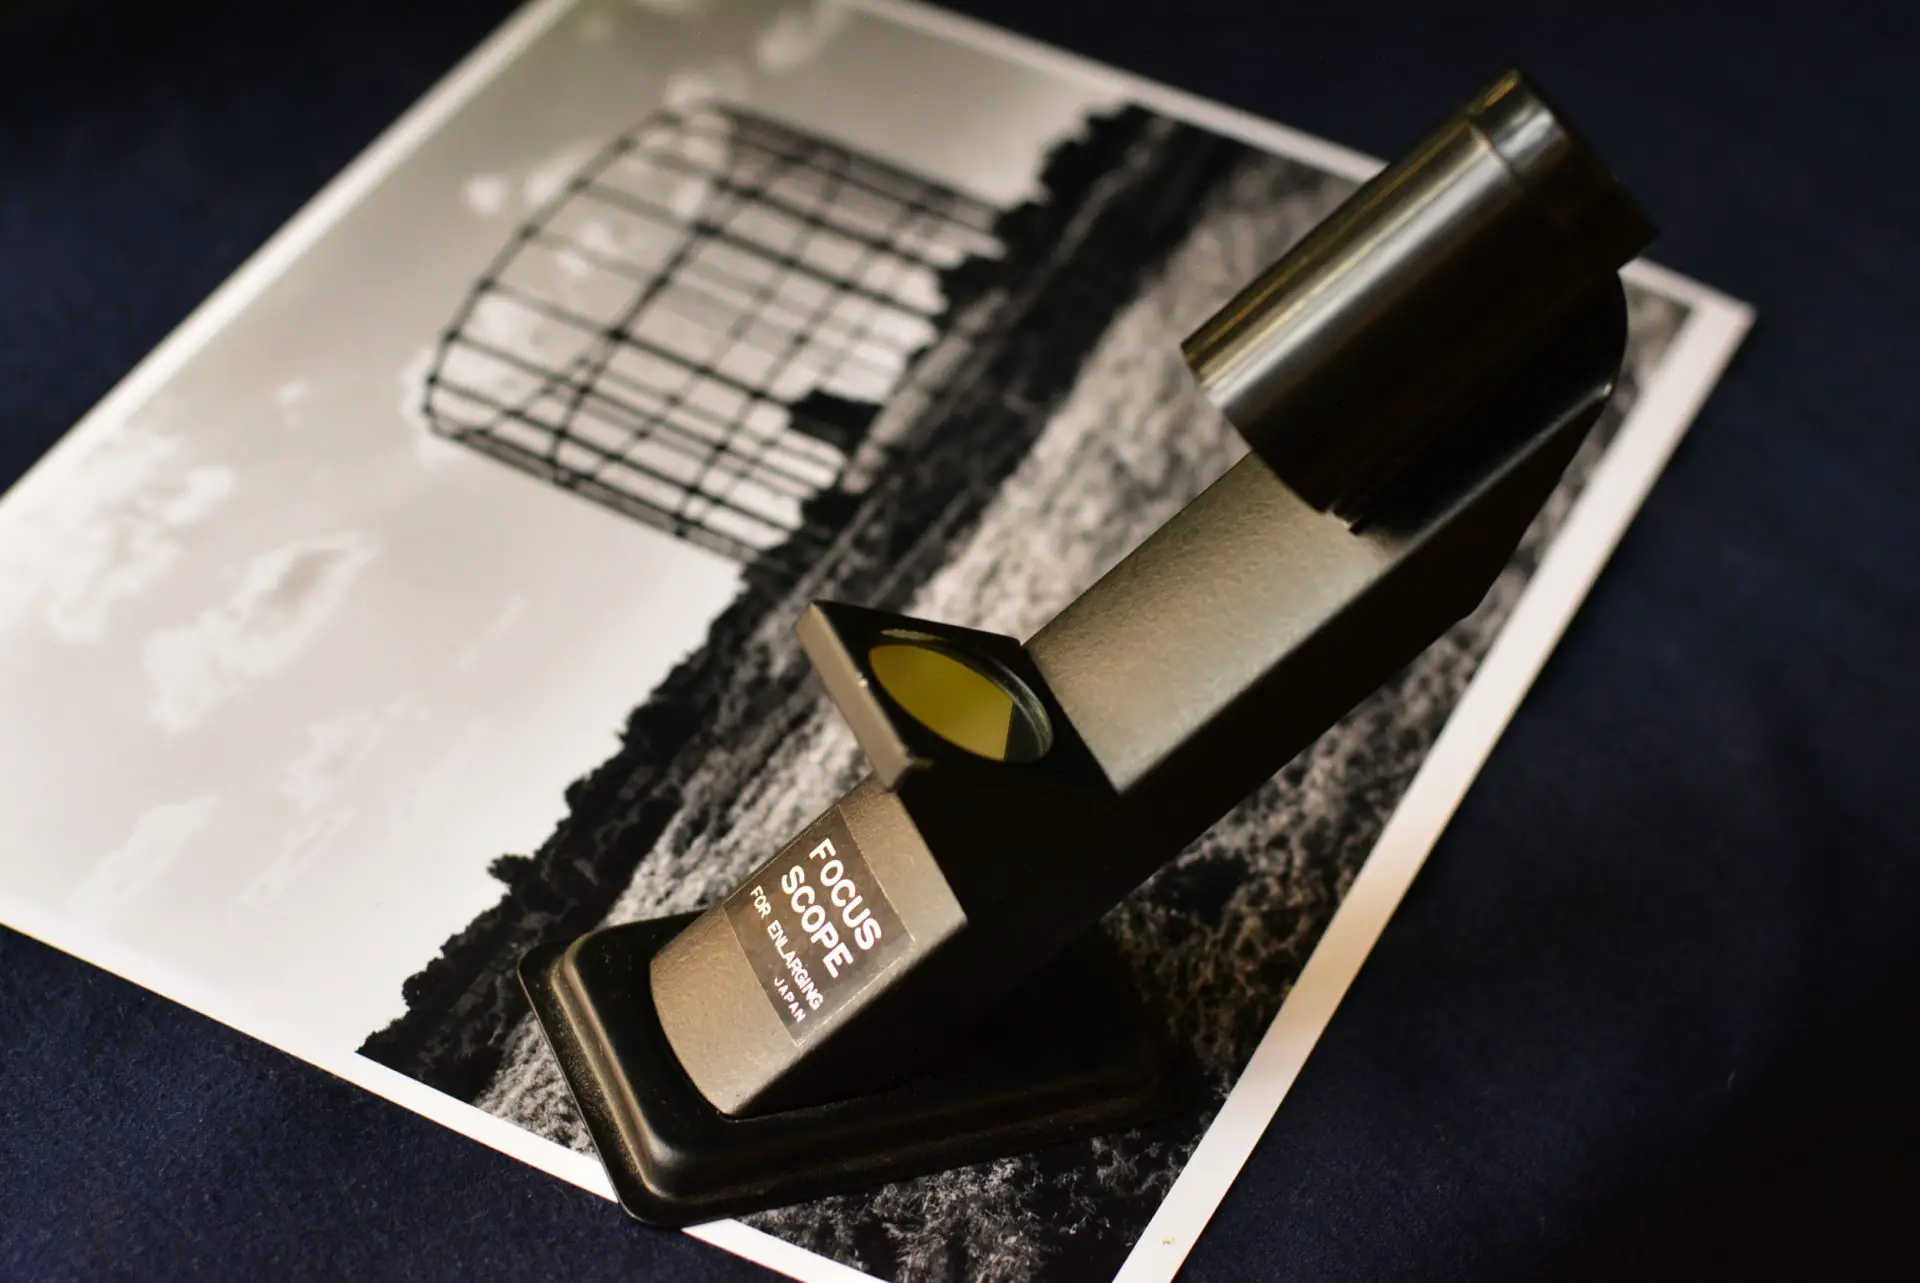
My Paterson kit came with a grain focuser. It helps with precise focusing, but I don’t consider it essential if you have good near vision.
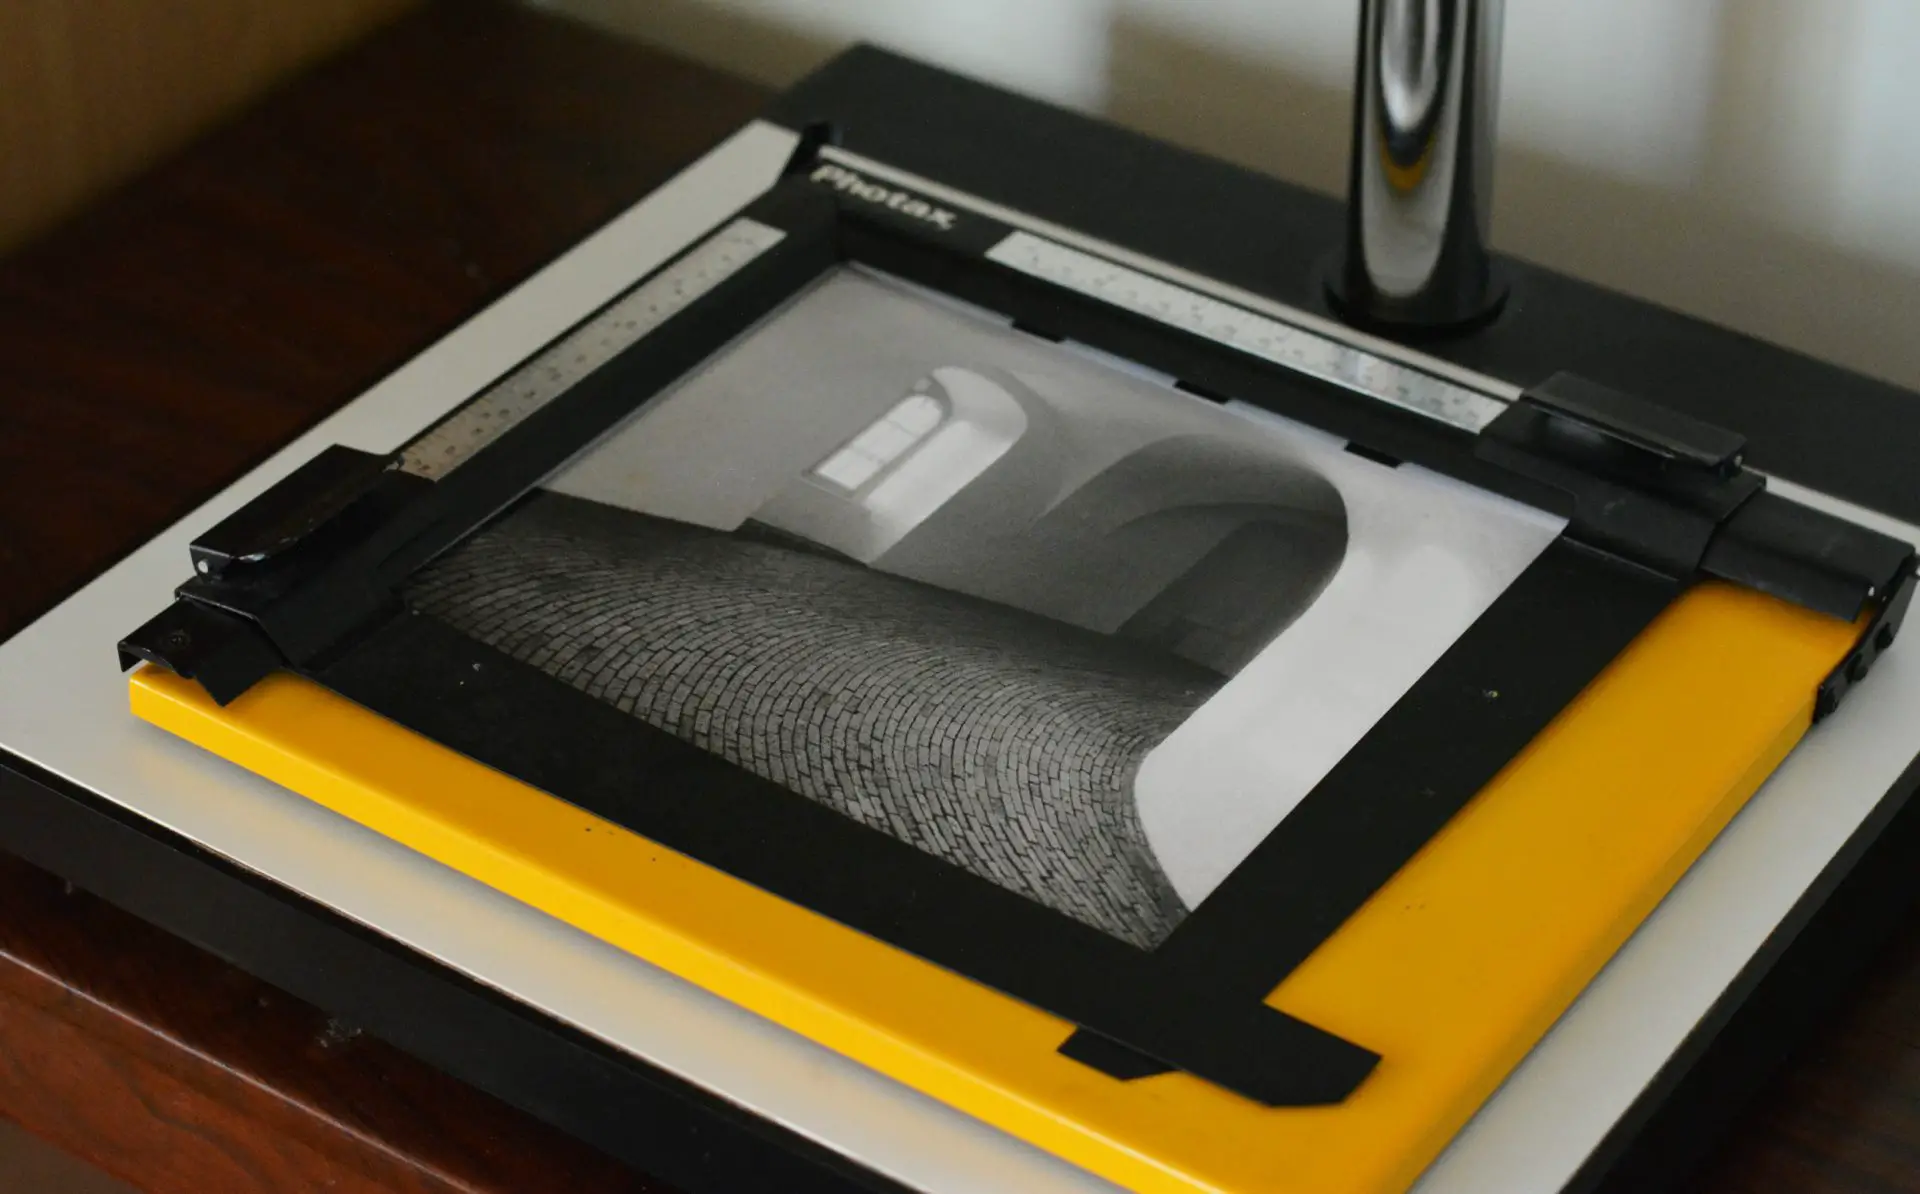
Contact-sheet printer
A few months after I set up my darkroom, I sold my first print: a long-exposure of Victorian-era gasworks in Greenwich, London.
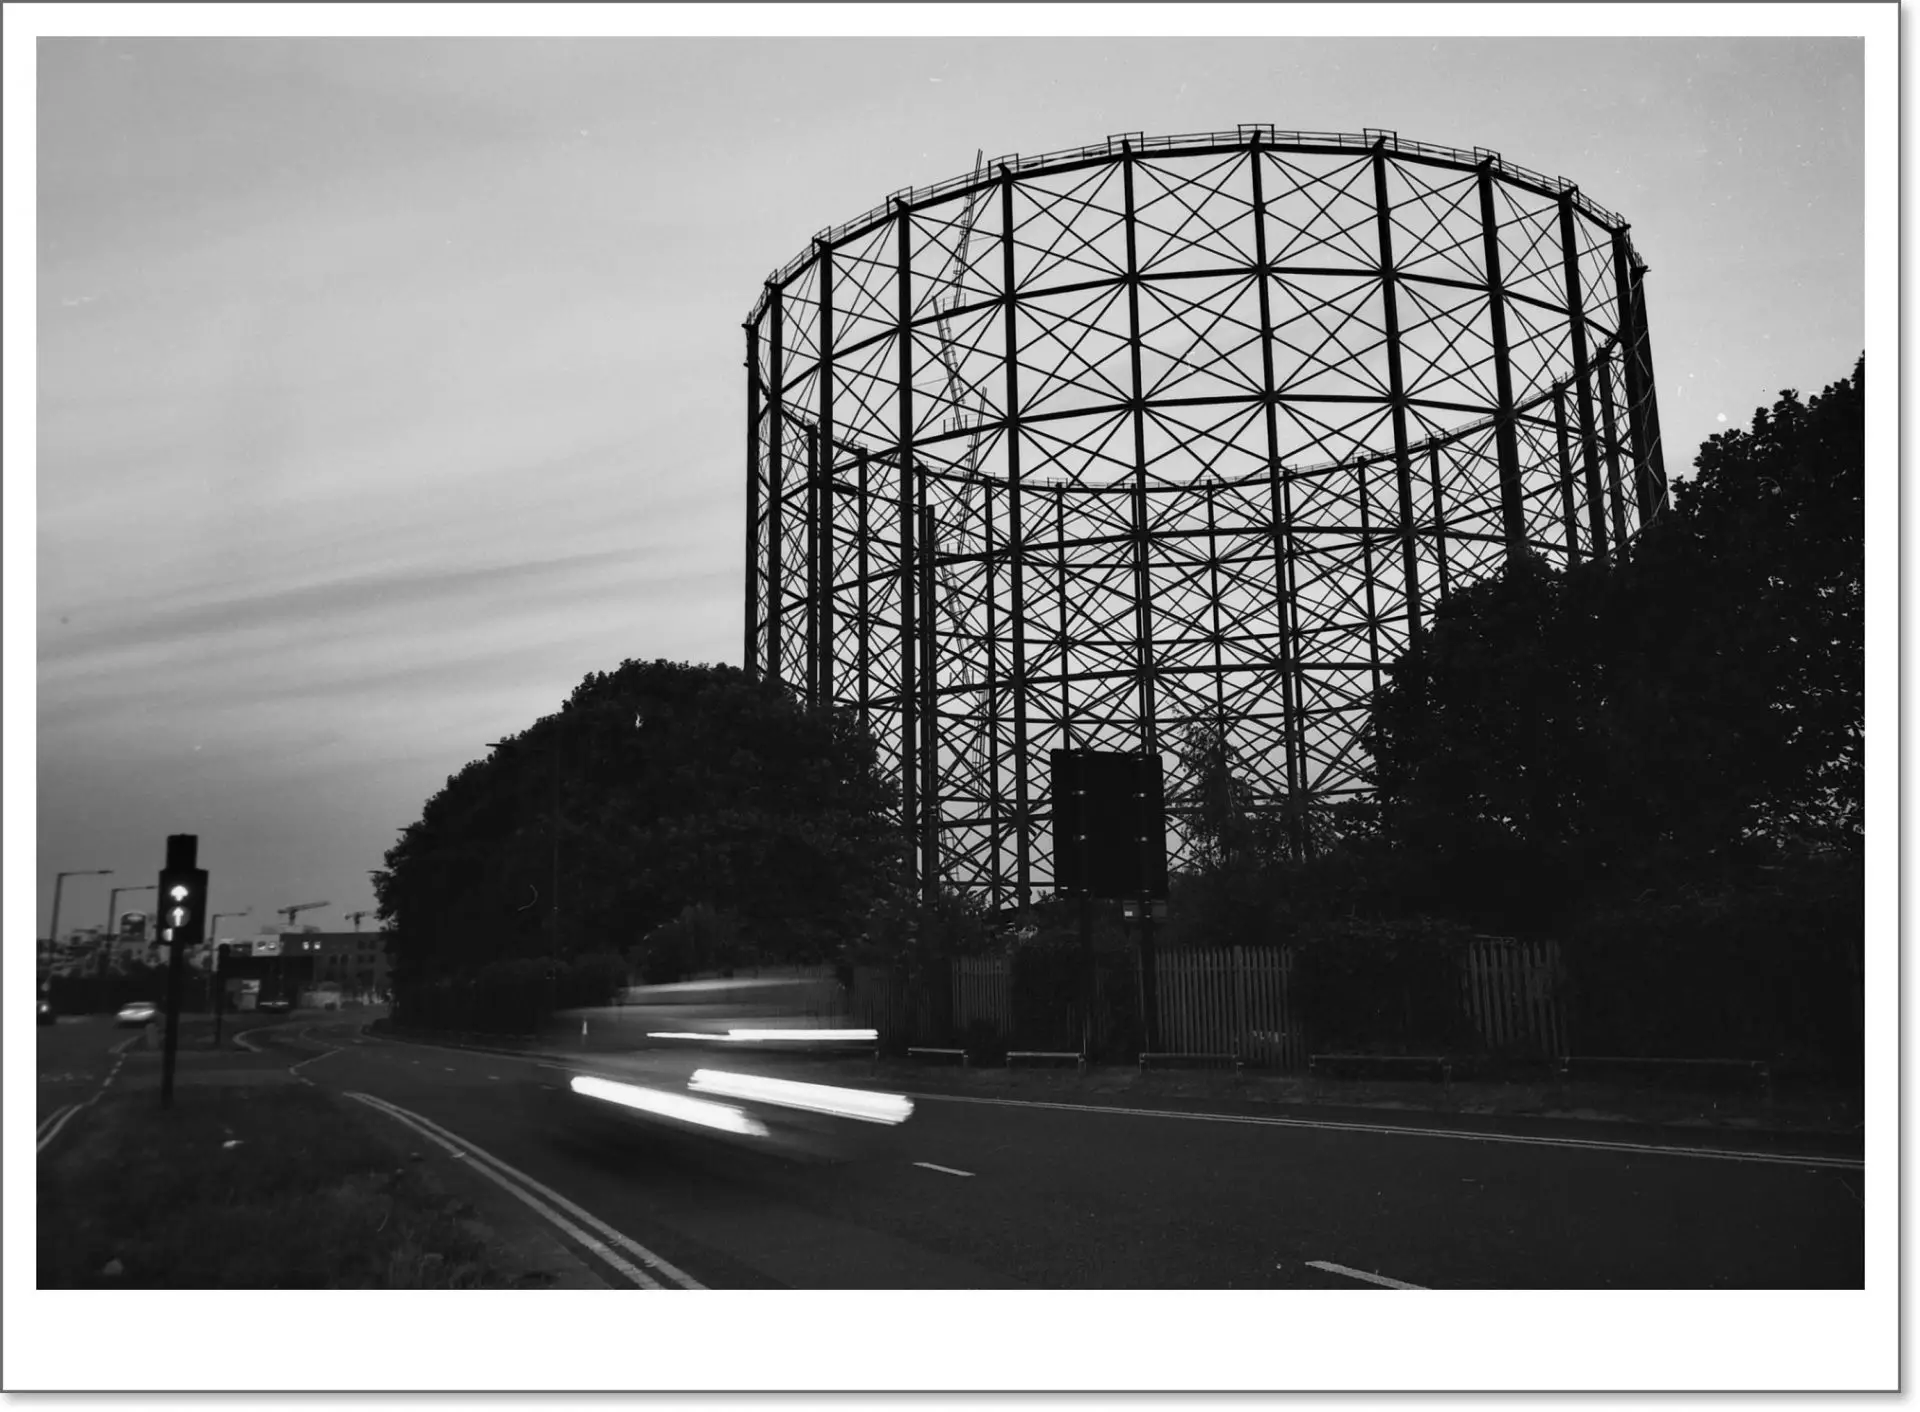
I had priced the print at only £10, but I thought I should use the proceeds to buy myself a darkroom indulgence. I finally settled on a contact-sheet printer from eBay, which was exactly £10 including shipping (bringing the total to £92.50).
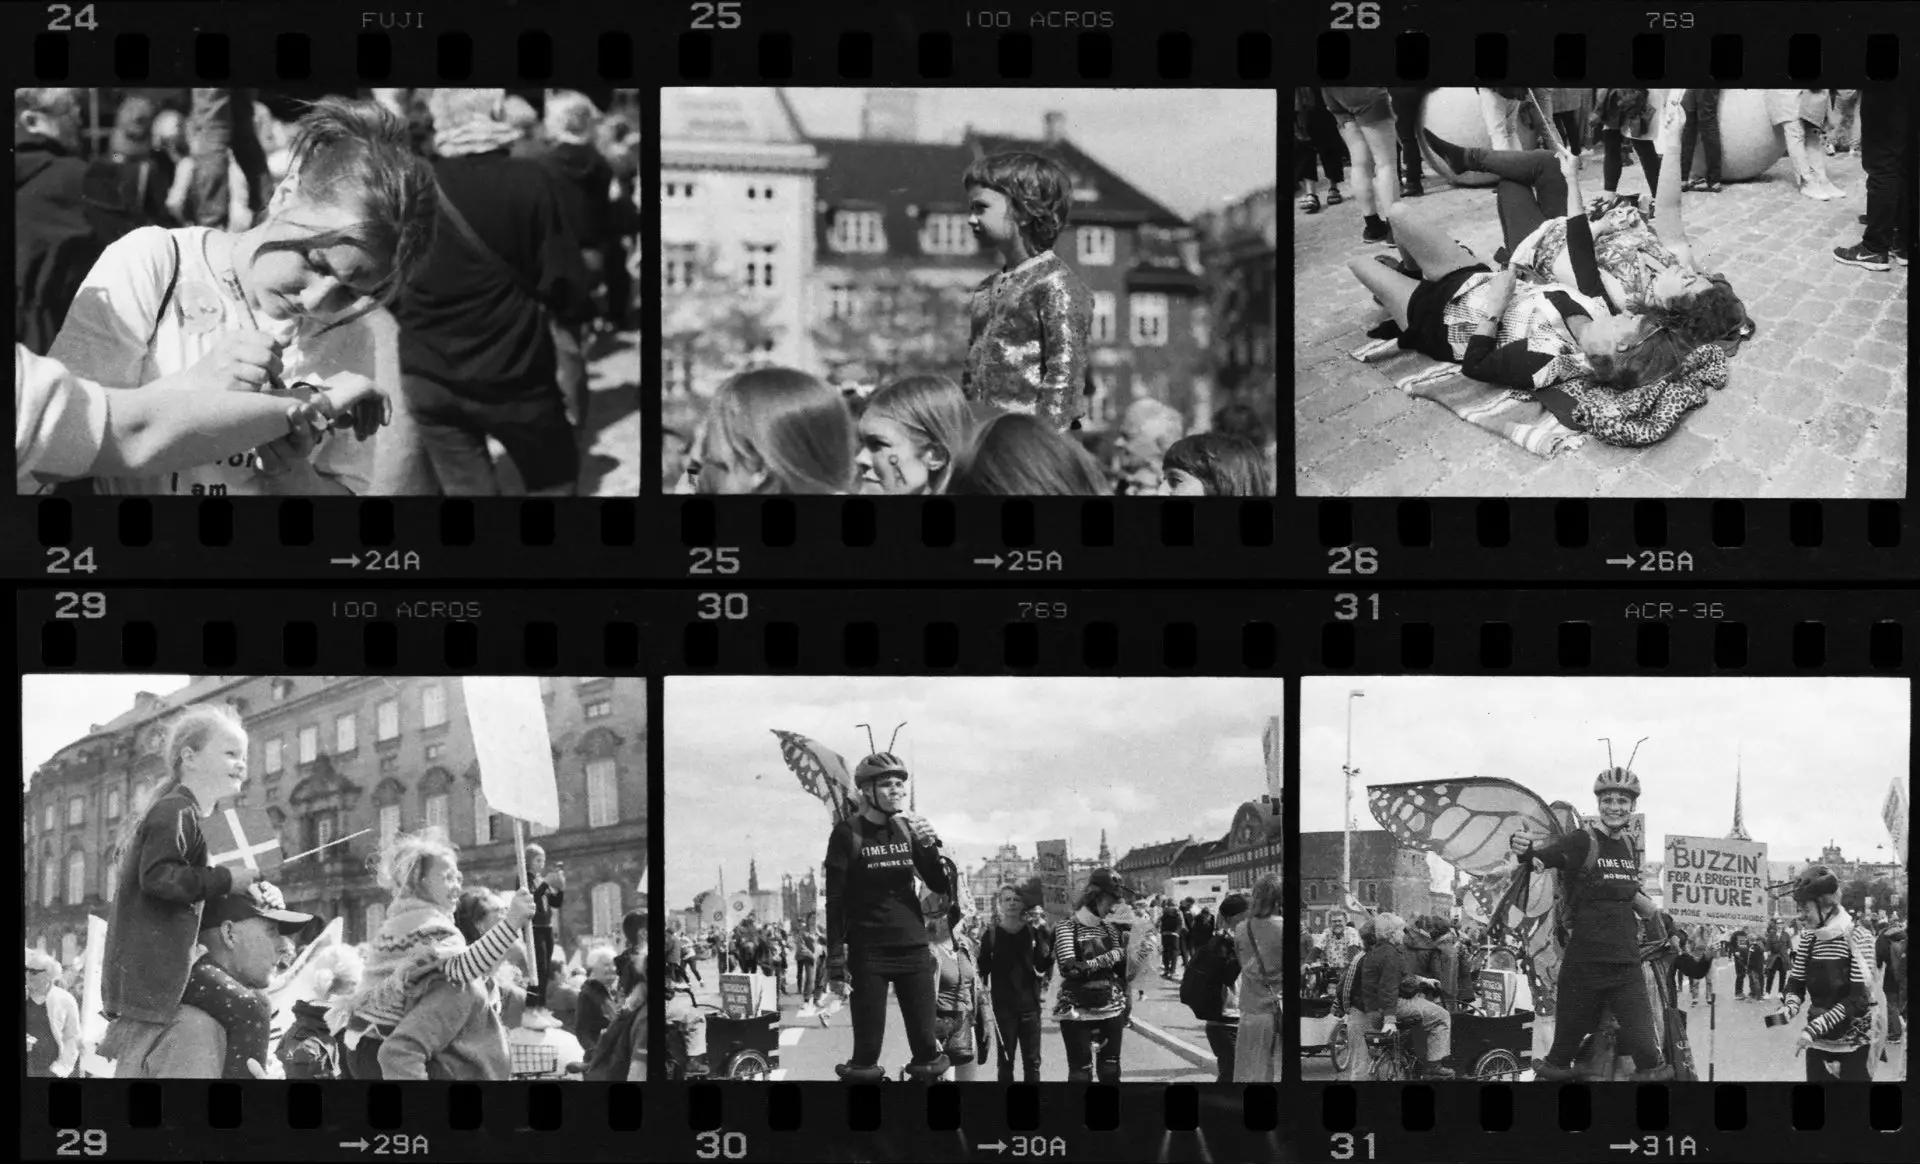
A contact sheet is a sequence of negatives printed directly on a sheet of paper (in fact, one of my favourite photography books is a compilation of Magnum contact sheets). The negatives are not enlarged but placed directly on – in ‘contact’ with – the paper itself. Contact sheets let you see a whole roll at a glance and identify the keepers. Since the whole roll is printed at the same enlarger setting, it also shows the exposure and contrast of individual photos, which informs how we might print it. In practice, I usually look at digital scans to decide which ones to print, but I sometimes print contact sheets anyway because I think they look extremely cool.
I used to print contact sheets using just a clear piece of glass to hold the negatives flat against the paper, but a contact-sheet printer is more convenient, and a nice memento of my first print sale.
Miscellaneous
Modifications
My enlarger column, unfortunately, has a small crack at its base, so it doesn’t stand rigid: the weight of the enlarger head gives it a slight forward tilt. This is not good. If the negative and lens planes are not parallel to the easel, the print will not be sharp all over and may even be distorted. This effect can be exploited for creative purposes (as Nigel Henderson did with his Stressed Photographs), but is clearly not ideal for regular printing. I fix this by the low-tech but effective means of tying the enlarger column to a bookshelf behind it; the tension keeps it level.
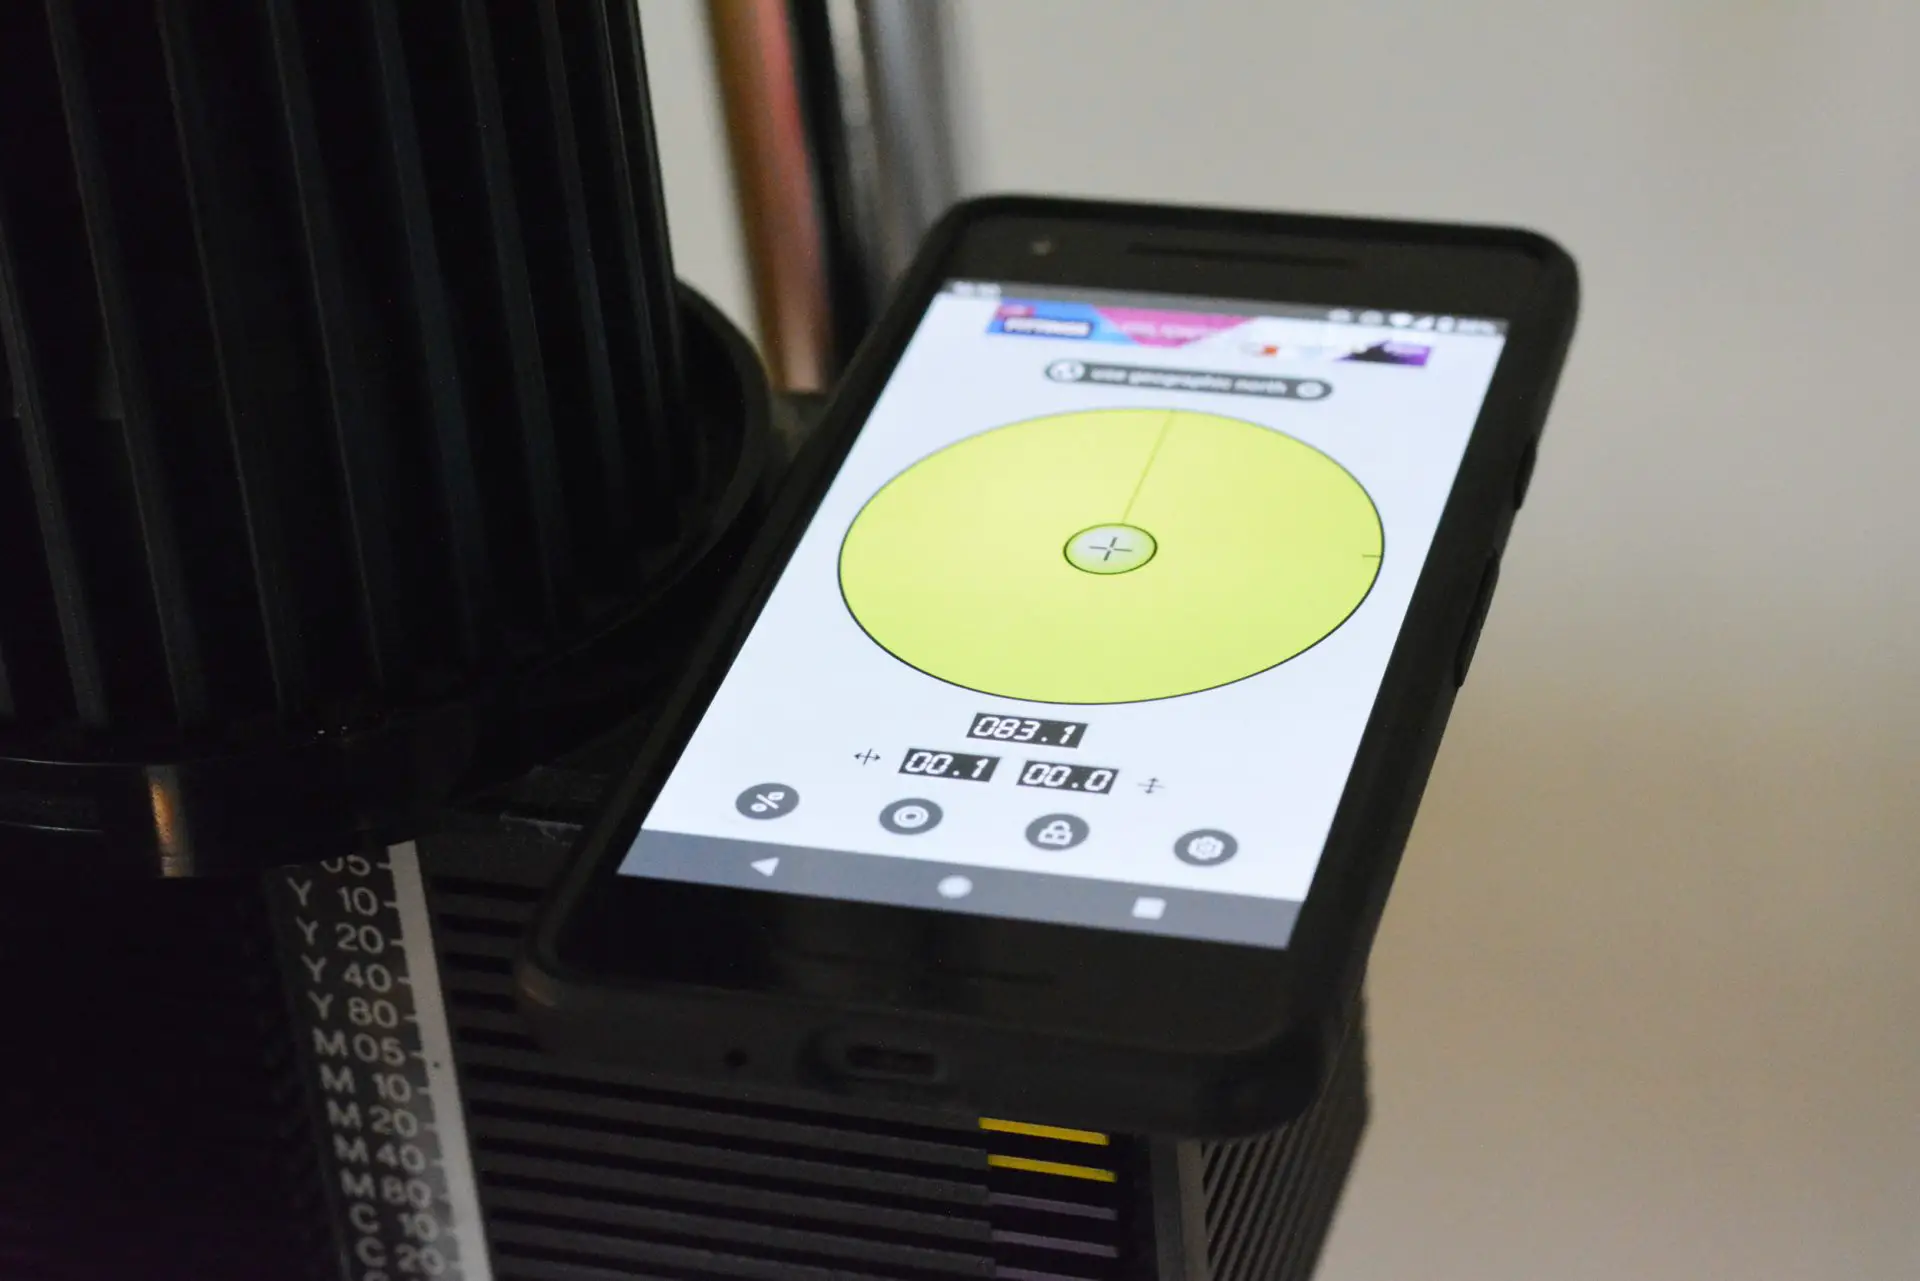
As with light-proofing (see above), my approach is to do a quick-and-dirty fix (with rope, in this case), and then test. To check that your enlarger is correctly aligned – which I recommend even if you don’t have an obvious issue like mine – there’s the time-honoured negative scratch method. For a quick check, you can even use a bubble-level phone app.
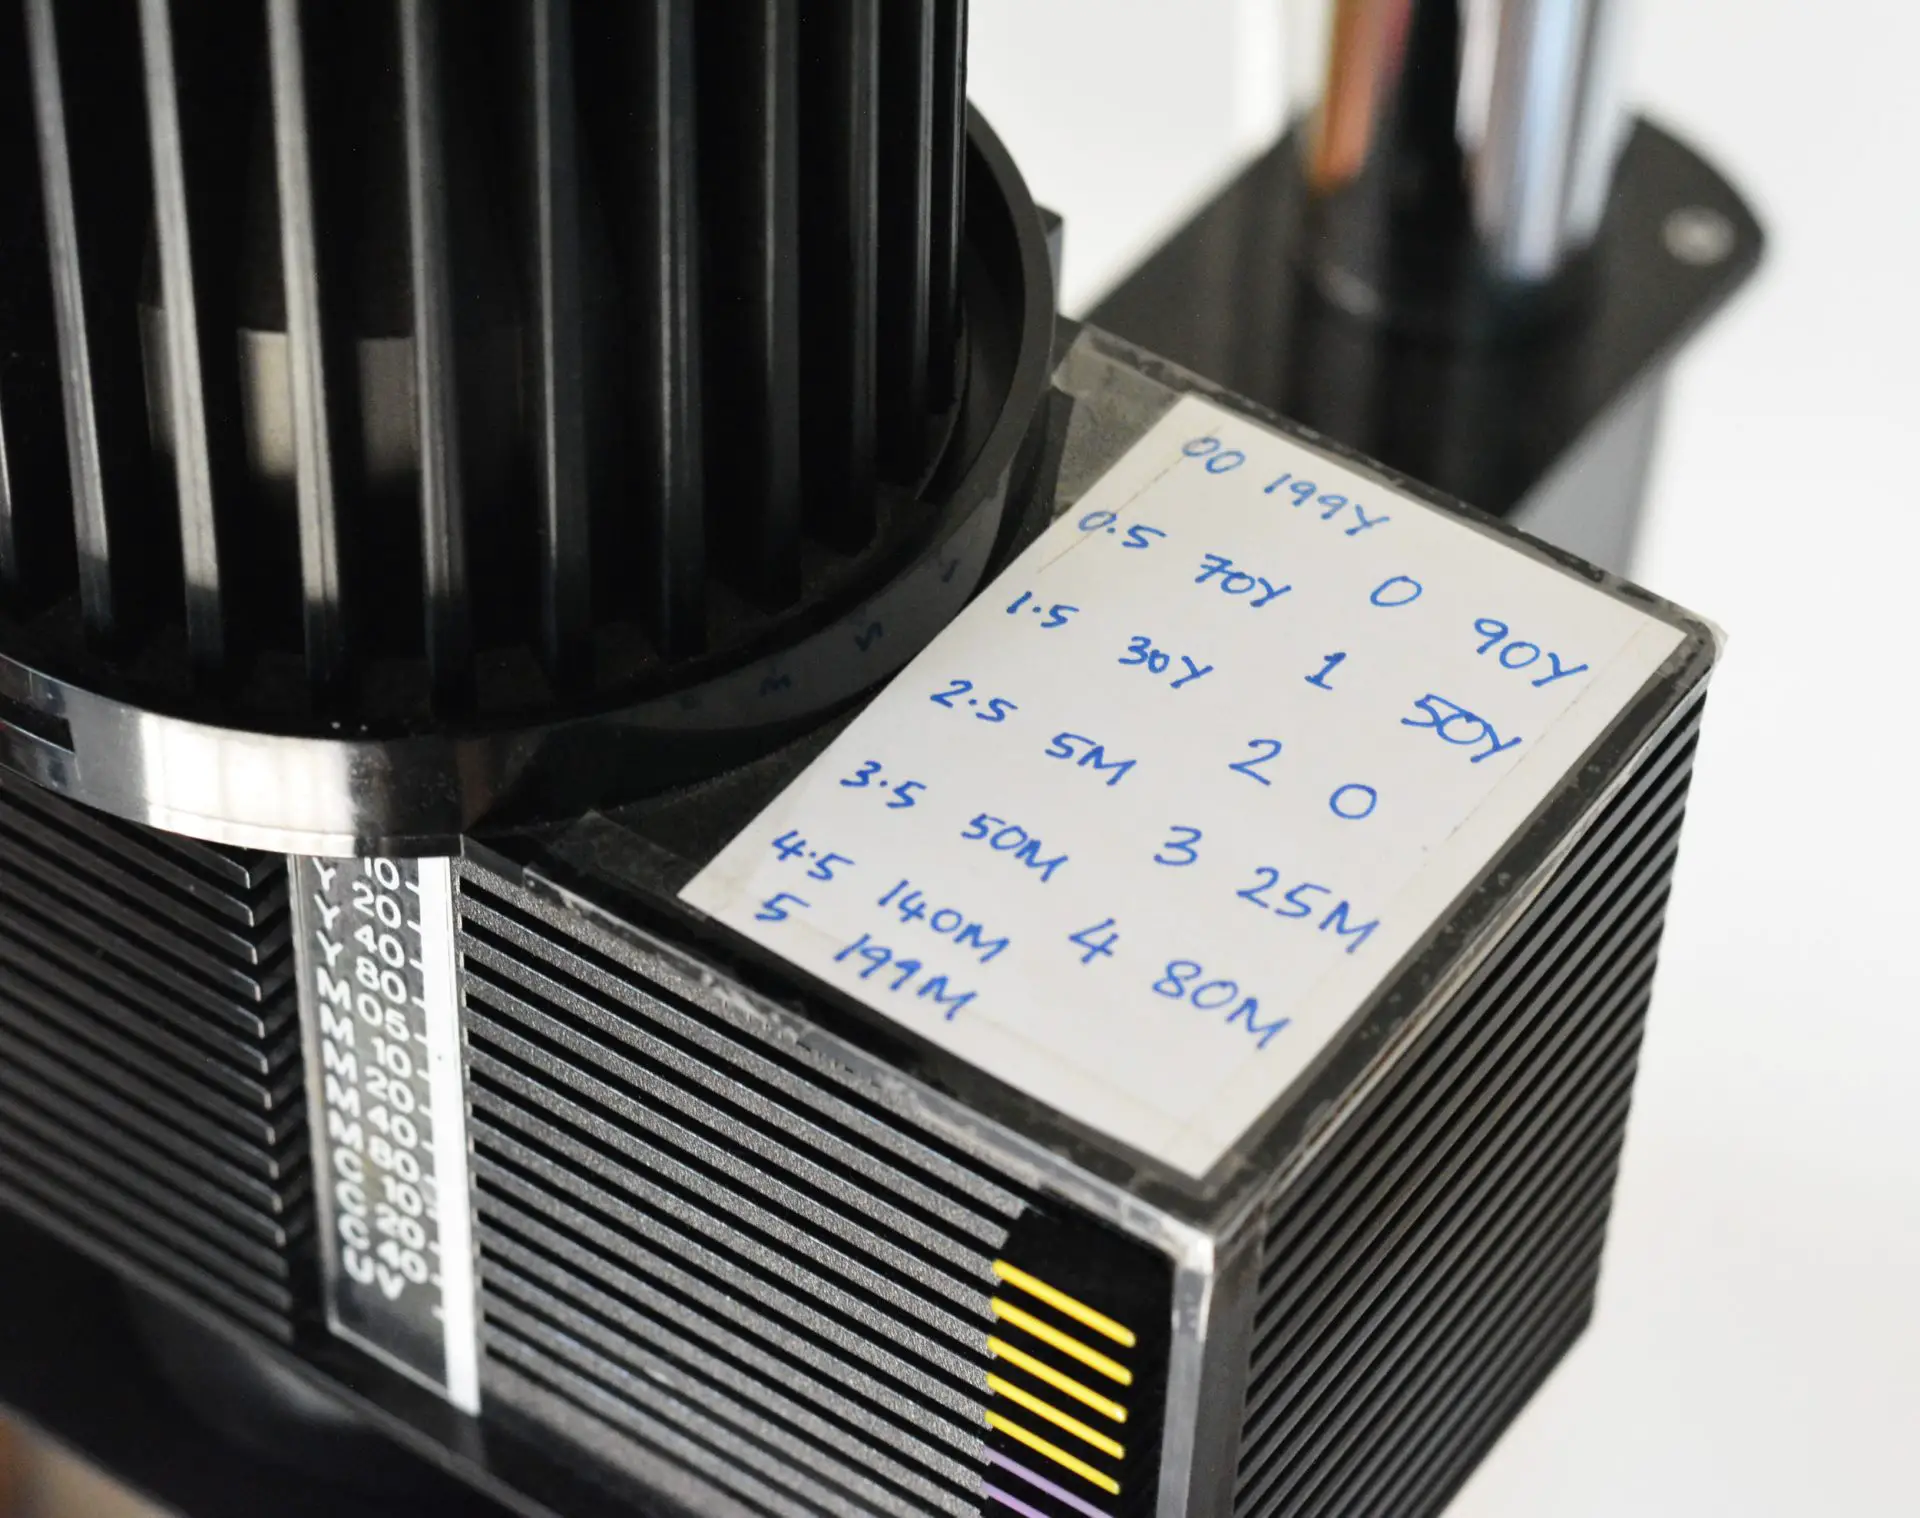
A smaller modification was to tape a card to the enlarger head, as a reminder of the filter settings for various contrast grades (I got this idea from Way Beyond Monochrome by Lambrecht and Woodhouse). Manufacturers of variable contrast paper, like Ilford, publish tables with such information, but it helps to have a ready reference while printing.
Household items
Everything else I need, I had at home – and you probably do too. Wine bottles to store chemicals, a plastic spoon for a stirring-rod, dodging and burning tools made from cardboard and wire (see Part 5), clothes pegs for drying prints, basic stationery like ruler, scissors, marker pens and so on. As I said, I haven’t counted these costs in my total.
Less/more
In summary, my total set-up cost, including shipping, was:
£71 (Paterson kit including enlarger, graduated vessel, trays and tongs)
£2 (red bulb)
£9.50 (easel)
£10 (contact-sheet printer)
Total: £92.50
Perhaps even more importantly, I didn’t need a dedicated darkroom space – just an easily light-proofable hallway and a sideboard.
But what if you do have space, or if you’re not on a shoestring budget? Well, congratulations on getting this far, but you’ve been reading the wrong article! Fritz Nordengren over on Emulsive talks about how to set up a darkroom for under $500 (note that he had a dedicated darkroom space already). Elsewhere on this site, Dan Castelli describes how he renovated and outfitted his (enviably well-equipped) darkroom. Or perhaps, you could set up a low-cost darkroom anyway, and spend the spare cash on more paper and chemistry.
I don’t mean to suggest there’s something morally superior about a low-cost darkroom – far from it. If I had the space, I’d build a dedicated darkroom. If I won the lottery, I’d buy more and better equipment. But building a darkroom on a small budget is not just about saving money. Along the way, it taught me the value of trying to get the best possible results with minimal gear, creative problem-solving, and to some extent accepting, perhaps even embracing, small inconveniences and imperfections.
Inspiration
But a lot of photographers recoil from inconveniences and imperfections, and most of us love buying gear. Perhaps for that reason, many books and websites make darkroom set-up seem more elaborate and expensive than it needs to be. In this article I’ve tried to counter this with the example of my functional but cheap darkroom, and reflections on my general approach. Of course, that is not to encourage others to replicate my set-up. It’s more about an attitude – or a philosophy, if you will: being frugal, flexible and resourceful, but without compromising the quality of the final print. The idea is to start with that approach, and adapt it to your unique circumstances.
So in addition to my darkroom, I thought it would be fun to reach out to other people who share the same philosophy, and take a glimpse into their darkrooms. To that end, I posted on my Facebook darkroom group, asking for examples of creative use of space. The thread garnered 99 comments(!) including some real gems. I present four examples below, with the contributors’ permission of course.
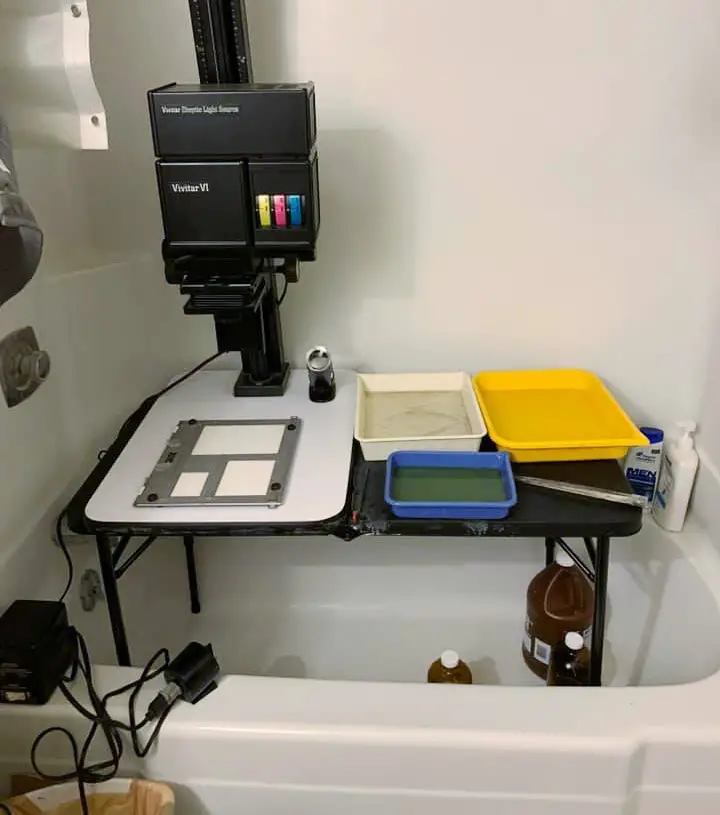
Hunter’s darkroom
Hunter Menzel from Wyoming sets up his enlarger in his bathtub, on a folding table from Costco. He says the hardest part is bringing everything upstairs from the basement. “But once it’s all in place, I can develop and print all day.” Hunter got his whole darkroom from a teacher who was retiring. He had to drive across two states to get it, but it was all free.
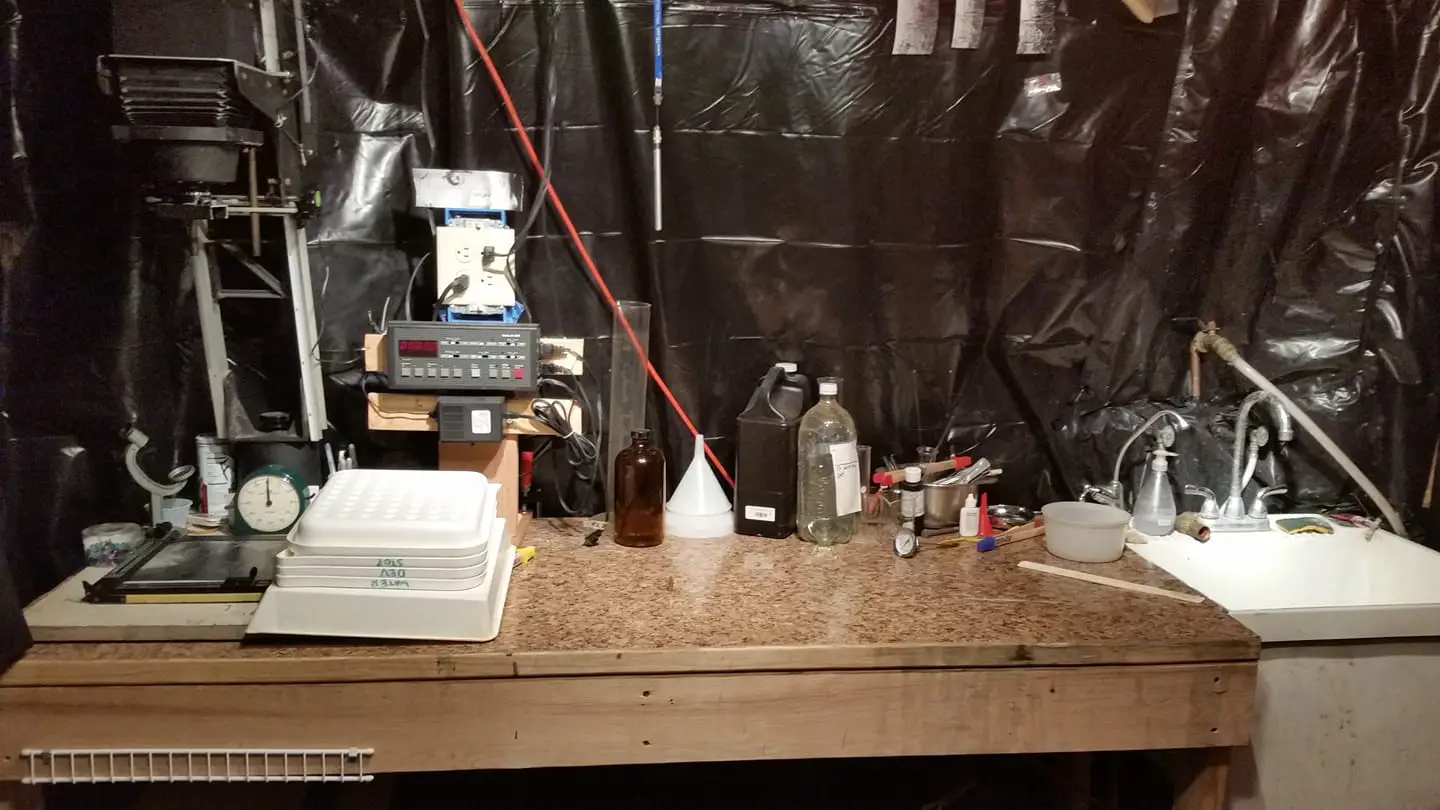
Natalie’s darkroom
Natalie from Pennsylvania has converted a corner of her basement into a darkroom, using a wooden frame covered with black plastic tarp.

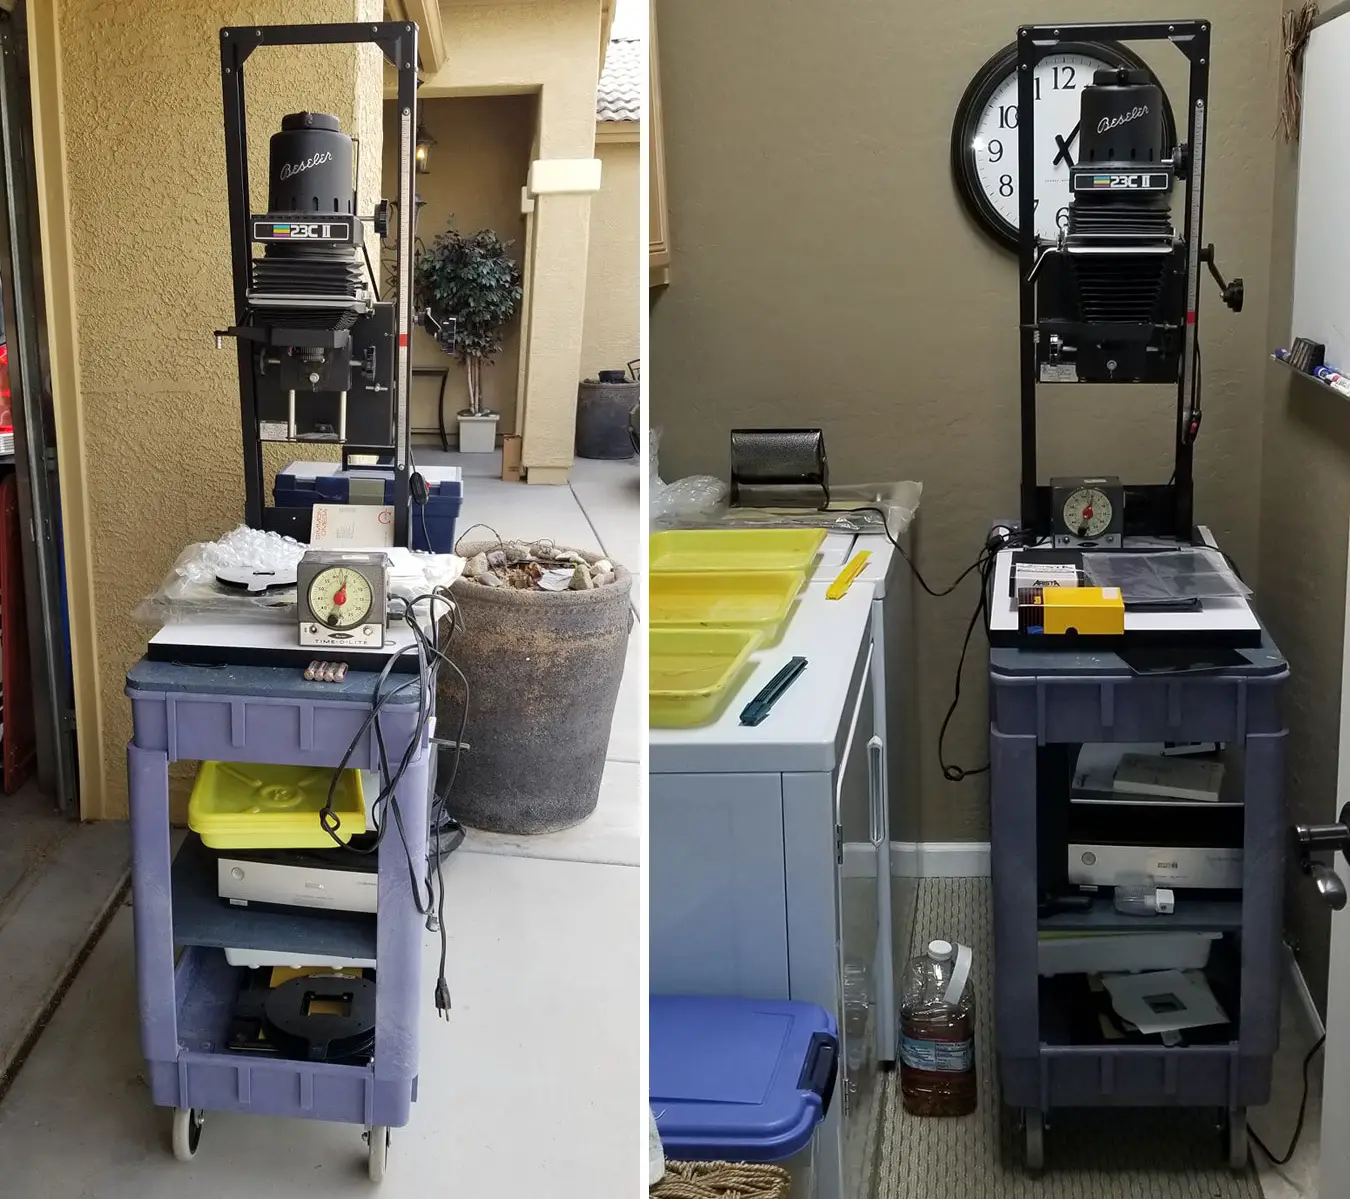
Patrick’s darkroom
Patrick Rapps from Arizona has his enlarger on a cart, with shelves for trays and a timer. He keeps his cart in the garage. “For printing, I just roll it up next to washer and dryer, set trays on them and go to work,” he explains – like it’s the most natural thing in the world.
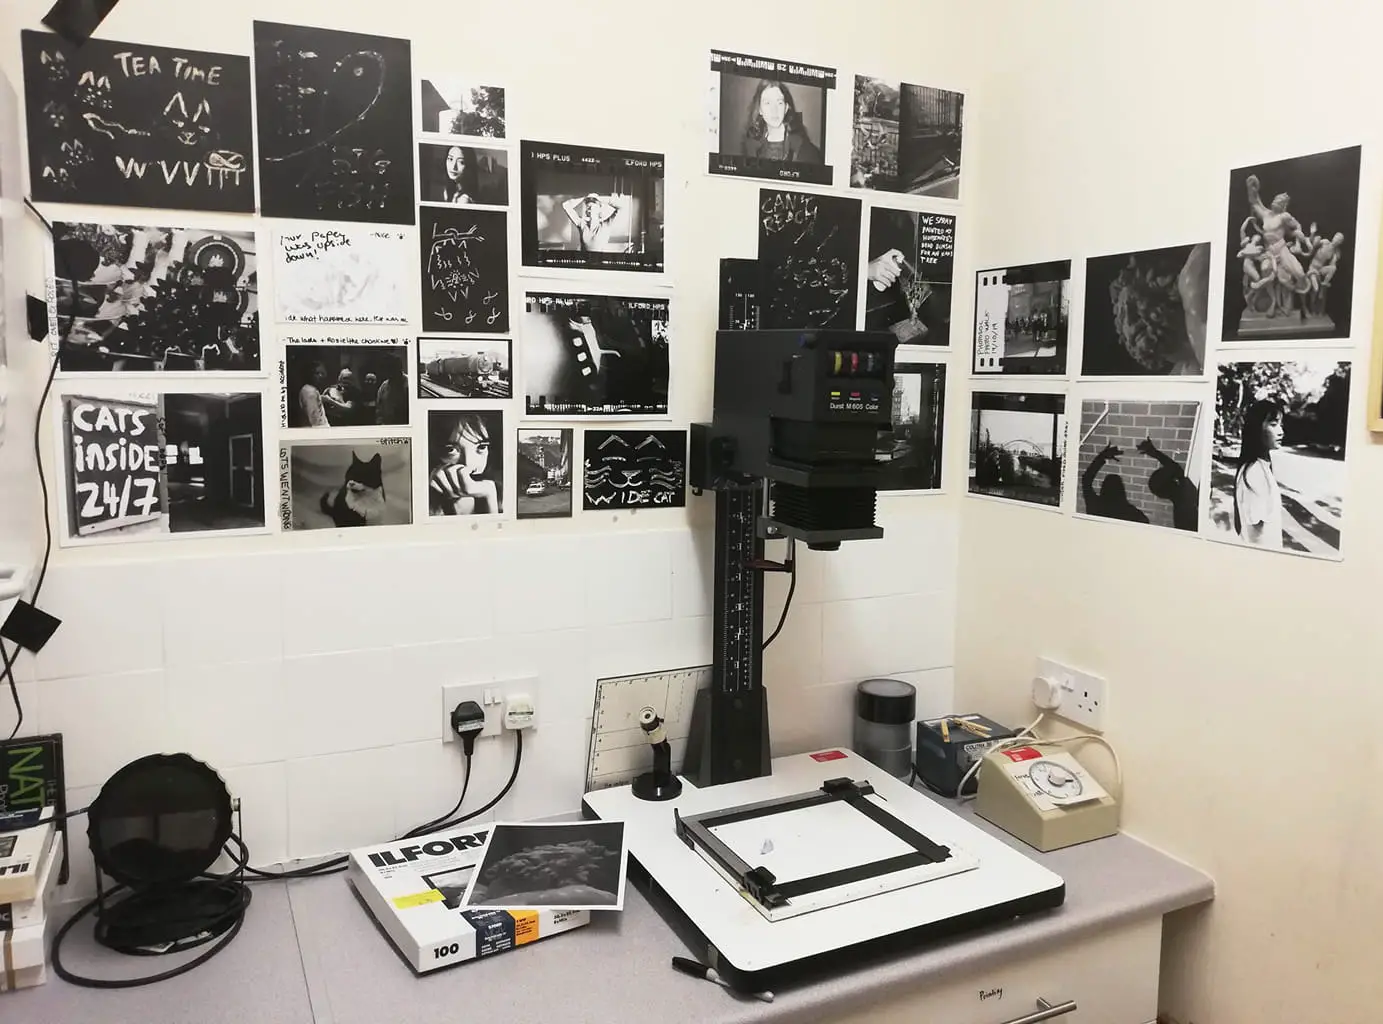
A community darkroom
Finally, Josh O’Sullivan from Lincoln posted a photo of the University of Sheffield PhotoSoc’s darkroom: a great reminder that if you’re lucky enough to have access to a community darkroom, that can be as good as having your own – or perhaps even better!
I’m grateful to everyone who commented on the thread and shared photos. I found them oddly inspiring – a real highlight of writing this piece. I hope you liked them too.
Next up: Part 2!
That’s all for now – see you in Part 2! If there’s anything specific you’d like me to cover, let me know in the comments and I’ll see what I can do. And if you have any low-cost darkroom tips, tricks and experiences to share, I’d love to hear about that too. Thanks for reading!
Share this post:


Comments
thorsten on How to Build a Darkroom for £100 or Less – Darkroom Technique Part 1 – by Sroyon Mukherjee
Comment posted: 06/04/2020
Comment posted: 06/04/2020
Rock on How to Build a Darkroom for £100 or Less – Darkroom Technique Part 1 – by Sroyon Mukherjee
Comment posted: 06/04/2020
Comment posted: 06/04/2020
AmDe Sidik on How to Build a Darkroom for £100 or Less – Darkroom Technique Part 1 – by Sroyon Mukherjee
Comment posted: 06/04/2020
Comment posted: 06/04/2020
Malcolm Myers on How to Build a Darkroom for £100 or Less – Darkroom Technique Part 1 – by Sroyon Mukherjee
Comment posted: 06/04/2020
Comment posted: 06/04/2020
Adam C on How to Build a Darkroom for £100 or Less – Darkroom Technique Part 1 – by Sroyon Mukherjee
Comment posted: 06/04/2020
Comment posted: 06/04/2020
Bruno Chalifour on How to Build a Darkroom for £100 or Less – Darkroom Technique Part 1 – by Sroyon Mukherjee
Comment posted: 06/04/2020
Comment posted: 06/04/2020
Andrea Bevacqua on How to Build a Darkroom for £100 or Less – Darkroom Technique Part 1 – by Sroyon Mukherjee
Comment posted: 06/04/2020
I loved reading your experience and this is what I need at the moment! Thanks.
Because, sooner or later, I want to print as well, you experience is very precious. Thanks for sharing it so detailed.
I might enquire you when I am going to set up my dark room.
Thank you again,
Andrea
Comment posted: 06/04/2020
Andrew Craig on How to Build a Darkroom for £100 or Less – Darkroom Technique Part 1 – by Sroyon Mukherjee
Comment posted: 06/04/2020
Many years ago, I did some developing and printing at college.
Later, I saved a Paterson kit from the recycle shed at the local tip, cost me £5! I am ashamed to say it has languished in my attic so long - which seems a sin - I cannot remember what came with it, whether it has filters nor do I know its operational state.
I will try to get it set up once we move house. Most houses these days seem to have a rather wastful 'utility room'...
Comment posted: 06/04/2020
Dan Castelli on How to Build a Darkroom for £100 or Less – Darkroom Technique Part 1 – by Sroyon Mukherjee
Comment posted: 07/04/2020
I'm impressed with your darkroom journey and your excellent attention to detail. People reading the article will get a real sense of tools and materials. I'm glad you were able to share photos of other darkrooms, this should encourage people that 'where there is a will, there is a way' and you can make one almost anywhere. These photographers are really dedicated to work in less than perfect conditions...I love it!
Your photo of the cart in your girlfriend's apartment reminded me of the time we build a cart for a fellow college student back in the 1970's. We were enrolled in a furniture making class and it became a semester long project. He wanted everything in a cabinet that could be rolled from storage to use. It was made from furniture-grade plywood, filled with nooks & crannies to hold everything you would need to process film & make prints. It housed a Beseler 23C; he had to lift it out and bolt it to the cabinet surface. It looked like a mid-century piece of furniture. Lost the photos of it long ago.
Looking forward to the second part. Keep healthy & safe during these scary times.
-Dan
Comment posted: 07/04/2020
Michael Scott on How to Build a Darkroom for £100 or Less – Darkroom Technique Part 1 – by Sroyon Mukherjee
Comment posted: 07/04/2020
Great post! You may have read my own on using a shared darkroom (published here on 19th March) where I mentioned that I built a darkroom in my parent's house attic, but your solution would have saved me a lot of effort! I still can't believe I sold all my darkroom kit years ago. If I had retained it I might well be tempted to have a home darkroom again in my flat. Maybe I'll scour eBay and see what's available!
Michael
Sroyon on How to Build a Darkroom for £100 or Less – Darkroom Technique Part 1 – by Sroyon Mukherjee
Comment posted: 07/04/2020
Matt on How to Build a Darkroom for £100 or Less – Darkroom Technique Part 1 – by Sroyon Mukherjee
Comment posted: 09/04/2020
Comment posted: 09/04/2020
jeremy north on How to Build a Darkroom for £100 or Less – Darkroom Technique Part 1 – by Sroyon Mukherjee
Comment posted: 09/04/2020
Comment posted: 09/04/2020
Matt Gosselin on How to Build a Darkroom for £100 or Less – Darkroom Technique Part 1 – by Sroyon Mukherjee
Comment posted: 09/04/2020
Comment posted: 09/04/2020
m Engles on How to Build a Darkroom for £100 or Less – Darkroom Technique Part 1 – by Sroyon Mukherjee
Comment posted: 10/04/2020
At least empty the bath or place what look like power cables in a safer place
Robert on How to Build a Darkroom for £100 or Less – Darkroom Technique Part 1 – by Sroyon Mukherjee
Comment posted: 10/04/2020
Later I improved by building a table/sink combo out of 1/4 inch plywood and lots of urethane varnish that would span across the lavatory sink, over the toilet and long legs to brace in the tub. With wing nuts on the long legs I could take the entire thing down and store it in the extra bedroom.
Comment posted: 10/04/2020
Mikhail Konovalov on How to Build a Darkroom for £100 or Less – Darkroom Technique Part 1 – by Sroyon Mukherjee
Comment posted: 10/04/2020
Comment posted: 10/04/2020
jim arnold on How to Build a Darkroom for £100 or Less – Darkroom Technique Part 1 – by Sroyon Mukherjee
Comment posted: 10/04/2020
When I started (nearly 60 years ago with my father) we had little kit so I can offer a few tips
1) without an easel cut cardboard masking frames - help to keep the paper flat an gives you white borders.
2) 1 Mississippi, 2 Mississippi.... is good enough for timing if you practice. Exposure timing is not as critical as film. You really would be pushed to see the difference between 9, 10 or 11 seconds
3) If you can get running water (we used to commandeer the kitchen) then its a great help
4) I know this is about B&W but colour is possible I used to print an evenings B&W then a couple of colour prints Which I placed in a lightproof tank for developing the next day
5) Glossy prints really need a glazer We managed with sticking them to a window but its nowhere near as good so stick to matt finish prints
Comment posted: 10/04/2020
Terry B on How to Build a Darkroom for £100 or Less – Darkroom Technique Part 1 – by Sroyon Mukherjee
Comment posted: 12/04/2020
Fortunately, having a Saturday job enabled me to pretty quickly upgrade to a Gnome Universal Alpha Rangefinder and Wray Supar lens, but my bedroom was still my darkroom. I printed on Saturday evenings as my parents enjoyed a lie-in on Sundays, allowing me to get the prints out of the bath.
Regarding the crack in the base of your enlarger, without knowing exactly what it is, I wonder if effecting a repair with Milliput will be feasible. This is a putty-like material and comes in tube lengths of two compounds, the one I use are coloured grey and yellow. Using equal amounts of each, you blend them with fingers, folding in regularly until smooth. During this time, you will notice it gets slightly warm. It remains firm but pliable for a few minutes during which time it can be moulded to any shape. Once it has cured it is extremely strong, it sets as hard as rock. Once set it can be filed and painted. This could be a better solution than a piece of string.????
Comment posted: 12/04/2020
John Driggers on How to Build a Darkroom for £100 or Less – Darkroom Technique Part 1 – by Sroyon Mukherjee
Comment posted: 12/04/2020
Comment posted: 12/04/2020
Knowing Little, Aiming High – Darkroom Technique Part 2 – By Sroyon Mukherjee - 35mmc on How to Build a Darkroom for £100 or Less – Darkroom Technique Part 1 – by Sroyon Mukherjee
Comment posted: 13/04/2020
Matt on How to Build a Darkroom for £100 or Less – Darkroom Technique Part 1 – by Sroyon Mukherjee
Comment posted: 13/04/2020
Great work!
Comment posted: 13/04/2020
Semana Fotográfica, ed. XVIII (6 a 12 de abril, 2020) - EFEcetera on How to Build a Darkroom for £100 or Less – Darkroom Technique Part 1 – by Sroyon Mukherjee
Comment posted: 13/04/2020
Alan G on How to Build a Darkroom for £100 or Less – Darkroom Technique Part 1 – by Sroyon Mukherjee
Comment posted: 16/04/2020
Comment posted: 16/04/2020
Art on How to Build a Darkroom for £100 or Less – Darkroom Technique Part 1 – by Sroyon Mukherjee
Comment posted: 16/04/2020
Comment posted: 16/04/2020
Cat-and-Mouse with Exposure and Contrast - Darkroom Technique Part 3 - by Sroyon Mukherjee - 35mmc on How to Build a Darkroom for £100 or Less – Darkroom Technique Part 1 – by Sroyon Mukherjee
Comment posted: 20/04/2020
Richard on How to Build a Darkroom for £100 or Less – Darkroom Technique Part 1 – by Sroyon Mukherjee
Comment posted: 21/04/2020
Comment posted: 21/04/2020
Comment posted: 21/04/2020
Comment posted: 21/04/2020
Comment posted: 21/04/2020
Sroyon on How to Build a Darkroom for £100 or Less – Darkroom Technique Part 1 – by Sroyon Mukherjee
Comment posted: 24/04/2020
That's cool that you can print up to 6×6, mine only does 35mm. But I'm lucky to have a (semi-retired) professional darkroom artist in my city, so I sometimes go to him for medium-format.
I've never used an enlarger light meter myself, but many authors seem to think they're not of great practical use, or at best you get a ballpark figure but for actual printing you still need test strips/human evaluation.
Comment posted: 24/04/2020
Comment posted: 24/04/2020
eric on How to Build a Darkroom for £100 or Less – Darkroom Technique Part 1 – by Sroyon Mukherjee
Comment posted: 27/04/2020
Simply great. You make a great article to help people to enter in the magic of film photography with the darkroom : this is an huge pleasure full of feelings.
A great article to recommend to everybody.
Eric
Comment posted: 27/04/2020
Split Grade Printing – Darkroom Technique Part 4 – by Sroyon Mukherjee - 35mmc on How to Build a Darkroom for £100 or Less – Darkroom Technique Part 1 – by Sroyon Mukherjee
Comment posted: 27/04/2020
Start Printing From Film For Around £100 | 3d print ......errori ed esperienze, on How to Build a Darkroom for £100 or Less – Darkroom Technique Part 1 – by Sroyon Mukherjee
Comment posted: 03/05/2020
Dodge, Burn and Other Heresies – Darkroom Technique Part 5 – by Sroyon Mukherjee - 35mmc on How to Build a Darkroom for £100 or Less – Darkroom Technique Part 1 – by Sroyon Mukherjee
Comment posted: 04/05/2020
Dave on How to Build a Darkroom for £100 or Less – Darkroom Technique Part 1 – by Sroyon Mukherjee
Comment posted: 15/05/2020
My makeshift darkroom is in the corner of a small cellar so I share my space with the freezer, two fridges, old toys and assorted junk! The downside is it takes time to set up and breakdown and of course it’s two flights of steps to the bathroom to wash prints ???? I’d love a permanent darkroom but until that day comes I’m very happy in my corner of the cellar.
Comment posted: 15/05/2020
How to Get Started Developing Black & White Film for £25 (or Less) - by Sroyon Mukherjee - 35mmc on How to Build a Darkroom for £100 or Less – Darkroom Technique Part 1 – by Sroyon Mukherjee
Comment posted: 07/09/2020
Michael on How to Build a Darkroom for £100 or Less – Darkroom Technique Part 1 – by Sroyon Mukherjee
Comment posted: 26/09/2020
Thanks so much for all the hard work you've put into this series. With your tips and encouragement I setup a darkroom in a small understairs cupboard and bathroom in my rented house. It was a great project to do during lockdown, and your guide helped me a lot (aswell as a friend who gave me an enlarger!)
I have since moved to another house, which has a basement!! And have just produced my first contact print!
Thanks,
Michael
Comment posted: 26/09/2020
Amigo toro on How to Build a Darkroom for £100 or Less – Darkroom Technique Part 1 – by Sroyon Mukherjee
Comment posted: 25/10/2021
Aaron on How to Build a Darkroom for £100 or Less – Darkroom Technique Part 1 – by Sroyon Mukherjee
Comment posted: 03/11/2022