As a film photographer, I’m in the fortunate position of being able to print my own work, both colour and black and white, in a darkroom. For some few years now I’ve been renting a place in a darkroom in London. But my first taste of the darkroom experience was in school – it’s an experience which changed my life giving me an interest in film photography that has stayed with me ever since. When digital first appeared I admit I was tempted, but the magic of seeing your negatives emerge from the developing tank or a print taking form in a developing tray simply cannot be beaten.
Developing and printing for enjoyment and learning
Now although over the years I have done some semi-professional work as a photographer, I am today purely here for the enjoyment of taking pictures. Nothing really hangs on whether my efforts turn out successfully or not. So I tend to eschew the safe option of having a tried and tested formula – you know what I mean, one or two films always developed according to the same recipe in one or two developers. Which is great as it means I can experiment with a whole range of films and developers. And that’s my point too – in the darkroom it’s about learning and enjoyment.
Film developing
I develop my films in my kitchen just to save time when I’m in the darkroom. This is a great way to get to use different films and developers, and also to expand on what is possible when out shooting – everyone knows the saying “expose for the shadows and develop for the highlights” – nothing is more creative than processing your own films to your exact requirements.
Before I head to the darkroom I scan my negatives into Apple’s Photos and tinker around with them to see what each negative offers and the possible issues I may need to address in the printing process. As I take my iPhone to the darkroom it also acts as a sort of digital contact sheet. As a result, I do not make a physical contact sheet.
In the darkroom
It’s in the darkroom that the fun really gets going. Let’s stick to black and white (colour is a whole different ball game). As a self-taught printer, I can honestly say I’m pretty average. Sure, there are courses out there which I could sign up to improve my technique. But there’s a load of good material on YouTube (as diverse as Lina Bessonova to Darkroom Dave) and advice from my fellow photographers in the darkroom I use. Here’s the thing though – I’m not out to be a great printer. Presently, I use resin-coated paper, never fibre, and usually stick to 12” x 9.5” Ilford Multigrade (just bought my first box of the new version five – it’s great). I haven’t done toning or anything fancy, I’ve just been out to make a few prints from the roll of film I shot in the week. In that sense I have definitely been a “quantity” over “quality” person. I wanted to bring home 5 or 6 prints rather than just the one perfect print. Though, that is changing, I’m now shifting to wanting to come away with one good print. Why? Because the more I get into printing the more I realise and appreciate just how much there is to learn and what techniques are available to maximise the image quality.
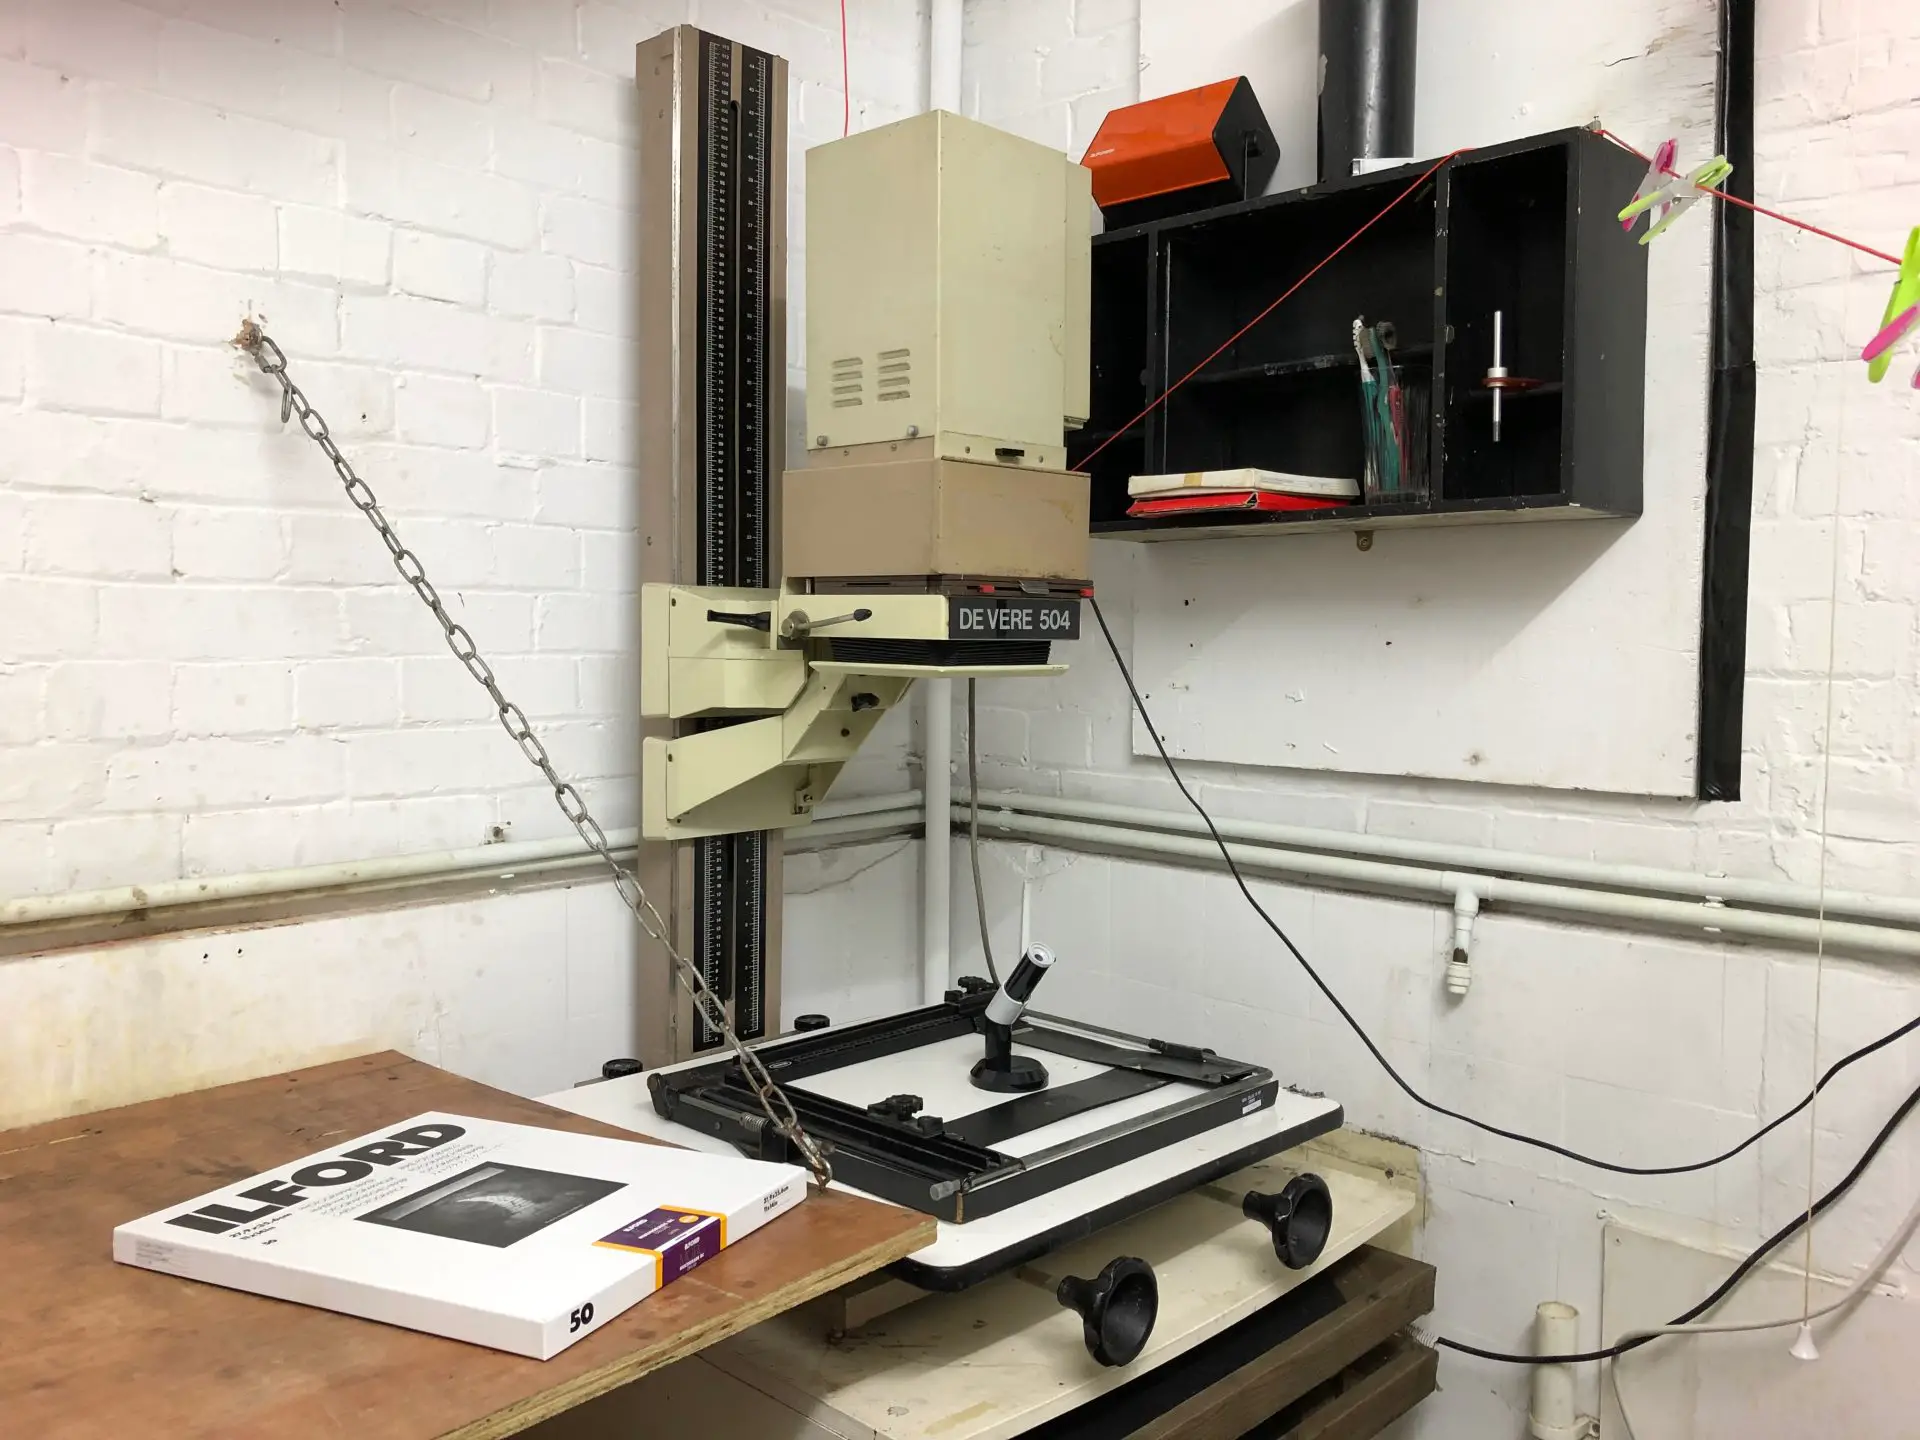
The darkroom set-up
In the darkroom is a De Vere 504 Varicon which uses above the lens multigrade filters. Attached is a De Vere timer, essential to control the exposure time correctly and consistently. The 504 is a condenser enlarger which is worth noting as some film developers suggest that if you use a condenser enlarger you might want to reduce your development time by up to 30% to help control contrast (see for example Kodak’s HC-110 datasheet). Aside from the enlarger, everything else is pretty straightforward with developing trays, tongs, thermometers, print washer and a drying rack. A tray warmer to keep the developer at 20ºC is needed in the cold months.
There’s an air extractor fan built-in though, to be honest, the door provides plenty of changes of air as I open and shut it frequently to view test strips and test prints in natural daylight.
It should go without saying that I’m dealing with chemicals and I take care to read the technical data sheets before use. As is necessary, there is a ‘dry’ bench and a ‘wet’ bench with the enlarger and anything attached to the live mains kept well away from water. I use chemical resistant gloves if I am going to get my hands wet, and glasses to keep splashes from my eyes. Lint-free gloves are essential to keep grease off the negatives, and a blower to gently clean the negative before loading into the negative carrier.
Getting started
Using Ilford Multigrade RC paper, the obvious choice for a print developer is Ilford’s own Multigrade, but in fact, I have a slight preference for Tetenal’s Eukobrom which is a cool tone developer giving rich blacks.
For ages, I worked to the principle that if my negatives had been properly exposed and developed then it should be possible to make a straight print without any filters in place. After all, Ilford Multigrade RC paper is a grade 2 paper straight out of the box. And sure enough, that worked. However, the prints were often quite flat, lacking contrast and a wide dynamic range of greys, and needed dodging or burning to get the best image.
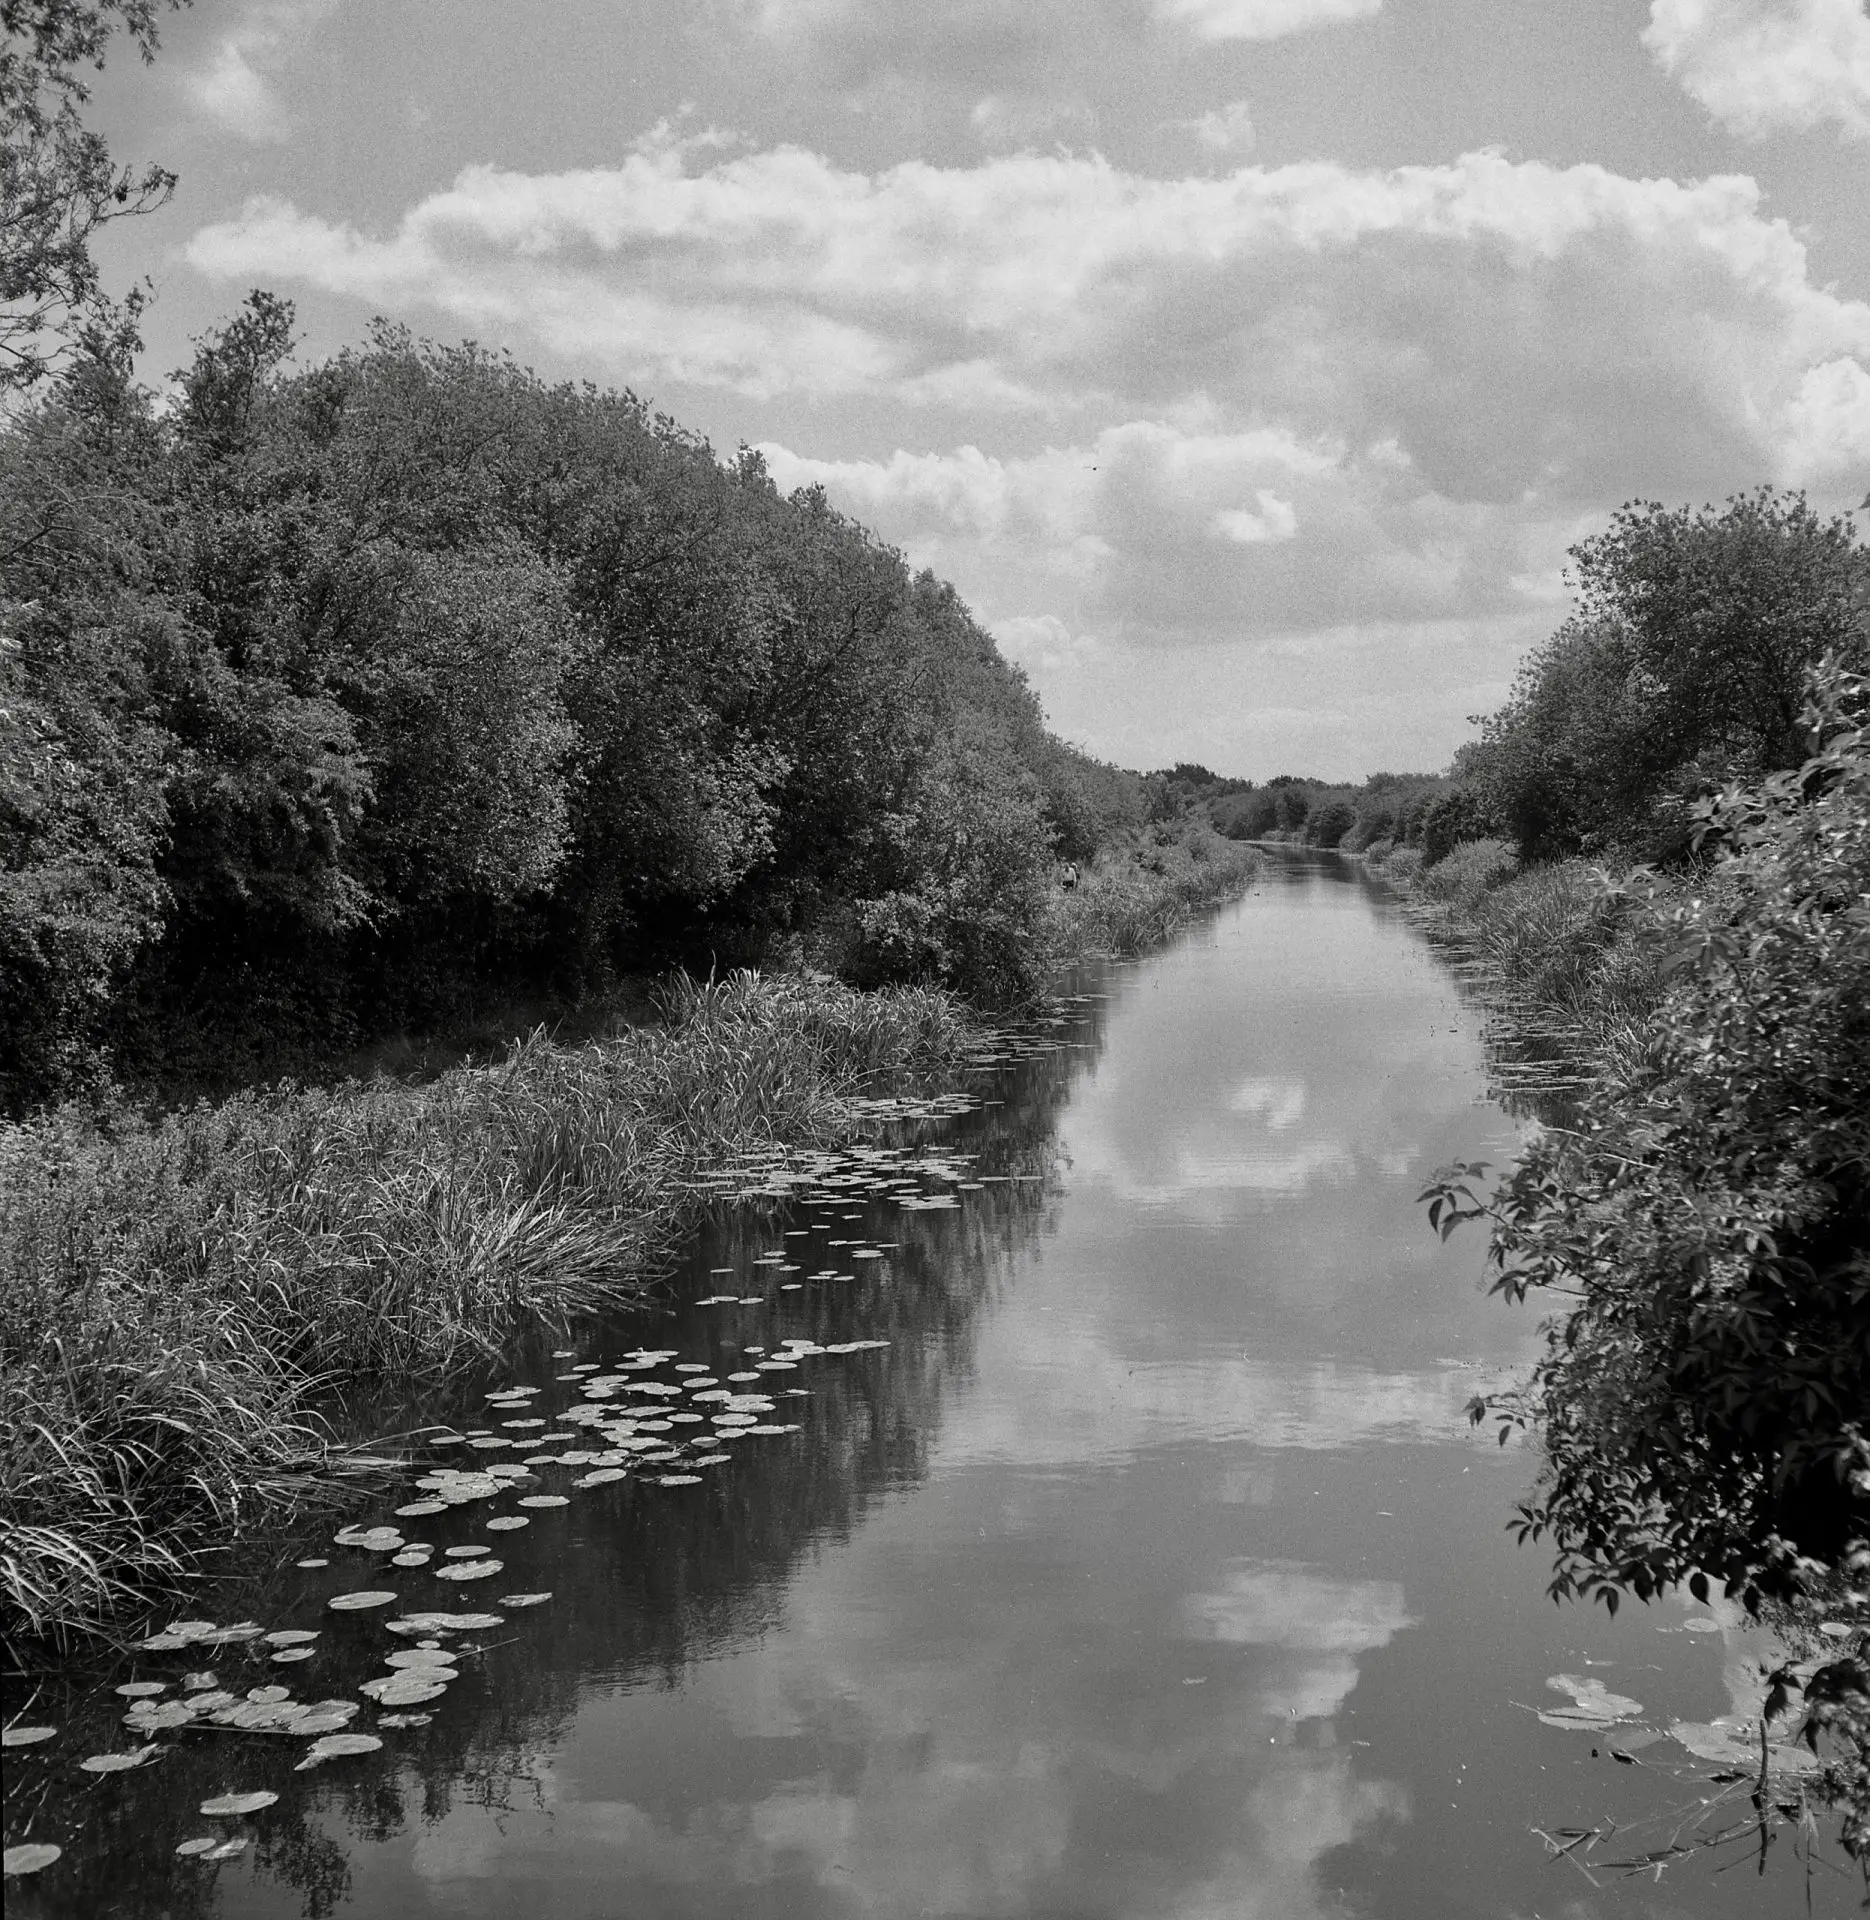
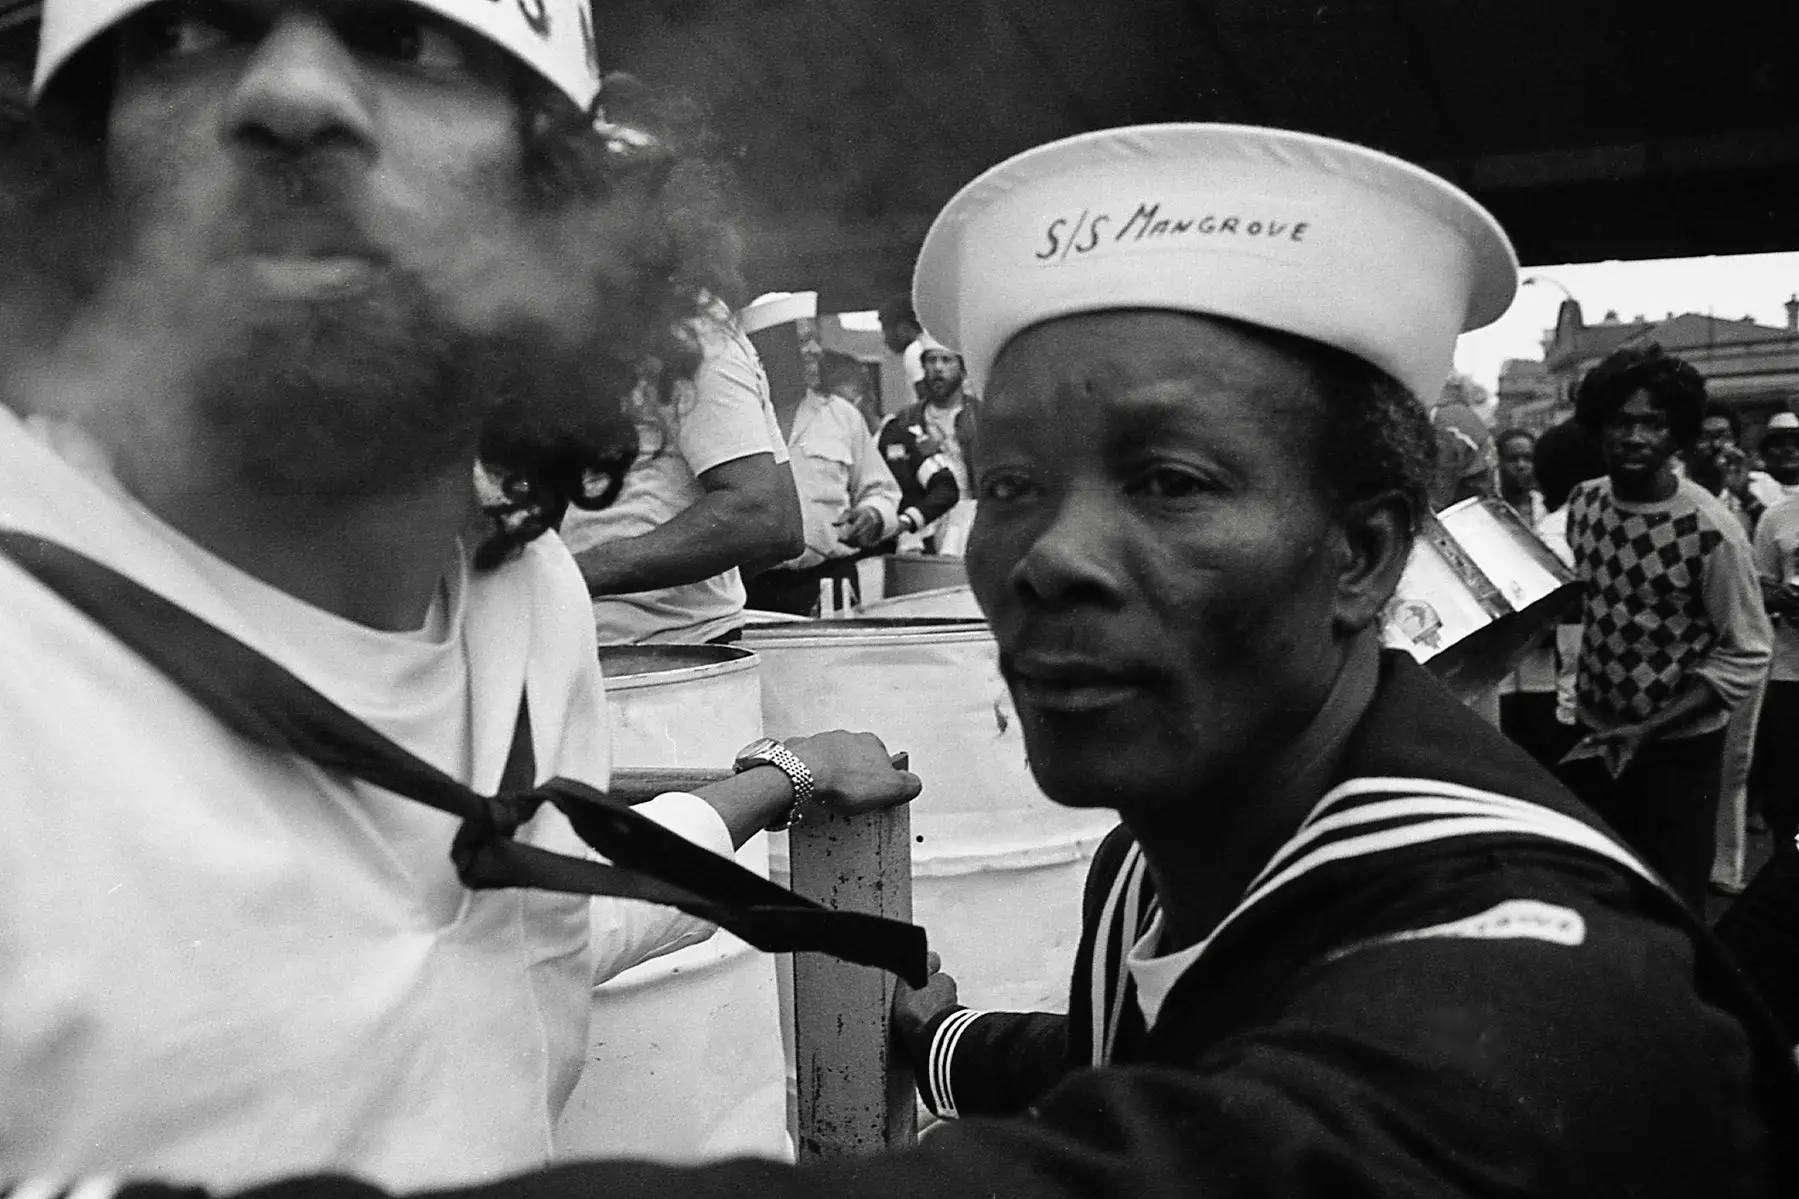
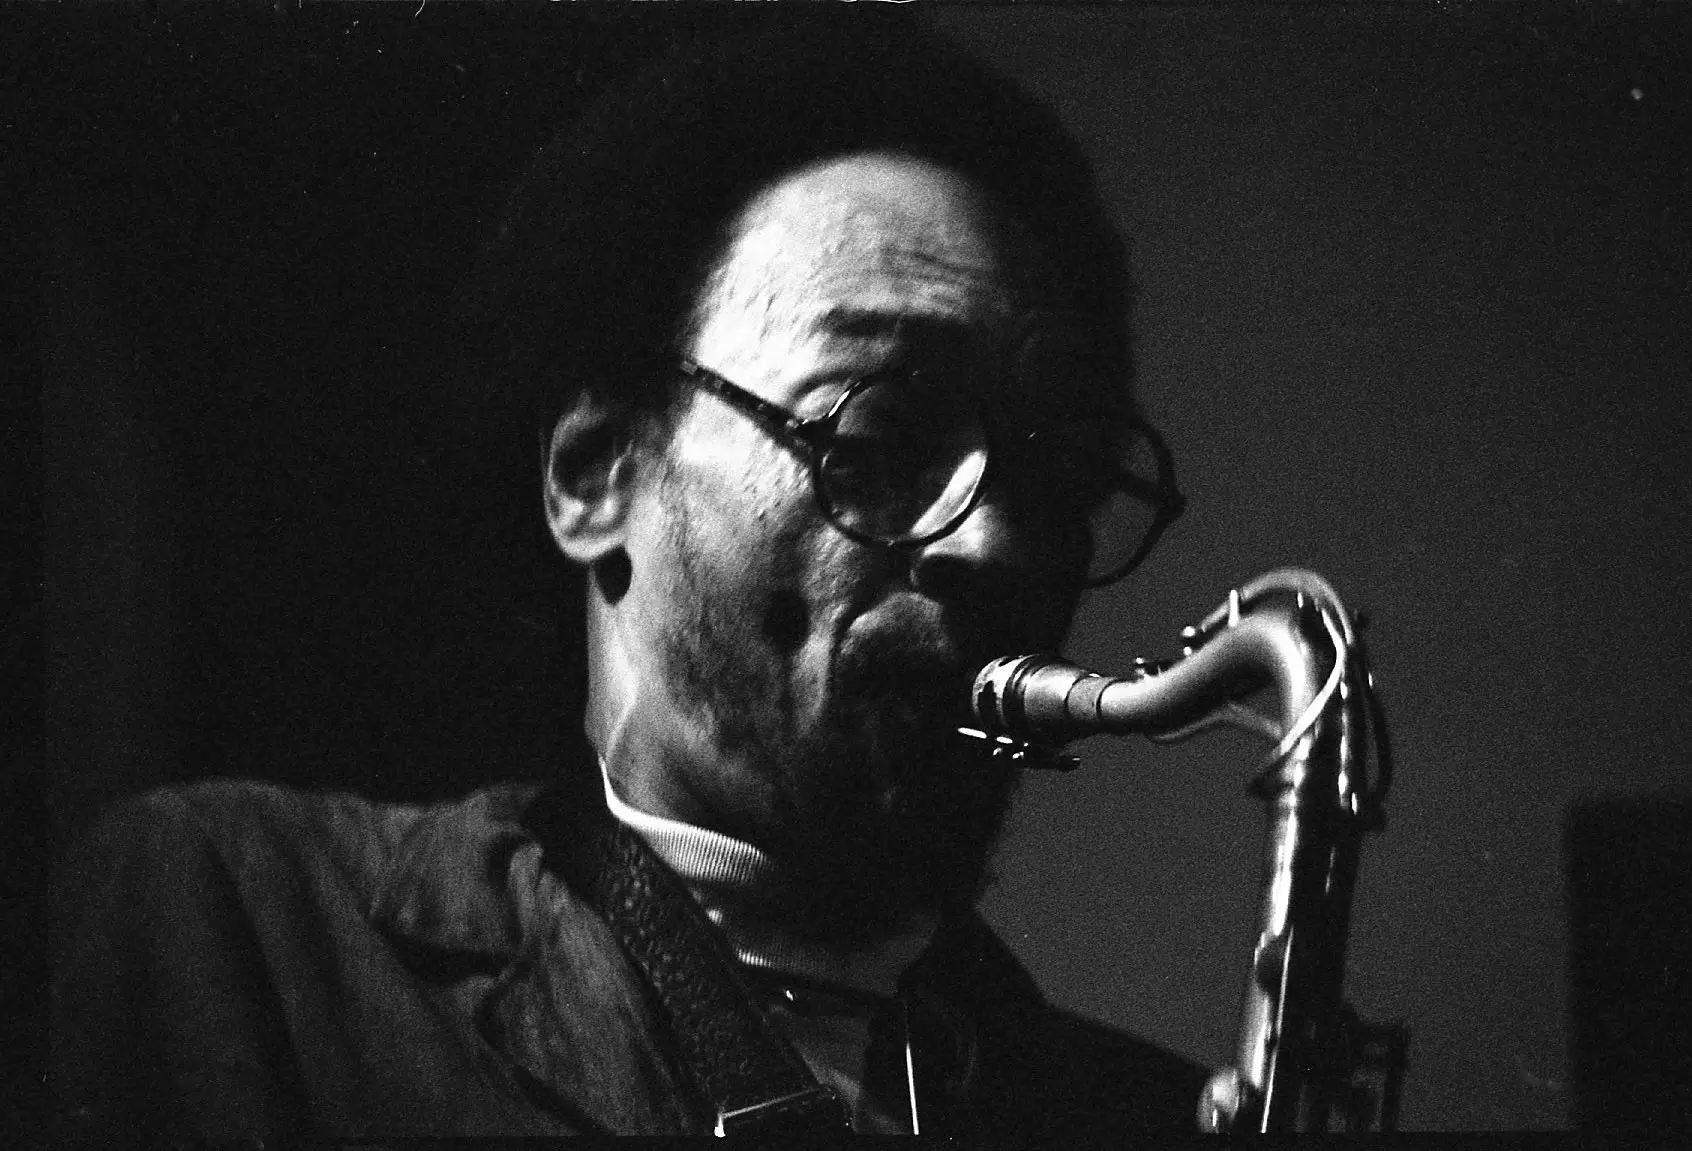
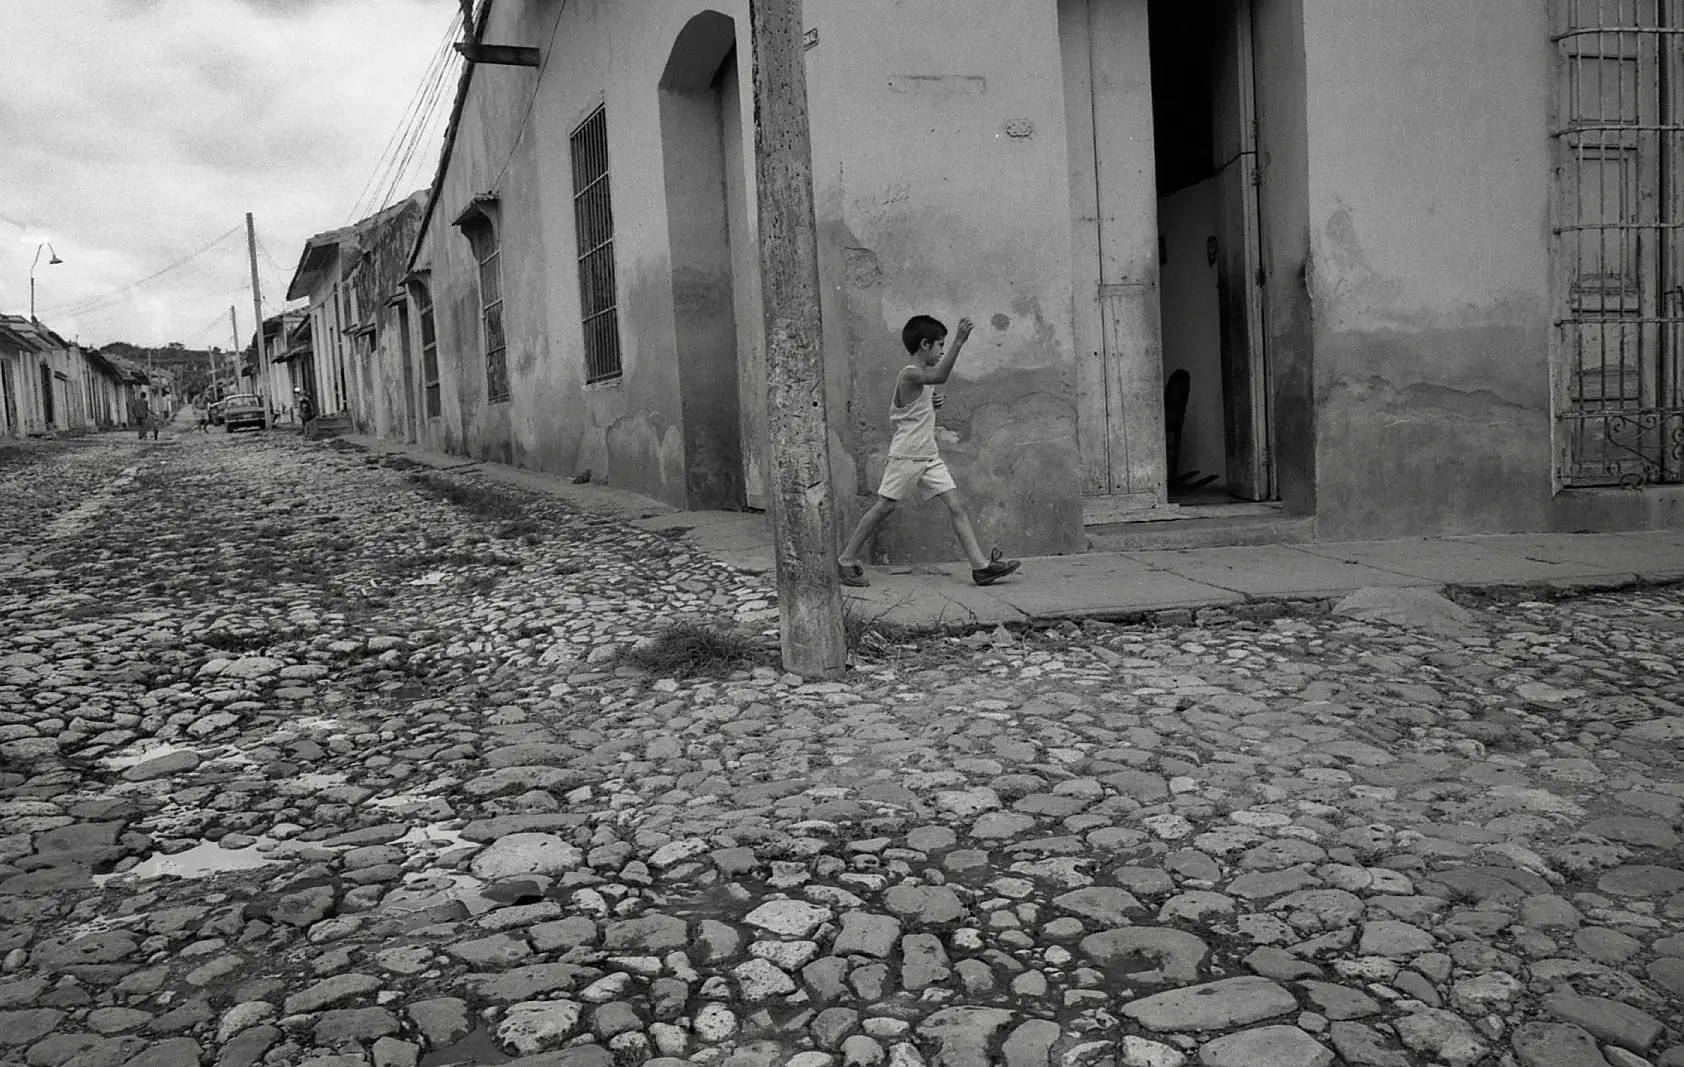
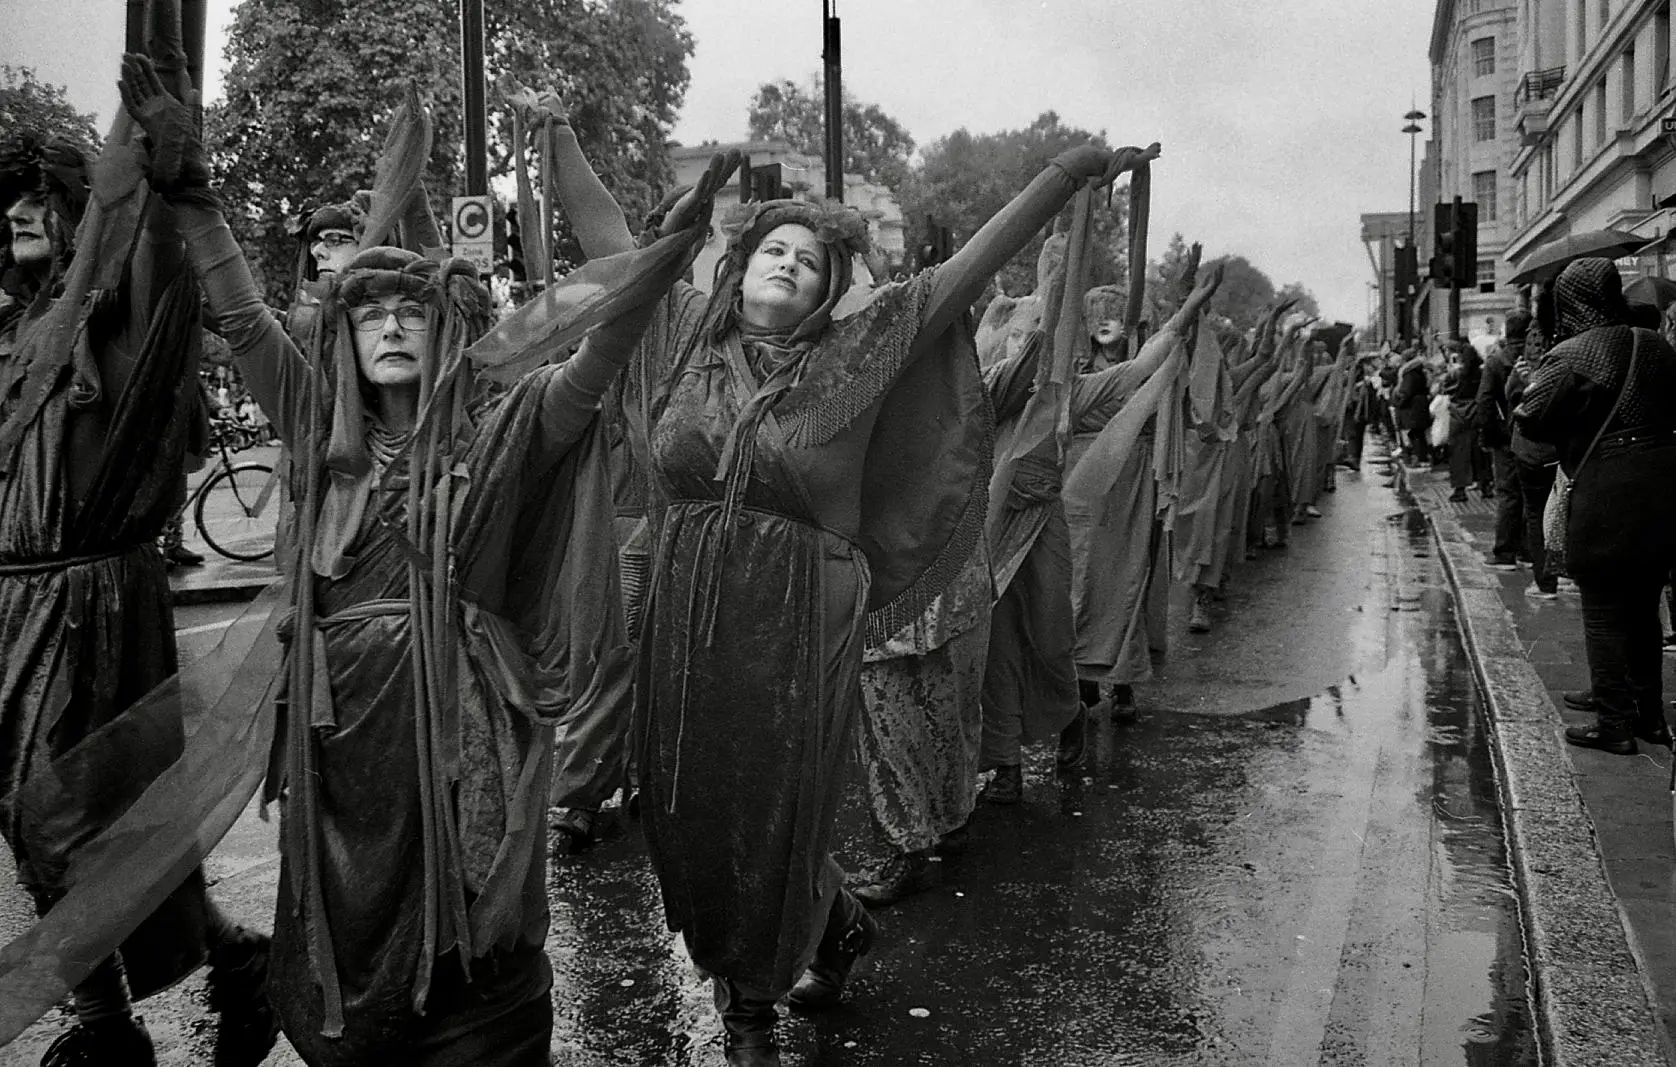
In essence, every image brings its own challenges as these below illustrate, each one a very different printing proposition.


F-Stop printing, flashing and spilt-grade printing
So, of course, I had to move on to using contrast filters and now split-grade printing. My print output per session dipped as I worked my way through the conceptual leap that split grade printing needs. But it’s been a worthwhile journey. My prints are definitely more dynamic and show better contrast. Also, dodging and burning is considerably reduced, in some cases even eliminated.
The next breakthrough in technique was thanks to the legendary Gene Nocon and his pioneering of F-Stop printing. I can thoroughly recommend his seminal work “Darkroom Printing”. The widely used method of using linear increments to adjust exposure time was how I had always worked. The F-Stop method uses a more instinctive and natural approach by making adjustments to exposure time by stops or fractions of a stop, in the same way as one does when exposing the film in camera.
There is now an F-Stop printing app from the same company that provides the Massive Dev Chart which I find invaluable.
Nocon’s work also covers the effectiveness of pre-flashing the paper to the threshold point. This is a useful technique on those images where there is a stubborn highlight that would require excessive burning in to bring some density to the image.
Combining F-Stop Printing, pre-flashing and split-grade printing has demonstrated to me – if ever it was needed – that working in a darkroom is a continuing learning experience. I don’t think I’ll ever tire of it. I can also foresee the time very soon when I will want to buy a box of fibre paper and be content with one print per session. And, there’s such a range of papers and developers to work with these days.
Conclusion
Commercially run darkrooms which are accessible to the public (albeit as ‘members’) for an hourly or monthly fee are popping up here and there. In London UK there’s already a good choice. And, as Ilford are quick to point out, a home darkroom isn’t that hard to put up and down in a small space such as a bathroom or kitchen. My first home darkroom was in the loft space of my parent’s house. Sadly, my flat won’t accommodate one. But even a garden shed would do if it was well insulated. If you can get the use of a darkroom I thoroughly recommend it. It completes the analogue photographic journey from film to print in a most satisfying way.
If you can’t, I would still recommend developing your own films (for which you only need a dark changing bag to load the film into the developing tank) which gives you so much more control over the film capture process.
I hope you’ve enjoyed this and if you would like to see more of my images please head over to my web site michaelscottfoto.com
Share this post:


Comments
Andrea on Enjoying and Learning in the Darkroom – by Michael Scott
Comment posted: 19/03/2020
My plan is to start "soft", so I want to develop and scan the negatives. Who knows, may be in the near future I will set up a dark room :-)
I will read your article with passion and attention.
Thanks for sharing.
Andrea
Comment posted: 19/03/2020
Faraz on Enjoying and Learning in the Darkroom – by Michael Scott
Comment posted: 19/03/2020
Home darkroom tips; 1. blackout cloth is not that blackout, try neoprene sheets, much better. 2. Cheap folding picnic tables are your path to speedy bathroom conversion. 3. Lock the door
Comment posted: 19/03/2020
Terry B on Enjoying and Learning in the Darkroom – by Michael Scott
Comment posted: 19/03/2020
When I considered which enlarger to get when taking up 5x4 I opted for a cold cathode light source, as this light was considered to be kinder to grain and defects in, or on the film, such as scratches. This certainly turned out to be the case, but the downside was all my negs developed for a gamma best suited to my condenser enlarger, were now somewhat lacking in gamma. Oh, well, one can't have it all. This was considerably helped by Ilford's Multigrade papers which made paper selection a lot easier as I could do a strip test on one sheet utilising different MG filters.
Going from your narrative for your first image, I'm guessing that you've scanned the print, and therefore a flatbed. Which of these is your preferred choice?
Comment posted: 19/03/2020
Comment posted: 19/03/2020
Geoffrey Rivett on Enjoying and Learning in the Darkroom – by Michael Scott
Comment posted: 19/03/2020
It is so much quicker than messing with a computer and much more fun.
Geoffrey
Comment posted: 19/03/2020
Paul Brant on Enjoying and Learning in the Darkroom – by Michael Scott
Comment posted: 19/03/2020
Comment posted: 19/03/2020
Bruno Chalifour on Enjoying and Learning in the Darkroom – by Michael Scott
Comment posted: 19/03/2020
Just a few comments and questions to further the conversation: you said "some film developers suggest that if you use a condenser enlarger you might want to reduce your development time by up to 30% to help control contrast". Although it is true that a condenser enlarger will produce (for the same exposure, temperature, paper grade, processing time and agitation—elements to be considered and that may modify the contrast of the final print) a print with more local contrast than a diffused-light enlarger (color head for instance), modifying the developing of a roll of film (assuming the ultimate development was reach) may also result in the loss of details in the shadows (underdevelopment) or in the highlights (overdevelopment). I would probably opt working with different grades depending of the light source of the enlarger (2 for condenser, 3 for diffused light; and multigrade papers make this even easier). What do you think?
About your landscape photograph and caption: "A landscape which needed work to bring out the sky and cloud details whilst not burning out the woodland bank". Are you using or thought of using a yellow or orange filter to block off the blue light coming from the sky and so ending up with skies and clouds that are easier to print?
And this: "The F-Stop method uses a more instinctive and natural approach by making adjustments to exposure time by stops or fractions of a stop" I do not know whether we can call this method "instinctive" or "natural" as there is little of the kind in the definition of f-stops. Even for tests strips I would not use this method as too "rough" and lacking fine tuning (especially if one has a powerful light source or does not print big. This method may be useful in color-printing (when the length of exposure modifies the color balance, longer exposures increasing yellow) but I found it lacks precision and nuance.
Finally: "If you can’t, I would still recommend developing your own films (for which you only need a dark changing bag to load the film into the developing tank)" and a thermometer and above all a dust-free space where to hang your film to dry! ;o)
By the way, Geoffrey, you said:"It is so much quicker than messing with a computer and much more fun." If I can understand the "fun" part, practicing both darkroom printing and digital printing I would strongly disagree with the "so much quicker". Set aside the time spent setting up the darkroom (all the more if it is not a full-time darkroom but a room that has to be modified every time), mixing the chemicals, making tests, processing, and above all rinsing (even longer with baryta papers) and final cleaning [just those "details'], I can dodge and burn and above all print far more efficiently from my computer than from my darkroom. And I am not mentioning that all modifications (different contrasts, burnings and dodgings are recorded and I do not have to repeat them for every single print), but I agree for one who enjoys the emergence of the image on the print in the developing tray, living in a dark place with the right music, food and drink, breathing chemicals (no, opening the door is not enough and my wife often complained about my clothes smelling of the photo chemicals), really doing things by hand, darkroom work can be a lot of fun... now when it comes to print quality (superior D-max (maximum density of the blacks), control, and being efficient I resort to digital printing.
And finally I'd like to thank everyone for sharing their experiences and love for the medium, a good thing to talk about these days!
Comment posted: 19/03/2020
Comment posted: 19/03/2020
Adrian Cullen on Enjoying and Learning in the Darkroom – by Michael Scott
Comment posted: 20/03/2020
Comment posted: 20/03/2020
Jesus of Nazerath on Enjoying and Learning in the Darkroom – by Michael Scott
Comment posted: 21/03/2020