This post has been a long-time coming, I think I’ve lost count of the number of times Hamish has trolled me about writing about shooting 35mm pinhole cameras. But, there is a bit of an excuse for the delay – I don’t really think 35mm film is ideal for pinhole photography. That being said, it does offer a great place to start, and there’s lot of great cameras to try, and since I have tried a few of them, I let Hamish talk me into this…
A bit of background
I’ve been making pinhole photographs for a number of years now, and my route in was via a 35mm DIY camera: the P-Sharan. I picked up one of their kits in a store in Japan at the end of a holiday, really as a way to use up my surplus yen. This was a lucky choice because once I’d managed to make the camera I was pretty much hooked as soon as I got the film back from the lab.
Making the camera was simple enough, even with my cack-handed approach to anything DIY. More simple still was using the camera. Figure out the exposure, open the shutter, close the shutter, done. In fact, for the Sharan I didn’t even meter exposure, I just used a rough guide on the camera and bracketed… and it worked out OK!

As I got more into pinhole photography, I realised that just using a rough guide for exposure wasn’t going to cut it, the aperture is so small (largest would be about f/90, ranging down to f/235 and smaller) that I needed something more accurate.
I now tend to incident meter with a simple Sekonic meter and adjust exposure times for reciprocity failure. This is vital with longer exposures unless you use a film like Fuji Acros 100 or some E6 films which have little reciprocity failure. Personally, I tend to shoot C41, so I do need to adjust.
For the sake of this post, I’m not going to try and explain reciprocity failure – just rest assured you’ll need to figure it out if you shoot a lot of long exposures with film. Fortunately, there are some apps such as Pinhole Assist which will do this for you as well as metering.
Letting the cat out of the bag
I prefer to shoot 120 film for pinhole – this, I guess, lets the cat out of the bag? It’s my view that where 35mm is fine for pinhole, 120 is better (as long as you can easily get it processed). This is a subjective view based purely on the fact that the resolution of the larger frame size seems to work so much better. As a result, my go-to pinhole camera is a Zero Image 69MF, which I promise you is a thing of absolute beauty. But thats not to say a lot of fun can’t be had with 35mm and a pinhole.

Feeding your pinhole GAS
Like I suspect many readers of 35mmc, I have a problem with GAS! This has led me to experiment with a number of different 35mm pinhole cameras. There’s also a bunch I haven’t used, such as the Zero Image 35mm. I also haven’t tried 35mm film in my Viddy (another DIY camera), but there are many that I have…
Ondu
Ondu has run two very successful Kickstarter campaigns (somewhat marred by slower than planned delivery). I know a lot of people who really like their cameras. I have used both the 35mm panoramic and the 6×6 and both are pretty decent, with what seems to be a pinhole that is well matched to the focal length (trust me, this is important if you want the image to be as sharp as possible).
My only issue with the Ondu cameras is the shutter, which is a simple wooden slat. This works well, but I find that I prefer to use the cable release attachment on my Zero. To be fair to Ondu, most pinhole cameras come with a similar manual shutter, so it is something you get used to.

If you do use a camera with a similar shutter, then you need to know that your best bet to avoid camera shake (not an issue with longer exposures) is to slide the shutter open with your thumb and simultaneously cover the pinhole – take away your thumb when you are ready. Another approach is to cover the shutter with a hat when you open it (all the best pinhole photographers wear top hats, or bowler hats for the slightly less dapper – obviously).

Nopo
Nopo cameras also did a pretty decent crowdfunding campaign. They also produce some nice 35mm camera. I have one which produces a square image (which I really like). The shutter is, again, a simple sliding job (this time made of metal) but the camera is fairly compact. Mine did have a slightly softer image, but this is not necessarily a bad thing (horse for courses and all that). If I am reading their website correctly, their other 35mm cameras use a really cool shutter mechanism that works by twisting the “lens”.
I should probably point out here that I have met Tono from Nopo, and they also sponsored an exhibition I was part of – though I’m not otherwise affiliated to them.

Miru
Last of the more traditional cameras I have tried is made by Miru from the Philippines. Again, a small disclaimer that David sent me this camera (and I did a little write up on Pinholista). The Miru is a lovely little thing, and the closest to the classic matchbox pinhole.
DIY
When I was preparing this post Hamish asked me to write about the fun of making a pinhole camera, which leads to another confession, which is that I am a massive klutz when it comes to making things. With that caveat in mind, I find it somewhat difficult to call the experience fun – generally more frustrating as my many cameras (35mm, instant and others) have never quite been as good as I’d hope. I did make an underwater 35mm camera once (cannibalising one of those really cheap 35mm cameras that come with a housing – and using magnets as a makeshift shutter) which I did enjoy hugely. The results were…interesting.

The matchbox pinhole is a must-try if you want to build a camera, which I’d encourage you to do at least once. If you do decide to take the plunge, also take a look at Chris Keeney’s website and book (a must-have), the man is a camera building genius and a thoroughly nice chap to boot.


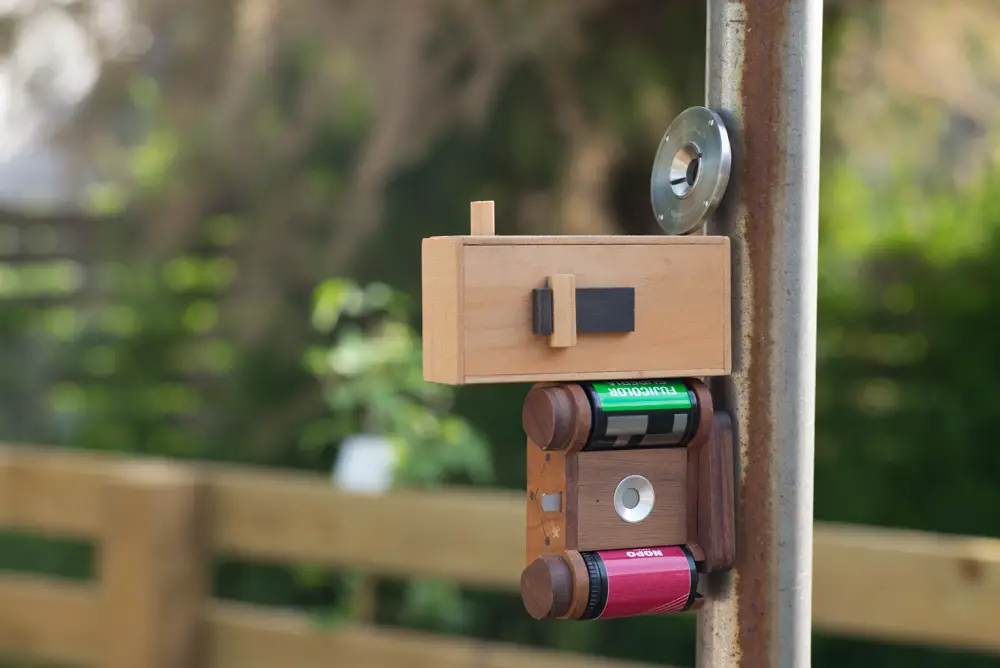
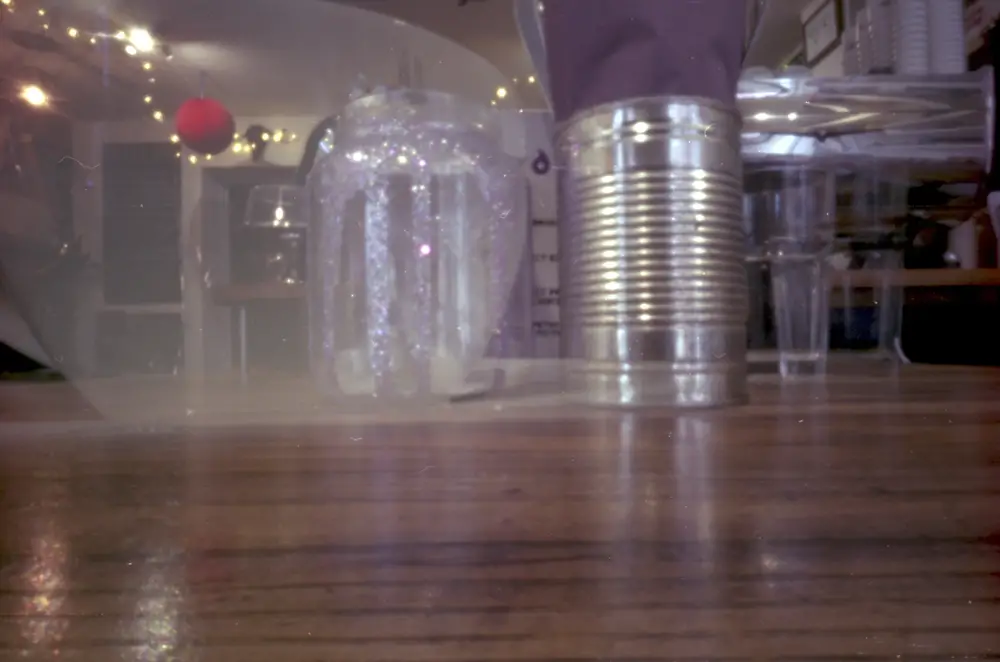
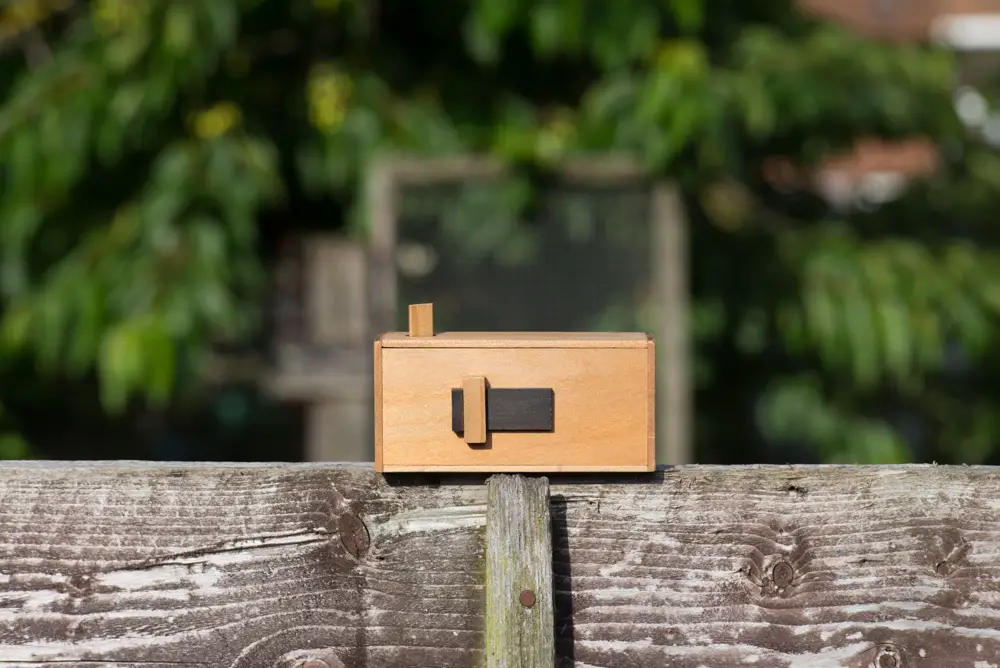
The Skink Pinhole
The more observant above you will have noticed a similarity between the last two images. These were both made using a Skink Pinhole pancake “Lens”. This is effectively a body cap (which again is something you could make yourself).
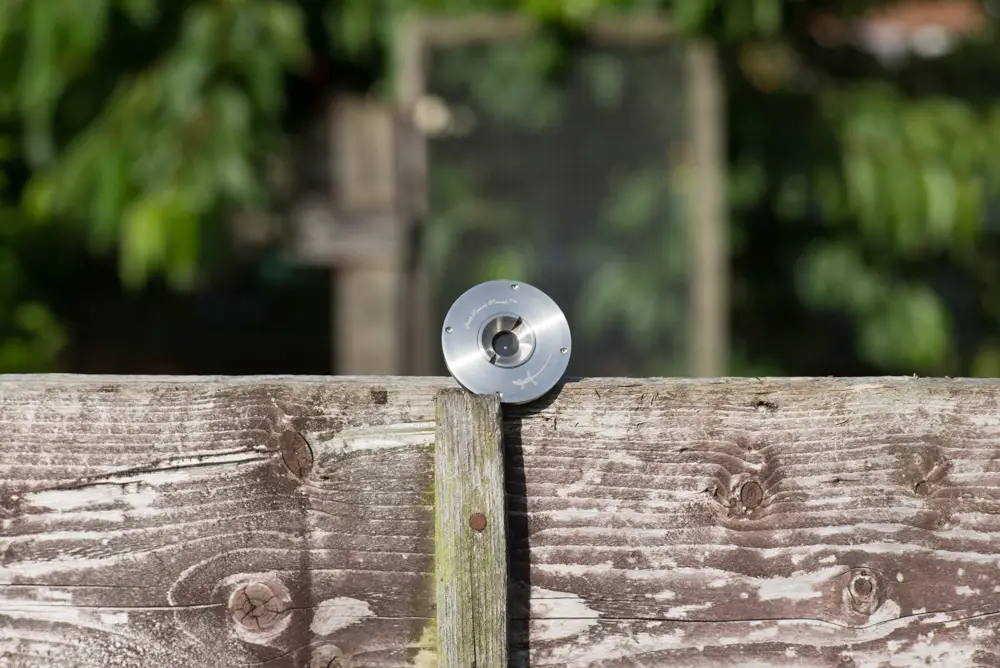
The nice thing about the Skink is that it is machined from solid metal, and if you get the right version it comes with a Zone Plate and Zone Sieve. I’m not going into the details of what makes these options different to a standard pinhole – you can find out more on their website. Regardless, you can see that these will give you different creative options, which can only be a good thing.

That the Skink is a body cap, also opens up another option – that of using a digital camera. Though, my advice is DON’T! Using a pinhole on your digital camera will have the horrible side effect of picking up every bit of dust on your sensor. Remember that with a pinhole depth of field is effectively infinite, and that includes what is behind the hole. I’ve also found that the results of digital pinhole seem to be a bit muddy – it’s OK in black and white but personally not for me (I am aware others like it).

So…there’s my little write-up of 35mm pinhole, which hopefully will keep Hamish off my back for a while… I’d definitely encourage you to give pinhole photography a try, I’ve found it to be a wonderful way to work that has opened up my creativity and improved my lens-based work as well. There’s also a wonderful community out there, which culminates with the very wonderful Pinhole Day at the end of April each year (there will be a group of us getting together in Norwich).
Have fun kids!

Should you so desire, you can find more of my work on alexyates-photography.com, or you can find me on Instagram and Facebook.
Share this post:


Comments
StephenJ on A little introduction to 35mm for Pinhole photography – Guest post by Alex Yates
Comment posted: 10/09/2017
I have the Ondu 6 x 9 and agree with you regarding the shutter mechanism, which I found to be a bit jarring, but then I had initially been using a Leica M2 with a pinhole body cap and Leica's are not known for their sticky shutters.
I later found that Silverprint stocked the Zero Image cameras and they also sold their brass cable release kit, which I adapted for the Ondu and has made a massive difference to the camera. Other problem with the 6 x 9 is incorrect placement of the red film viewing window on the back, which never reveals the numbering on Kodak colour film, the window is misplace apparently.
Do you contribute to World Pinhole Day?
Stéphane on A little introduction to 35mm for Pinhole photography – Guest post by Alex Yates
Comment posted: 10/09/2017
George Appletree on A little introduction to 35mm for Pinhole photography – Guest post by Alex Yates
Comment posted: 10/09/2017
I started with a Zero 120 years ago. I sold that beautiful thing, ... it was too perfect.
My first creation was made with a cooky tin box: just crazy. It works pretty fine.
But at last high tech devices like that one need a lot concentration (not as much as cleaning a leica sensor, lol) and the easiest way of doing one is getting a cheap camera or any of those lomo, remove the lens and make a hole.
Roger B. on A little introduction to 35mm for Pinhole photography – Guest post by Alex Yates
Comment posted: 01/10/2019