I’ve often observed from afar large format photographers esoterically divining their cameras and producing photos that my 35mm camera could only dream about. But I was largely content shooting the smaller formats until I went into a gallery and was caught staring at the photographs on display. The owner of the gallery (and a sage photographer) noticed me looking at his works and walked up to me.
“These are large format aren’t they?” I asked rhetorically. He smiled knowingly and after a pause said,”You have to try it at least once,” still smiling as if the memories of each photograph came flooding back to him. I asked him a flurry of technical questions and he did his best to encourage me with non-threatening answers. I left determined to try large format “at least once”.
Still, I wasn’t sure I wanted to invest in a large format camera, lens, film holders, ground glass, loupe, light meter, film, developing tank adapters, and who knows what else I’d need to try this “at least once.” And as I thought about it, I realized I could make a really simple large format camera out of a cardboard box, lined with black cardboard and calibrated to infinity with whatever lens I could get ahold of. Which brings me to… the lens.
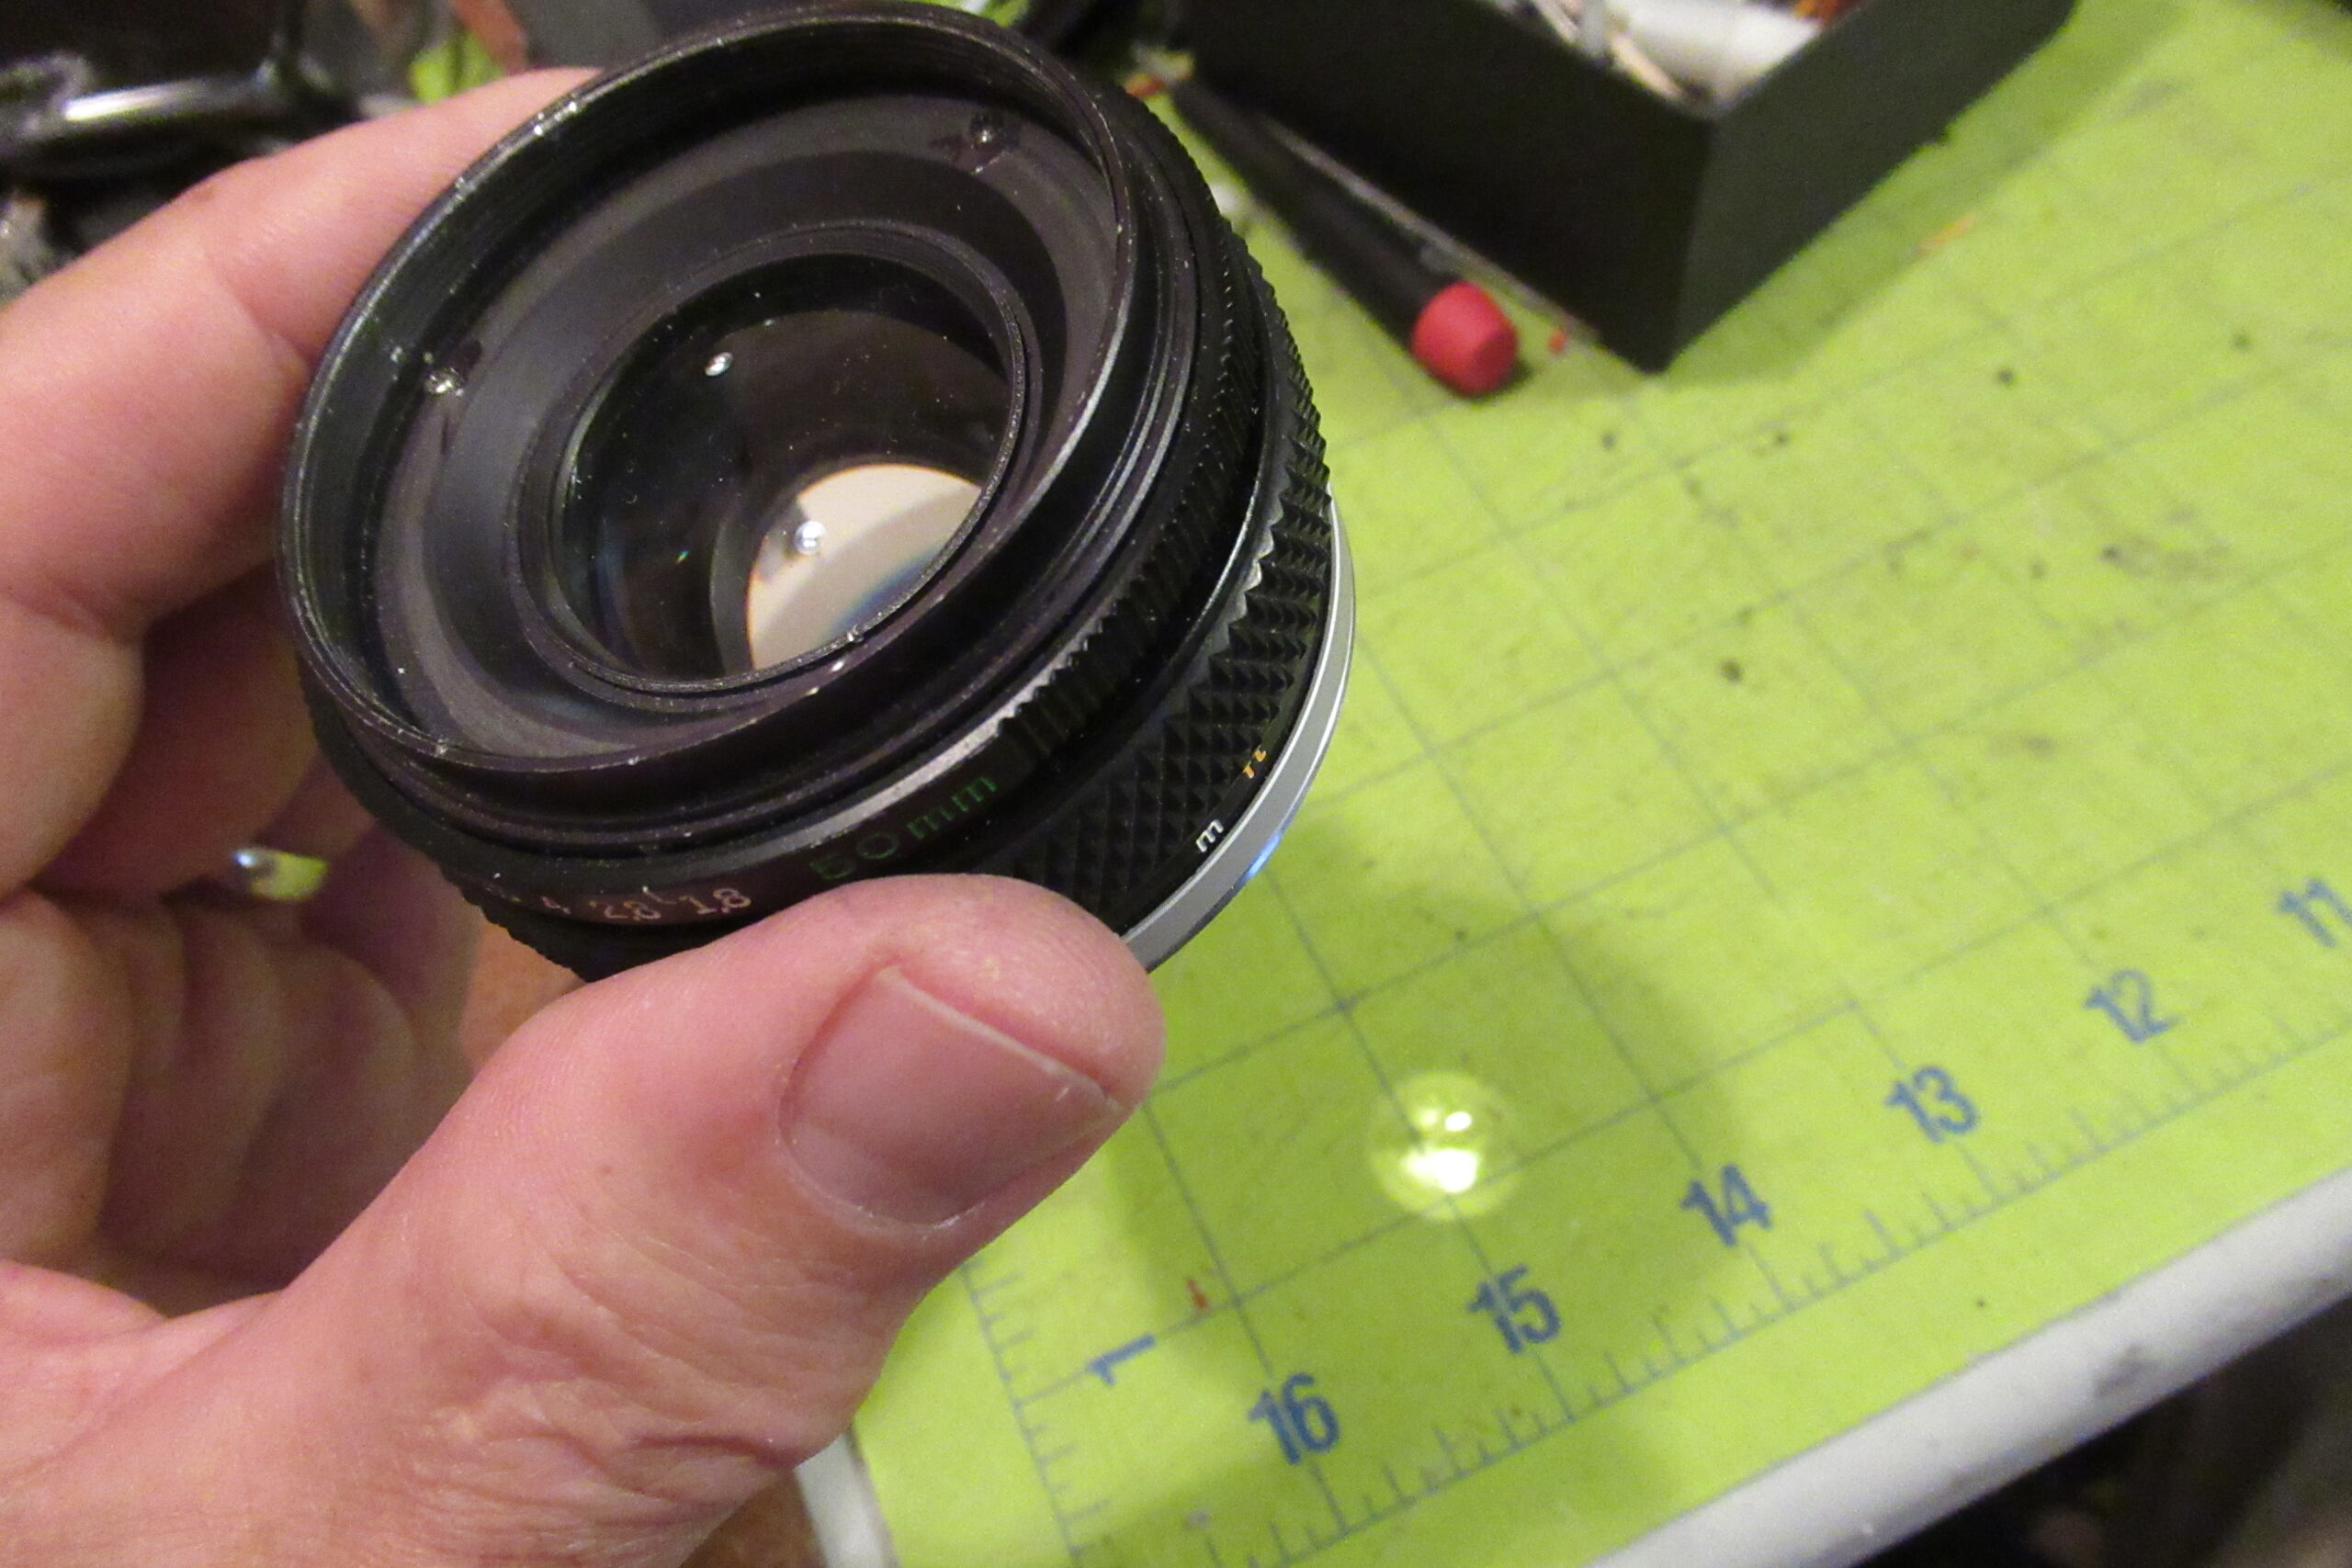
In case you haven’t checked, large format lenses are kind of expensive, especially if you are only planning on using it just once, and aren’t sure this is going to be your thing. I could have resorted to a pinhole, but I wanted to see what kind of quality a lens could do. So the project got put on hold for a while until I was messing with a spare 50mm lens made for 35mm film and the project didn’t go well. A teeny ball bearing and spring didn’t make it back into the aperture ring so I had a lens without the nice clicks between stops. A perfect lens for experimenting.
Now, I don’t know much about optics except what I learned in Physics 10 class in high school, and was curious as to why lenses made for 35mm film had such small image circles. Even a 200mm lens has an image circle that’s not much bigger than a couple of inches. How does a 200mm large format lens produce an image circle of 8 inches or more? I still don’t know the real answer to this question, but I suspect it has to do with the rear elements. I found I could make the image circle bigger by placing a concave lens element behind the lens, which effectively increases its focal length. Couple this fact with the observation that the rear element of my 50mm lens is really convex, and that the focal length of a lens is a factor of all of its elements combined, I went for it. I removed the rear convex element and found this more than doubled the focal length and increased the image circle at the same time!
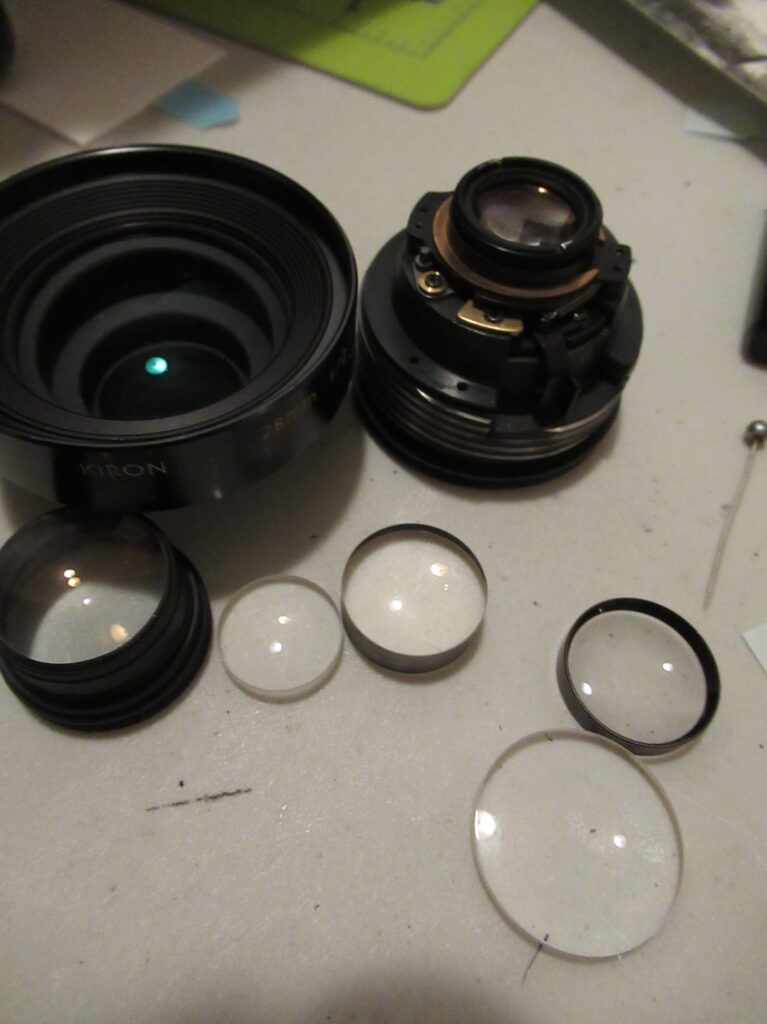
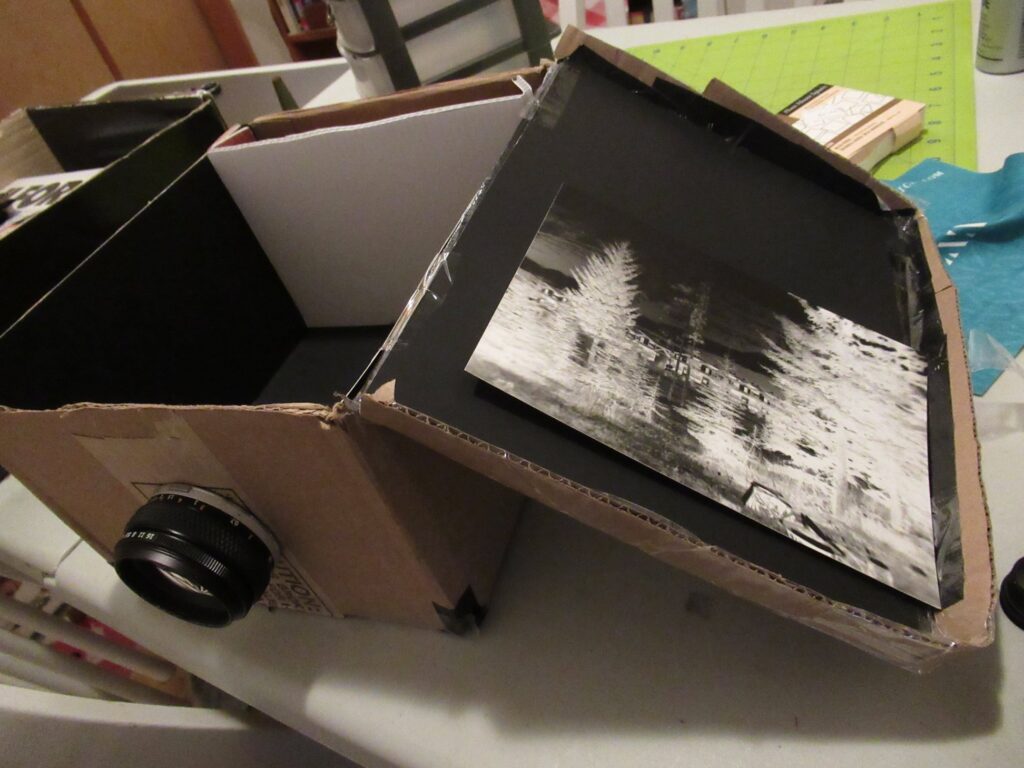
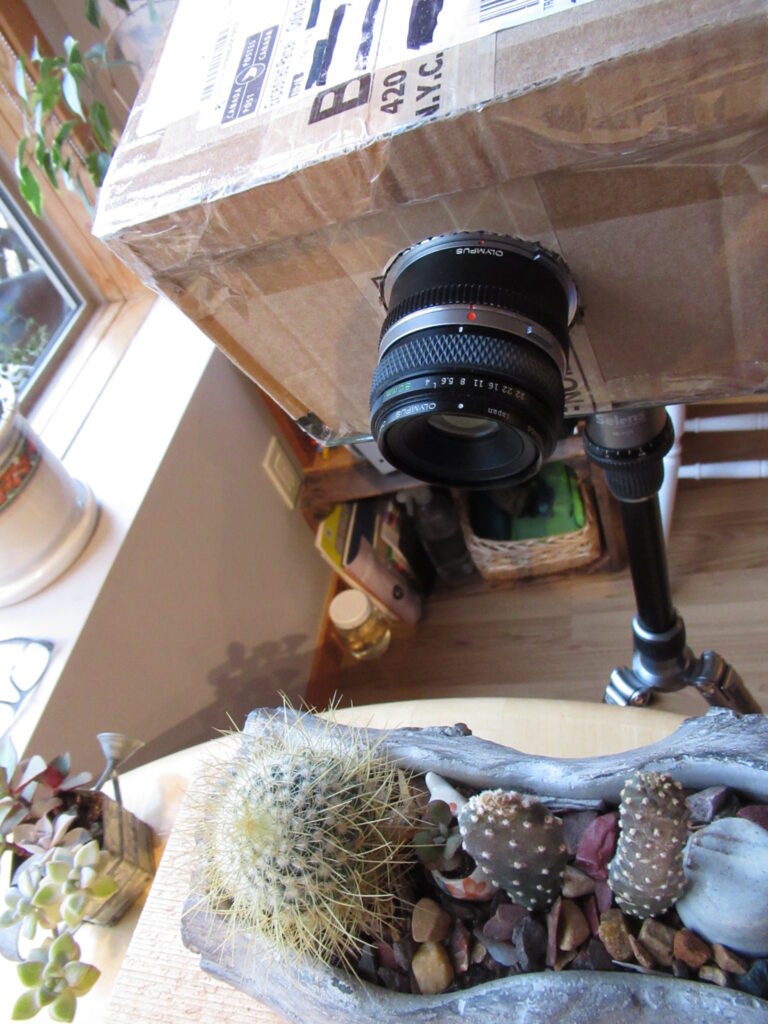
So, I picked up the pieces from another failed 28mm lens project and found a concave lens element of the right diameter which replaced the rear element of the 50mm lens which made it focus around 170mm from the film plane. I had my lens! So I got a cardboard box, cut a hole through the front and twisted the lens in and made a make-shift film plane and operated it like a camera obscura moving the film plane back and forth until the image looked like it was in focus. Then, in a darkened room, I taped a 5×7 sheet of photographic paper to the film plane, stuck a lens cap on and set the box up outside on a chair. In my haste, I forgot to figure out the exposure, so I had to slow down and figure this out. Although it was originally an f/1.8 lens, I was sure this wasn’t the case now. This was going to require some math. The aperture wide open looked like it was around 30mm, and an aperture calculator came out with an f-number of 5.6 – 3 stops slower than f/1.8 – so I figured I’d have to add 3 stops to whatever the aperture setting said on the lens. Combine that with an ISO rating of around 6 or so for paper, and I had my exposure time.
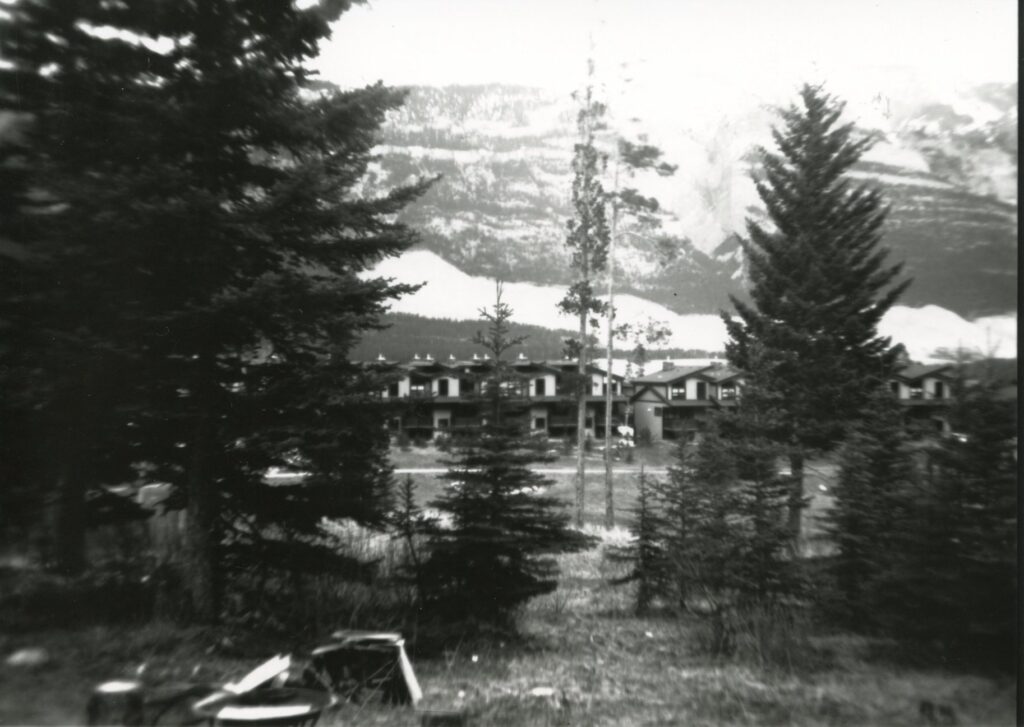
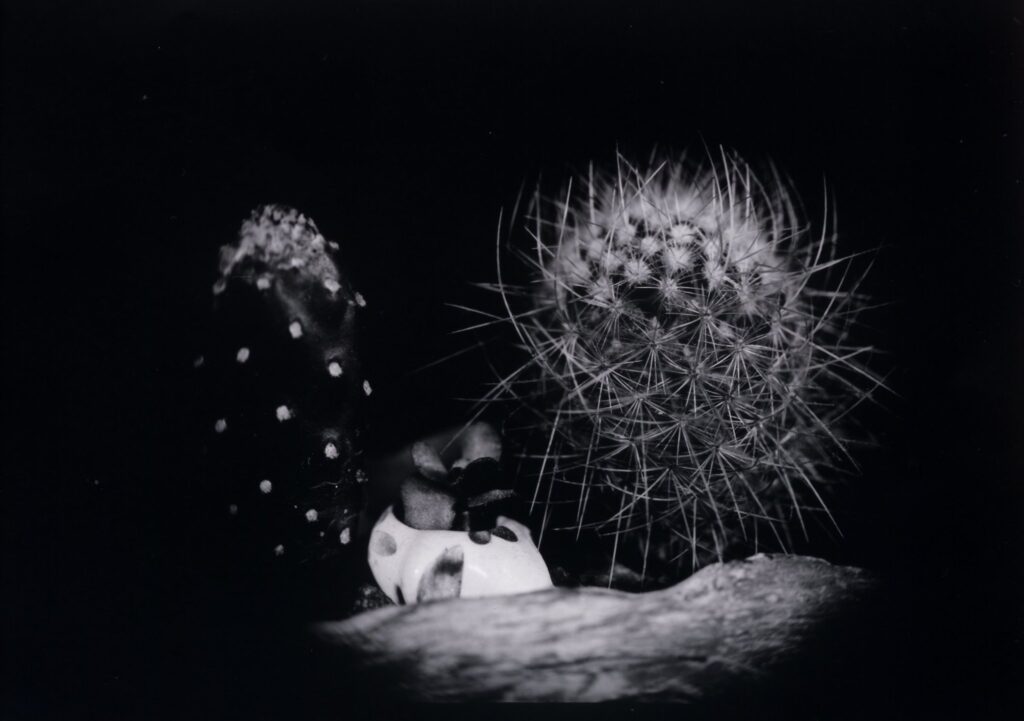
After exposing, I rushed back to my bathroom and developed the paper negative. The wonder of large format photography began to develop in front of my eyes and I knew then that this would not be my last time I did this. It felt like I was going back in time, doing raw photography in its simplicity. I was totally hooked. After making a print from the negative it became apparent that spreading the image circle on that little 50mm lens definitely pushed the optics way beyond its limits, but the potential was there. Later I experimented with an 80mm macro lens and though the image circle was around 4×4, the image came out nicely.
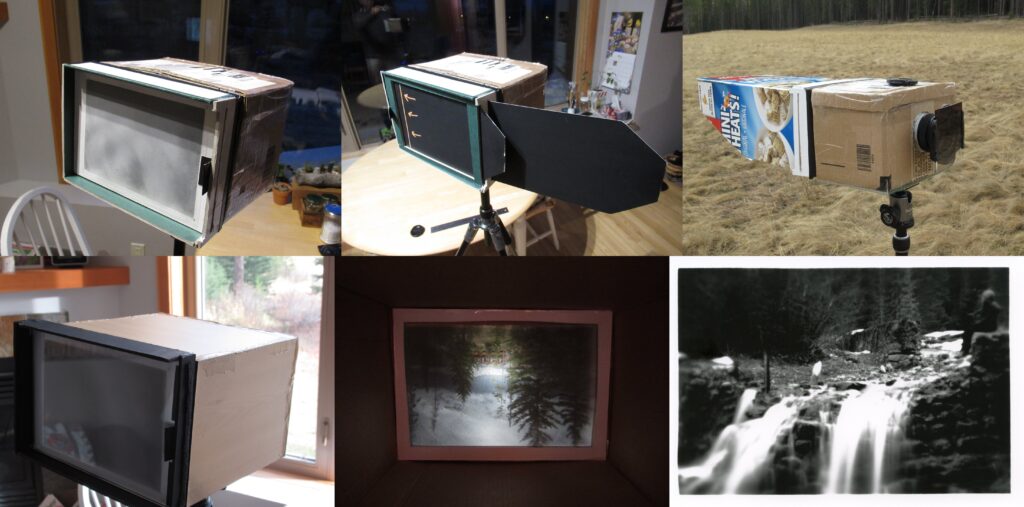
This led me on a journey of upgrading the cardboard to hardboard, making focusable sliding boxes, making my own ground glass and film holders, experimenting further with that rear element on the 50mm lens, making a servo operated shutter, then eventually finding a 210mm large format lens and building a camera. But I’ve kept that 50mm lens in case I want to take a 5×7 picture with lots of character, going back to my simpler days of large format. And I eventually realized that large format photography isn’t just about taking unique photos on big negatives. It was about creating memories of the process, each hard won photo packed with a story behind it.
I sometimes think back on that sage photographer in the gallery and think of his smile, smiling to myself as I look back on the memories created with that 50mm lens.
Share this post:


Comments
Stephen Meese on Converting a 50mm lens meant for 35mm film to large format
Comment posted: 12/06/2024
Comment posted: 12/06/2024
Alan Withington on Converting a 50mm lens meant for 35mm film to large format
Comment posted: 12/06/2024
Eric Rose on Converting a 50mm lens meant for 35mm film to large format
Comment posted: 12/06/2024
Eric
Murray leshner on Converting a 50mm lens meant for 35mm film to large format
Comment posted: 12/06/2024
Most, if not all, modern (since Angenieux) 35mm SLR optics are 'retrofocus' designs to shorten the back focal length (or flange focal distance)...that's one function that often ends up in the rearmost element.
Andreas Feininger, among others, used simple lenses at times, including a magnifying glass. Reducing the aperture diameter solves a number of issues with aberration & other flaws.
Alan Greene's Primitive Photography book is interesting for its LF camera constructions and guidelines for self-combined lenses, typically doublet or singlet. There is a good bit of guidance (more than explanation) on combining lens element diameters, spacings, and stop (aperture) location.
If you have such interest, 35mm SLR zooms can be obtained inexpensively, especially if the iris/diaphragm is 'stuck' in one position.
With patience, quality screwdrivers that don't twist when confronted with Japanese thread-locking compound, and maybe am occasional fan of solvent or heat gun, you can test one down to subassemblies quickly.
Many such zooms have a triplet assembly in the front and some lens designers have told me those front cells of long f.l. are typically highly corrected.
Holding a lens to project an image onto paper or a ground glass usually looks better than what you commit to print...where you find out lenses aren't perfect by accident...especially when deconstructed.
You can also experiment with positive diopter reading glasses. +1 has 1 m f.l., +2 has 1/2 m f.l., +3 has 1/3 m f.l.
If you stack two lenses from a pair of thrift store glasses, the separation distance causes some reduction in f.l. the Hyperphysics website at Georgia State University has online calculators to guide you in the use & abuse of the 'thin lens equation'. It will also help you make mistakes you didn't know you had the skills to discover. If you empirically combine elements and spacings to figure out focal length, beware projecting indoor lighting at less than infinity because you will end up with optics that focus at macro instead of landscape distances. Remember that before committing positions to adhesive.
If you don't have unrealistic expectations, you can do some fun, if awful, things with reading glasses.
After a while, anything that passes light will be worth taking a 2nd look at
I saved an empty olive jar once, for a while because it formed an image. I decided it wasn't worth figuring out a method of spacing a stop or mounting it to stabilize focus long enough to use.
I am usually content to capture distortions of light and shadow through such 'optics' with a separate camera. A beer or wine glass and overhead lighting provide me minutes of entertainment, sometimes at the cost of discomfort for other patrons. I can only wonder what they think (if I cared).
It becomes difficult to release partial lenses once you discover their potential, leading to drawers and boxes of specimens in your optics graveyard. Don't leave them on shelves if you have cats.
Comment posted: 12/06/2024
Tony Warren on Converting a 50mm lens meant for 35mm film to large format
Comment posted: 12/06/2024
Geoff Chaplin on Converting a 50mm lens meant for 35mm film to large format
Comment posted: 13/06/2024
Johan on Converting a 50mm lens meant for 35mm film to large format
Comment posted: 16/06/2024
Comment posted: 16/06/2024
Jeffery Luhn on Converting a 50mm lens meant for 35mm film to large format
Comment posted: 14/07/2024
Comment posted: 14/07/2024