That time I “Half-Framed” a cute Kodak Flash Bantam camera (Part 1 of 3)

By Dave Powell

I’ve long wanted a half-frame 35mm camera. Doubling one’s images per roll is especially great with today’s film costs. I’m an inveterate tinkerer, though, and preferred to convert an inexpensive (but decent) “full-frame” camera, rather than buy a “real” half-frame. But what camera should I tackle? Ideally, it would be:

  • Pocketable
  • Well-built
  • Fully mechanical
  • Blessed with a nice lens
  • Easily (and reversibly) converted and
  • Fun to shoot

Trusting the Universe’s Sense of Humor

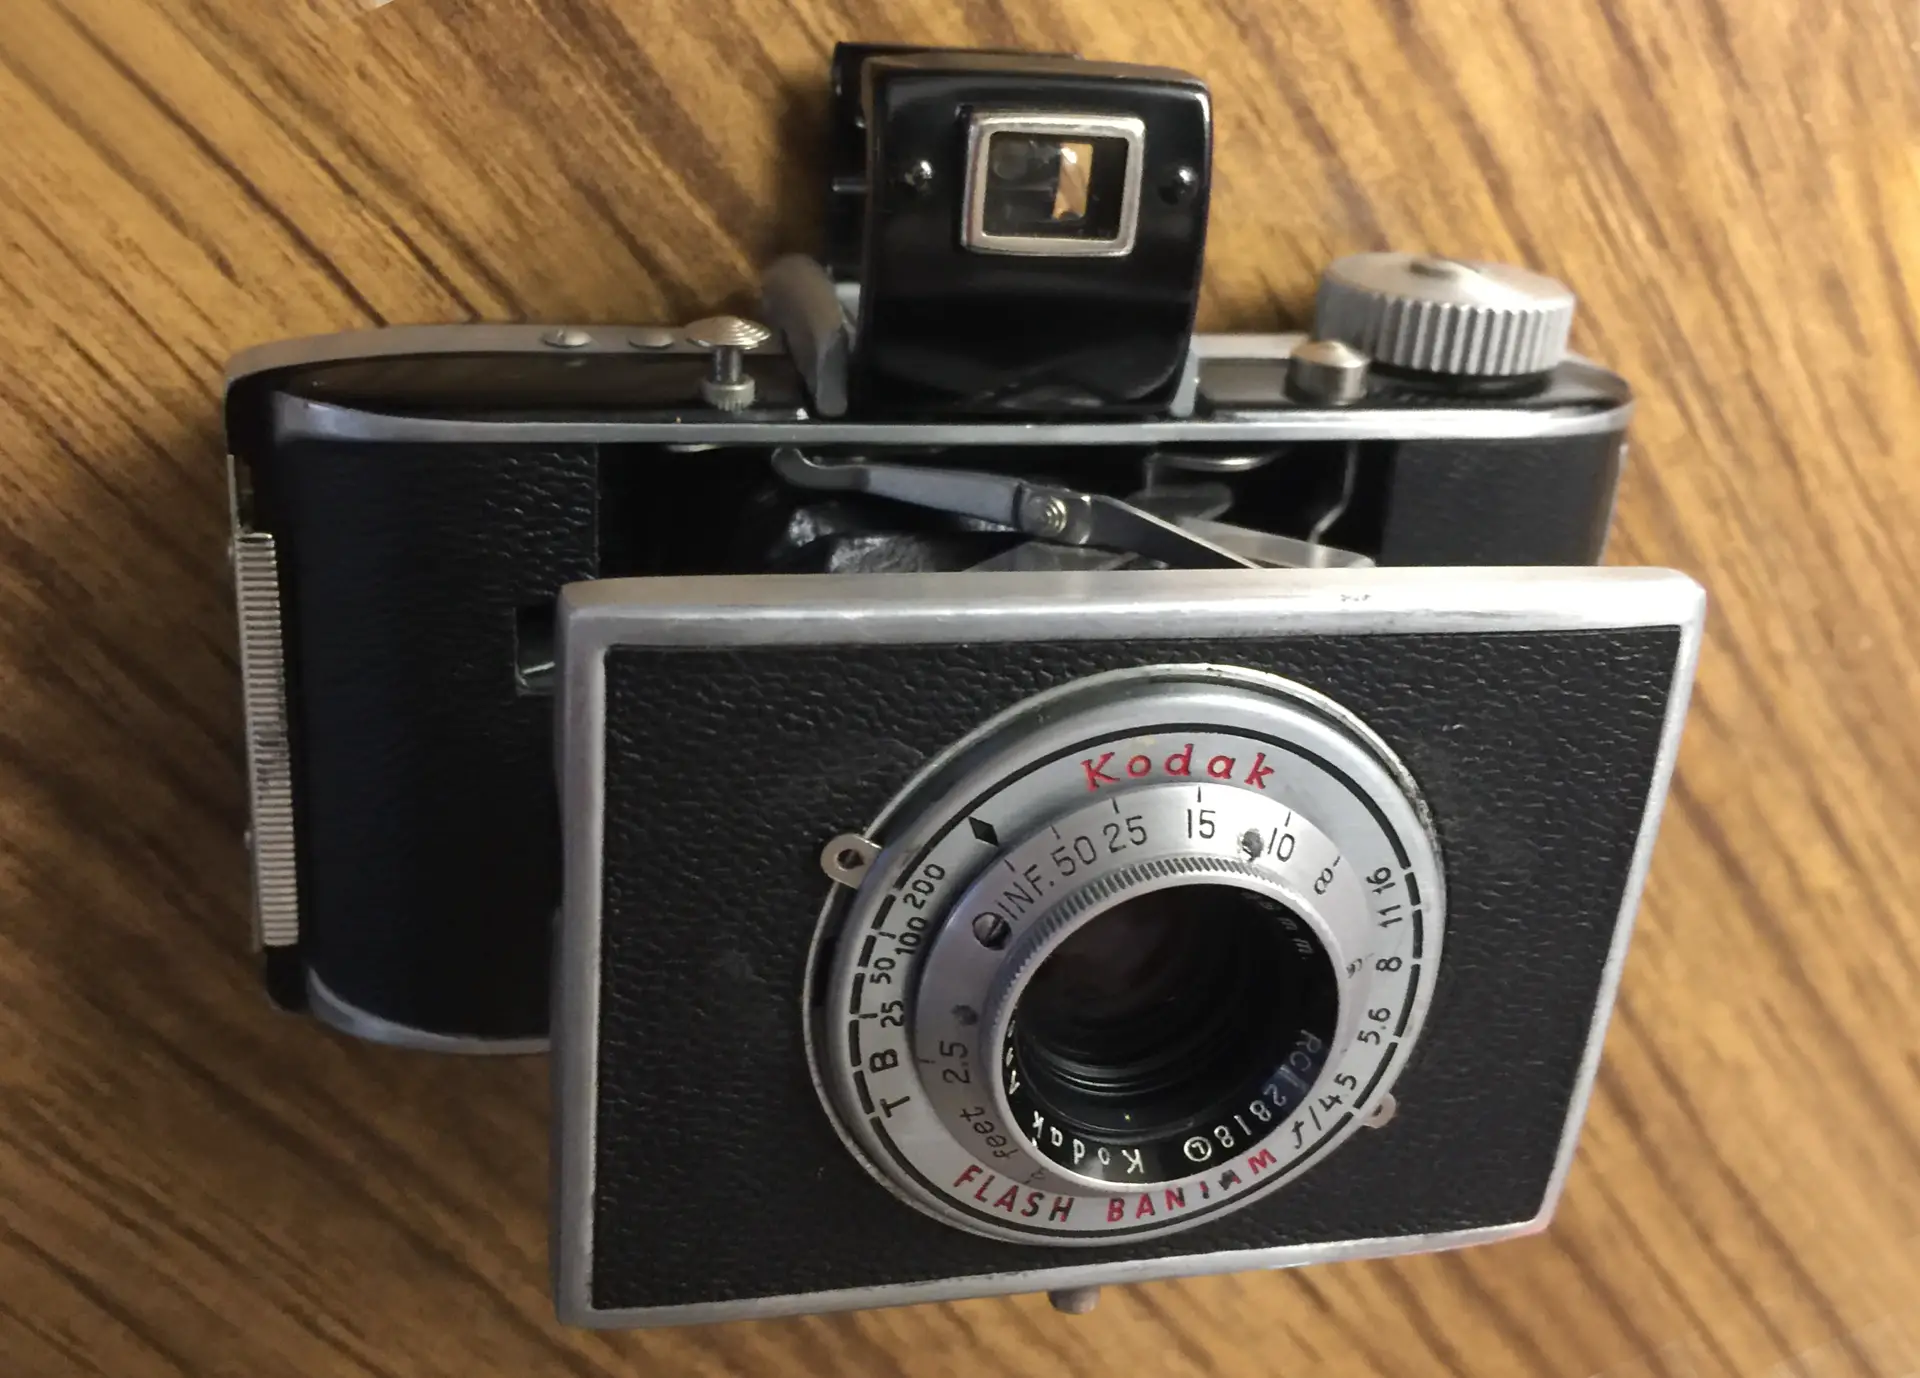
For a long time, I trolled the web for candidates. It was difficult to qualify them against my list, and I decided to leave the decision to the universe’s sense of humor. A few months later, my wife and I noticed a “Free” basket leaning against the trunk of an old tree at an estate sale. Inside was the Kodak Flash Bantam camera in the opening photo. It appeared to tick all my boxes:

  • Its 2.5×4.5×1.5-inch body is palm-friendly, but weighs in at a sturdy 10oz.
  • Fully mechanical, it sports a highly rated 48mm f/4.5 “Anastar” (coated Anastigmat Special) lens, and ranks among the best of Kodak’s long-lived Bantam line. The only model often rated higher above it (and its earlier “Bantam 4.5” sibling) is the beautifully Deco “Bantam Special.” But while that camera commands prices into the hundreds, the Flash Bantam (and Bantam 4.5) can be grabbed online for $10 to $20.
  • The camera also seemed simple enough to convert non-destructively and reversibly.
  • And in the end, it proved to be extremely fun to use!

Half-framing it would be more than worth the effort too, if my camera performed anywhere near as well as the unaltered unit profiled in this and this article.

Solid and Simple to Use

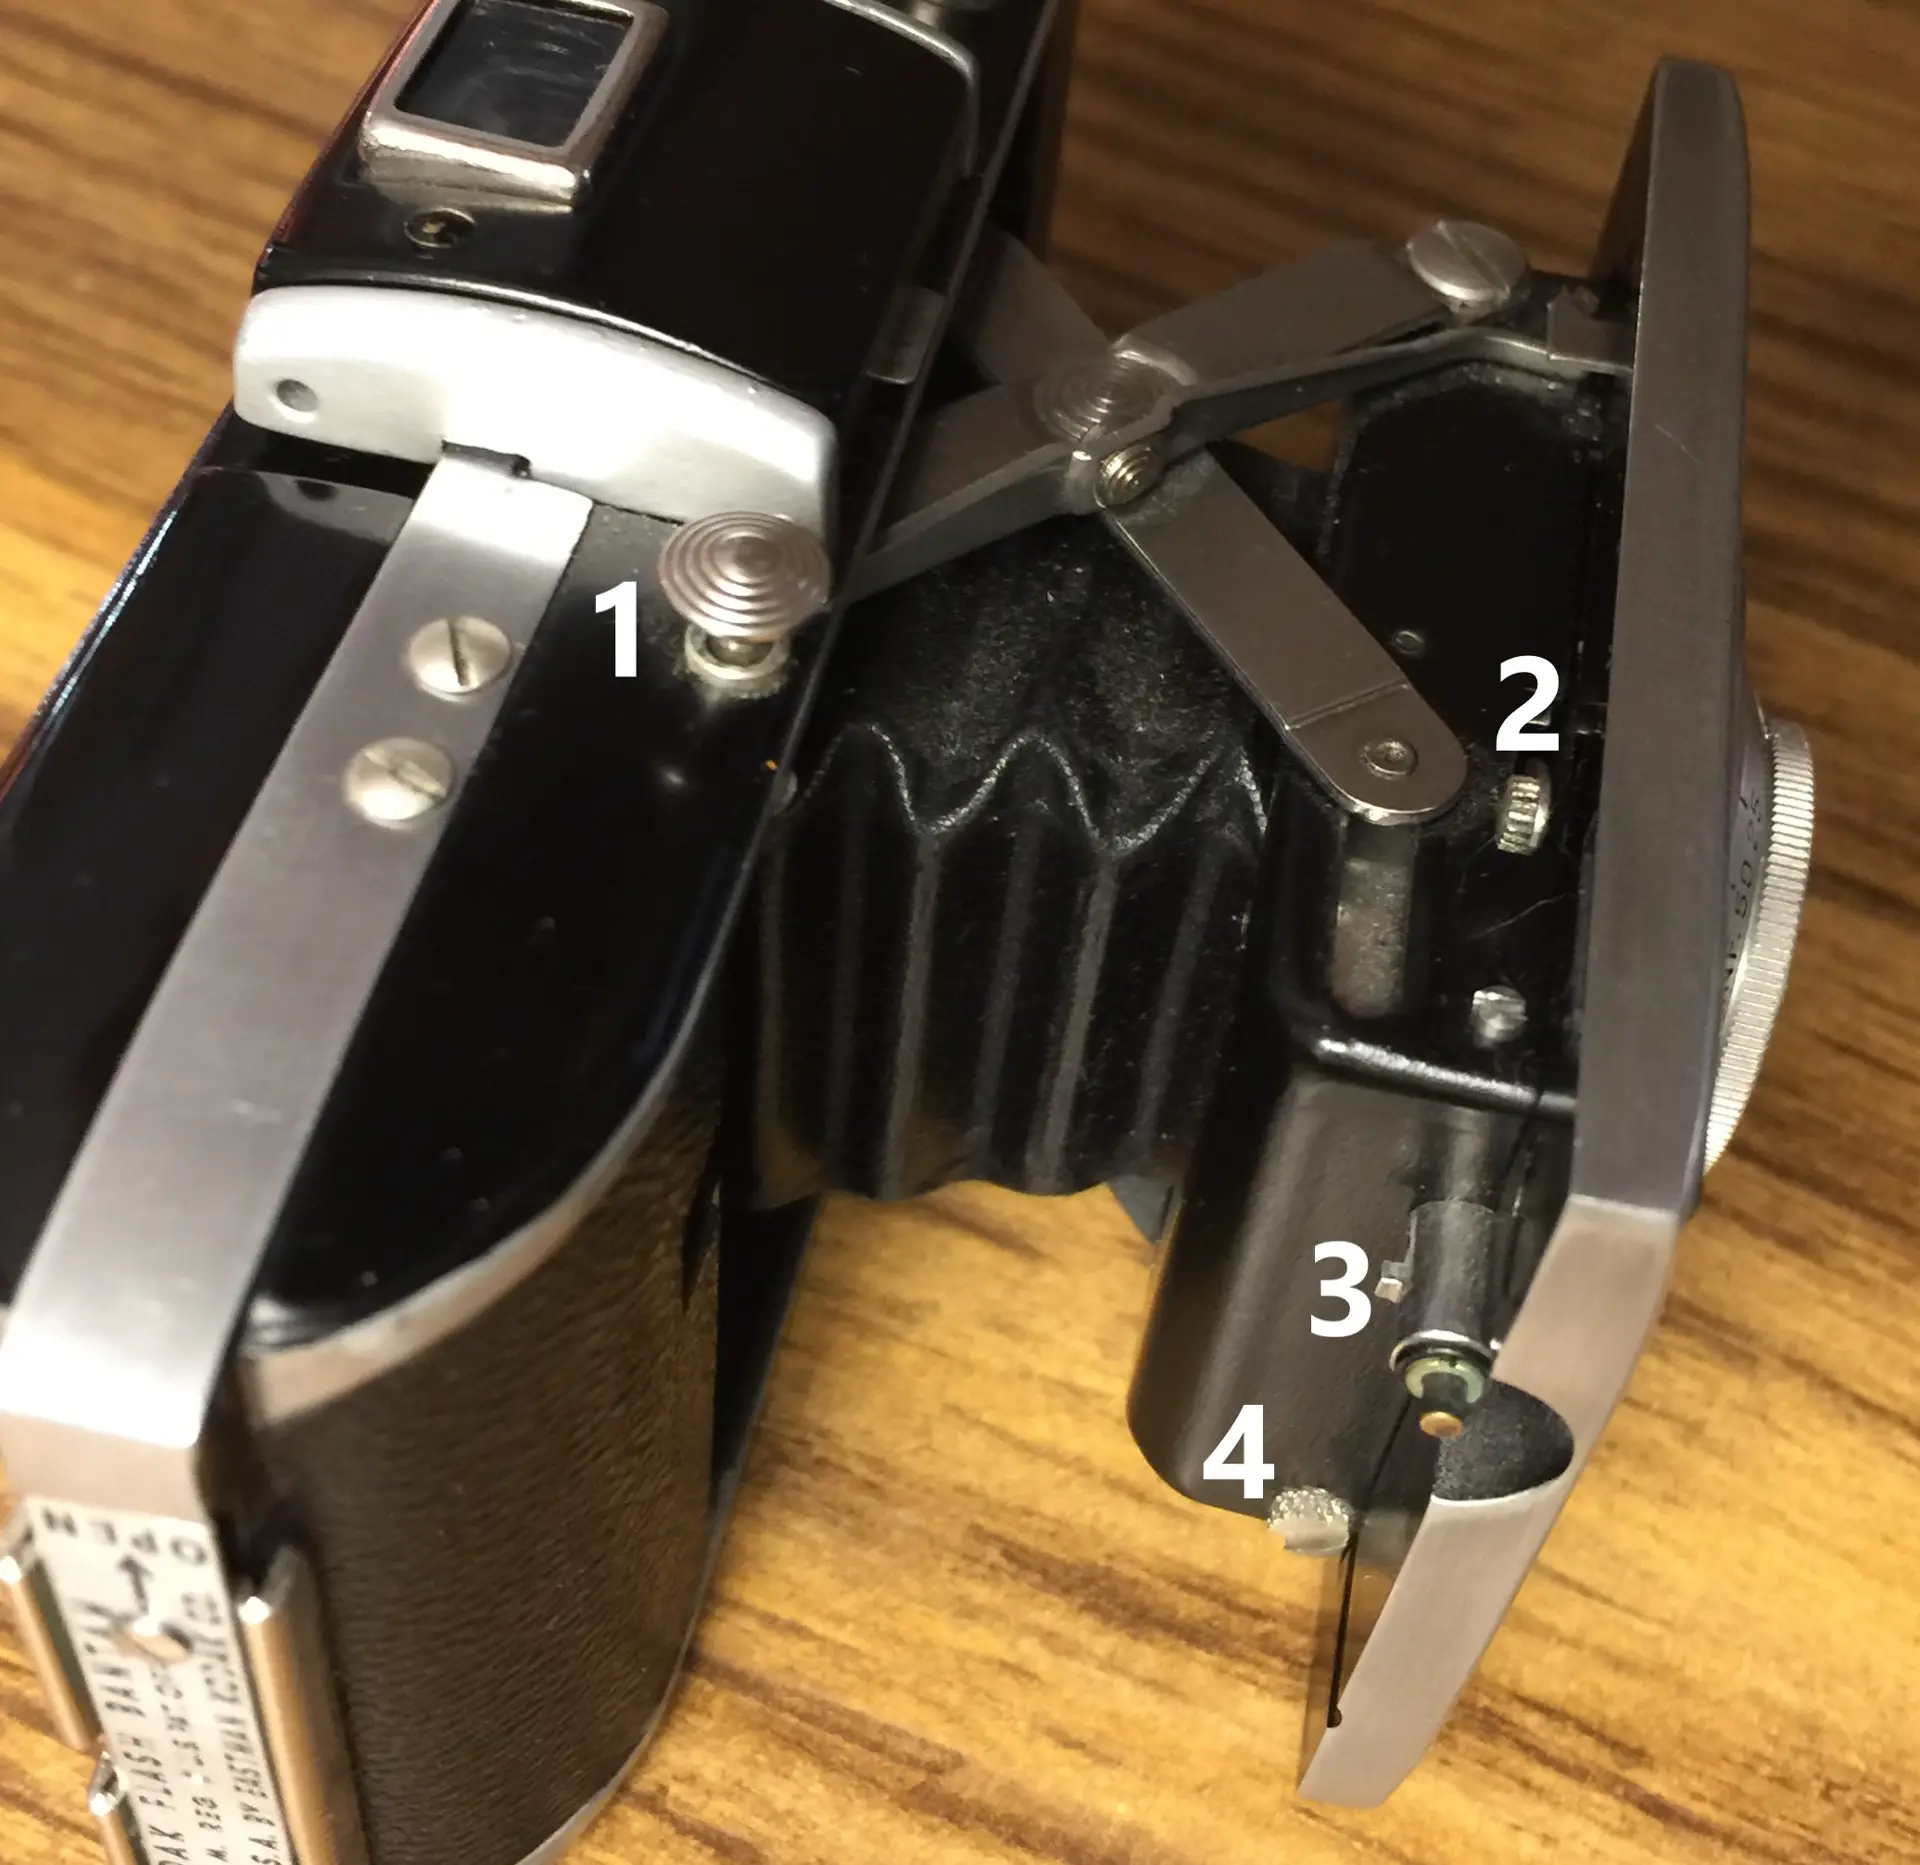
According to the Kodak Camerosity code on its lens, the camera was assembled in 1951 from metal and Bakelite. It feels solidly built, and is very easy to use. Press a button to the left of the camera’s pop-up viewfinder, and a rectangular lens panel springs forward on sturdy scissor struts:

Kodak Flash Bantam camera opened
A metal box on the panel back houses the camera’s shutter and Tessar-design lens. Behind it, a small bellows is (unusually) made of thin leather rather than paper. Here, item 1 is the shutter button, 2 is the knurled lever that cocks the shutter, 3 is the proprietary flash-sync port, and 4 is a screw cap that, when removed, allows one to attach a standard release cable. (On my camera, I need to press the cable plunger firmly to trip the shutter.)

I also love being able to set apertures (f/4.5-16), shutter speeds (1/200-1/25 plus B and T), and focus distances (down to 2.5 feet) at the lens front. It’s easy to configure the camera before even bringing it to the eye. A highly flexible piece of pocketable kit!

Cleaning the Lens

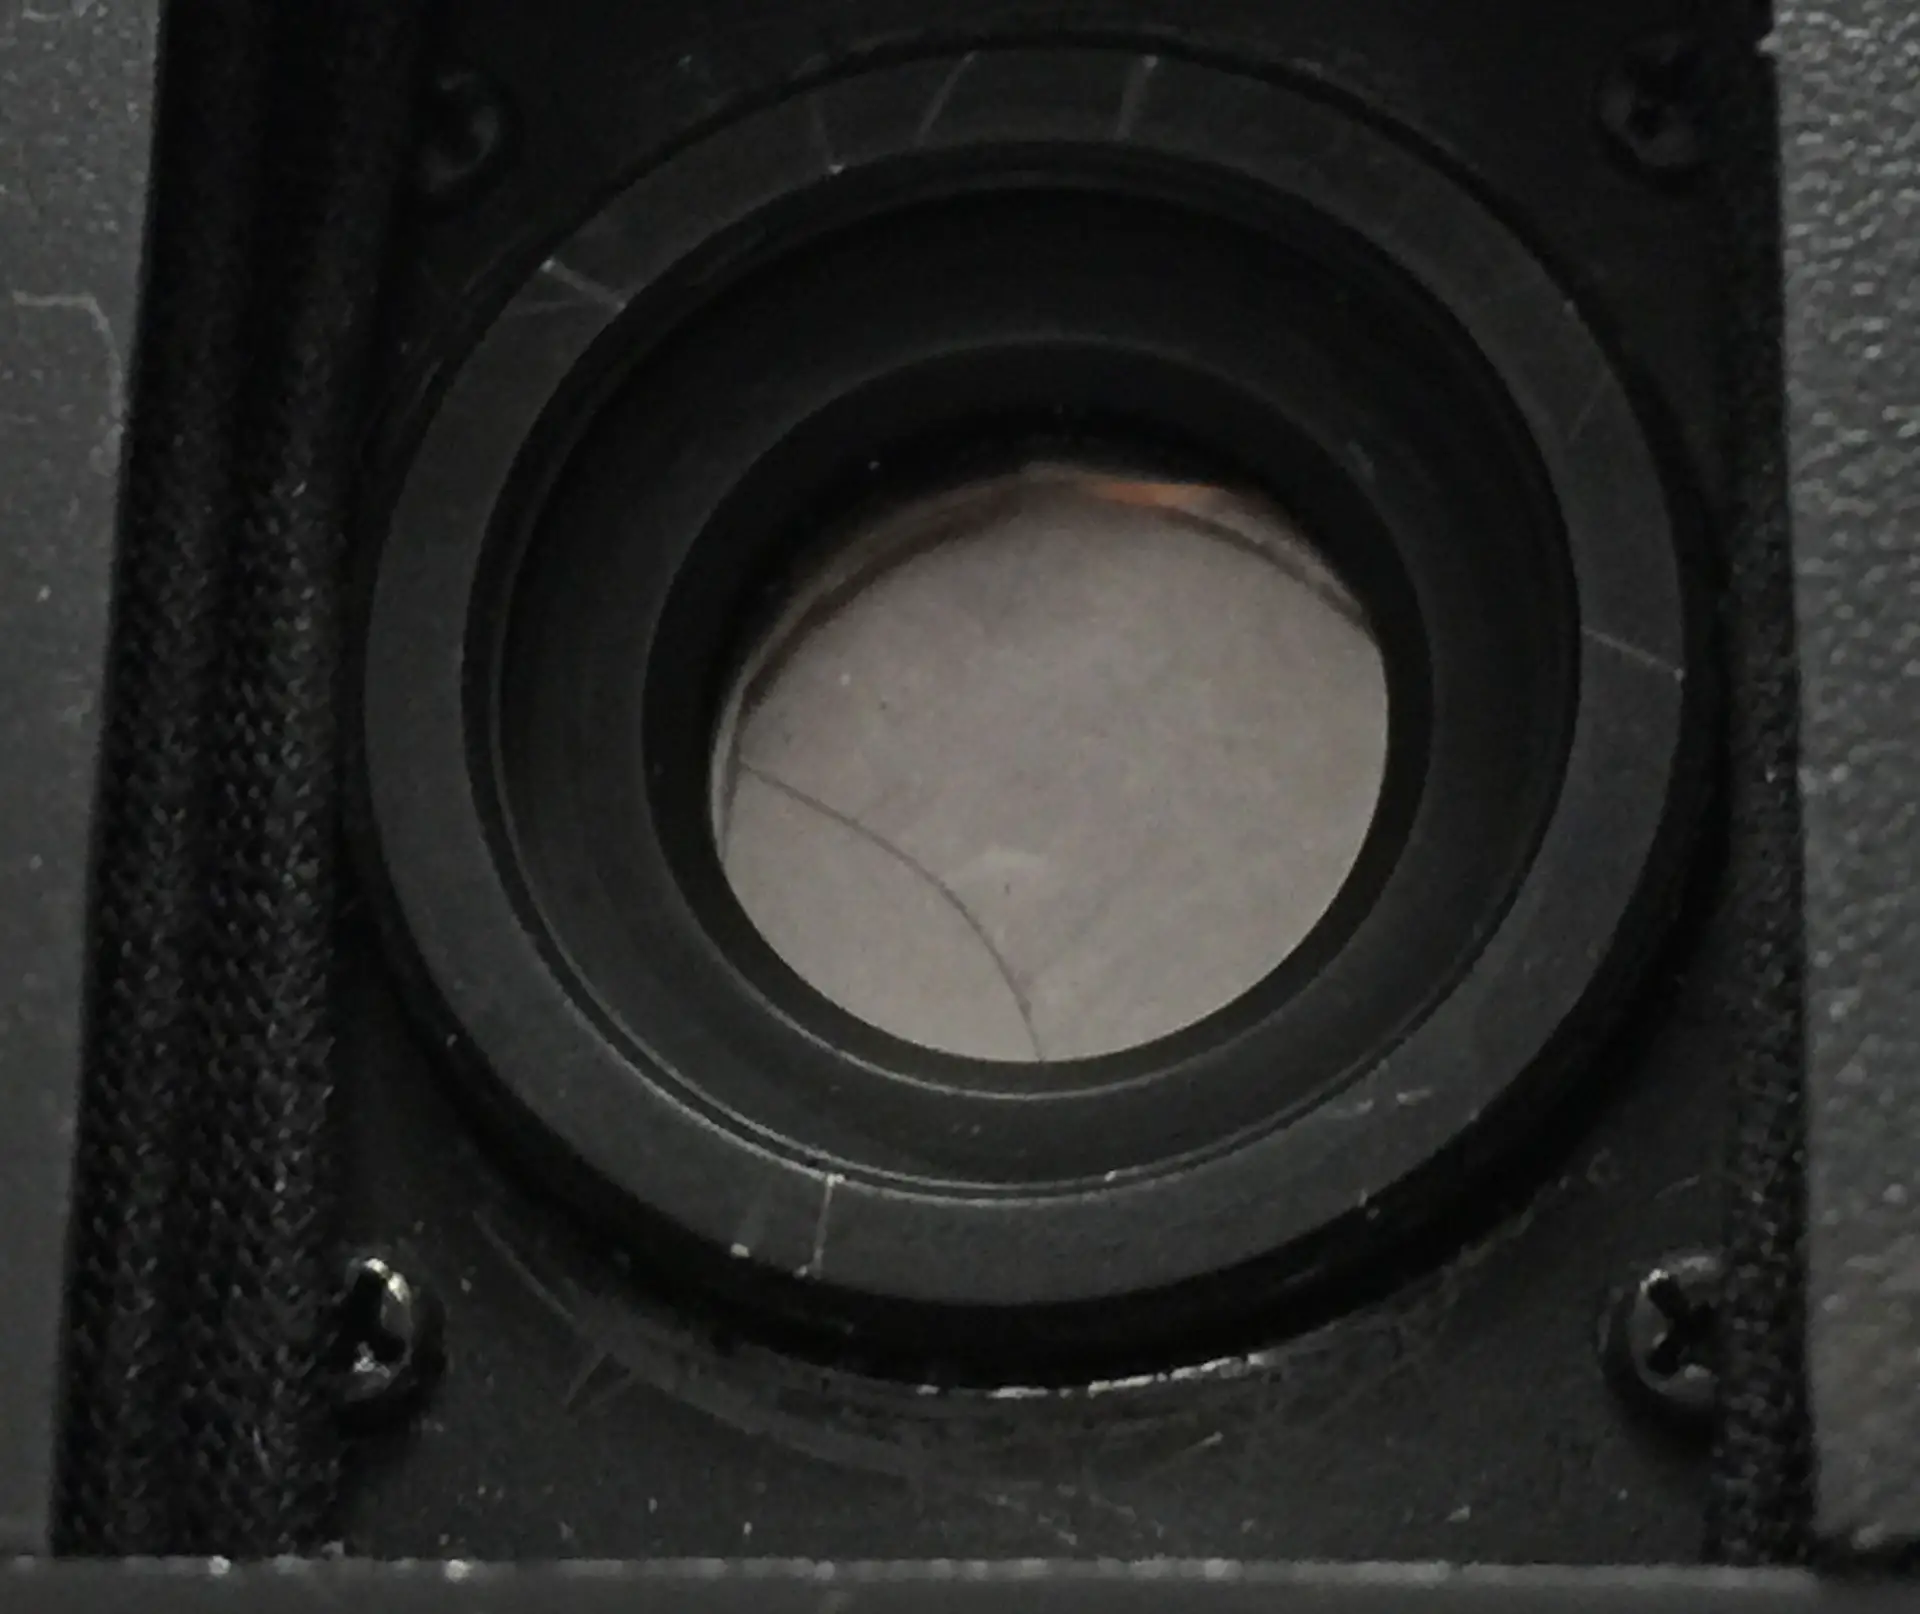
Overall, the camera was in beautiful cosmetic condition– except for the missing (and unneeded) knobs on its shutter and aperture levers. But bright light through the lens revealed some interior dust and a small smudge. There wasn’t enough of either to do much harm, and the smudge didn’t look like fungus. But I still wanted to clean the glass.

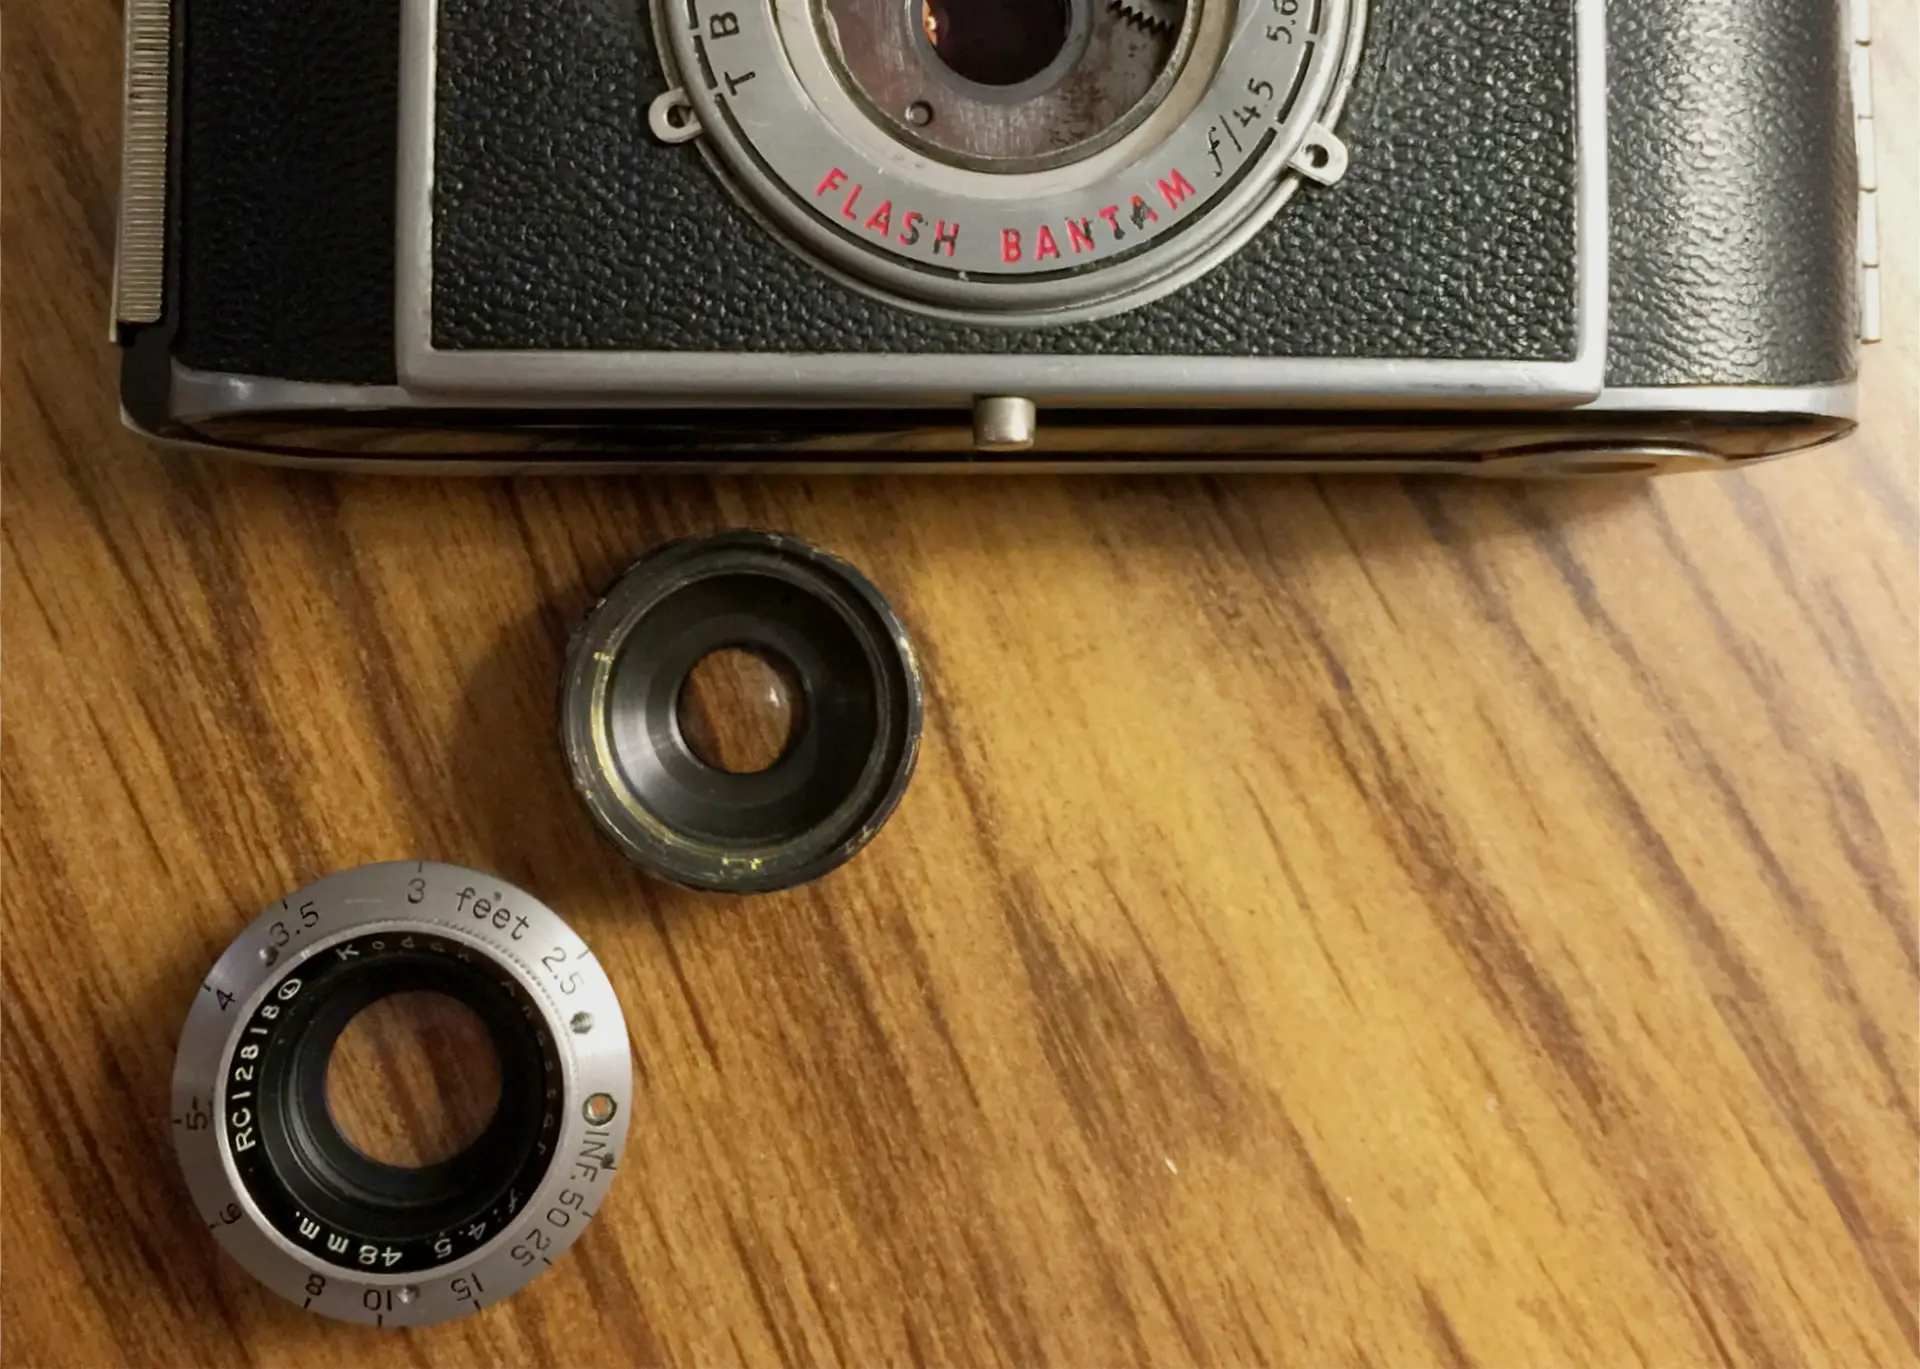
It proved harder than it should have been! The camera’s 4-element/3-group lens contains what I will call four “units.” From the camera front, they are:

  • UNIT A: The metal focusing bezel/ring that screws onto UNIT B (and locks onto it with a very tiny set pin).
  • UNIT B: The brass focusing-cell that contains the first optical element. (With threads on its outer surface, this unit screws into UNIT C:).
  • UNIT C: A brass cylinder (wider than UNIT B) that contains the second optical element. (UNIT B screws into UNIT C… which itself screws into the camera in front of the leaf shutter.)
  • UNIT D: A short brass cylinder (painted black) inside the camera that houses two cemented glass elements. It screws onto the back of the lens panel behind the shutter.

UNITS C and D were easy to detach from the camera for cleaning.

Kidak Flash Bantam camera lens unit 4
But as you can see here, I needed to be extra careful when removing UNIT D. It was so close to bellows folds that I could only turn my needle-nose pliers in short arcs. (I had to press the lens panel against the camera front to reach this unit with the pliers.)

However, it proved nearly impossible to separate UNITS B and C for cleaning. Huge effort produced little progress, and it felt like UNIT B’s threads were grinding through sandpaper inside UNIT C. Used judiciously, acetone can be a temporary lubricant. So I pressed an acetone-damped cotton bud into the few visible threads that I’d exposed between the units, and with somewhat less effort, finally got them apart.

Their problem became clear. A previous owner had apparently clamped rough pliers jaws around UNIT B’s outer threads… and deformed them. But I could fix that! TIP: Using a pointed awl like a needle playing a record, I returned the soft brass threads and grooves to as close to their original state as possible.

And then there was UNIT A: the camera’s metal focusing bezel. My last step before loading film would be to “re-collimate” the lens to restore its infinity focus. And we’ll get to that. But past experience with collimation told me that the bezel would need to screw onto and along the focusing cell without any friction.

However, after I removed the single minuscule set-pin that locked the bezel to the focusing cell (and also removed the bezel’s larger infinity-stop screw), the bezel still seemed locked-on. If not fixed, this tightness would move the focusing cell away from any corrected infinity setting.

Long story short, I thoroughly cleaned the threads of all four UNITS with acetone (being careful to keep it away from the lens’s “Lumenized” coatings)… and then cleaned all glass surfaces with cotton buds and Kodak lens solution. (The internal smudge I’d seen before looked like finger grease, and came off easily.)

Kodak Flash Bantam lens units 1, 2 and 3
This shows the problematic UNITS A, B and C after final cleaning. UNIT C is nearest the camera, and below it, UNIT A (the focusing bezel) is screwed onto UNIT B (the focusing cell)… but not yet locked on.

Re-assembling everything and again looking at bright light through the lens, it was now pristinely clear. And the lens worked smoothly

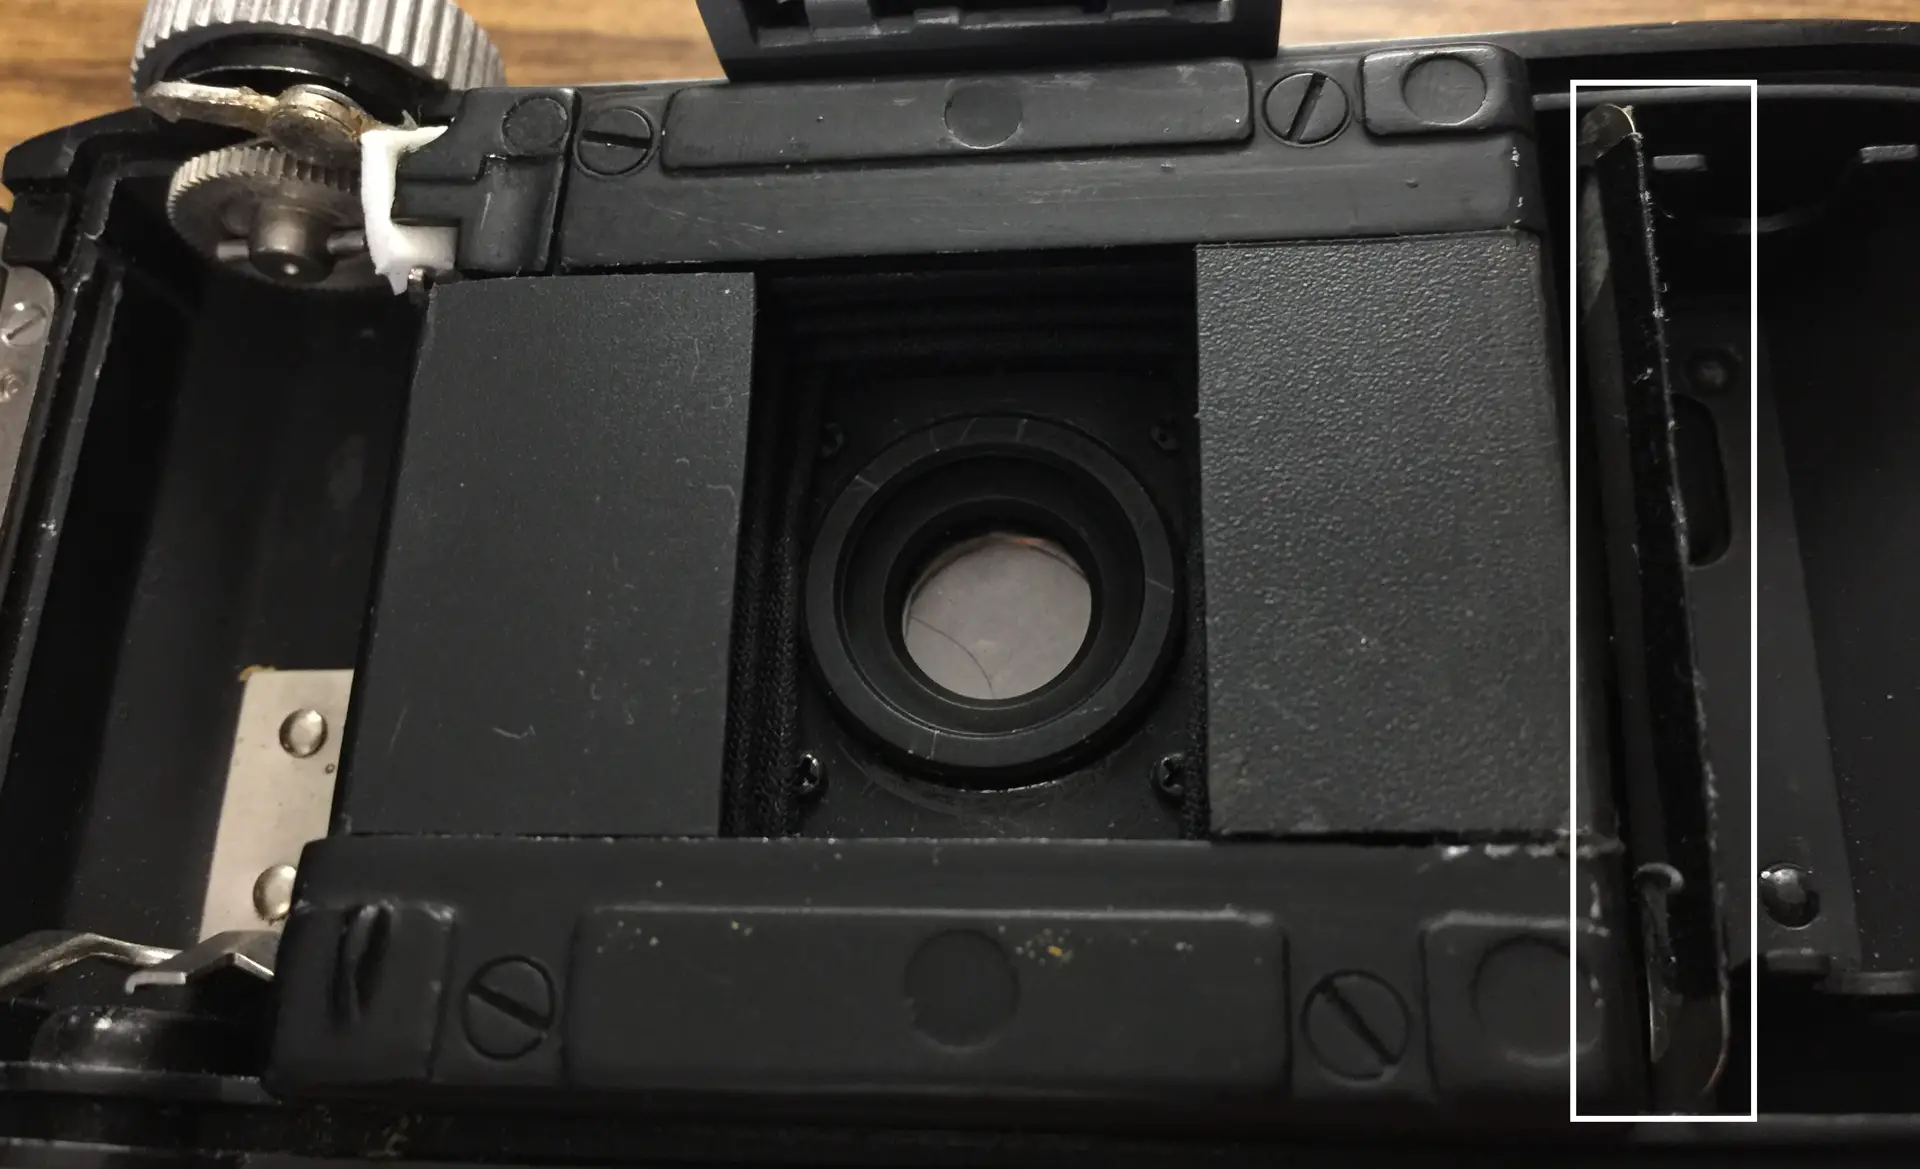
Masking the Film Gate

Next, I masked the camera’s film gate– at the rear of the bellows– for half-frame photos. The Flash Bantam was designed to throw 39x28mm images onto 828 roll film (images nearly one-third larger in area than 35mm’s 36x24mm). So while 35mm “half-frame” photos are around 18x24mm in size, Flash Bantam half-frames would be more like 20x28mm.

Masking the Flash Bantam film gate
I cut two 17x28mm strips of stiff black plastic, which I attached using double-stick transparent tape to narrow the film-gate opening down to 20x28mm. Also, I wrapped electrical tape around a nearby metal edge (outlined in white), so that it wouldn’t scratch film as it left the supply chamber.
Taping the exposure-number window
I then made three more physical changes: (1) Shown here, I put electrical tape over the exposure-number window on the camera back… to prevent film fogging. (2) As recommended in one of the above-linked articles– I inserted a strip of black paper behind the camera’s internal pressure plate to keep light from reflecting off the plastic exposure-number window and two shiny screws. And (3) Since I’d be shooting half-frame images, I masked the viewfinder glass with tiny strips of electrical tape. TIP: I got the best results by masking only the viewfinder’s rear-most glass surface.

Collimating the Lens

After all of the above, I doubtlessly needed to “re-collimate” the lens to restore infinity focus. Though it sounds complicated, the process can be fairly simple. I’ve used SLRs to collimate several vintage rangefinder lenses. But this time, I’d use my Fuji X-Pro1 digital to restore the Flash Bantam’s infinity focus.

NOTE: Photographer Mike Elek offers a well-illustrated article about collimation here. Though it involves a different camera, the general description still applies.

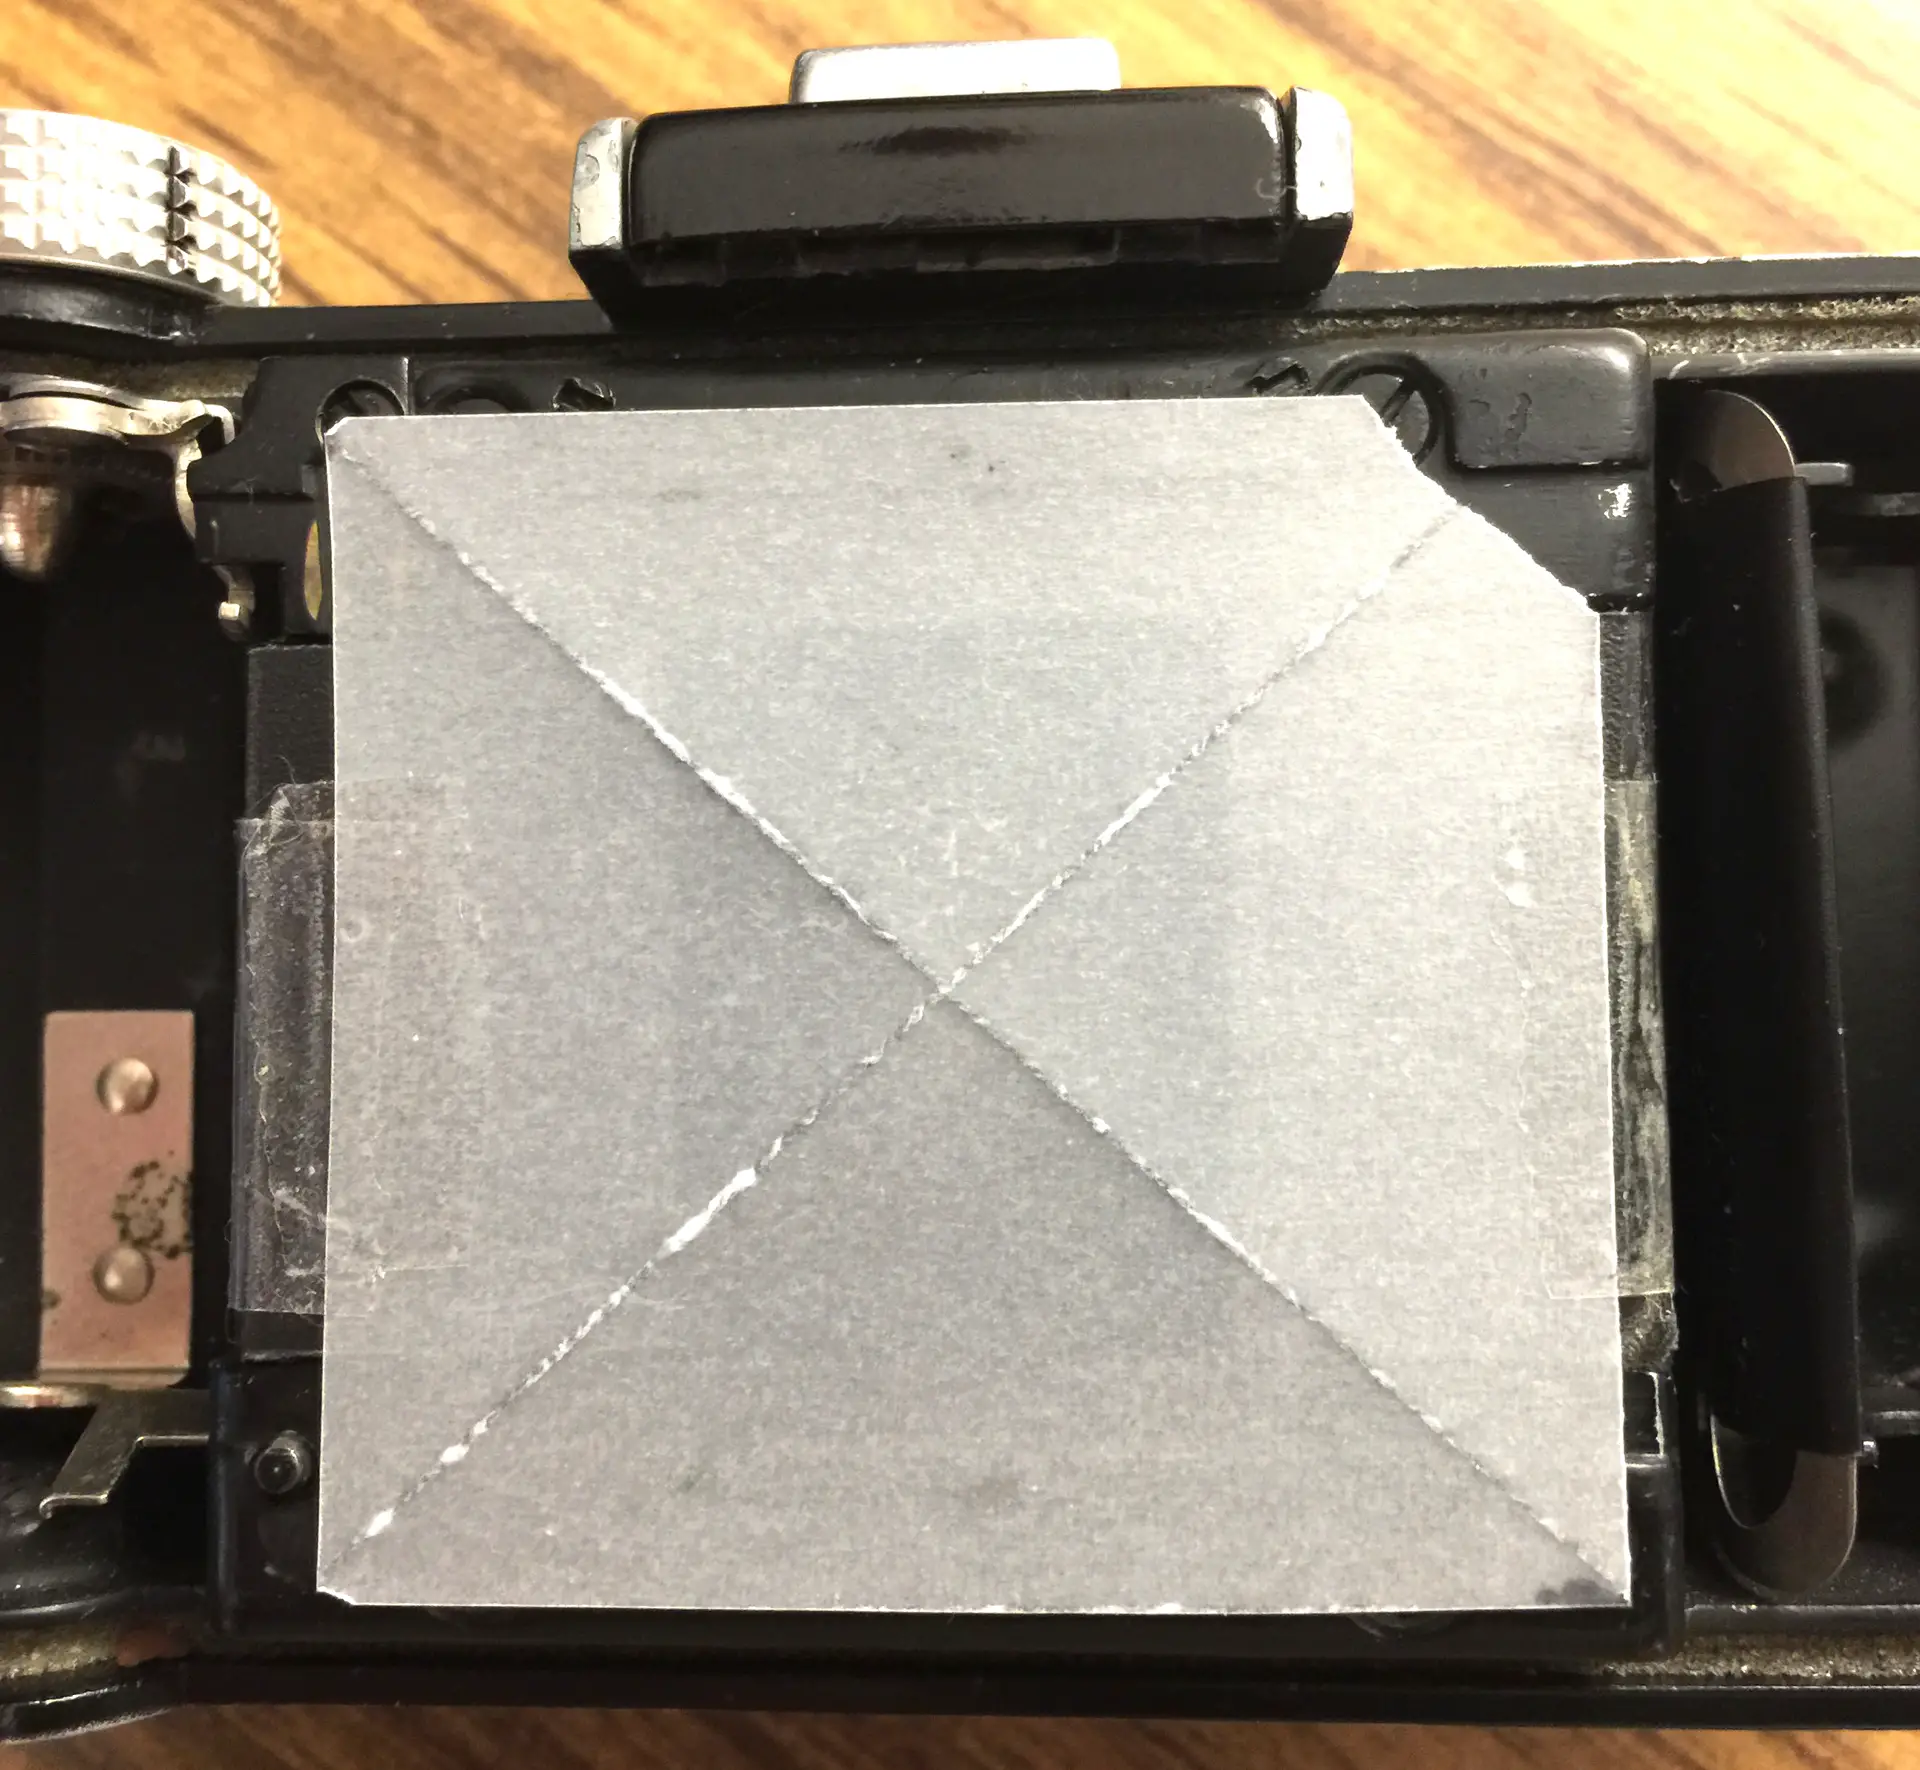
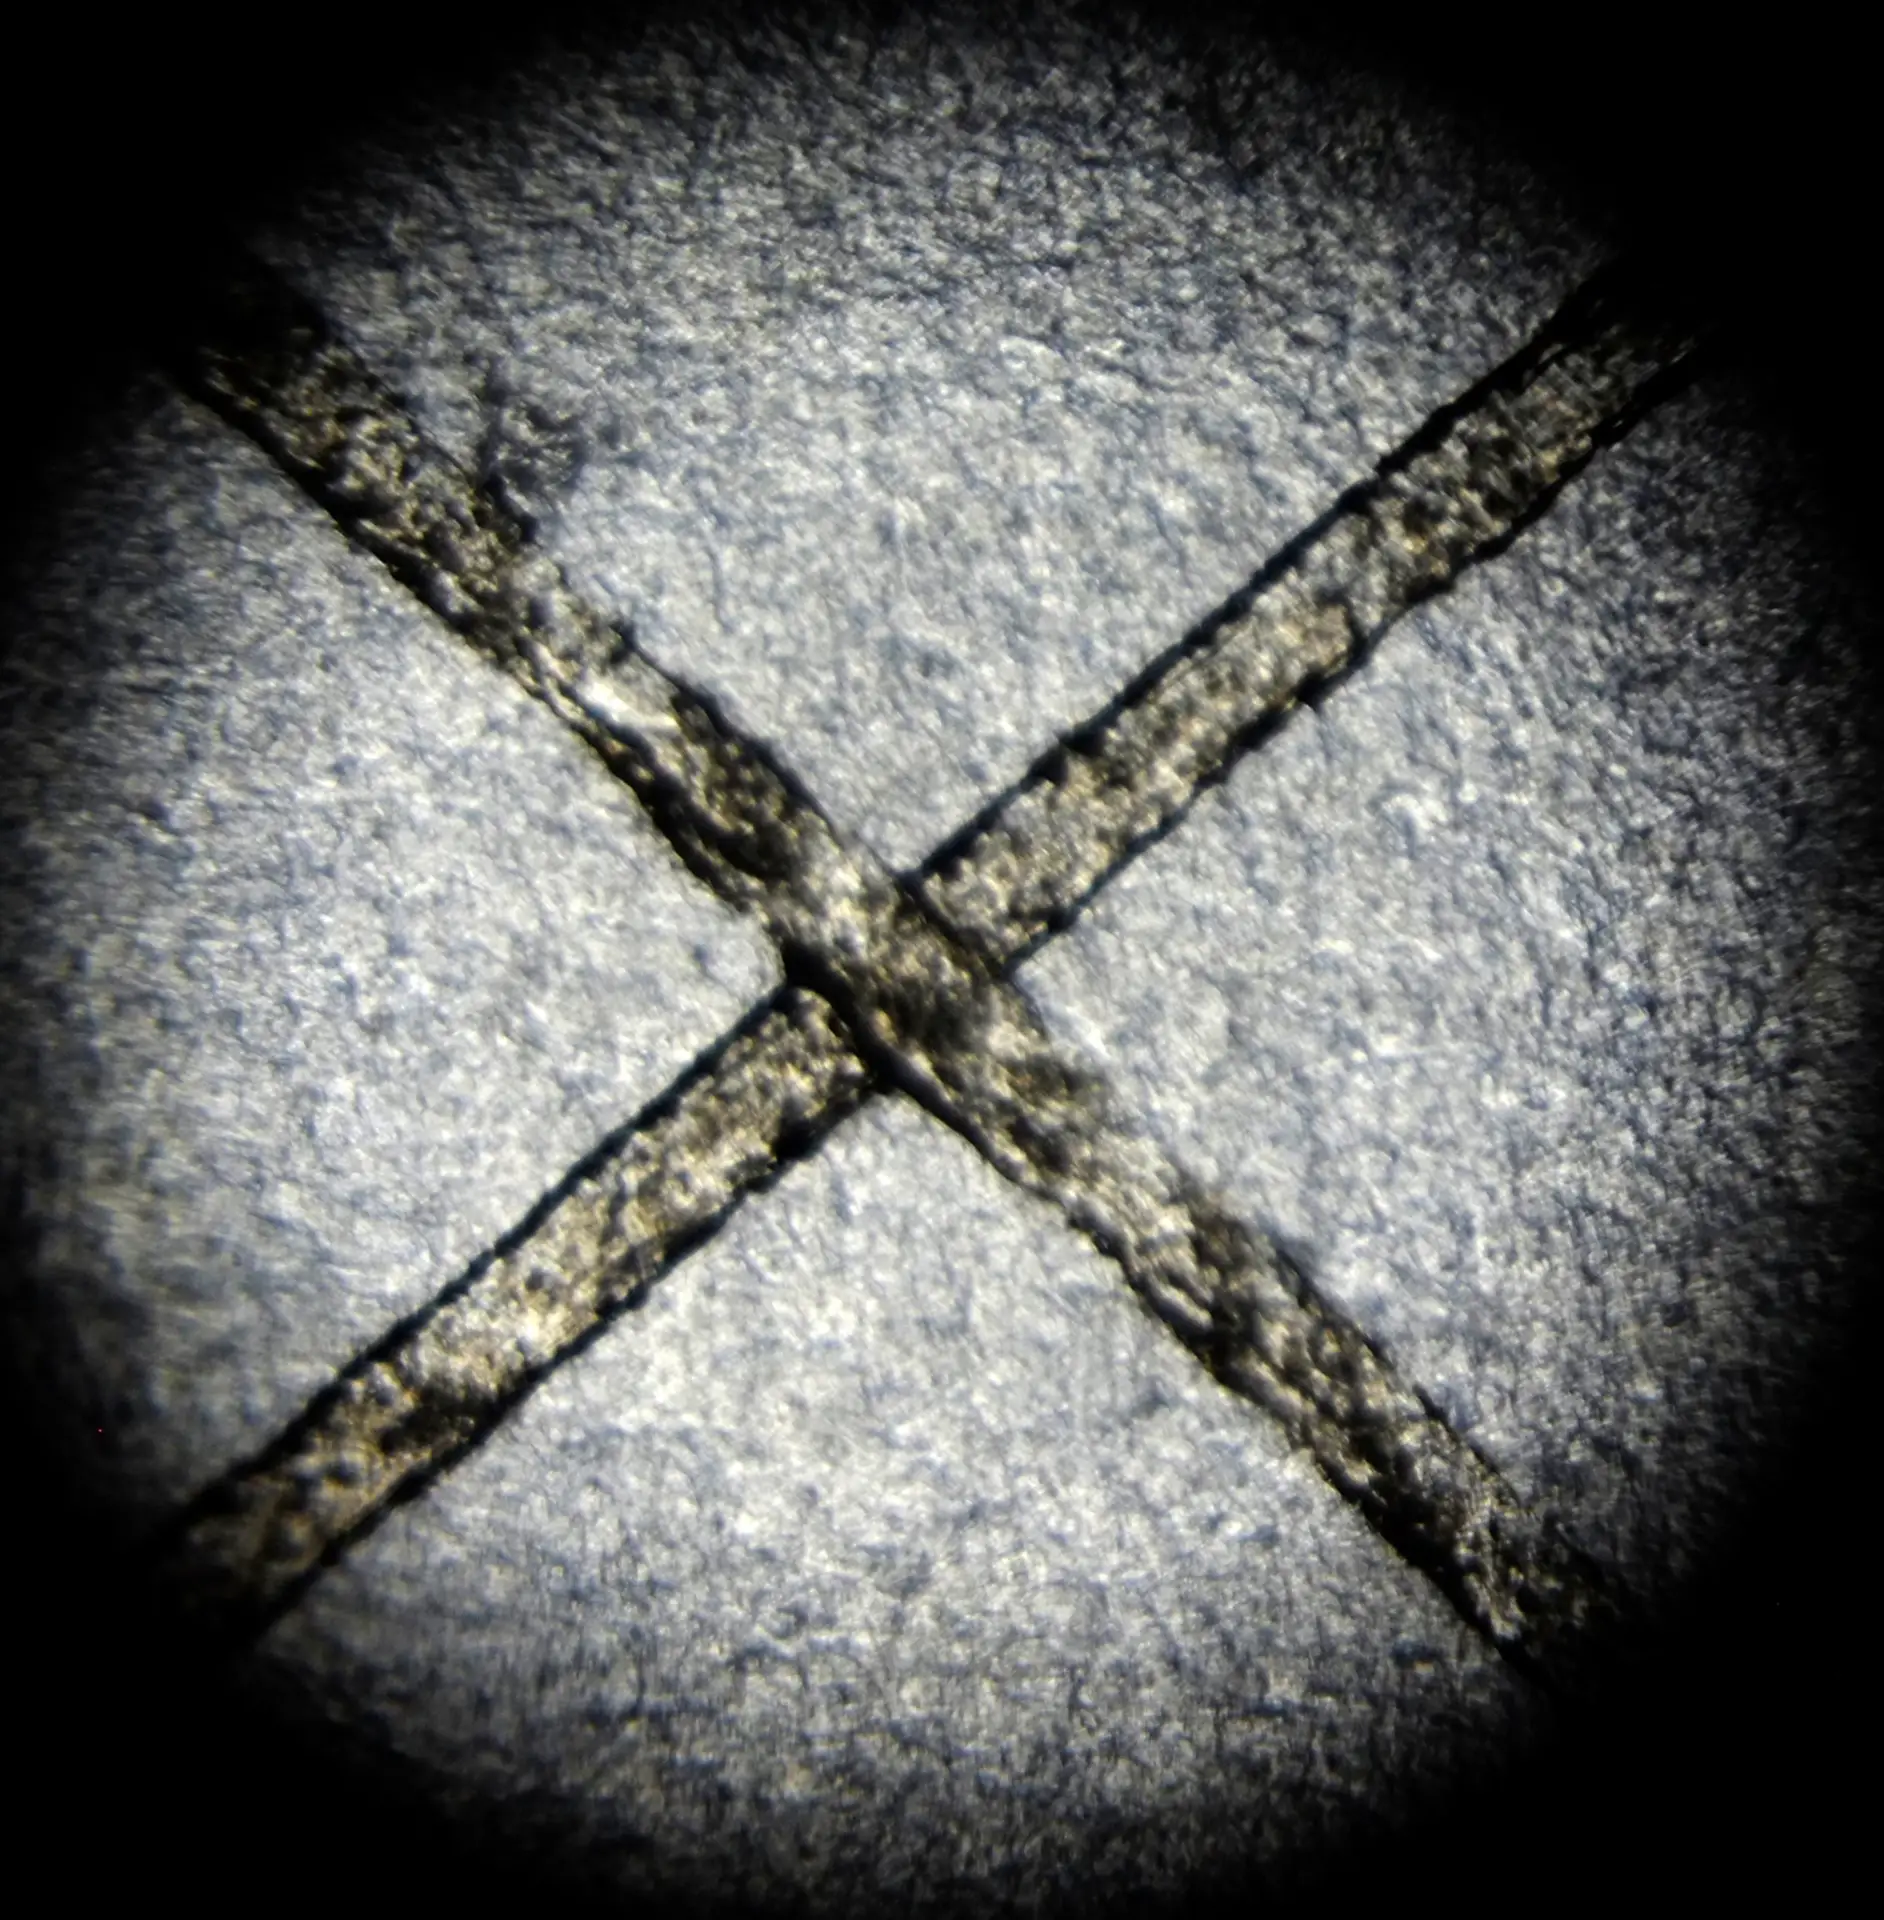
For a collimation-target image, I penned an “X” on a piece of ink-jet vellum and taped it across the film gate:

Flash Bantam collimation target

Here’s the collimation setup (I darkened the room before actually using it):

Flash Bantam collimation setup
I set the X-Pro1 and its 55-200 zoom lens to ISO 400, spot metering, auto exposure, a moderate 100mm zoom setting, and infinity focus. (The zoom setting affects the size of the collimation image on the LCD.) Various rulers and CD cases helped me level and shim both cameras so that their sensor and film gate were parallel and their lenses centered on each other. And an LED light behind the Bantam’s film-chamber illuminated the target image.

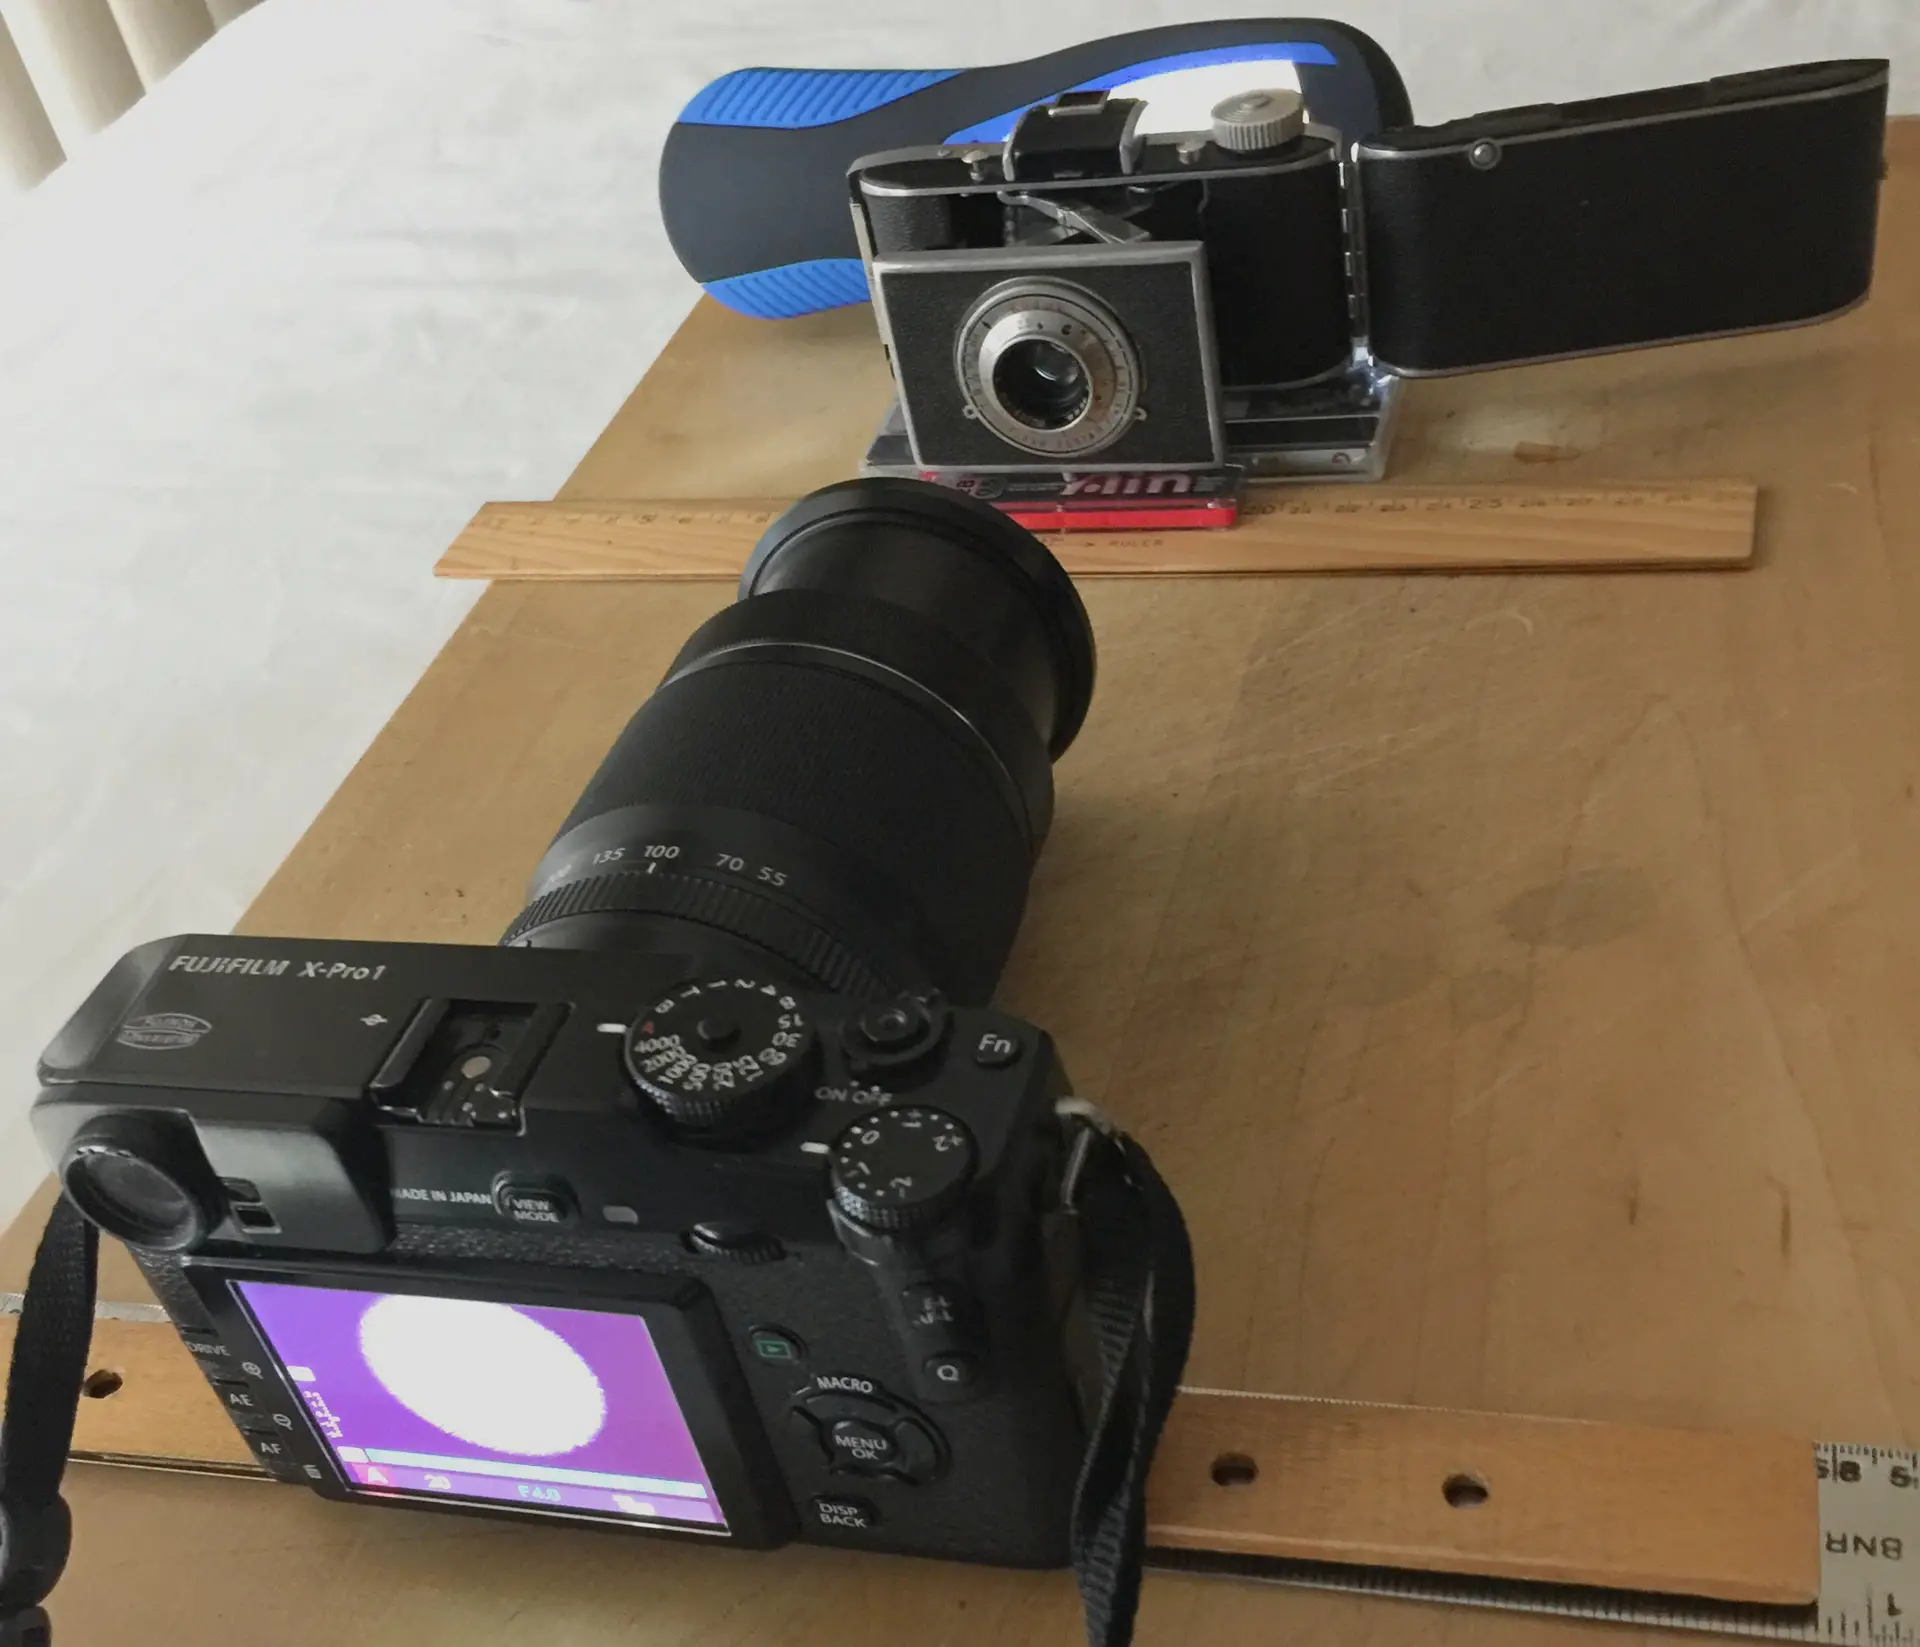
With the X-Pro1 lens manually focused to infinity, the Bantam’s collimation image would reach maximum sharpness on the Fuji LCD when I turned the Bantam’s focusing cell to its own infinity focus. There, light rays projecting out through the Bantam’s lens and into the Fuji’s would be parallel and the image projected on the Fuji sensor would become sharp– as if the Bantam was actually located at infinity. (And with both lenses focused to infinity, the distance between the cameras wasn’t critical.)

The first collimation image didn’t wow me:

First collimation image

But after a few small adjustments of the Bantam’s focusing cell, it sharpened significantly:

Second collimation image
The image even showed– almost in 3D– which of the collimation-target’s lines I’d penned over the other. As has been claimed, the Flash Bantam seems to have excellent optics!

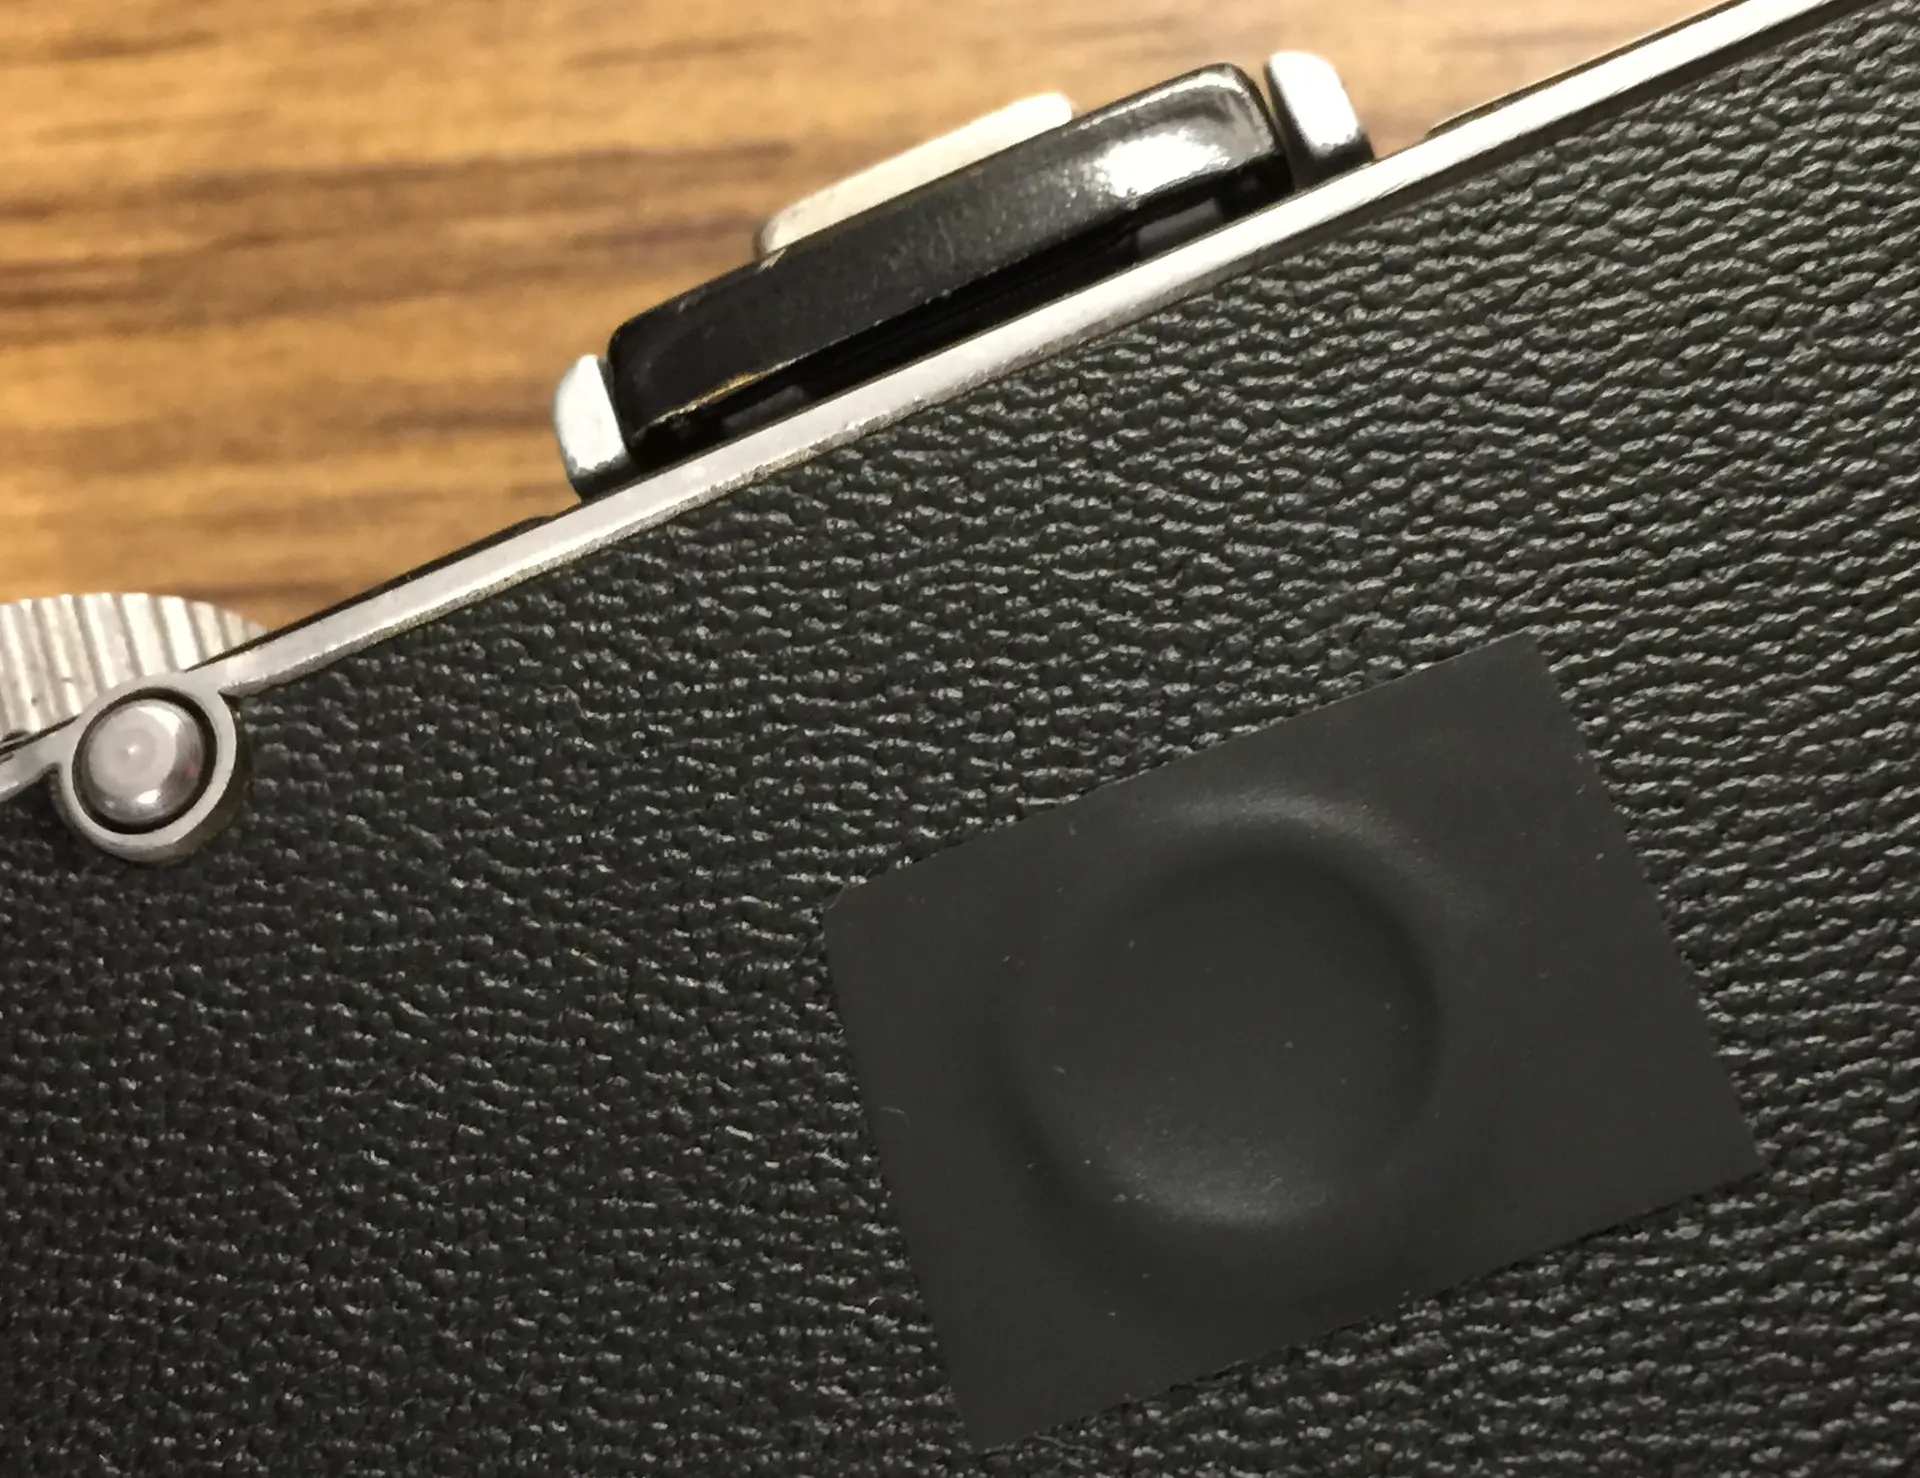
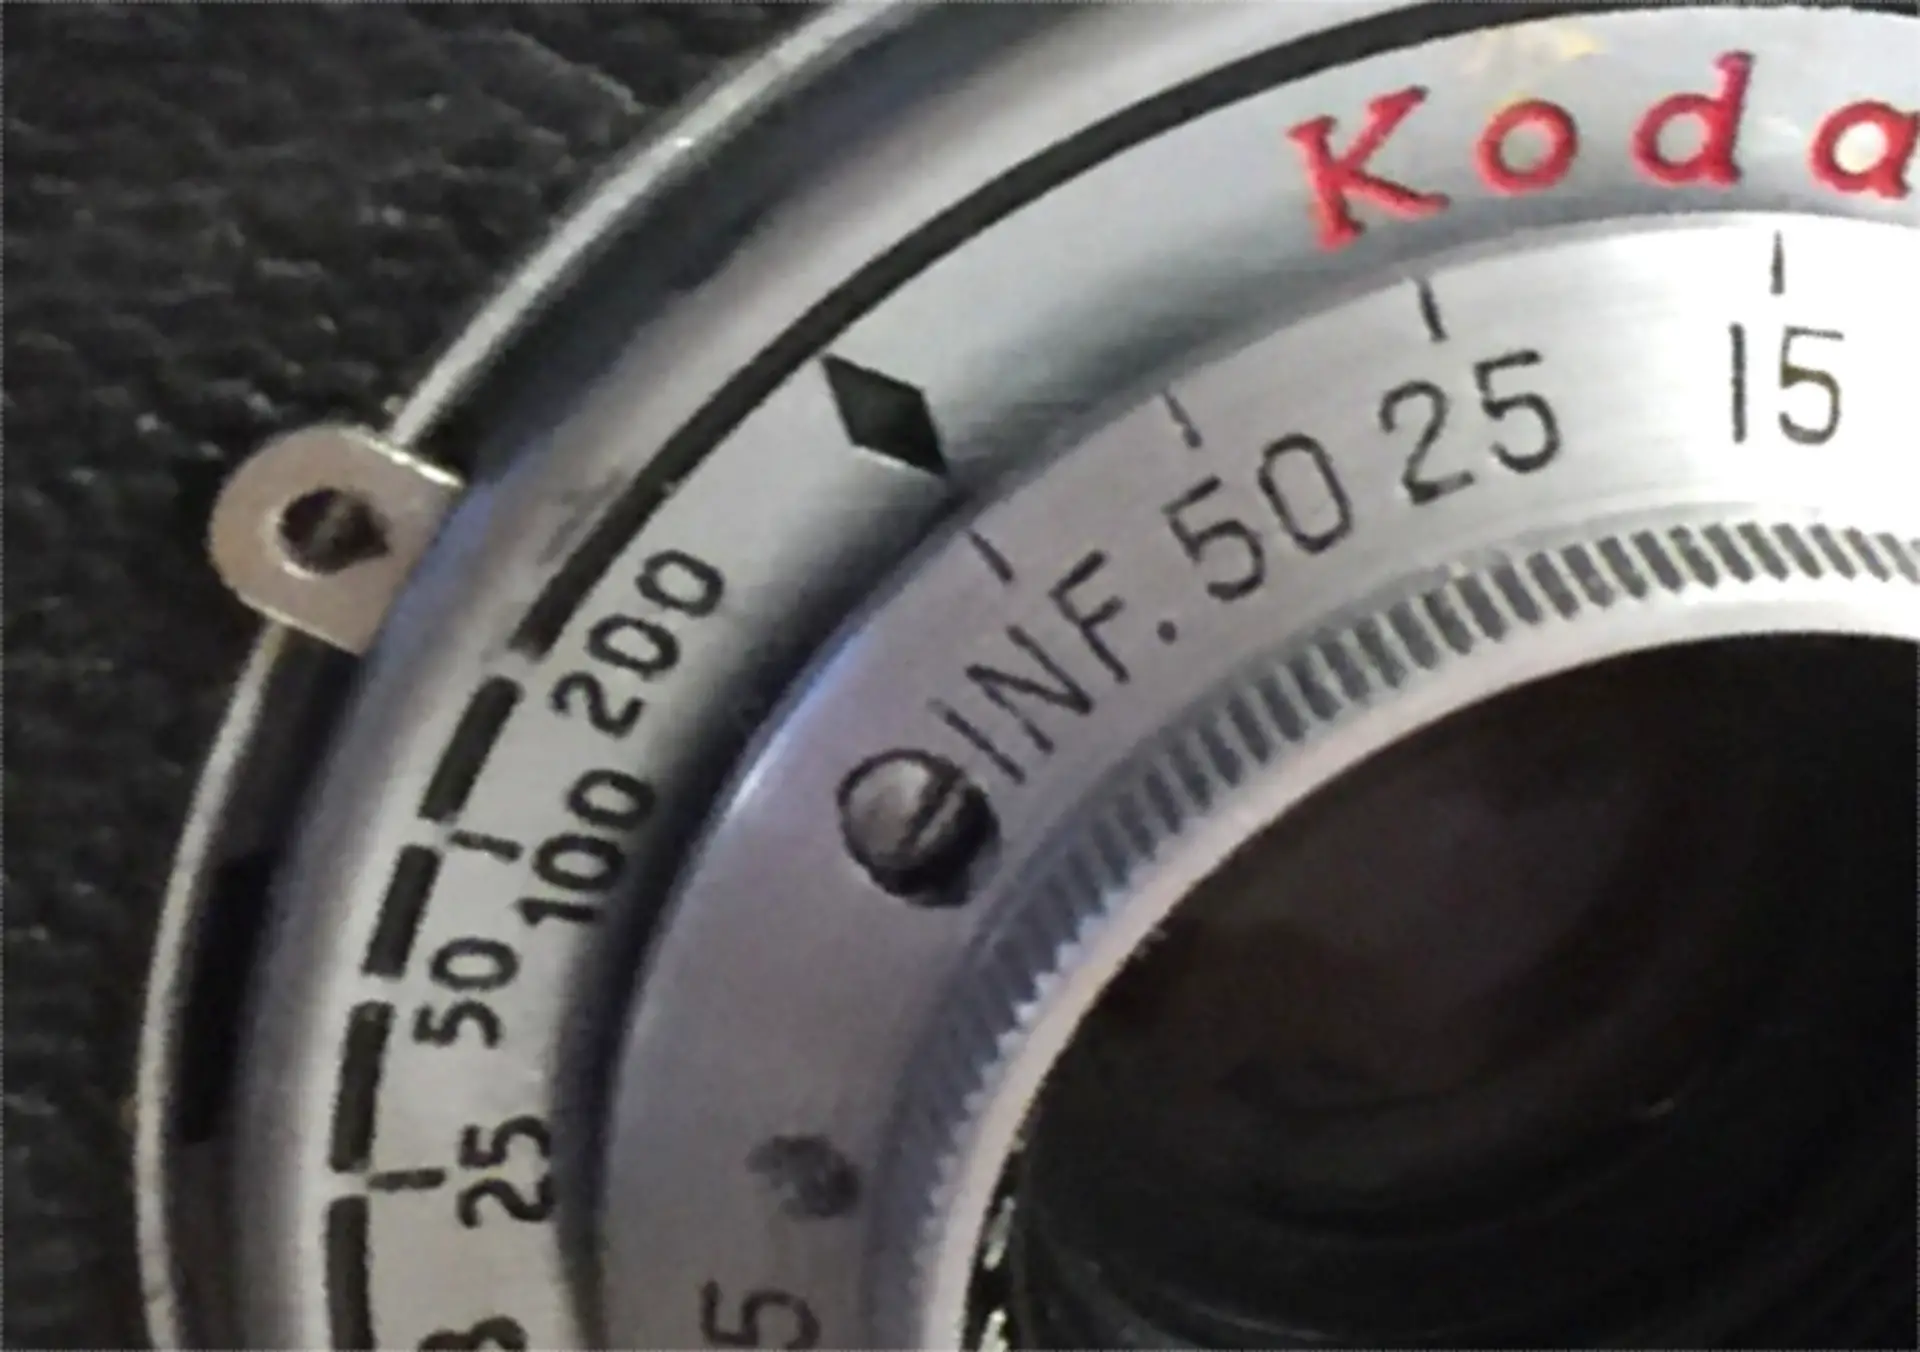
And now came the potentially touchy part I mentioned earlier: moving the metal bezel on the focusing cell without also rotating the cell out of its new infinity focus. Pressing the blade of a rubber spatula firmly against the side of the focusing cell to help hold it still, I gently turned the bezel until it almost touched the camera faceplate and the bezel’s INFinity mark lined up with the faceplate’s focusing diamond (as shown here):

Flash Bantam INFinity setting and screws
Then– over a tray to keep from losing the screws– I moved the infinity-stop screw hole to its proper position, inserted and tightened the stop screw (seen above), and screwed the minuscule set-screw into the tiny hole near the 1/25-second shutter mark). That locked the bezel to the focusing cell.

A last quick collimation check showed that infinity focus hadn’t changed.

That’s probably enough for now! In Part 2, I’ll describe my:

  • Half-frame winding strategy
  • Fairly simple film-loading procedure and
  • Shooting techniques

And then, Part 3 will describe my first attempts at Caffenol development (with hopefully at least one sharable image)!

–Dave Powell is a Westford, Mass., writer and avid amateur photographer.

Share this post:

Find more similar content on 35mmc

Use the tags below to search for more posts on related topics:

Contribute to 35mmc for an ad-free experience.

There are two ways to contribute to 35mmc and experience it without the adverts:

Paid Subscription – £2.99 per month and you’ll never see an advert again! (Free 3-day trial).

Subscribe here.

Content contributor – become a part of the world’s biggest film and alternative photography community blog. All our Contributors have an ad-free experience for life.

Sign up here.

About The Author

By Dave Powell
Trained in mathematics, physics, cosmology, computer programming and science journalism. Retired mathematician, award-winning technical and journalistic writer. 1989 winner of the Bruce B. Howat Award-- an international business-journalism equivalent of the Pulitzer Prize. (Only one Howat was awarded each year, IF the committee in Geneva found an article they really liked. But I don't think the prize is granted anymore.) Also a past author and editorial advisor for Sesame Street... where I regularly worked with Jim Henson and Kermit!
View Profile

Comments

Robert on That time I “Half-Framed” a cute Kodak Flash Bantam camera (Part 1 of 3)

Comment posted: 12/08/2023

Good Saturday afternoon!
Wonderful idea and article regarding the process. I was wondering if you could share any images of the lens disassembly, I am having a little bit of difficulty following it. I'm interested because I was wanting to clean the lens on my Bantam Flash.
Again, wonderful article! cleaning
Robert
Reply

Leave a Reply

Your email address will not be published. Required fields are marked *

Dave Powell replied:

Comment posted: 12/08/2023

Hi Robert, I'm SO glad you liked the article and want to follow it (and the subsequent Parts 2 and 3)! Sadly, I don't have photos of the lens-disassembly process... since all the parts are supposed to simply unscrew from the camera and each other! But in lieu of photos, I've edited the article's list of the four lens "units" to make their relationship more clear. But as in the article, disassembling your lens may require the use of two sturdy pliers (and duct tape to protect the units' soft brass threads). With my camera, UNITS C and D were easy to detach from the camera... but UNITS B and C were nearly impossible to separate from each other because someone had damaged UNIT B's outer threads that screw into the rear of UNIT C. And you might encounter the same issue. I say that because I recently found the "Bantam" version that came just before the "Flash Bantam." And its nearly identical lens has the same problem. Sadly, I've not been able to separate its UNITS B and C. Even after soaking the lens in acetone for a week (to potentially dissolve any "Thread Lock" that may have been applied where UNIT B screws into UNIT C). I still can't separate 'em. However, the acetone did partially clean the still-inaccessible glass surfaces between them! BUT, there may be hope... even if you also have trouble unscrewing those (or other) UNITS. Acetone evaporates easily, and when I just peered through the older "BANTAM" lens, its inaccessible glass surfaces are now almost totally clean, clear and dry! So a good acetone soak could clean glass surfaces that you can't reach. But I should add a word of caution. The earlier Bantam's lens was uncoated. But the Flash Bantam's is coated. And I'm pretty sure that soaking it in acetone to loosen threads or clean interior elements would remove the coatings. It'd still be usable... but without the coatings. I hope your project proves to be easier!

Reply

Leave a Reply

Your email address will not be published. Required fields are marked *

Dave Powell on That time I “Half-Framed” a cute Kodak Flash Bantam camera (Part 1 of 3)

Comment posted: 03/03/2023

HI again Dan,

I just noticed that you re-posted your comment, so I'll see if I can delete the first version. And if I can, I'll repeat my reply here! Since acetone is very penetrating, it may take a series of minute applications to get it under that focus ring without also reaching glass elements. Since the ring is stuck, it seems worth trying. And as much as is practical, use just sightly damp cotton buds, and hold the camera at angles that prevent the acetone from flowing inside too rapidly!
Reply

Leave a Reply

Your email address will not be published. Required fields are marked *

Dan Emerson on That time I “Half-Framed” a cute Kodak Flash Bantam camera (Part 1 of 3)

Comment posted: 15/02/2023

Hi Dave enjoyable read, and like others, I am looking forward to parts 2 and three. Appreciate and will find useful the basics of collimation, and the tip on using acetone as a temporary lubricant may provides a potential solution to a stuck focus ring on one of a collection of Kodak Retinas that stretch from the '3Os Retina II to the 70s S1 SLR
The former, a 35mm rangefinder folder has, in my opinion, the design with most character and a confluence with exposure workflow that maximises the experience. Consequently this is my favourite. Interestingly, it has the highest degree of original functionality, that in the series, has a timespan that seems to diminish with the increase complexity of newer models
I am looking forward to hearing of your adventures with caffenol.
Regards,
Daniel
Reply

Leave a Reply

Your email address will not be published. Required fields are marked *

Dan Emerson on That time I “Half-Framed” a cute Kodak Flash Bantam camera (Part 1 of 3)

Comment posted: 14/02/2023

Hi Dave enjoyable read, and like others, I am looking forward to parts 2 and three. Appreciate and will find useful the basics of collimation, and the tip on using acetone as a temporary lubricant may provides a potential solution to a stuck focus ring on one of a collection of Kodak Retinas that stretch from the '3Os Retina II to the 70s S1 SLR
The former, a 35mm rangefinder folder has, in my opinion, the design with most character and a confluence with exposure workflow that maximises the experience. Consequently is my favourite. Interestingly, it has the highest degree of original functionality, that in the series, has a timespan that seems to diminish with the increase complexity of the newness of the coupled with increasing production date.
I am looking forward to hearing of your adventures with caffinol.
Regards,
Daniel
Reply

Leave a Reply

Your email address will not be published. Required fields are marked *

Dave Powell replied:

Comment posted: 14/02/2023

Glad to help, Dan! Since acetone is very penetrating, it may take a series of minute applications to get it under that focus ring without also reaching glass elements. Since the ring is stuck, it seems worth trying. And as much as is practical, use just sightly damp cotton buds, and hold the camera at angles that prevent the acetone from flowing in too rapidly!

Reply

Leave a Reply

Your email address will not be published. Required fields are marked *

Hamish Gill on That time I “Half-Framed” a cute Kodak Flash Bantam camera (Part 1 of 3)

Comment posted: 14/02/2023

This is great, looking forward to reading the next part ;)
Reply

Leave a Reply

Your email address will not be published. Required fields are marked *

Dave Powell replied:

Comment posted: 14/02/2023

Appreciate it Hamish! (I gotta figure out how to add emojis in comments.)

Reply

Leave a Reply

Your email address will not be published. Required fields are marked *

Kurt Ingham on That time I “Half-Framed” a cute Kodak Flash Bantam camera (Part 1 of 3)

Comment posted: 14/02/2023

Wow- great stuff. I am among those who love quixotic projects like this! If you imagine that you were getting $ 7.50 an hour for your build timeyou could buya nice little Fujica half frame- with a built in light meter.But where is the fun in that (comparatively)? Looking forward to the next parts
Reply

Leave a Reply

Your email address will not be published. Required fields are marked *

Dave Powell replied:

Comment posted: 14/02/2023

Thanks so much Kurt! Several decades ago, I bought a Fujica Half-Frame at a yard sale. A lovely camera too! But it suffered from an optical glitch that exposed two very slightly offset images of every shot. So I sold it for parts and repair. If I ever decide to buy a "real" H-F, though, it would be the Fujica!

Reply

Leave a Reply

Your email address will not be published. Required fields are marked *

Ralph Turner on That time I “Half-Framed” a cute Kodak Flash Bantam camera (Part 1 of 3)

Comment posted: 14/02/2023

Interesting article, Dave. I look forward to parts 2 and 3. Thanks for sharing. I particularly look forward to seeing how the caffenol goes. I’ve recently started getting back into home developing and thought I’d have a crack at the stuff. Whether it’s just luck, I’m not sure, but I’m getting some superb results with it and Kentmere 400. A little tweaking of exposure/dev time is something I want sort but, to be fair, even as-is the negs scan beautifully. Anyway, I hope all continues to go well with both the Bantam and the caffenol.
Reply

Leave a Reply

Your email address will not be published. Required fields are marked *

Dave Powell replied:

Comment posted: 14/02/2023

Thanks Ralph... and you're very welcome! I too am looking forward to seeing what I get from the Caffenol... considering that it's my first attempt and the film is 4-decades-expired. But even if I get only one usable frame to show, it won't be a total waste 'cause I'll be able to report the length of film that the camera accepted without backing paper and the number of frames that fit on it. I also found a recipe online that was claimed to work very well on a wide variety of B/W emulsions. we'll see how well it performs. So everything considered, the pressure's a little off on Part 3. (However, I"m still practicing getting film onto my old Nikor reel. The last time I did that was in 1978... and it's not quite as easy to pick up again as riding a bike. Harumph!)

Reply

Leave a Reply

Your email address will not be published. Required fields are marked *

Leave a Comment

Leave a Reply

Your email address will not be published. Required fields are marked *