
My first year of shooting film Part 9
Time for reporting about my next step in film photography. In this post I want to share the results I got with Portra 400 in Curaçao, discuss some mysterious white spots in my photos, and compare the scanning results from two different labs. So lots to talk about!
I have been on a quest for colour, and trying Portra 400 was next on the list. Coincidently I had a holiday planned in the Caribbean (I know how lucky I am 🙂 ), so lots of colour all around. I brought my M2 and my Minolta Riva Panorama.


Up till now I had shot very cautiously, most of the time only 1 or 2 shots per photo expedition, where I take most of my photos with a digital camera. For this holiday I decide to bring 5 rolls an gave myself permission to shoot them all during these 10 days. However after 5 days I still found myself being scared. I always bring my digital camera, and I noticed that I only take the M2 out when I have a good feeling about a digital photo. Then I take a photo with the M2 at the same spot. But it feels a bit like cheating. And I realised that I would like to be more relaxed about shooting the M2. So I had a chat with myself and came to the conclusion that I let the fear of making mistakes get in the way of the fun. Shooting film has its cost, which makes you more deliberate, but I let it go too far. I also realised that if I want to learn I also have to make mistakes.

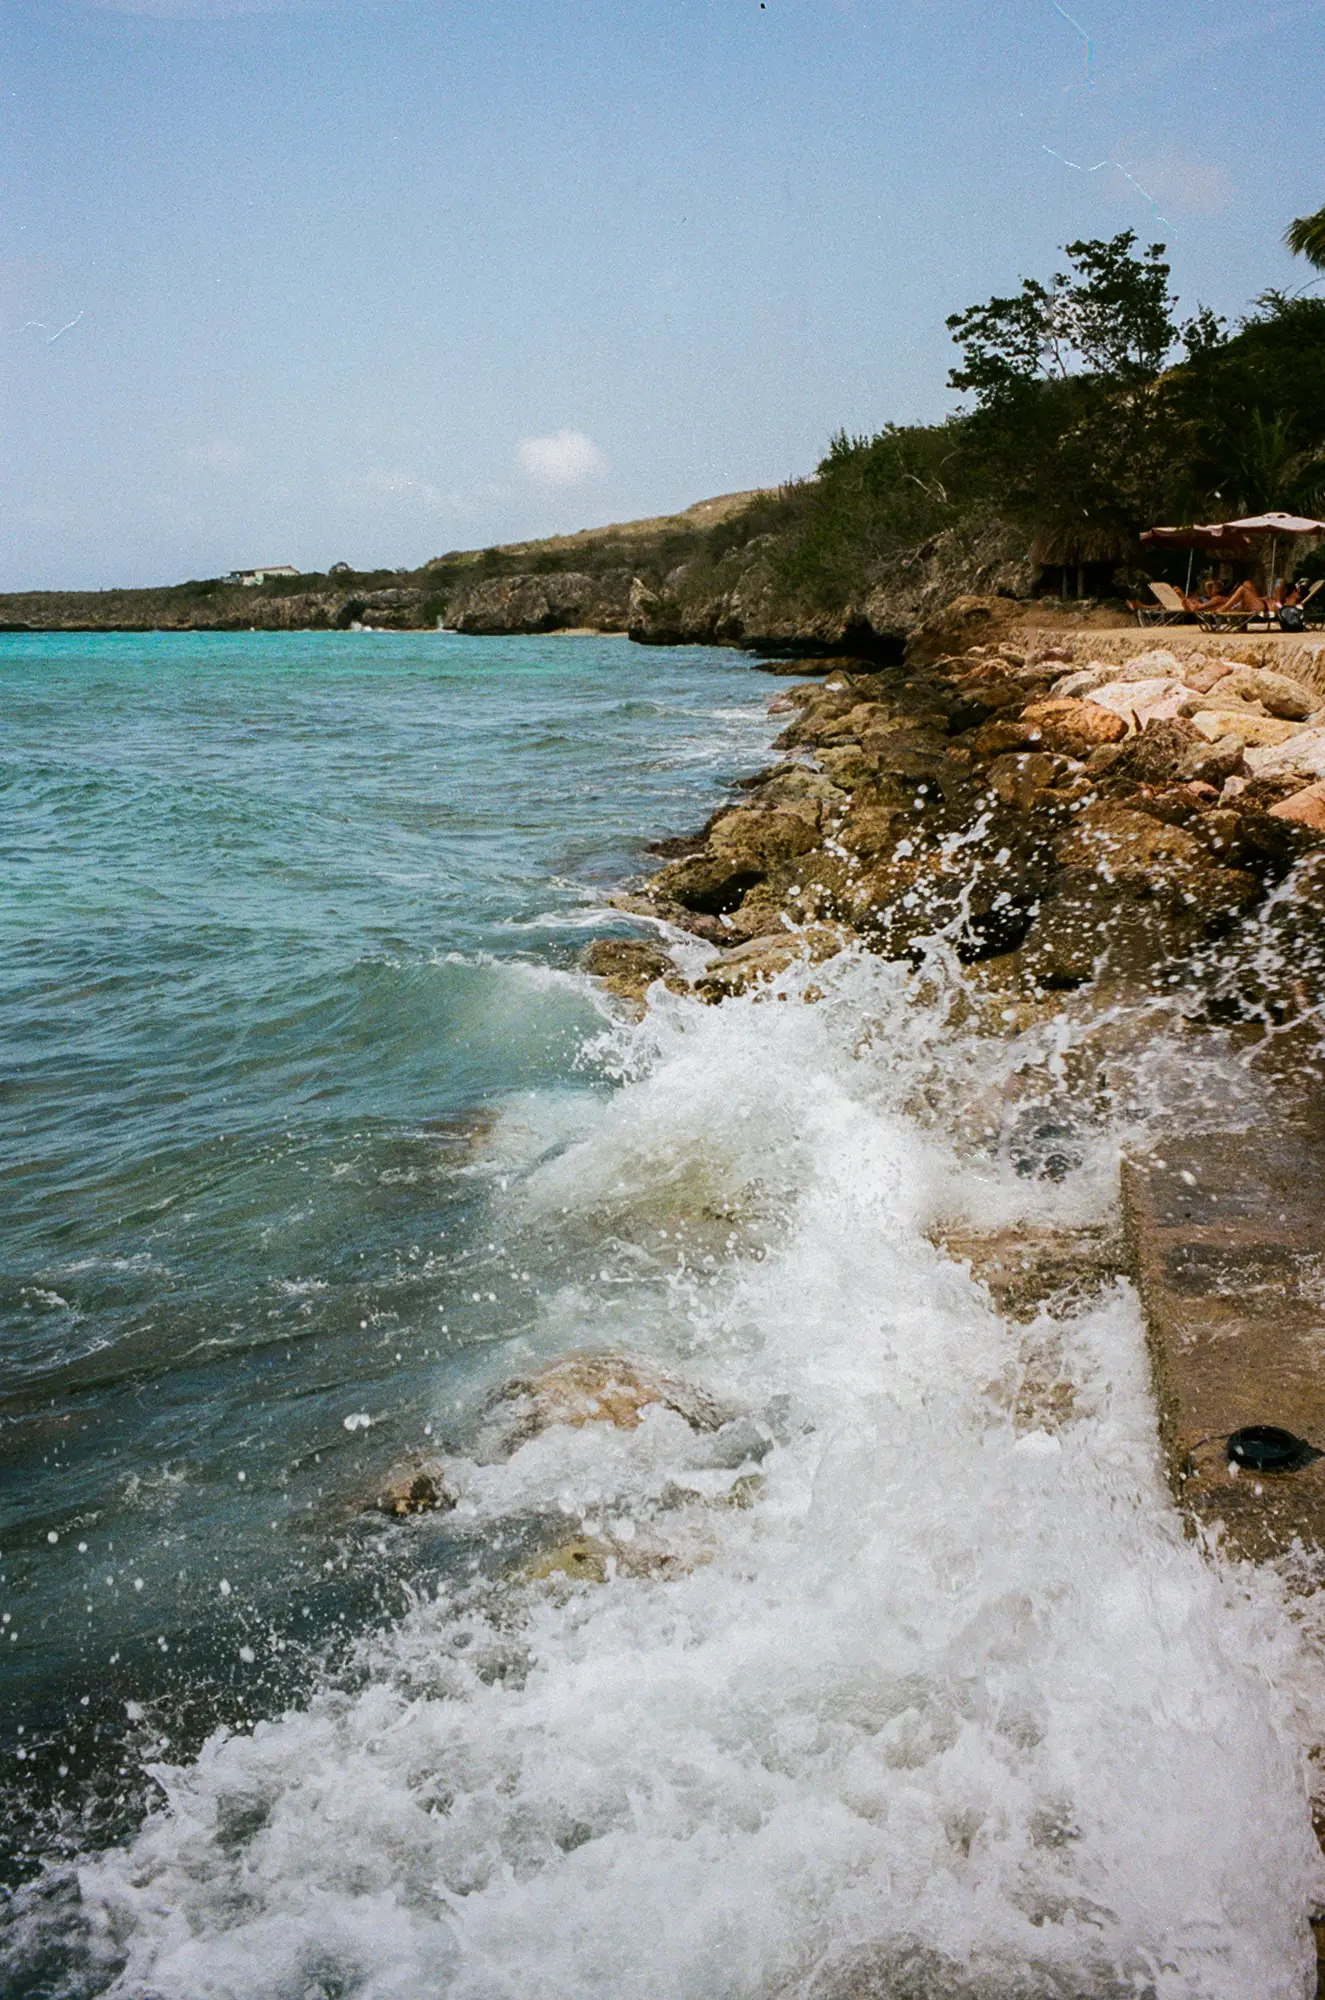
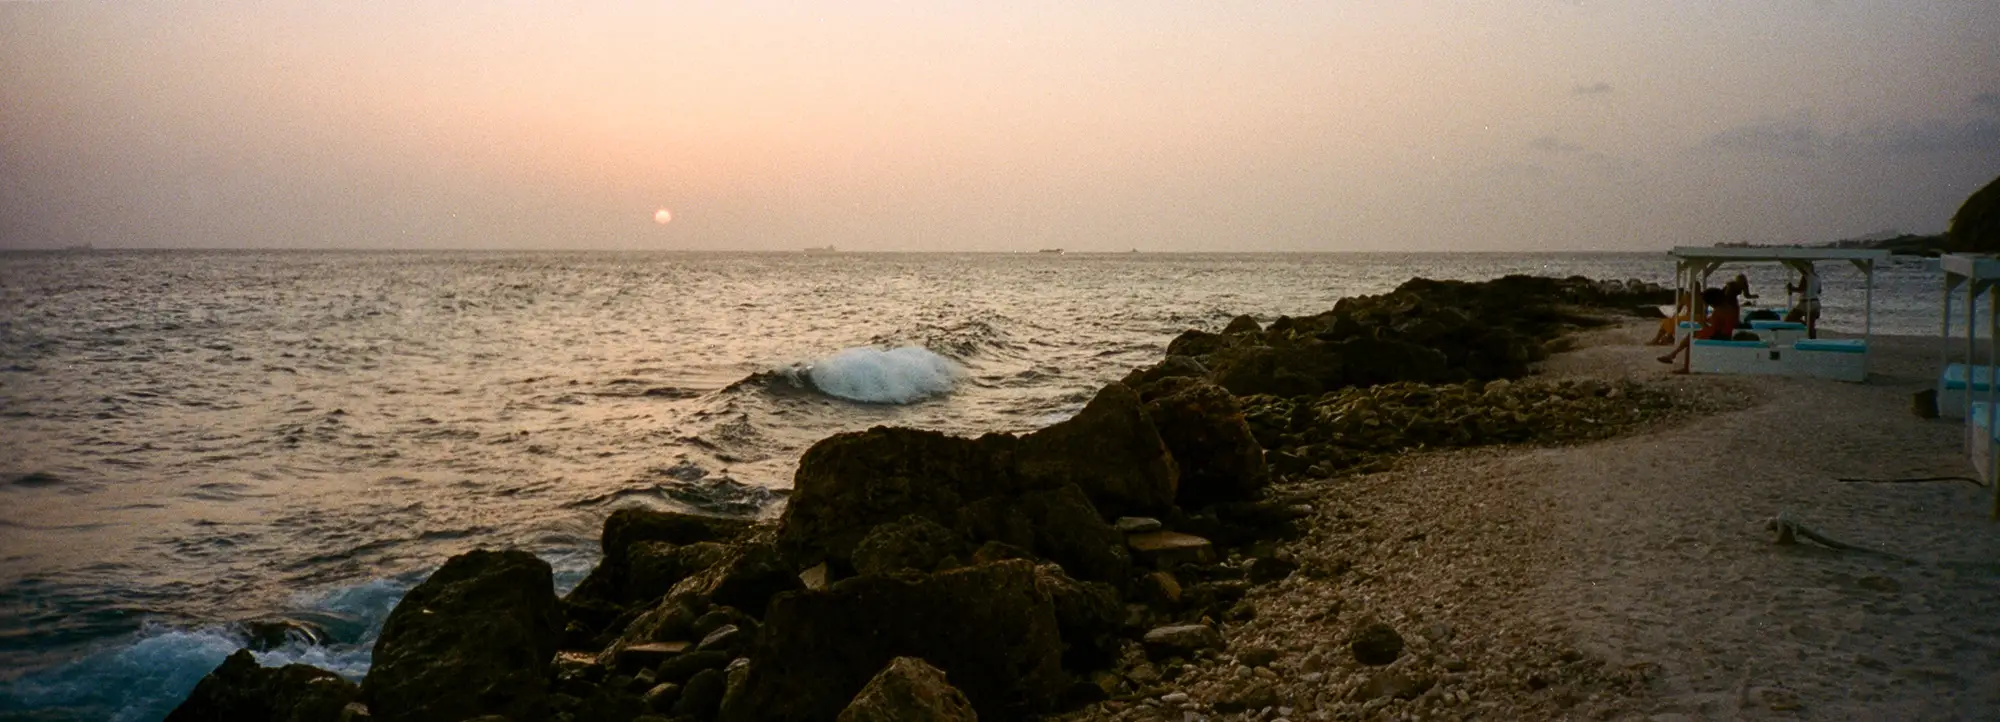
On day seven we went to a beautiful beach, and here I decided that would just take my camera and shoot what I like, without over-thinking it. I did some metering for the first photo, but after that I just shot away…
But then I made a mistake 🙂 . I had brought two new rolls as the films in both the M2 and the Minolta were almost full. The plan was to reload the M2 with Portra 400, and the Minolta with Tri-X. However, I somehow forgot to look at the film, and loaded the M2 with Tri-X, thinking that it was Portra 400. I guess being on holiday made my brain shift to a lower gear, and I just picked one of the two. And of course with a 50% chance I picked the wrong one. In my defence, they both have a yellow label! At the end of the day I realised my mistake, and came to grips with the fact that I had shot black and white, and did not capture those colours I thought I was.
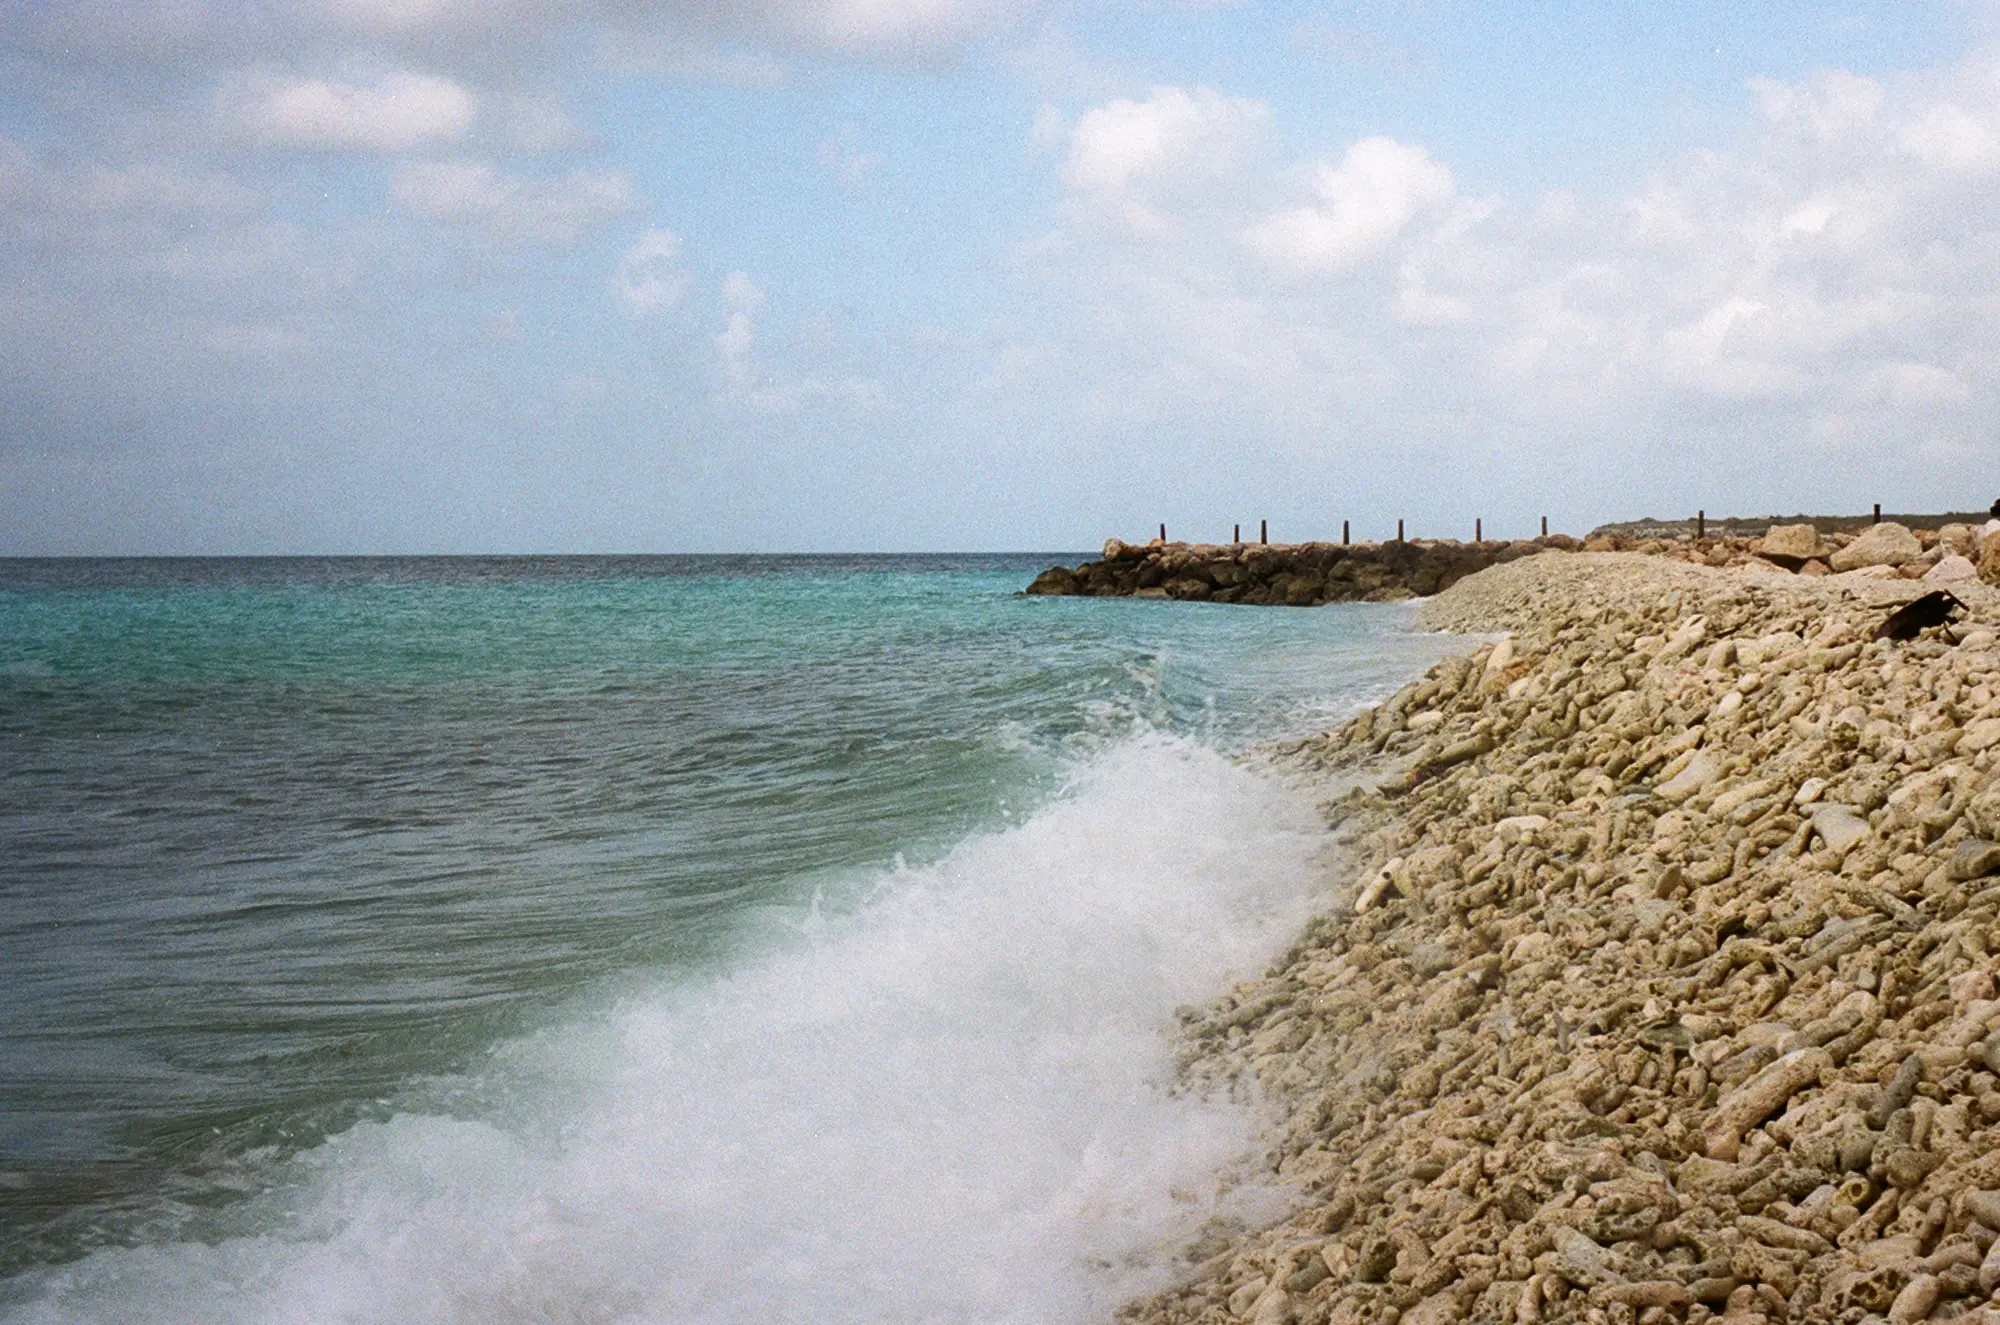
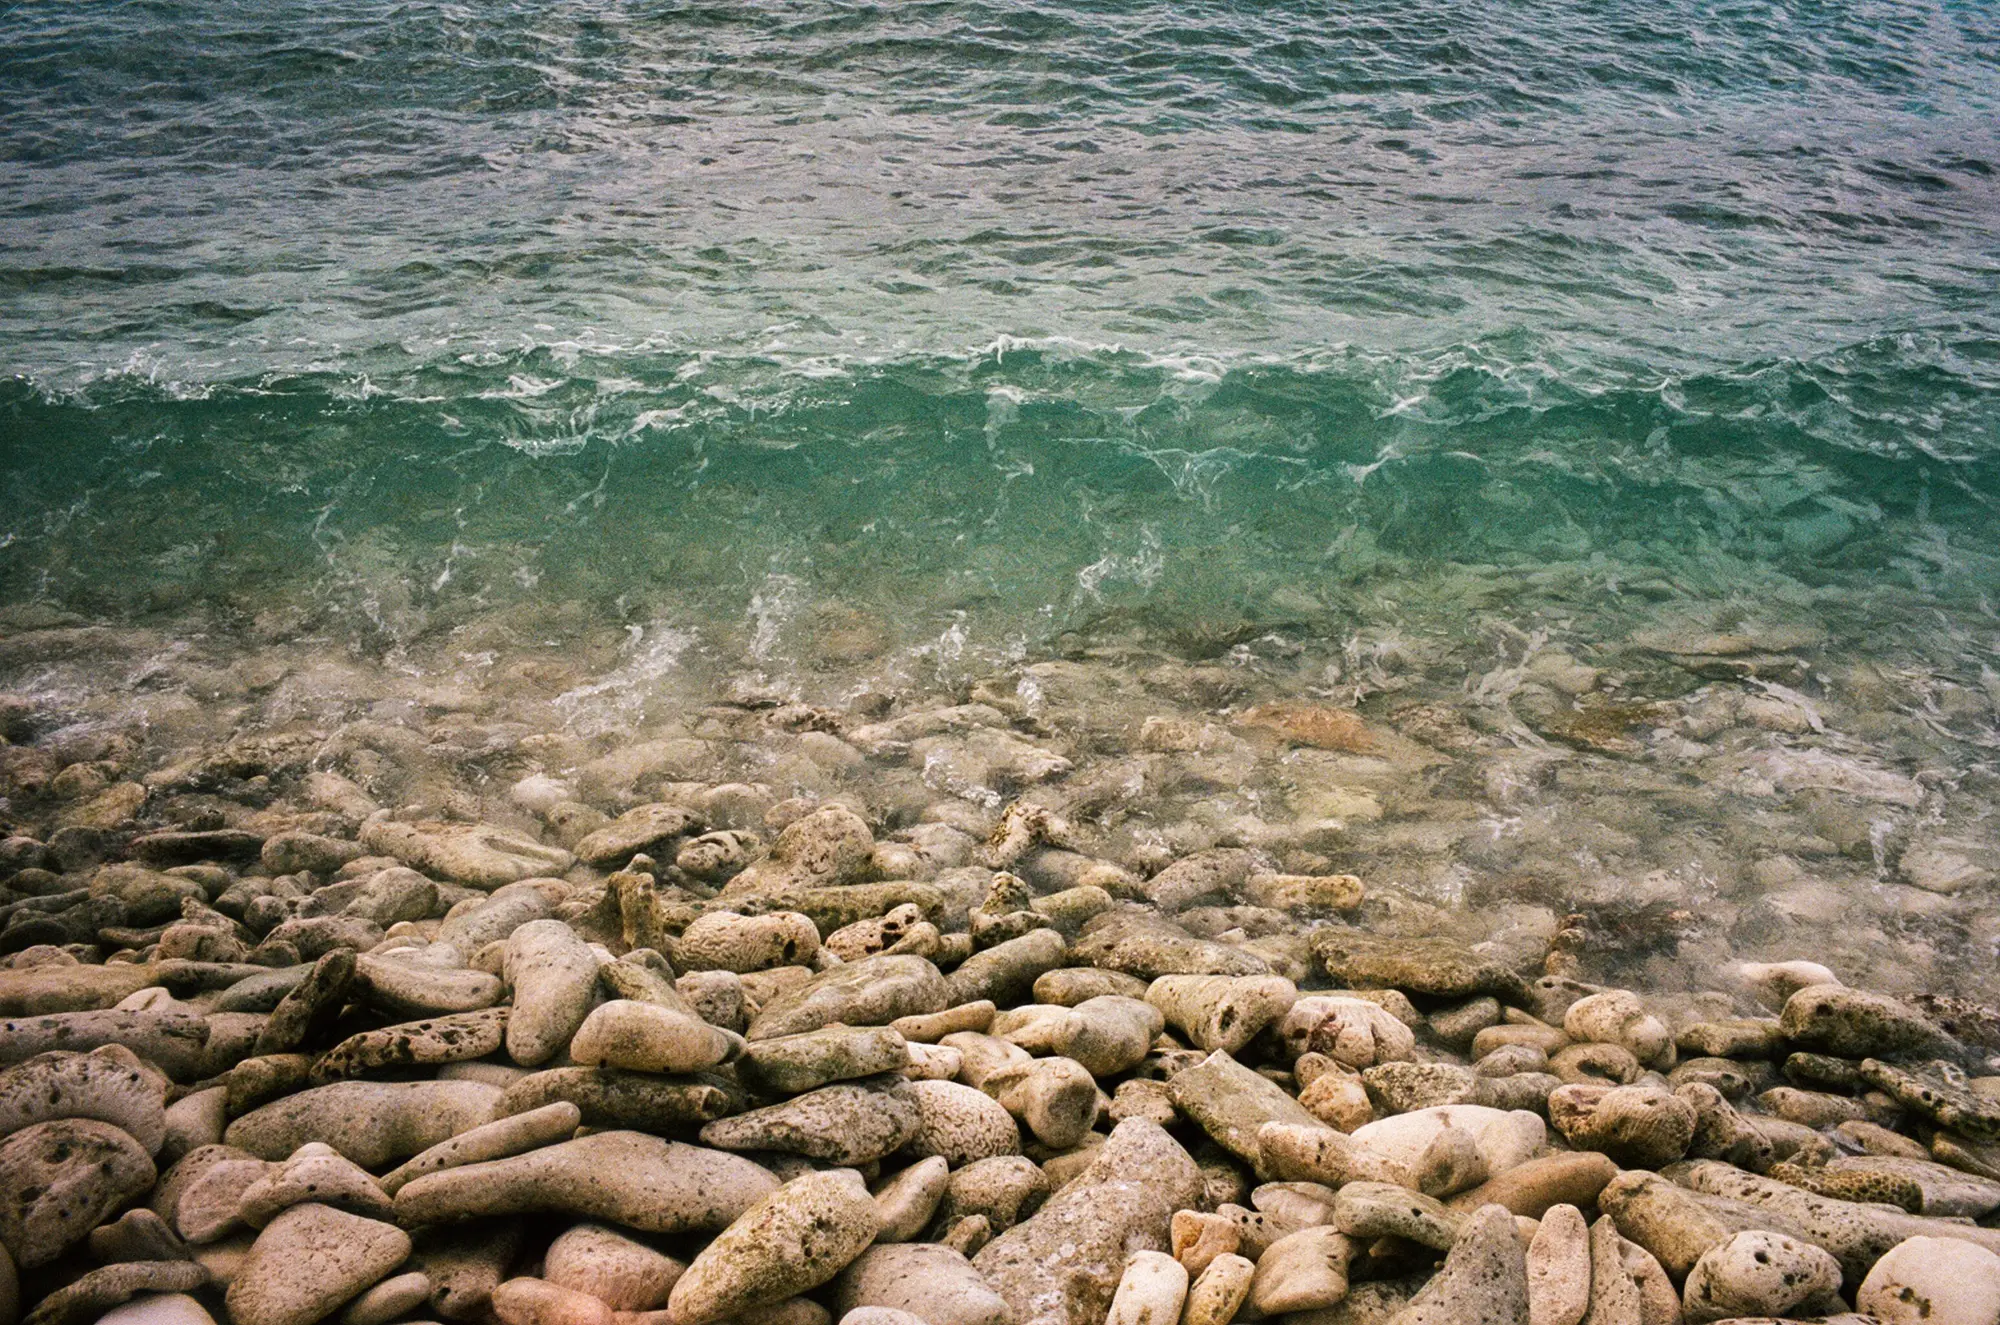
But two days later we went back to that same beach, this time I loaded Portra 400, and again just wandered around with my camera and shot casually (or something close to that) about 25 photos (I will not show them all, although I have trouble editing 😉 ).

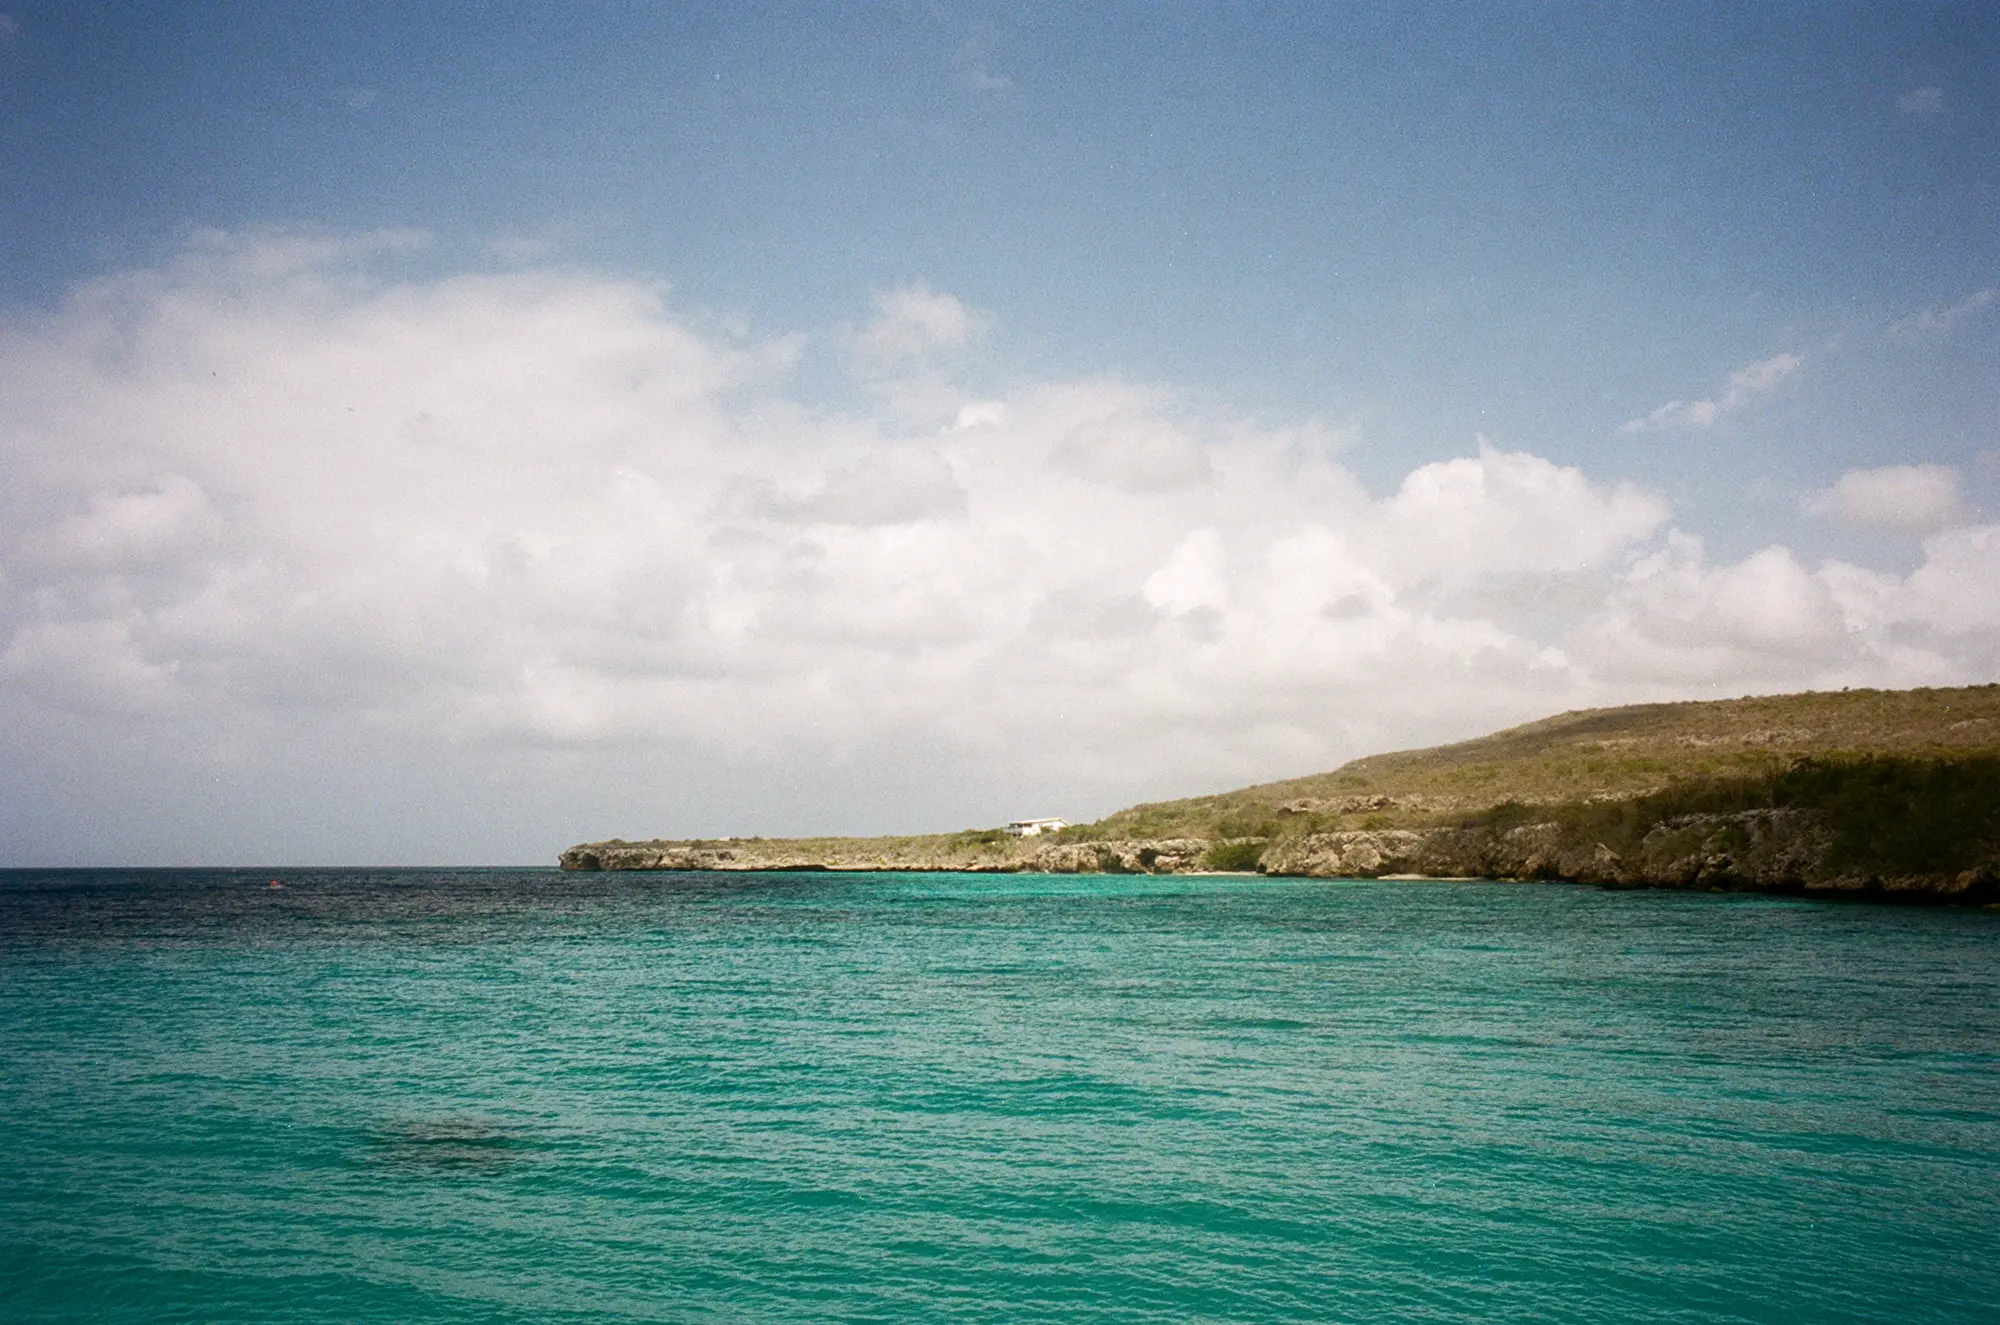
This next one is my favourite. I remember waiting there until the sun hit the little white house in the distance. What I don’t really understand is why this photo looks more grainy, it is less crispy than some other photos, specifically the morning shots. I thought that underexposure or lack of light would cause more grain, but with the amount of light here, at midday, that can hardly be the case. I used a polariser, for which I compensated one stop, but I already over-exposed by two, so there should be some margin left. The negative looks dense enough, but lacks contrast. Maybe even more exposure would have been better?
I guess you can’t go on a holiday in the Caribbean and not make photos of a sunset. It is really hard to keep the camera in your bag when you see the sun sinking in the sea, and every day there seem to be different colours. So I want to share a couple of those too…


It was with the sunset photos that I first noticed a problem, or issue. I don’t know what it is, but there are white spots in the sky. I asked twitter what it could be, and the first reaction seems to be that it is dust. However the photos were developed and scanned by AG photo lab, who are known for their quality.
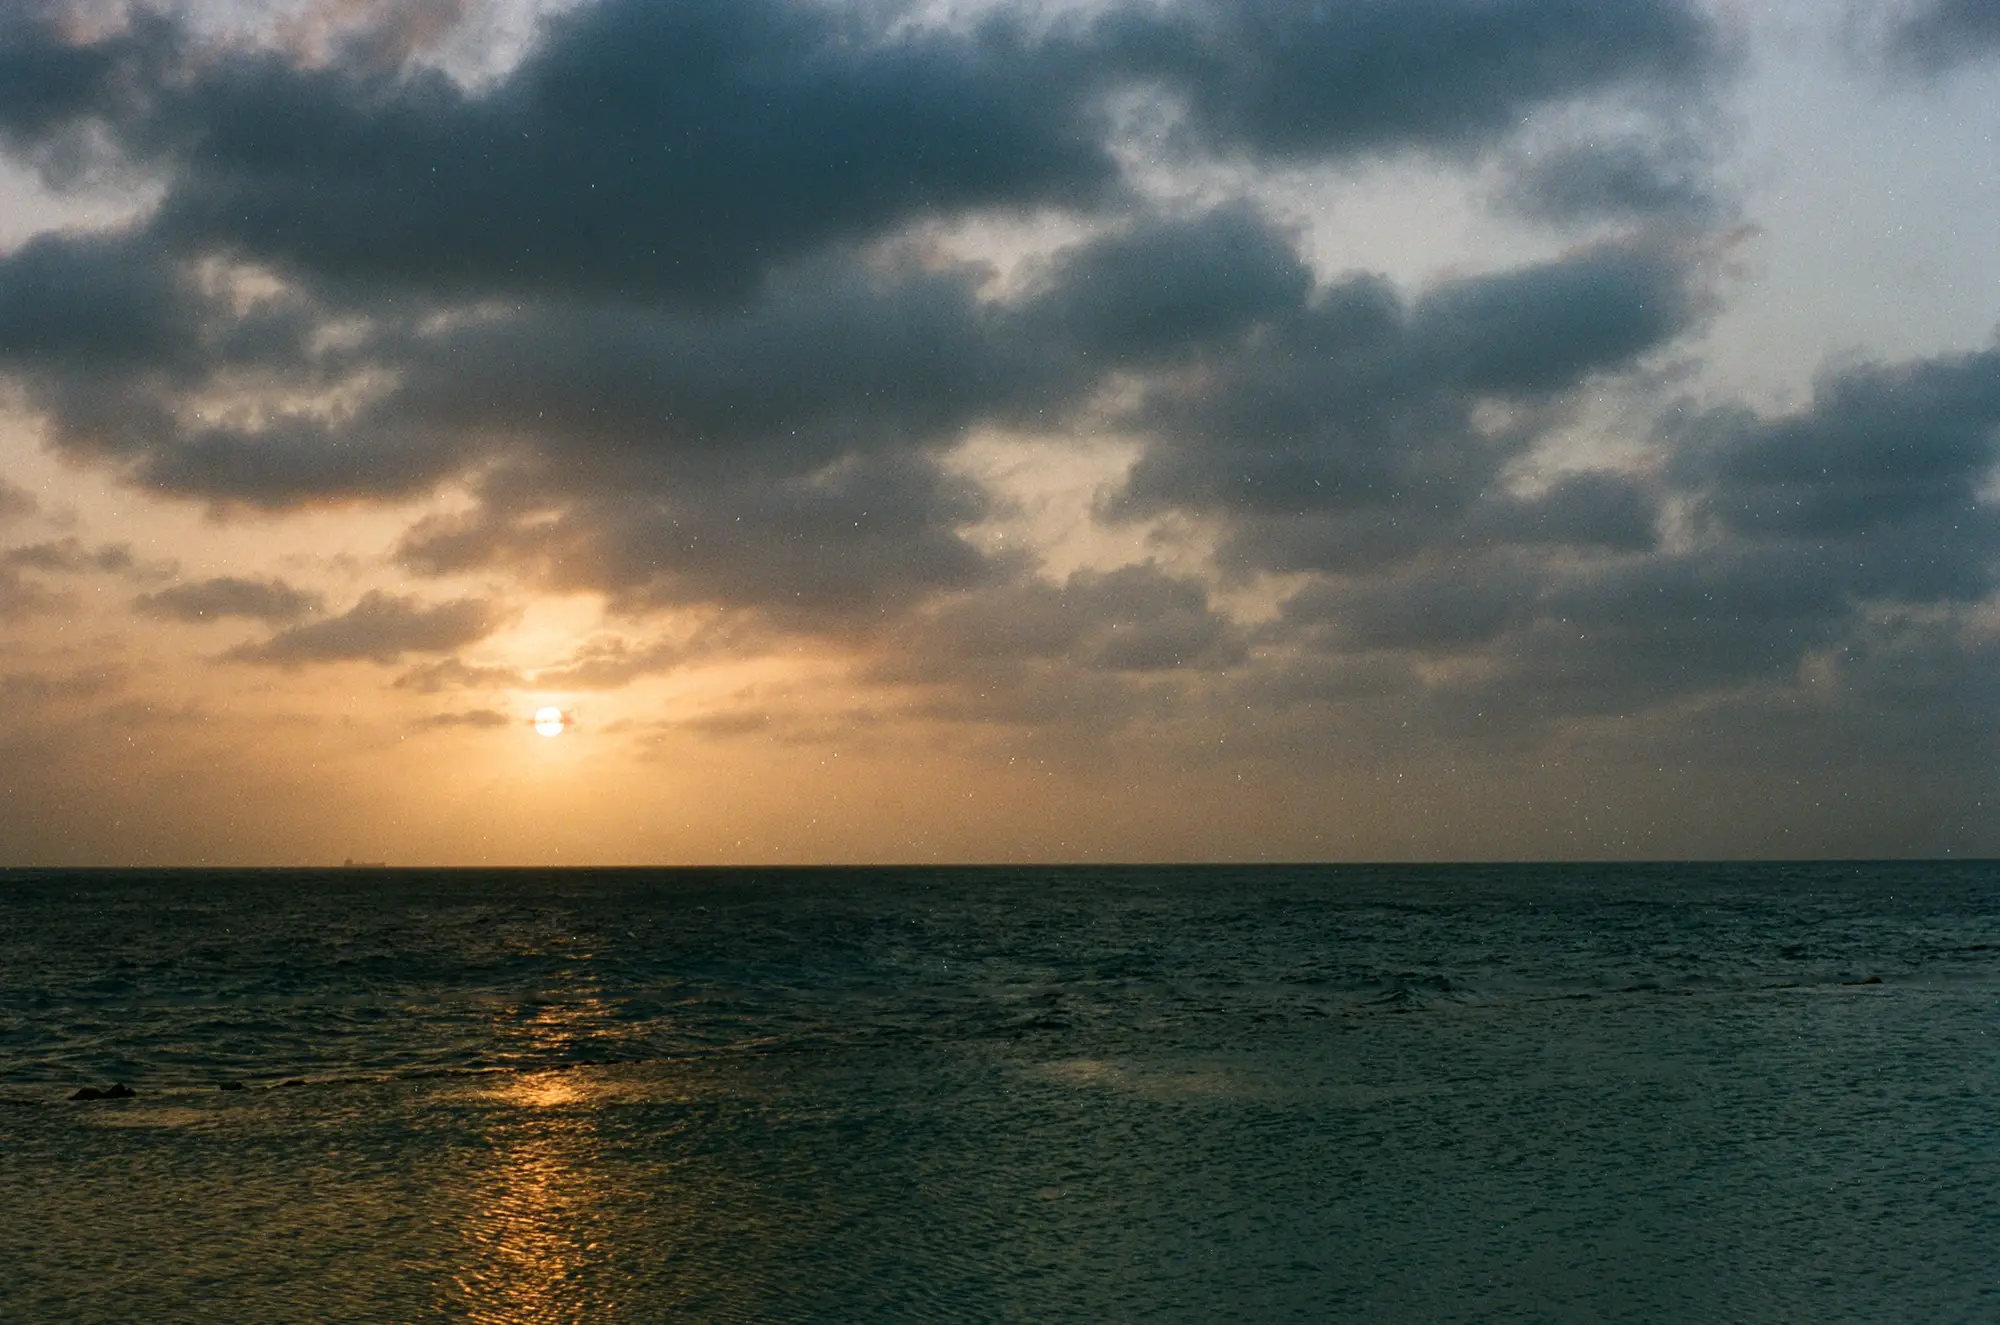
After spotting this I checked my other photos, and they appear in almost every photo. They just stand out more against a dark sky. Not necessarily a dark background, as in the image below, with the underexposed dark background, they seem to be smaller.

I decided to ask AG photo lab for advice. They asked me to send the negatives back to them, so they can have a look at them and help me figure out what went wrong. Basically their suggestion is that there must have been a storage problem. I am not sure if that is possible. So here is my summary of the circumstances:
- Bought film in The Netherlands
- Stored it in the fridge in a plastic multi-film holder
- Put in my hand-luggage in the same plastic box
- In Curaçao put the plastic box in the fridge
- Loaded the camera with the film, the camera was on a table most of the time
- Humidity in Curaçao is about 80%
- After shooting the film I removed it and put it in the fridge
- Put it in the hand luggage for the flight home
By the way, I see the same spots on my black and white film, and I see it in all films shot with both the M2 and the Minolta Riva. If anyone have a suggestion what it can be, please leave me some comment. If you think it is indeed a storage issue, what would be the proper way to store film?
One more note on colour, as I have been looking to get the colour I want in film, Portra 400 doesn’t disappoint. In comparison with Fuji pro 400H the colours seem to match the real colours better. Where Pro 400H is mostly on the green side, making blues more turquoise, Portra 400 seems to be more yellow. Is there a relation with the label colours, or is that a coincidence? Two more examples of the Portra 400 colours, with natural morning light and with artificial light in the bar:


All previous photos were developed by AG Photolab. But I tried UK Film Lab for my last roll shot with the Minolta Riva Panorama. After some discussions following my last post Hamish prompted me to UK Film Lab’s service of giving feedback on the negatives and a free-of-charge tailored scanning profile. I have a couple of images from them to compare to the AG photo lab results. First, Karakter beach with red parasol:


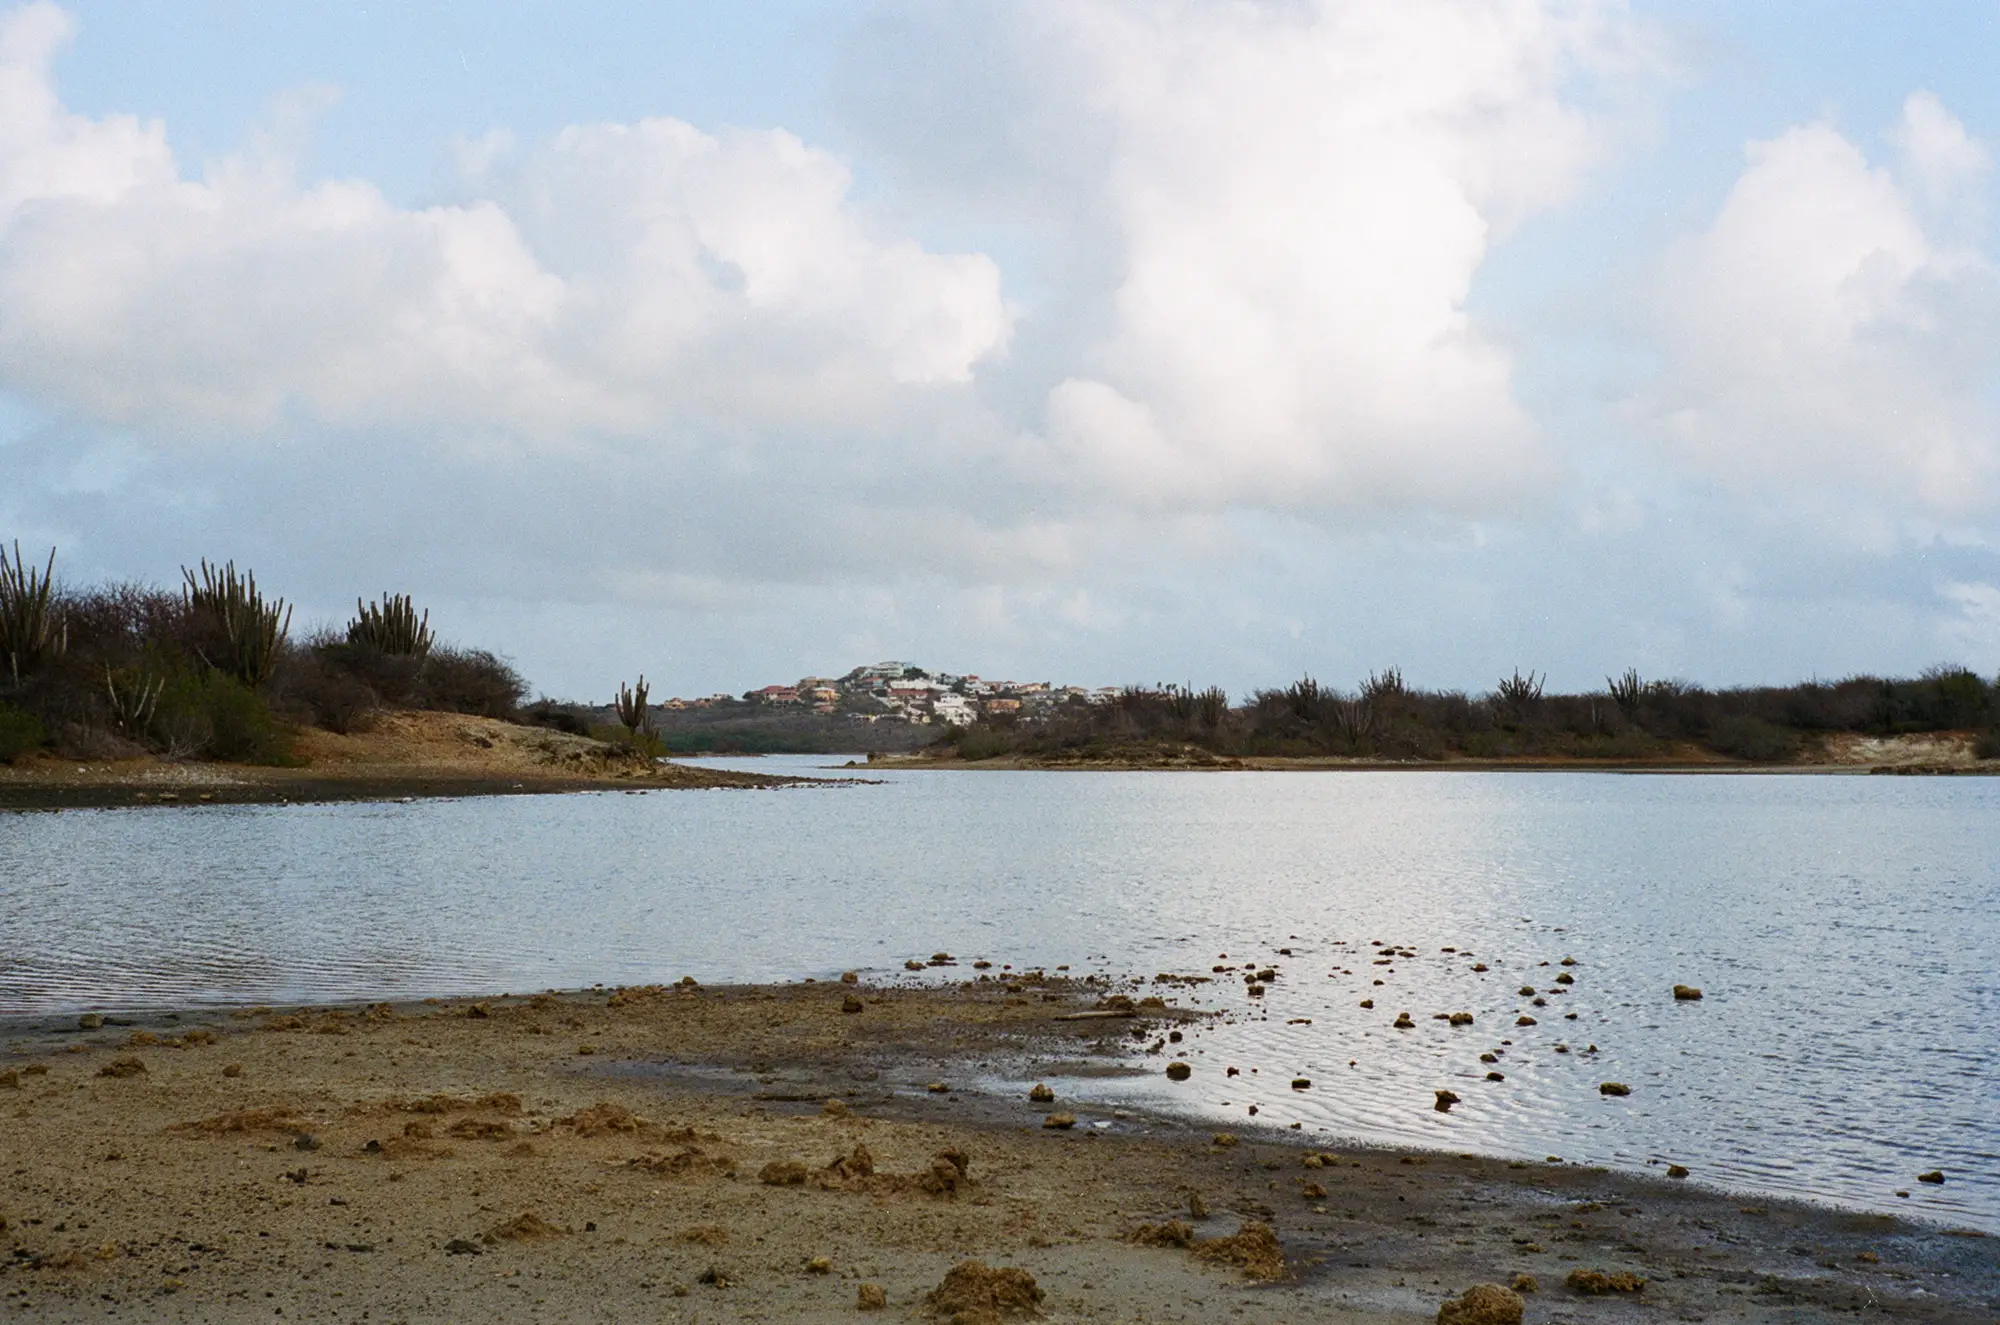
Next a little lake with cloudy sky:
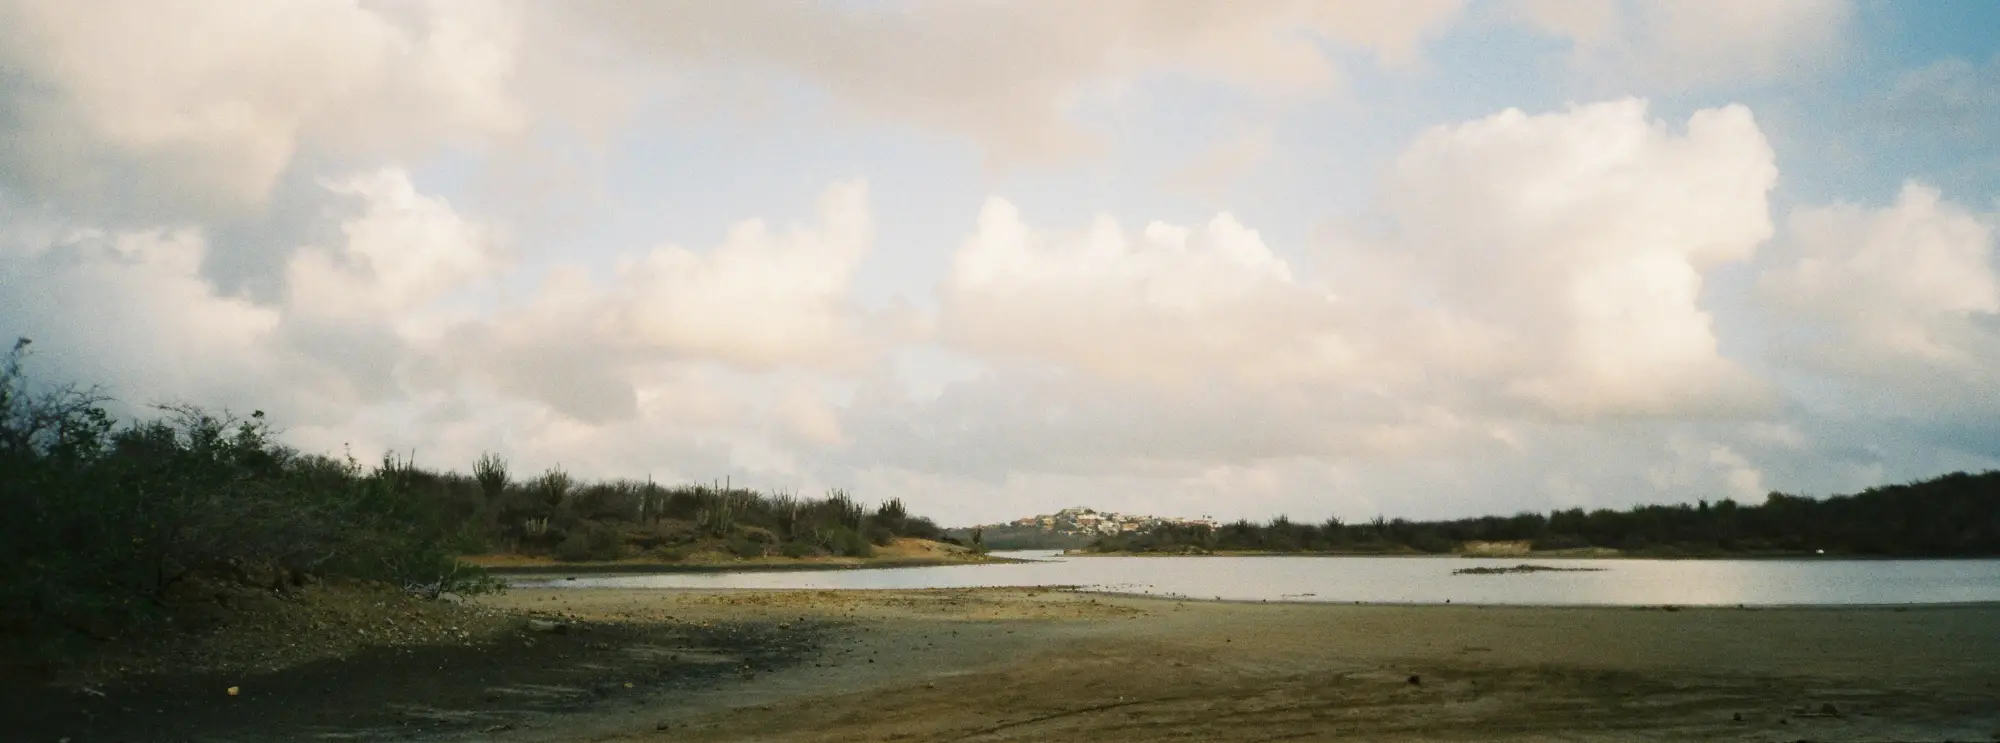
As you can see the images coming from UK Film Lab are a bit more yellow and more green. I can make them very similar in lightroom by adjusting the white balance (temp -5, tint +15). I guess it depends on personal taste which you would prefer, but the scans from AG photo lab look more realistic to me. I have to mention again that UK Film Lab has a free service for a personal scanning profile, where you can give your preference with respect to contrast, colour, toning etc, so I could ask them to change the colours a next time.
As I mentioned before, UK Film Lab also gives you feedback on the negatives. They include a word-document in the download file, the feedback looks like this:
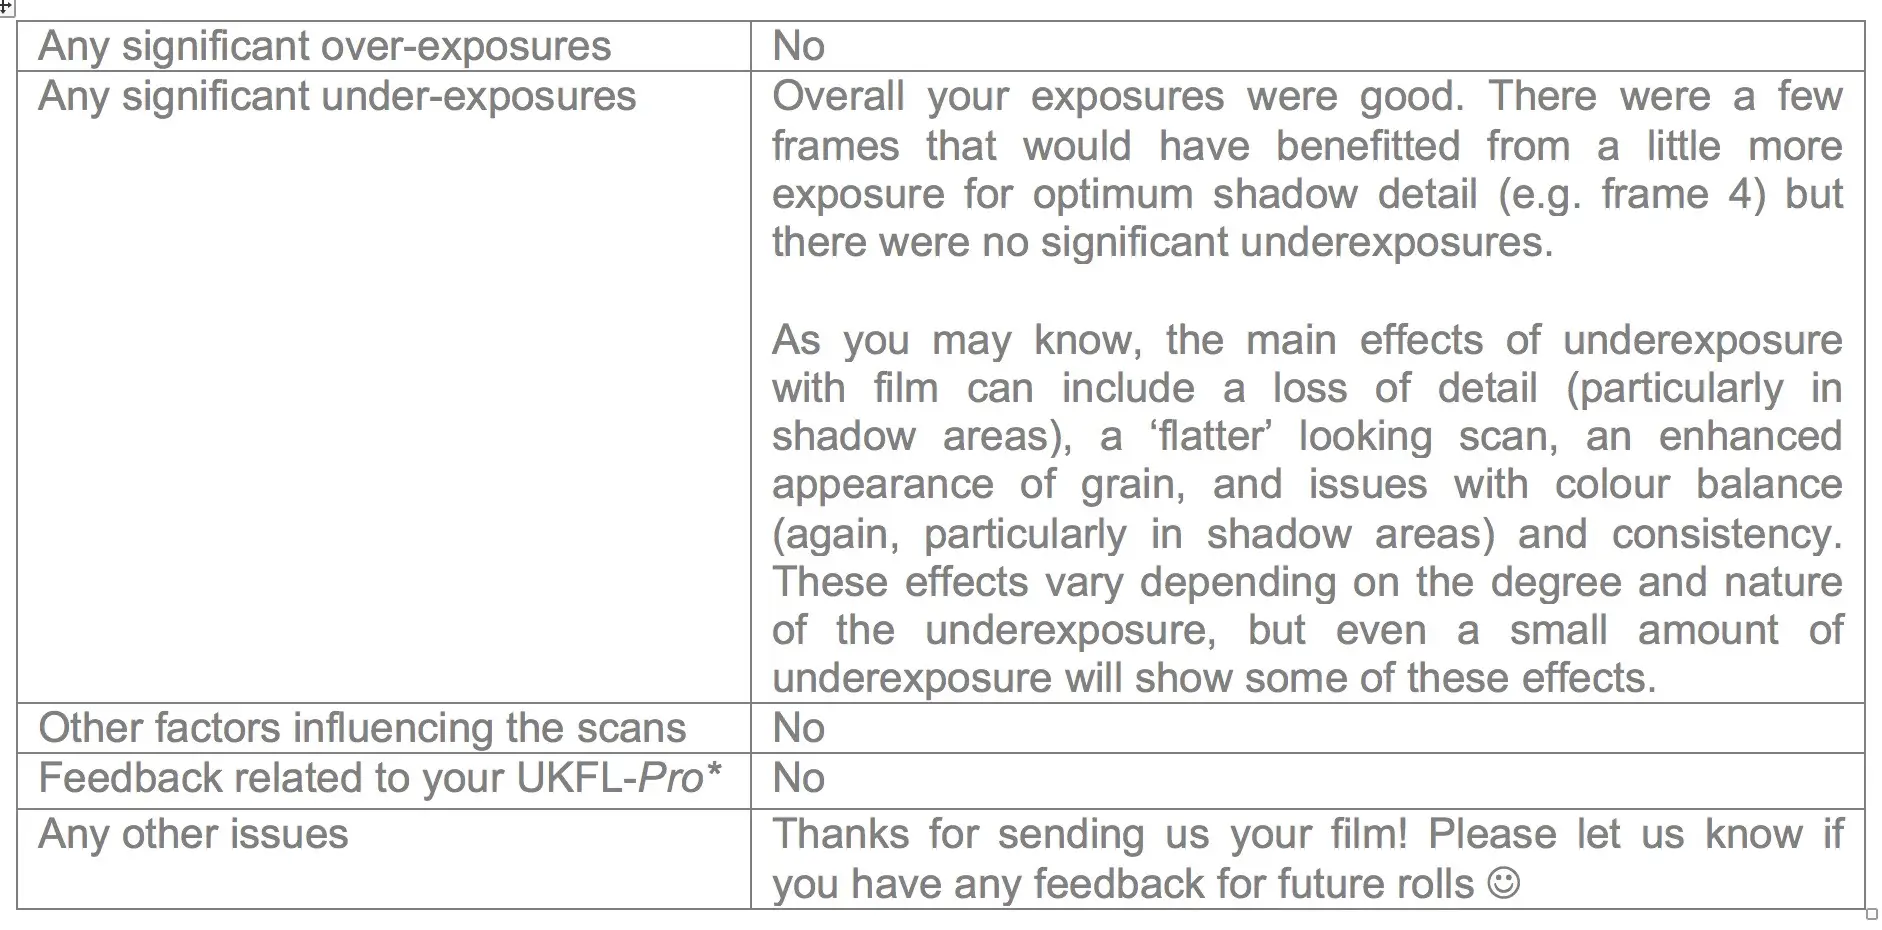
In this case the photos were made with the Minolta Riva, so it says more about the auto-exposure of that camera, but useful none the less. On the downside, their standard procedure is that they keep the negatives until there is a large enough stack before they send it back. It does reduce cost, but it means that I cannot judge the negatives myself. I assume they are willing to accommodate other arrangements, but this is the default procedure.
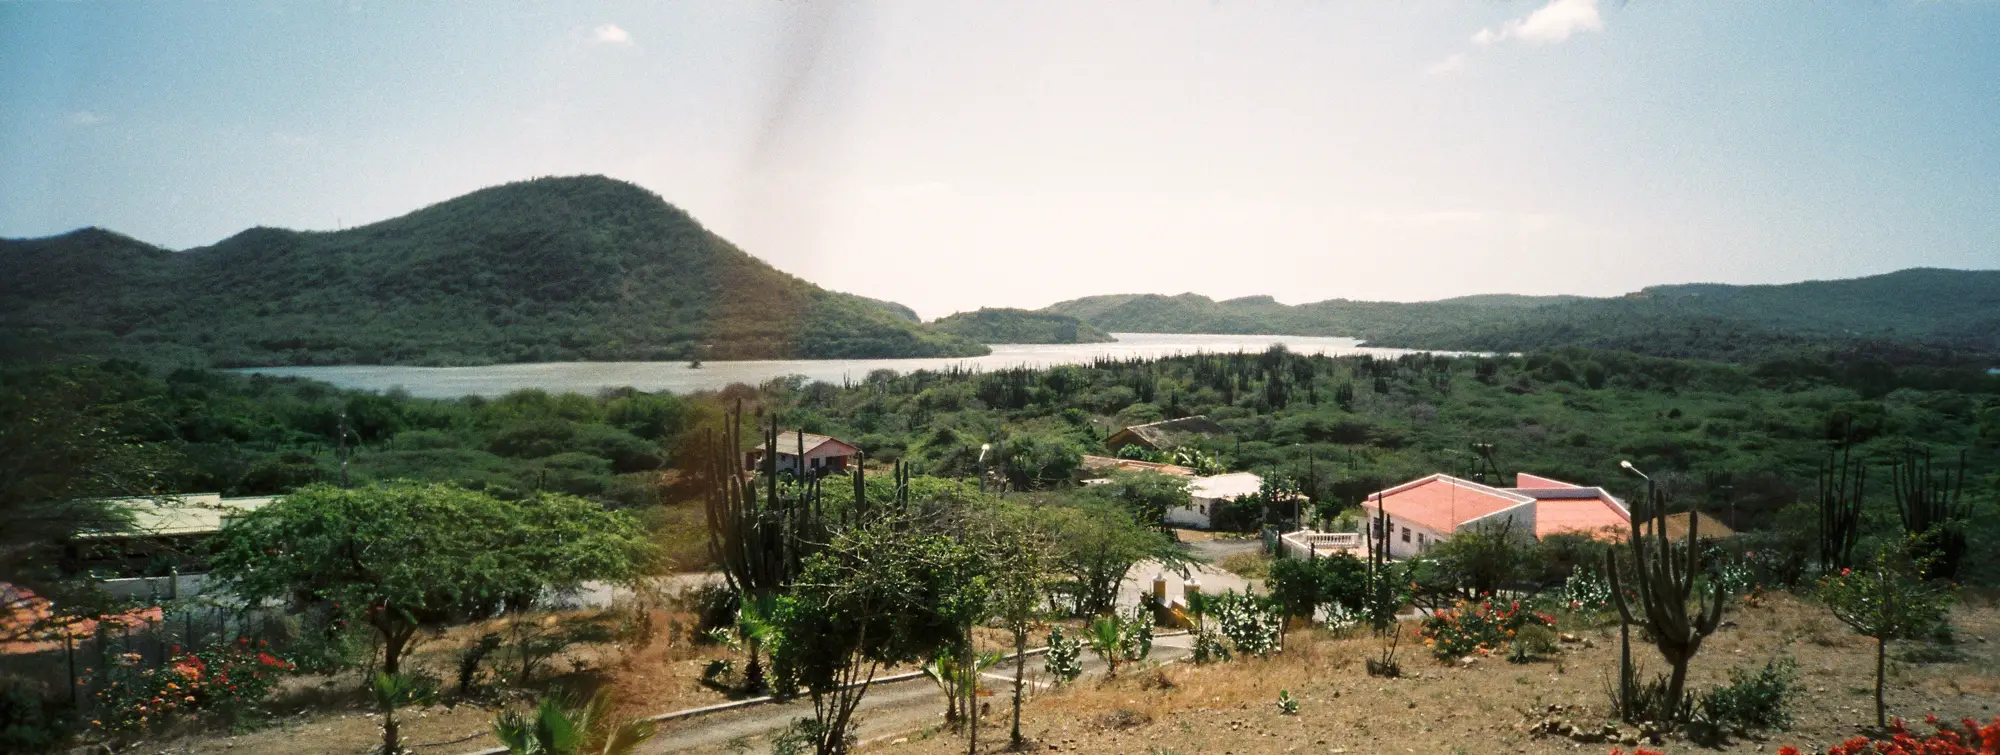
I’ll finish with a panorama from Curaçao which I quite like, apart from the red smudge caused by a strand of my hair flying in front of my lens. Just a reminder that you just have to keep paying attention to every detail…
Thanks for reading, and Hamish thanks for having me!
Read Part 10 of journey into film here.
Share this post:


Comments
rollbahn on Kodak Portra 400 – My First Experience With – by Aukje
Comment posted: 15/04/2016
The AG scans look like they have had very little manual intervention eg a little exposure tweak and some CMY tweaks would have got much better results.
I am absolutely no expert but having been through many labs over the years and finally getting my own scanner (and have scanned about 300 rolls) I can straight away see what could be fixed. UK Film Labs to my eye have done a much better job.
I am not sure about the white spots - that's very odd. We have 80-90% humidity regularly here in Australia and I've never seen that issue. It certainly looks like a development issue but for a pro lab that would seem to not be a possibility. I've just carried 50 rolls of Portra to Japan, through X-Rays and in and out of different temperatures and haven't seen the white dot issue - very strange.
Anyway - nice images and I'd suggest always setting Portra 400 to 100 on an Auto camera (either in camera or tweaking the DX codes on the canister) as you ALWAYS want to be on the over-exposed side with film.
Comment posted: 15/04/2016
Matthew on Kodak Portra 400 – My First Experience With – by Aukje
Comment posted: 15/04/2016
I prefer the AG Photo scans, but as ever its down to personal preference.
I used a few rolls of Portra 400 pushed to 800 in my M6 at a friends wedding a couple of years ago now.
I have to say I didnt find anything special about the Portra and so have stuck with my usual Poundland Agfa 200 used at 400 (dev time isn't changed to its not technically pushed), and at about a quarter of the price its hard to justify it when I currently have the consistency of the same film and film speed across most shots.
Im always tempted to try it again but with a stack of Agfa in my bag, I cant see the point.
Using 120 film however - I like to experiment there, just tried Fuji 400 Pro and have some Ektar, but my Yashica 124G really needs the lens cleaned (I've discovered, oil on the lens seems a common issue).
Keep em coming.
Comment posted: 15/04/2016
Pieter Geloen on Kodak Portra 400 – My First Experience With – by Aukje
Comment posted: 15/04/2016
As for the spots, just a thought. Did your handluggage go trough any scanning devive at the airport? (assuming you flew there)
That might be a cause of 'damage' to the film. I don't know the details, but I've heard from frequent flyers that film doesn'tlijke to go trough X-rays.
Also, I'm more a fan of the UK Film scanned images, love the contrast, the colours have more pop to them.
Comment posted: 15/04/2016
Brian Shields on Kodak Portra 400 – My First Experience With – by Aukje
Comment posted: 15/04/2016
I have been happy with the colour processing and scanning from AG, but have had issues with black and white medium format film. The last few scans from them have had dust and hair clearly visible and some negs showing scratches. I did email them but they said they thought it was a camera problem, even though two different cameras were used. I was not happy with the response so have stopped using them for colour and black and white.
Comment posted: 15/04/2016
Terry B on Kodak Portra 400 – My First Experience With – by Aukje
Comment posted: 15/04/2016
My experience of d&p is with B/W film and one thing I would discount is dust on the film at the time of exposure. Dust would prevent light reaching the emulsion and thus the emulsion would not get exposed and the area covered by the dust would develop out as transparent ( the unexposed silver in the neg being washed away by the fixer) and give a black spot in a print. I would assume a similar situation with colour neg film. Another cause could be during development and microbubbles, or even impurities in the water used for the developer, could attach themselves to the emulsion and prevent that spot from developing. But, again, leading to a black dot in a print.
What all this means is for a white spot to appear in a print via a negative, the relevant point in the neg has to be black. An opaque impurity being laid down along with the emulsion during film manufacture would lead to the required black dot, but you say you are getting the same effect on two different film emulsions which is odd. So what is the common denominator? Could it be the printing environment? If so, at what point is the problem manifest?
IMO, this is more likely the problem area. It is easier to get a white spot on a print during the printing process or, more accurately, when the paper is being exposed. Two potential causes will be dust settling on the paper leading to the paper not being exposed at these points (white hair marks were often attributable to this) and this will leave a white dot when the paper is developed. (Analogous to the neg situation.) Another possibility is a defect in manufacture by microscopic areas where the emulsion hasn't fused properly to the print base, thus when this is developed there will be no chemical reaction leaving the white paper base to show up as a white dot.
These are my personal views, and are offered only as possible causes of what you have experienced. One final thought, as a control, have you had films developed and printed but without scans at the same time?
Funnily enough, I am beginning to see
Comment posted: 15/04/2016
Comment posted: 15/04/2016
Comment posted: 15/04/2016
JK Lockwood on Kodak Portra 400 – My First Experience With – by Aukje
Comment posted: 15/04/2016
Portra is optimized for skin tones, thus the name. It gives a natural color palette. Ektar 100 would be a better choice (IMO) for this tropical environment to increase color saturation, especially since you had a dSLR as your prime camera (for evenings and low-light situations). Ektar has extremely fine grain too. ISO 100 may sound impossibly slow, but is in fact considered a medium speed film. Hard to believe in this age of hyperspeed CMOS sensors, but true.
Yellow box vs. Green box reminds me of the reputation Fujifilm had over Kodak as the better choice for landscape work. Of course this was mainly regarding slide film, Kodachrome vs. Velvia. With print film, the lab has a large hand in creating what you see.
Regarding the white spots and color balance, you have swerved into the biggest area of improvement of digital photography; the photographer is in complete control. During the film era, pro shooters were completely dependant on our labs to chemically develop, color and density correct our film and print it. If any of these steps went awry, we had limited ability to improve it. Once we started shooting dSLRs, we assumed the responsibility of "developing" correcting and processing our own images. Truly a double edges sword for a business.
Remember: "Film's not dead, it just smells funny"!
Comment posted: 15/04/2016
JK Lockwood on Kodak Portra 400 – My First Experience With – by Aukje
Comment posted: 15/04/2016
Comment posted: 15/04/2016
RK on Kodak Portra 400 – My First Experience With – by Aukje
Comment posted: 15/04/2016
Comment posted: 15/04/2016
Comment posted: 15/04/2016
Comment posted: 15/04/2016
Nick Clark on Kodak Portra 400 – My First Experience With – by Aukje
Comment posted: 18/04/2016
Long story short - dust reduction software isn't perfect...
Comment posted: 18/04/2016
Curaçao on Film - What Aukje Sees on Kodak Portra 400 – My First Experience With – by Aukje
Comment posted: 20/04/2016
Miriam on Kodak Portra 400 – My First Experience With – by Aukje
Comment posted: 29/04/2016
www.miriamwoodburnblog.co.uk
Marc-paul on Kodak Portra 400 – My First Experience With – by Aukje
Comment posted: 11/05/2016
But I am wondering how ISO 400 worked with a Leica M in tropical midday? I can hardly expose Tri-X correctly in The Netherlands summer in full sun due to the shutter limited to 1/1000.
Comment posted: 11/05/2016
Khürt Louis Williams on Kodak Portra 400 – My First Experience With – by Aukje
Comment posted: 10/05/2020
Comment posted: 10/05/2020