
A few months ago a professor at the University of Sheffield where I work gave me and some colleagues a couple of boxes of expired film, which were owned by his father. Most of them were black and white, 35mm, and all had expiry dates over 20 years ago but had been kept in the fridge. There were a few boxes of the film featured here, Konica Infrared 750nm, with expiry of 2001. I decided to give it a try over summer, when the light is brightest, in the hope of creating some characteristically infrared landscape images with black skies, white fluffy clouds and white foliage like others’ work I have often admired.
I didn’t have an infrared filter of my own but I was able to borrow a Hoya R72 from my colleague Chris. It was 49mm thread so it fitted my Pentax-M lenses. I loaded the roll into my ME Super with the 28mm f/2.8 attached. First problem: I didn’t know what ISO setting to use! It’s not listed on the box anywhere as one would expect. I re-checked in case I’d missed it, but it was definitely not there. Then I looked in the little instruction book that was in the box, which informed me that the ISO was 32.
The next problem was that I didn’t know how many stops to adjust the exposure by with the IR filter attached. I thought it would be easy to find out online, but it was anything but. I found many definitive answers saying that it was 4 stops, 5 stops, or 10 stops depending on who was advising. So that was not helpful. I thought I had better bracket the exposures, at 4 stops and 10 stops, with nothing in between, because I don’t like wasting film (even if it is free!). This strategy turned out to be counter-productive.
I remembered I needed to adjust the focus for infrared photography. This was easily achieved on my Pentax lens which has a marker for this on the focus scale.
There were some times when I couldn’t really be bothered to set up the tripod and manually calculate the exposures, so I wondered what it would be like to shoot it as a normal b/w film, rather than infrared. This allowed me some handheld shooting, on bright days.
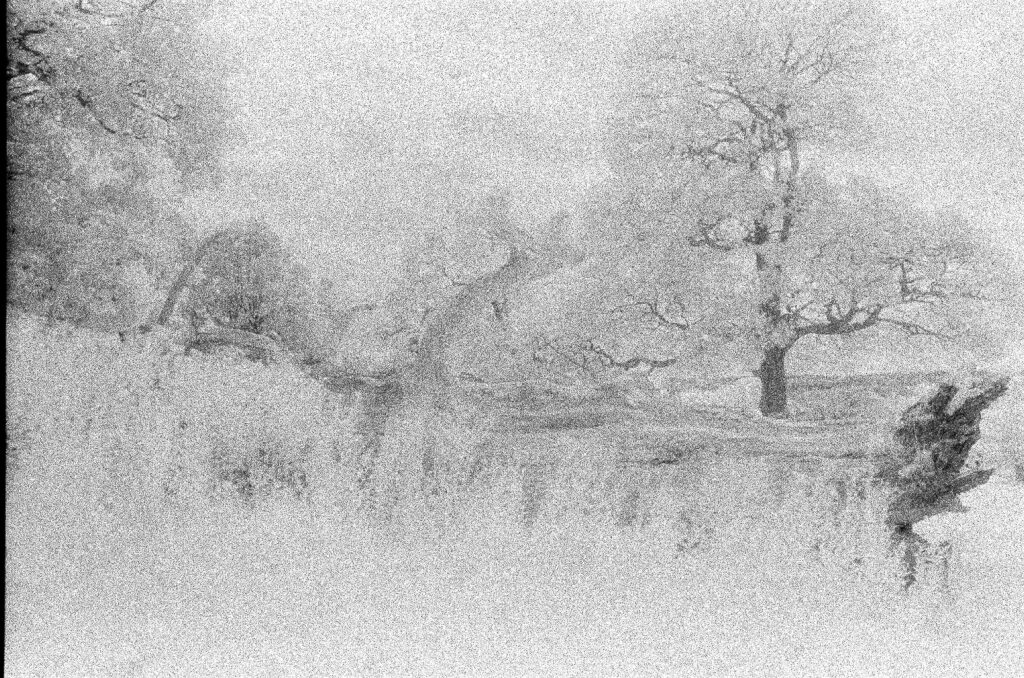
Once processed by AG Photolab, I downloaded the scanned images and I was pleased with some and bemused by others. There were many that were very very grainy and low contrast. The non-IR ones looked great. Here are the negatives.
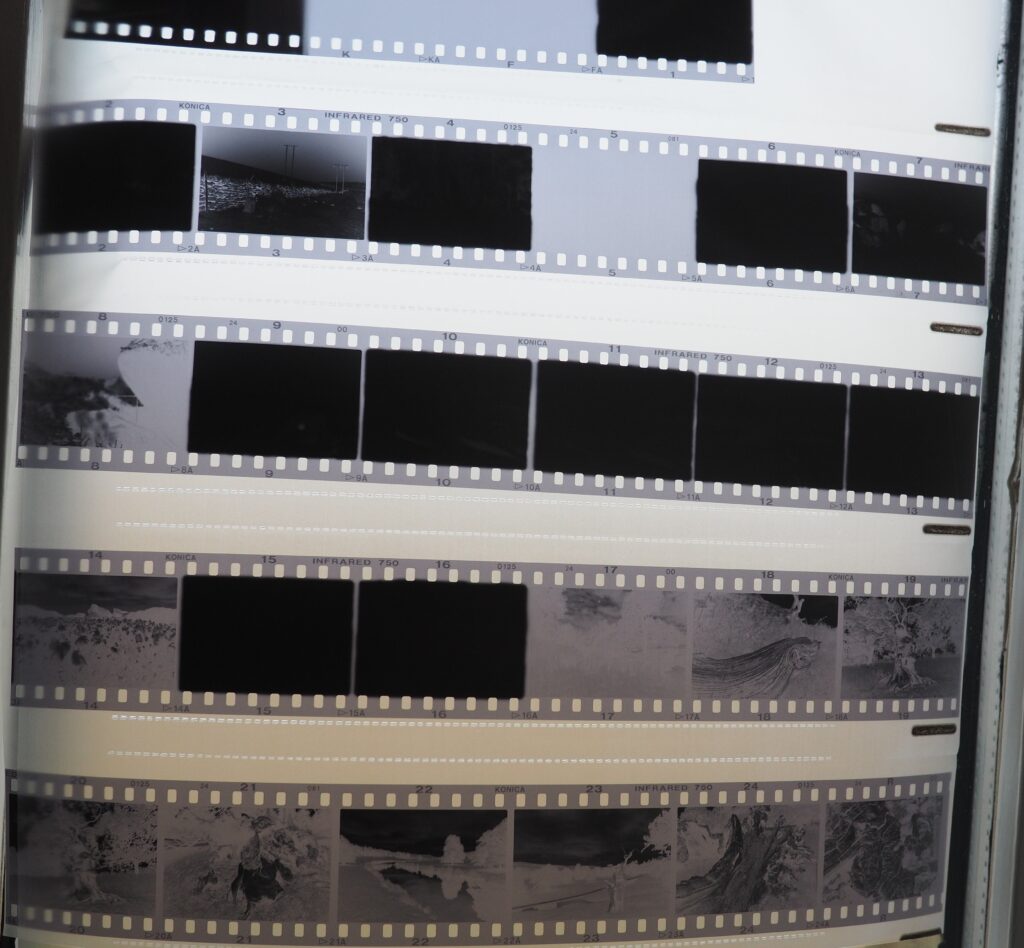
Obviously from looking at the neg’s, many were grossly overexposed and it was impressive that the lab’s scanner was able to extract any detail at all from these very dense frames. What is reassuring though, is that the film is not fogged at all; impressive for 25+ year old stock.
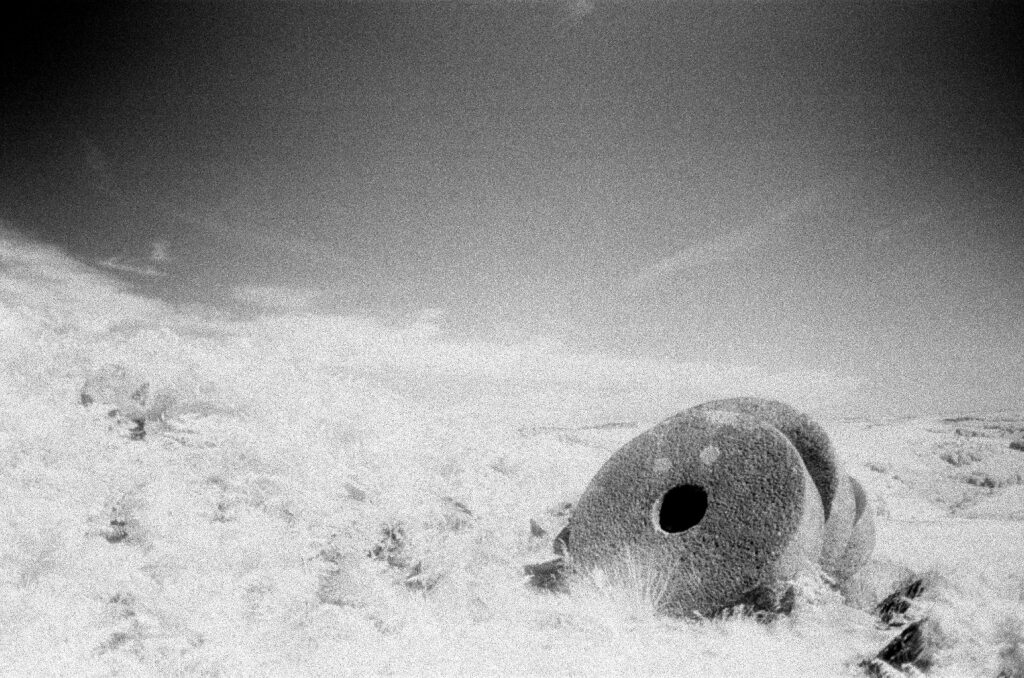
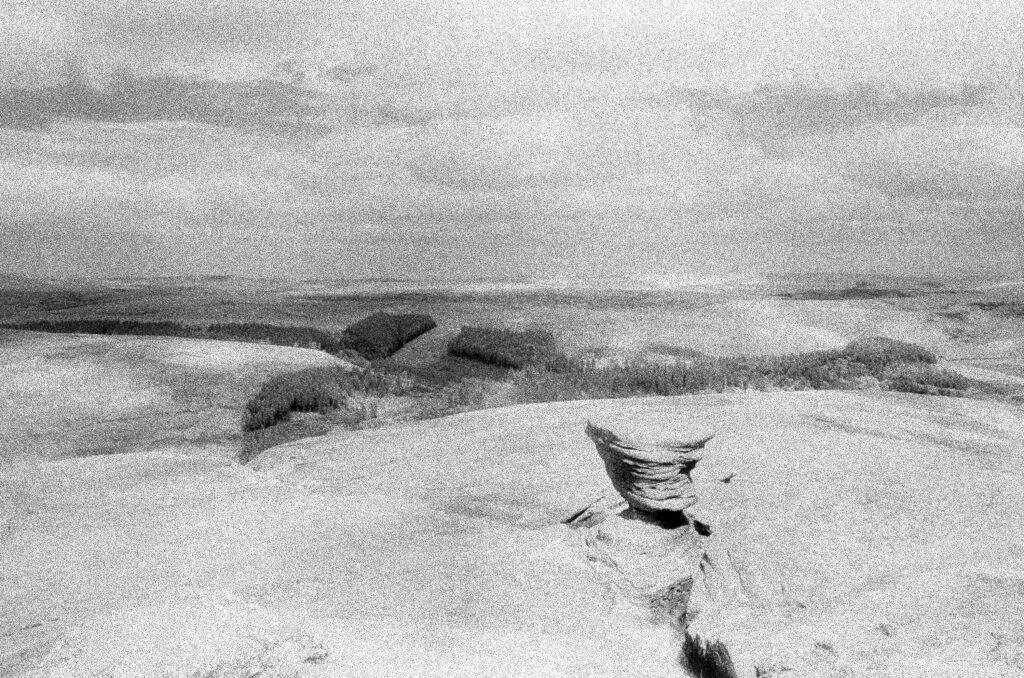
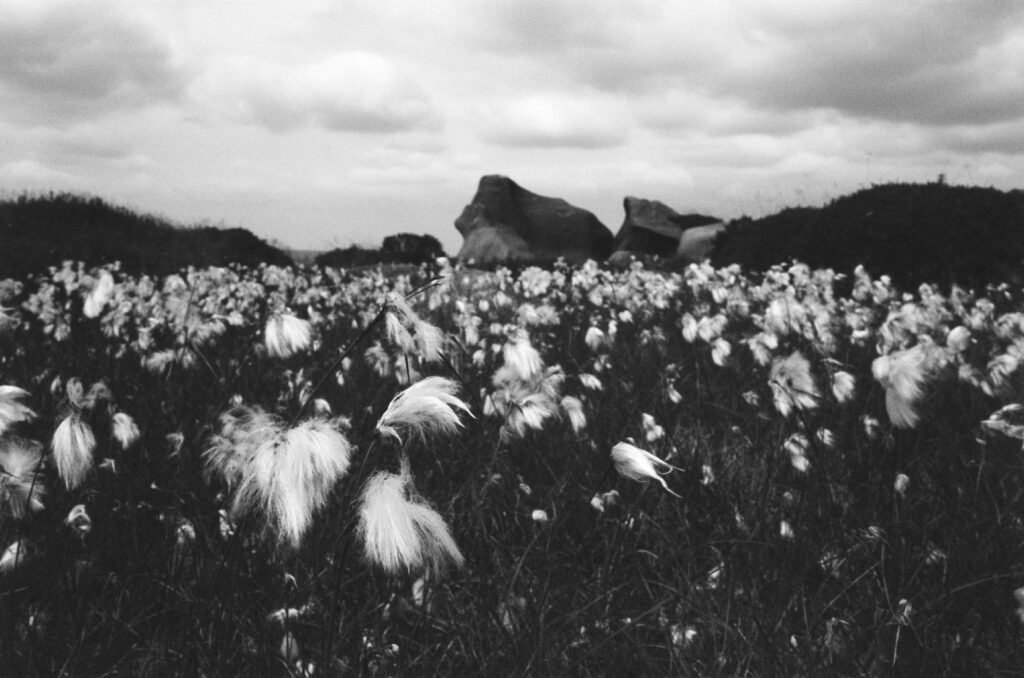
These five were overexposed and I used my image editor to add contrast:
This one underexposed but saved by image editing:
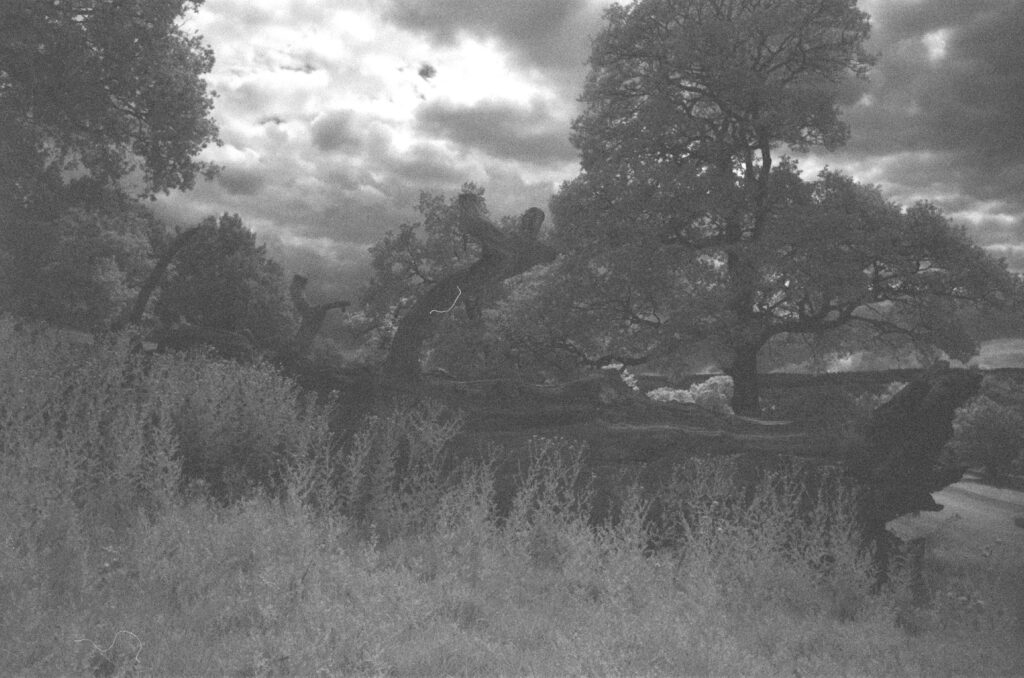
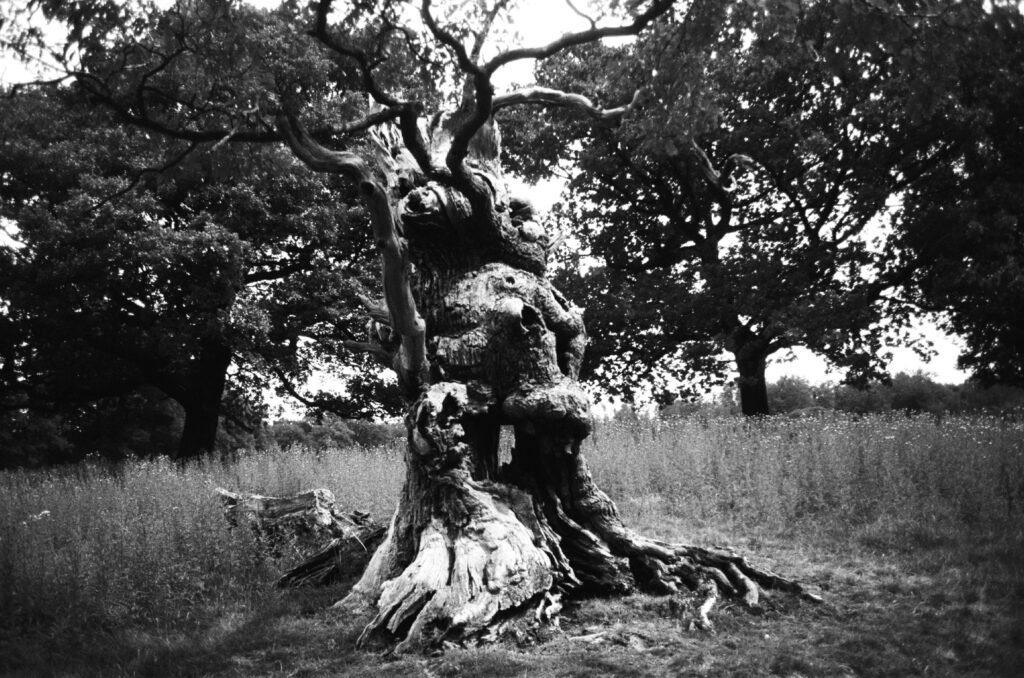
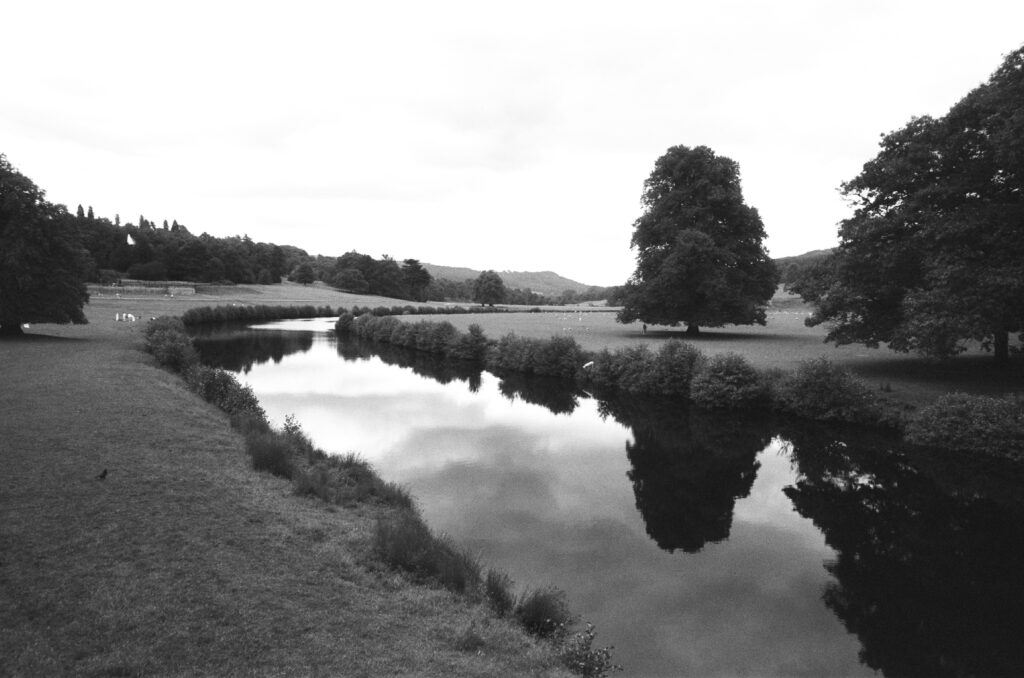
These few were unfiltered, so look like normal black and white.
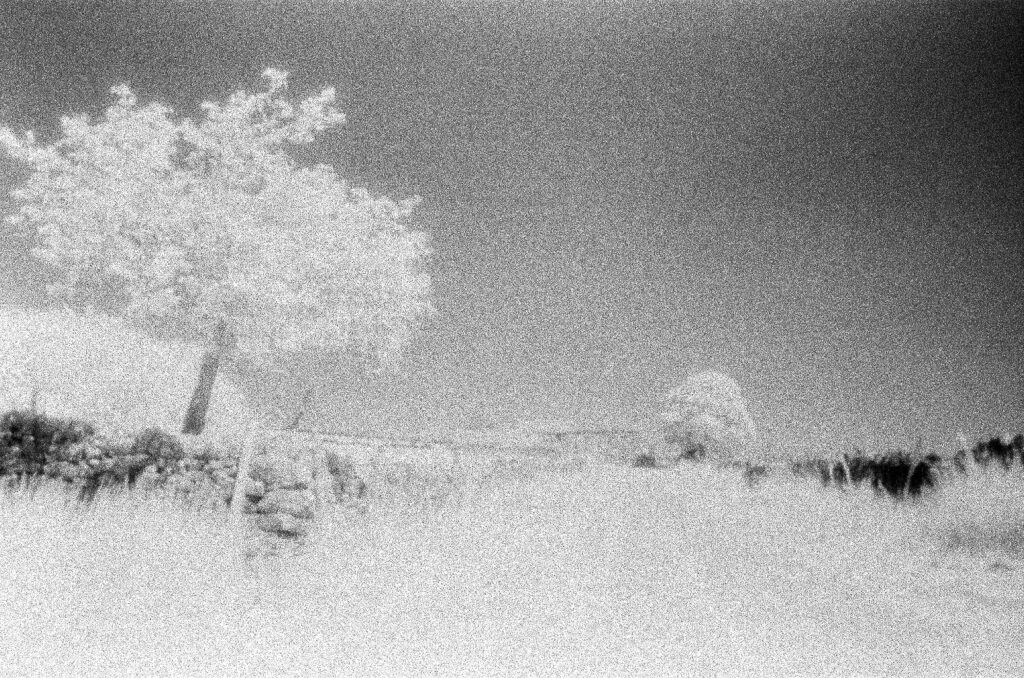
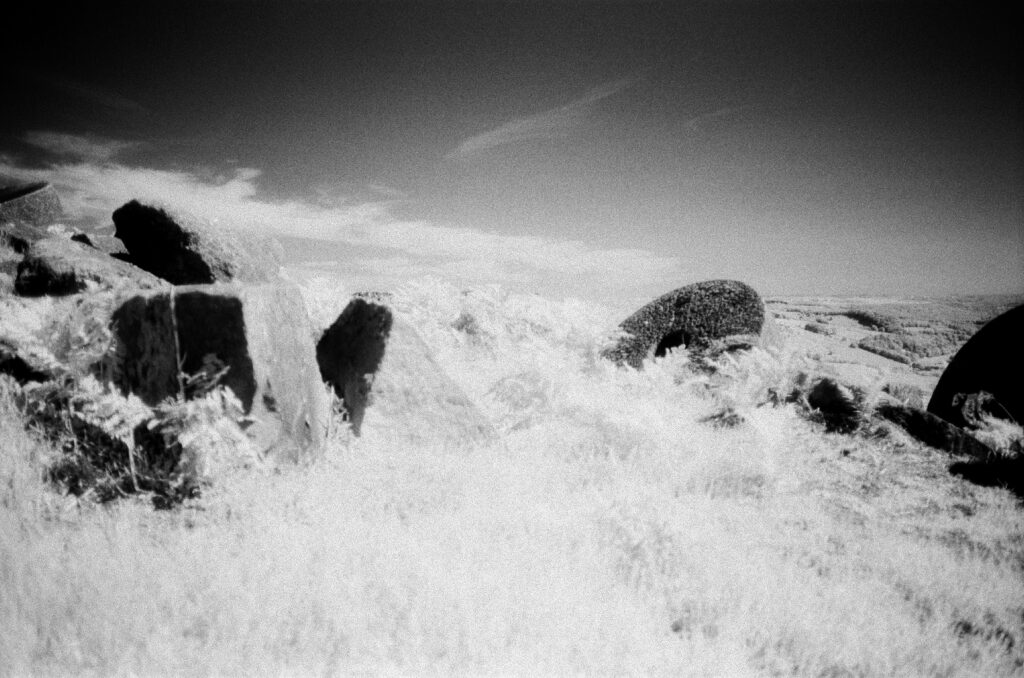
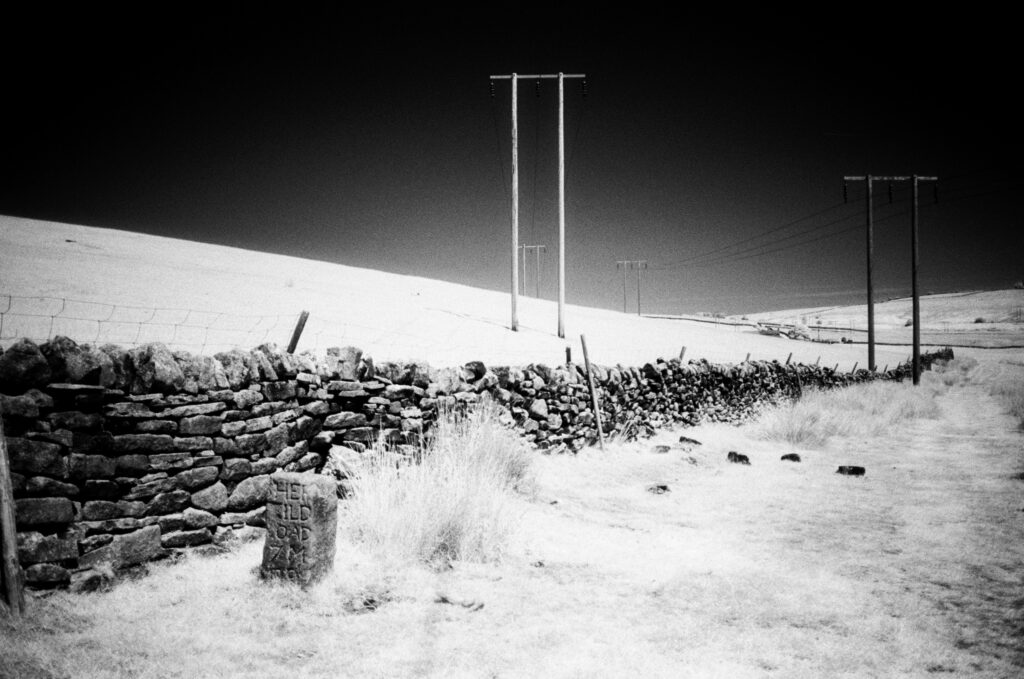
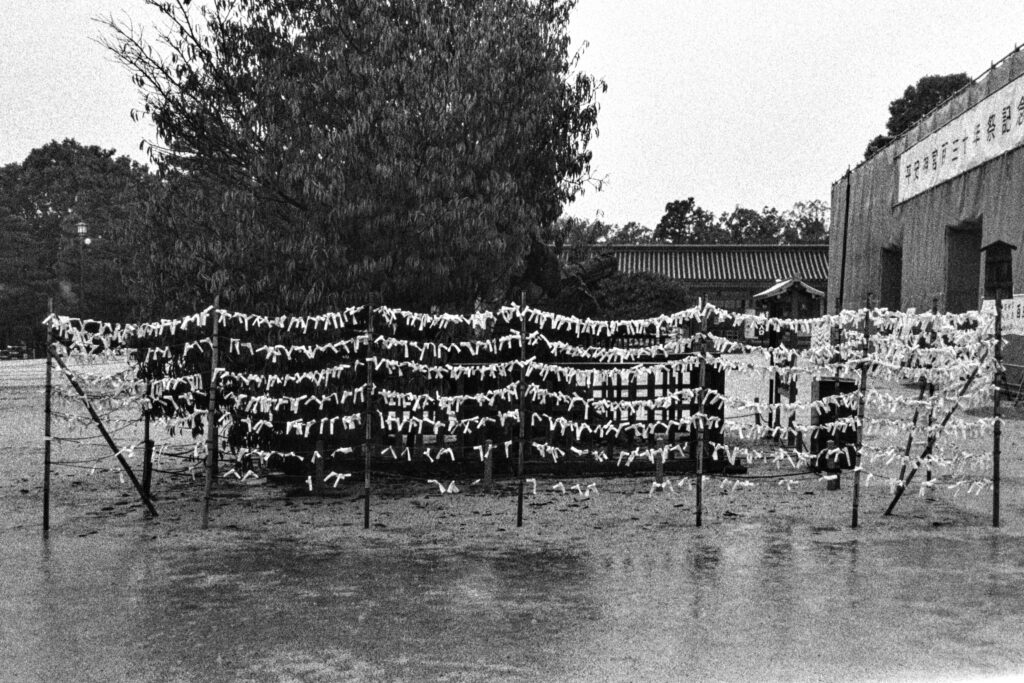
This is the only “proper” infrared one which had a decent exposure that allowed for black sky and white foliage. I think this was the only one that I let the camera meter, rather than my own clumsy efforts. I couldn’t see a thing through the viewfinder though, so I’m impressed that it included the objects I wanted, although it’s not a very good picture really.
The pictures I was most impressed by were the non-IR ones. The film gives beautifully rich tones and depth of contrast. I’ll be using this film again even if not with a filter. I don’t really know how to do the IR and it was frustrating to have so many rubbish frames from this roll. If I knew how much visible light the filter was blocking, it would help. I probably would have created more usable frames if I had bracketed 3 exposures per picture rather than 2. Next time I will. I have a few rolls left to try, and after that it is gone forever.
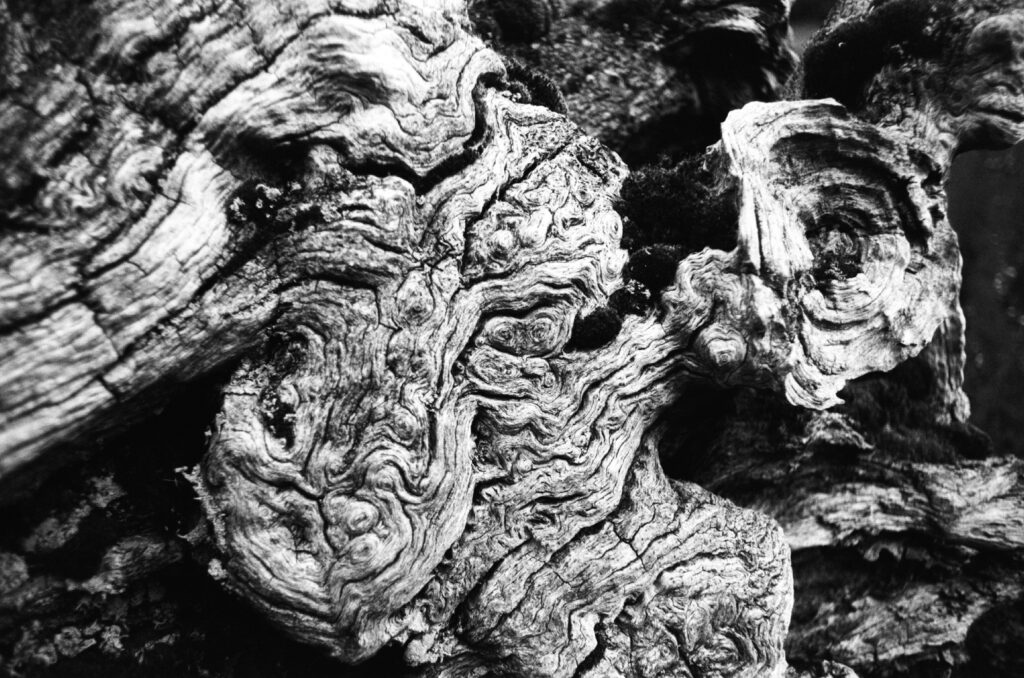
My favourite picture from this roll is the one of the patterns in the old tree trunk, which was photographed unfiltered, even though I would have preferred the top left to be in focus as well as the centre. This lovely Konica film seems to have given the picture a special quality with deep blacks and fine detail across the whole range of tones.
I share my photography on Flickr which you can view here.
Share this post:


Comments
Bob Janes on Konica Infrared 750nm – Experimenting with Expired Infrared Film
Comment posted: 18/01/2026
Comment posted: 18/01/2026
Comment posted: 18/01/2026
Comment posted: 18/01/2026
Comment posted: 18/01/2026
Neal A Wellons on Konica Infrared 750nm – Experimenting with Expired Infrared Film
Comment posted: 18/01/2026
Comment posted: 18/01/2026
Gary Smith on Konica Infrared 750nm – Experimenting with Expired Infrared Film
Comment posted: 18/01/2026
Nice couple of images Mark!
Comment posted: 18/01/2026
David Dutchison on Konica Infrared 750nm – Experimenting with Expired Infrared Film
Comment posted: 18/01/2026
Comment posted: 18/01/2026
James Evidon on Konica Infrared 750nm – Experimenting with Expired Infrared Film
Comment posted: 19/01/2026
Russ Rosener on Konica Infrared 750nm – Experimenting with Expired Infrared Film
Comment posted: 19/01/2026
Comment posted: 19/01/2026
Alexander Seidler on Konica Infrared 750nm – Experimenting with Expired Infrared Film
Comment posted: 19/01/2026
Comment posted: 19/01/2026
Ibraar Hussain on Konica Infrared 750nm – Experimenting with Expired Infrared Film
Comment posted: 19/01/2026
Comment posted: 19/01/2026
Comment posted: 19/01/2026
Comment posted: 19/01/2026
Comment posted: 19/01/2026
Comment posted: 19/01/2026
Leon Winnert on Konica Infrared 750nm – Experimenting with Expired Infrared Film
Comment posted: 19/01/2026
I have had a brief encounter with Ilford SFX 200. According to the Ilford spec sheet the spectral sensitivity at the red end is increased to 740nm falling to nothing at 760nm. Normal black and white Panchromatic film is only sensitive to 650nm, give or take.
Ilford (or should I say Harman) don’t overtly claim the film to be IR. The datasheet describes it as a black and white camera film with extended red sensitivity for creative photography. It further states that it is especially suited for use with a red filter to create special effects. For example, by using a very deep red filter, skies can be rendered almost black, and most green vegetation almost a white. Its unusual tonal rendition ensures interesting results for a range of subjects, including portraits, landscapes, townscapes and architecture.
I shot it using no filter, yellow and orange and ultimately a Red 29 filter. The factor for the Red 29 being 20 (4.3 stops). With the red 29 I was beginning to get some semblance of an IR effect in so much that grass was rendered very light. By the time I got round to doing that it was late on a summer’s evening, sun visible. Not bright sunshine as Ilford recommends for best results. So under those conditions I may have had some unrealistic expectations of results.
When the spring growth is with us and we have a nice sunny day, I will venture out again. This time using my recently acquired Hoya R72 filter. The factor of which is specified by Hoya in their spec sheet as being between 1024 and 20,000 (10 to 14.3 stops).
I will use a rangefinder camera so I can at least see what I’m shooting. Given that sunny 16 (200th at f16) corrected for 10 stops results in ¼ sec at f4.0 and 14.3 stops its 6 secs at f4.0 then obviously it will necessitate the use of a tripod.
I will also try the Red 29 again.
I will report back in due course if I have anything interesting to say.
Comment posted: 19/01/2026
Comment posted: 19/01/2026
Omar Tibi on Konica Infrared 750nm – Experimenting with Expired Infrared Film
Comment posted: 20/01/2026
Others have given great advice, but I just want to echo that getting a deep red filter might be the best outcome here, it'll be easier to use than a true IR filter but it should still give you that IR effect.
If you like plain B&W shots with a bit of IR sensitivity, then try some of the many Aviphot 200 derivatives (Superpan 200, Retro 400S, Svema Foto-200, etc). Aviphot 200 and 80 both have some IR sensitivity.
Comment posted: 20/01/2026
Zheng Li on Konica Infrared 750nm – Experimenting with Expired Infrared Film
Comment posted: 20/01/2026
- Red 25A filter: enough infrared effect, f/5.6 1/60s seems to retain details in highlights
- R720 filter: more dramatic rendering with darker sky, f/5.6 1/30s seems to retain details in highlights
Comment posted: 20/01/2026