
When I became aware of the existence of the Solarcan™ (the cheap and easy yet effective famous solargraphy pinhole camera), I immediately ordered one and, lucky me, received it just several days before a solstice. My little house is facing the South almost perfectly, and I climbed on a tall and shaky ladder to attach the can to the downspout with duct tape, as high as my fear of breaking myself a leg could afford.
The humble device resisted the local weather (very rainy, windy and frosty in winter) during a full year, and it was time to disclose the inner treasure. Following the instructions, I opened the can in a darkened room, and rushed to my scanner to capture the image before it fades away for ever. With the help of Photoshop, the scan was turned to negative, the contrast a bit enhanced and the overall colours tweaked and boosted (yes, the black and white paper produced colours!). I was stunned. The picture was absolutely beautiful, with heavy grain and blurry trees, mysterious blotches and water stains. I was thrilled and ordered two more Solarcans™.
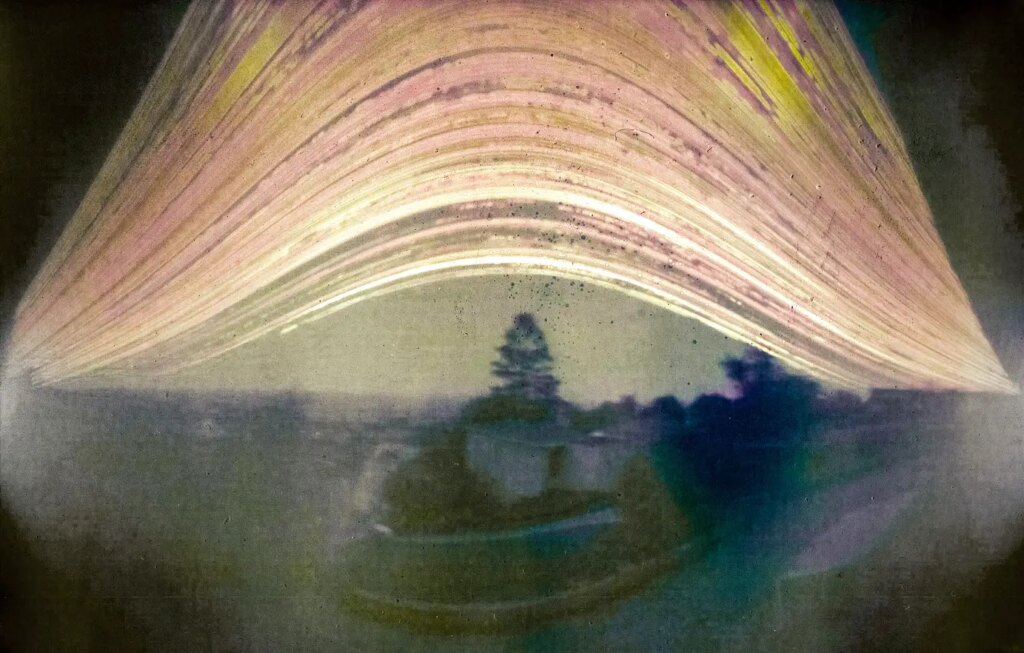
A soft bitterness occurred after the first excitement. Indeed, the summer sun paths were cropped by the top (for real, the bottom) of the photographic paper, since I had taped the cans on the vertical downspout and the pinhole was aiming the horizon, not the sky. My idea then was to build a wooden cradle with different angles for the two new Solarcans™. The decent object turned to be ugly after I over wrapped the cans on it with tape, to ensure a waterproof set-up. I firmly fixed the monster on my balcony (no risk of broken bone) but wasn’t able to tolerate its miserable aesthetic more than six months, solstice to solstice, fearing to be jailed for affront against landscape and sight. Anyway, this duration appeared to be a better exposure time, since the solar paths of the spring would not trace over the fall trails.
During those months, awaiting for the Solarcans™ results, but hiding in my basement, ashamed of my crime against aesthetics, I decided to make a reusable solargraphy can, sturdy and handy, with an adjustable angle system, and with a decent look. One? I made four.
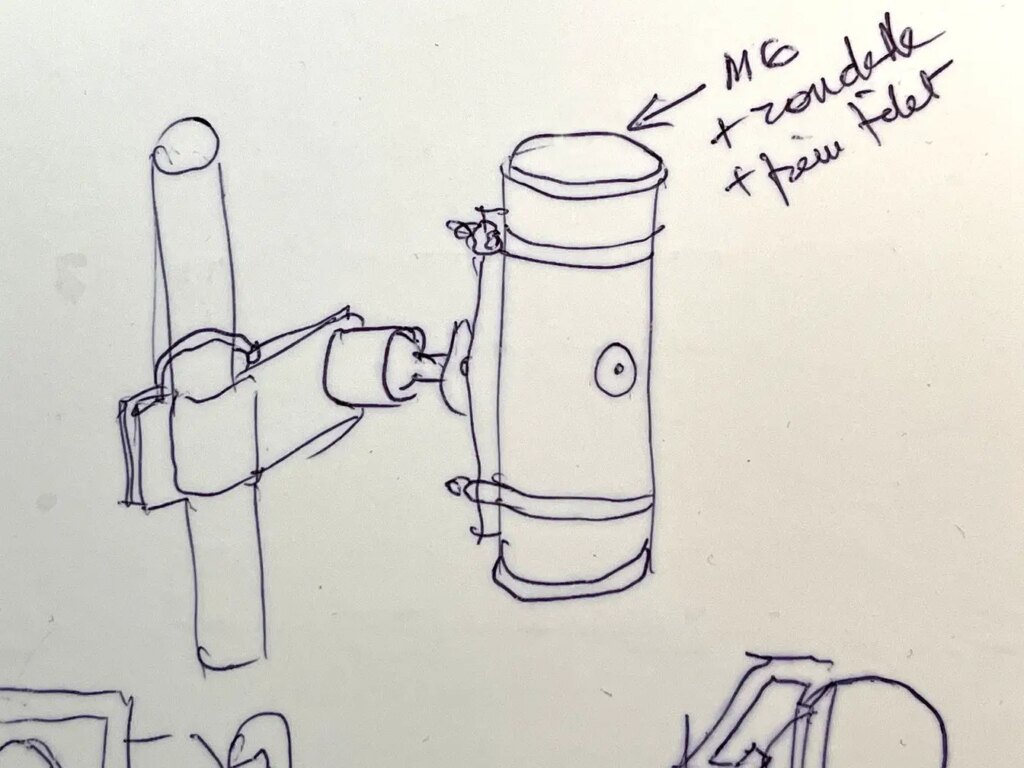
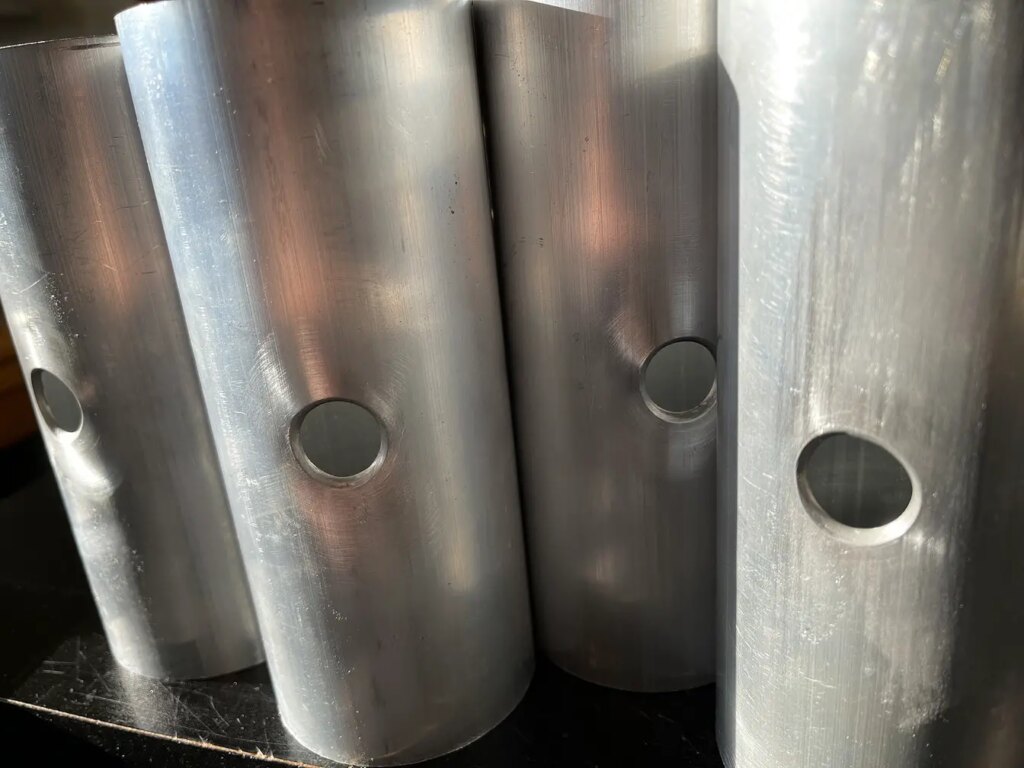
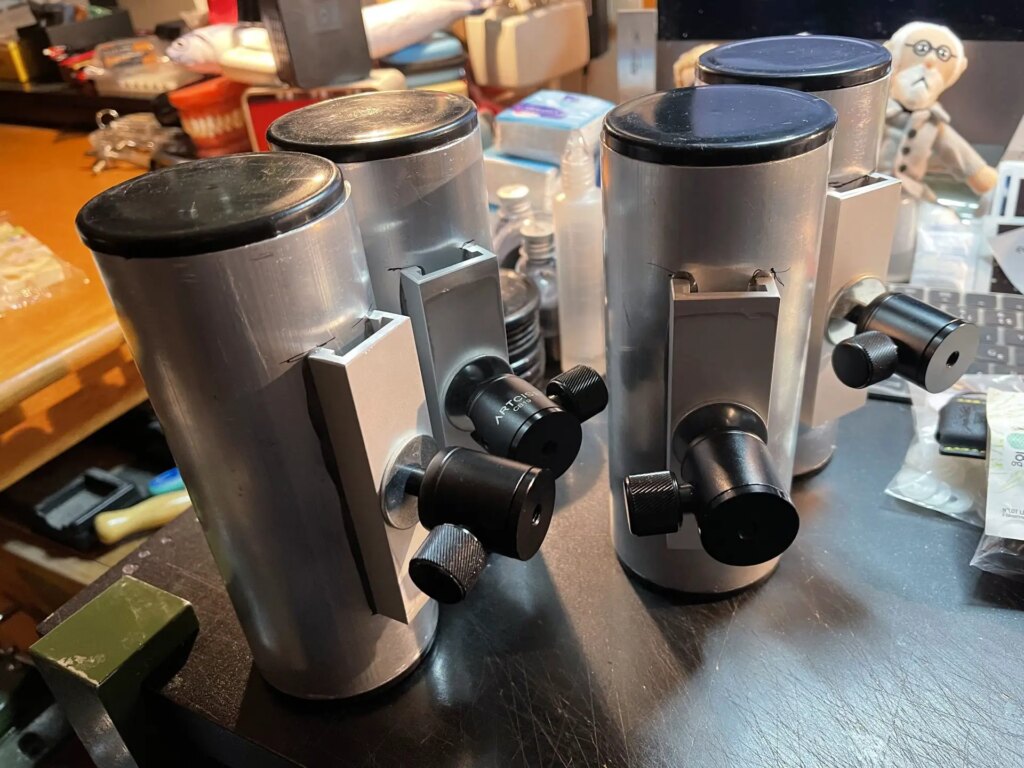
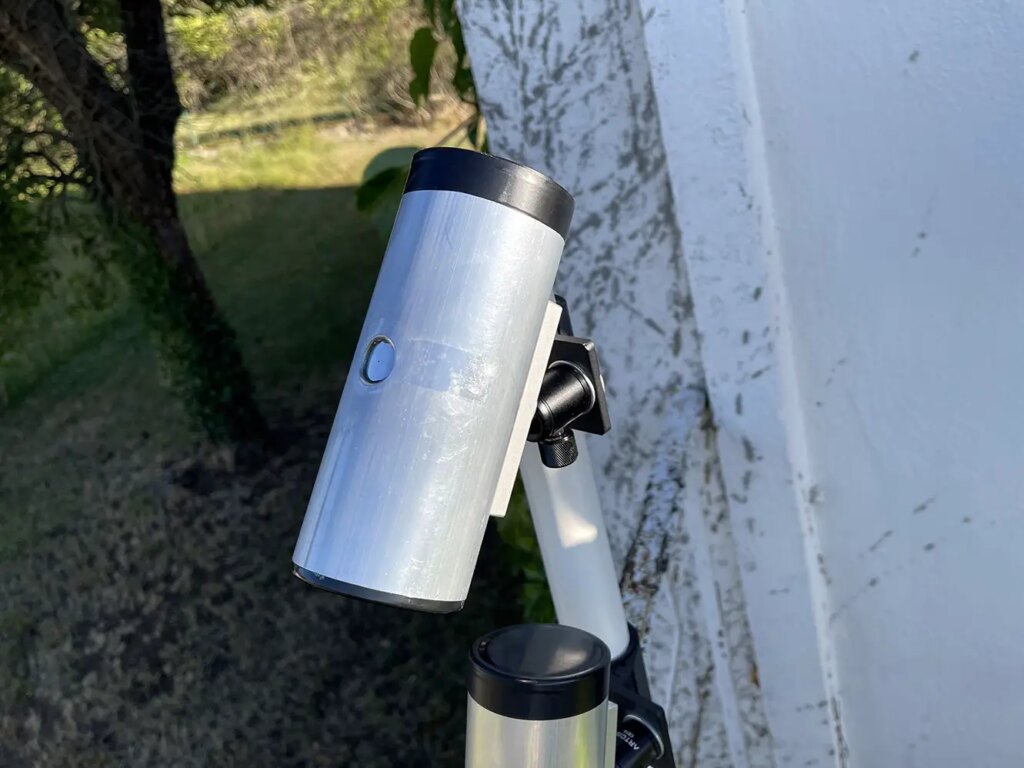
I have no workshop, just a messy and worn desk, and all was made with very common tools. I drew a little sketch of what I intended to build, and was then ready to seek for the materials needed. The main tube was cut in an aluminium pipe (OD 70mm / ID 65mm), fitting well a 12.7 x 17.8 cm (5 x 7’’) paper sheet, rolled with a ±2.6 cm gap at the pinhole area, where the sunray can’t strike anyway. The length of the can was set to 17 cm after I found the right table leg tubing plugs to be used as end lids.
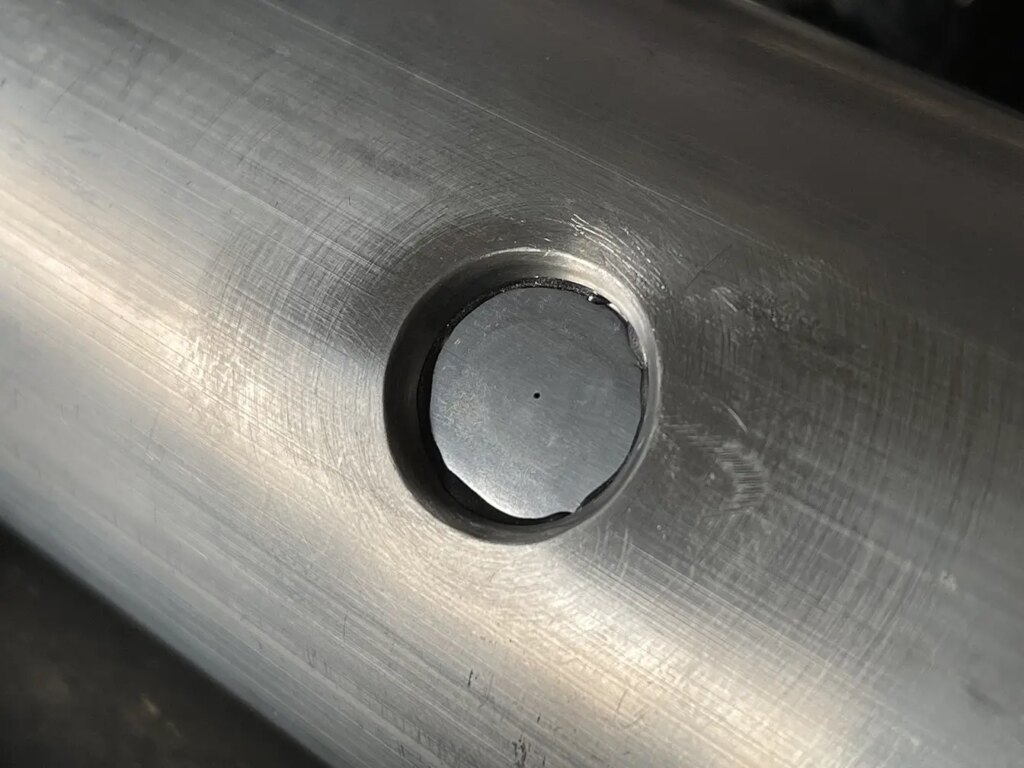
The aluminium was too thick (2.5mm) to host a pinhole, and so I cut a 20 mm circle with a hole saw in the middle of the tube. Maybe would it have been preferable to offset the hole towards the top of the cylinder in order to get more (available paper for the) sky and less ground on the picture, while setting the device in a vertical position. Nevertheless, I bored in the middle, and beveled and sanded the edge to avoid any drop shadow on the pinhole.
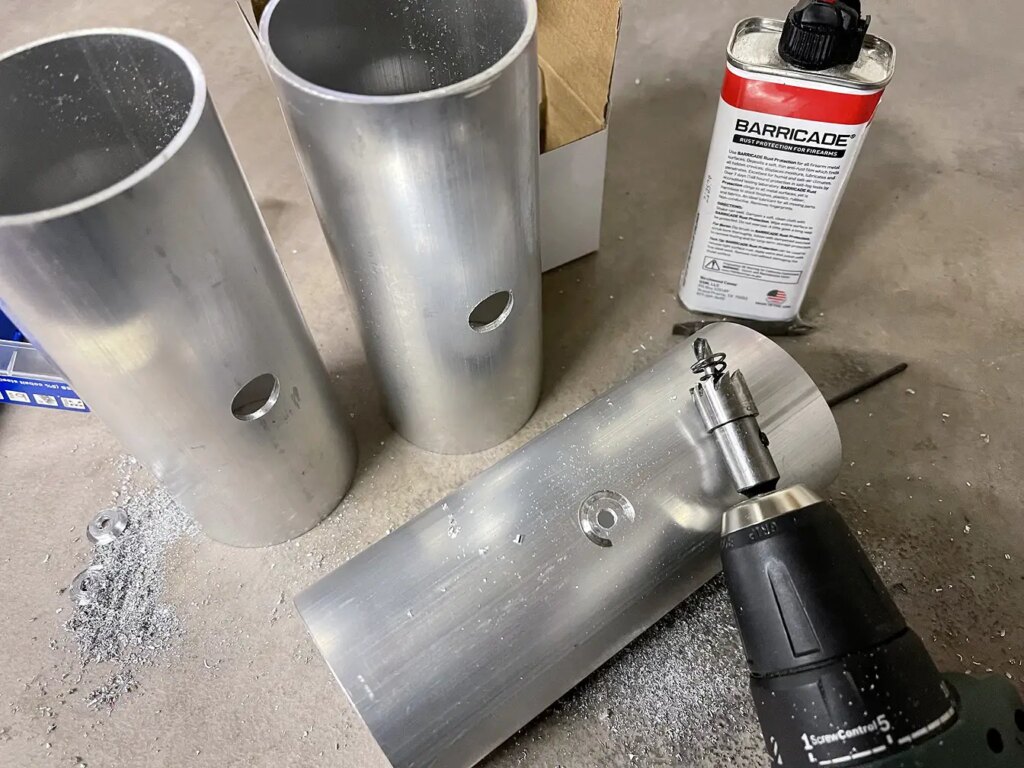
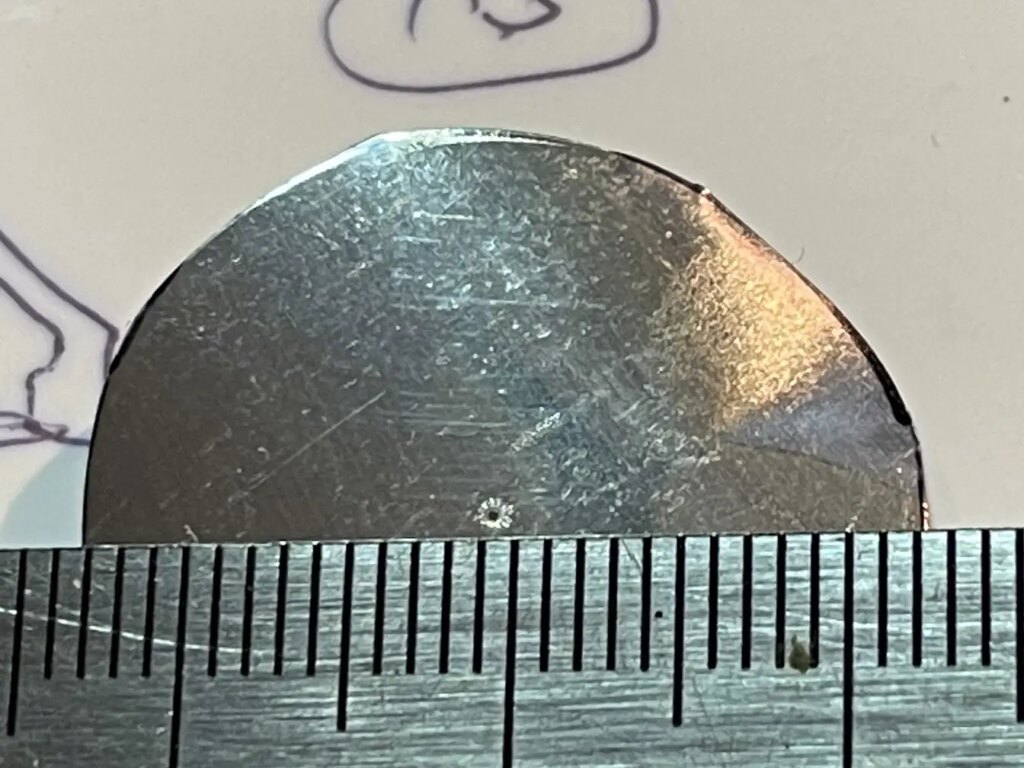
The membrane for the pinhole was cut in an aluminium soda can (rid of logo thanks to acetone), as the genuine Solarcan™ proved it to be, among usual materials, the best trade-off between sturdiness and thinness. I punched the hole with the very tip of the smallest needle I found and gently sanded the burr on the back with very fine grit abrasive paper. Actually, I made ten of those punched membranes, and discarded six of them. Only four showed a sufficiently clean and tiny circular hole, while checking with 10x magnifying glass. The pinholes appeared to be around 0.3 mm in diameter. 0.2 would have lead to sharper images, but out of my reach without a laser puncher.
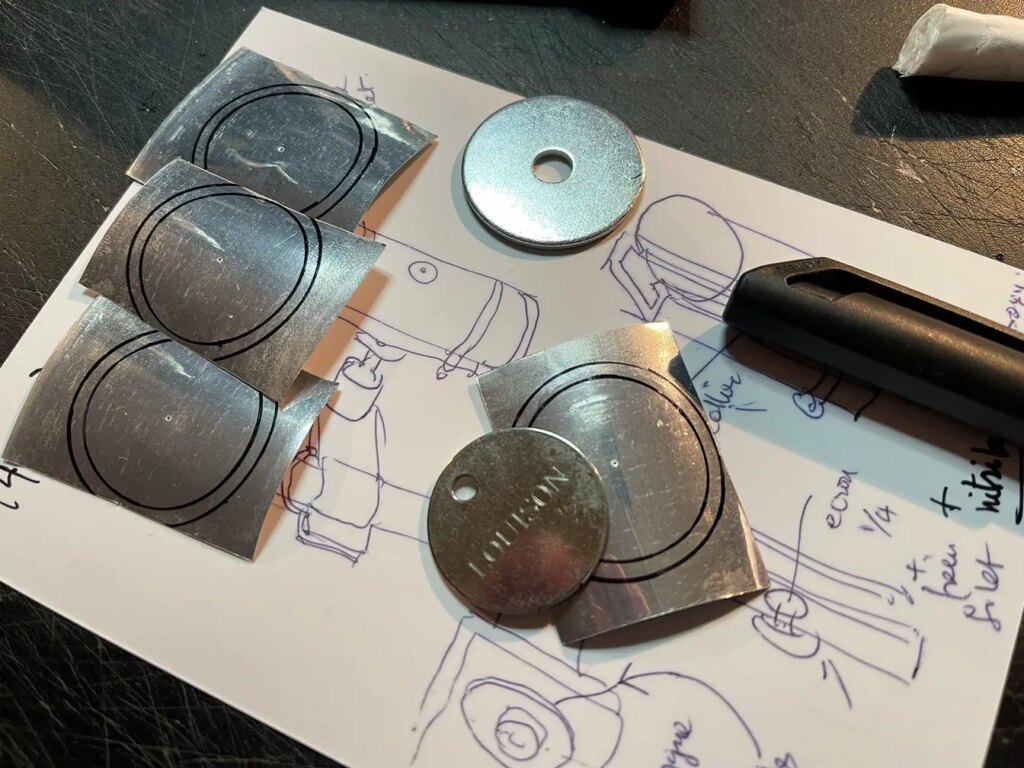
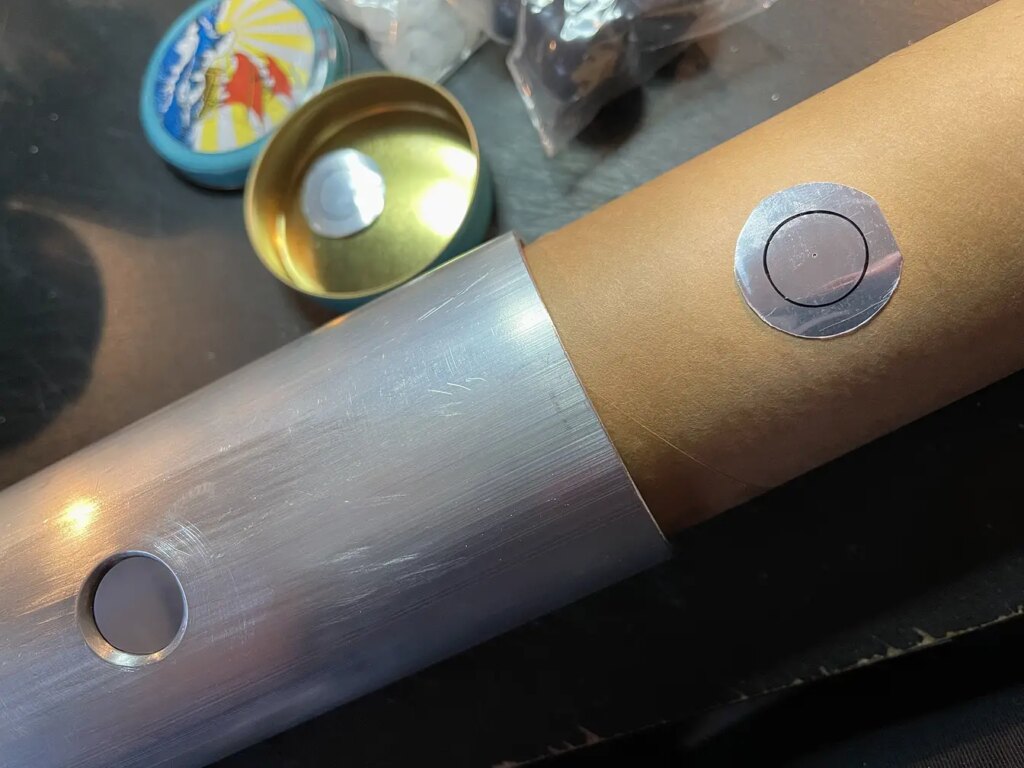
The membranes were glued with opaque epoxy, using a cardboard tube to guide and press the small aluminium disks at the right place. I added some more glue around the external rim to ensure hermeticity and opacity.
The table leg plugs were epoxied at the bottom of the can, while the top ones were cut and simply inserted and set with electrician adhesive tape, as they are intended to be the access for removing and loading the photo paper.
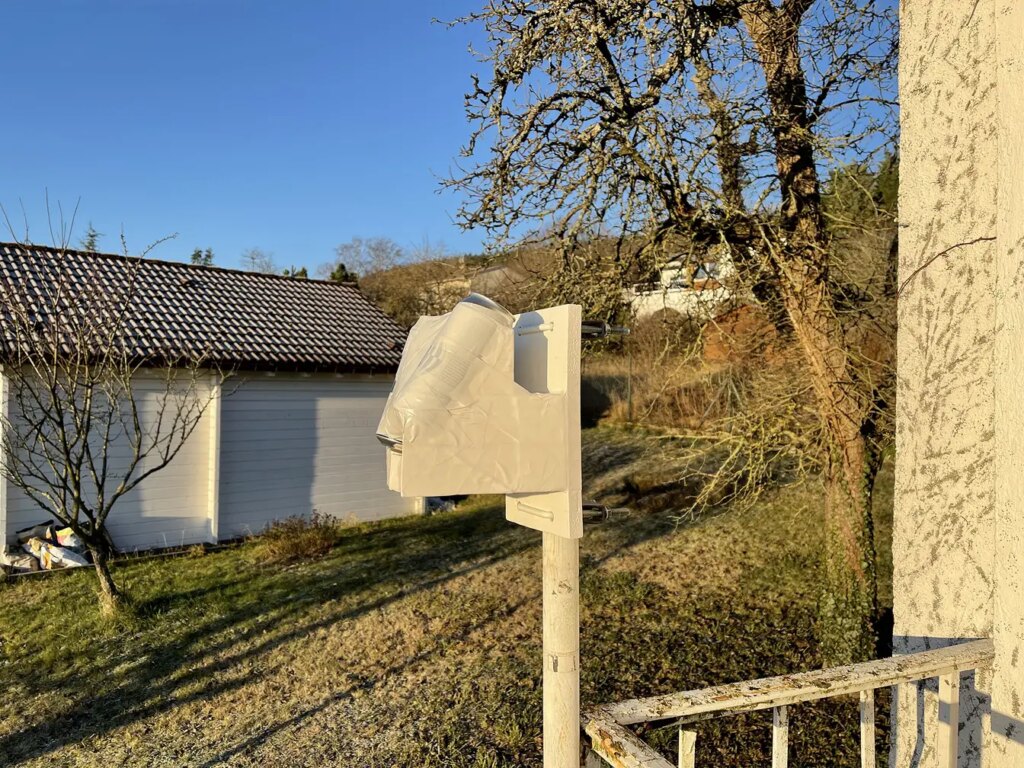
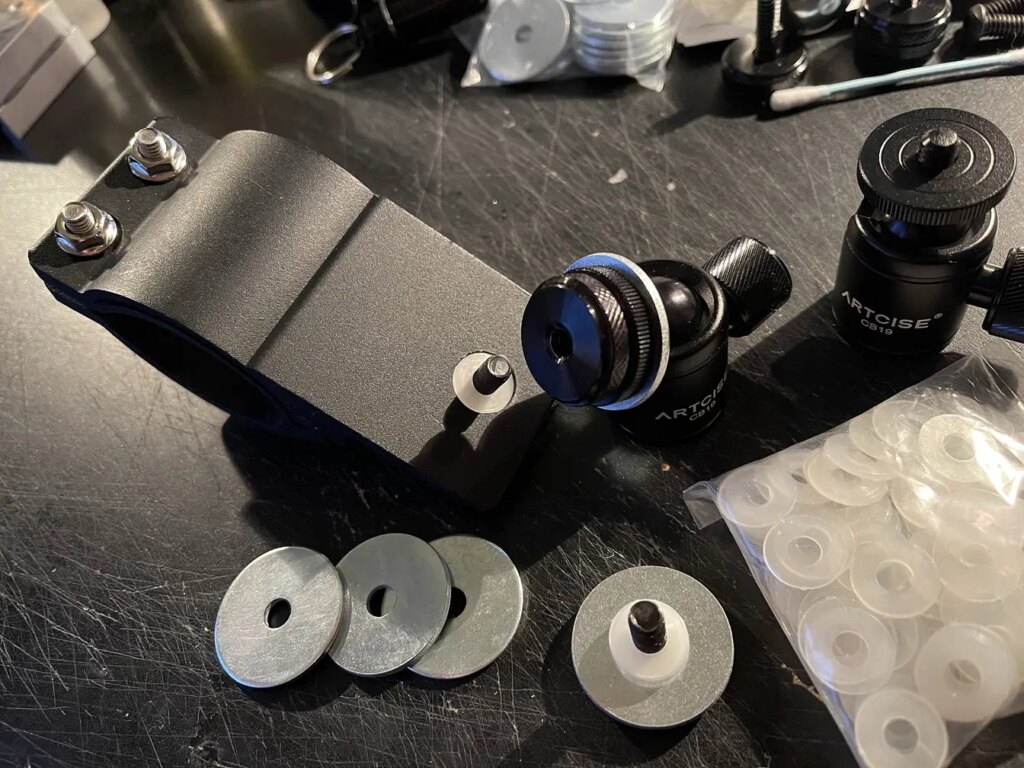
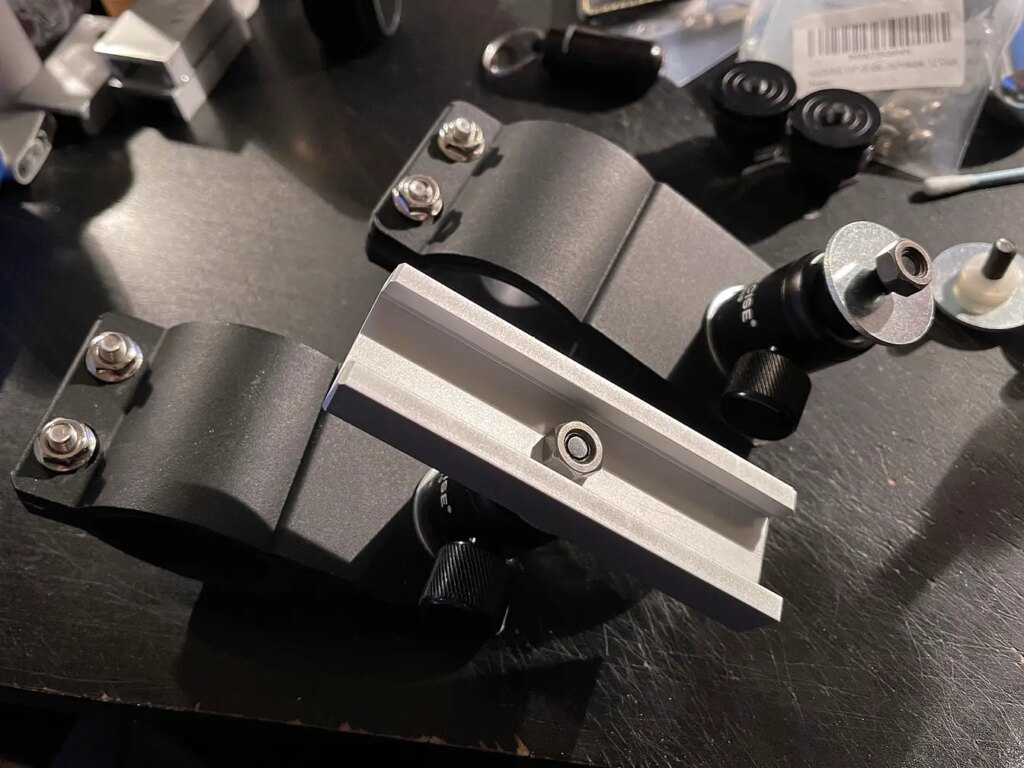
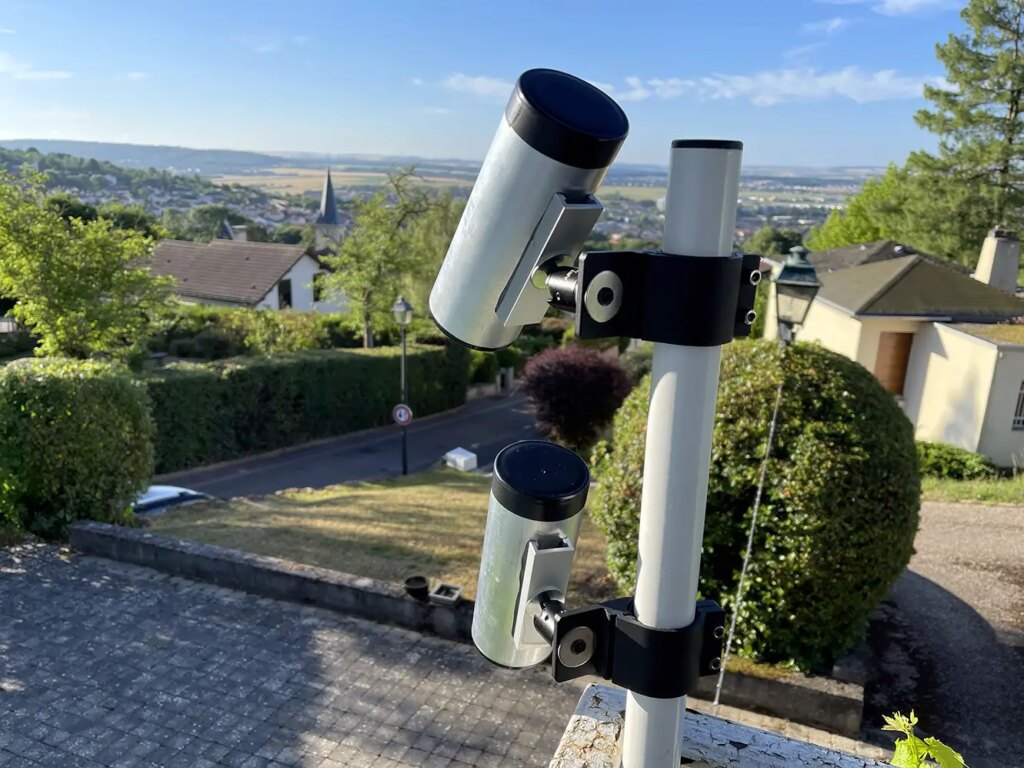
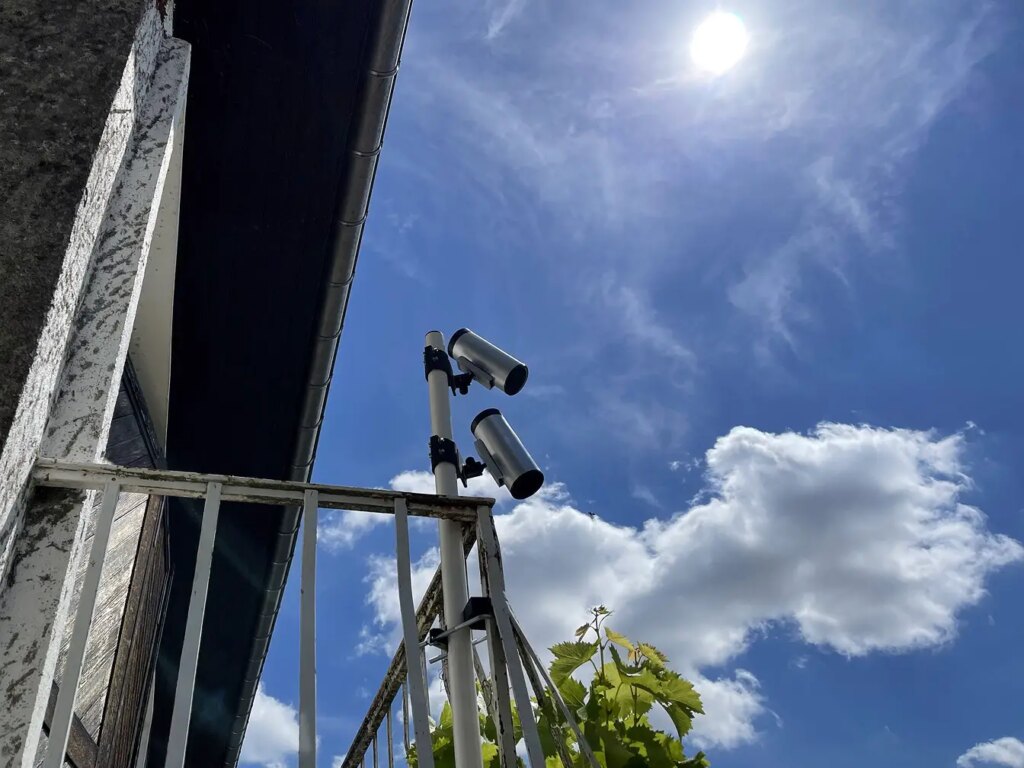
In parallel, I cut, primed, painted and closed with plugs two steel tubes that I attached to the corners of my balcony with antenna mast jaws. I found four sturdy clamps dedicated to fix long range headlights on the chromed buffalo bars in front of fat SUV. With a piece of 2 mm nitrile sheet set inside the clamps for a better grip, they fit perfectly my steel posts.
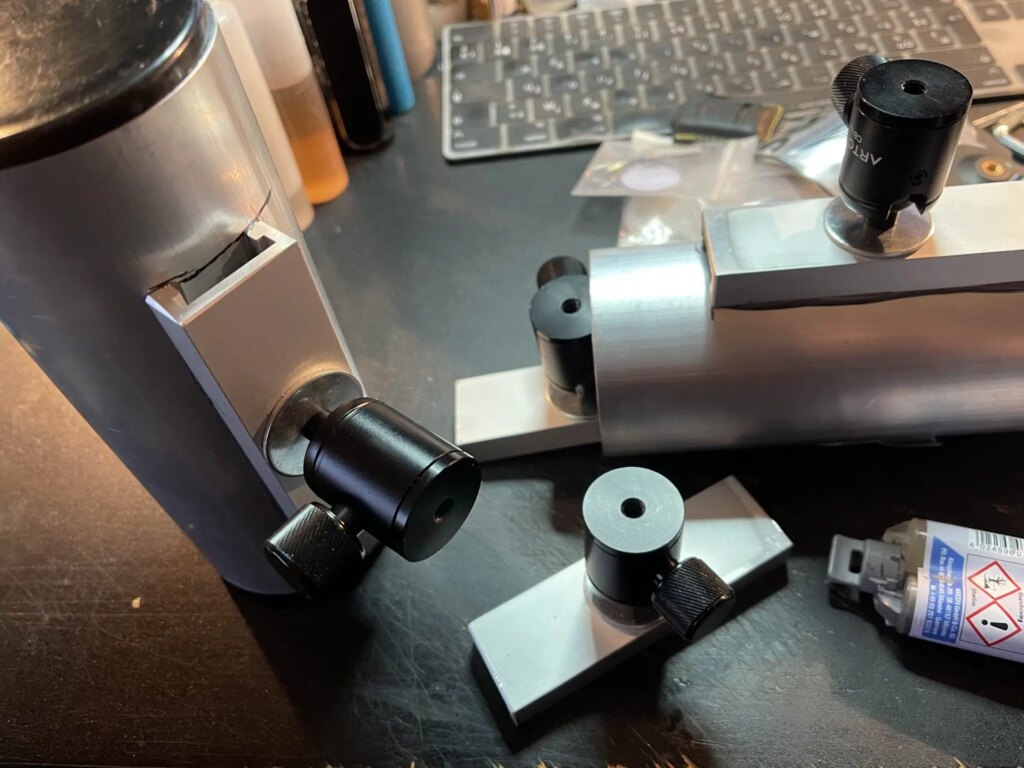
The most difficult part was to find a ball head mount, simple and handy but sturdy, not too expensive (I needed four!), and able to connect securely my device with its stand. The bolting was done with the use of nylon washers to reduce the hole diameter of the clamps, and regular steel ones for adjustments.
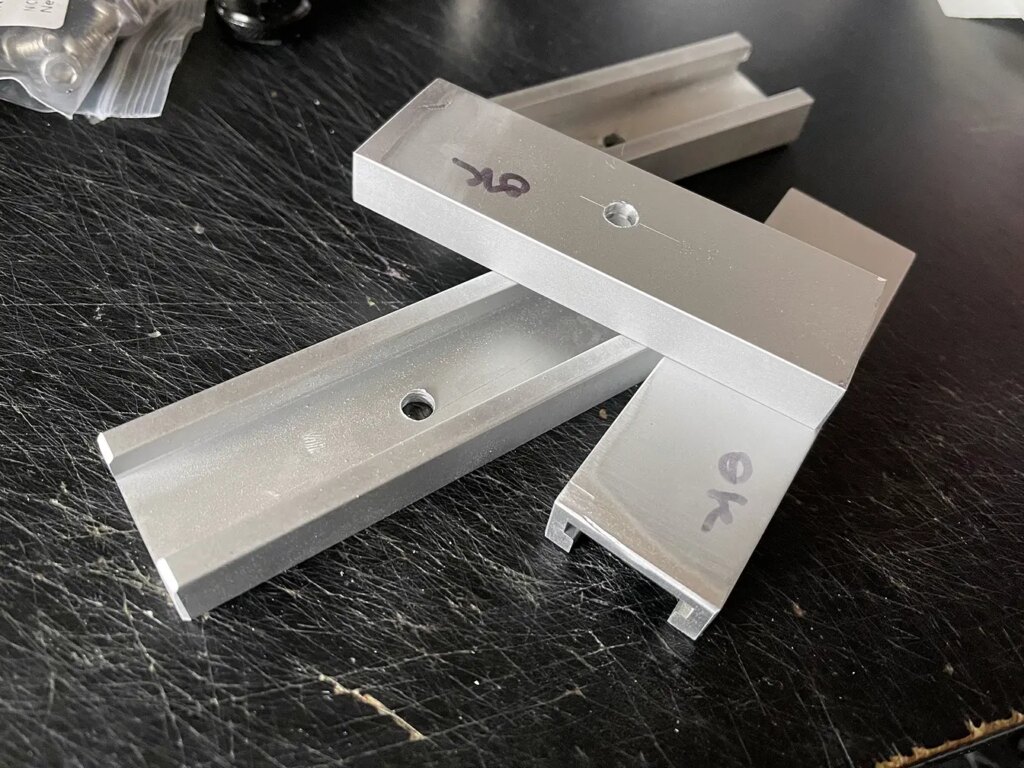
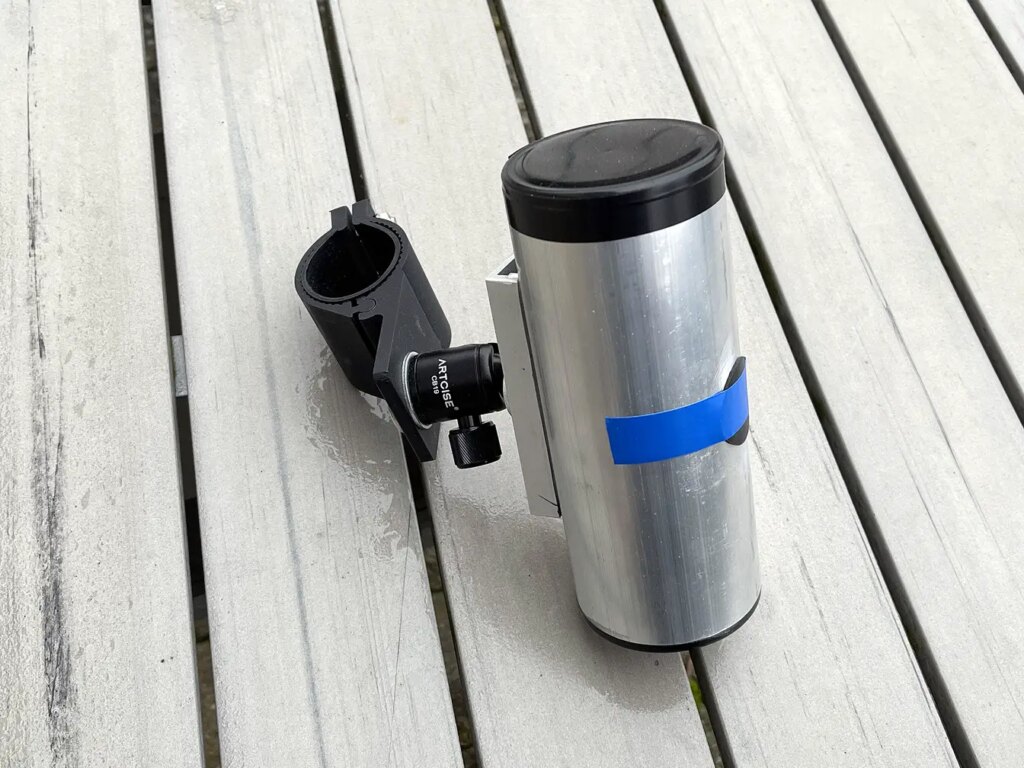
I cut a piece of 30mm wide T rail (the kind used to guide machines in a carpentry workshop), drilled it in the middle and tapped the hole, in order to screw the mount. This piece of rail was glued with weather resistant epoxy on the aluminium can. Just needed to cut black nitrile round caps to temporarily close the pinhole, and it was done!
Then, the best part. I placed a sheet of Ilford Multigrade RC Pearl in each can, and taped back the top lid with black electrician tape. I oriented two cans to the South, with a different vertical angle, and chose more ‘experimental’ directions for the two others. I removed the nitrile caps on the summer solstice and collected the exposed papers on the Winter Day.

The results appeared to be quite unalike according to the cans orientation and location on the balcony. I enhanced the contrast (necessary) but tweaked the colours only very lightly. So, the series looks very different — much more ‘natural’ — from my Solarcan™ first trials.
The pair set on the most protected part of the balcony provided decent pictures, with no rain blotches but, let’s admit it, the first one is a bit boring and flat, underexposed. The second one is much more dramatic, but a bit less crispy.
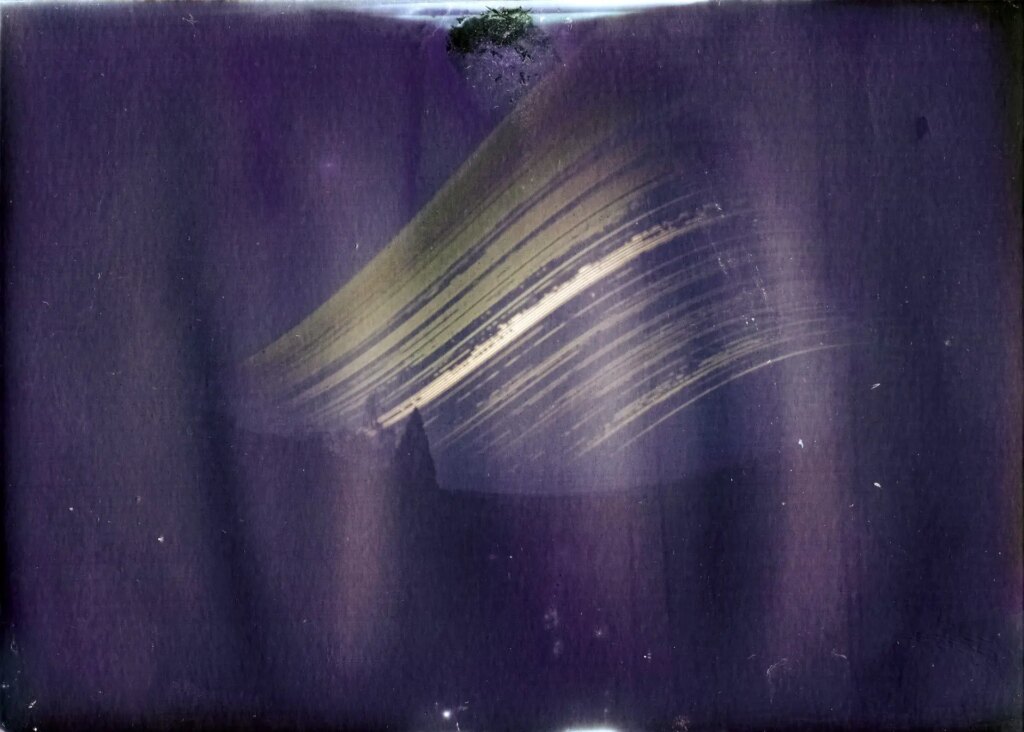
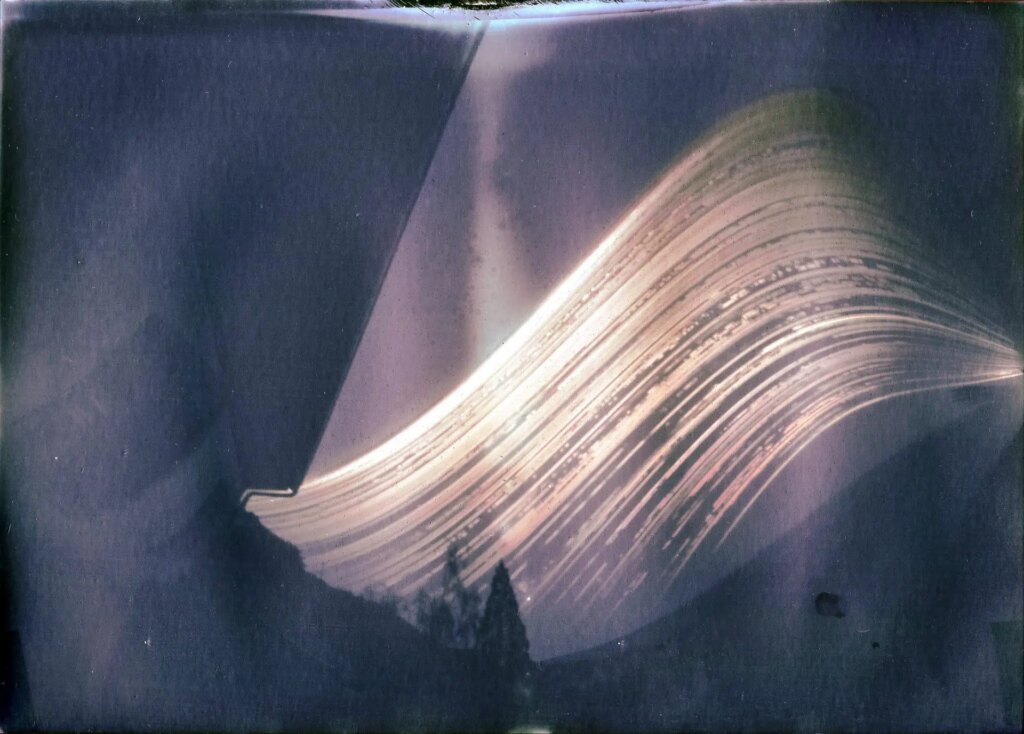
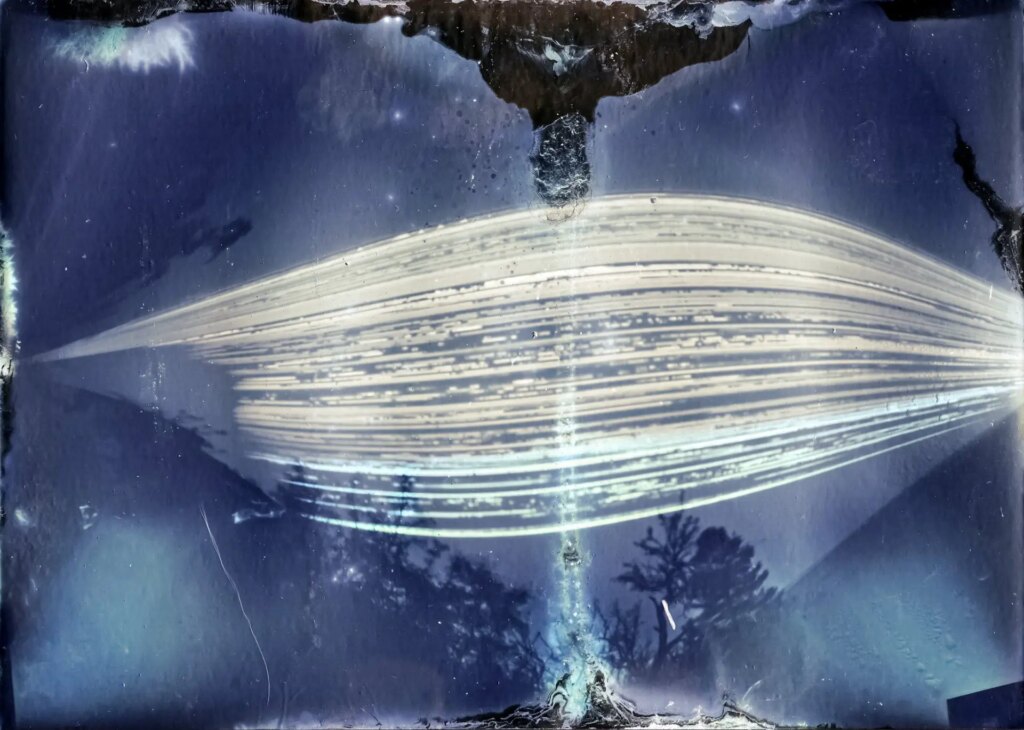
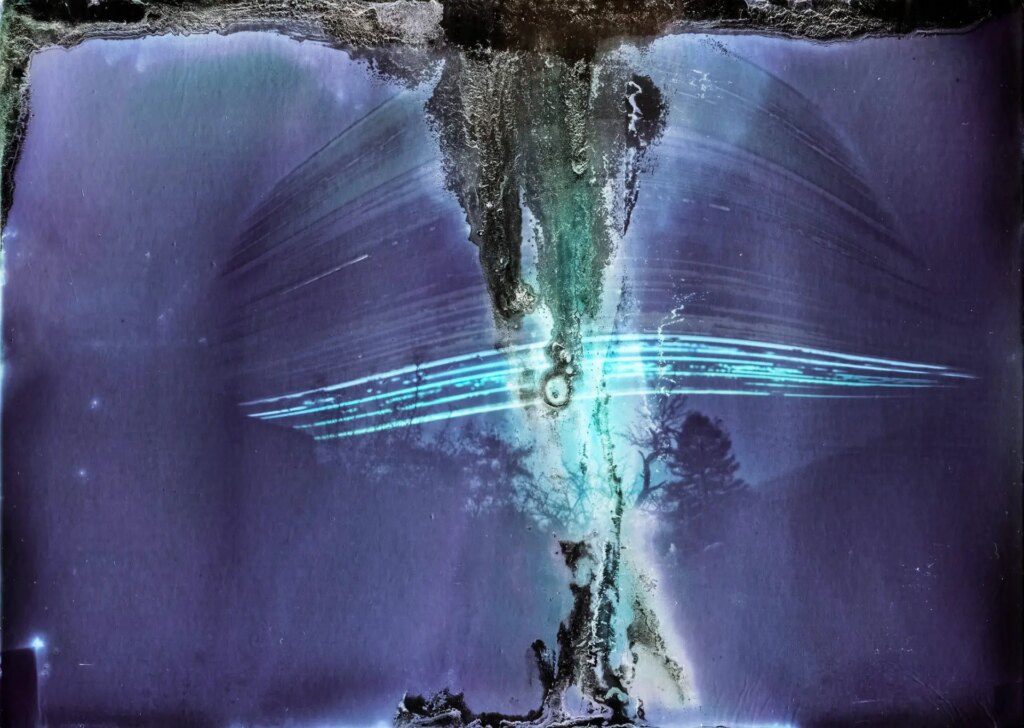
The two devices facing the South were the ones the most exposed to bad weather, being at the corner of the house, deprived of the wall wind protection. The weather had been horrible during the last weeks before the winter solstice. Very rainy and stormy during days, then seriously freezing (-12°C/10°F). When I opened the cans, the paper sheets were very wet and the coating damaged. However, the colours were bright, and the smears and stains are beautiful. A scientist would be disappointed, I love their worn and stained aesthetic. The first one is beautiful, with its creepy ambiance around the full spectrum of the sun paths. The other was really badly damaged. Suprisingly, most of the sun trails are barely visible, while the winter ones brightly shine. Note that the trees contours are very sharp on that one.
Next steps ? Several experiments: try different photographic papers, build a model with the pinhole nearer the top of the can to get more sky ratio while setting the device vertically, and consequently avoid the ground line huge distortion caused by the angle, use water repellant on the membrane and place a big silicate gel bag into the can (but I really like those rain smears!), and for sure, install the cans in other places and to different orientations.
Antoine Carolus, January 2023.
Share this post:


Comments
Bob Janes on Solargraphy Cans – Going Homemade after Learning with Solarcan – By Antoine Carolus
Comment posted: 20/03/2023
Is there a reason why you don't fix the images before scanning?
A couple of suggestions:
Some form of drain hole to allow water out of the bottom without letting light in?
Perhaps something like a lens hood (or even a piece of glass) to protect the pinhole from the elements and reduce the risk of water getting in that way?
Comment posted: 20/03/2023
Comment posted: 20/03/2023
Comment posted: 20/03/2023
Steven G on Solargraphy Cans – Going Homemade after Learning with Solarcan – By Antoine Carolus
Comment posted: 20/03/2023
Comment posted: 20/03/2023
Comment posted: 20/03/2023
Comment posted: 20/03/2023