The scanning method described here is based only on my best personal result, I’m sure other more easy methods could give similar or even better results than mine ones.
Why
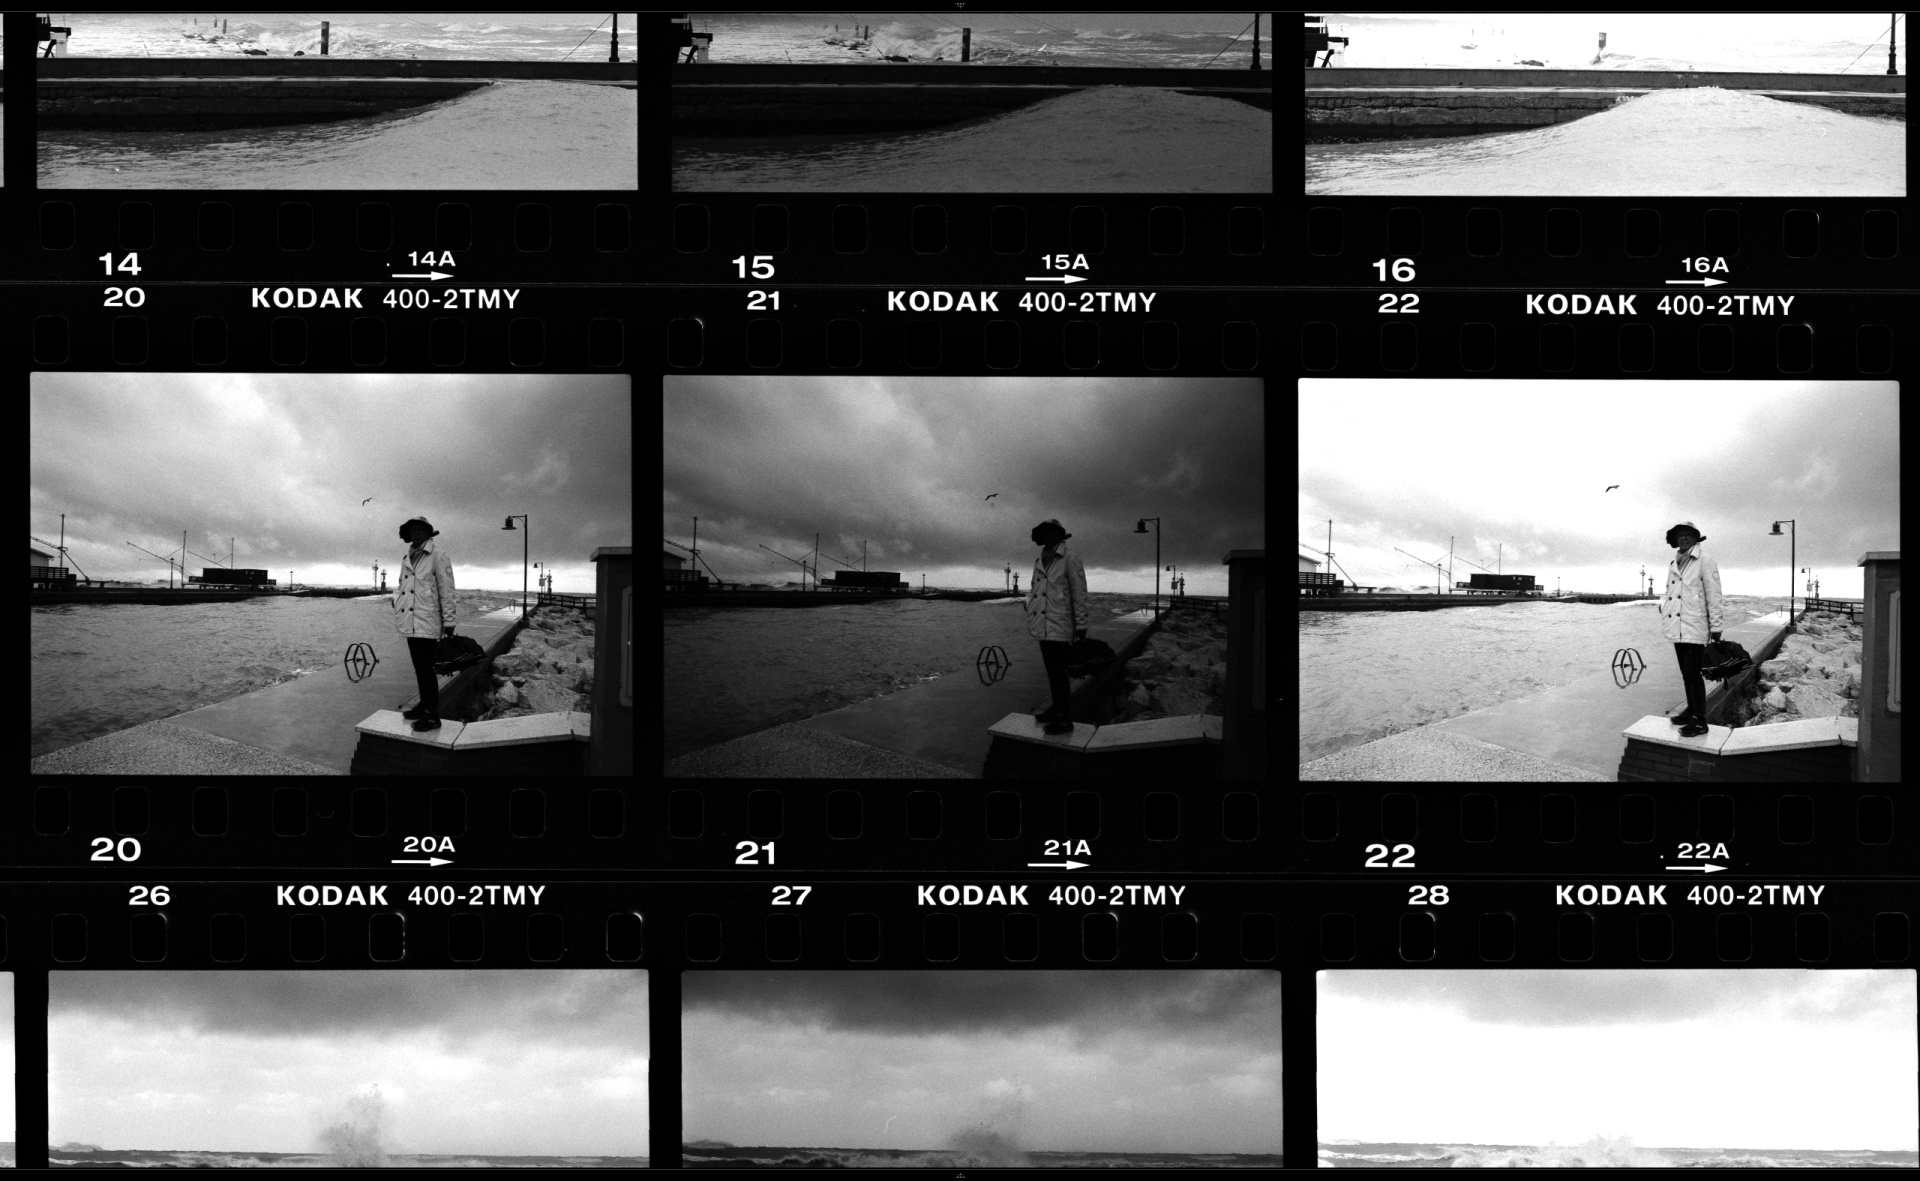
I think that sooner or later every analogue photographer has come across at least a contact sheet in his life. Looking at my family photos envelopes most of them have a single print with all the roll photos on it (although this cannot be truly called a contact sheet as the images are way smaller than the actual negative frame size), it was a very fast way to look at the whole roll, choose the right image to print and so on.
In today digital-analogue hybrid many can state that contact sheets are no more necessary as we already have the whole roll ready available in our screen(s) and, like in a contact sheet, we can tell each photo apart just by looking at its thumbnail. Nevertheless, I wanted to recreate a digital version of old fashioned contact prints, where film markings, sprocket holes and so on were clearly visible.
Tools
The following step described in this guide were performed with these tools:
- Flatbed scanner (Epson Perfection V850)
- Acquisition software (Vuescan)
- Lightroom Classic
- Negative Lab Pro
Scan
A good negative setup is fundamental for nice results, 120 film are the easiest one as a single scan pass is sufficient to cover up the whole roll. Same story for 24 exp. 135 film.
36 exp. 135 film are a little bit trickier as we need to perform 2 scans and take advantage of Lightroom merge function in order to get a single image, no big deal, we just need to leave the central strip on the edge for both scans as it will be our reference for the merge.
Another important aspect to achieve good results is that negatives must lay as flat as possible, this technique does not involve any support frame at all, therefore the more flat our negative are the better.
Film strip placement
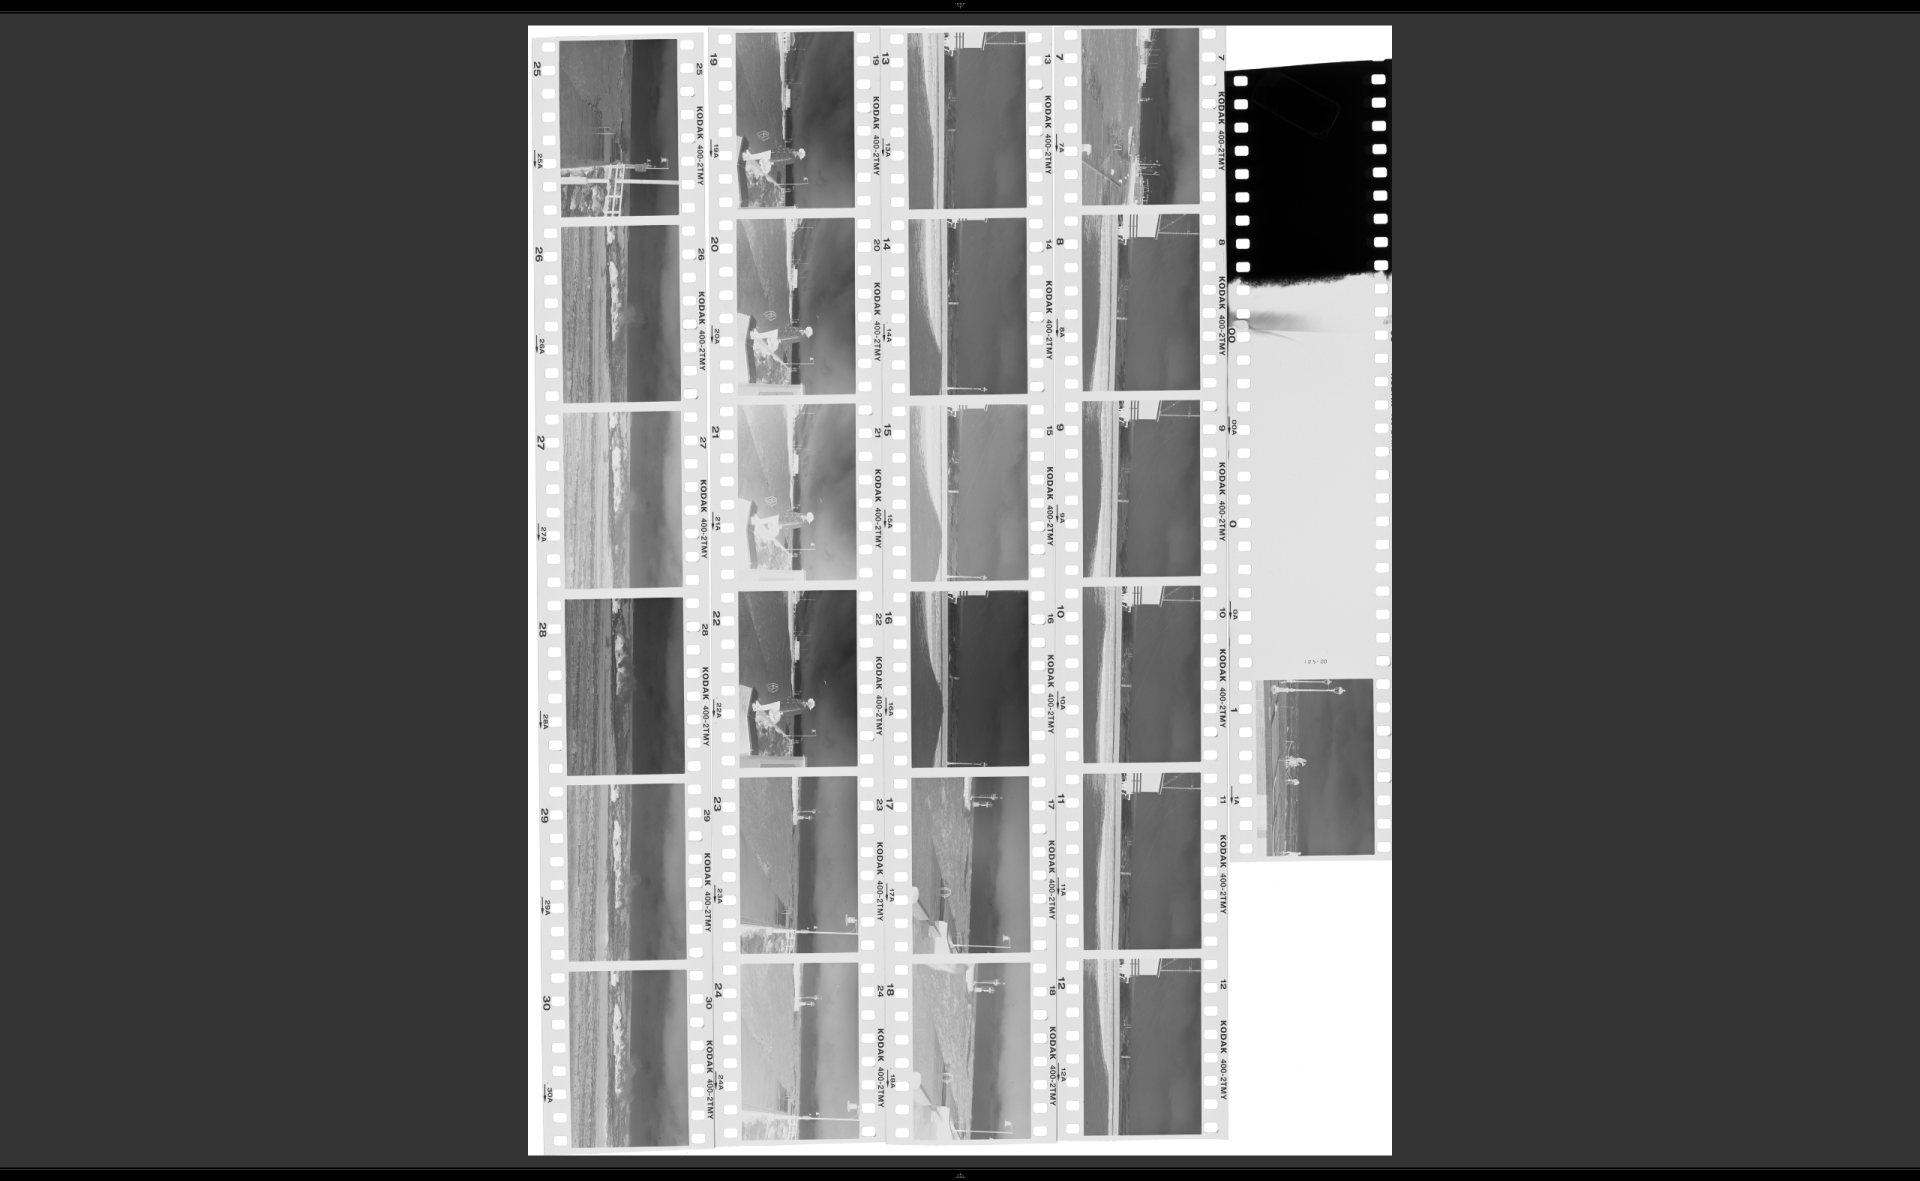
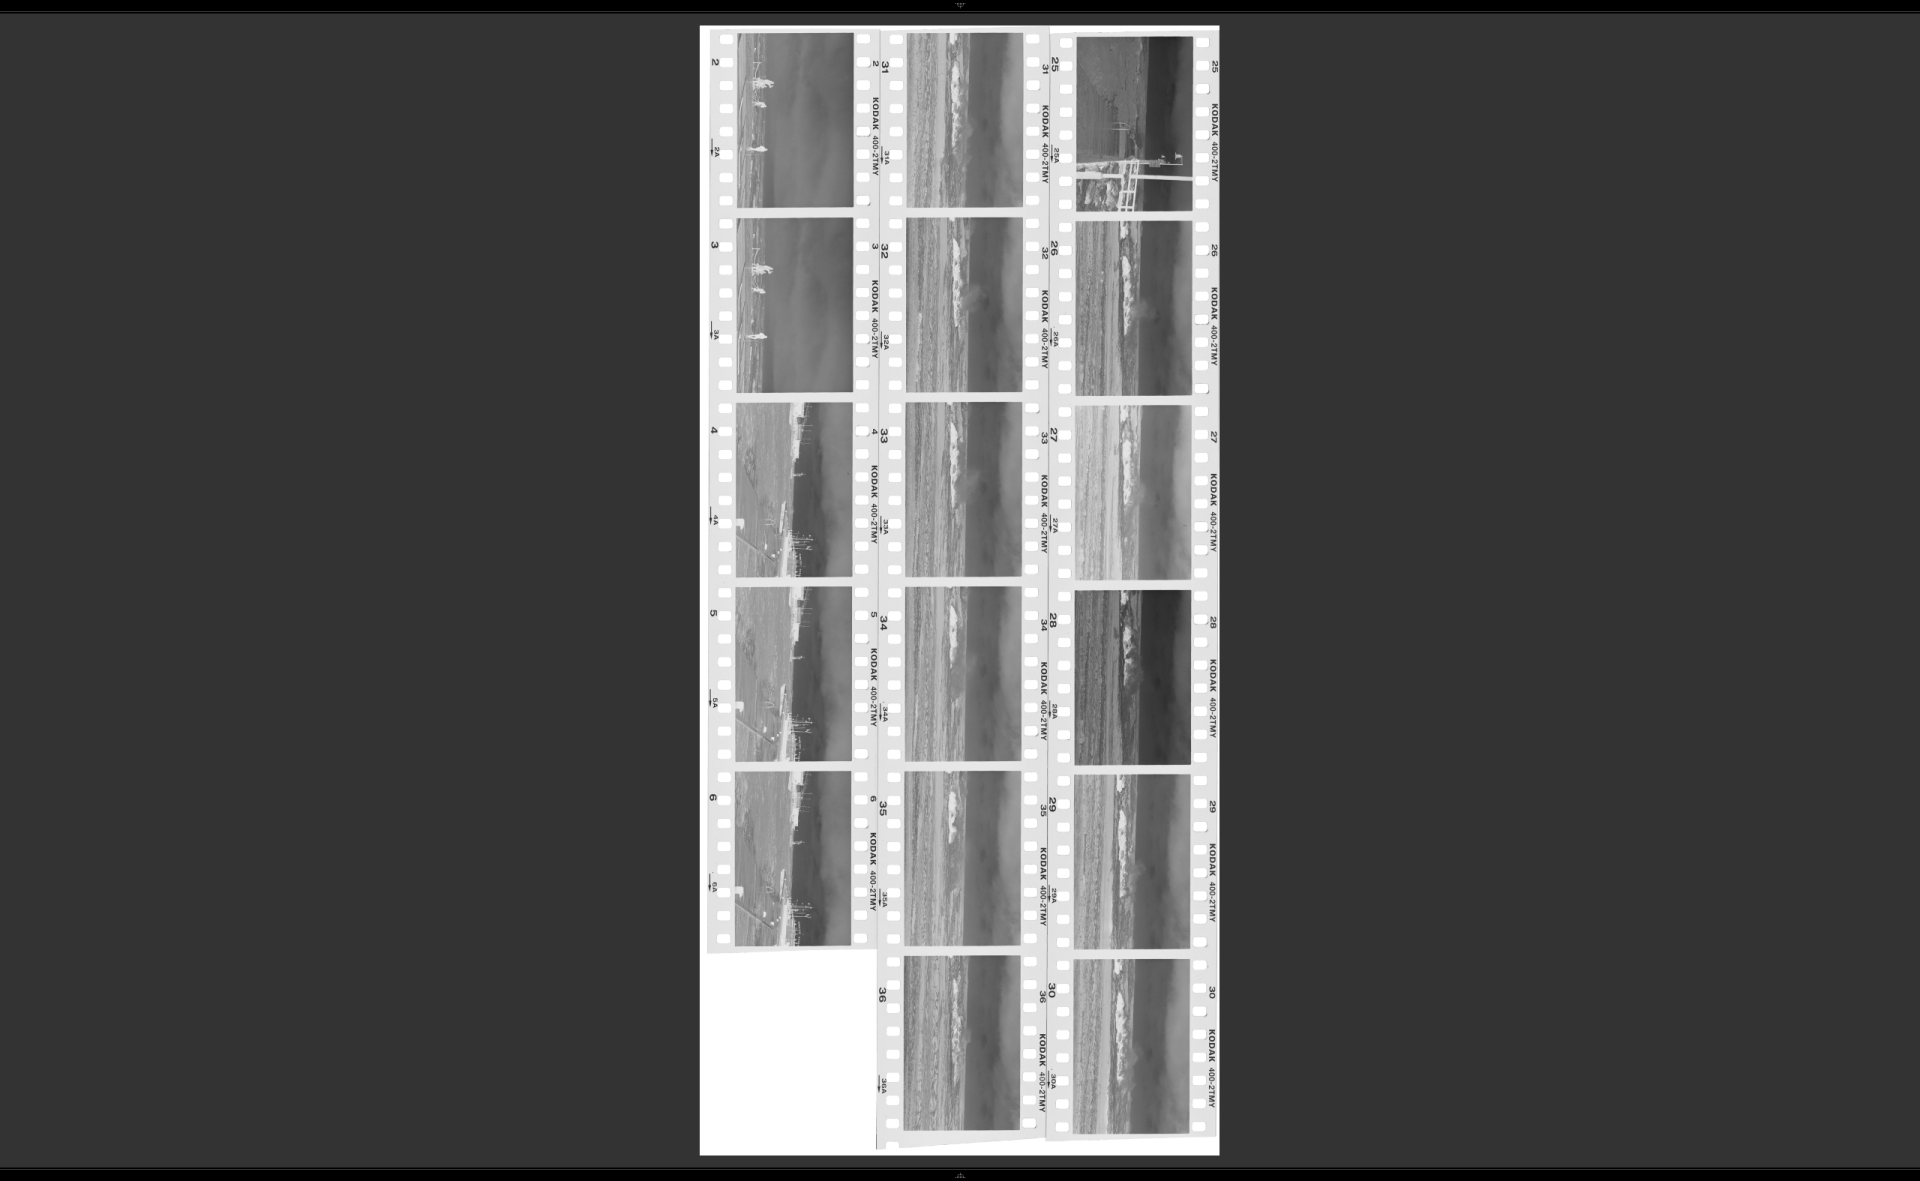
All the negative strips must be laid down over the scan bed with the emulsion side facing up. Here is an example of how I place my negatives strips for scanning, as you can see all of them are tightly packed together and all frames are mostly aligned.
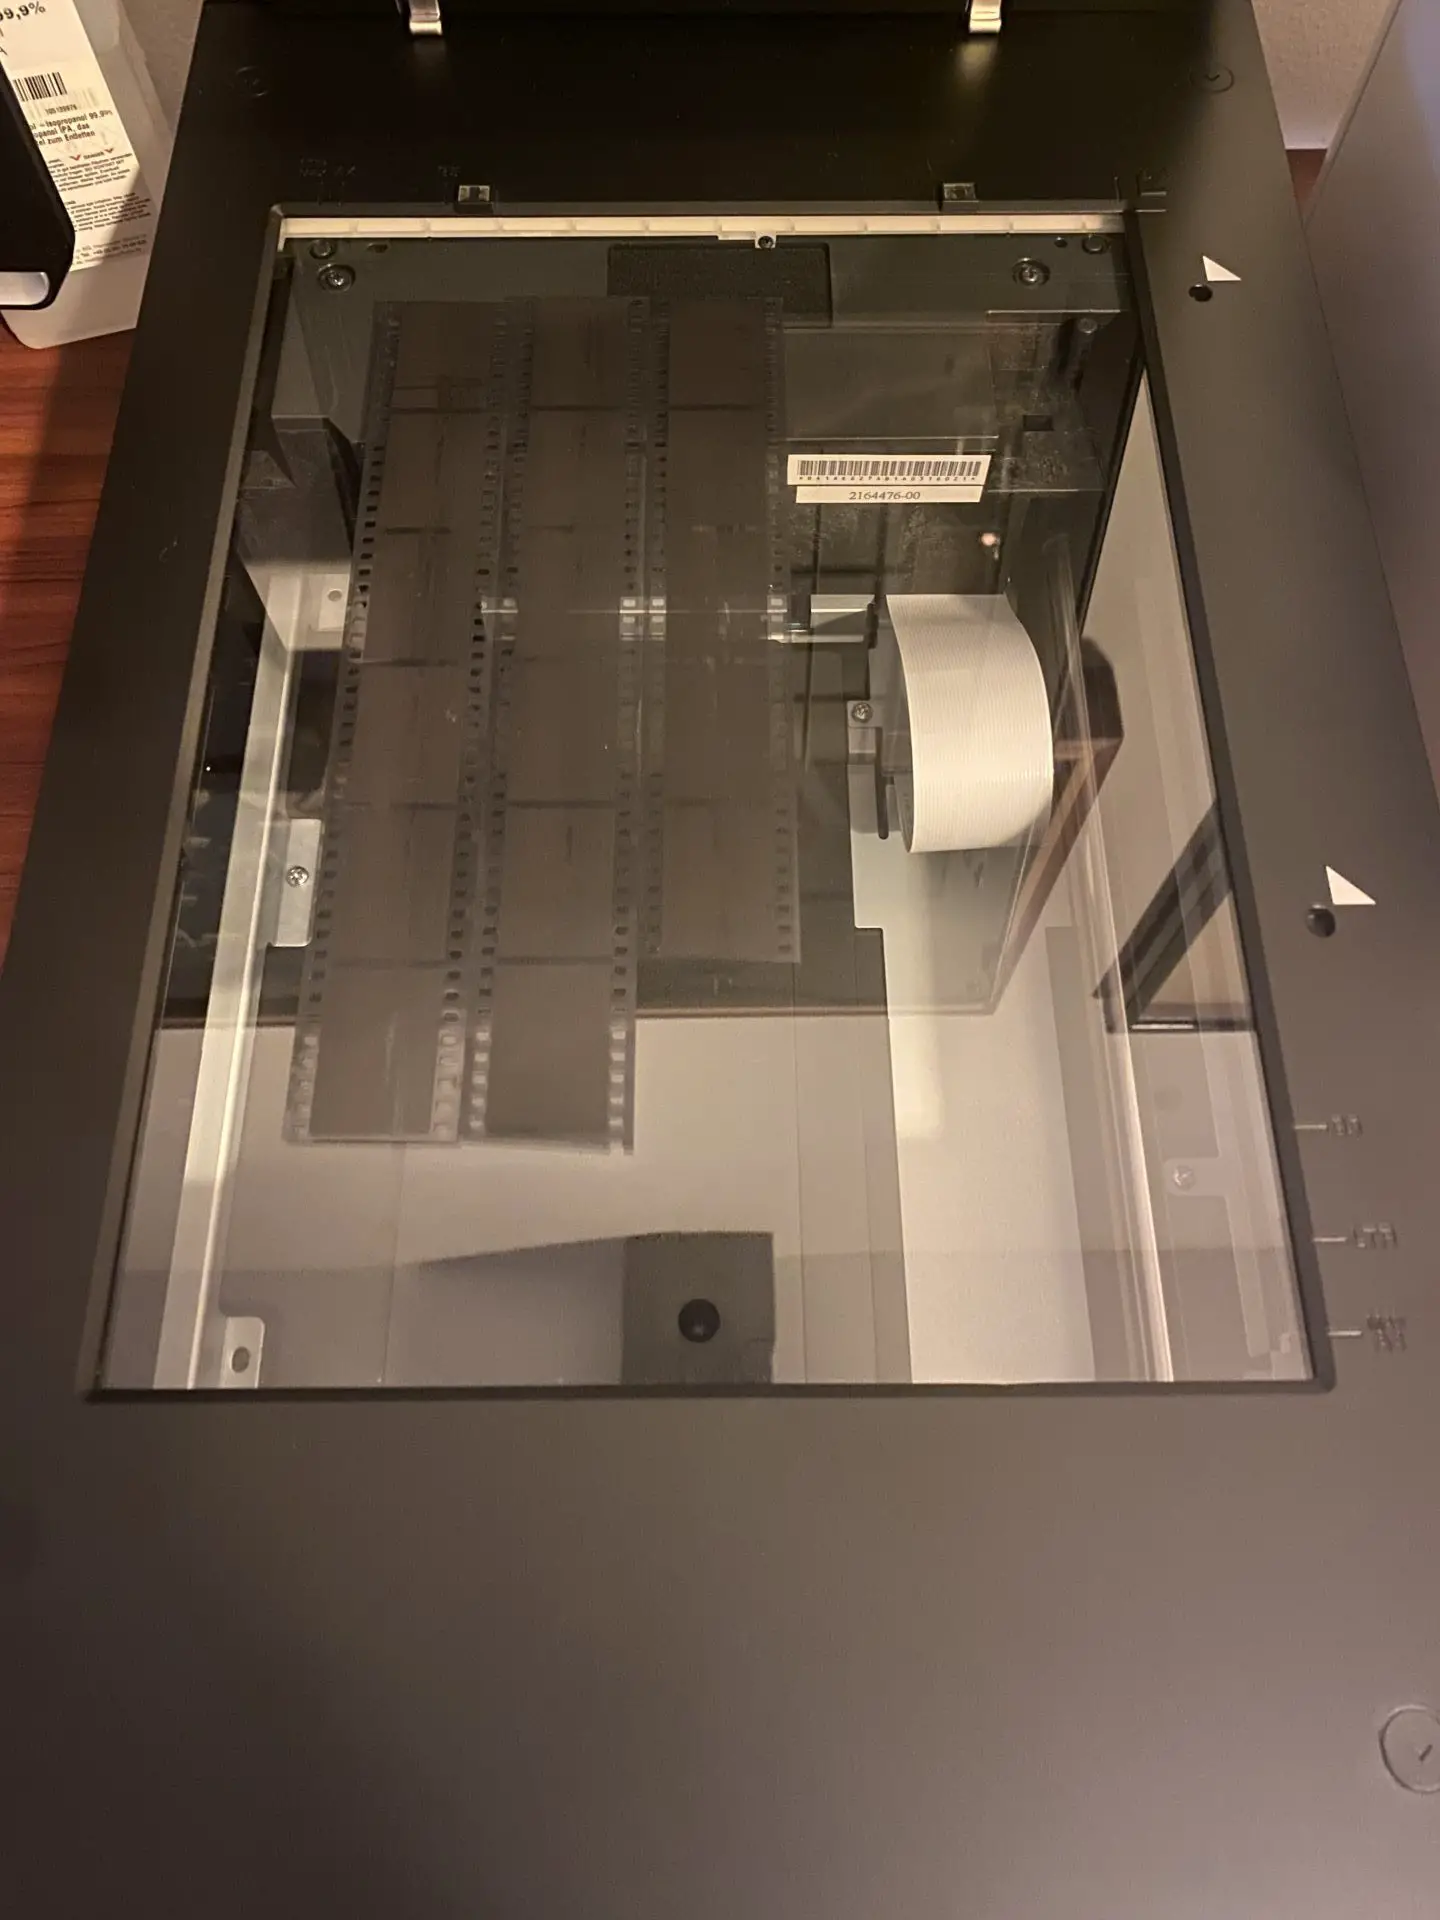
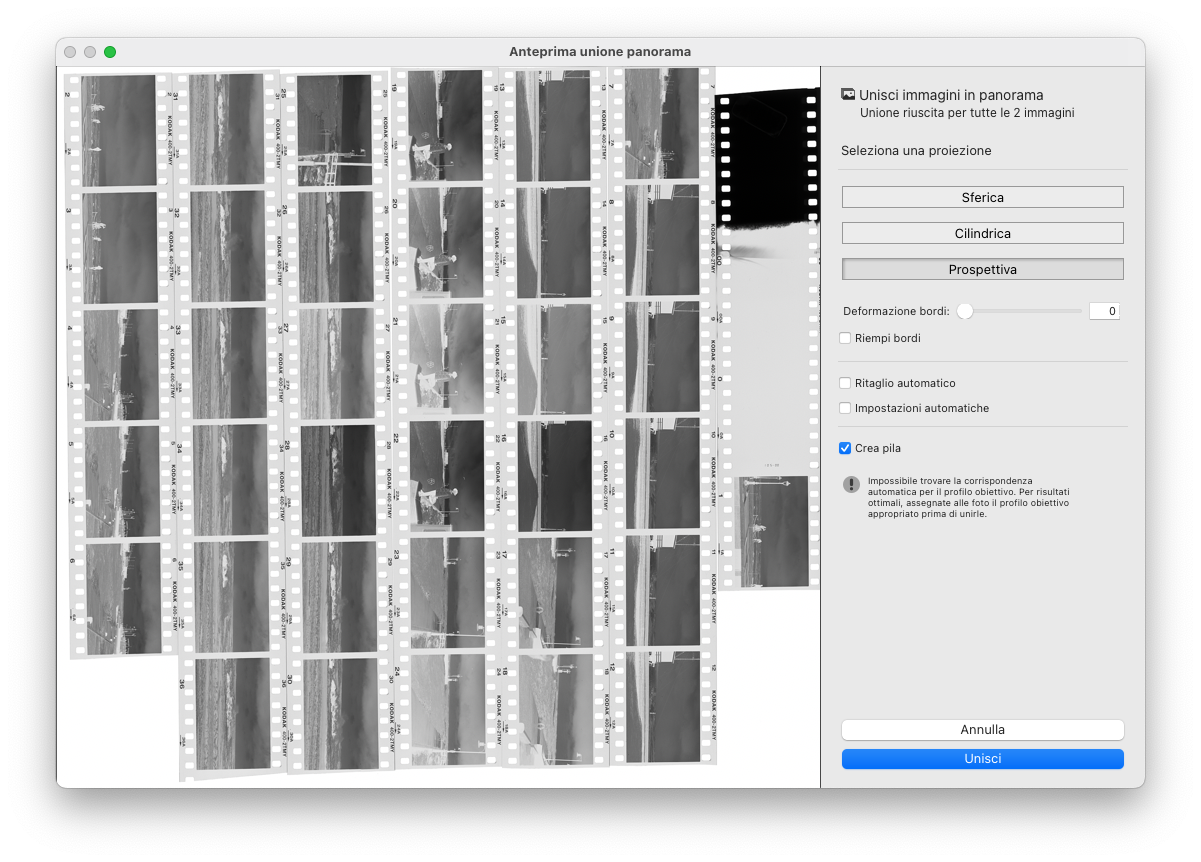
As stated above, when we need to scan a 36 exp. roll we need to scan the 4th or the 5th strip 2 times as it is used for the “panorama” merge in Lightroom.
Note: remember to move that film strip from the leftmost to the rightmost portion of the scan bed, otherwise the merge cannot be performed
Vuescan in Action
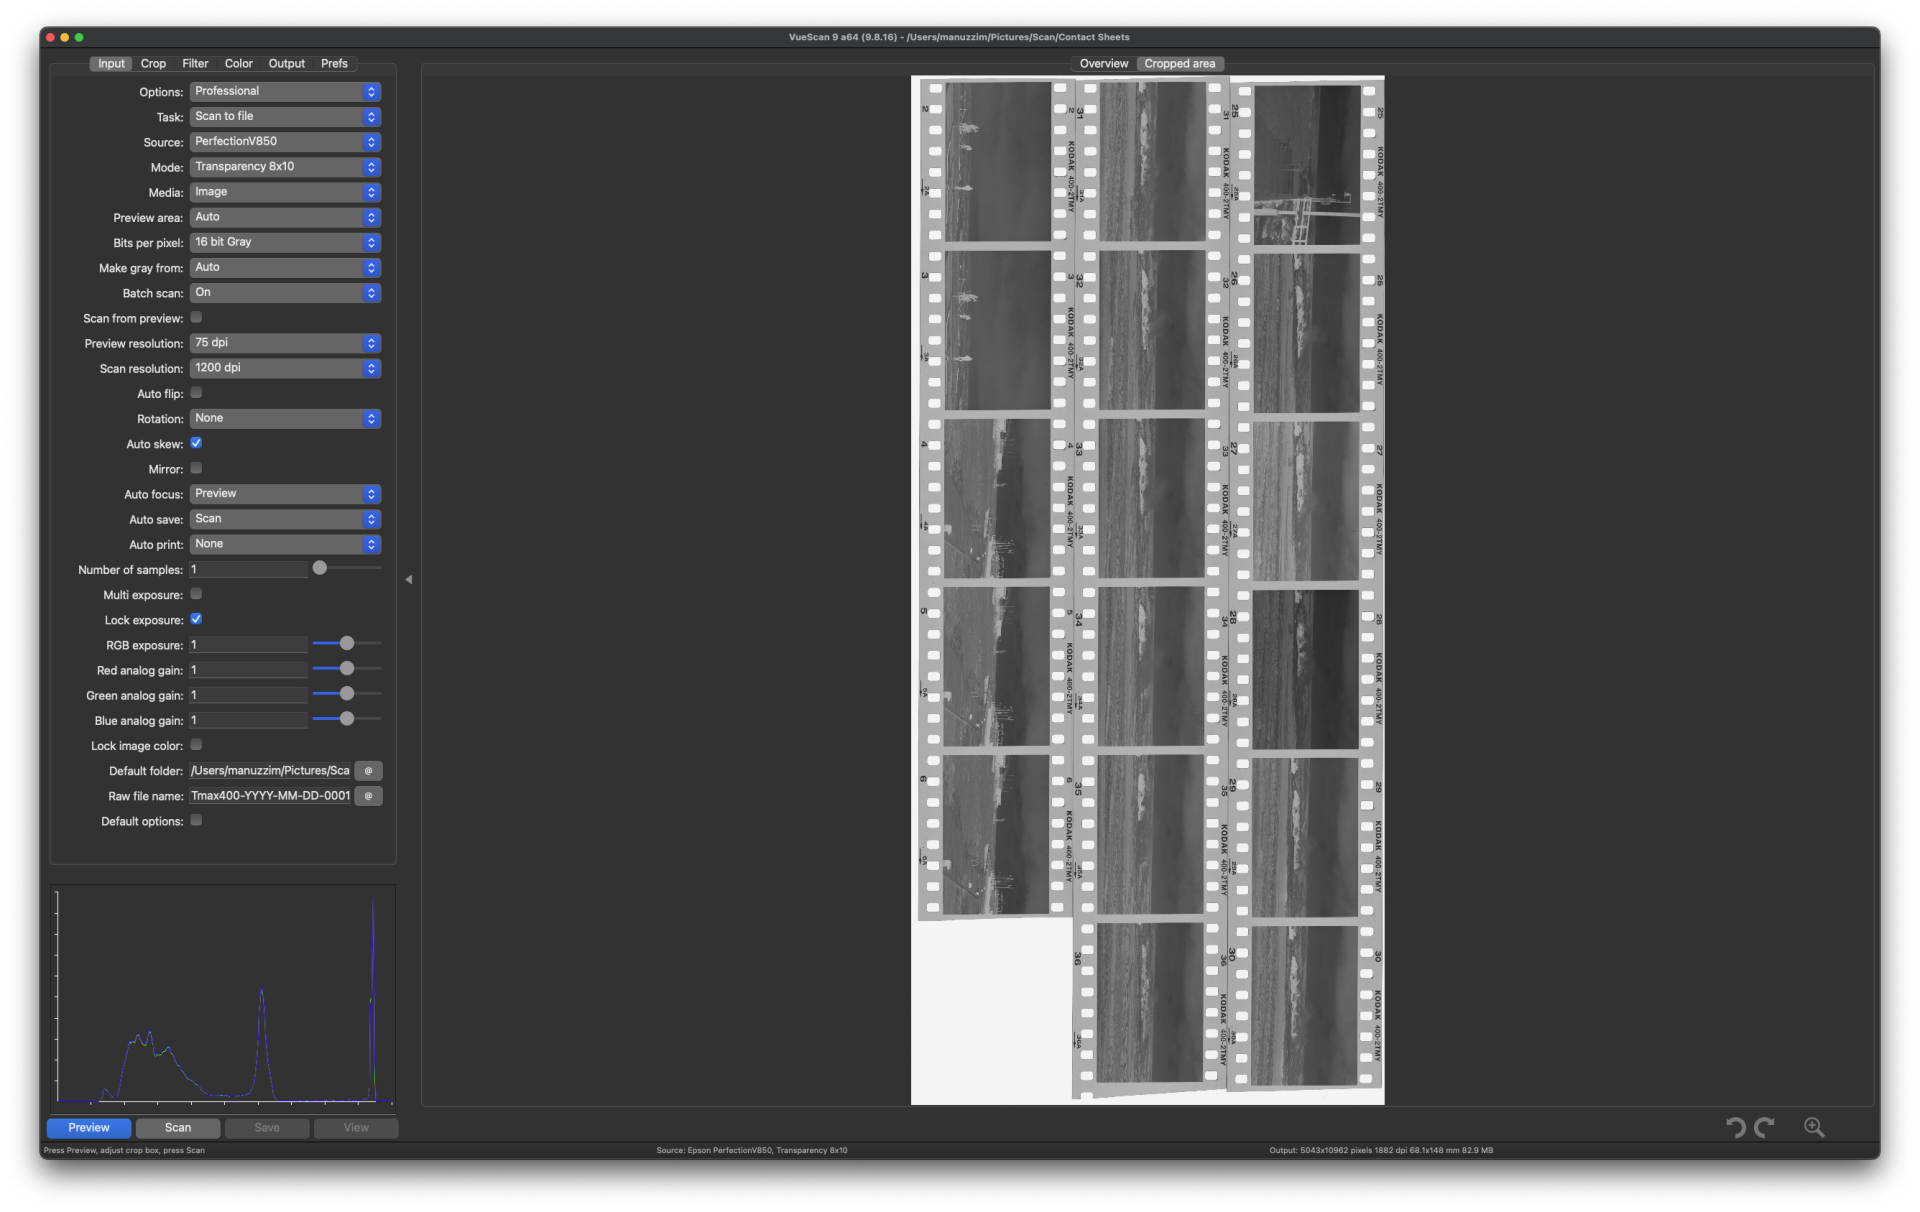
Once our film strips are placed we can launch Vuescan and start the actual scan process.
With my epson V850 I usually follow NLP best practice for output file setup, moreover I set “Transparency 8×10” and a final scan resolution of 1200 dpi. The V850 supports scan resolution yup to 4800 dpi in 8×10 mode, personally I think this is too much out of scope from the final goal I want to achieve with digital contact sheets, moreover 8×10 mode lacks of Infrared cleaning capabilities therefore scratches and dust won’t be cleaned out. Before the actual scan I strongly recommend to perform a preview before the actual scan as it will help us to sort out any misalignment issue, this step could be sped up just by setting the lowest resolution available (75 dpi in my case).
Lightroom
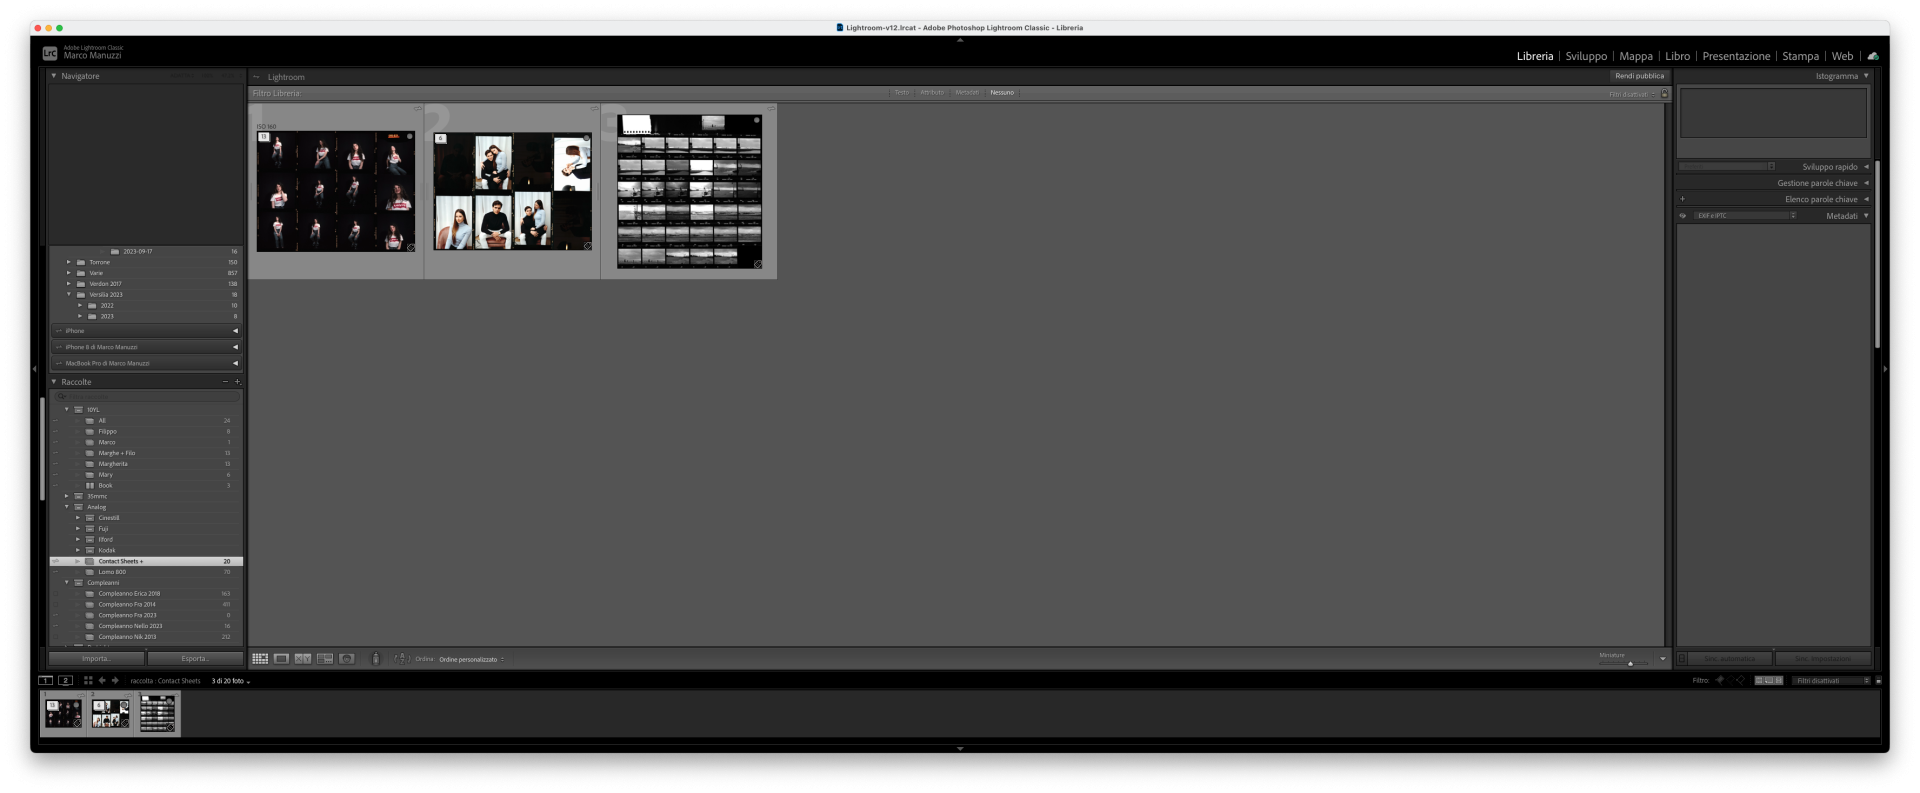
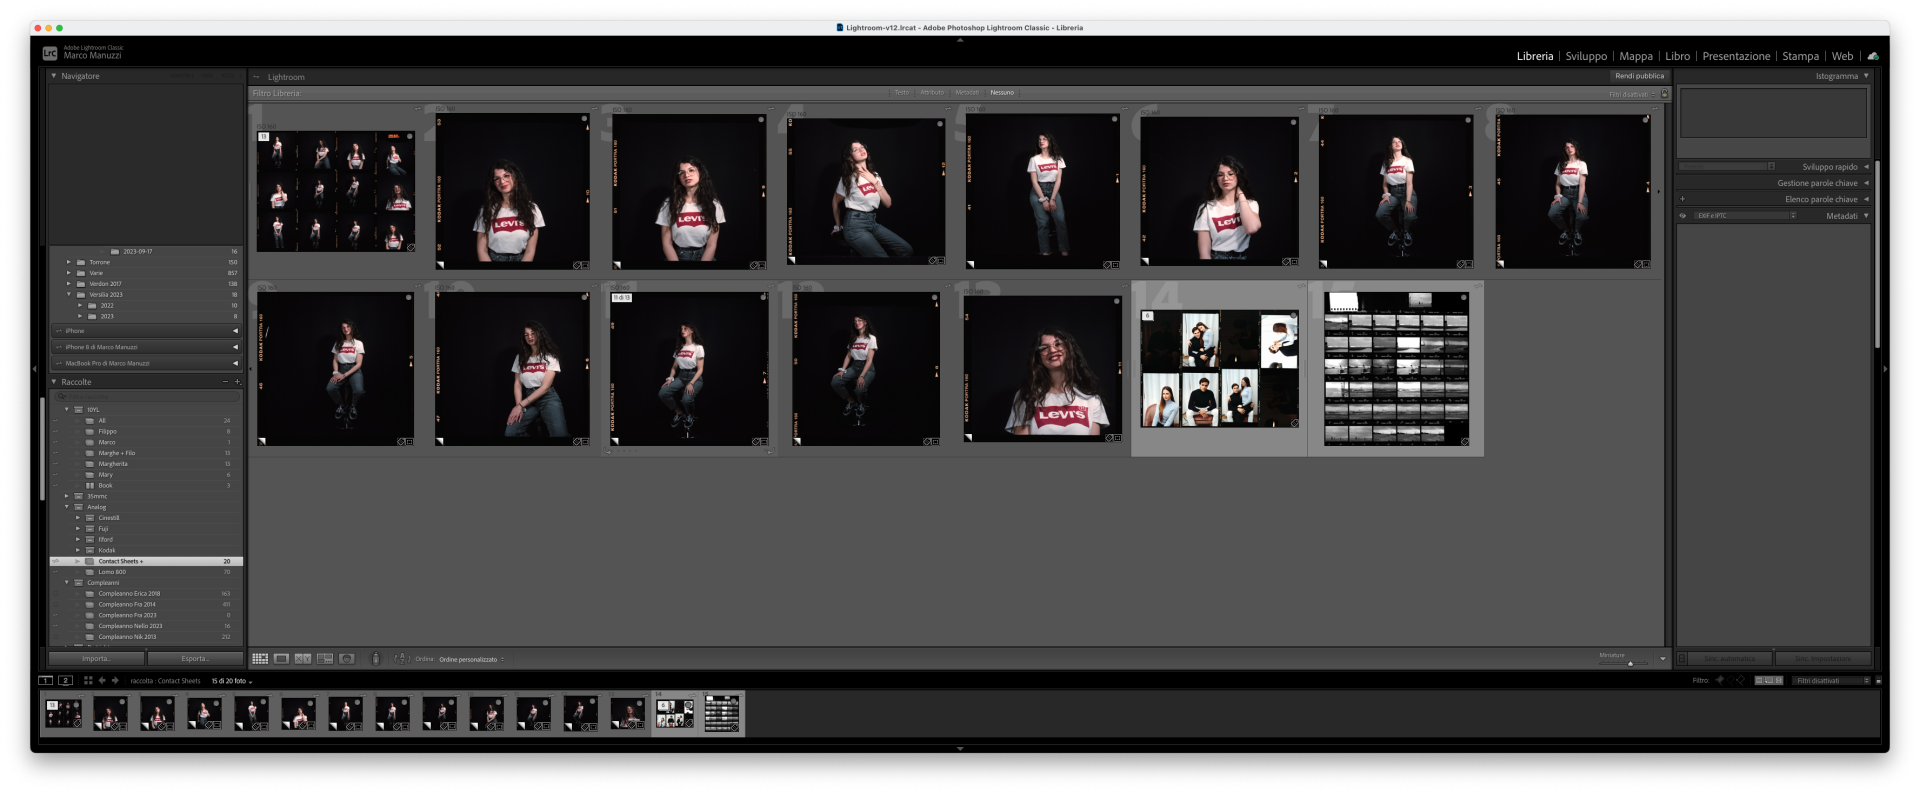
Once all our scans are complete we need to import them into Lightroom and perform the negative to positive conversion thought NLP.
I personally prefere to “move” all my scanned image directly into Lightroom storage folder rather than by copying them in order to always have a clean scan directory.
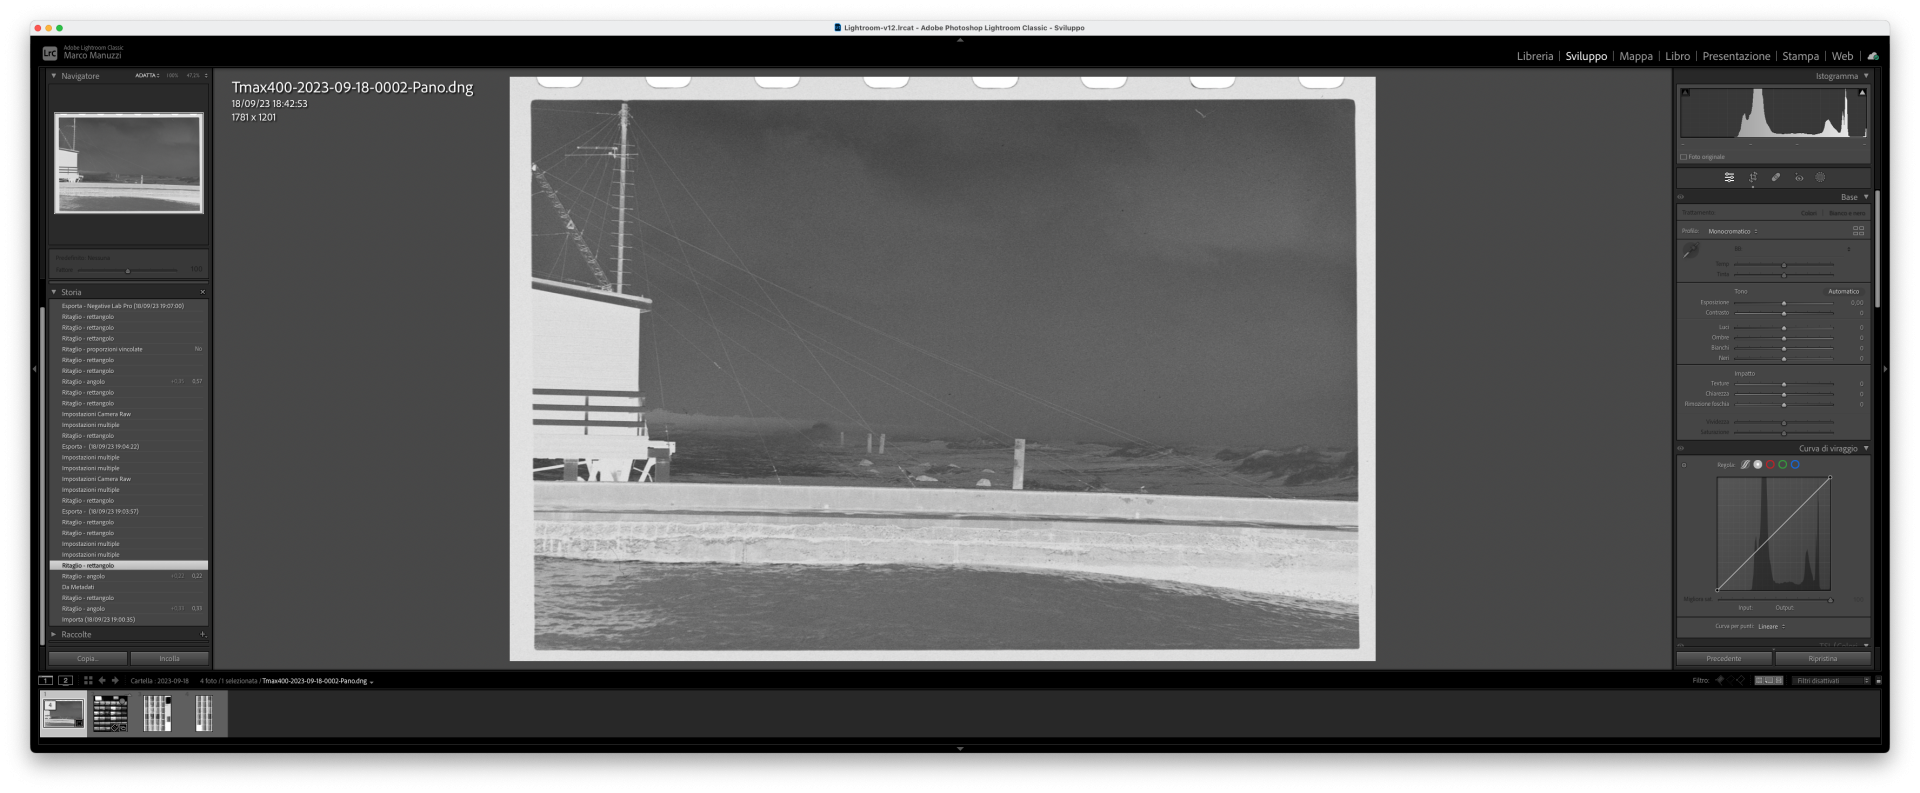
Once again I follow the best practice as reported in NLP website but this time we need to crop the whole image to a single frame in order to provide just a single photo to NLP for correct conversion, otherwise the plugin will take into account all the blank areas.
As mentioned above 36 exp. films needs to be merged before conversion, to do so just select the 2 images on your library and open up the merge tool.
If you look closely you can see that the leftmost strip in the first scan and the rightmost on the second scan are the same, this trick will allow us to merge these scans in a single “panorama” picture.
NLP
Since the NLP conversion settings will be based on that single cropped image I strongly suggest to choose the best one of the entire roll, this step is somewhat similar to the analogue practice as no exposure compensation can be performed on every single shot but rather every frame will be exposed with the same amount of light.

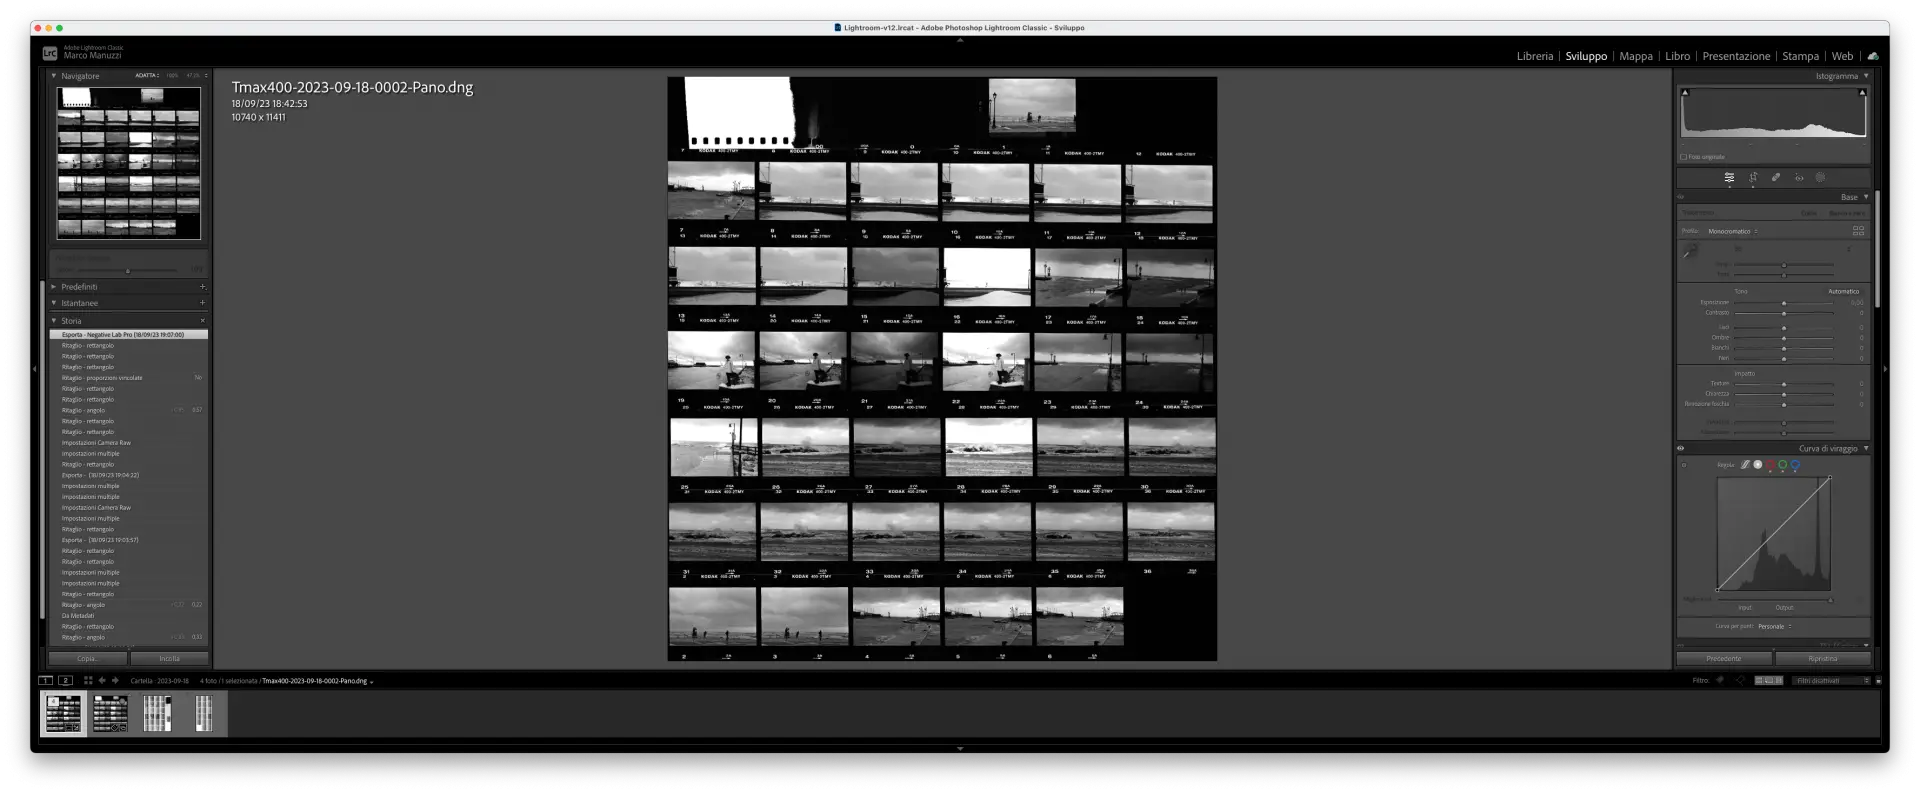
Once the conversion is complete we have to restore the original photo size in order to unveil the whole contact sheet.
Final result
The final result should be something that resembles “traditional” contact sheets.
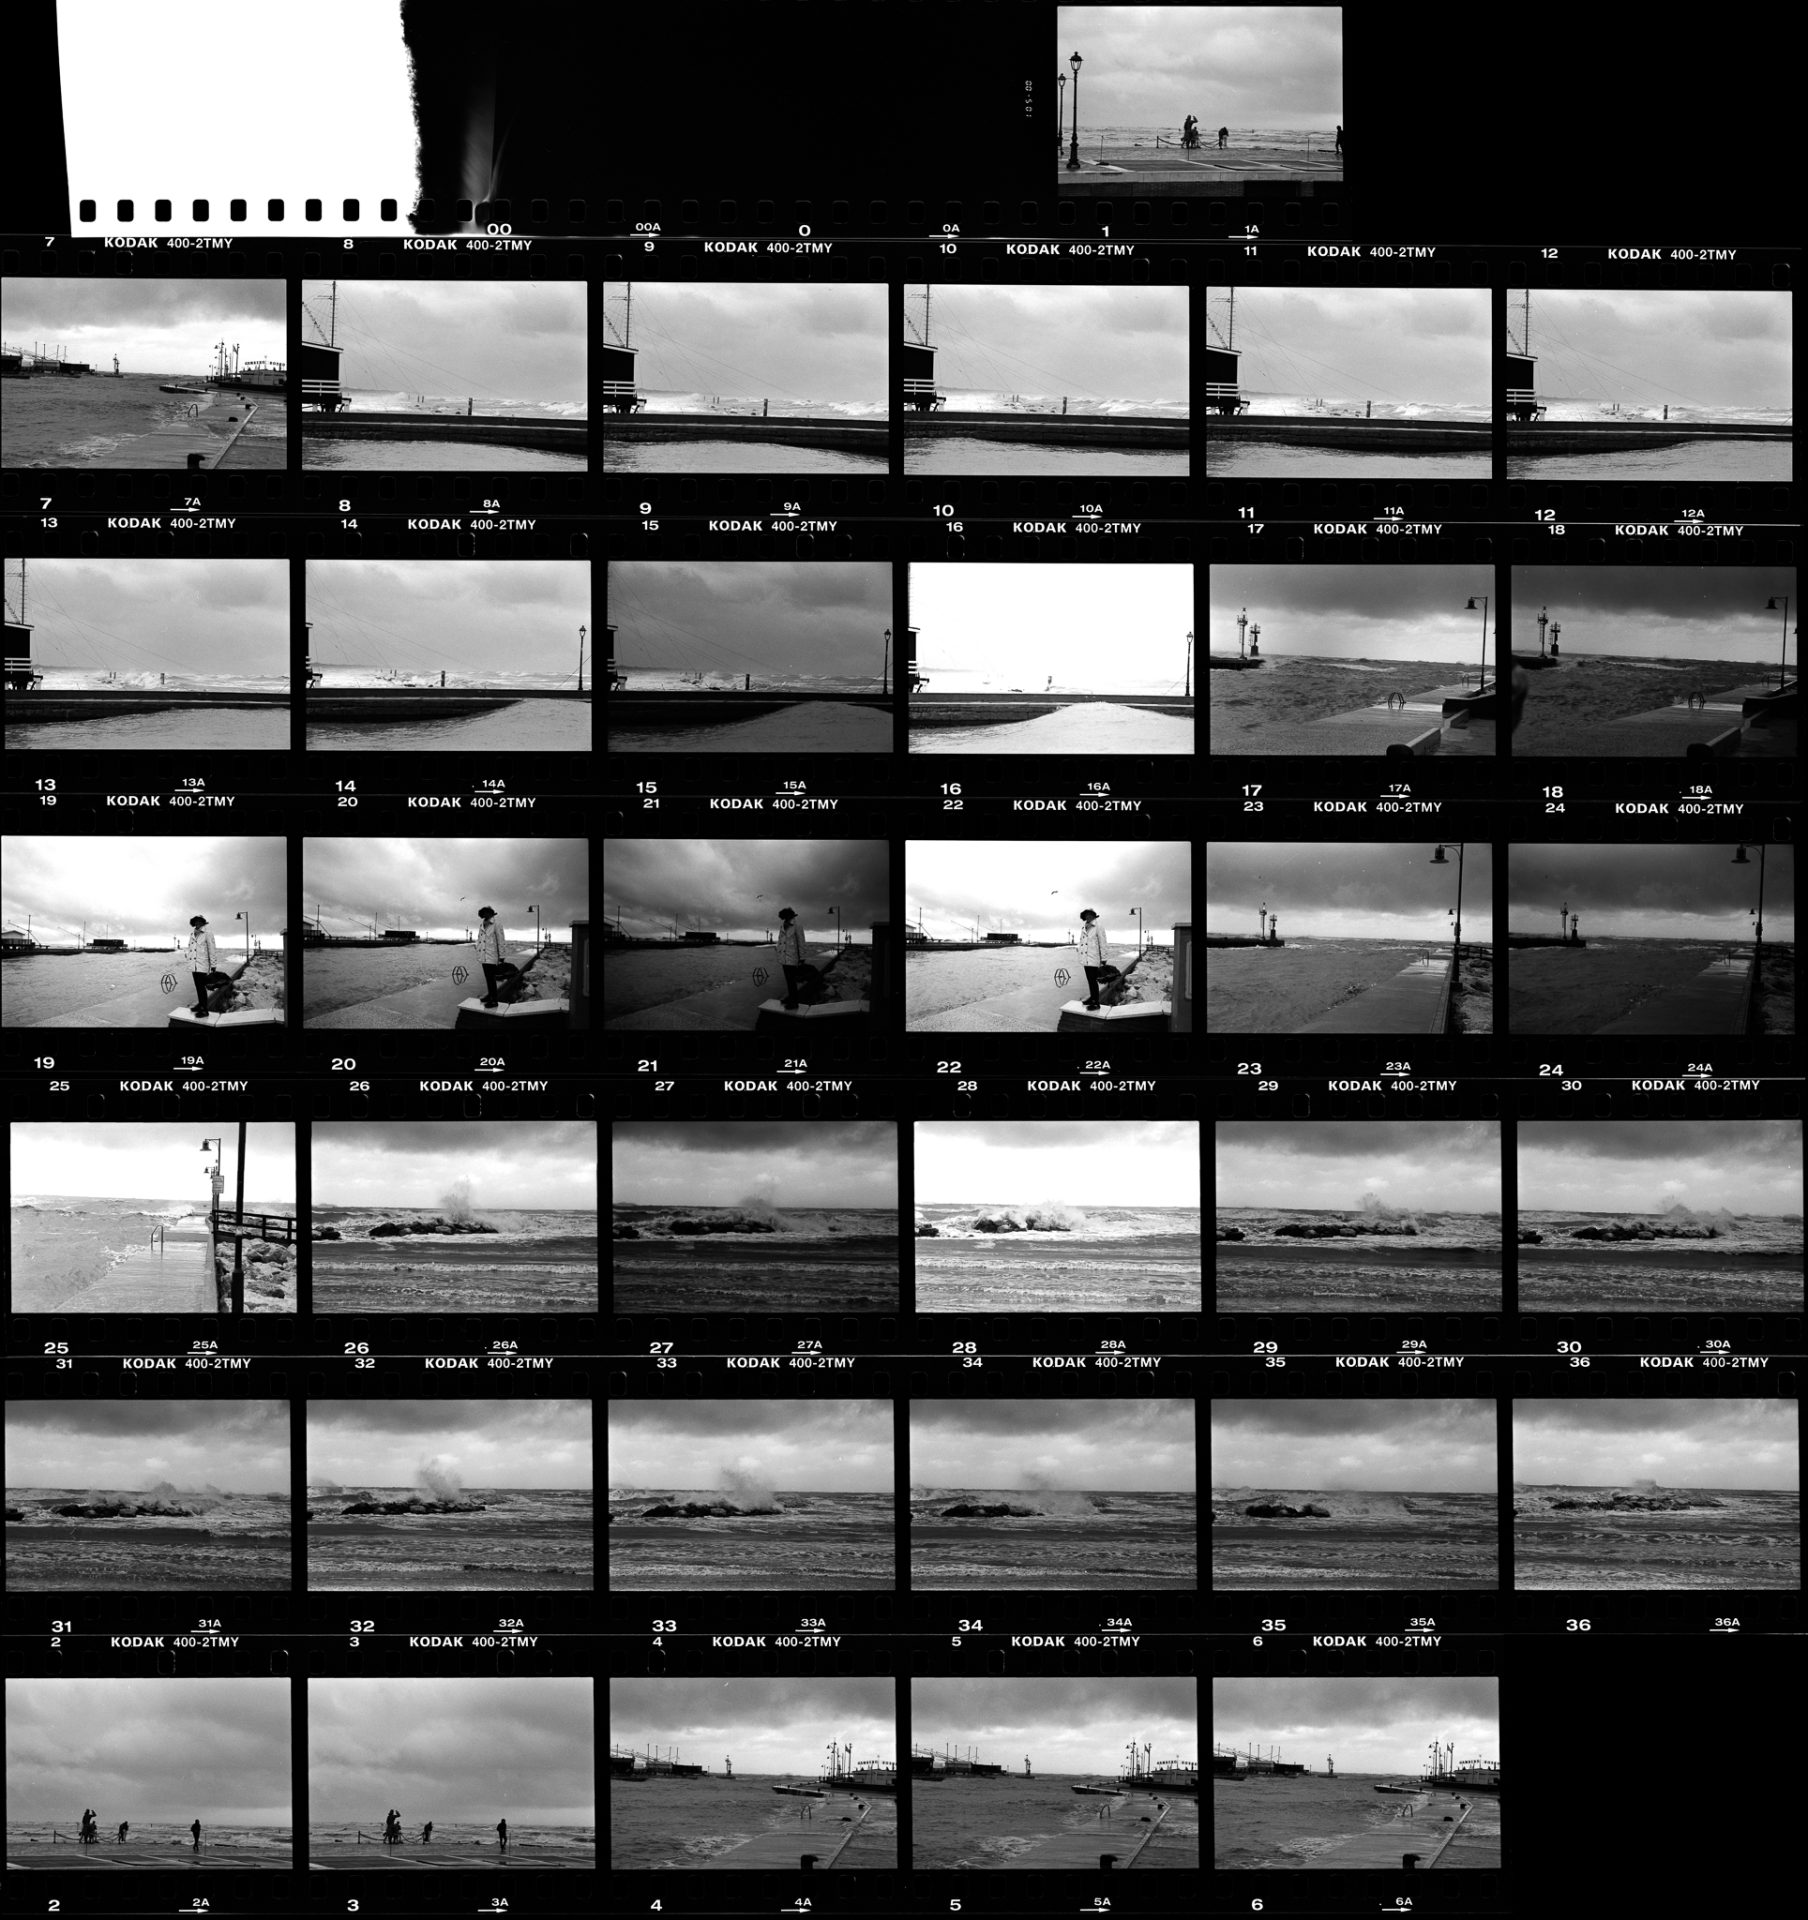
The overall quality mainly depends on roll flatness and good scanning procedures,
An overall good indicator could be the film markings above and below the sprocket holes: if they are sharp and clear we could expect the same also from the actual frames.
Here below the full roll used in this tutorial
Note
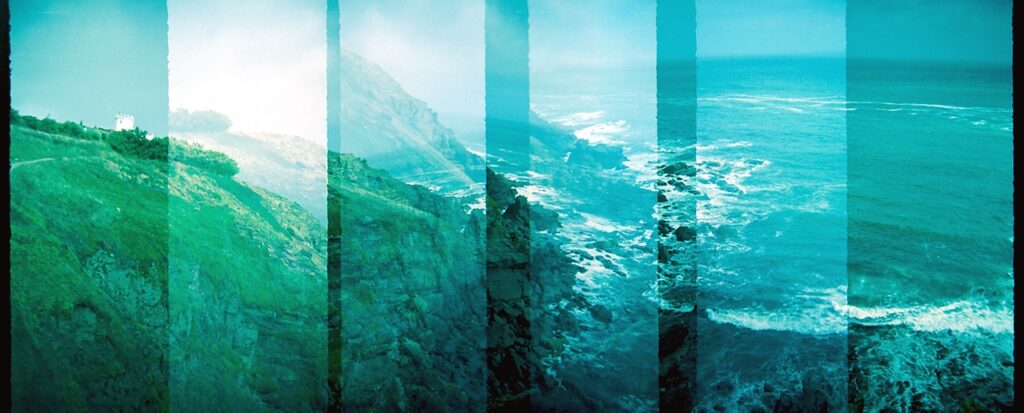
Even if the scan resolution is somewhat low, especially for 35mm film, we could extract an individual frame by creating a virtual copy and the cropping it. In that case I personally like to include the sprocket holes and the markings, they provide a sort of natural framing to the picture.
As an extra step I like to join all the single corp in a single stack, making it like expanding the whole roll the in click over it.
Conclusions
I’m very happy about these results, for sure I’ll continue to use this technique, especially with 120 film rolls.
As stated before some may argue how this practice could be somewhat useful or not, from my perspective this procedure allows me to replicate a style somewhat hard to achieve without proper printing equipment.
Hope this guide will help someone who wants to replicate the contact sheet style, please send me a comment if you find out a better or faster way to achieve the same results.
Happy Shooting
Ciao
Share this post:


Comments
Doug Anderson on How to Make a Digital Contact Sheet
Comment posted: 20/10/2023
The above is how I make a contact page for black & white negatives. I use the same process for color negatives except that instead of the Affinity Photo batch job I use Vuescan Professional Edition to invert and process the color images. (Vuescan can be used as an image processor, not just as a scanner driver.)
Comment posted: 20/10/2023
Kary Schumpert on How to Make a Digital Contact Sheet
Comment posted: 20/10/2023
Bill Watts on How to Make a Digital Contact Sheet
Comment posted: 23/10/2023