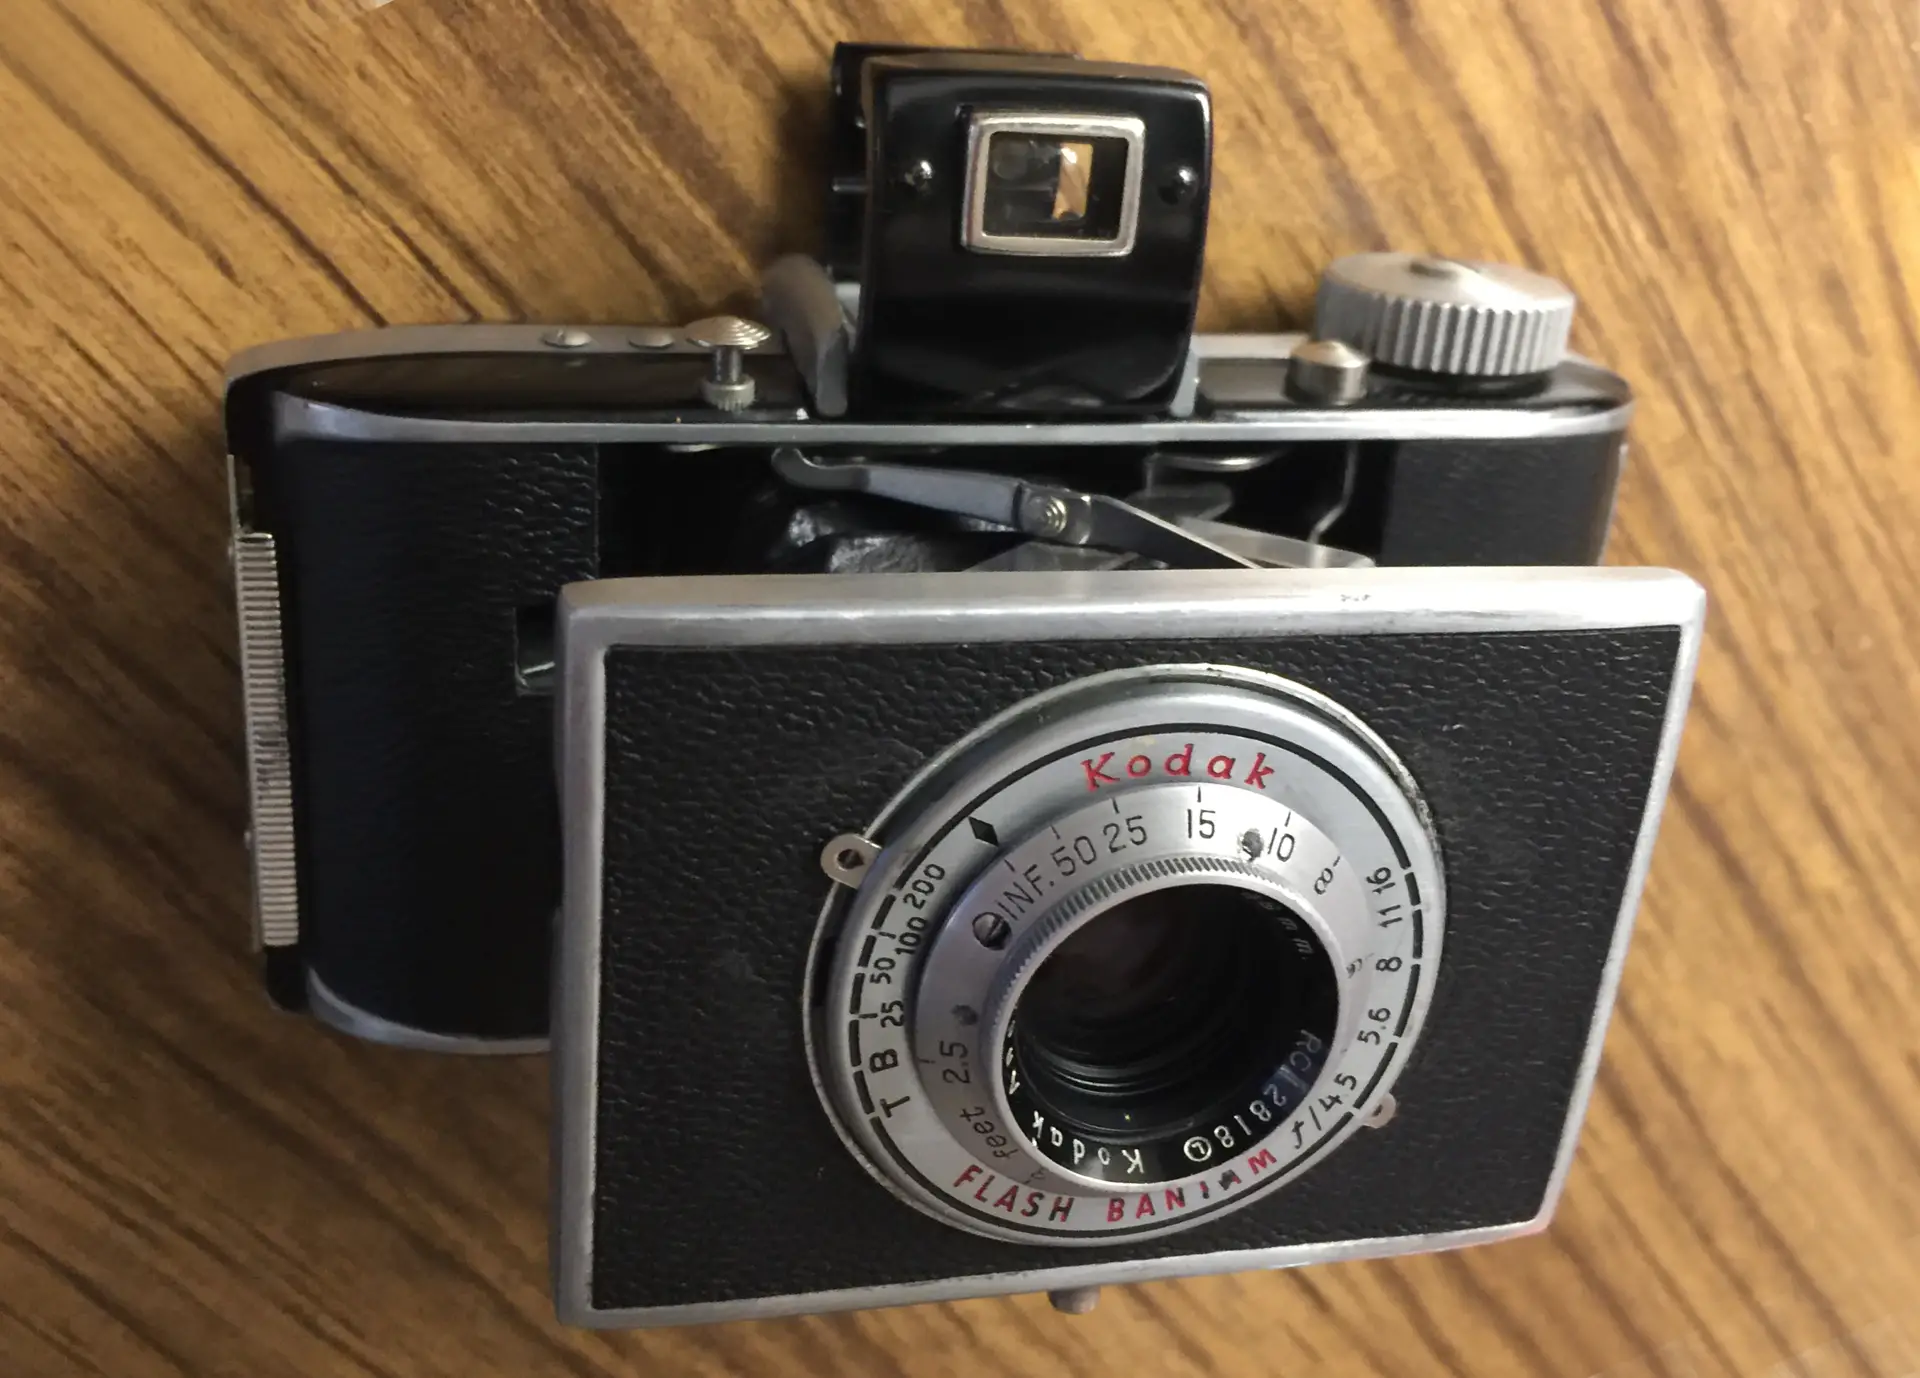
Part 1 of this three-part mini-series detailed how I converted a lovely little Kodak Flash Bantam camera to shoot half-frame images. It was fun and (more-or-less) easier than expected. This part describes what followed– my:
- Half-frame winding strategy
- Somewhat simple film-loading procedure and
- Shooting techniques
Choosing a Winding Strategy
One great feature makes the Flash Bantam (and probably its Bantam 4.5 sibling) ideal for “half-framing”: Its manual film advance and shutter cocking work independently of each other. One could easily disable the camera’s film-stop mechanisms, advance film by any amount, trigger the shutter as often as one wants– and do so wherever one wants– along the film.
With no mechanical synchronization between winding and shutter operations, it should be easy to shoot a bunch of half-frame images (and double/multiple exposures would be easy too).
I considered two image-spacing strategies:
- As is usually done in DIY half-frame projects, I could apply a mantra like “Turn the winding knob A degrees for the first X shots… B degrees for the next Y shots… and so on.”
- Or I could use the camera’s semi-automatic film-stop mechanism! Yes, it would halt winding at every 35mm sprocket hole it encountered. But I’d be shooting narrow half-frames only 20mm wide. Comparing a piece of scrap film against this distance, I saw that I’d only have to cycle the camera’s film-stop mechanism six times between shots. This would also leave a consistent 6mm gap between exposures, and maximize the number of images I’d get on film. (It wouldn’t hurt that I’m a patient person!)
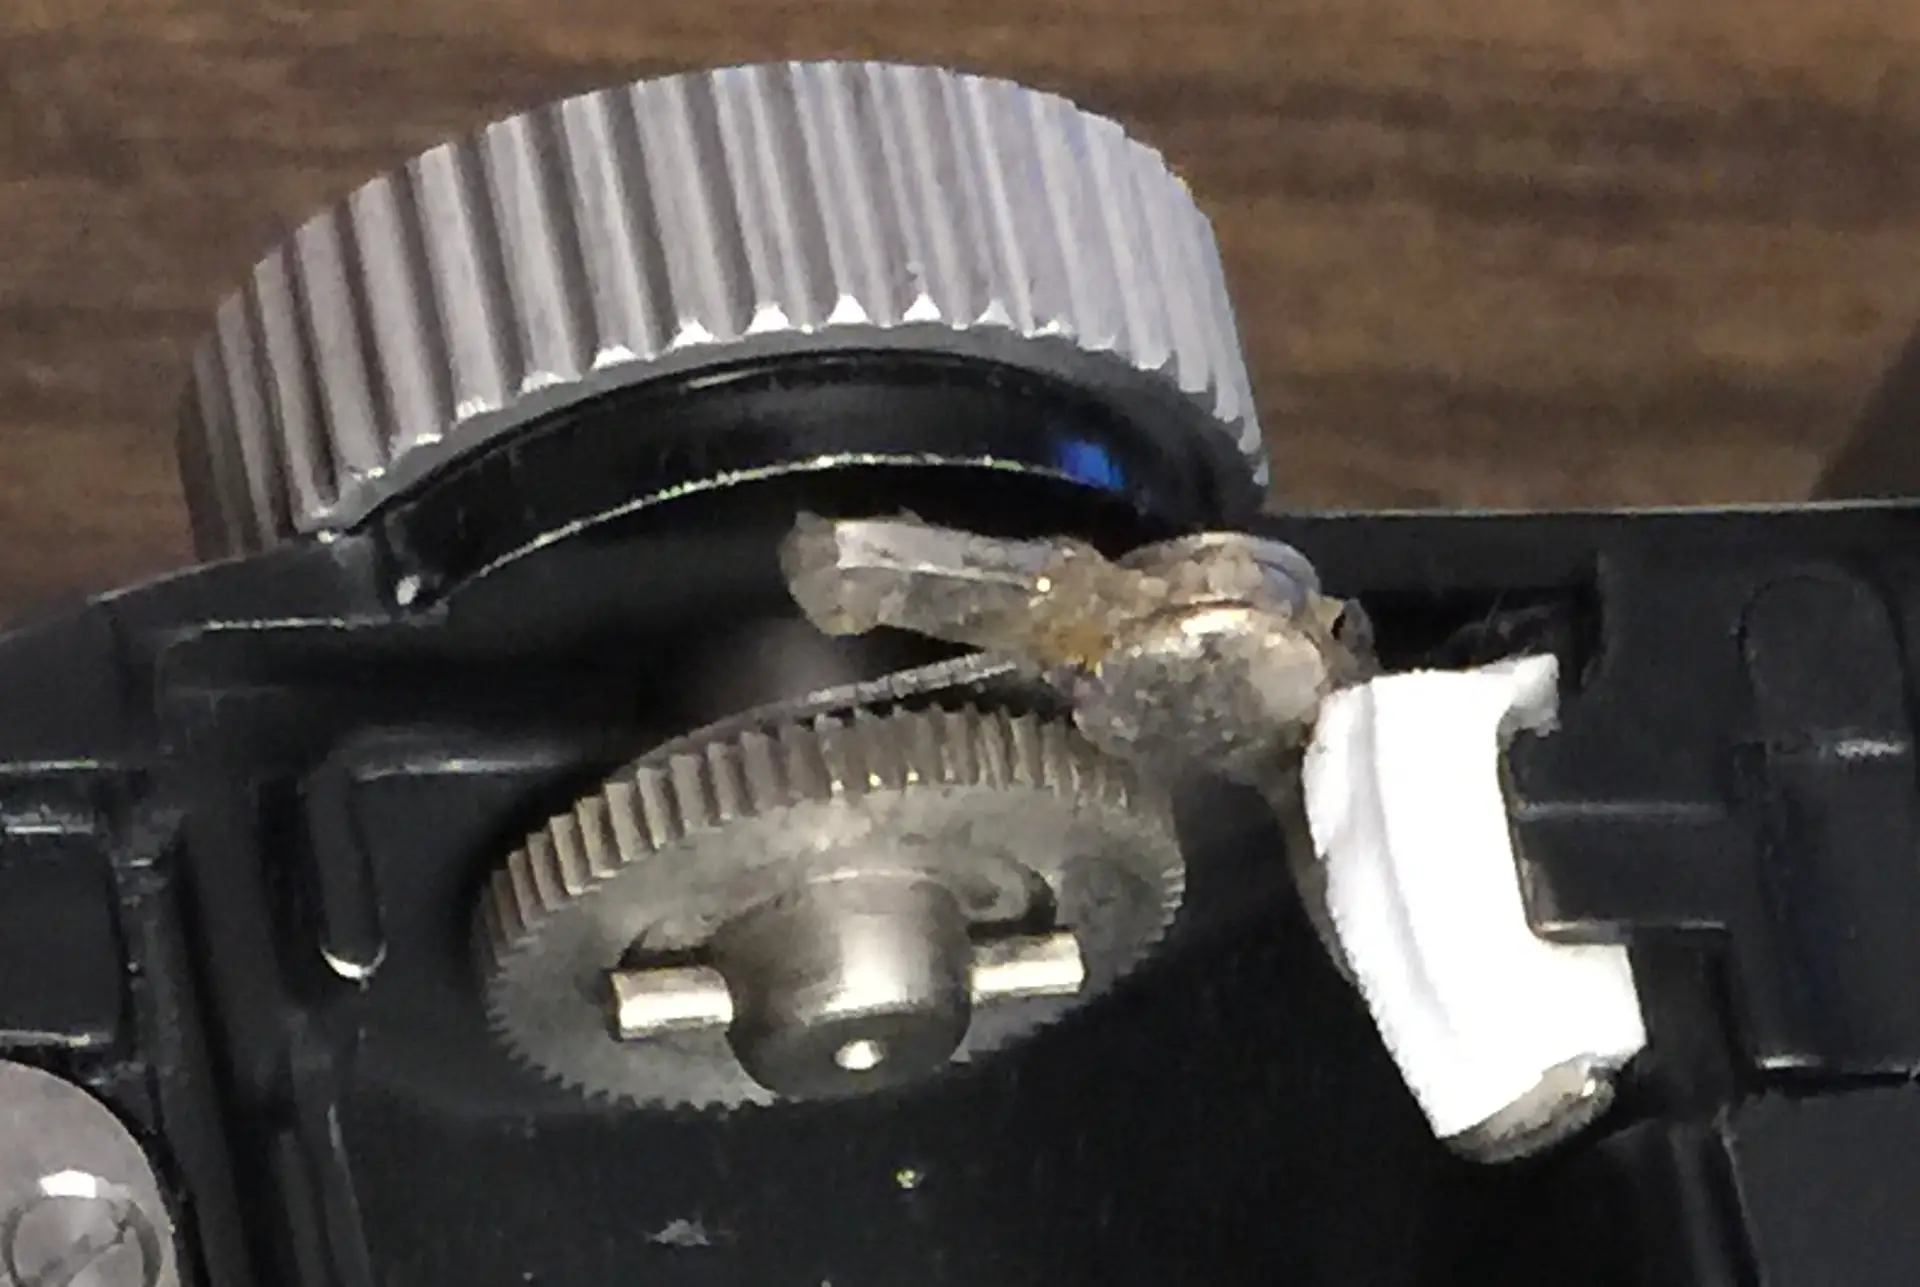
But as it turned out, I’d already been committed to strategy #1. The previous owner had snapped off part of the camera’s winding system. (If I come across an unbroken Bantam, I’ll definitely try strategy #2!)
Based on his extensive experience, Mike Eckman’s excellent article (referenced at the beginning of Part 1) recommends the following procedure for spacing full-frame Bantam images on 35mm film:
“Advancing the film between exposures is done by rotating the winding wheel one-and-one-half full turns for the first six or eight exposures, and one full turn for the remaining exposures. A 24-exposure roll of 35mm film will yield 15 to 20 frames per roll using this method.”
So, for half-frame exposures, it seemed reasonable to wind three-quarters of a turn for each of the first twelve to sixteen exposures, and a half-turn between the rest… to yield maybe 30 to 40 frames. I could remember that!
Loading Film
I decided to test the camera with ISO 400 Tri-X from a long-expired bulk roll bought online. After everything I’d already been through, loading the film was surprisingly easy.

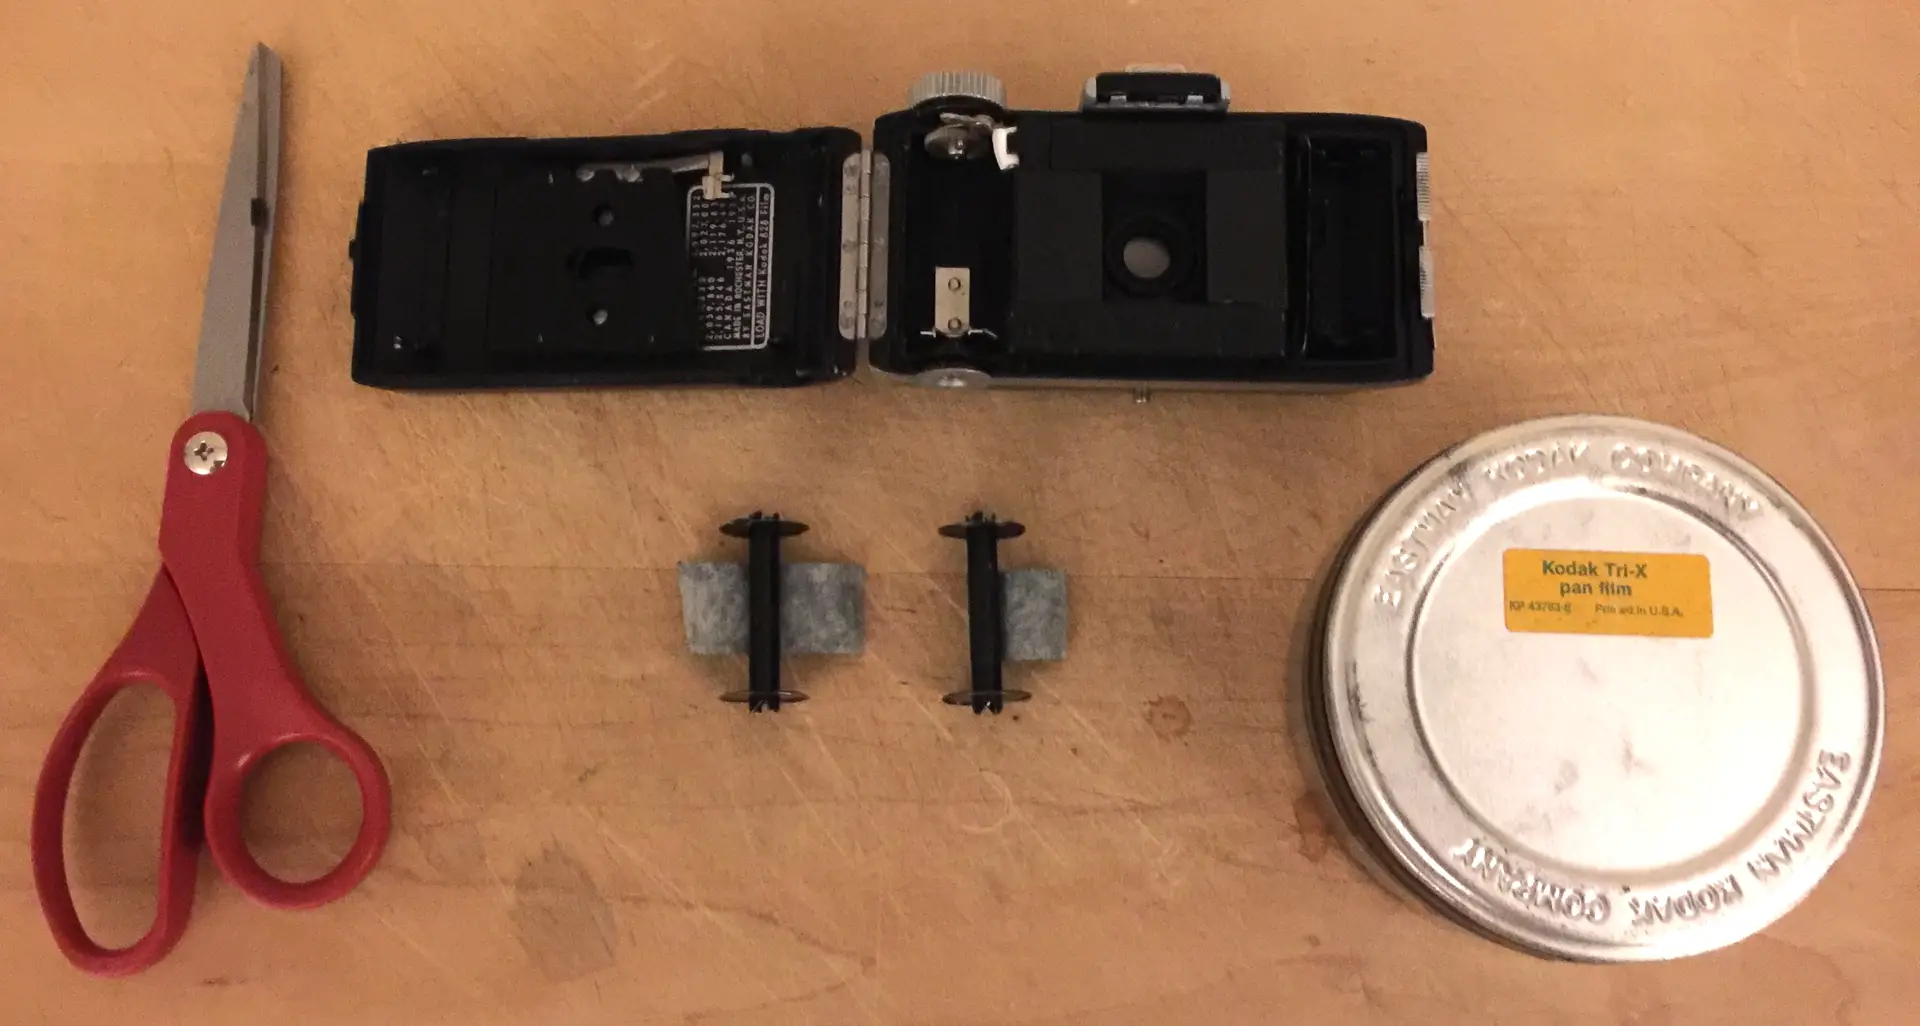
In the darkness, I:
- Extracted an edge of the film from its canister (and left the film roll in the open canister).
- Pressed the two ends of the supply spool’s tape against the front and back of the film end. (This double-attachment kept the film attached to the spindle when I reached the end of the roll and clearly signaled when to stop winding.)
- Held this supply spool’s flanges with my left and right hands, and snugly rolled film from the canister onto the spool until the roll nearly reached the flange edges.
- Cut across the film (with the scissor blades squared up against the spool flanges).
- Pressed this new edge firmly under the pre-positioned tape on the take-up spool, and wound it tightly a couple times around its spindle.
- Dropped the loaded source spool into the camera’s right chamber, worked the empty take-up spool into the left chamber, thumbed the source spool’s flanges to the right until the film was taught, and quickly closed and locked the film-chamber door. Tip: While the source spool drops easily into the right chamber, the take-up spool must be properly slotted up against the top of the left chamber before the bottom of the spool will fully slide in. (If the spool isn’t inserted properly, the film-chamber door won’t close.)
- Replaced the film canister lid.
- And left the room.
The entire process took under 15 minutes.
Mega Tip: Practice this procedure with spools and waste film– in both illuminated and dark rooms– before tackling the real thing!
Shooting Techniques
Fully manual cameras like the Bantam can become true “point-and-shoots” if one knows guidelines like hyperfocal focusing, Sunny-16 metering, and even the oft-quoted “f/8 and be there.” If one loves vintage cameras, they’re all worth learning.
Hyperfocal Focusing
The Bantam’s lens bezel isn’t marked to simplify hyperfocal focusing. But there are many hyperfocal calculators online. I used this one to compile the following guidelines for focusing a “35mm” camera’s 48mm lens– at the Flash Bantam’s five available apertures:
- At f/16, focusing the lens to 16 feet delivers a depth-of-field from 8 feet to infinity.
- At f/11, focusing the lens to 24 feet delivers a depth-of-field from 12 feet to infinity.
- At f/8, focusing the lens to 33 feet delivers a depth-of-field from 16.5 feet to infinity.
- At f/5.6, focusing the lens to 47 feet delivers a depth-of-field from 23.5 feet to infinity.
- At f/4, focusing the lens to 58 feet delivers a depth-of-field from 29 feet to infinity.
At f/8, for instance, if the camera is focused to 33 feet, one gets the lens’s maximum range of acceptably sharp focus at that aperture: from 16.5 feet (half of 33) to infinity. But if one wants to shoot something closer, selecting an aperture of f/16 and setting focus to 16 feet delivers a maximum depth-of-field (at f/16) of from 8 feet to infinity.
Note: One could instead use a vintage rangefinder accessory to gauge a subject’s exact distance from the camera… and set the lens accordingly.
And now, we come to metering. The Bantam doesn’t do that! So I decided to divide my test shots into two groups. For the first set, I’d use Sunny-16 metering. And for the second, I’d try “f/8 and be there.” Both techniques are just guidelines. They don’t guarantee precision results in all circumstances… but I wanted to compare their overall effectiveness.
Sunny-16 Metering
Sunny-16 recommendations begin where the name suggests. Regardless of the camera lens or technology, in bright full sun, set the camera’s aperture to f/16 and its shutter speed to the reciprocal of the film (or sensor) sensitivity. In other words, on the brightest day, I’d shoot ISO 400 Tri-X at f/16 and 1/400th second. From there, I would gradually open up the aperture, lengthen the shutter speed, or both… as light levels drop during the day from full sun to nearly dark.
Tip: If a shutter doesn’t support the specific speed that Sunny-16 recommends, I generally use the camera’s closest slower speed when shooting negatives (which don’t mind some overexposure), or the closest faster speed for slide film (which may tolerate very slight underexposure).
But my Tri-X actually expired four decades ago… and probably lost light sensitivity over time. I’ve read in several places that one should increase exposures of expired black-and-white film by one stop for every two decades since expiration. According to that, I should increase my Tri-X exposures by two stops. This means that– under Sunny-16, on a bright sunny day– I should:
- Lengthen the shutter duration to 1/100th second at f/16,
- Leave it at 1/400th second and open the aperture two stops to f/8,
- Or try the equivalent “mid-point” setting of 1/200th second at f/11.
Since the Bantam shutter doesn’t do 1/400th second, 1/100th at f/16 would be my full-sun setting. (But then, I decided that the equivalent exposure of 1/200th at f/11 would better control hand-held blur… and used that in my sunny-day tests.)
“f/8 and be there”
With this other popular method, one only has to point… and shoot. Its recommendations aren’t as granular as Sunny-16’s, so some photos may be underexposed and some over. But (especially with negative film), the variations should be correctable in chemical and digital darkrooms.
Who originally coined the phrase is debated. But it boils down to answering one question: “If forced to shoot everything at only one aperture, one shutter speed, and at one focusing distance, what should I use?”
The answer depends a bit on the specific camera and lens, but the procedure obviously calls for an aperture of f/8. Why? Because for most lenses:
- f/8 is in the sharper “Goldilocks Zone” between tiny apertures that can cause diffraction blurring and wide apertures that can pull in distortions from the outer fringes of the lens.
- and f/8’s “hyperfocal focusing distance” provides a decent depth-of-field for most outdoor shooting. As we saw earlier, the Flash Bantam’s 33-foot hyperfocal setting at f/8 delivers reasonably sharp images of everything from about 16.5 feet to infinity.
This leaves only the decision about shutter speed. Another well-known photographic maxim helps here: that for a lens with a focal length of F, the safest shutter speeds for hand-held shooting will be 1/F or faster. So for the Flash Bantam’s 48mm lens, I would shoot everything at 1/50th of a second.
Therefore, according to “f/8 and be there,” I would shoot the balance of my test roll at f/8, 1/50th second, and with the camera focused to 33 feet. (On the Bantam, one must “guesstimate” this with the lens set about halfway between its 25- and 50-foot marks.)
But again, my film expired 4 decades ago! And I should theoretically increase exposures by 2 stops to counteract the emulsion’s potential sensitivity losses. Since I could only lengthen the Bantam’s shutter speed by 1 stop (from 1/50th to 1/25th second), I would also open its aperture 1 stop (from f/8 to 5.6). Obviously, this wouldn’t be a perfect execution of “f/8 and so on”… but it’d be the best equivalent execution with my long-expired film.
And from then on, I simply pointed and shot– at f/5.6, 1/25th second, and focused to around 33 feet– regardless of whether subjects were in bright sun or deep shade. I also tried a few indoor scenes as well. It was immensely freeing (though I always heard Sunny-16 barking in my ear). And shooting at 1/25th second, I had to mindfully steady the camera.
The next (and last) part of this series will describe my attempt to develop the film with “Caffenol”– instant coffee + vitamin C powder + sodium carbonate (soda ash) + iodized table salt. It’ll be my first time with this homemade developer… and I’ll hopefully get at least one image worth sharing!
–Dave Powell is a Westford, Mass., writer and avid amateur photographer.
Share this post:


Comments
Stephen Meese on That Time I “Half-Framed” a cute Kodak Flash Bantam camera (Part 2 of 3)
Comment posted: 21/02/2023
Comment posted: 21/02/2023
Murray on That Time I “Half-Framed” a cute Kodak Flash Bantam camera (Part 2 of 3)
Comment posted: 27/02/2023
I am going to try making some spools. The prices for empty spools & expired film are obscene.
Comment posted: 27/02/2023