It was Day 6 of COVID-19 isolation, I was feeling more and more restless. Being one of the lucky ones, I could still work from home, but my mind was distracted by the barrage of sad news. I needed a project, a welcomed point of focus. Luckily for me, Wilco Jensen from Hassyparts posted his latest project on a Facebook group for film camera users. He made a mechanical XPan from a Nikon FE body with a 47mm Schneider lens on a simple helicoid. This project immediately got my gears spinning… didn’t I have a couple of broken FEs sitting in my parts camera bin?
Some background: I started shooting film 4 years ago and the Nikon FM/FE series were my favorite SLRs. Prices for them were pretty low and I would scoop up any kit I could find for under $75USD (65EUR). They were durable machines and all was needed was some cleaning and new foam. Eventually, I had collected a few bodies so I could swap parts to create collector worthy samples. Along the way, I ended up with a couple of broken ones as well – I used them for repair practice and they were partially disassembled and stored with all my other parts cameras.
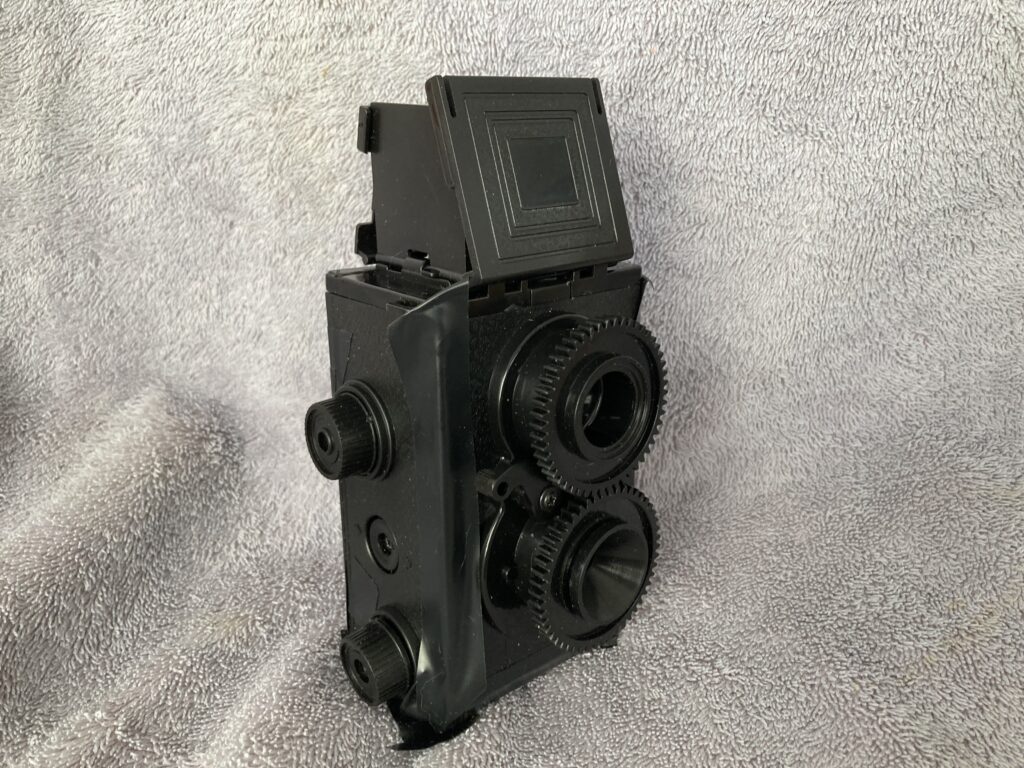
I dug up a black FE body, it was already stripped to the chassis and ready for modification. The first step to this build was to machine and widen the film gate. A standard 35mm frame is 24x36mm and the XPan captures 24x65mm. Since I would be double stroking the film advance per exposure, I could technically go to 24x72mm. Unfortunately, the chassis of the Nikon FE was the limiting factor, allowing me to widen to ~69mm instead. Still wider than a XPan, Cool!
The chassis was covered with tape to keep metal filings out, and chucked into a vise on a Sherline milling machine. I used a small 1/8” (~3mm) endmill to keep the cutting load small. The vise could only grip the bottom of the FE chassis and therefore I needed to keep deflection/vibration low. Using an endmill left rounded corners on the film gate so I used a small file to cut the corners square. I then used a Dremel tool to cut off any bits of the chassis that could be in the way of light reaching the widened gate. This included the top plate since I won’t need to use the prism.
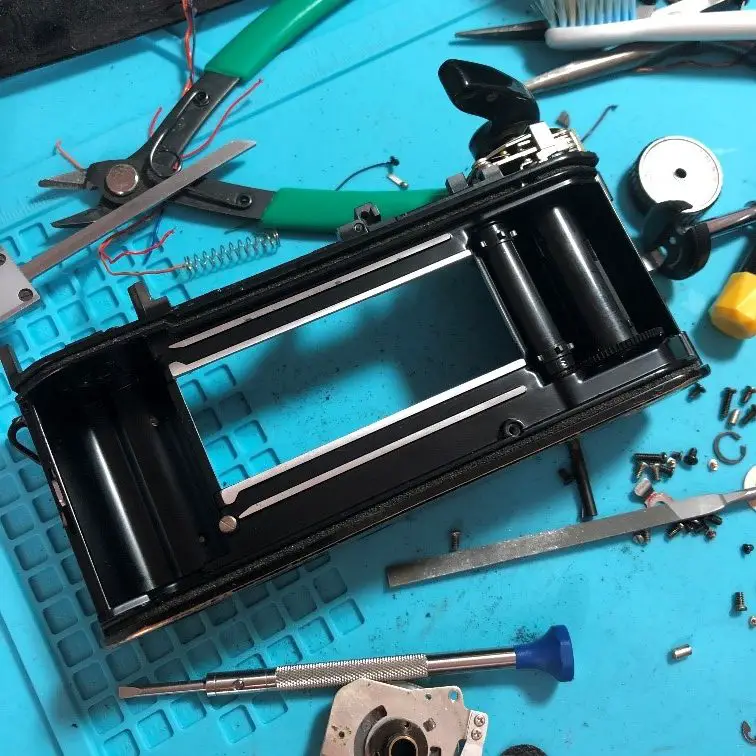
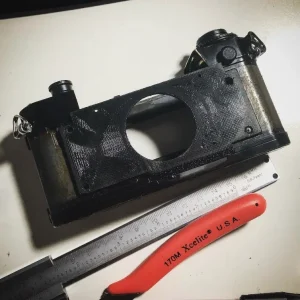
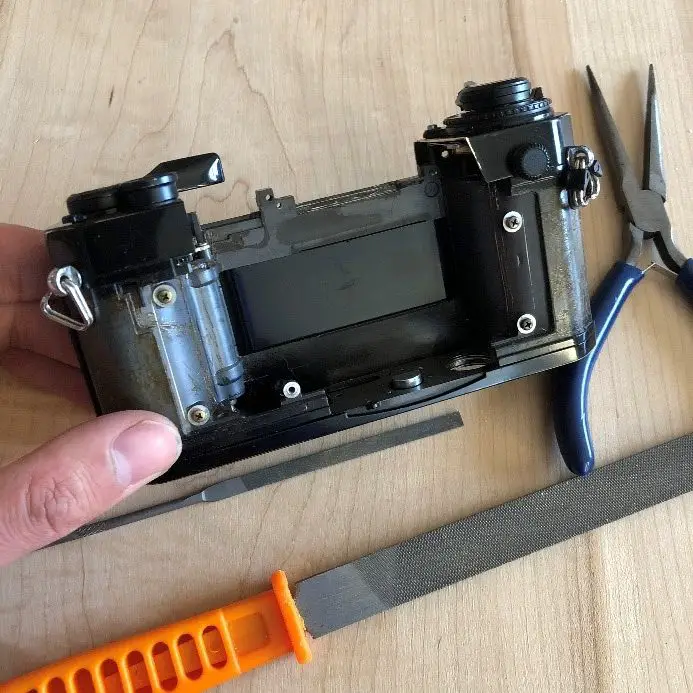 The FE chassis machined with an enlarged film gate
Now came the fun part – covering up the big holes in the chassis to create something that still looked like a camera. Wilco used metal to build a new front plate and top cover, I had a different tool at my disposal – an Anycubic i3 Mega 3D printer. This is one of the cheapest printers on the market right now and it is a great tool for prototyping. For a camera exterior part, I chose PETG filament for its chemical and temperature resistance. It is a step up from the standard PLA material – which can get soft in the heat (think hot car in the summer). To model, I used an ancient copy of SolidWorks from my university days. There are many CAD options out there, Autodesk’s Fusion 360 is one that I recommend as it is free for hobbyists (at the time of this writing). I used Cura to convert the model into tool paths for the printer.
My process for modeling was (and is) very iterative, I prefer to make small changes over many revisions. First, I used a caliper to measure the spacing of the mounting holes on the chassis as well as the relative position of the film gate. It can be very hard to get it right the first time so I started 3D printing a template right away. I could then use the template to determine any errors. PETG is not the prettiest to print with an entry level printer so I also needed to print multiple revisions to adjust printing parameters to refine the fit and finish.
 The first 3D printed template test fitted
Soon, after 6 revisions, I had a perfectly mated front plate. FauXPAN (this is the only fitting name) is looking more and more like a camera!
 Finalized front plate outline
A top plate was required to cover the large hole where the prism was. I removed the hotshoe from the FE and transplanted it to the top plate. I also added a hole where I can later mount a bubble level (which is very important for wide angle panoramas).
 Top plate with a Voigtlander 25mm viewfinder
To ensure there were no light leaks, a tunnel was printed to connect the front lens mounting plate to the film gate. The interior would be painted matte black and have foam around the seams to guarantee perfect darkness.
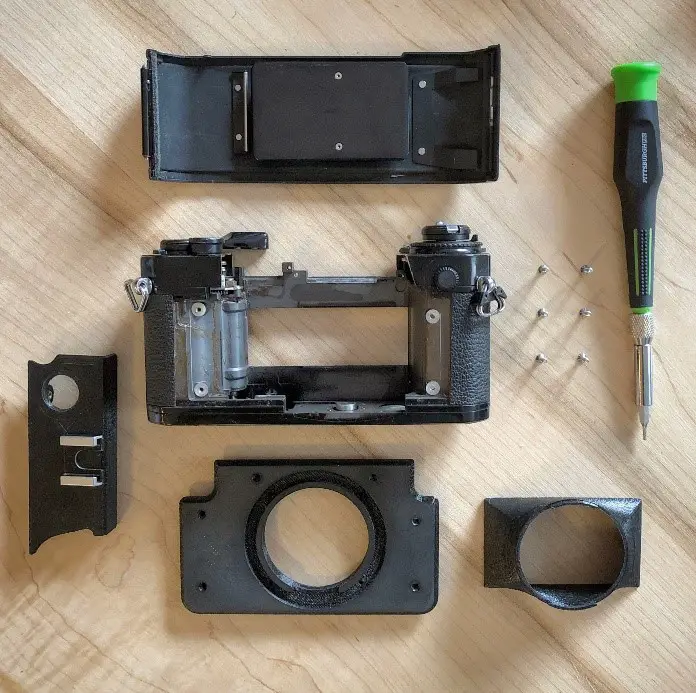 The three main 3D printed components
Now that the camera is light tight, I moved on to the actual picture taking components. Wilco used a simple 12-18mm Helicoid (likely from eBay) with a Schneider Super Angulon 47mm f/8. This was not my first choice as I didn’t want to be a copycat. I started to research wide angles (30-50mm focal length) that could cover the 24 x 69mm frame. I wanted wide to make it easier to zone focus and to keep it close to the standard 45mm that is on the XPan. There were surprisingly few that are commonly used:
- Bronica 40mm f/4 (from their 645 ETR series) – The built-in Seiko electronics shutter is usually bypassed and the lens elements mounted to a Copal No.0 shutter. This of course would add to the cost of the build (lens alone is ~200USD). Supposedly it can be converted without modifications and therefore could allow the lens to be restored to its original condition. I didn’t like the look of the modded lens, the front lens group stuck out too much. This is partially because of the large flange distance of the lens (to clear the SLR mirror). If I were to attempt using this lens, I would probably program a micro-controller to activate the electronic shutter. This would make the camera a lot more complex and more prone to electronic failures.
- Mamiya 50mm f/6.3 (from their Press series) – Aperture, focus, and shutter all in one, but very large and heavy, has way more coverage than needed, and is not cheap (~300USD). I had this lens on the top of my list until I found that I had a suitable helicoid which would make the next option the most economical.
- Schneider Super Angulon 47mm f/8 or f/5.6 (the F8 can be found in the Brooks Veriwide) – Helicoid required. There are four Schneider 47mm Super Angulons to my knowledge. The f/8, the early non-XL f/5.6, the later non-XL f/5.6, and finally the XL f/5.6. The XL is a modern lens and way outside my budget. My preference is for the f/8 or one of the non-XL f/5.6s. They are fairly compact and can be found for $250-300 USD. What really swung the vote was when I found in my parts bin a helicoid from a Minolta 50mm f/1.4. This helicoid had a very large inner bore and is buttery smooth after I rebuilt it. It really helps to hoard parts!
- Mamiya 55mm f/4.5 (a TLR lens for the C220 and C330) – Helicoid required. Another option I considered as I also have a 55mm helicoid that I could salvage from a Cosinon 55mm f/1.4. This is a sleeper lens in my opinion as it is possible to get a copy for cheap if the viewing lens is damaged. Even in great shape, it’s only ~$150USD.
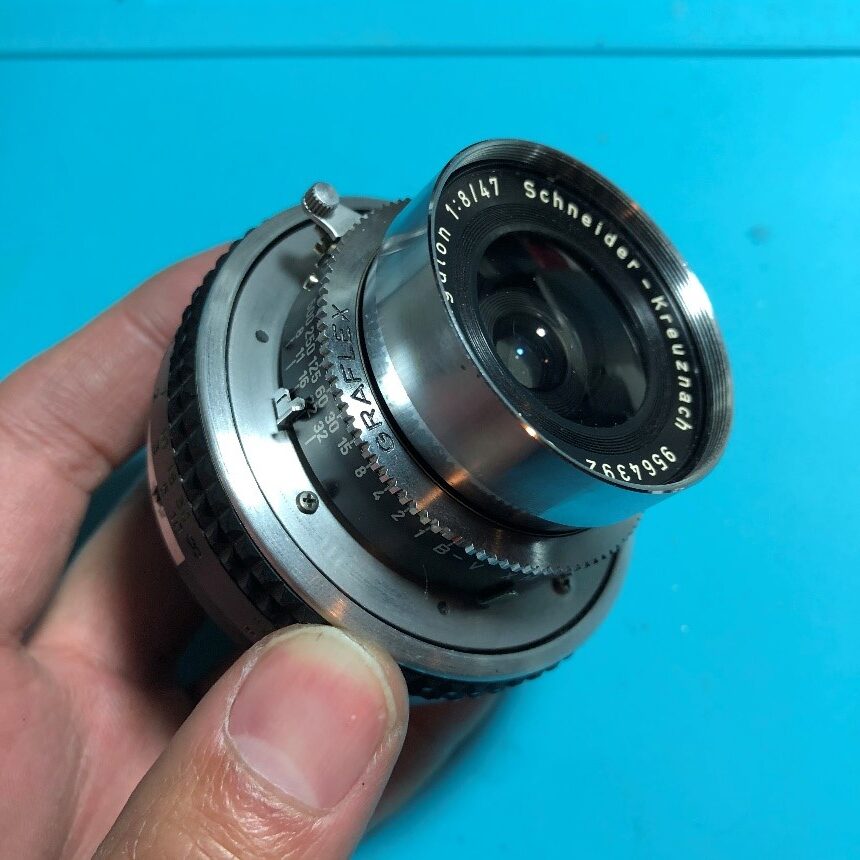
With the COVID restrictions, I thought it would take weeks for the lens to arrive, but I got lucky. Within a week, the lens was in my hands.
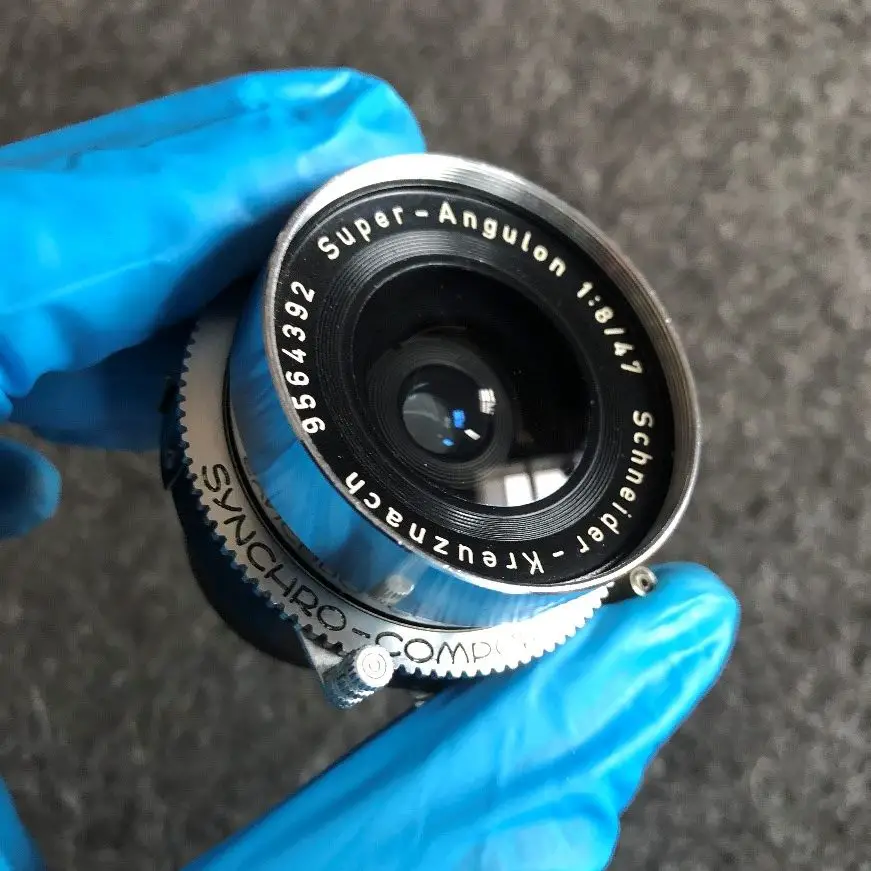 Nice little gem of a lens
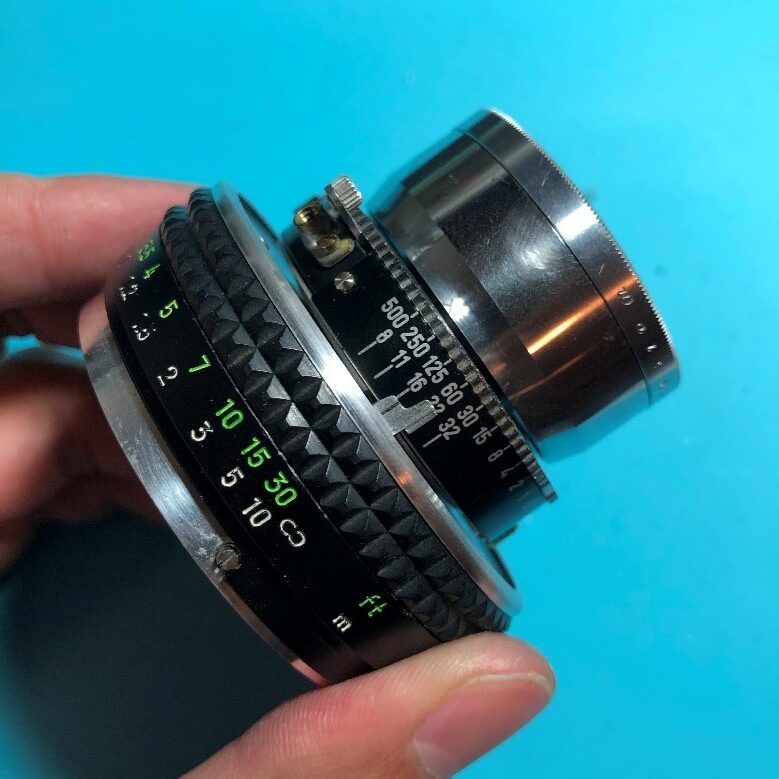
Once I double checked the dimensions, I started to modify the Minolta helicoid. The 47mm f/8 has a flange distance of 50.5mm which is one of the shortest and great for making the camera super compact. I machined down the focus ring to shorten the helicoid. To make it look better, I machined a new rim. I thought about painting it, but figure to start with the raw chrome-nose look first and see if I liked it.

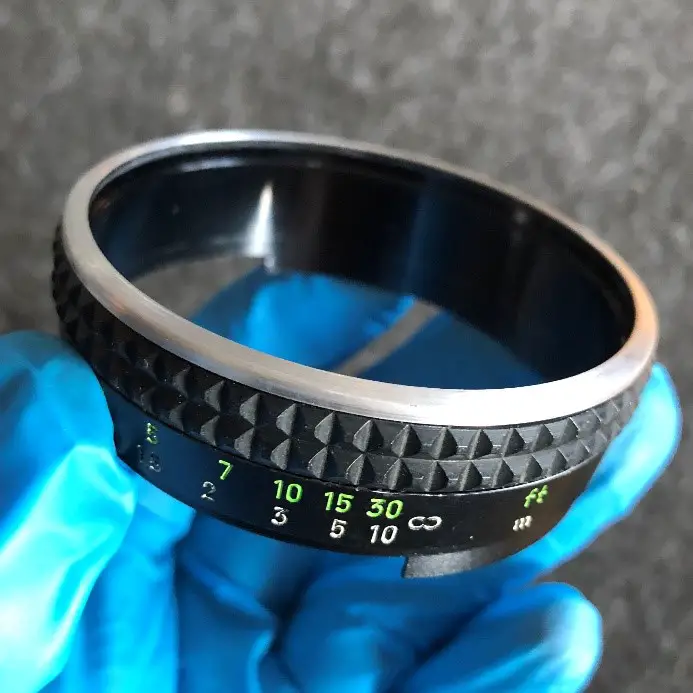 Focus ring shortened and a new rim glued on
Once I had the helicoid fitting within the 50.5mm limit, I started to machine the lens mount on my Taig micro lathe. This would be the thin plate that the large format lens would mount on. Screw around the lens plate secured the plate to the helicoid.
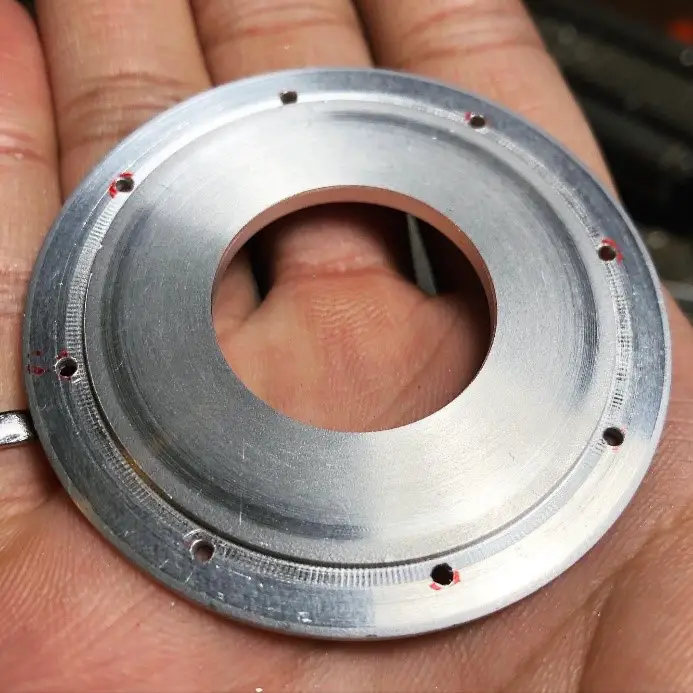 Lens mount machined from aluminum
 The plate is attached to the helicoid and the lens mounted
Now a 47mm lens needed only ~2.4mm of adjustment to focus from 1m to infinitely, a 50mm would need ~2.8mm. This meant the distance markings on the 50mm helicoid would be slightly off. The good thing was that with a max f/8 aperture, the depth of field would be quite large and the slight error in markings would not be noticeable. The hyperfocal distance of ~6m would bring everything from 3m to infinite in focus. A piece of ground glass was used to quickly check that infinity and 2m are accurate.
 Looks the part now
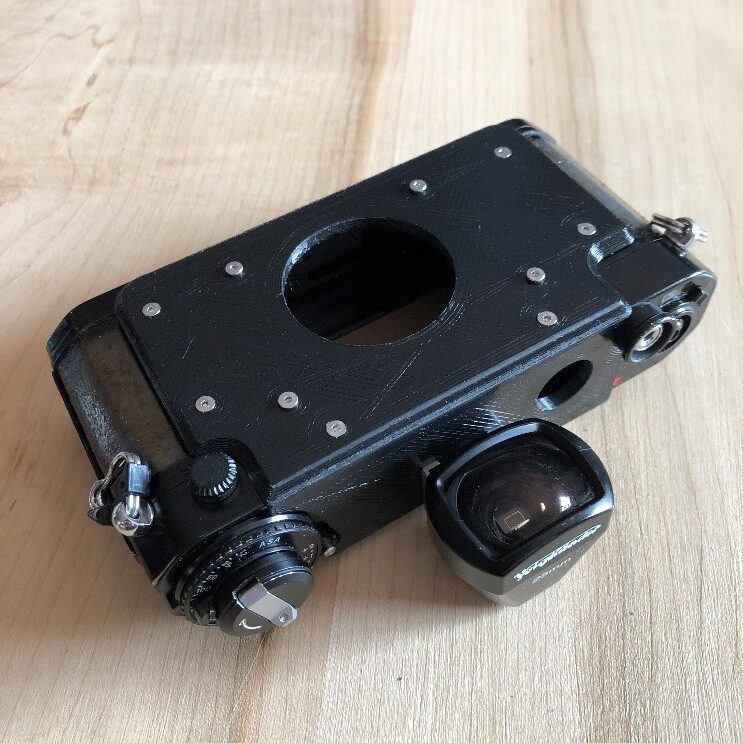
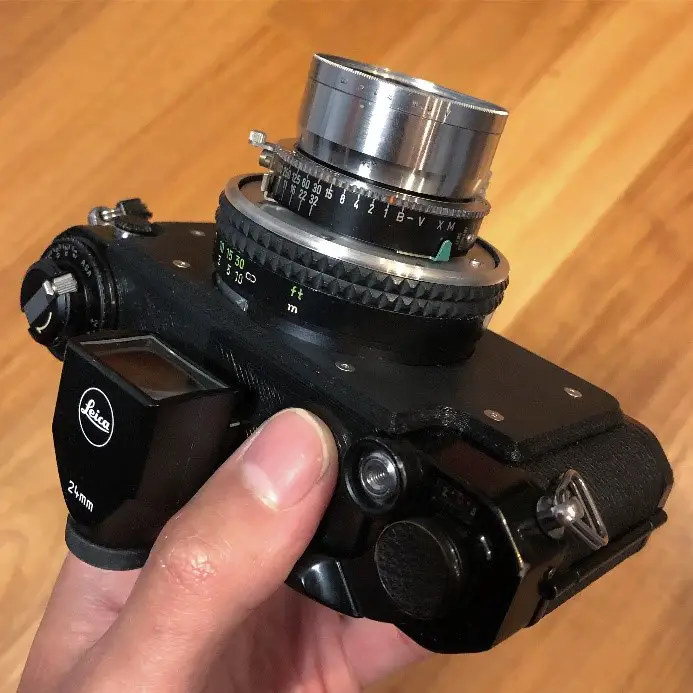
Time for the finishing touches. Foam strips were added to the light tunnel to ensure a perfect seal. I then printed a rectangular lens hood and a mask for the Leica 24mm viewfinder to reduce its view to the correct aspect ratio.
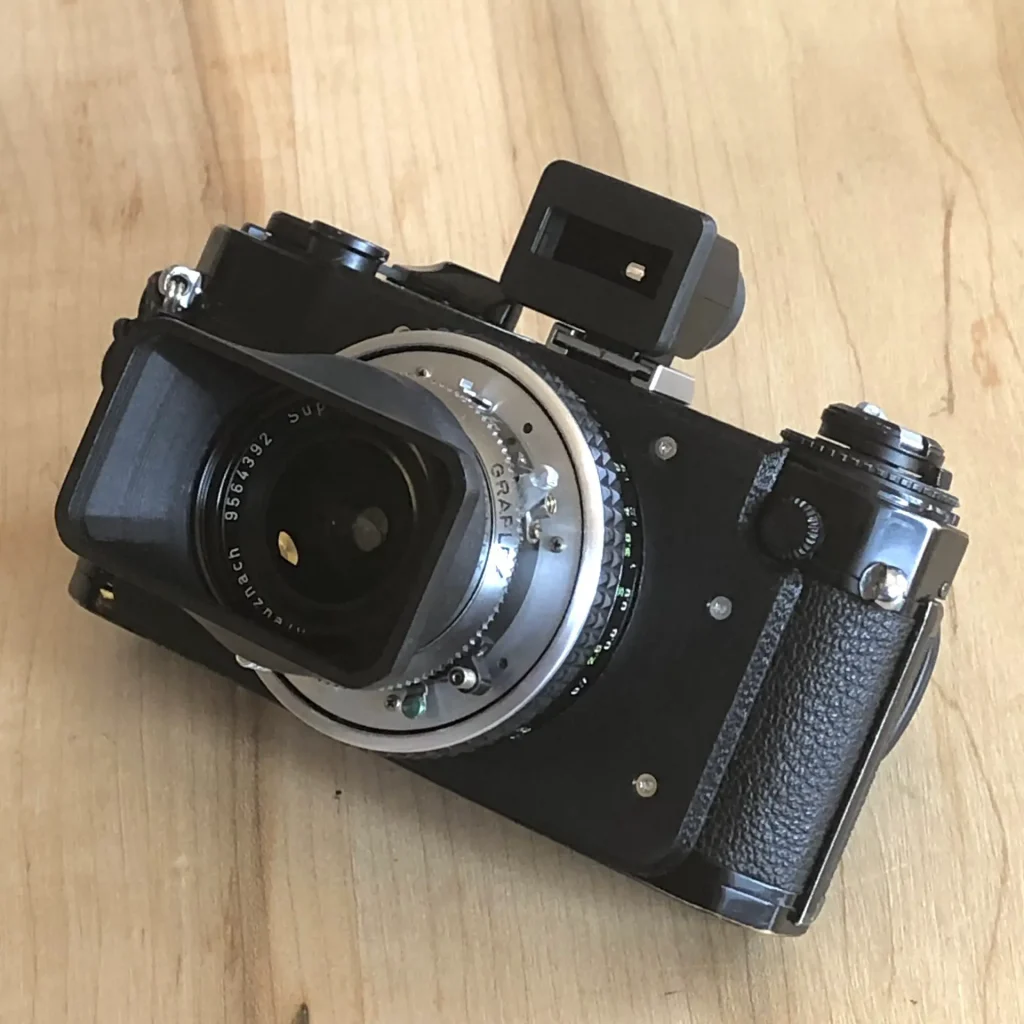
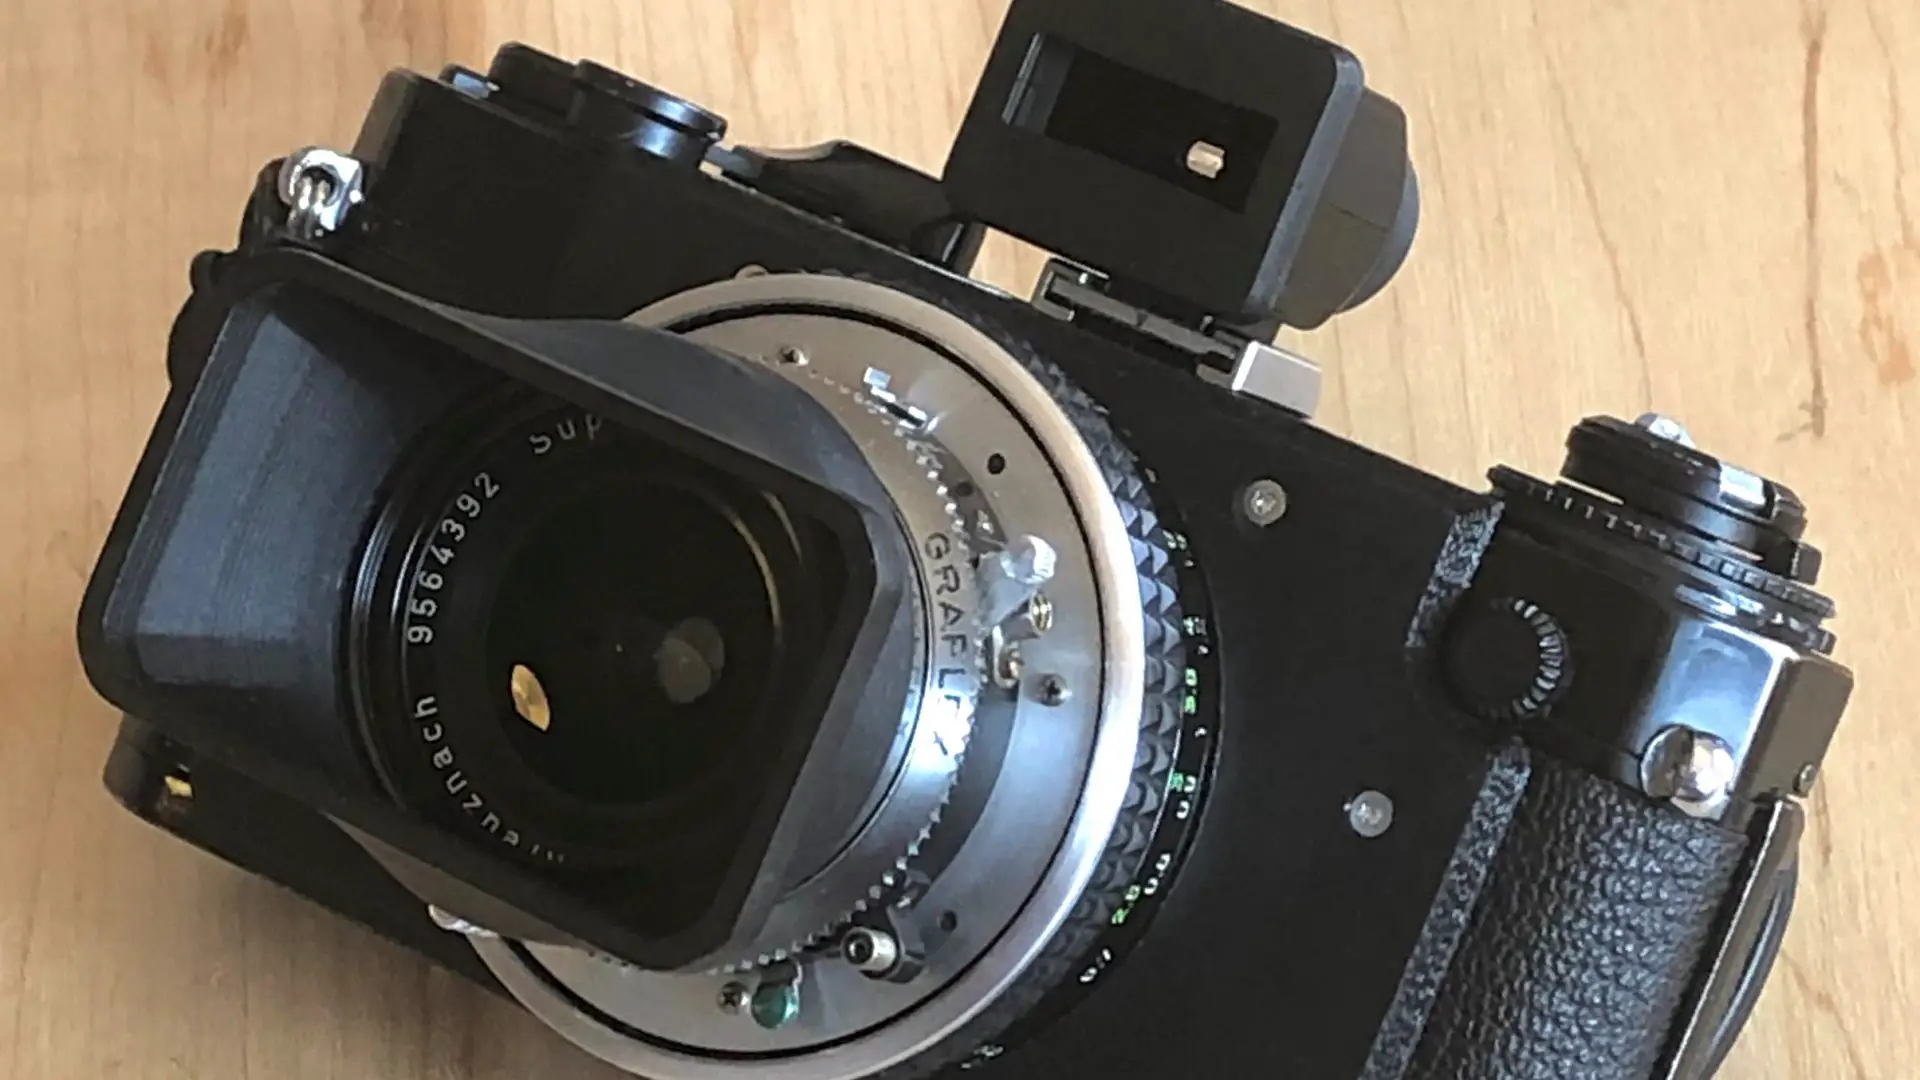
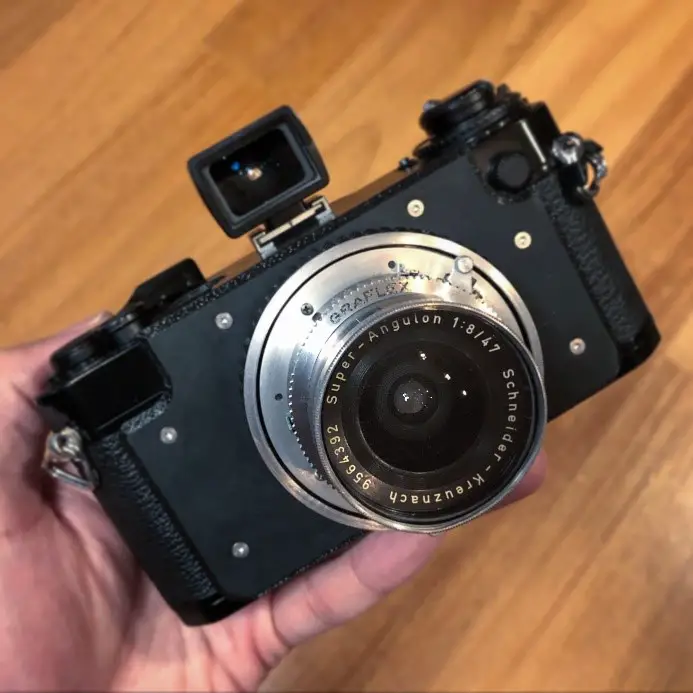
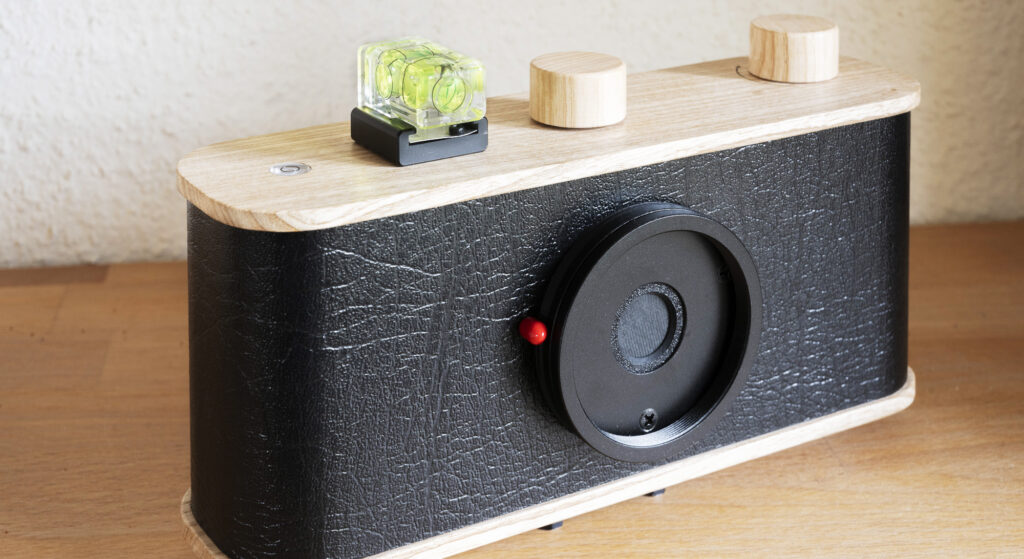
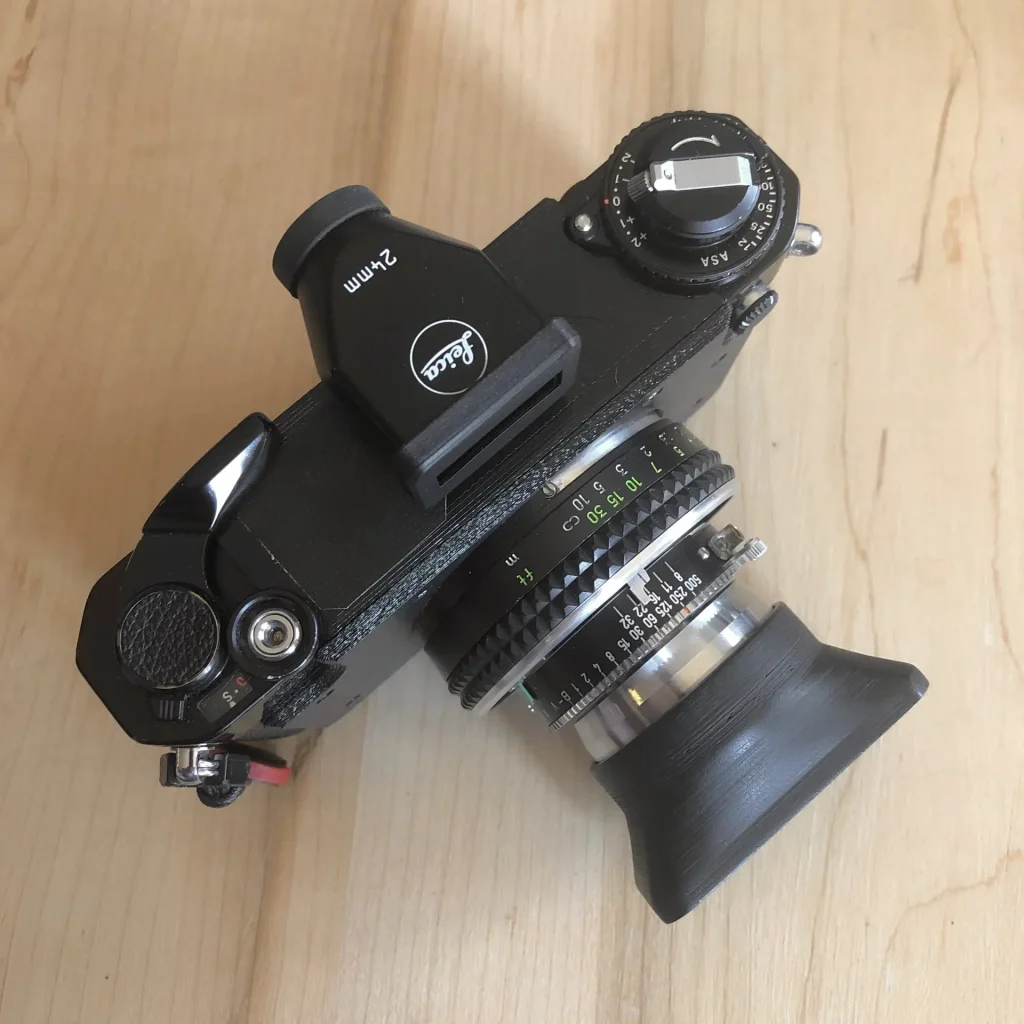 Here is the final product (minus the bubble level)
I went out for a quick walk with my dog and took the FauXpan out for its test run loaded with Kodak Tmax 400. To ensure the focus was proper, I shot the whole roll at the maximum aperture of F8. I scanned at 1200dpi on an old Canoscan 8800F (unfortunately my Nikon Coolscan didn’t accept beyond the normal 24x36mm frame and I didn’t want to stitch multiple scans).
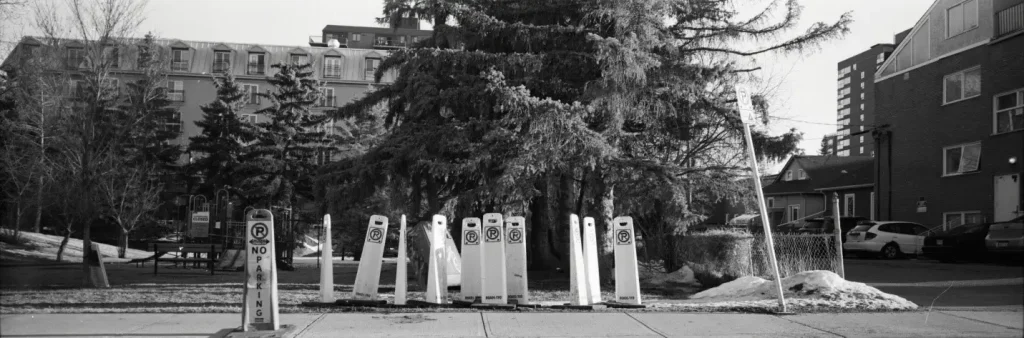
The first thing I noticed looking at the negatives was that framing was high. This mostly had to do with how the lens was mounted to the body. To allow such a large helicoid to fit on the front, I had to offset the center axis by 2mm up. This effectively made this lens a permanent shift lens. To frame correctly, I should have made a viewfinder mask that is also shifted up. A few quick edits to the 3D model and I printed a new frameline mask.
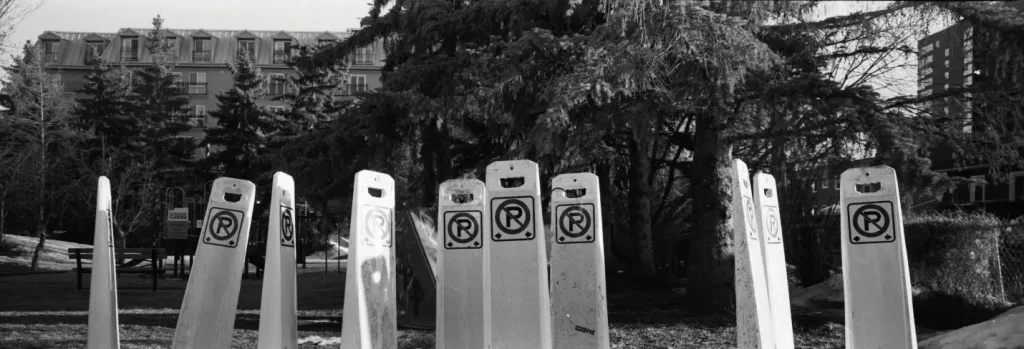
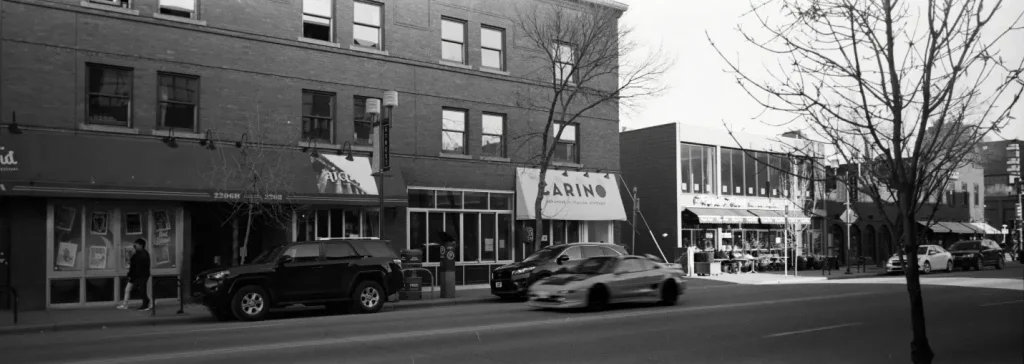
Careful examination of the scans also showed that the focus was off and infinity a bit blurry. Since closer objects were looking sharp, it appeared that the lens back focus distance was not short enough. Thankfully, it was pretty easy to disassemble the helicoid and shave a hair off the lens mounting plate. To confirm it was usable, I properly set up a focus target at 1m to confirm that near focus was adequate, and then double checked the focus at infinity. Now I should be pretty confident with the focus and can move on to the next roll! Another roll of Kodak Tmax 400 was loaded and I went for a quick stroll through downtown Calgary.

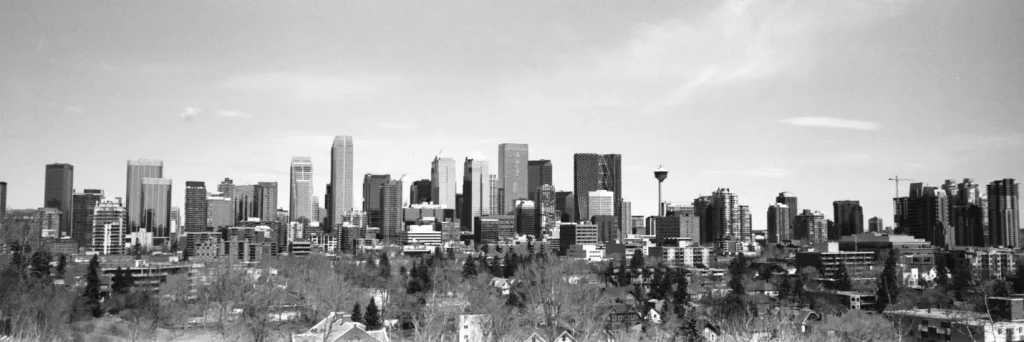
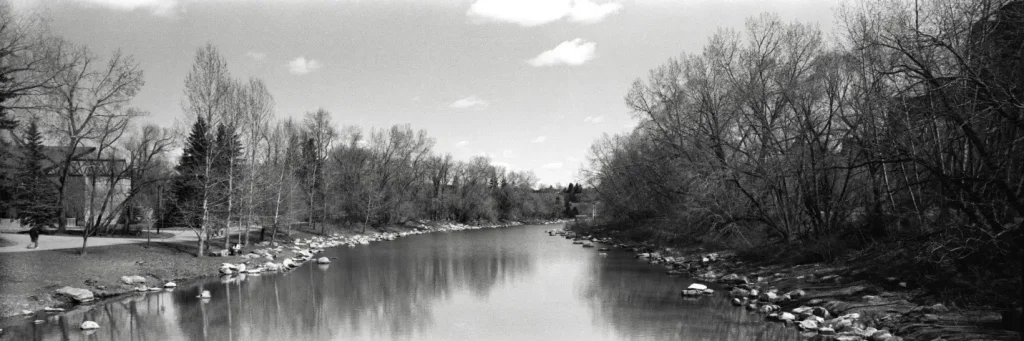
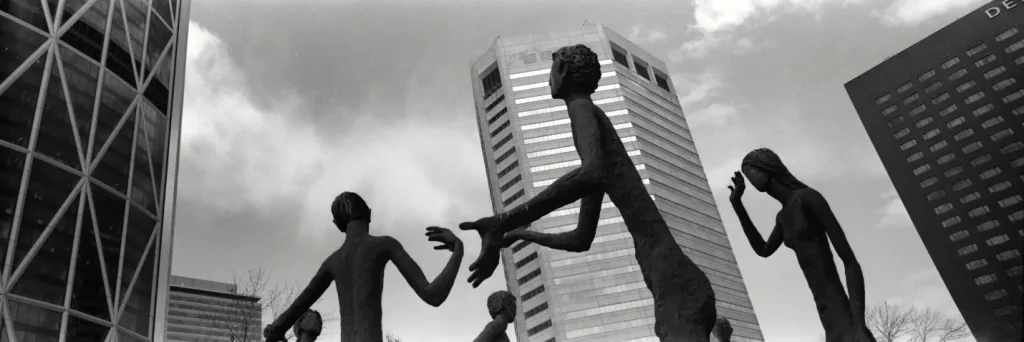
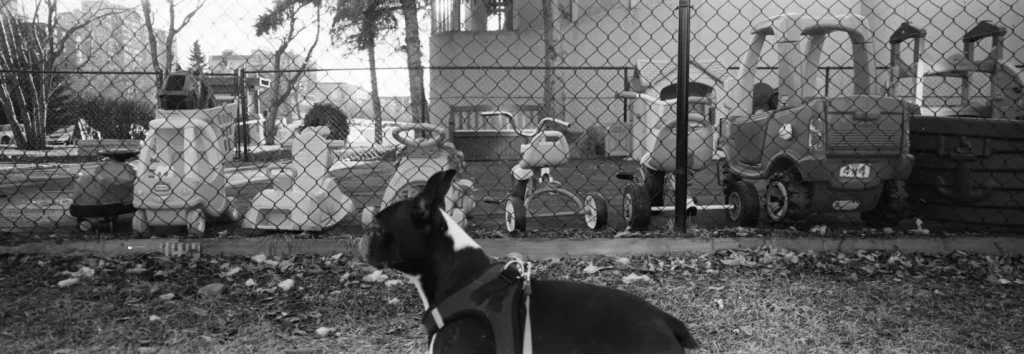
Framing is perfect this time around. You can see a bit of falloff at the corners but not noticeable in most shots. Care must be taken to not tilt the camera and get really bad perspective distortion. Focus this time is right on and the frame is sharp from corner to corner. It’s very easy to crop to a 1:3 ratio and that is very pleasing to the eye.
All in all, I’m very happy with the results and it seems like other folks are as well – I have been contacted about making more of these panorama conversions. To inquire, please get in touch with me on Instagram @watchmemake. Cheers!
Share this post:


Comments
Kurt Ingham on FauXPAN, Just Another DIY 35mm Panorama Camera – By Freeman Lin
Comment posted: 22/06/2020
[email protected]
Nick Lyle on FauXPAN, Just Another DIY 35mm Panorama Camera – By Freeman Lin
Comment posted: 22/06/2020
Leo on FauXPAN, Just Another DIY 35mm Panorama Camera – By Freeman Lin
Comment posted: 22/06/2020
'@colinrobinphoto on FauXPAN, Just Another DIY 35mm Panorama Camera – By Freeman Lin
Comment posted: 22/06/2020
Comment posted: 22/06/2020
Bruno Chalifour on FauXPAN, Just Another DIY 35mm Panorama Camera – By Freeman Lin
Comment posted: 22/06/2020
Ted on FauXPAN, Just Another DIY 35mm Panorama Camera – By Freeman Lin
Comment posted: 22/06/2020
Very cool camera, hats off to you, amazing project. I’ll take one !
Jamie W on FauXPAN, Just Another DIY 35mm Panorama Camera – By Freeman Lin
Comment posted: 23/06/2020
bp_reid on FauXPAN, Just Another DIY 35mm Panorama Camera – By Freeman Lin
Comment posted: 23/06/2020
andy on FauXPAN, Just Another DIY 35mm Panorama Camera – By Freeman Lin
Comment posted: 23/06/2020
Khürt Louis Williams on FauXPAN, Just Another DIY 35mm Panorama Camera – By Freeman Lin
Comment posted: 23/06/2020
Srinidhi A on FauXPAN, Just Another DIY 35mm Panorama Camera – By Freeman Lin
Comment posted: 23/06/2020
Sacha Cloutier on FauXPAN, Just Another DIY 35mm Panorama Camera – By Freeman Lin
Comment posted: 24/06/2020
Robert Behr on FauXPAN, Just Another DIY 35mm Panorama Camera – By Freeman Lin
Comment posted: 27/09/2021
Thnks
Robert on FauXPAN, Just Another DIY 35mm Panorama Camera – By Freeman Lin
Comment posted: 23/02/2022