Otherwise known as “third time’s the charm”.
I have recently decided to plough on with my goal of developing film at home and here is the story of my first 3 rolls.
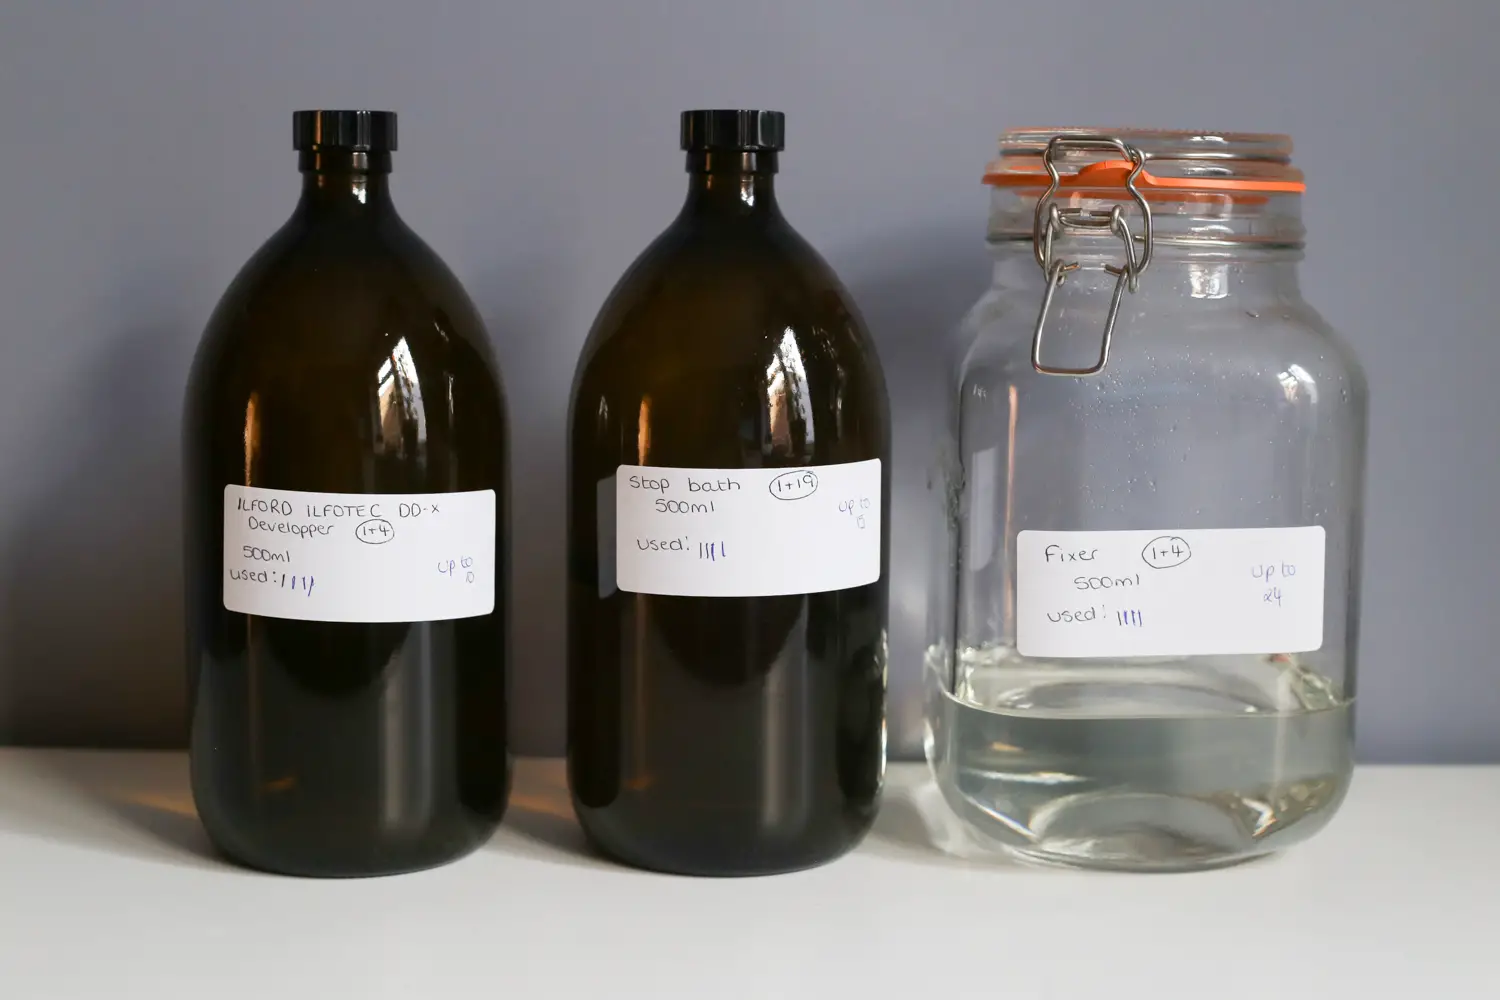
I have developed in a lab setting with a mentor before, so I knew the basics and opted to purchase the chemicals that I had used in the lab to reduce my incessant researching and because I was happy with the result that I got there. That is Ilford DD-X and the Ilford Stop Bath, Fixer and Wetting Agent – yes I know you can do without some of these and homemade variations can be used but I decided to follow instructions to the letter whilst I’m a beginner.
Master the basics before you begin experimenting as they say.
Roll 1
Ilford HP5 Plus. Shot at box speed through my Pentax ME Super.
I spent about an hour preparing; making sure that I had everything set out, everything labelled, step by step instructions next to me to follow, timers set up, and I also practised loading the tank with an old film until I was confident in the technique. I got the relevant bits and pieces into my dark bag and began. And that’s where it fell apart for me.
I spent another hour fumbling in the dark bag, unable to get the film onto the reel. It was getting incredibly hot in the bag and I was feeling frustrated, disappointed and just so, so gutted. In the end my husband said “get in the coat cupboard where you’ve got some space to work”. That’s the trick. Getting it all out in the open meant I could get the film loaded so much more easily. (My coat cupboard is light tight as proved by the next couple of rolls).
My next error was not checking the temperature of the chemicals first and thinking that I needed to warm them up. Currently room temperature is 20 degrees and so, once I realised they were too warm, I had to wait around for the temperature to come down.
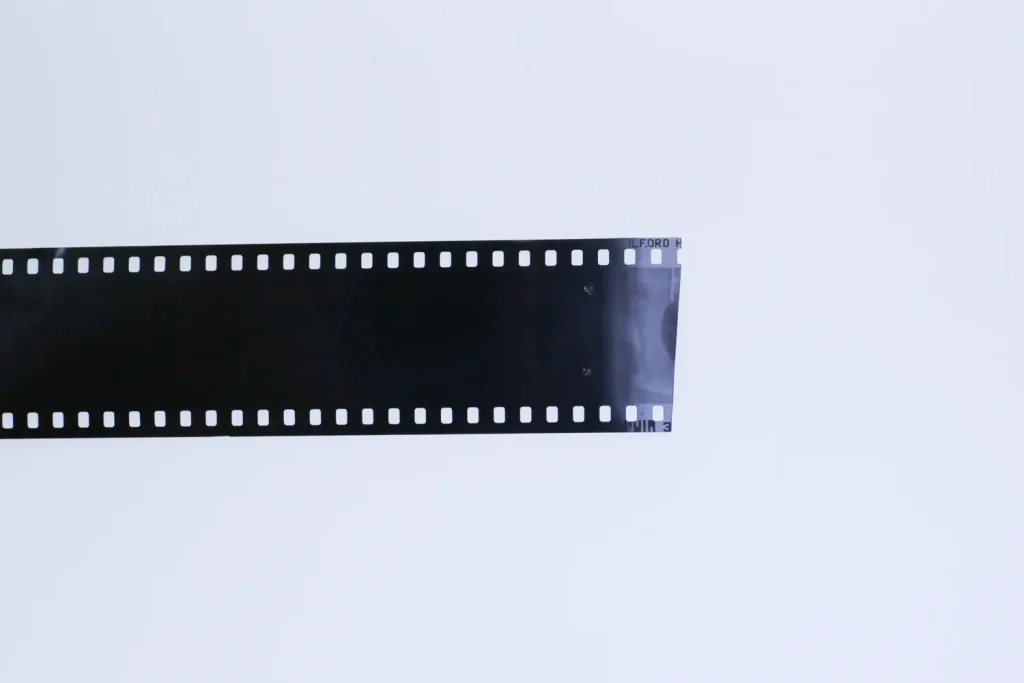
Once the developing process began it all went fine. No hiccoughs. But when I pulled the film out at the end it was a completely black roll of film.
I don’t even have a word that covers how I felt at that point.
I did some troubleshooting, looked at “The Darkroom Handbook” by Michael Langford and worked out that somewhere along the line the roll had been exposed to a lot of light. I was pretty sure it wasn’t the camera as I’ve had some successful rolls through that recently and I was confident that the developing tank was light tight and so that just left the loading process to look at.
I realised that my dark bag has arm holes that are far too wide for my arms, the supposedly tight elastic is too baggy and, with having spent an hour fumbling around, a lot of light was getting in. Needless to say I will not be using the dark bag again!

Roll 2
Agfa APX 100. Shot at box speed through my Chinon CX.
I knew something was wrong with this roll from the moment I tried to rewind it. It was far too slack almost straight away. My first thought was that the rewind mechanism might be faulty and not locking to the cartridge or perhaps that the film had unspooled completely from the cartridge. Either way I didn’t try to remove the cartridge until I was in the coat cupboard.
As I gingerly felt inside the camera for some clue as to what had happened I realised that I couldn’t feel any film. It was all back inside the cartridge. So I took it out, opened it up and loaded it onto the reel as normal. This time the chemical process went much more smoothly. This time I pulled out a perfectly exposed but blank roll of film.
For crying out loud.
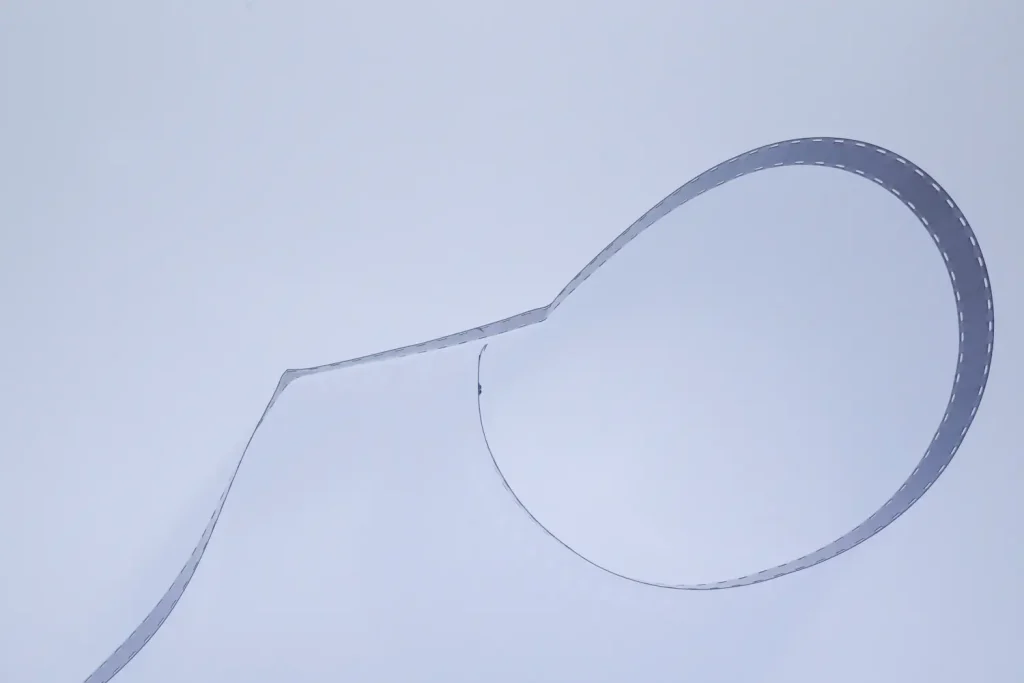
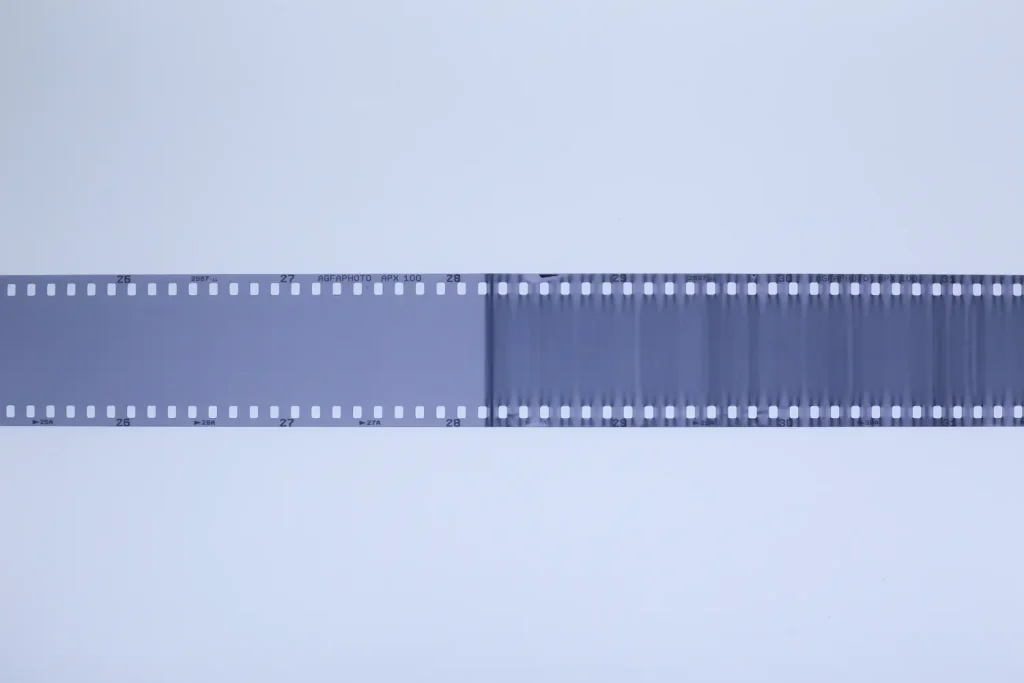
My first instinct would be to say that I hadn’t loaded the camera properly as this is the most likely cause of this sort of error. However there are some odd markings and creases in the film which give me reason to doubt that theory. The folds in the film were present when I was loading it onto the reel, straight out of the cartridge, I’ve tried to photograph the effect but it’s hard to capture how prominent these folds are. The severity of the folds leads me to think that the film has been stored folded and not that it has folded in the course of removing it from the cartridge and loading. From the point of the first fold the film has unusual stripes across, from sprocket hole to sprocket hole which may be a result of the folds affecting the evenness of the development.
A final theory is that my camera may be malfunctioning as it has been sat unused for a few years and sat in a window where it could be exposed to extremes of temperature. (I know I shouldn’t treat my cameras like that!)

Roll 3
Agfa APX 100. Shot at box speed through my Canon 1-N.
I decided not to take any chances this time, I pulled out my trusty Canon which is the easiest to use 35mm camera I own and which has successfully shot a couple of rolls recently so I could be confident that it was in good working order.
With my previous 2 rolls of film I had taken a long time over shooting them as I am also really trying to work on my exposure and composition. Feeling like I had wasted 3 weeks, I shot this roll relatively quickly over a couple of days.
There was an extra layer of nerves to this development as my best friend of 20 years had decided she wanted to watch along and learn about the process. I wasn’t sure how I would cope with a semi-public, third failure.
I actually enjoyed playing the Blue Peter host (sorry if you don’t get the reference) and it wasn’t until we started the rinsing process that I began to feel those nerves surface. What if it was another failed roll? What could have gone wrong this time? I was wracking my brains to remember anything that could have been an error.
I began to pull the roll off the reel and, lo and behold, IMAGES!
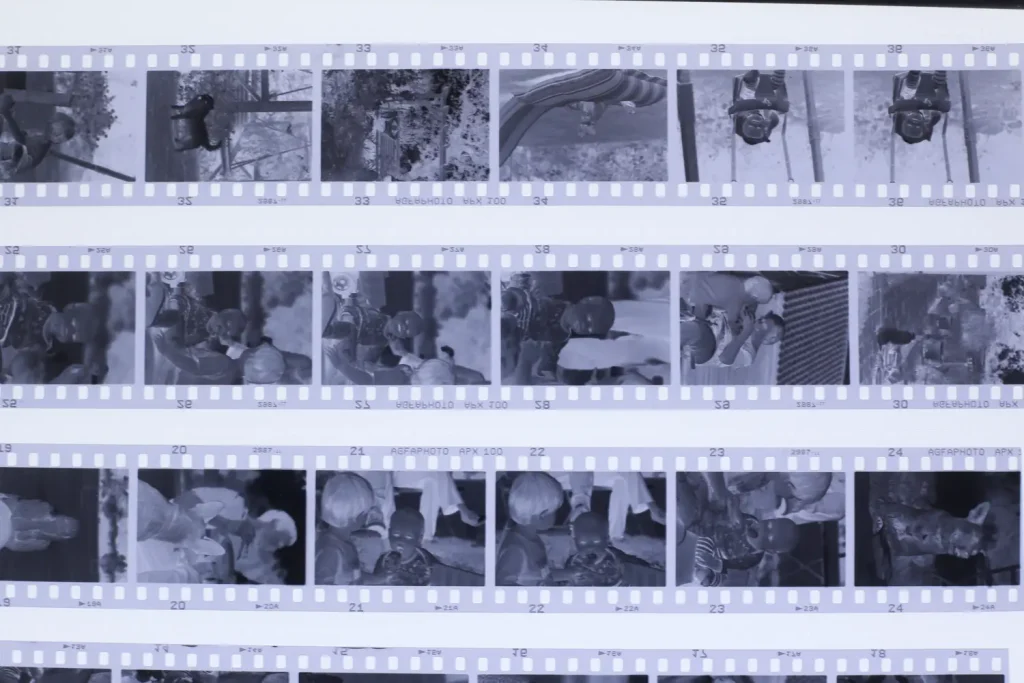
Beautiful black and white negatives!
And so now I feel I can relax a little. I’ve decided to only shoot relatively cheap black and white film for now (Kentmere 100 and Ilford HP5 are in my stash) and I’m holding off on any 120 film until I’ve had a few more successes but I’m happy. The next task is to learn to digitise them myself (my darkroom dreams are still a little way away), I’m just waiting for one final bit of kit that I need and then we can see whether the images are any good.
I really hope you’ve enjoyed this and that it may be of use to others who are thinking of starting to develop black and white film. If you are interested in following along with my learning journey I have more posts on my website and I also post on Instagram.
Share this post:


Comments
Bob Janes on My first 3 rolls of home developed film – By Holly Gilman
Comment posted: 22/08/2020
I remember my first couple of rolls being a bit disastrous - back in 1978 I had access to a dark room but didn't realise that the safe light was only safe for prints (how could anyone load the reel in total darkness?) The next roll was covered in fingerprints and grime and the prints ended up insufficiently fixed. It gets better with practice and learning from your mistakes (although I try not to get complacent).
How are you planning to digitise - scanner or camera copy?
Comment posted: 22/08/2020
Comment posted: 22/08/2020
Comment posted: 22/08/2020
Michael Jardine on My first 3 rolls of home developed film – By Holly Gilman
Comment posted: 22/08/2020
Comment posted: 22/08/2020
Howard S Shubs on My first 3 rolls of home developed film – By Holly Gilman
Comment posted: 22/08/2020
Rod ZX on My first 3 rolls of home developed film – By Holly Gilman
Comment posted: 22/08/2020
Nice article, sorry to hear about your two lost rolls. That's why I'm not willing to self develop, I find every click I do is a little treasure that I want to keep and edit in post, share with family and friends. I know that you wanted to self develop and in the end you achieved your goals and that is a great achievemen, kudos to you, you are brave. I wish it was easier so for the time being I will continue to support my local film lab. They do a great job. Guaranteeing a positive outcome every time.
Comment posted: 22/08/2020
Peter on My first 3 rolls of home developed film – By Holly Gilman
Comment posted: 22/08/2020
Comment posted: 22/08/2020
Sandy Noble on My first 3 rolls of home developed film – By Holly Gilman
Comment posted: 22/08/2020
This system works for me. Good luck and have fun.
Comment posted: 22/08/2020
James T on My first 3 rolls of home developed film – By Holly Gilman
Comment posted: 22/08/2020
[127 is a whole other ball game as it is so tightly rolled that it's very hard to start it into the reel].
Comment posted: 22/08/2020
Comment posted: 22/08/2020
Comment posted: 22/08/2020
Alex Vye on My first 3 rolls of home developed film – By Holly Gilman
Comment posted: 22/08/2020
Comment posted: 22/08/2020
Jeff on My first 3 rolls of home developed film – By Holly Gilman
Comment posted: 22/08/2020
Comment posted: 22/08/2020
Ken Rowin on My first 3 rolls of home developed film – By Holly Gilman
Comment posted: 22/08/2020
Comment posted: 22/08/2020
Daniel Castelli on My first 3 rolls of home developed film – By Holly Gilman
Comment posted: 23/08/2020
Thanks for posting your experiences regarding film developing. They bring me back to my beginnings 50 years ago. I still get excited as a kid on Christmas morning when I take the film off the reel and hang it to dry.
Developing 120 soon? In 1975 I was a Teaching Assistant in the photo department of my college. I ran the darkroom and my prof taught the classes. I had a person load the backing paper on the reel and toss their film in the garbage. I could never figure out how they did that.
My career was in education. I taught B&W photography and Graphic Design to high school students (14-18.) I never worked a day in my life because I taught what I loved. Each year, new adventures, fresh eyes and lots of talent. One year, a student was using a changing bag, and didn't check it out before loading film. A large, mostly harmless spider was in the bag and helped the student load their film...Mishaps were few and far between.
Here's my advice nuggets (from a film dino): Every part of the photographic process is interconnected and carries equal weight. Exposure is just as important as fixing the film properly. Eliminate as many variables as possible. Ideally: one camera/lens, one film, one developer. Work them until they become second nature. Create repeatable habits: i.e., agitate your film the same way each time, used distilled water for processing, etc. A garbage can is the most important piece of post-processing equipment you can have. You will never make a mistake that has not been made before by me or someone else. Just try and not to repeat the same mistake. Carry your camera everywhere, and I mean everywhere. Most of all, have fun. You are creating original art - never seen before, and no one can copy you. You are showing the world your world. Kinda cool.
Regards,
Dan (flickr.com/photos/dcastelli9574/)
Comment posted: 23/08/2020
Miichael McDermott on My first 3 rolls of home developed film – By Holly Gilman
Comment posted: 23/08/2020
Comment posted: 23/08/2020
Eric Norris on My first 3 rolls of home developed film – By Holly Gilman
Comment posted: 24/08/2020
I don't think anyone else has mentioned this, so I will suggest that you try some of the new "monobath" chemicals for black and white film. It's very easy and much faster than standard chemicals. One chemical to develop/stop/fix in about 3 minutes (reusable for about 24 rolls) plus a plain water rinse. I'm currently using CineStill's Df96 monobath, but I have had good results with Film Photography Project's monobath as well. Each is about $20 per liter, which takes your processing down to about a buck a roll. You can even push/pull if you want (I haven't tried that yet).
Professionals or others looking for specific results will probably prefer standard chemicals, but for me it works perfectly well.
--Eric
Comment posted: 24/08/2020
Mark Verona on My first 3 rolls of home developed film – By Holly Gilman
Comment posted: 25/08/2020
Mark Verona on My first 3 rolls of home developed film – By Holly Gilman
Comment posted: 25/08/2020
Your difficulties with film remind me of my photo 101 class I took in collage back in the day.
I am now semi-retired and want to go back to taking analog photography again.
I used to develop a lot of B&W film. I prefer the Paterson reels to load my film onto over the mental reels - I find them easier to load.
I load the film onto the reels at night. In our house, one of the bathrooms has only one small window. I cover that window & have a good place to load my film.
When developing the film, I first start with water, I invert the developing tank twice and empty &then start the developing process. It's important to use the manufacturer's developing times. If the developer is warm, I place an ice cube in a sealed plastic bag & put it in the developer beaker to lower the temp.
I sold most of my camera equipment, but kept a bag of Nikons. I recently bought a 120 film camera. The Nikon FM I have is probably like the 35mm cameras your using.When you have loaded the film in the camera, make sure that when to push the film advance lever, (on right) the device that holds the film cartridge in place, (top left), spins. This way you know the film is advancing properly.
I hope there are some recommendations that will help you, Mark V.
Comment posted: 25/08/2020
Neal A Wellons on My first 3 rolls of home developed film – By Holly Gilman
Comment posted: 28/08/2020
Comment posted: 28/08/2020
How to Get Started Developing Black & White Film for £25 (or Less) - by Sroyon Mukherjee - 35mmc on My first 3 rolls of home developed film – By Holly Gilman
Comment posted: 07/09/2020
Get Began Creating Black & White Movie for £25 (or Much less) - by Sroyon Mukherjee | Gadget News Plus on My first 3 rolls of home developed film – By Holly Gilman
Comment posted: 07/09/2020
Where you can find more of my writing… EEEK – School of Holly on My first 3 rolls of home developed film – By Holly Gilman
Comment posted: 28/12/2020
Dave Henderson on My first 3 rolls of home developed film – By Holly Gilman
Comment posted: 05/07/2021
In about 1980, I'd first got into home processing and made a fair go at it, but life and career changes got in the way, and I didn't get back into photography for a good few years. Sure, I'd had an OM-1 but never did any home processing with that, just sent them off and waited.
Then digital came along and re-awakened my interest. Along with that, the old urge to develop my own re-emerged.
I'd snapped up a pile of good condition Jobo kit about twelve years ago, and a couple of years of frantic processing followed, but the electons won out in the end.
So, for the past decade or so, the chemical kit's been sitting idle, but ready to be used again.
Photography can be funny like that - you can veer from taking hundreds of pics in a week to none for months.