I’ve thought about covering off some of the basic principles of photography a few times on this website, but often find myself coming to the conclusion that someone else will have done a better job. The problem is, when I’m asked questions about some of the basics, most of the links I find online are so heavily based on digital photography, that I worry they create confusion in those looking to approach learning photography via analogue mediums.
As such, nearly 6 years into running this website, I thought I might put together a few articles on some of the basic principles of photography, but talk about them in the context of analogue rather than digital.
This first article is to focus on three key variables in photography: shutter speed, aperture and ISO (film speed), and the relationship between them.
Exposure
The first thing to understand about these three variables is that if you strip a camera back to its most basic function, shutter speed, aperture and film speed are the only things beyond light itself that you need to understand to take a photo. These three variables amount to what’s called “Exposure”.
Exposure defines how light or dark a photo will be. With there being three variables, the relationship between them is often referred to as the “Exposure Triangle”. By understanding the exposure triangle it is not only possible to achieve correct exposure, but it also opens the up doors to greater creativity within photography.
It’s worth noting at this stage that the concept of “Correct Exposure” is a very deep hole – so for the sake of this post, let’s just assume we always want to achieve an even distribution of light, mid and dark tones across our photo. This is about the most simple definition of correct exposure I can think of. As a definition, it overlooks many potential creative goals – but to obtain the correct exposure, it is important to understand all three of the key variables, and indeed the relationship between them.
Before we get to the relationship between them, it’s useful to understand how each one of the variables has a different impact on how your photo will look. And so, the best place to start is to understand what they do and how they work.
Shutter Speed
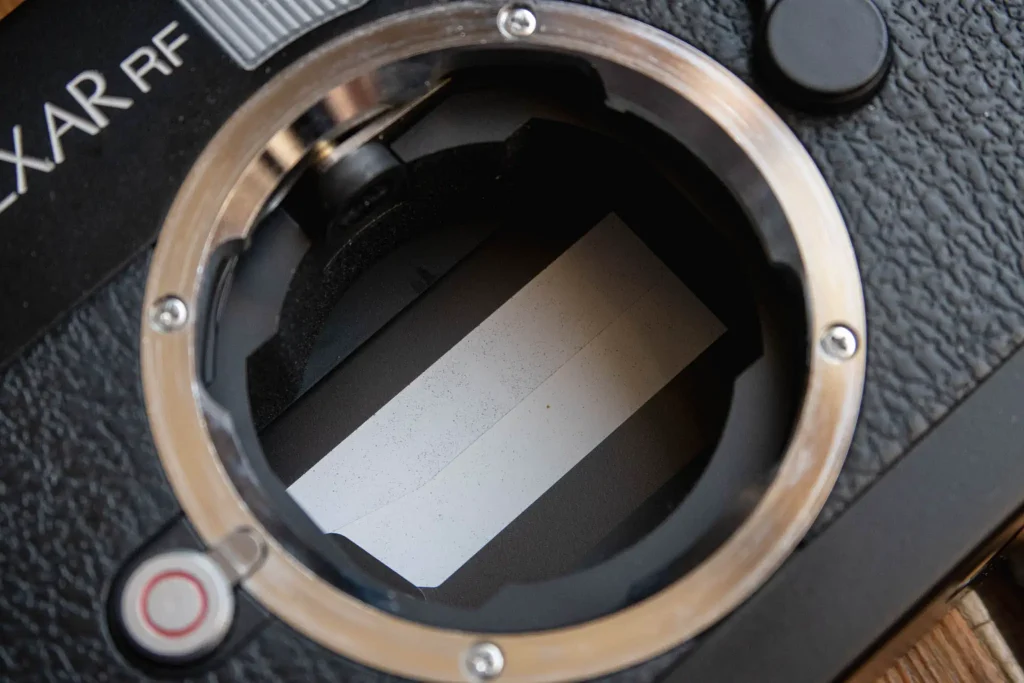
Inside all cameras, there is a component called a “shutter”. Open the shutter and light travels through to the film behind. Close it and it prevents the light from hitting the film behind. The amount of time a shutter is open is defined by the “shutter speed”. A slow shutter speed let light through for a longer amount of time, and a fast shutter speed lets light through for less time.
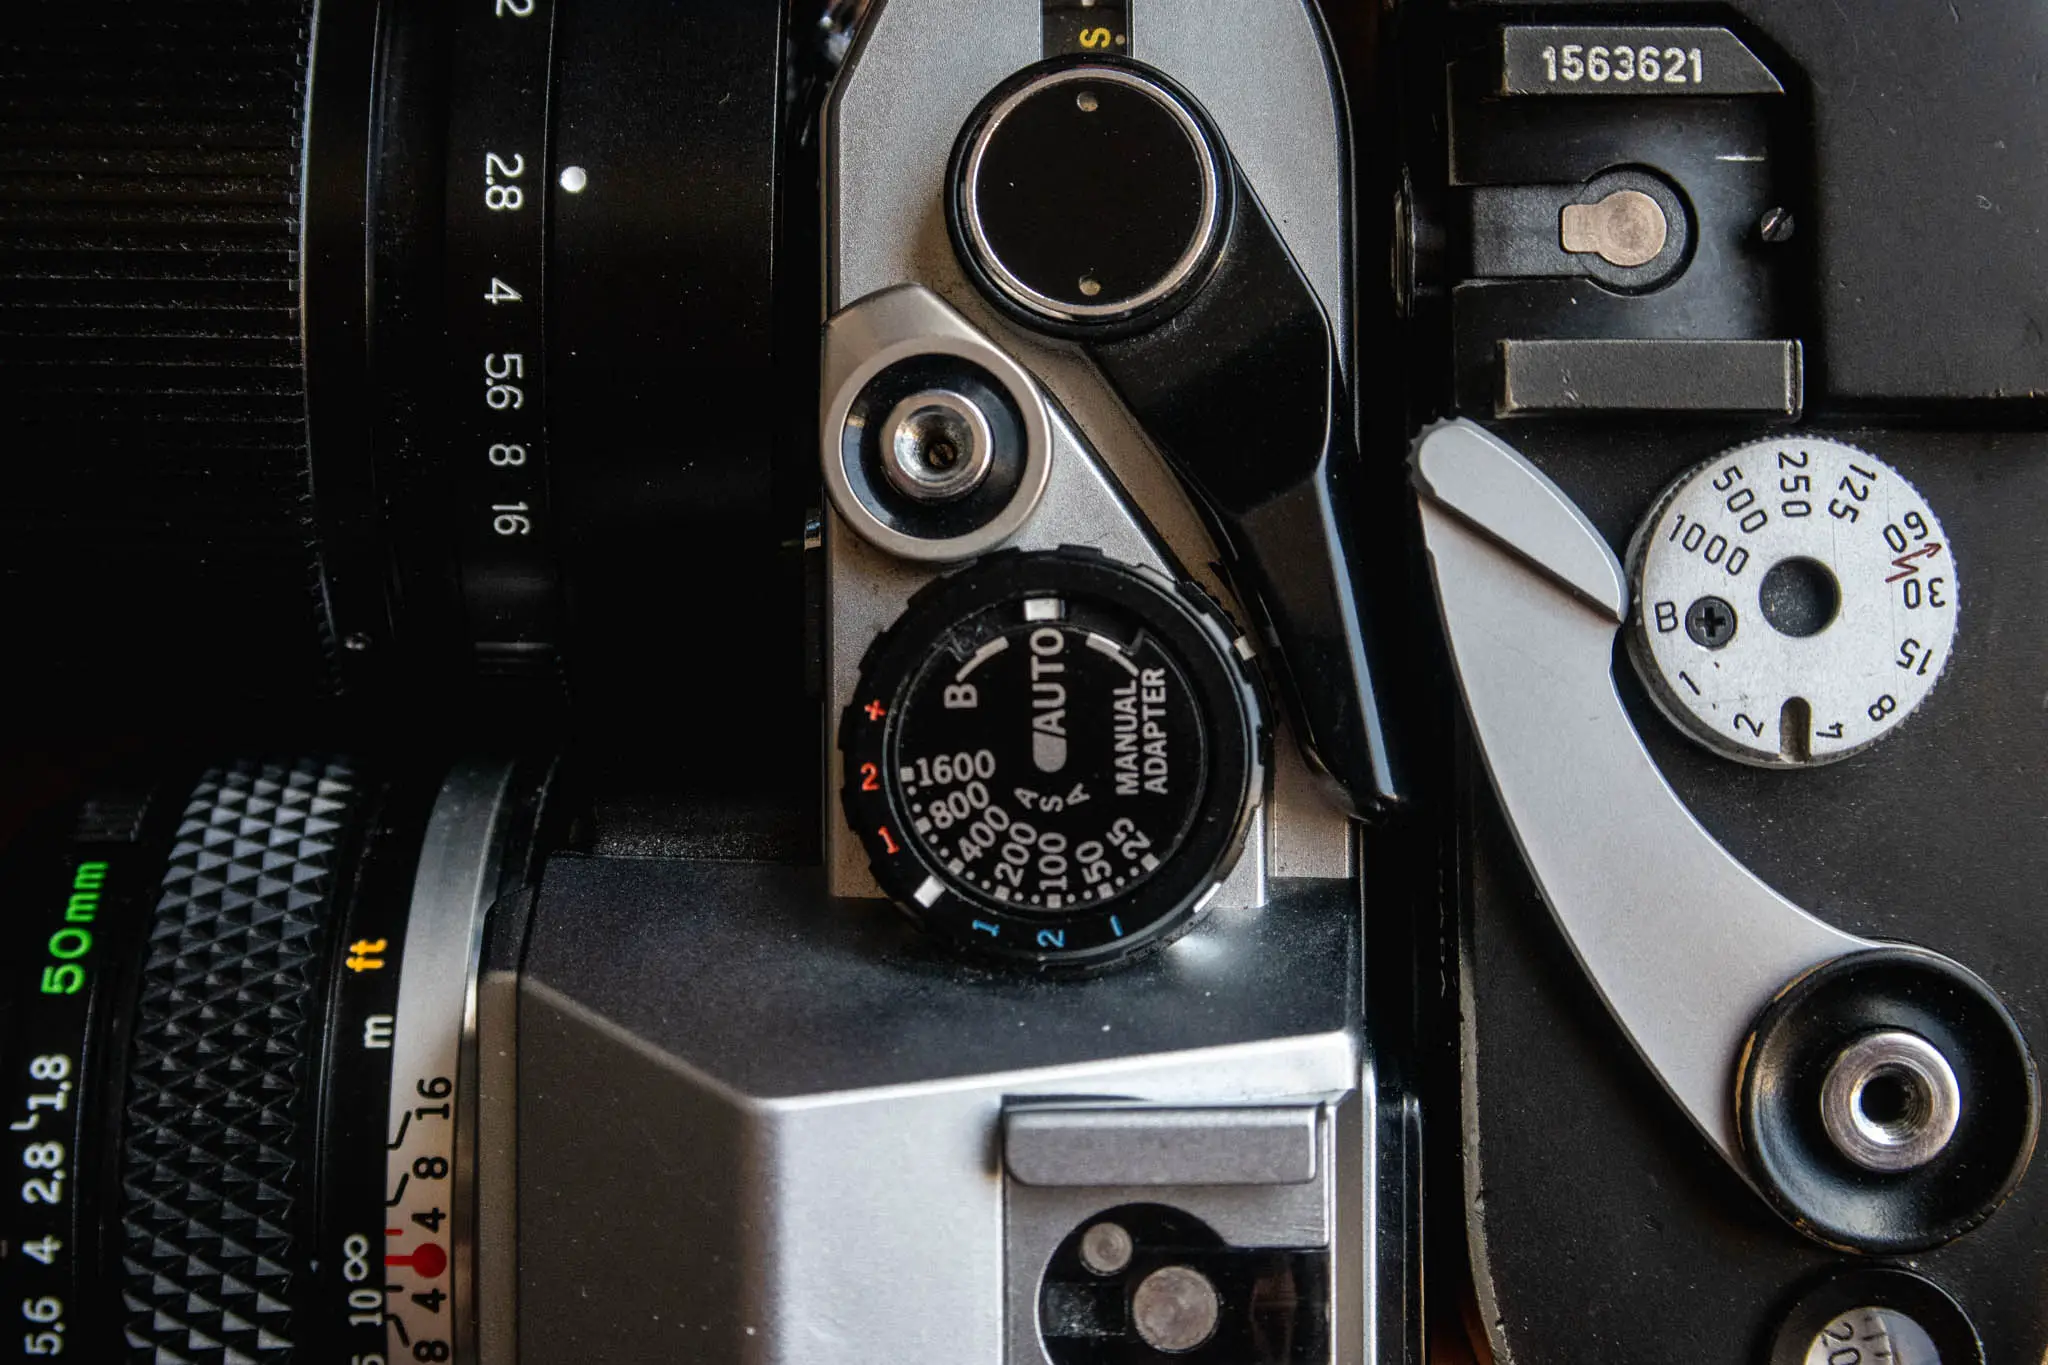
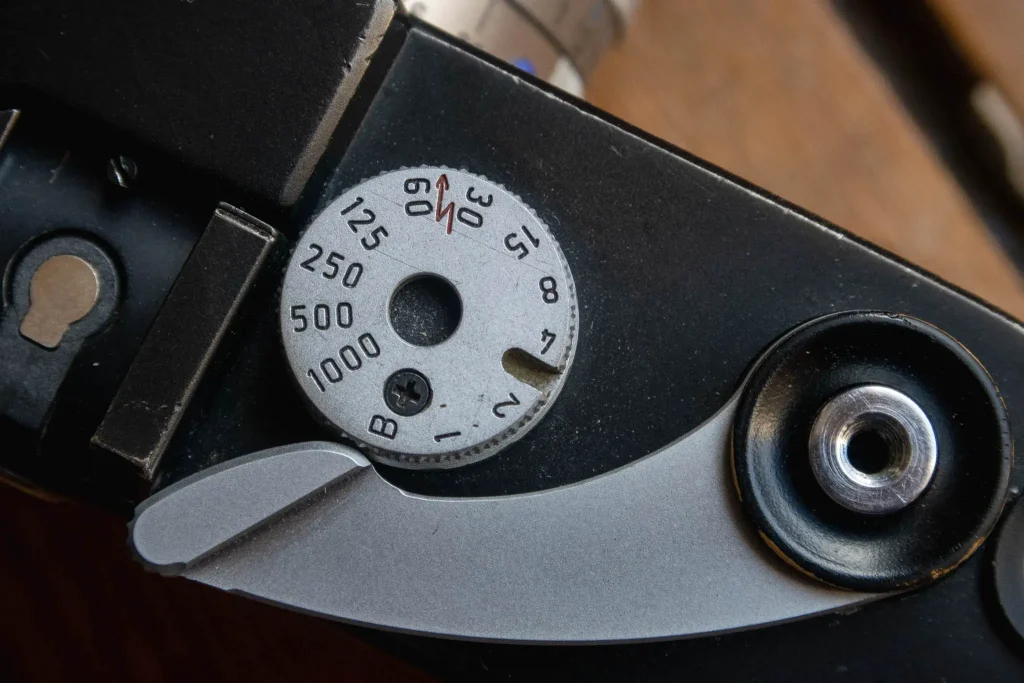
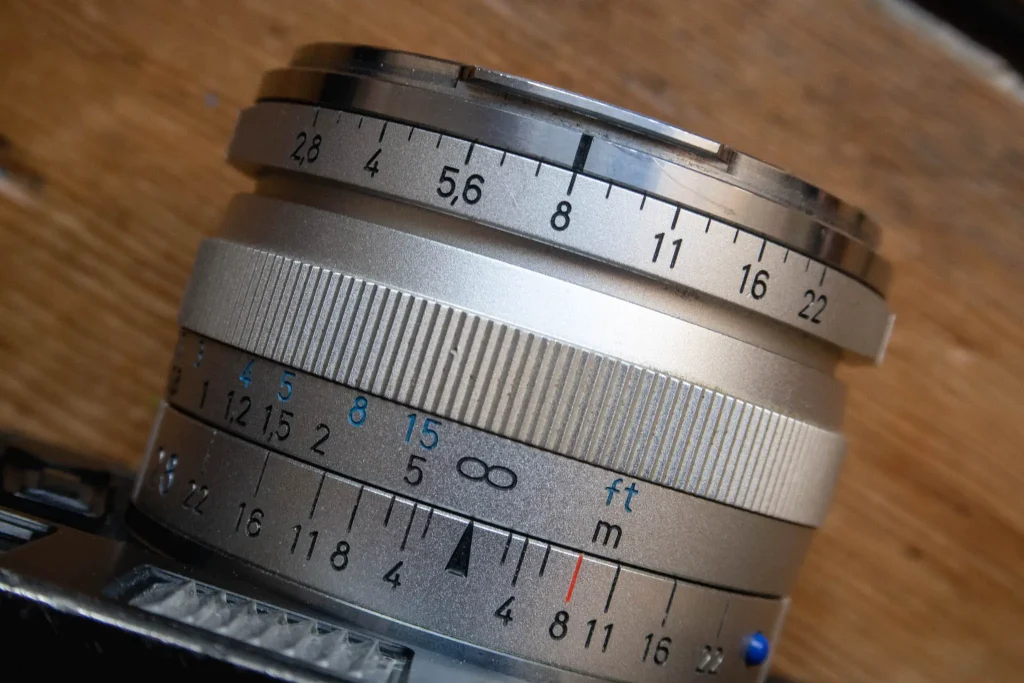
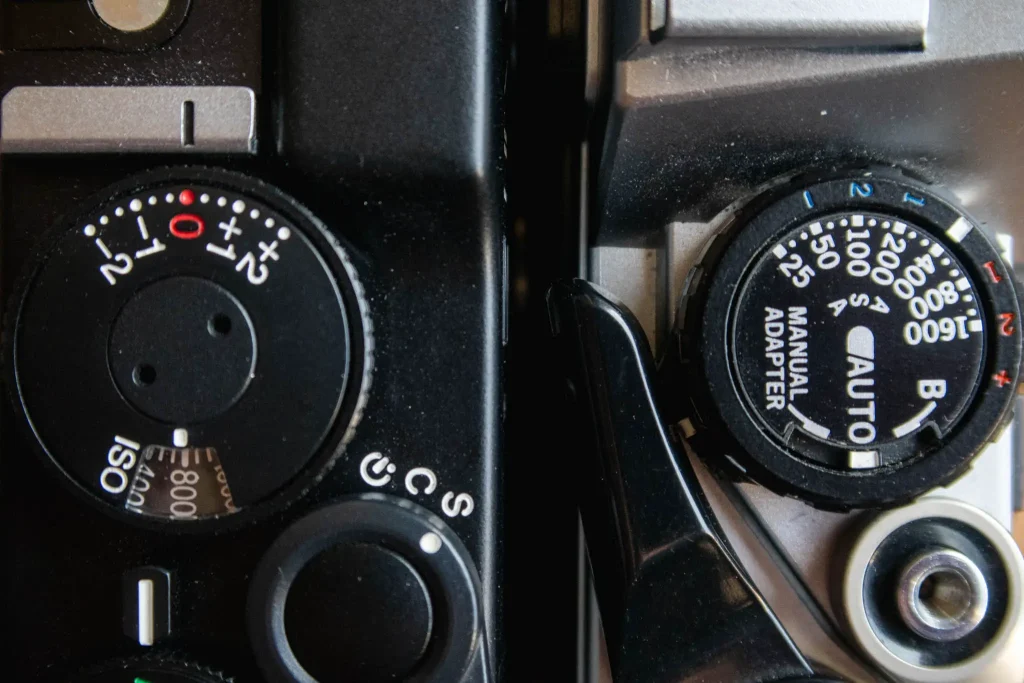
Shutter speed is measured in seconds and fractions of seconds. If you look at the picture below you will see a shutter speed dial with shutter speeds from 1 to 1000. 1 is 1 whole second, 1000 is 1/1000th of a second. 125 is 1/125th of a second.
Doubling and Halving
Looking at the scale of numbers you might also note that there seems to be a system, though the system isn’t quite right. The scale on my camera goes 1, 2, 4, 8, 15, 30, 60, 125, 250, 500, 1000. With the exception of the difference between 8 and 15 and 60 and 125 the numbers double or halve. The slight discrepancy is just a product of rounding to keep the numbers, well, round. This standardisation was introduced in the 1950s so older cameras might have different numbers, but the principle is essentially the same.
Stops and Shutter Speed
The numbers double and halve for good reason too. Doubling and halving is the underlying system behind how exposure works. With shutter speeds, changing from one setting to the next halves or doubles the amount of time light is able to travel through to the film behind. This is called changing the settings by one “Stop”.
So, when you increase the shutter speed by one stop, you are halving the amount of time light travels through to the film. When you decrease the shutter speed by one stop you are doubling the amount of time light travels through to the film.
Some Examples
Changing from 1/125th of a second to 1/250th of a second is increasing the shutter speed one stop. This halves the amount of time light travels to the film.
Changing from 1/60th to 1/30th is decreasing the shutter speed by one stop. This doubles the amount of time light travels to the film.
Change from 1/500th to 1/60th is decreasing the shutter speed by 3 stops. From 1/8th to 1/125th is increasing the shutter speed by 4 stops. etc.
The Impact of Different Shutter Speeds
The impact of a fast shutter speed is that it’s more likely to freeze any movement in your subject. The faster the subject is moving the faster the shutter speed needed to freeze it.
With slow shutter speeds you’re more likely to see motion blur in your subject if it’s moving, or even cause motion blur if the camera isn’t held or supported still enough.
A Shutter Speed Tip
If you’re just starting out, it’s useful to know that there’s a lower limit to how steady most people can hold a camera before the natural slight movement of the person holding the camera can be detected as motion blur across the whole photo. To make things slightly more complicated, the longer the focal length of the lens, the more camera shake will be seen in the photos.
The rough rule is to not go below 1/60th with any lens 50mm and wider, and to go for a shutter speed that’s equal to the focal length of the lens for longer lenses. So, if you’re shooting a 100mm lens, choose a shutter speed of at least 1/100th of a second to ensure the photos don’t suffer from visible motion blur. Vibration Reduction/Image Stabilisation found in more modern equipment is designed to help with this problem – though of course, this technology can only reduce movement in the person holding the camera, and not the subject.
Aperture
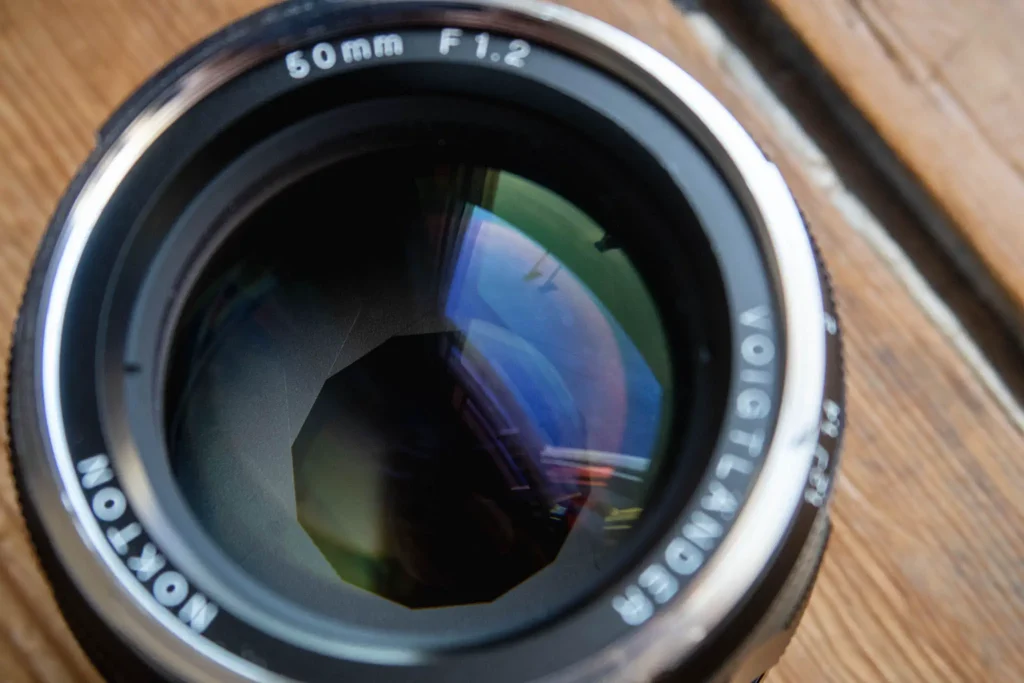
Inside all lenses, there is a thing called an iris. The iris is a series of leaves of metal that move together to create an often roughly-circular “Aperture” (or in simple terms a hole) that varies in size. The larger the aperture, the more light is let through, the smaller the aperture the less light is let through.
The Strange Number Sequence
The aperture of a lens is measured as a fraction of the focal length of the lens. This is to provide consistency from one lens to the next, but it can be a little confusing for the beginner as the system of numbers isn’t obvious without knowing the maths behind it.
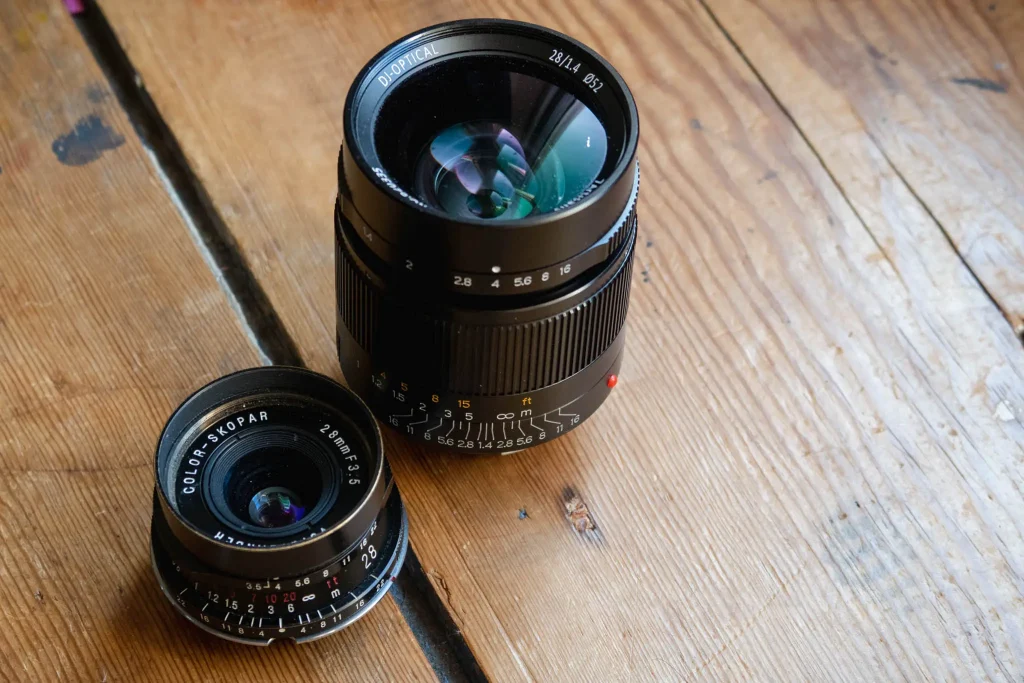
What appear to be small numbers actually relate to a larger aperture, and what appear to be big numbers relate to a smaller apertures. You can see the scale of numbers on the top of the lens below. 2.8 is the largest aperture, 22 is the smallest. 2.8 lets the most light in, 22 the least with the numbers between being an evenly spaced scale between.
These numbers are called “f-numbers” or “f-stops” and are often written down as f/2.8, f/5.6, f/16 etc. The scale on the top of the lens might seem like an odd series of numbers, but as I say, it is designed as such to provide a workable system for the photographer that’s based on fractions.
The maths (in simple terms)
For example, a 100mm lens with an aperture of f/2 will have an aperture with a diameter of 50mm – 100/2 = 50. A 50mm lens with an aperture set to f/2 will have an aperture of 25mm – 50/2 = 25. It might seem therefore like the 100mm lens has a bigger aperture, but because of the way lenses work – and you’re just going to have to trust me on this one as it goes way beyond the scope of this article – a 50mm lens set to f/2 theoretically provides the same exposure as a 100mm lens set to f/2.
As such, the f-numbers provide the user with a system of exposure that’s the same from lens to lens. Make sense? Honestly, it doesn’t matter either way. What’s important to understand is that the difference between each f-stop on a lens is the same, and the system works across all your different lenses.
Doubling and Halving
Going back to the lens above the scale goes f/2.8, f/4, f/5,6, f/8, f/11, f/16. Remember the doubling and halving from shutter speed? The difference between one f-number and the next is a doubling or halving of the amount of light the lens lets through. That is to say, changing from f/2.8 to f/4 halves the amount of light passing through the lens. Changing from f/8 to f/5.6 doubles the amount of light passing through the lens.
Aperture Stops
Changing aperture settings is often called “opening up” and “stopping down”. When you “open up” the aperture by one stop, you are doubling the amount of light that travels through to the film. When you “stop down” the aperture by one stop you are halving the amount of light.
Some Examples
Changing the aperture from f/4 to f/2.8 is opening up the aperture by one stop and doubling the amount of light.
Changing the aperture from f/8 to f/11 is stopping down the aperture by one stop and halving the amount of light.
Change your aperture from f/16 to f/4 is opening up your aperture by 4 stops. Changing your aperture from f/11 to f/22 is stopping down your aperture 2 stops. etc.
The Impact of Different Apertures
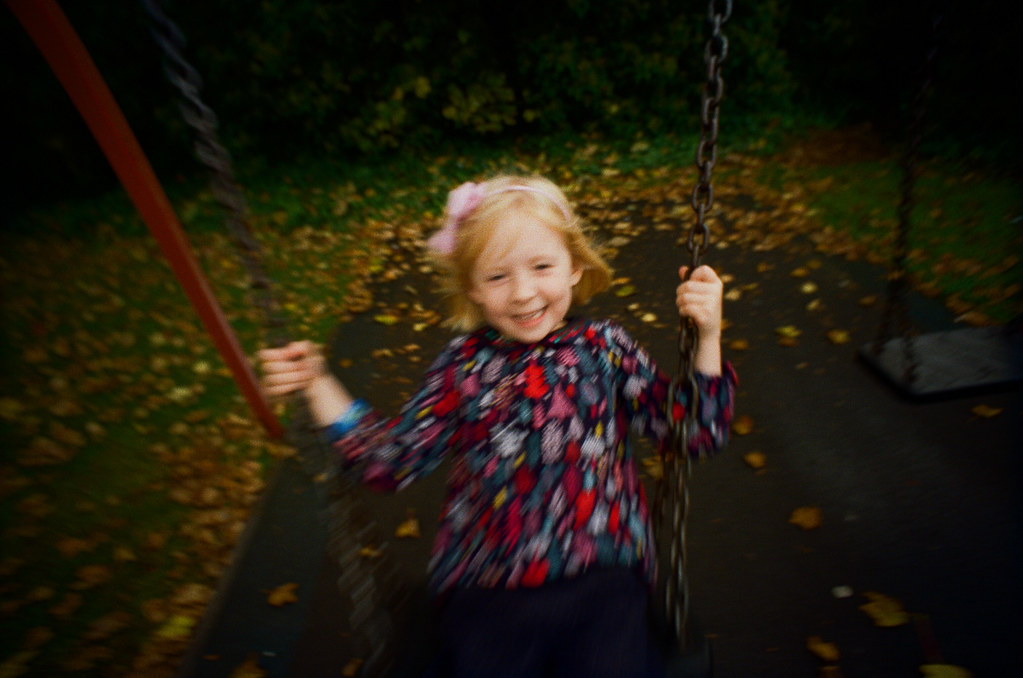
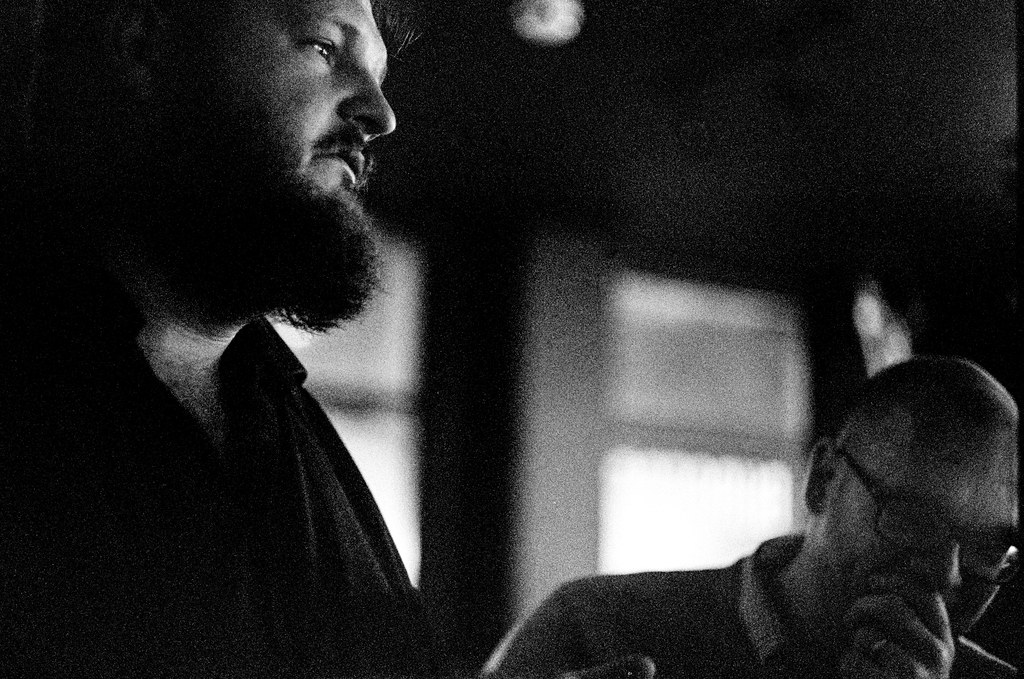
The doubling and halving bit is quite easy to understand, what’s potentially less easy to understand is the impact of the aperture on what’s in focus. The chosen aperture of a lens defines something called depth of field. Depth of field is the amount of the photo that is in focus in front of and behind the chosen point of focus.
Again, because of the nature of optics to a degree that’s way beyond the scope of this article, larger apertures (smaller numbers on your lens) result in a narrow depth of field, and smaller apertures (bigger numbers on your lens) result in a more broad depth of field.
This is an example of narrow depth of field – note the blurred background:

This is an example of broad depth of field – note the focus from the foreground all the way to the background:
A little while ago I wrote an article for Ilford that talks about depth of field and something called zone focusing – here – it should help you if this concept needs a little more explanation.
Fast Lenses and Slow Lenses
A little nugget of information that will likely become useful as you begin to get your head around aperture is that not all lenses are made equal when it comes to the minimum and maximum apertures. These days a lot of photographers value the versatility a lens with a large maximum aperture such a f/1.4. Lenses with such large maximum apertures are referred to as being “fast lenses”. Lenses with maximum apertures smaller than f/3.5 tend to be referred to as “slow lenses”. It’s also worth noting that slower lenses are often smaller and lighter. This – and the fact that faster lenses tend to be more expensive – is the price you pay for the added versatility of a faster lens.
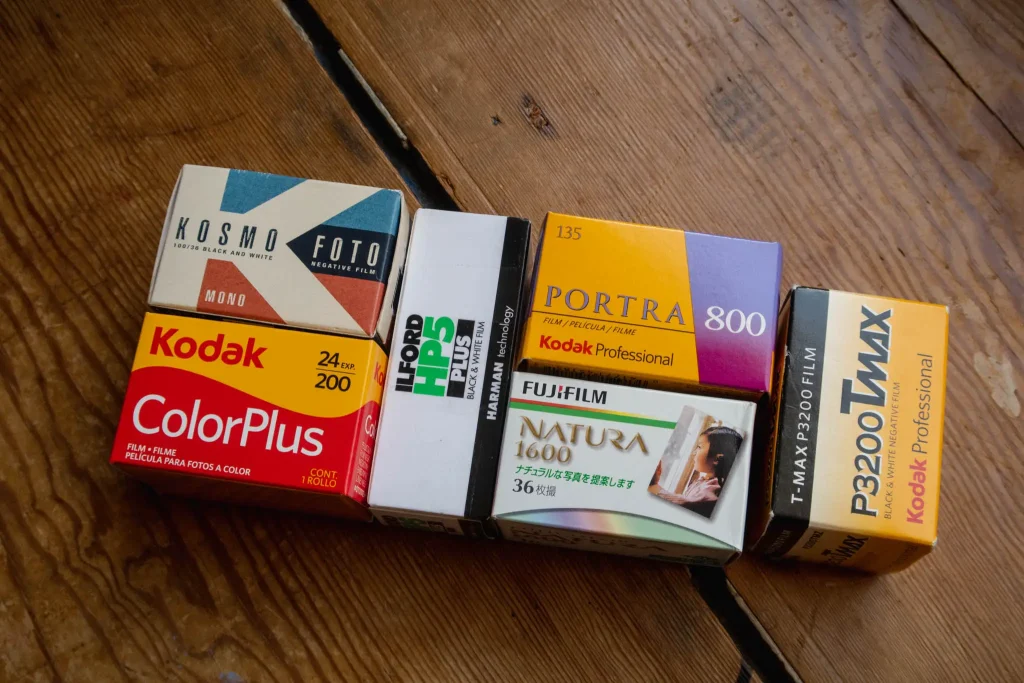
Film Speed (ISO)
Film speed is now defined using the “ISO” system. The ISO system was adopted in the 1970s, with a few other systems predating it. The ISO system in actually a combination of ASA and DIN, two of the most common systems used previously. Fortunately, whilst DIN numbers are still printed on film canisters as part of the ISO system, these days they are largely ignored. As such, if you hear or read ISO and ASA being referred to, you can consider them to be the same thing.
ISO numbers are values given to the sensitivity of film to light. The lower the number the slower the film reacts to light, the higher the number the faster the film reacts to light. As such faster films (higher ISO) are useful in lower light situations and slower films (lower ISO) are more suitable for brighter-light photography.
Doubling and Halving
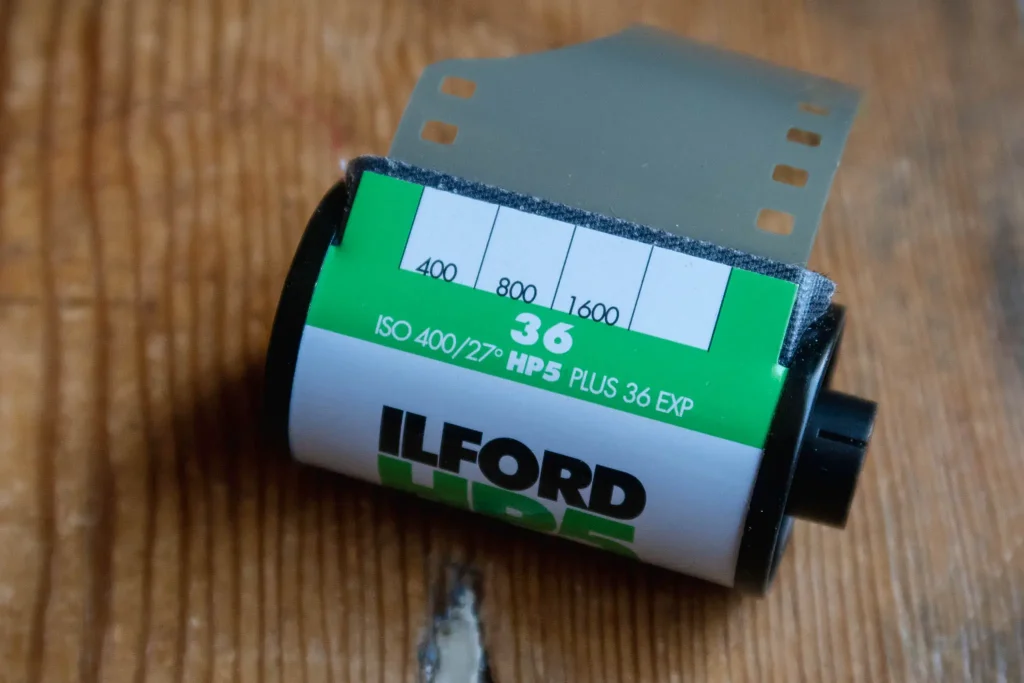
Common film speeds are 100, 200, 400, 800, 1600 and 3200 ISO. Notice the pattern of doubling and halving again? A 200 ISO film reacts to light twice as fast as a 100 ISO film, a 400 ISO film half as fast to react to the light as an 800 ISO film.
Film Speed and Stops
Choosing the right film comes mostly down to knowing the sort of light you’re going to be shooting in. Unlike digital cameras where you can change the ISO at any time, when shooting film the ISO is fixed by the film you choose to load into the camera and can’t be changed in any other way than by changing the roll of film or shooting the chosen film at a different “exposure index” – something I will come to in a moment. As such it’s important to load a film that is suitable for the lighting you are going to be shooting in, or at least one that suits your creative goals.
Some Examples
100 ISO film is 1 stop less sensitive to light than 200 ISO film. That is to say, it will react to light that travels through the aperture and shutter half as fast. A 100 ISO film is more broadly suited to brighter day time shooting.
800 ISO film is 1 stop more sensitive to light than 400 ISO film. It reacts to the light twice as fast. An 800 ISO film is more suited to slightly lower light shooting circumstances.
3200 ISO film is 3 stops more sensitive to light than 400 ISO film. A 3200 ISO film is most suitable for low light shooting.
The Impact of Different Film Speeds
As a general rule the higher the ISO the film is, the more grainy it will be. The lower the less grainy. Though it’s important to understand that grain varies between film and that it is also impacted by how a film is developed and in what chemicals.
Exposure Index
It’s useful (though not essential) to understand that when setting the film speed on a camera or meter, you are technically speaking setting the “Exposure Index”. The ISO of the film is fixed, the exposure index a film is shot at can be varied by the photographer.
Exposure index is often abbreviated to “EI”. So when setting a camera or meter to an exposure index of 400, this is often abbreviated to EI 400.
Box Speed
The most common practice when setting your exposure index is to set it to something people often call “Box Speed”. Setting box speed is simply setting the exposure index of the meter or camera to the ISO of the film (the film speed printed on the box). So if your film is 400 ISO and you set your camera’s exposure index to EI 400, you are “rating” your film at box speed. For best results, it is usually advised to rate your film at box speed.
Over and Underexposure
For reasons largely beyond the scope of this article, some people like to overexpose or underexpose their film. This can be achieved by setting an over/underexposure dial or by setting the exposure index on the camera or meter to a different ISO number than that specified on the film. So, for example, setting the exposure index to 200 when shooting a 400 ISO film would be overexposing the film by one stop. The meter thinks the film is 200 rather than 400 ISO so bases shutter and aperture readings accordingly, thus resulting in 1 stop overexposure of the film. Likewise, setting the camera or meter to EI 1600 when shooting a 400 ISO film is underexposing the film by 2 stops.
Push and Pull development
This, again, is a subject well beyond the scope of this article, I mention it only to highlight a common mistake in the way these words are used. “Pushing” and “Pulling” film is something that’s done when developing film, and not when shooting it. As I have said, if a 400 ISO film is shot at EI 1600, it is simply being underexposed. This underexposure can be counteracted by “push-processing” the film. Push-processing is the process of over-developing the film to counteract the underexposure. If a film is overexposed, it can be underdeveloped, or “pull-processed” to counter this overexposure.
Latitude
“Latitude” is another topic that for the sake of this post, I shall only lightly touch upon. A film’s latitude is loosely and in layman’s terms described as how much it can be over or underexposed without serious detriment to the quality of the photo. In short, with some films, it is ok to over or underexpose your film a little bit without the need to push or pull process it respectively. This is much more true of negative film than it is of reversal (slide) film which requires tighter control of exposure to get good results.

The fact that some films can be overexposed quite heavily actually provides a shortcut (cheat) to better results when shooting film – I wrote about this here. Just beware, cheating that much can and does lead to inconsistency in your results which can make learning much of the content of this post a lot harder.
Choosing the Right Settings
As I’ve said, shutter, aperture and film speed make up all the components of exposure, but choosing the correct combination of the three is key. Of course, the correct combination comes down to the desired photographic outcome – which as I’ve already alluded to, is very much a topic that’s way beyond the scope of this article. But, if you know how the settings work together, you have a much-increased chance of being able to achieve your creative goals.
Reciprocity – The Relationship Between the Variables
By now, hopefully, it’s clear that shutter speed, aperture and film speed have a system that’s built around the idea of doubling and halving. The purpose of this system is to allow the three settings to have a reciprocal relationship. That is to say, if you change one of them, you need to change another one of the settings an equal amount in the opposite direction to retain the same exposure.
That is to say, if you increase your shutter speed by one stop, thus letting light in for half the amount of time, you can retain the same exposure by opening up your aperture by one stop, thus doubling the amount of light travelling through the open shutter. Halve one, double the other. Double one, halve the other. Double one 5 times, you need to halve the other 5 times to retain the same exposure, and so on…
So, as an example, if your correct exposure requires settings of 1/60th, f/4 with a 400 iso film; 1/15th and f/8, 1/30th and f/5.6, 1/125th and f/2.8, 1/250th and f/2 etc. will result in the same exposure. The decision about which particular combination of settings is right therefore simply comes down to your creative goals or other limitations – such as whether or not you have a tripod.
Hopefully, you might also realise that if you didn’t have a tripod, wanted to shoot at f/8, and were worried that a shutter speed of 1/15th would result in motion blur in your photos, a 1600 ISO film would have been a better choice. A 1600 ISO film would mean you would need a 1/60th shutter speed to retain the same exposure. This might result in a more grainy photo, but with the camera handheld, you would be less likely to suffer from camera shake induced motion blur in the result.
The point being, sometimes selecting the right settings is about choosing the best compromise to achieve your creative goal!
Reciprocity failure
Another topic I shall only lightly touch on, but one that it seems remiss not to mention given the fact that I have used the word reciprocity is “Reciprocity Failure”. Reciprocity failure is what happens to some (most) films given long (very slow) shutter speeds. After a time, in simple terms, the chemical reaction in the film slows down meaning to achieve the desired exposure, a longer shutter speed than what the normal rules of reciprocity dictate is needed – hence: reciprocity failure. This varies from one film to the next and can be a bit of a minefield, but frankly, if you’re worrying about reciprocity failure, you are no doubt way ahead of the rest of the content in this post…
1/2 and 1/3rd stops
Just a final quick note before I close. Throughout this article, I have mentioned “stops”. To keep things simple I have been talking about what we call whole stops. Some cameras and lenses only allow changing the settings by whole stops, but some allow altering the setting by 1/2 or even 1/3 stops. This makes for some less memorable number-sequences, but the system is the same. Change one setting by 1/3 of a stop, and to retain the same exposure you need to change another by 1/3rd. Same, of course, goes for 1/2 stops.

A Final Word of Encouragement
I hope the above has bought some clarity to the concepts around exposure in photography – but even if it hasn’t, please don’t be put off!
I vividly remember the joyous moment it all clicked for me. I’m the type to learn by doing, so I’m almost certain that I would have found the above text a bit of a head-scratcher – I worked it all out for myself with a Voigtlander Vito B in one hand and a basic meter in the other. The thing is, whilst it all might sound quite complicated – to the point that it takes me 4000 words to explain it all – it’s actually profoundly simple. When it clicks for you, I guarantee it will seem so simple, you wondered what on earth seemed so complicated about it all!
I always think that it’s reassuring to remember that there was a time in the past when all this stuff needed to be learned to use any camera – when my Voigtlander Vito B was brought to market, the photographer learned this stuff, or just didn’t get photos. As such, manufacturers have done all sorts of things over the years to make it so you don’t need to know any of this stuff – for example, you can still take a good photo with your camera-phone, yet the funny thing is, at its core, even a camera-phone works based on this system.
The difference is, when you know it all – when you take the power of this knowledge into your own photography – it is you that will be able to make the creative decisions, and not your camera. Not only this, but you’ll be able to pick up almost any camera and make it work for you and those all-important creative decisions! Good luck – I promise you it’s worth it!
There’s loads of content on youtube about these topics, but a good place to start is this series from Ilford Photo
Share this post:


Comments
Faraz on Understanding Shutter Speed, Aperture, Film Speed (ISO) & The Relationship Between Them
Comment posted: 25/02/2019
Comment posted: 25/02/2019
Terry B on Understanding Shutter Speed, Aperture, Film Speed (ISO) & The Relationship Between Them
Comment posted: 25/02/2019
Hamish, clearly written for those new, or not quite so new, to photography. I thought I'd highlight this paragraph as an antidote to many posts on the internet that encourage people to effectively break, or ignore, certain "rules" before they've learned the basics. Beethoven often broke the rules, but you can bet your bottom dollar that he knew what they were before he broke them.
Incidentally, but certainly outside the scope here, reciprocity also raises its head with very fast shutter speeds or, more accurately, very short effective exposure times. This was an issue with some films and using electronic flash guns, some of which could fire as fast as 1/40,000 sec.
Comment posted: 25/02/2019
DannyBoyNYC on Understanding Shutter Speed, Aperture, Film Speed (ISO) & The Relationship Between Them
Comment posted: 25/02/2019
Comment posted: 25/02/2019
Calum on Understanding Shutter Speed, Aperture, Film Speed (ISO) & The Relationship Between Them
Comment posted: 25/02/2019
I chuckled a bit when you chickened-out of describing what f-stops of aperture really are, and why they have those numbers. I have an old Leica manual that tries to explain it in that old-fashioned, technical, way that all encyclopaedias and manuals seemed to be written, and honestly I'm only about 80% there. Given how much time is spent discussing f/1.8 vs f/1.4 -- or ooooh f/0.95!! -- just for the versatility alone and before even using the b-word, or talking about price, it would be great to have an article on 30mmc that coherently explained what these numbers actually are and where they come from. When I was starting out in photography, they always felt like a dark art that separated me from 'real' photographers. Since then the separation has broken down -- not because I understand it, but because I now know no-one else does!
Just another thought: I remember when I realised what felt so odd about all the doubling and halving, which is that it just doesn't _feel_ like the light is changing that much to our eye. I think that it's really important to say up-front that our eyes adapt really really fast across a huge range of exposures, so although going from sunlight to shade might mean a change of 4 or 5 stops (doublings, wow!) to our eye it can look only slightly dimmer, and quickly not very much different at all (except for the definition of the shadows). I know this probably is obvious, but when I was starting the disconnect between what it seemed to my eye and what the camera was doing jarred a bit.
Comment posted: 25/02/2019
Comment posted: 25/02/2019
Comment posted: 25/02/2019
Comment posted: 25/02/2019
Comment posted: 25/02/2019
Calum on Understanding Shutter Speed, Aperture, Film Speed (ISO) & The Relationship Between Them
Comment posted: 25/02/2019
Article on metering would be really great
NigelH on Understanding Shutter Speed, Aperture, Film Speed (ISO) & The Relationship Between Them
Comment posted: 25/02/2019
Comment posted: 25/02/2019
Andrew Cotterill on Understanding Shutter Speed, Aperture, Film Speed (ISO) & The Relationship Between Them
Comment posted: 27/02/2019
Comment posted: 27/02/2019
Recommended Reading 3/1/19 - mike eckman dot com on Understanding Shutter Speed, Aperture, Film Speed (ISO) & The Relationship Between Them
Comment posted: 01/03/2019
Terry B on Understanding Shutter Speed, Aperture, Film Speed (ISO) & The Relationship Between Them
Comment posted: 02/03/2019
Comment posted: 02/03/2019
Toby Van de Velde on Understanding Shutter Speed, Aperture, Film Speed (ISO) & The Relationship Between Them
Comment posted: 06/03/2019
Zone focusing - Ilford Photo on Understanding Shutter Speed, Aperture, Film Speed (ISO) & The Relationship Between Them
Comment posted: 21/03/2019
Using the Fujifilm X100F like an Analog Rangefinder - By Steven Bleistein - 35mmc on Understanding Shutter Speed, Aperture, Film Speed (ISO) & The Relationship Between Them
Comment posted: 07/01/2020
5 Frames With Kodak Gold 200 / My Analog Photography Process - By Leo Lukens - 35mmc on Understanding Shutter Speed, Aperture, Film Speed (ISO) & The Relationship Between Them
Comment posted: 31/03/2020
Knowing Little, Aiming High – Darkroom Technique Part 2 – By Sroyon Mukherjee - 35mmc on Understanding Shutter Speed, Aperture, Film Speed (ISO) & The Relationship Between Them
Comment posted: 13/04/2020
Which film camera should I buy? A guide to anyone asking this question - 35mmc on Understanding Shutter Speed, Aperture, Film Speed (ISO) & The Relationship Between Them
Comment posted: 22/04/2020
Monkeying Around with Focal Length and Perspective – by Sroyon Mukherjee - 35mmc on Understanding Shutter Speed, Aperture, Film Speed (ISO) & The Relationship Between Them
Comment posted: 24/08/2020
Autumn on Understanding Shutter Speed, Aperture, Film Speed (ISO) & The Relationship Between Them
Comment posted: 26/05/2021