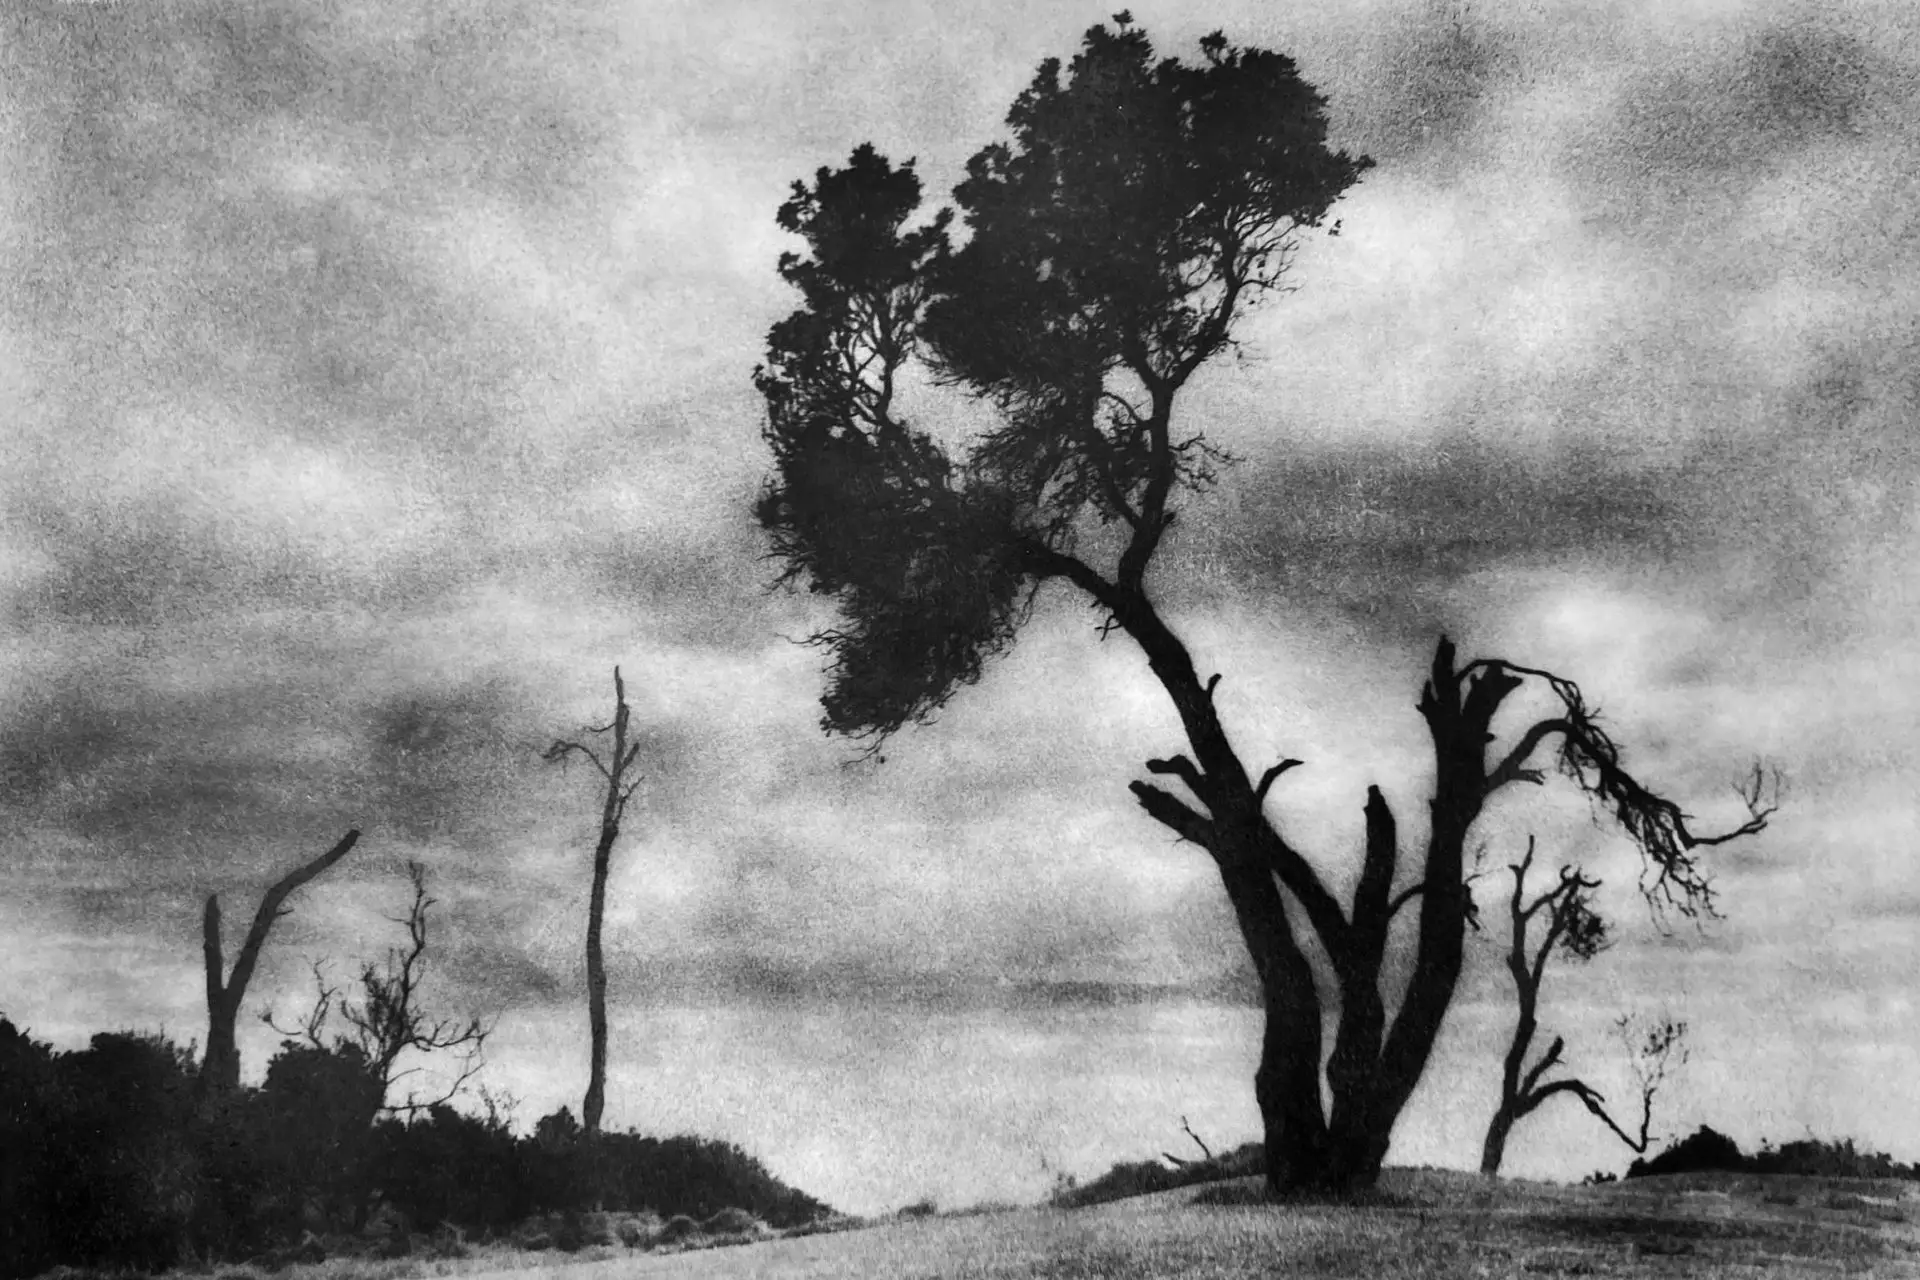
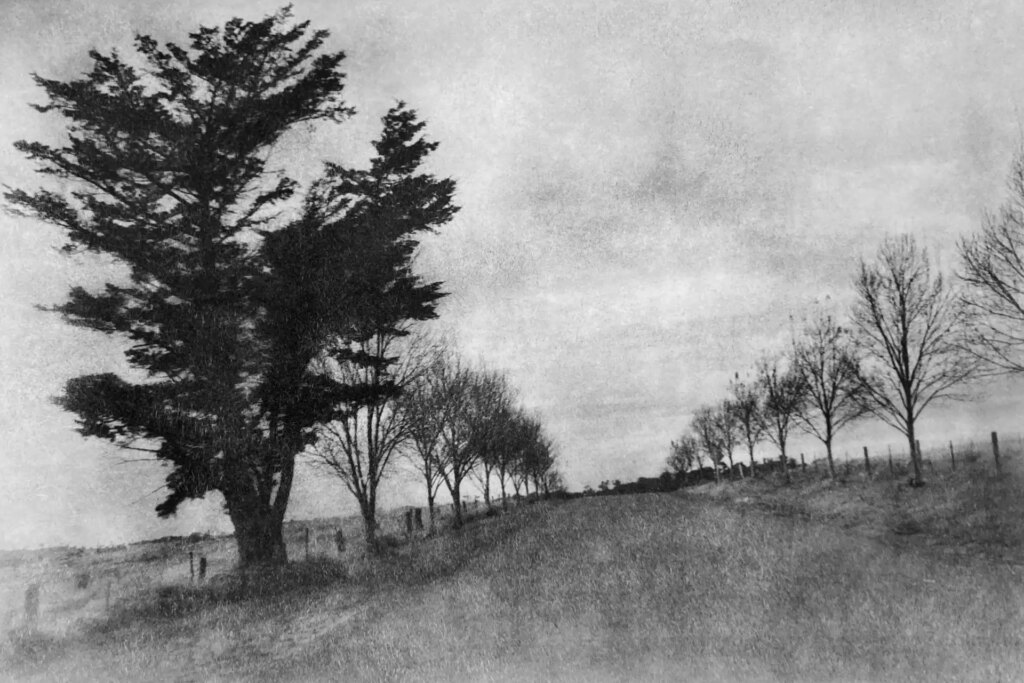
Early last year I began making Bromoil prints, and I cannot recall why.
Many a time I’ve scoured my brain for any clues. Unsuccessful however (so far)… I can only assume that one fateful day, I was drawn enough to the ‘non-traditional’ qualities of certain alternative printing processes, often described as soft and painterly, knowing full well I cannot draw or paint for the life of me… but no matter, that is a trivia for another day.
I can say however that after countless hours, I’ve fortunately been successful in performing this method, but at a great cost – it has continually tested my patience that I naturally have very, very little of.
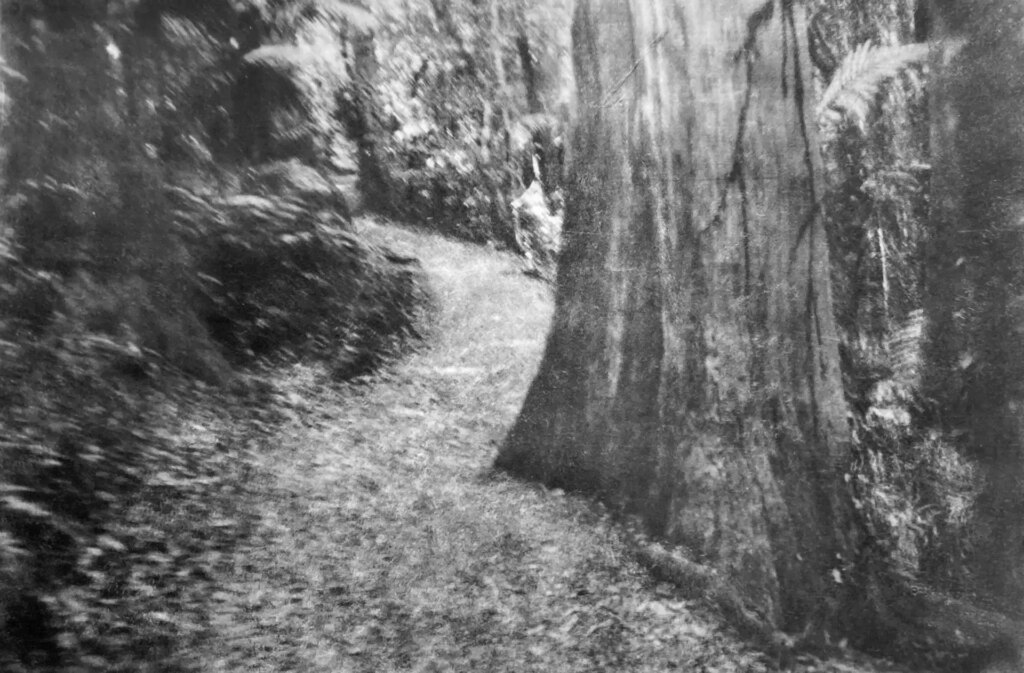
Speed and efficiency is everything in our modern world. All in the name of instant gratification, as they say. In this respect, what travels against the grain feels unnatural one might think. For example, film photography – time consuming unlike the cameras on our smartphones. Undoubtedly against the grain (and full of it hah!). Bromoils I reckon though aren’t even on the same piece of wood. Perhaps not even the same tree.
General consensus and history I suppose, dictate that good ol’ fashioned hands-on-work requires labour. Hours of it. Plus untimely and unsolicited sprinkles of nature’s law when it kicks your butt every now and then. Darkroom printing is a good example. The work you put in, and the result from it remains a mystery (for too long), and is only revealed after many minutes (more like hours or days) of nervous wondering if all procedures were undertaken correctly. At one of the limbs off darkroom printing is the Bromoil process. And the way most ‘bromoilists’ around the globe do it, ends up being a multi-day journey.
Simply put, they begin as traditional B&W fibre-based silver gelatin prints but are then
a. bleached to remove the silver compounds
then
b. inked to replace said silver.
To not put it simply, if you can be bothered to read, goes like this.
Create a silver grelatin print that is suitable for Bromoils
a. Use matt surface fibre paper that’s not even verified to work (all the Bromoil-compatible papers are now discontinued)
b. Find the right figure for extra exposure when exposing the paper
c. Develop to completion
d. Rinse with water because you’re not sure if acid baths are okay
e. Fixer (non-hardening only) for no shorter than 3mins and no longer than 5 mins
f. Continuous wash 1+hr
g. Dry overnight, usually minimum 24hrs

Bleach the print
a. Super-dry the paper
b. Soak but don’t over-soak the paper in water
c. Bleach and definitely don’t under-bleach using toxic chemicals that have been measured precisely
d. Thorough rinse
e. Fixer (non-hardening only) for no shorter than 3mins and no longer than 5 mins
f. Continuous wash 1+hr
g. Dry overnight, usually minimum 24hrs
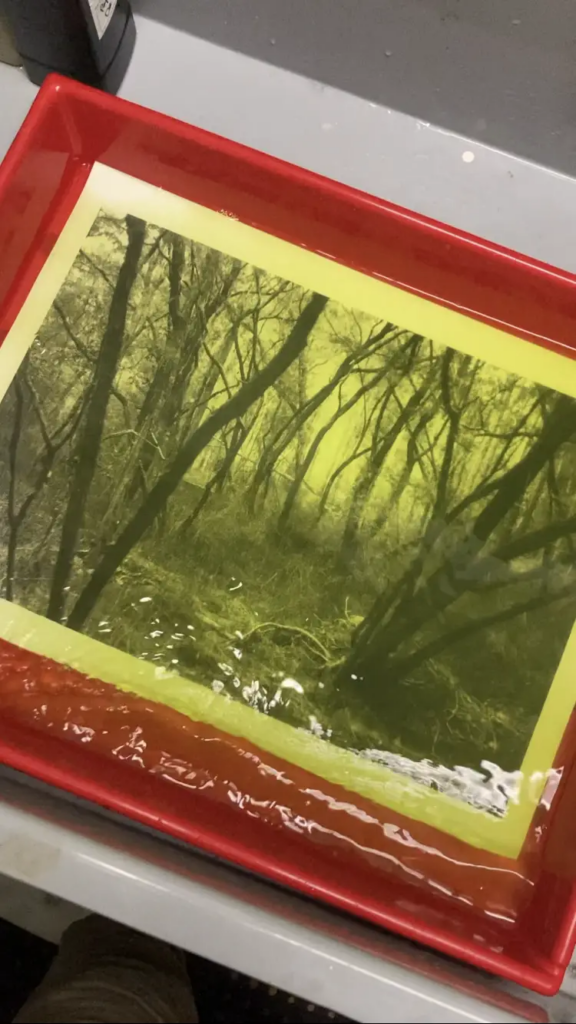
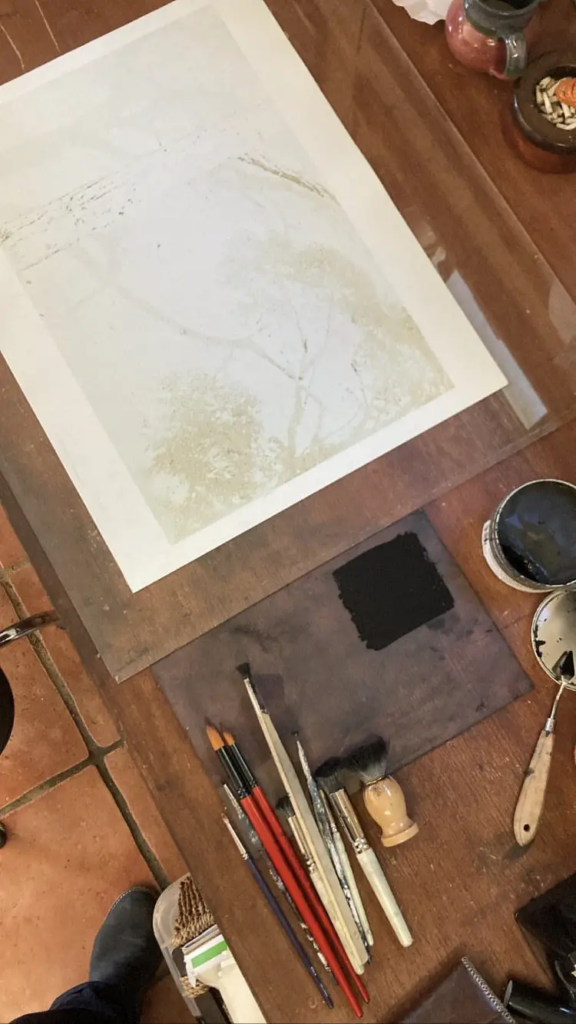
Ink the print
a. Super-dry the paper
b. Soak but don’t under or over-soak the paper
c. Dry off the paper. But don’t over-dry, just no water droplets to be left
d. Start dabbing appropriate lith-ink onto the paper using brushes that are in the right shape and not too hard or soft
e. Distribute the ink evenly across the paper
f. Quickly soak the paper because it’s getting dry and the image looks muddy
g. Ink and distribute ink evenly again
h. Put on/take off ink in specific spots that need it
i. Maybe soak the paper again
j. Put on/take off ink in specific spots that need it
k. Dry for min. 48 to 72hrs, but keep going back to it to do little bits n bobs
l. Start again because it’s atrocious, or it’s fine but could be better
And thus you’re there.
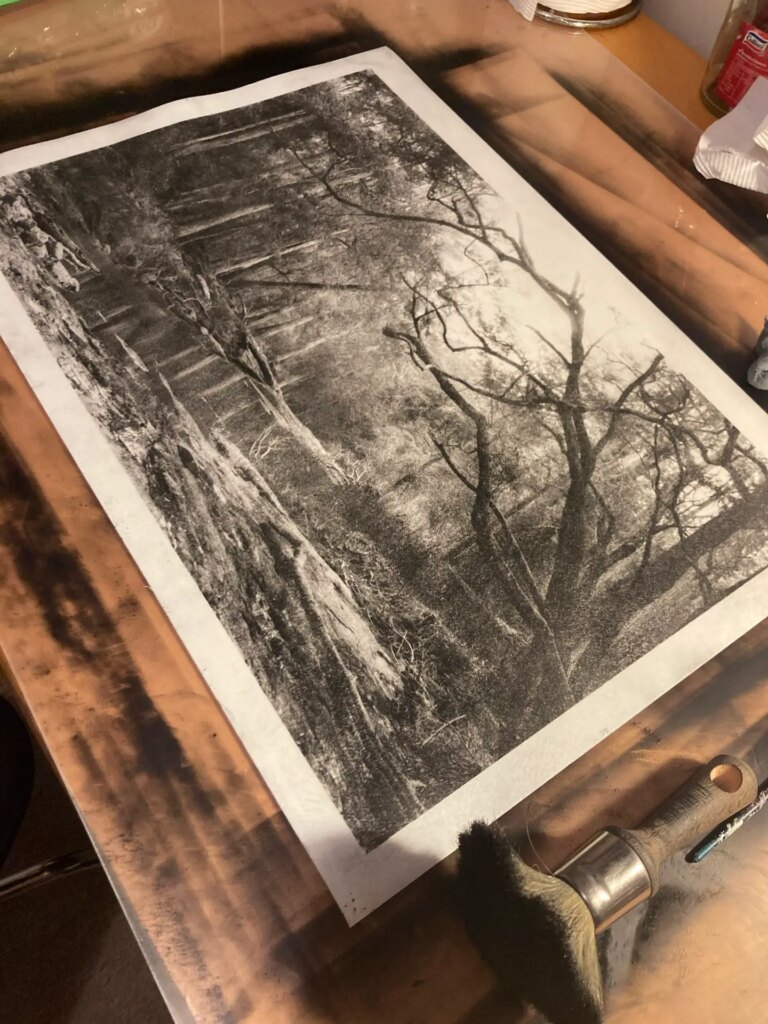
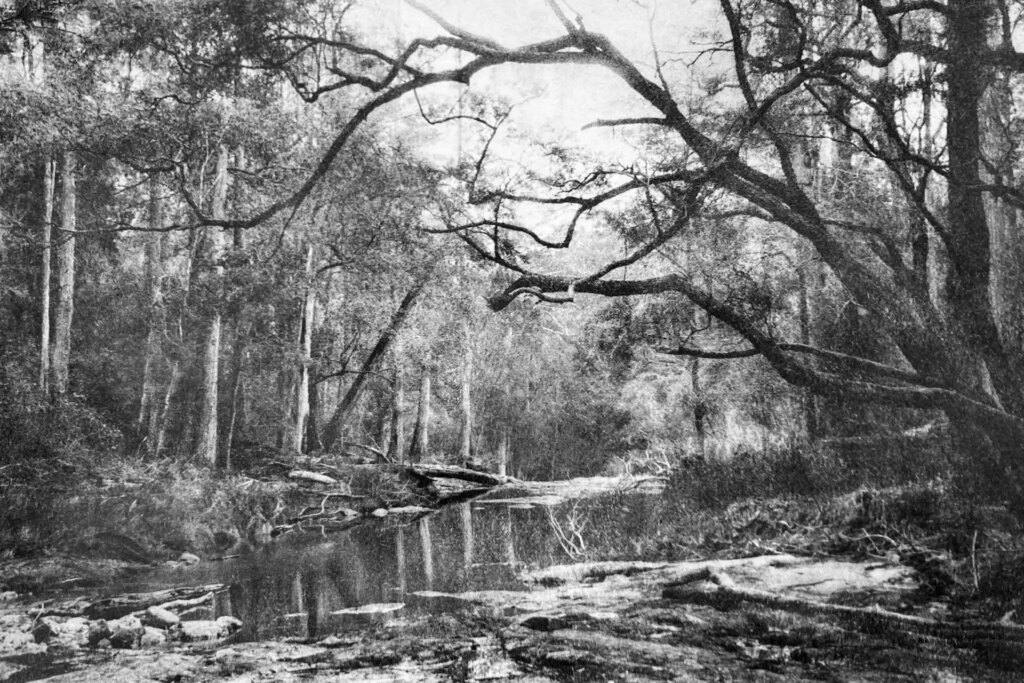
A multi-day journey indeed. And for someone who shoots quick, develops quick, smash out silver gels in sub-one hour (two’s pushing it), worst part is that if your initial exposure for the Bromoil isn’t ‘right’, you probably won’t know that until you start inking – a good few days after you initially exposed the paper. One image of mine required careful dodging and burning, but because I didn’t know if they were performed properly, it took at least twelve attempts (2-3 months in reality) to make a print that I’m now somewhat satisfied with (…it could be better…). I don’t know how painters do it – spending hours, days, months in front of a canvas working on one piece…!
I just recalled as I’m typing this out – ‘patience is a virtue…’
Nah, mate. Not for Bromoils. I’ll choke the damn thing and work through it because sometimes that’s what it takes.
Worth it. I’ve got a solo show in early February 2023, presenting my collection of eighteen 16×20 Bromoil prints that I’ve worked on for the last 6 months. If anyone is near Nth NSW, Australia, you’re welcome to come check it out. Details on my web and social media.
Would I have attempted to try this method if I knew beforehand that it’s a lengthy, painstaking job? I don’t know. Maybe not. I certainly do have very little patience for all things.
But I do like a challenge though.
p.s. if anyone’s interested in learning about Bromoils, here and here are good places to start.
Share this post:


Comments
Nik Stanbridge on Bromoil prints – Enduring Patience in ‘Painting’ a Photograph – By Tom Schulte
Comment posted: 25/02/2023
Comment posted: 25/02/2023
Tim Bradshaw on Bromoil prints – Enduring Patience in ‘Painting’ a Photograph – By Tom Schulte
Comment posted: 25/02/2023
I wish I was close enough to come and see the show!
Comment posted: 25/02/2023
Erik Brammer on Bromoil prints – Enduring Patience in ‘Painting’ a Photograph – By Tom Schulte
Comment posted: 25/02/2023
Comment posted: 25/02/2023
Ibraar Hussain on Bromoil prints – Enduring Patience in ‘Painting’ a Photograph – By Tom Schulte
Comment posted: 25/02/2023
Comment posted: 25/02/2023
David Hume on Bromoil prints – Enduring Patience in ‘Painting’ a Photograph – By Tom Schulte
Comment posted: 26/02/2023
Comment posted: 26/02/2023
Simon Foale on Bromoil prints – Enduring Patience in ‘Painting’ a Photograph – By Tom Schulte
Comment posted: 26/02/2023
Comment posted: 26/02/2023
Maxime on Bromoil prints – Enduring Patience in ‘Painting’ a Photograph – By Tom Schulte
Comment posted: 27/02/2023
https://www.editionstextuel.com/livre/bernard_plossu_tirages_fresson
Comment posted: 27/02/2023
Tony Cearns on Bromoil prints – Enduring Patience in ‘Painting’ a Photograph – By Tom Schulte
Comment posted: 28/02/2025
Besst regards
Tony