I recently undertook the repair of a Chinon 55mm f/1.4 M42 lens – the iris was jammed open meaning the I wasn’t able to set the aperture in manual mode and it didn’t function at all in auto. The repair was largely successful, albeit whilst also causing a small amount of superficial damage. The process gave me the satisfaction of a fixing a lens, but also gave me the opportunity to reflect on the risk I’d taken, and indeed the damage I’d caused.
Repairing lenses in many ways is not for the faint hearted. You certainly wouldn’t catch me opening up one of my Zeiss lenses and poking around inside them willy nilly… or any other higher end lenses for that matter. I just don’t enjoy is the fear of it all going horribly wrong. I’m actually not sure I ever want to get to the stage that I’d be comfortable opening up a particularly valuable lens. Maybe I’ll get there, maybe I won’t. But I’m certainly not pursuing a goal of being confident and able to repair such things.
As such, anything that has any real value gets sent to a repair person – and that remains my advice to anyone reading this. If you’re in anyway nervous about your potential loss, seek a professional repair service.
Risk vs. Reward
What this article is about is a time when the potential reward and the fun of giving something a go outweighed the risk. This might not be for everyone, but personally, given the right circumstances, I enjoy is a bit of low risk tinkering. I enjoy the satisfaction of discovering how lenses fit together, and indeed the sense of success I get if I can clean or repair one.
To my mind, when I find a lens that’s damaged or in need of a bit of a clean I can balance the risk if I can fit into one or a couple of a few categories. Those categories include lenses that:
- Cost very little
- Have a value too low to easily justify the expense of professional repair
- I have little or no emotional attachment to
- Are commonly found / not rare or worth “preserving”
- Are still worth attempting a DIY repair
Really, no.2 on the list is the crux of the issue. Chris Andreyo who I would trust with my valuable lenses charges well over £100 to clean and service a lens. That’s what you should expect to pay a decent repair person too. In reality, this means any lens sent to him would need to be worth a lot more than his minimum charge, or at very least be a thing of personal sentimental value to be worth repairing.
In reality of course, there are stacks of lenses worth considerably less than that sort of cash, and a lot of them need a clean or service. Which, in my opinion is where a little bit of DIY fun can come into play. In the case of the Chinon 55mm f/1.4, I felt that all of the above applied – especially given what I paid for it.
Finding the Chinon 55mm f/1.4 lens
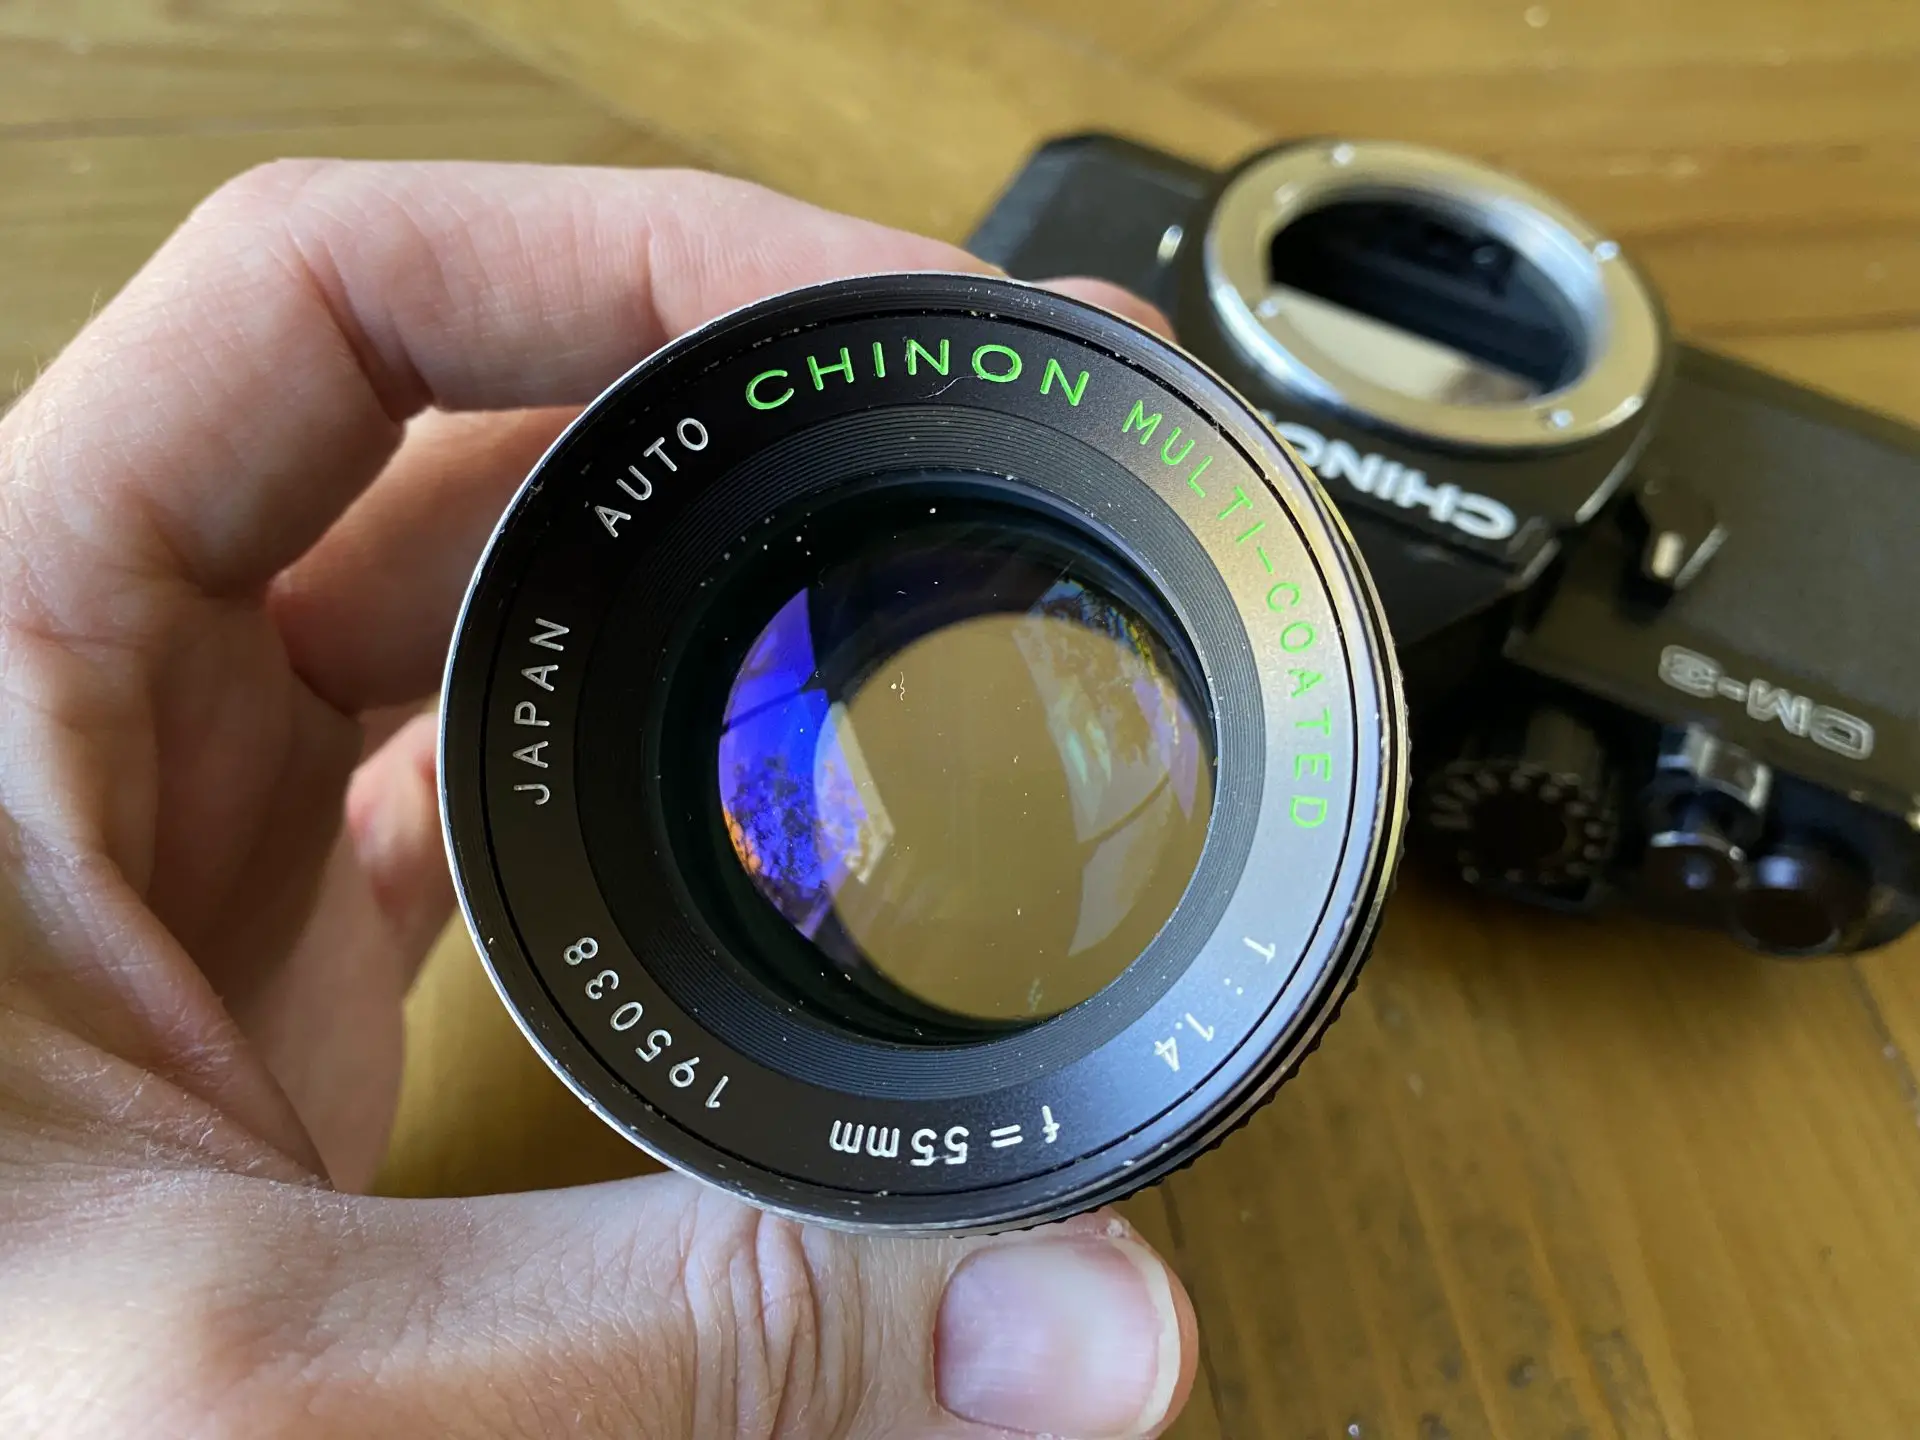
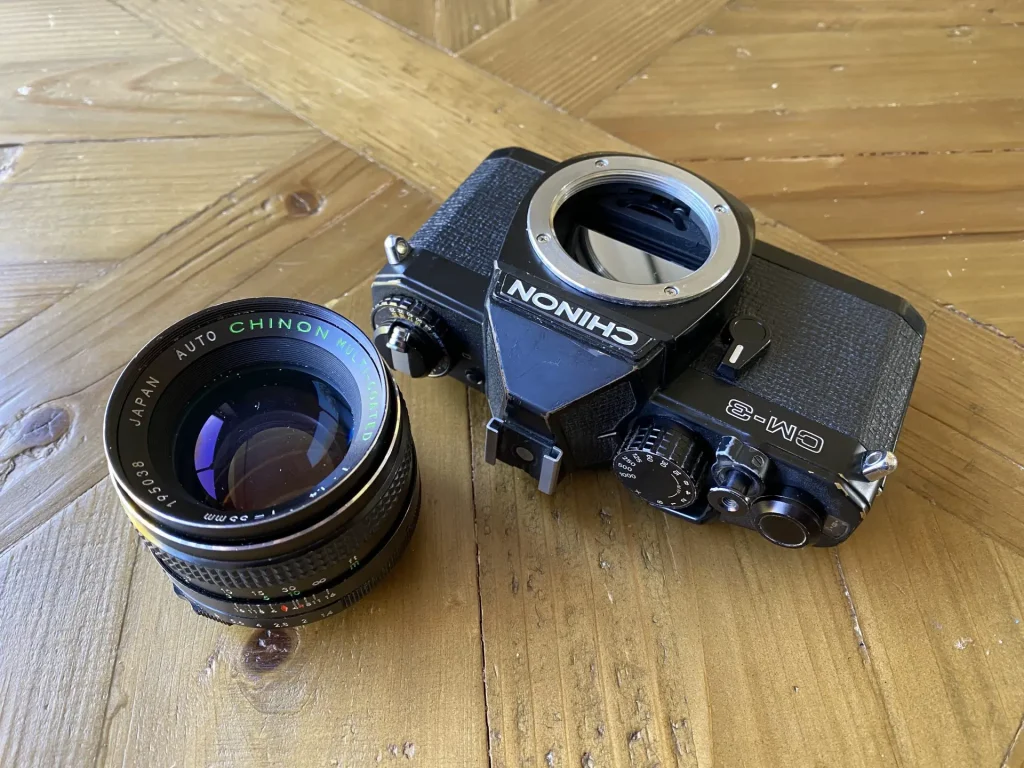
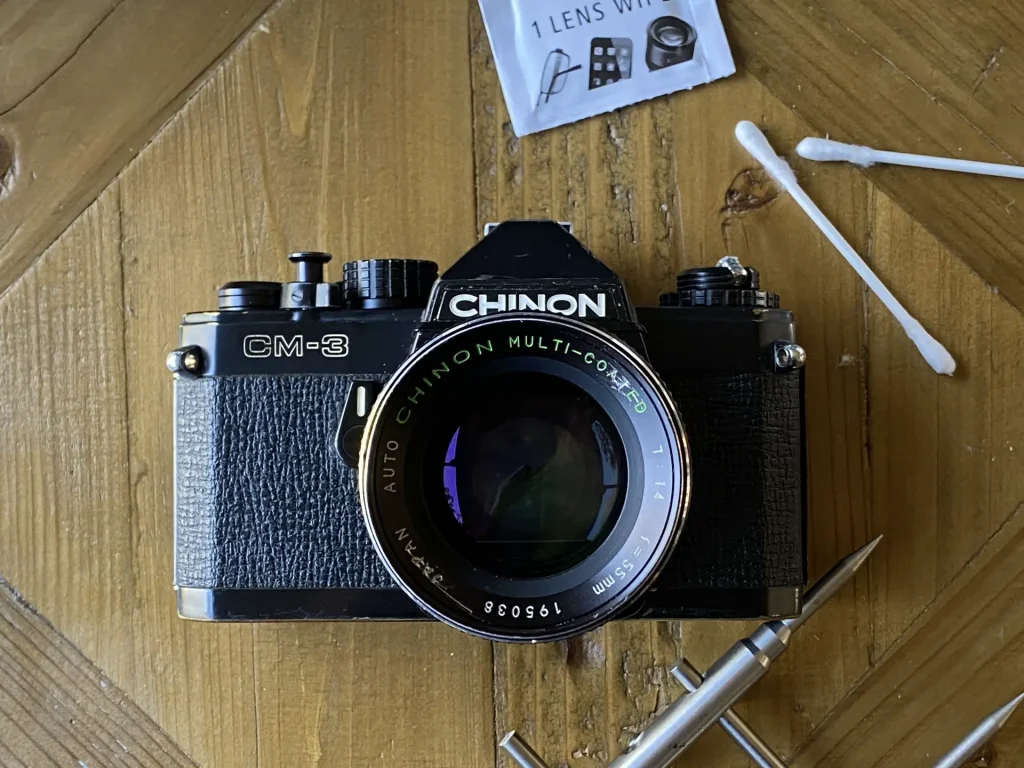
I recently started exploring Chinon gear – initially my interest was in PK mount lenses to add to my growing collection of Pentax equipment. I the found an M42 mount CM-3 and the 55mm lens via an ebay auction for £43. These lenses often go for more than this alone, but this particular auction had all the hallmarks of me ending up with a paperweight. It was titled poorly, and the description lacked detail and used the word “untested”, which we all know means broken, right?
As it turned out, the camera was mostly working. It was a bit gross, but after a wipe down, it was at least a mostly usable camera. On the other hand, the lens was not working very well at all. It’s an automatic aperture lens with a manual switch, but it didn’t matter what I did with it, the iris wouldn’t move. It was stuck wide open – probably, I assumed, gummed up with oil on the blades.
Repairing the Chinon 55mm f/1.4 lens
Anyone who has ever taken apart a lens will tell you they are far from made equally. Some are a lot more complicated to get into than others, and short of any easy to find guide or broader background experience in this sort of thing, sometimes you just have to get stuck in and take some bits off.
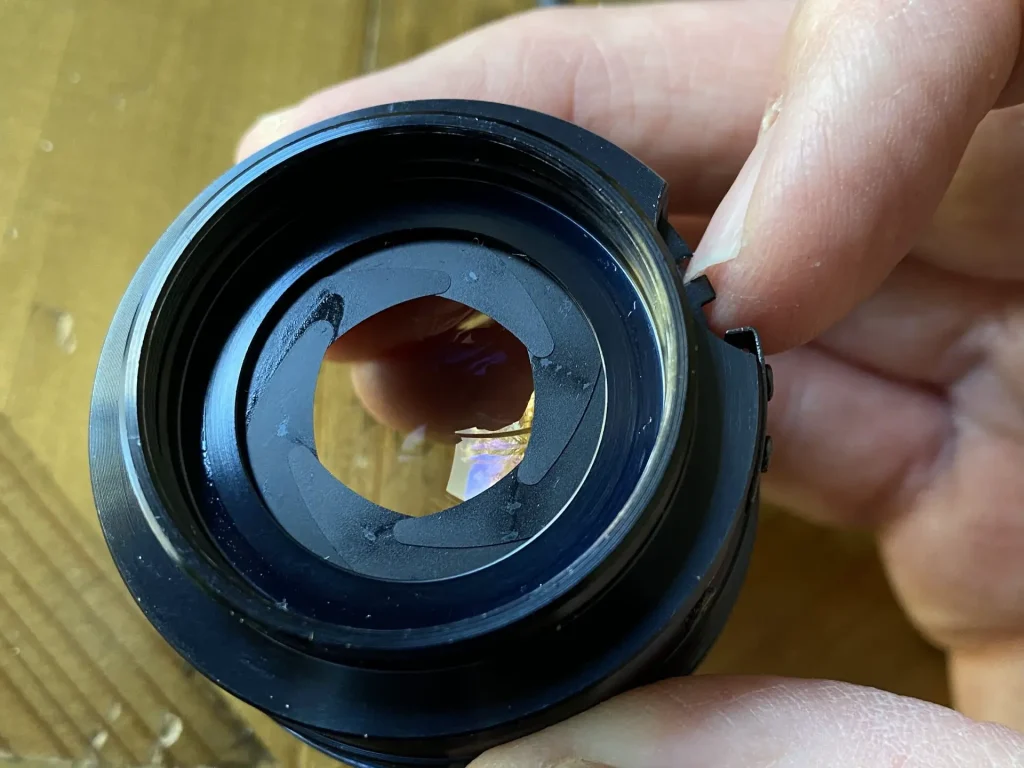
I actually attempted the repair twice. The first time I tried it, I accessed the iris from the rear of the lens. I managed to remove the rear element group and got as for as being able to access the mechanisms inside that that connect the aperture control dial to the iris. Sure enough, with a bit of tweaking I managed to free it. It very slowly stopped down revealing very oily blades. I managed to clean them up and get it moving freely just by wiping it gently with a cotton wool bud dipped in isopropyl. After doing this a number of times, the lens worked perfectly again.
Unfortunately, after a couple of days sat on the shelf, it gummed up again. It was still half-working. The iris opened and closed when I changed the aperture settings in manual mode, but it was very slow and seemed a lot more hesitant if I opened it to its maximum aperture. It was certainly too slow to use the lens successfully in auto-aperture mode.
As such, I decided to be a little more heavy handed. The lens fits into every single one of my above categories, so bugger it, I thought, if I balls it up I’m going to call it a “learning experience”… and learn I did too.
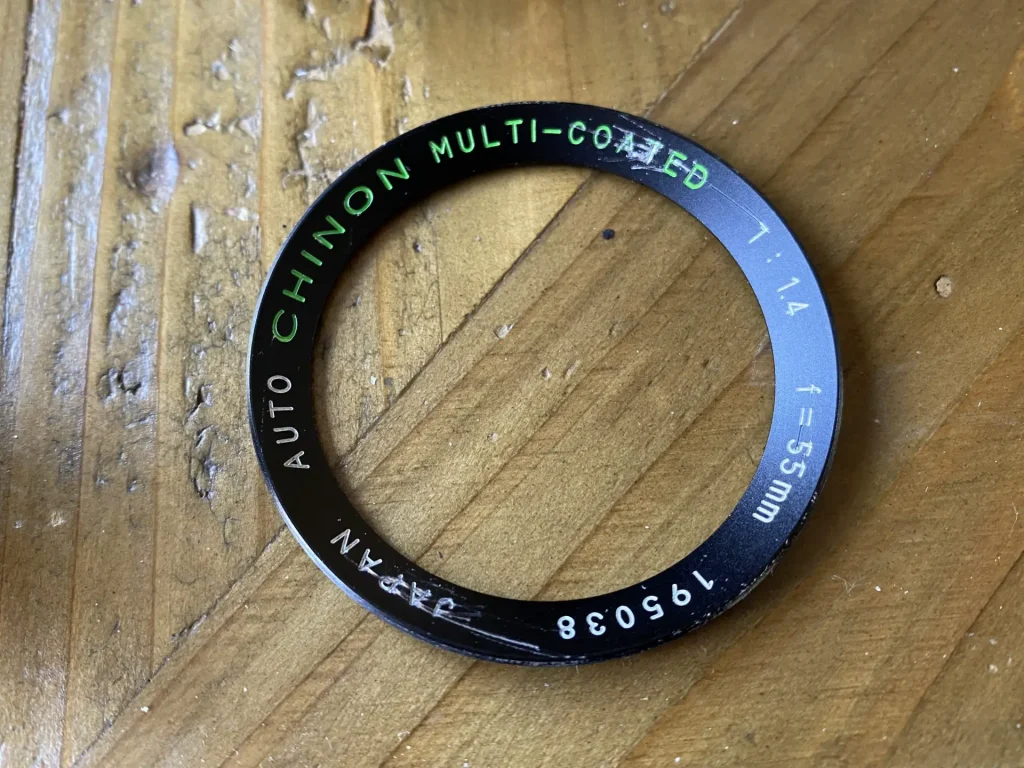
The thing I learned was that lens spanners are not the best thing for removing vanity rings. Of course, I knew this already, I’ve scratched them before doing this exact thing. The problem with this particular lens – unbeknownst to me when I started – was that the lens has obviously seen a beach, or at very least some grit in someone’s bag or pocket. The focus is smooth, but when I started unscrewing the vanity ring, the thread kept on grinding and eventually a load of grains of sand revealed themselves. The result of this was a lot more force needed to unscrew it and therefore a lot more scratches to the ring. I’ve since bought some rubber lens tools so as to avoid this in future.
It should also be noted, lens spanners and force near glass are a bad combination. If you decide to do what I did, you really need to be very careful so as not to scratch the front element!
Once the vanity ring was removed, I was presented with another retaining ring. This time it was one with two notches in… you know, the type that lens spanners are actually designed for…
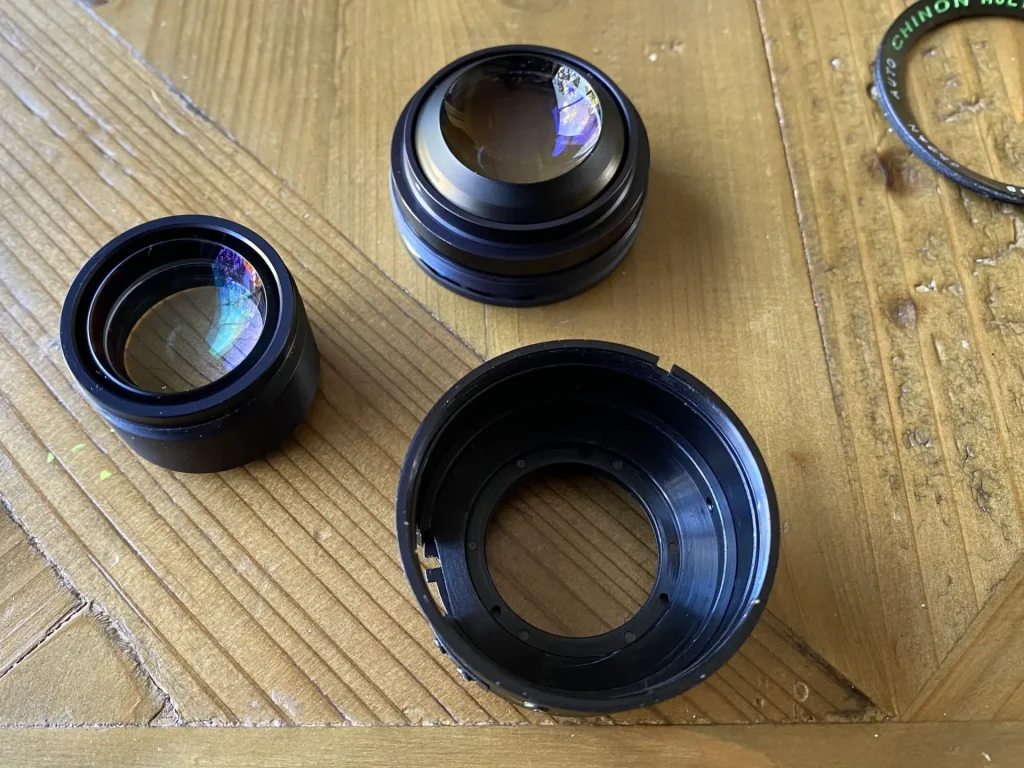
Once I’d unscrewed this, I was very pleased to find that the entire optical assembly just dropped out the front of the lens.
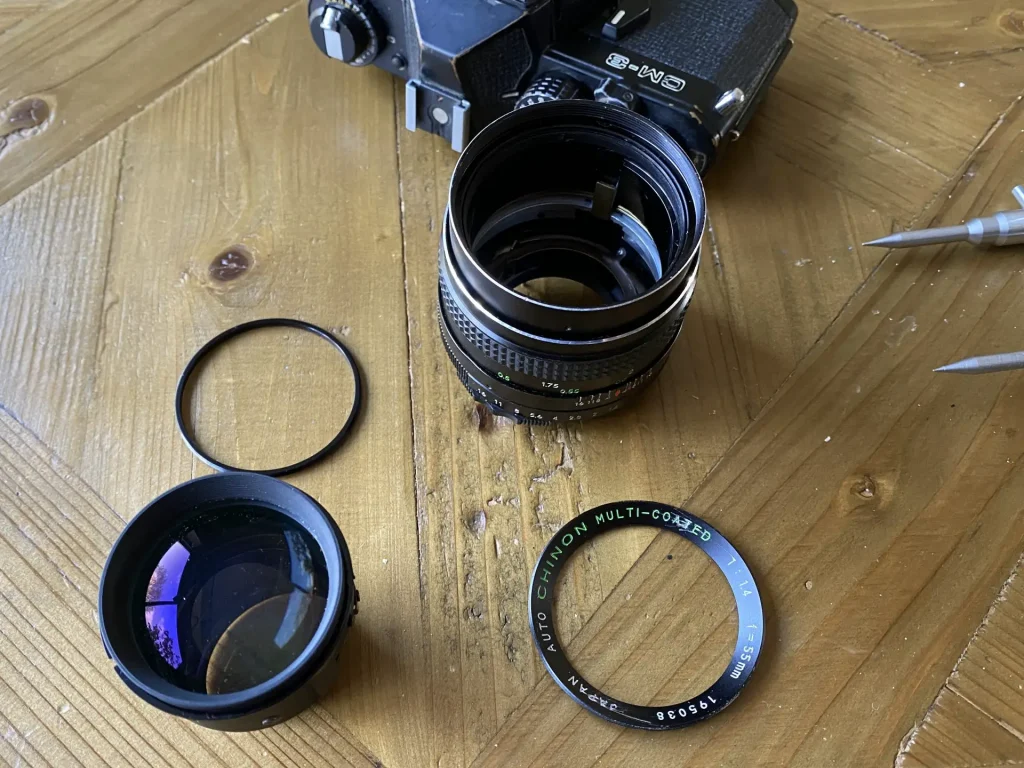
I already knew the rear group would unscrew from the iris, so I tired unscrewing the front too, and low and behold, it came out with ease leaving me with just an iris in its housing.
I did think about opening it up and cleaning the blades individually, but quickly thought better of that and started the process of cleaning with a cotton wool bud again. This soon got boring and proved mostly ineffective. For some reason when the iris was opened fully, it would stick open. This was even the case when the blades appeared to be completely clear of grease. Still reluctant to open the iris housing, I decided to take the plunge. Literally.
I found an old bowl, poured a few big glugs of isopropyl into it, and then dipped the housing into it and swished it around a load of times until I felt certain the stuff had gotten right into the mechanism.
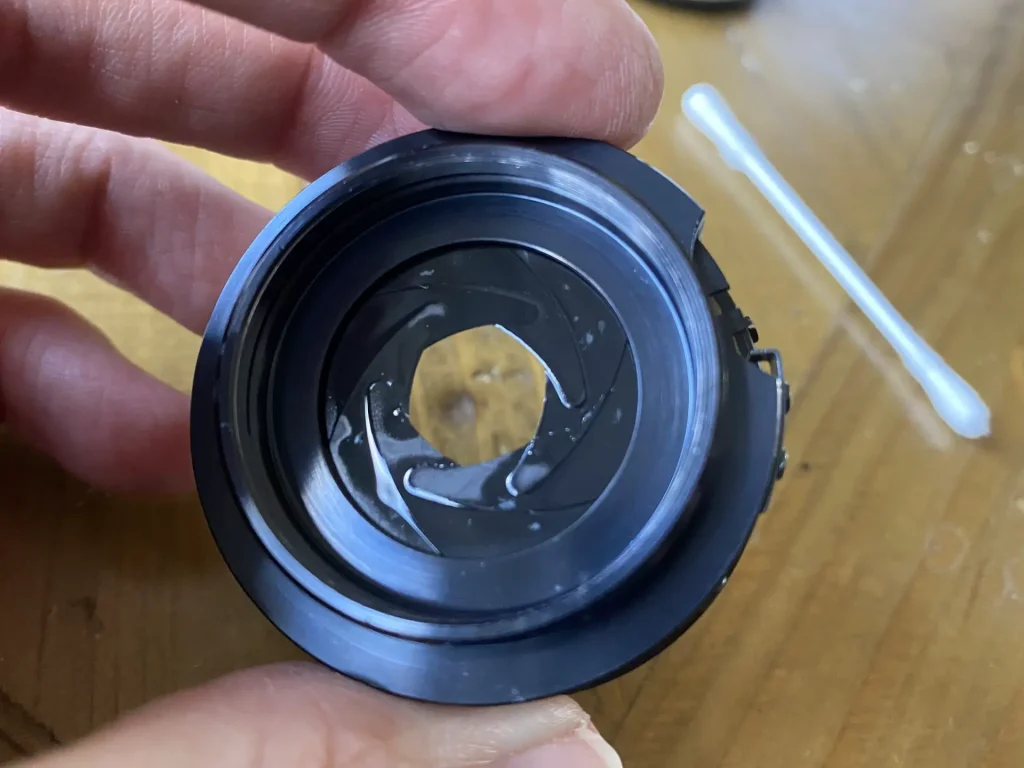
I then removed it, and blew on it whilst opening and closing the iris to help the isopropyl evaporate. Once it was dry, the iris moved freely and didn’t get stuck wide open.
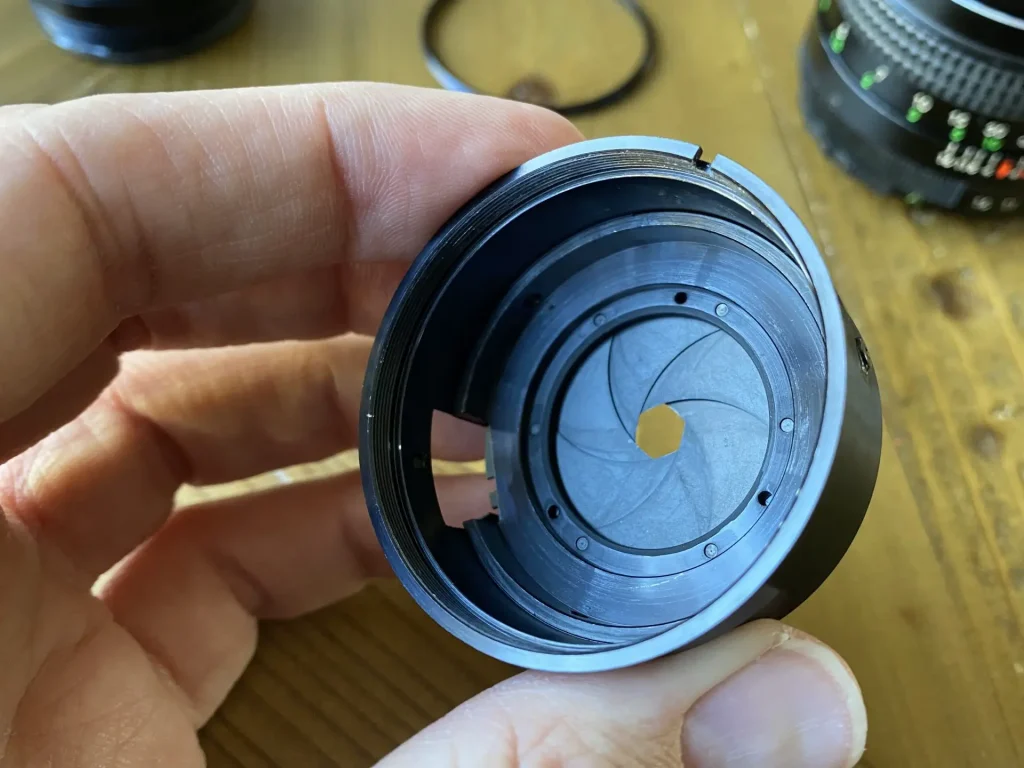
It even went back together with relative ease. Because the optical blocks and iris have their own assembly that just slots inside the focusing helicoid, there’s no worry about it going out of whack and not focusing properly. There’s only one way it can go in, and only one place it can locate with it functioning. If you do this yourself, just look for the little pin inside the lens and line it up with the notch on the iris control. You can see the notch in the opening in the image above.
Once in place, I screwed in the retaining ring and vanity ring – without the sand, it screwed in quite nicely.
The Chinon 55mm is now back together, albeit a little less pretty than it used to be, but it all works exactly as it should. I might have caused a little bit of damage, but I’m still really satisfied at having managed to repair it.
It was fun too, and it gave me the kick I needed to buy some rubber lens tools, not to mention the fact that the experience has grown my confidence in doing this sort of thing. Will I cause more damage in the future? Probably, but the way I see it, as long as I’m not breaking expensive, rare, or hard to find kit, it doesn’t matter that much… right…?
Of course, I’m now faced with a Chinon 55mm lens that I don’t expect will get too much use and has been devalued somewhat by my crack-handed approach to dismantling it. I’ll shoot a roll with it, and probably then sell it to someone at a low price. It didn’t cost me much in the first place, so I shouldn’t lose out too much I don’t think. And someone else will get a good lens for a lower price just for the sake of a bit of cosmetic damage.
Next job is another Chinon, this time it’s a 50mm f/1.7 I bought cheap that has a bit of fungus. I think I’ll wait for the rubber lens tools to turn up for that one though…
Share this post:


Comments
Bob Janes on DIY Repairs to Not-So-Precious Lenses – Chinon 55mm f/1.4 M42
Comment posted: 26/04/2021
One way of cleaning up the vanity ring would be to take it off and sand out the surface scratches - you might end up with very shallow engravings (or none at all), but it might look better painted in matt black than as it is at present.
Could also drill a couple of holes to take some dividers to make it easier to get on and off in future (in fact would drilling holes in the vanity ring have made it easier to get off in the first place?)
Comment posted: 26/04/2021
Comment posted: 26/04/2021
Comment posted: 26/04/2021
Jordi Fradera on DIY Repairs to Not-So-Precious Lenses – Chinon 55mm f/1.4 M42
Comment posted: 26/04/2021
It would be interesting to see a photo taken with the camera and the lens repaired.
Comment posted: 26/04/2021
Terry B on DIY Repairs to Not-So-Precious Lenses – Chinon 55mm f/1.4 M42
Comment posted: 26/04/2021
Many years ago I dabbled but without long-term success in that I'd get a camera working, only for the fault to reappear not long after.
My one and only true success, of which I'm very pleased, was to a Leica R3 which I came across on ebay being offered up as in mint condition but with faults. Having owned one in the mid-1980's I was very familar with the model, so I took a gamble and bid on it. And in mint condition it certainly was.
To say what I did could hardly be labelled a repair, as it only required a judicious amount of Singer sewing machine oil on a metal rod easily accessible through the lens throat. I could see that this moved a different amount depending upon whether the mirror flipped and the shutter fired, or it didn't. I surmised a lack of use could be the culprit as the ERC was also mint. So I took another gamble applied a drop of the oil and let it work its way down the connecting rod and tried again with the camera some hours later. Lo and behold, it worked, so I played with it for at least an hour, and it still works to this day. But the less said about my other repair attempts the better!
Wim van Heugten on DIY Repairs to Not-So-Precious Lenses – Chinon 55mm f/1.4 M42
Comment posted: 26/04/2021
Easy to find great instruction videos on Youtbe: https://youtu.be/TuJ_Me4SLeo. Never ever remove a name ring with a spanner. By not disassembling the aperture mechanism to clean it, there will be oil left that will let it stick again. Next time better follow the Youtube intructions! I love to bring vintage lenses back to life again, especially Pentax (Takumar) lenses.
Tobias Eriksson on DIY Repairs to Not-So-Precious Lenses – Chinon 55mm f/1.4 M42
Comment posted: 26/04/2021
Mike on DIY Repairs to Not-So-Precious Lenses – Chinon 55mm f/1.4 M42
Comment posted: 26/04/2021
That spurred me on to more repair projects and I have since destroyed a Zenit 11, a Minolta SRT101 and a 135mm f3.5 Minolta MC lens.
I Feel too guilty to throw them in the bin so there's a kind of camera mass grave developing in the corner of my room.
I hope you have better luck (and more dexterity) than me
Comment posted: 26/04/2021
Ralph Turner on DIY Repairs to Not-So-Precious Lenses – Chinon 55mm f/1.4 M42
Comment posted: 26/04/2021
All seems to have been fairly successful. I’d be very interested to hear other opinions with regard to fungus removal and also if there are any definitive references on the subject. Sorry this turned into a ramble, Hamish, but it seems to be a habit of mine once I get going lol. I look forward to your next endeavour. Btw this was the first time I’ve ever had a go at anything like this ????
Comment posted: 26/04/2021
Steve Curzon on DIY Repairs to Not-So-Precious Lenses – Chinon 55mm f/1.4 M42
Comment posted: 27/04/2021
Comment posted: 27/04/2021
Lee on DIY Repairs to Not-So-Precious Lenses – Chinon 55mm f/1.4 M42
Comment posted: 27/04/2021
Very nice write-up.
Comment posted: 27/04/2021