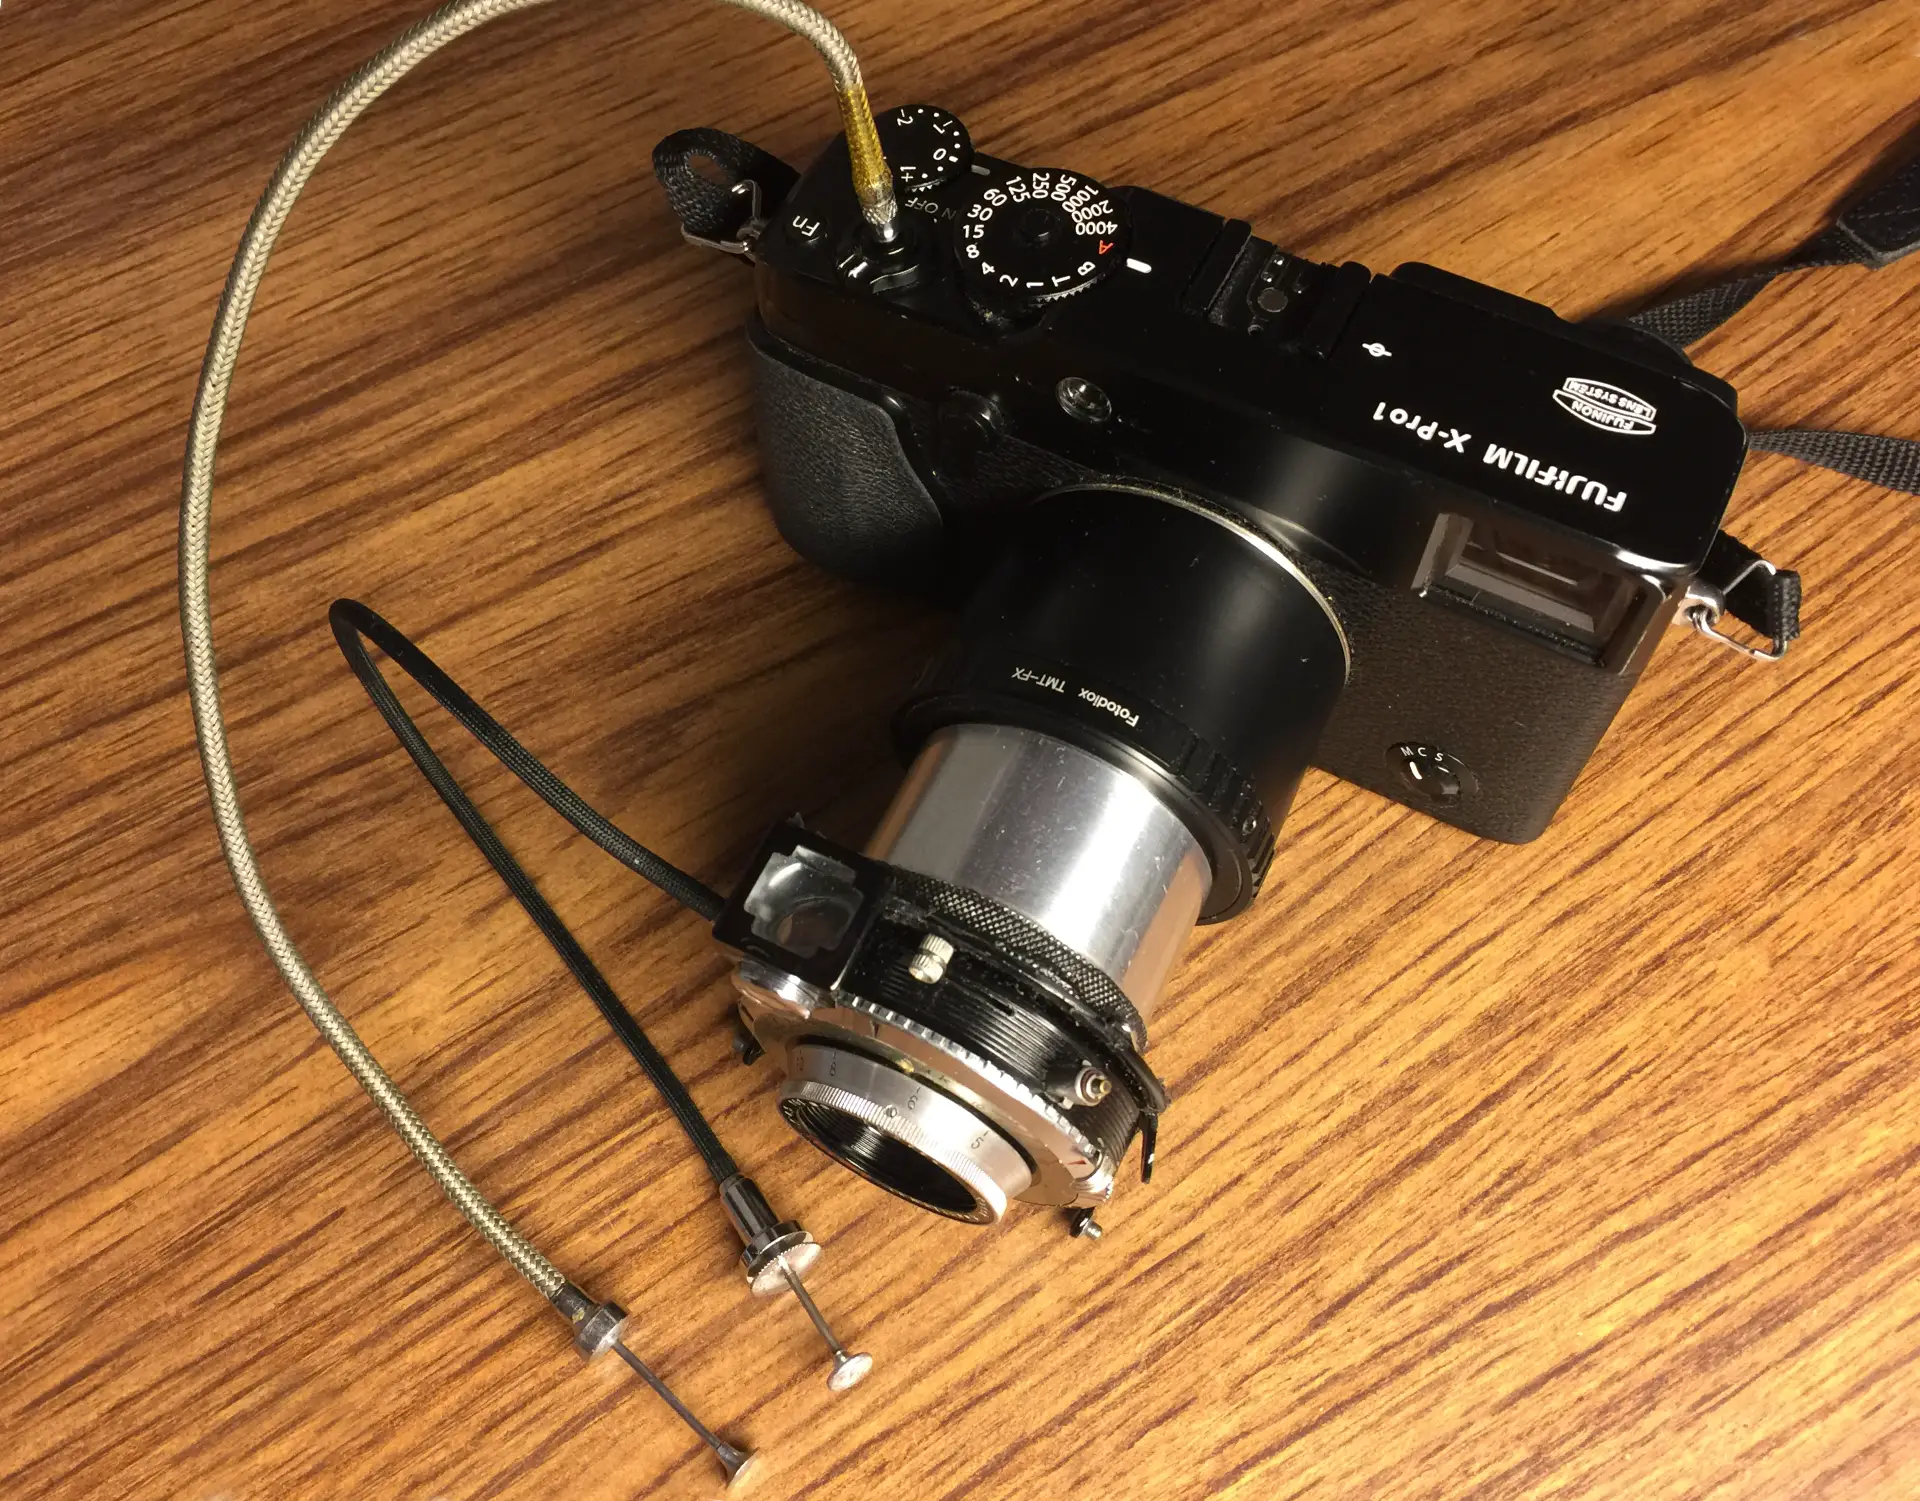
In my days before 35mmc, Jim Gray published this article on his great “Down the Road” site. It described how and why I adapted a 1940’s Kodak Monitor Six-20 lens to use on my Fuji X-Pro1 digital.
If you’re interested in the “how,” check out that article! But the “why” was simple. The Kodak camera’s 101mm f/4.5 Anastigmat Special lens is a famously good Tessar. And when I found a trashed Monitor Six-20 medium-format folder with a clean lens, I adapted it to the Fuji. [SPOILER ALERT: The conversion involved hack-sawing… but not of the X-Pro1!]
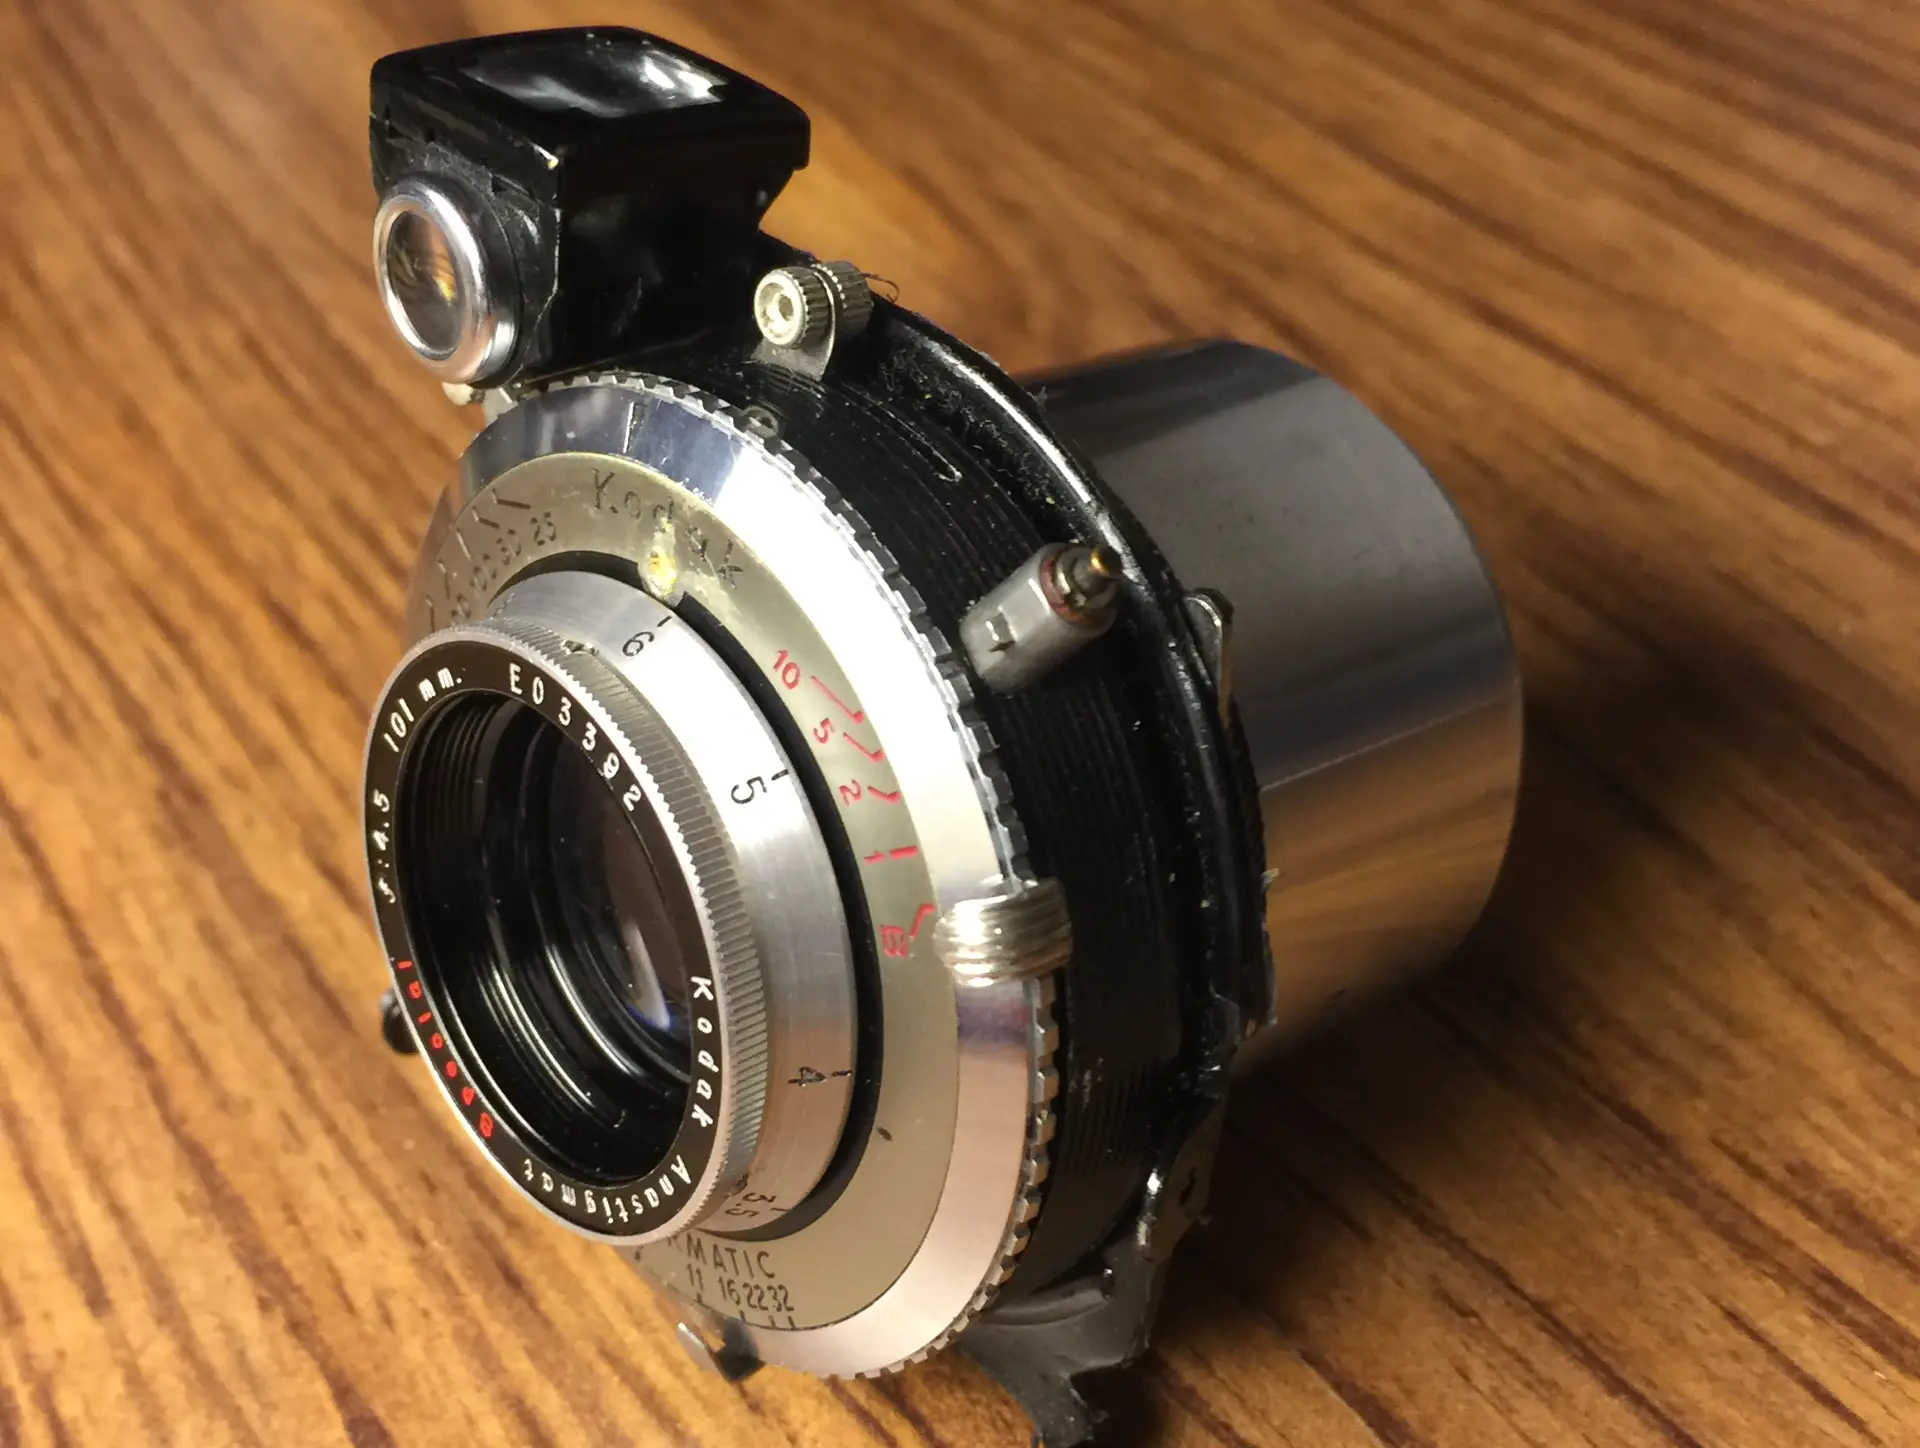
I thought I could use a vintage bellows extension tube to mount it on the camera. But even fully compressed, the tube proved too long to achieve infinity focus. So I cracked open my box of miscellaneous tubes and connectors, spent a delightful afternoon looking for some that might work, and eventually settled on a vintage 30mm-long Accura T-mount macro-extension tube.
I used industrial-strength E6000 adhesive to attach it to the back of the Anastigmat Special’s lens board… and mounted the combo on the camera with a TMT-to-FX adapter (seen in the opening photo). Here’s the finished lens… ready for action. NOTE: It’s extremely light, fairly cyberpunk-ish, and only 2.25 inches long:
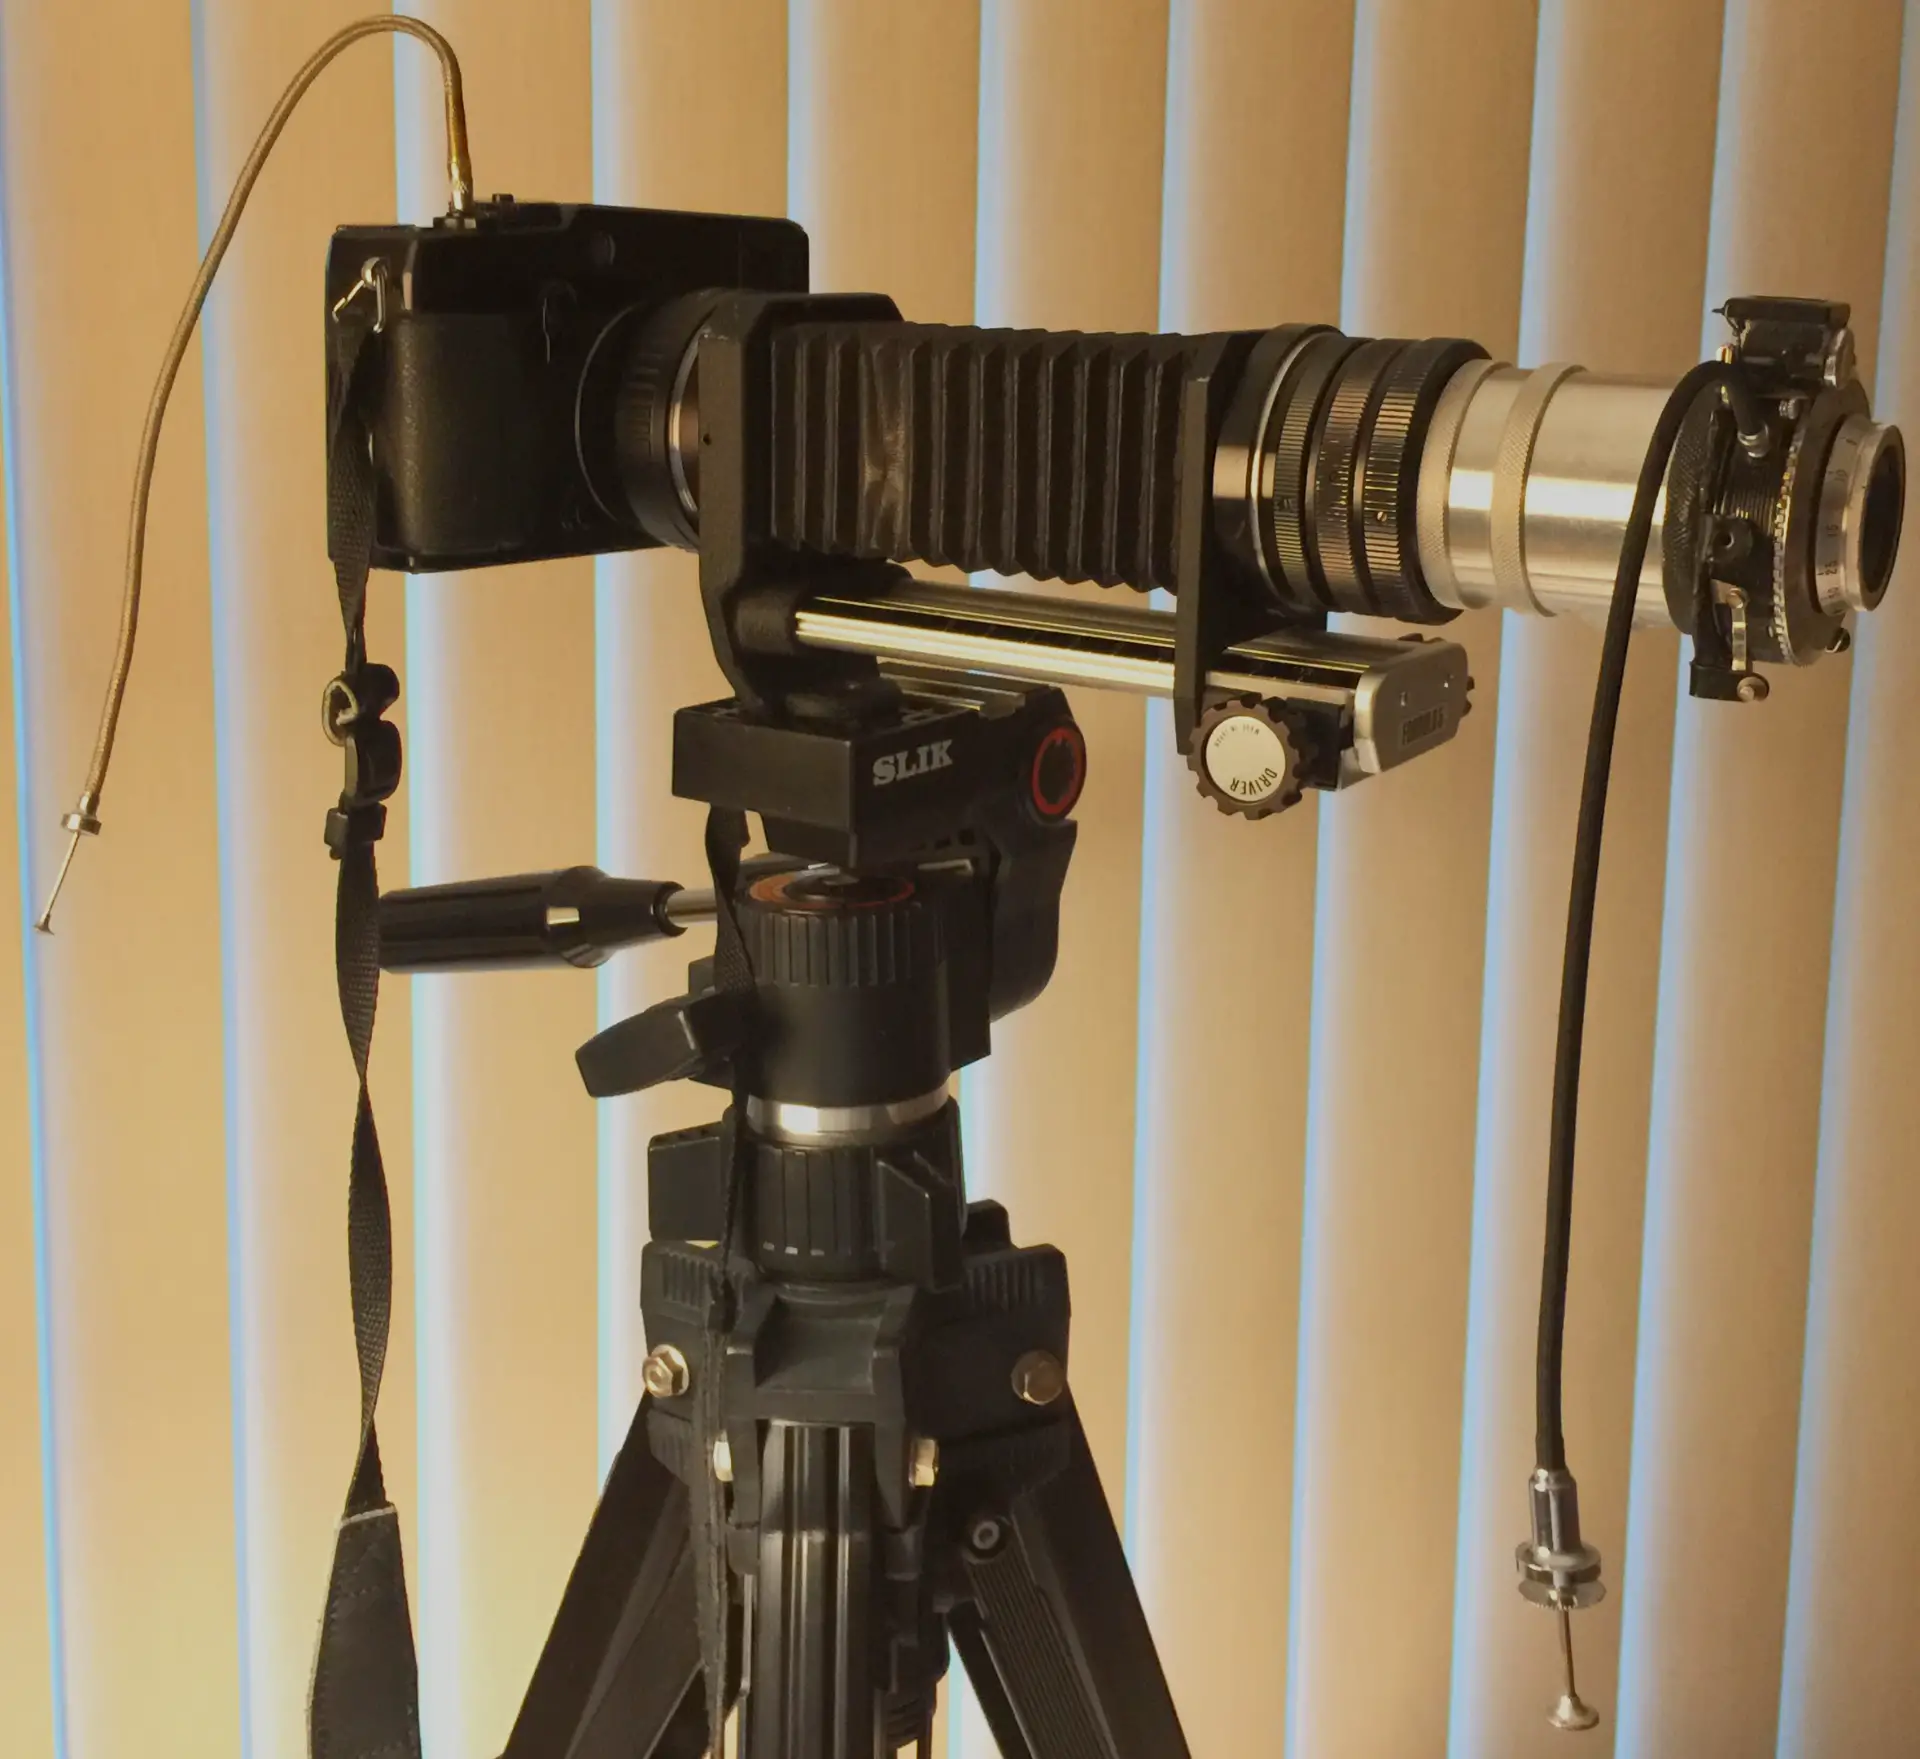
Why Two Cable-Releases?
Why does the opening photo show two cable releases? I’m tempted to say they honor the Frankenstein Monster’s neck bolts! But I won’t. The real reason is that when mounted on the X-Pro1, the lens became a 135mm telephoto. And this made it important to minimize all sources of camera shake. So:
- I always mounted the FrankenFuji on a tripod, rather than hand-holding it.
- The self-locking black cable-release opened the Kodak lens (set to Bulb mode) and held it at its preset aperture.
- And then, the silver cable triggered the X-Pro1 shutter.
This allowed me to shoot the circa-1940’s lens at any speed the X-Pro1 allowed– even as fast as 1/4000 sec!
Plus a Surprising Feature
Little did I realize what that macro extension tube also permitted. It was part of a typical vintage set of three hollow metal tubes: 10mm, 15mm and 30mm long. I suddenly realized that if I screwed either the 10mm, 15mm or both onto the back of my FrankenLens’s 30mm tube, I’d get macro lenses with three levels of magnification. A “zoom macro” of sorts!
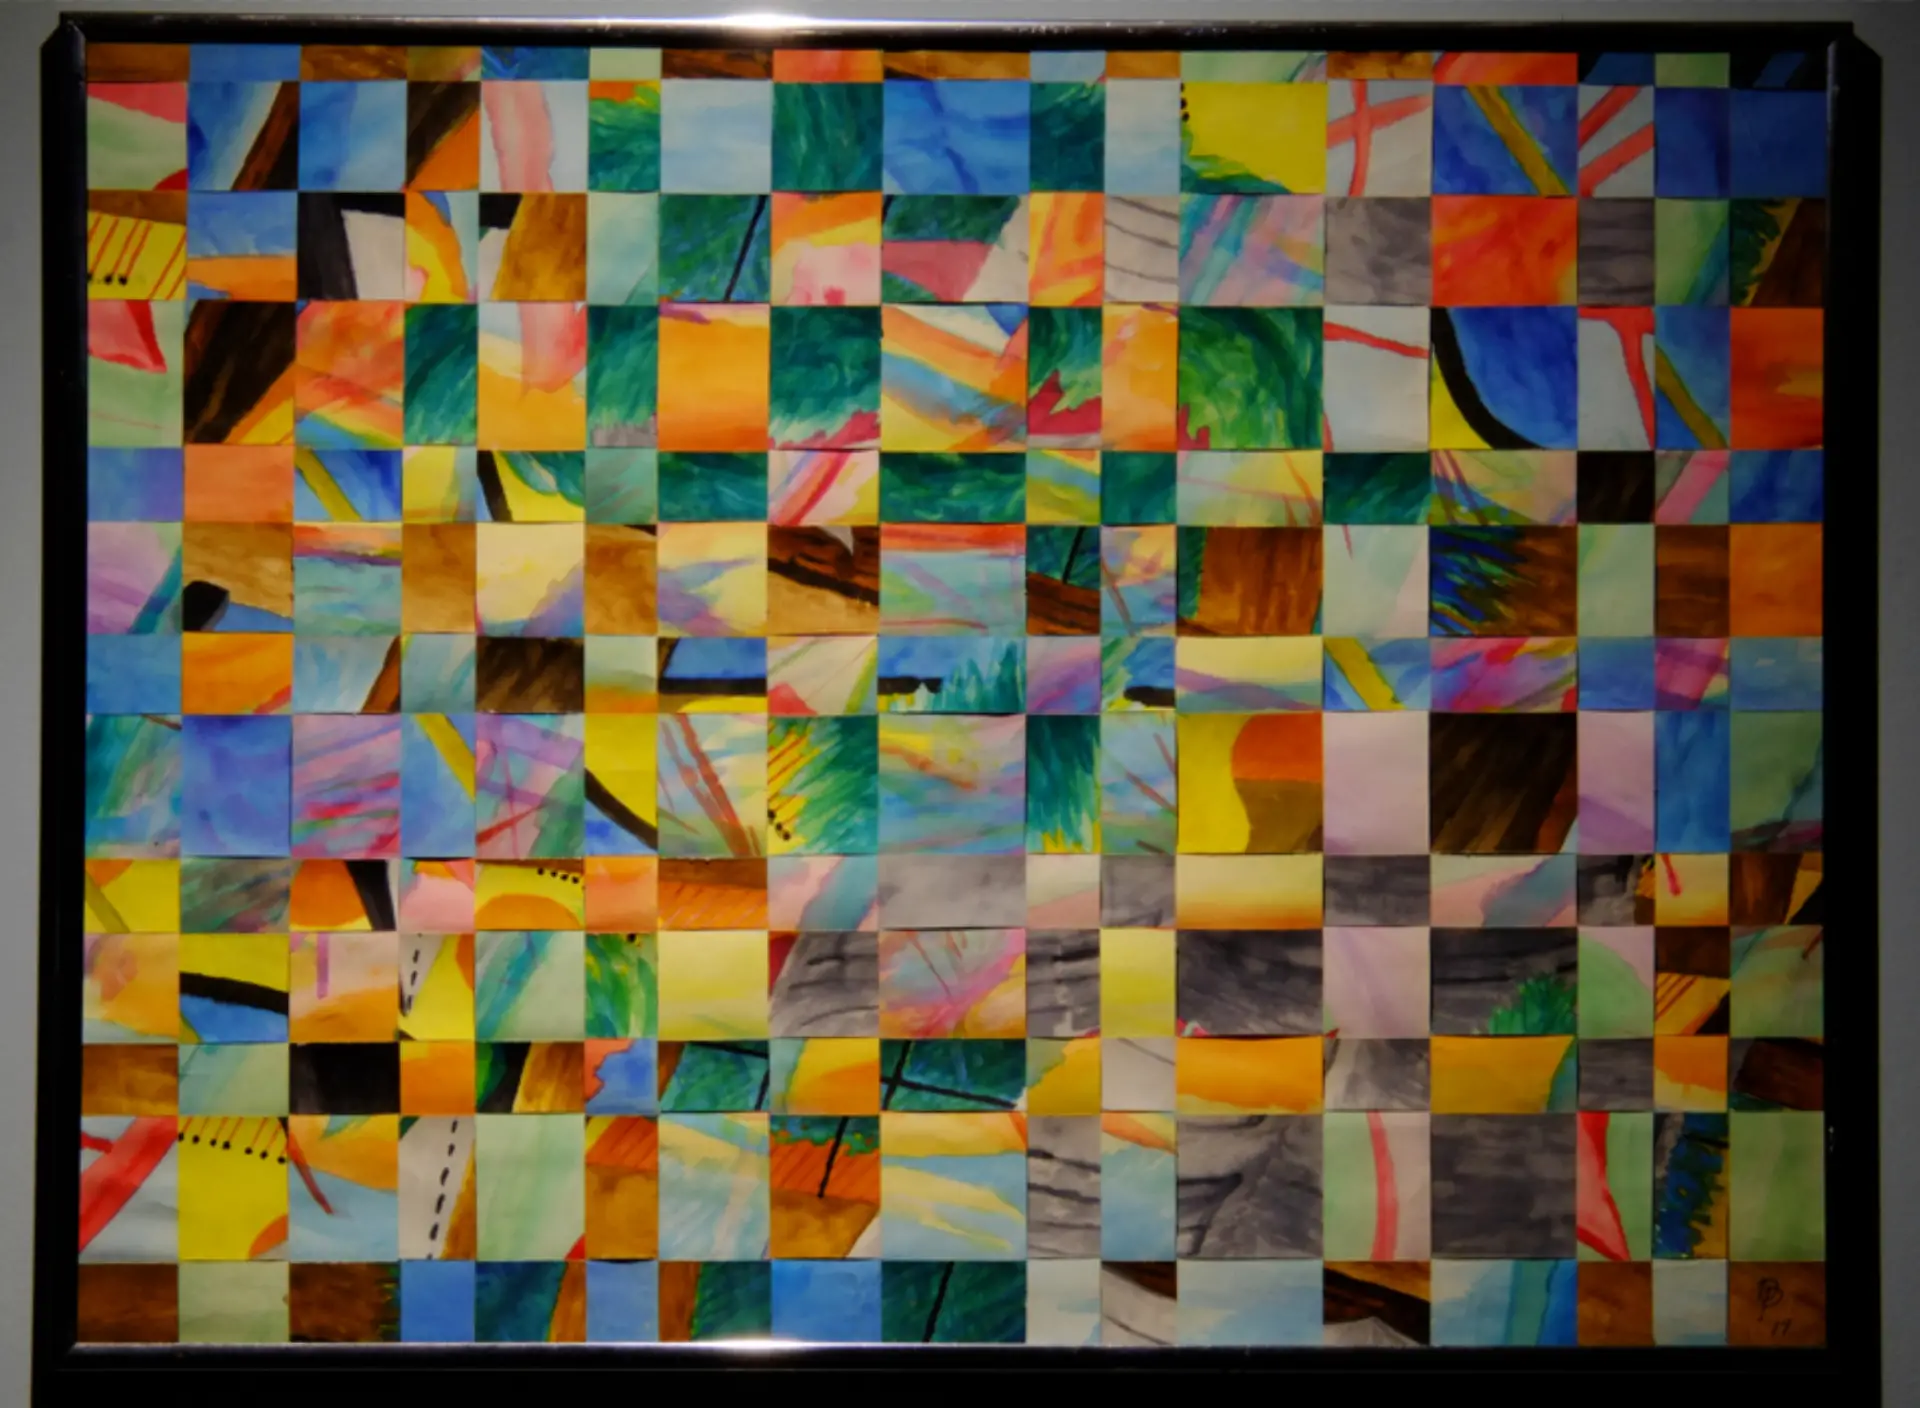
And my best target for testing these macro levels AND the quality of their enlargements was the following woven-paper abstract– which I made from two forgettable watercolors that I painted in high school. (These night-time shots were illuminated only by a floor lamp.):

And Closer Still…
Wanting to explore the lens’s macro-magnification range, I then shot two more configurations: first, with the 10mm tube added and then, both the 10mm and 15mm:

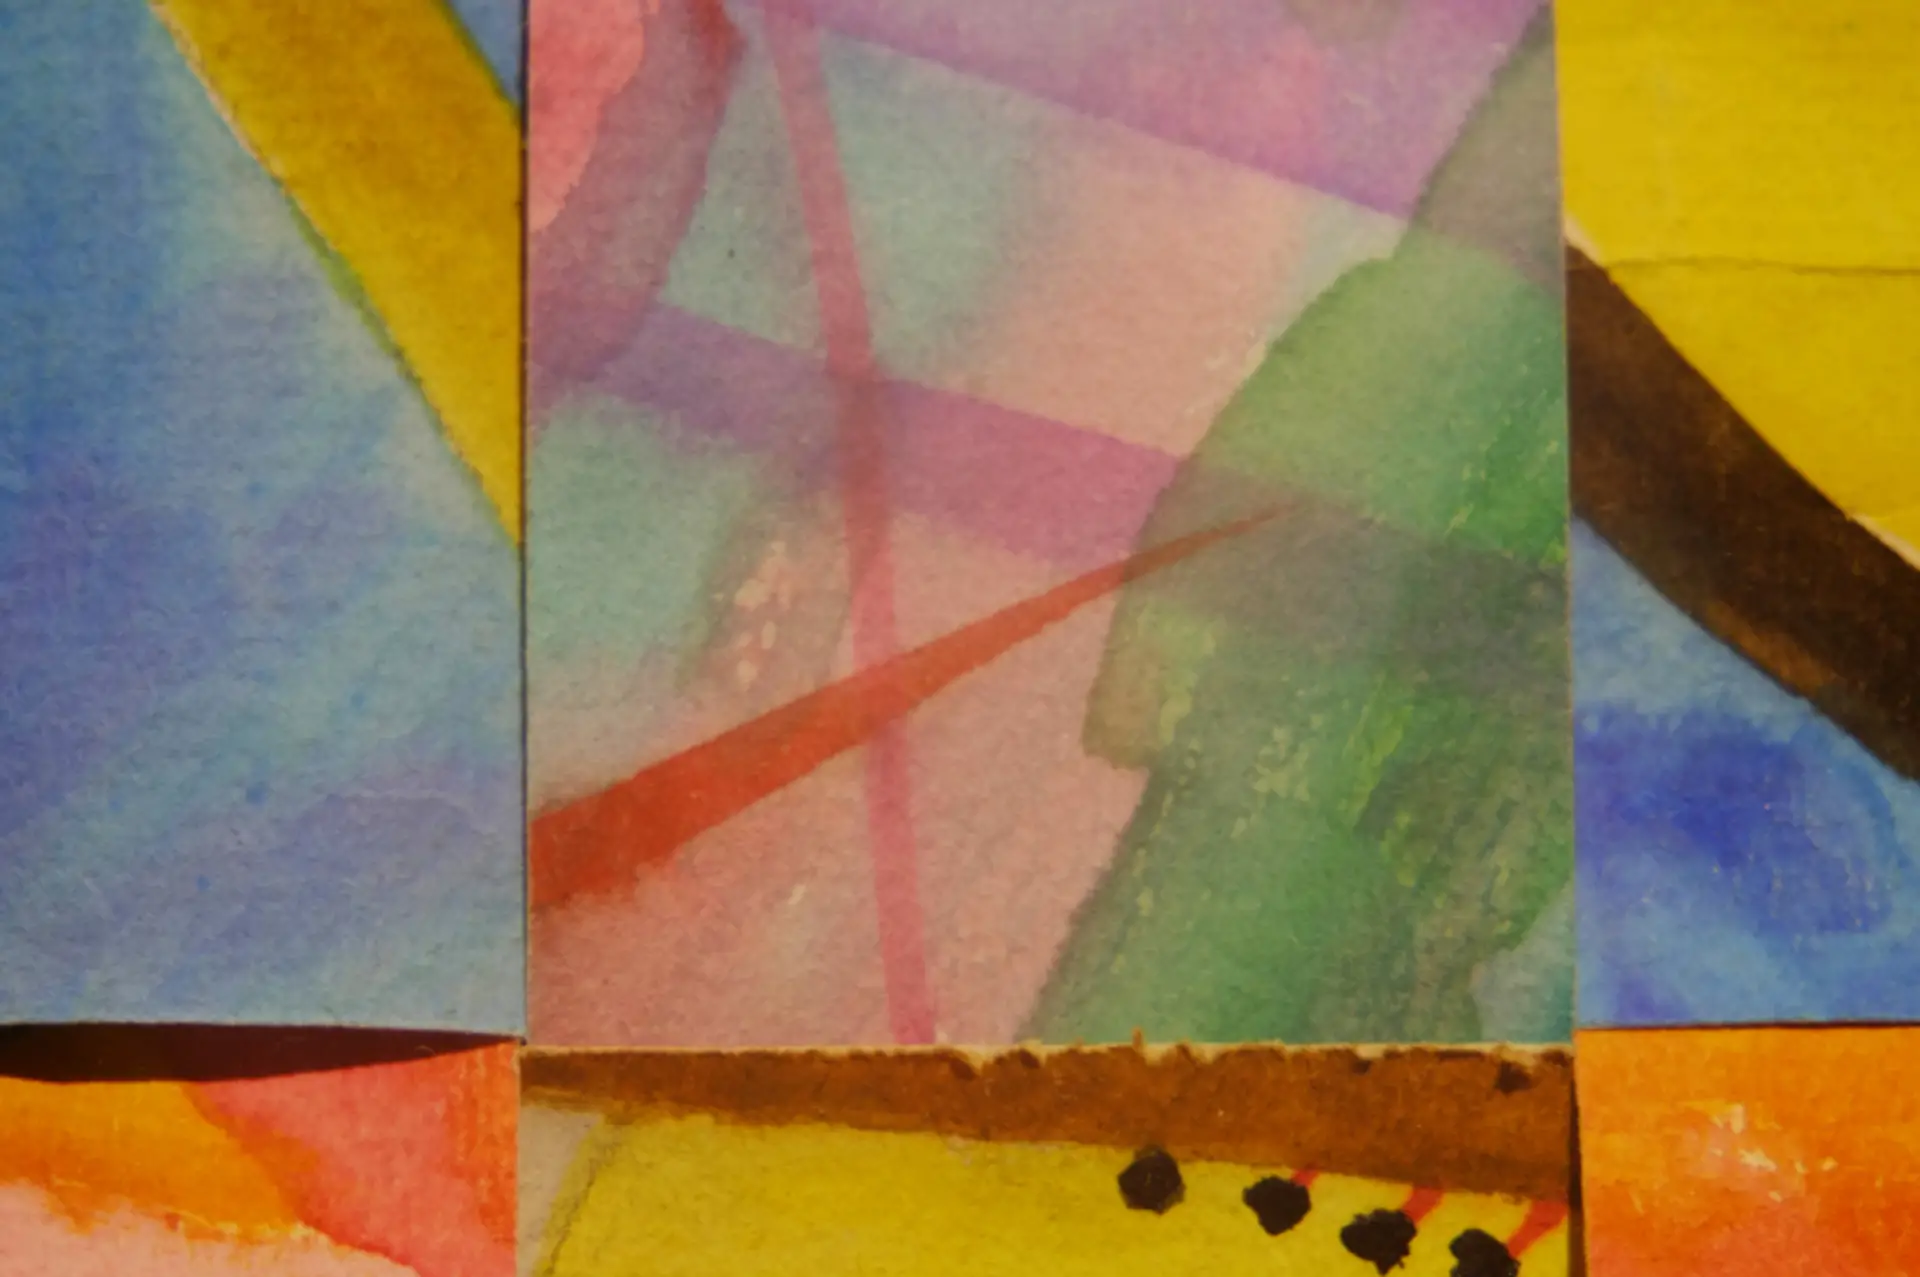
I was shocked at the photos’ color fidelity, sharpness and lack of distortion. That Kodak Tessar certainly lived up to its reputation! (And you’ll find more shots of other subjects in the article linked earlier.)
Then… Ultra-Super-Duper Macros!
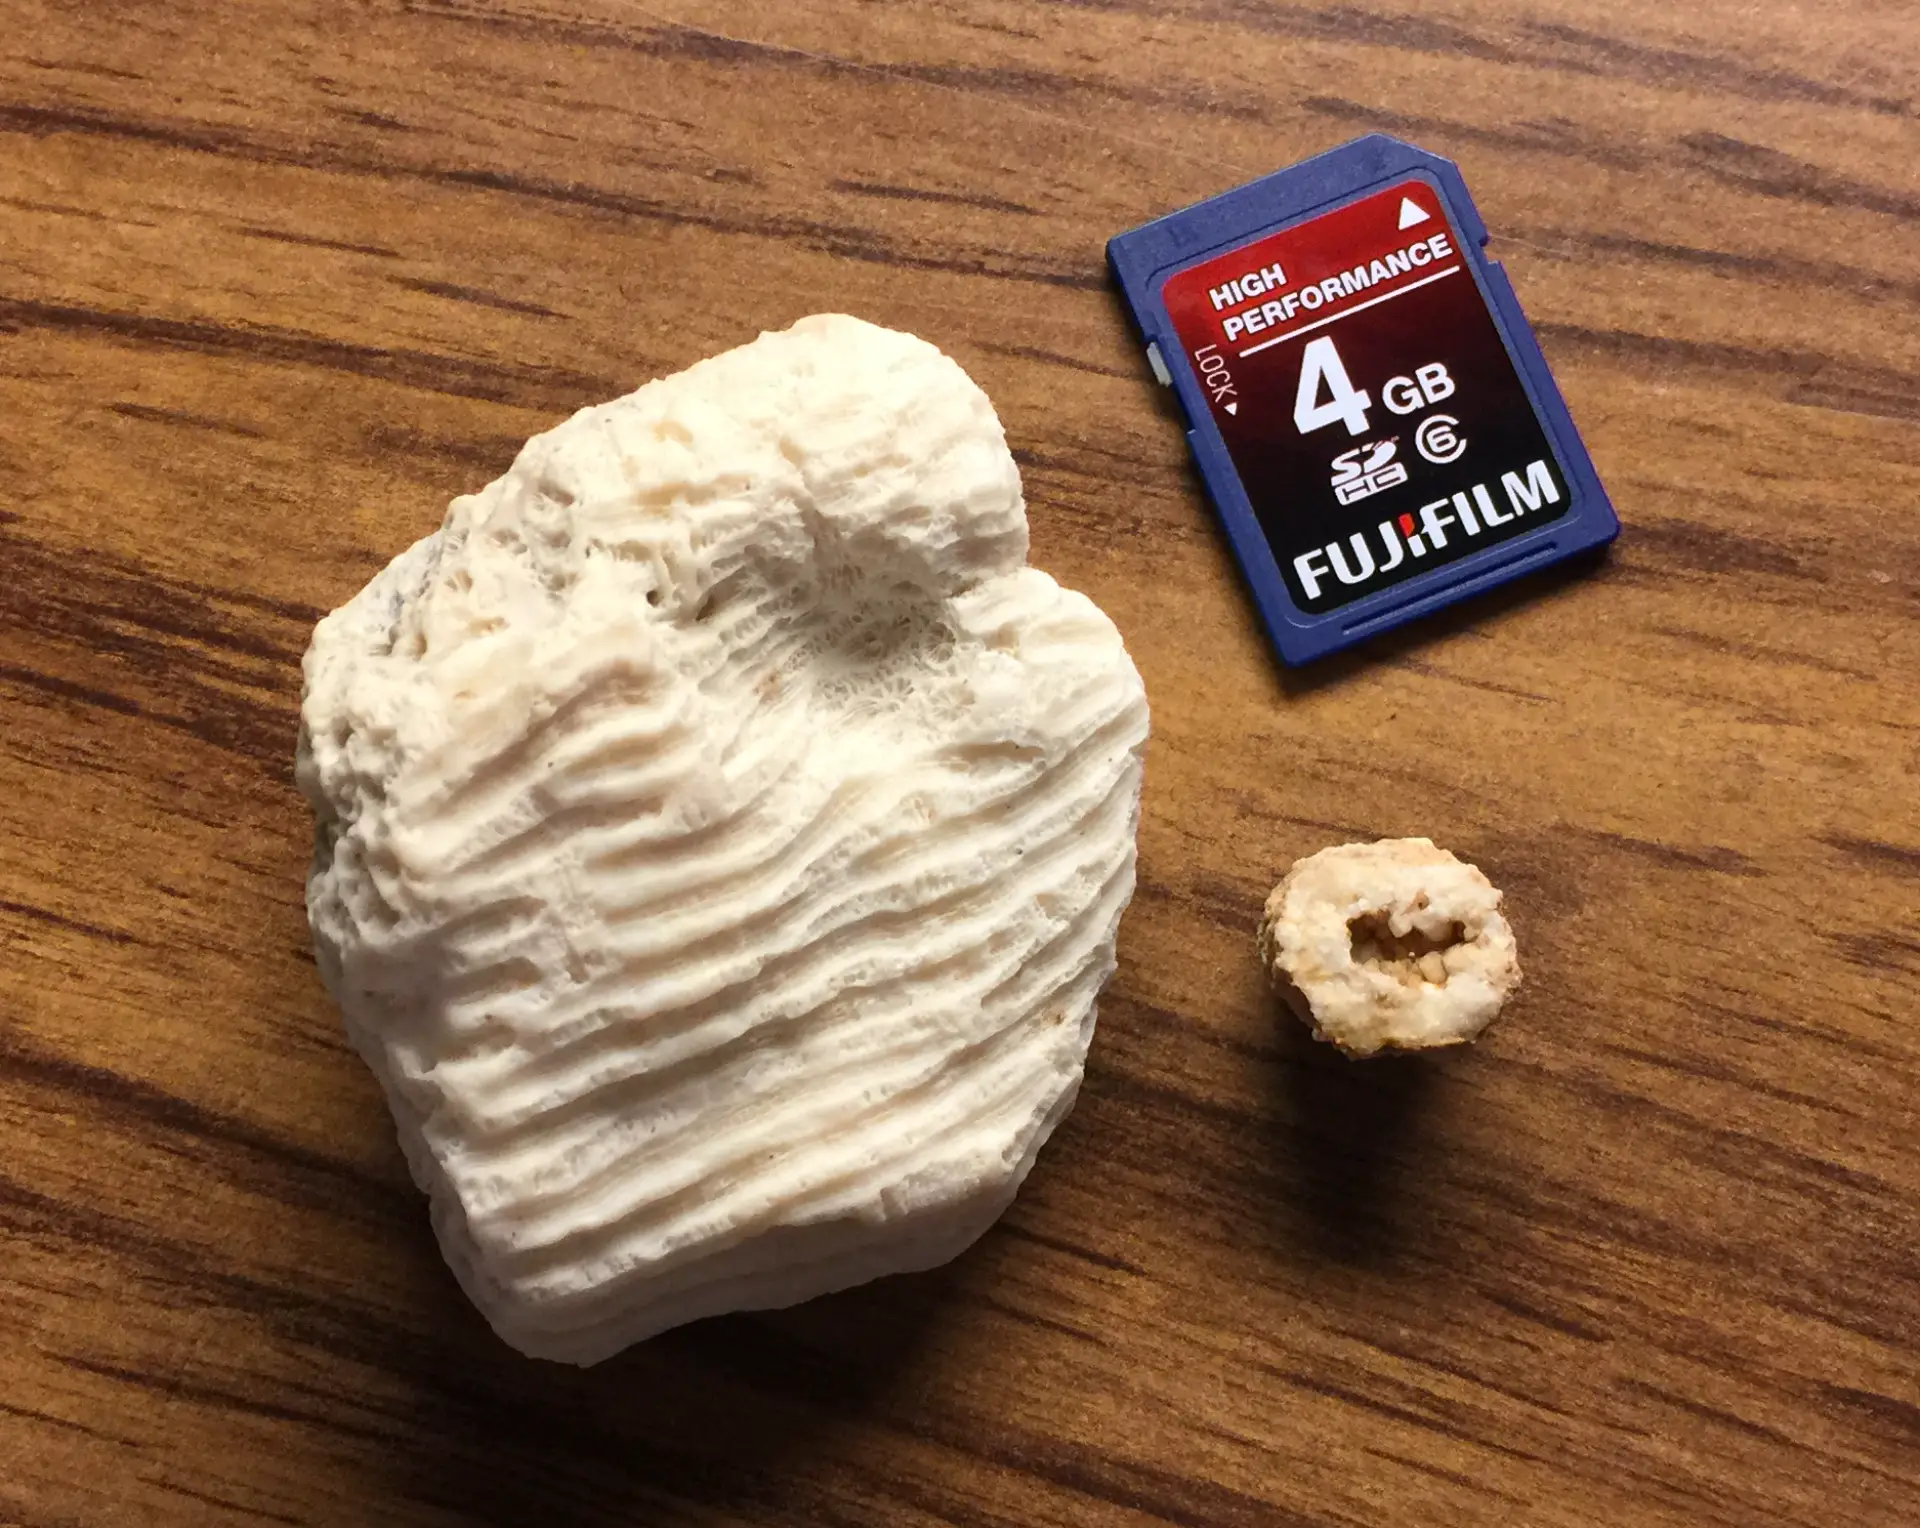
When I was a kid, mom, my younger brother, two sisters and I rediscovered a long-lost fossil field in Columbus, Ohio. (It’s a fascinating adventure for another story!) Over the years, we collected many marine fossils dating back nearly 280 million years.
And I’ve long wanted to try “super-duper-macro” photography (with magnifications far above 1:1). My new FrankenFuji lens seemed a good candidate for that… if used with the bellows extension tube that I’d rejected earlier. I also had a second set of T-mount extension tubes. And cobbling them all together, I got this:
I chose two fossils for this first attempt (shown below beside an SD card for scale). Both are corals, but the smaller hollow one gets its extra color from iron:
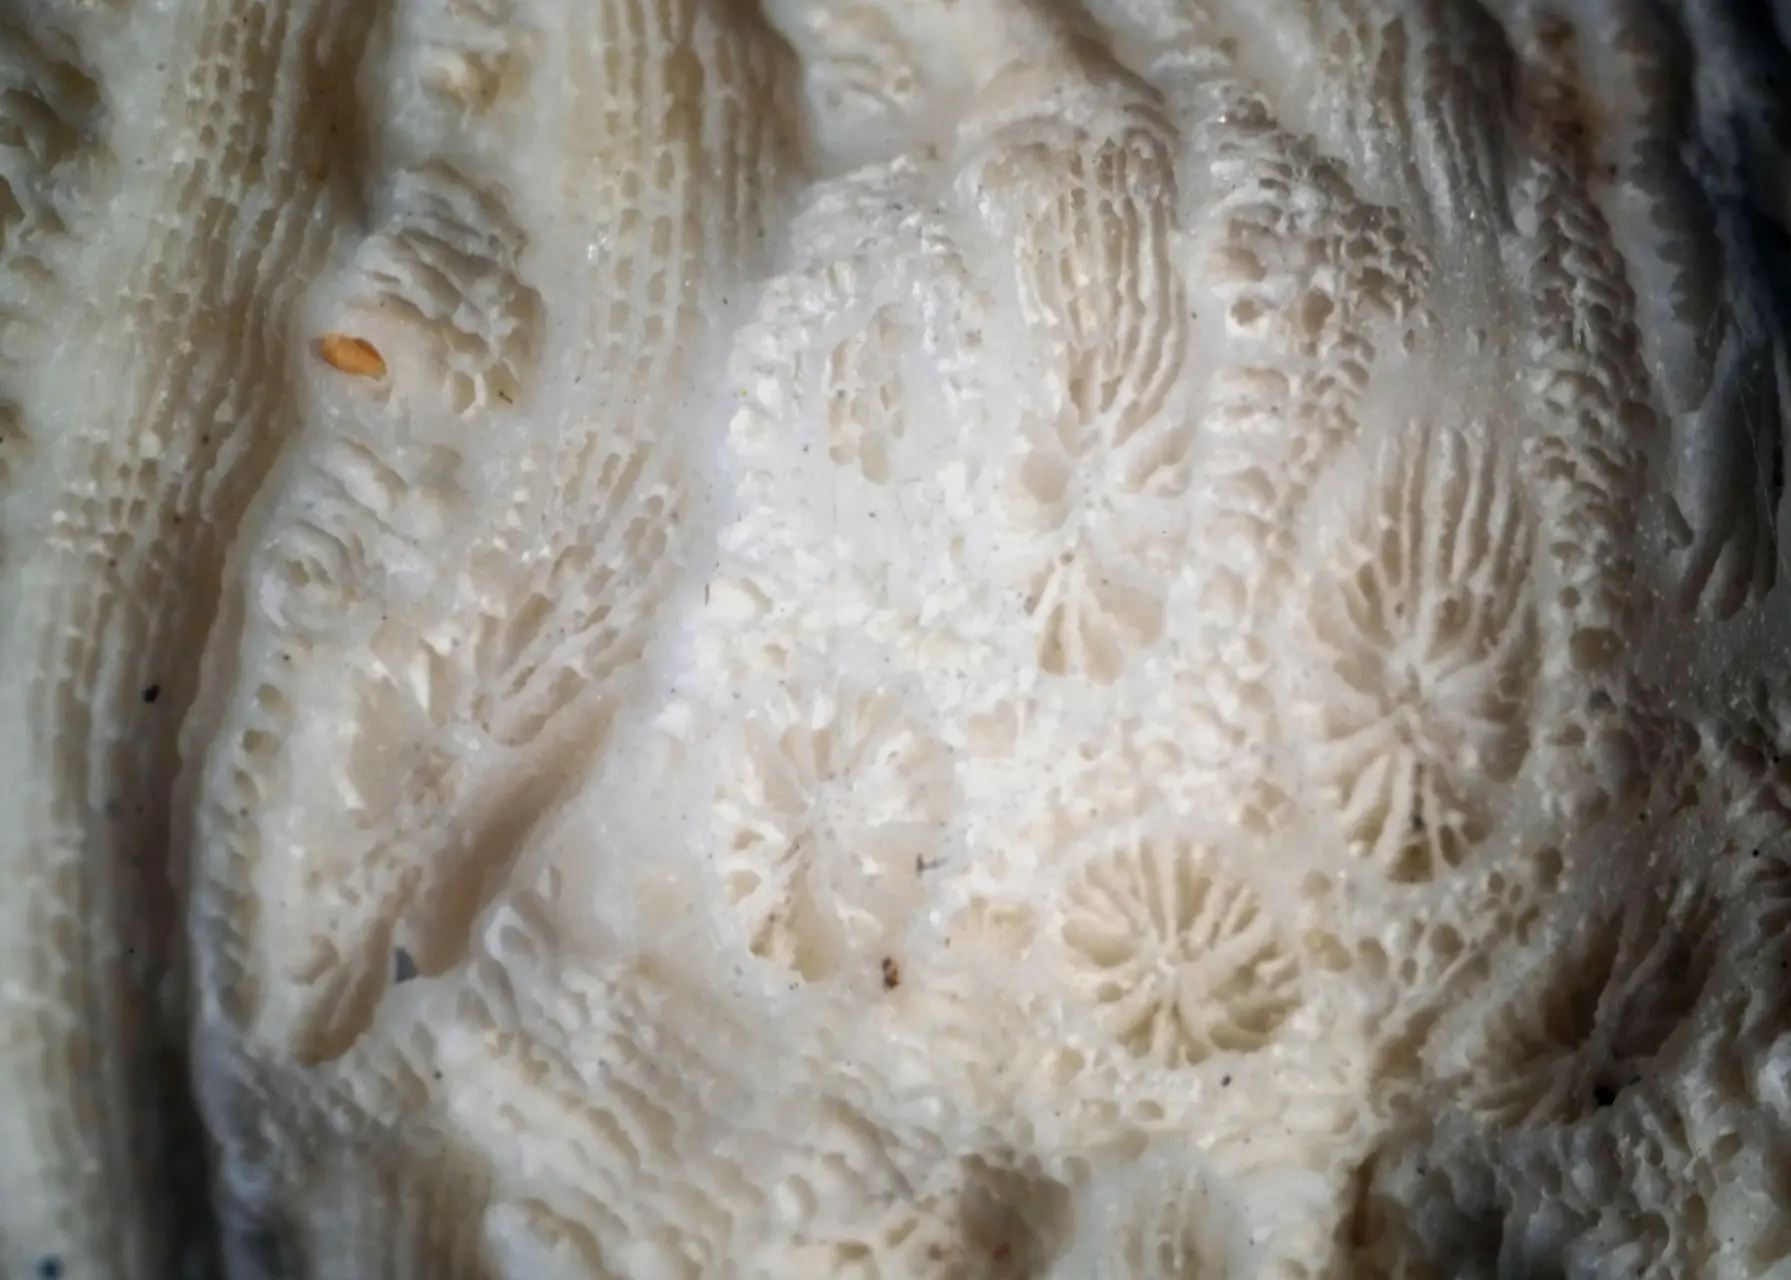
The area photographed below is in the shadowy portion of the oval depression in the larger chunk. (The following two photos were illuminated with a goose-neck desk lamp placed beside the camera to prevent lens flaring):
And in the next shot, you can see an extremely tiny, pointed, hexagonal “micro crystal” of quartz (like a tooth) just inside the lower lip of the smaller fossil’s “mouth”:
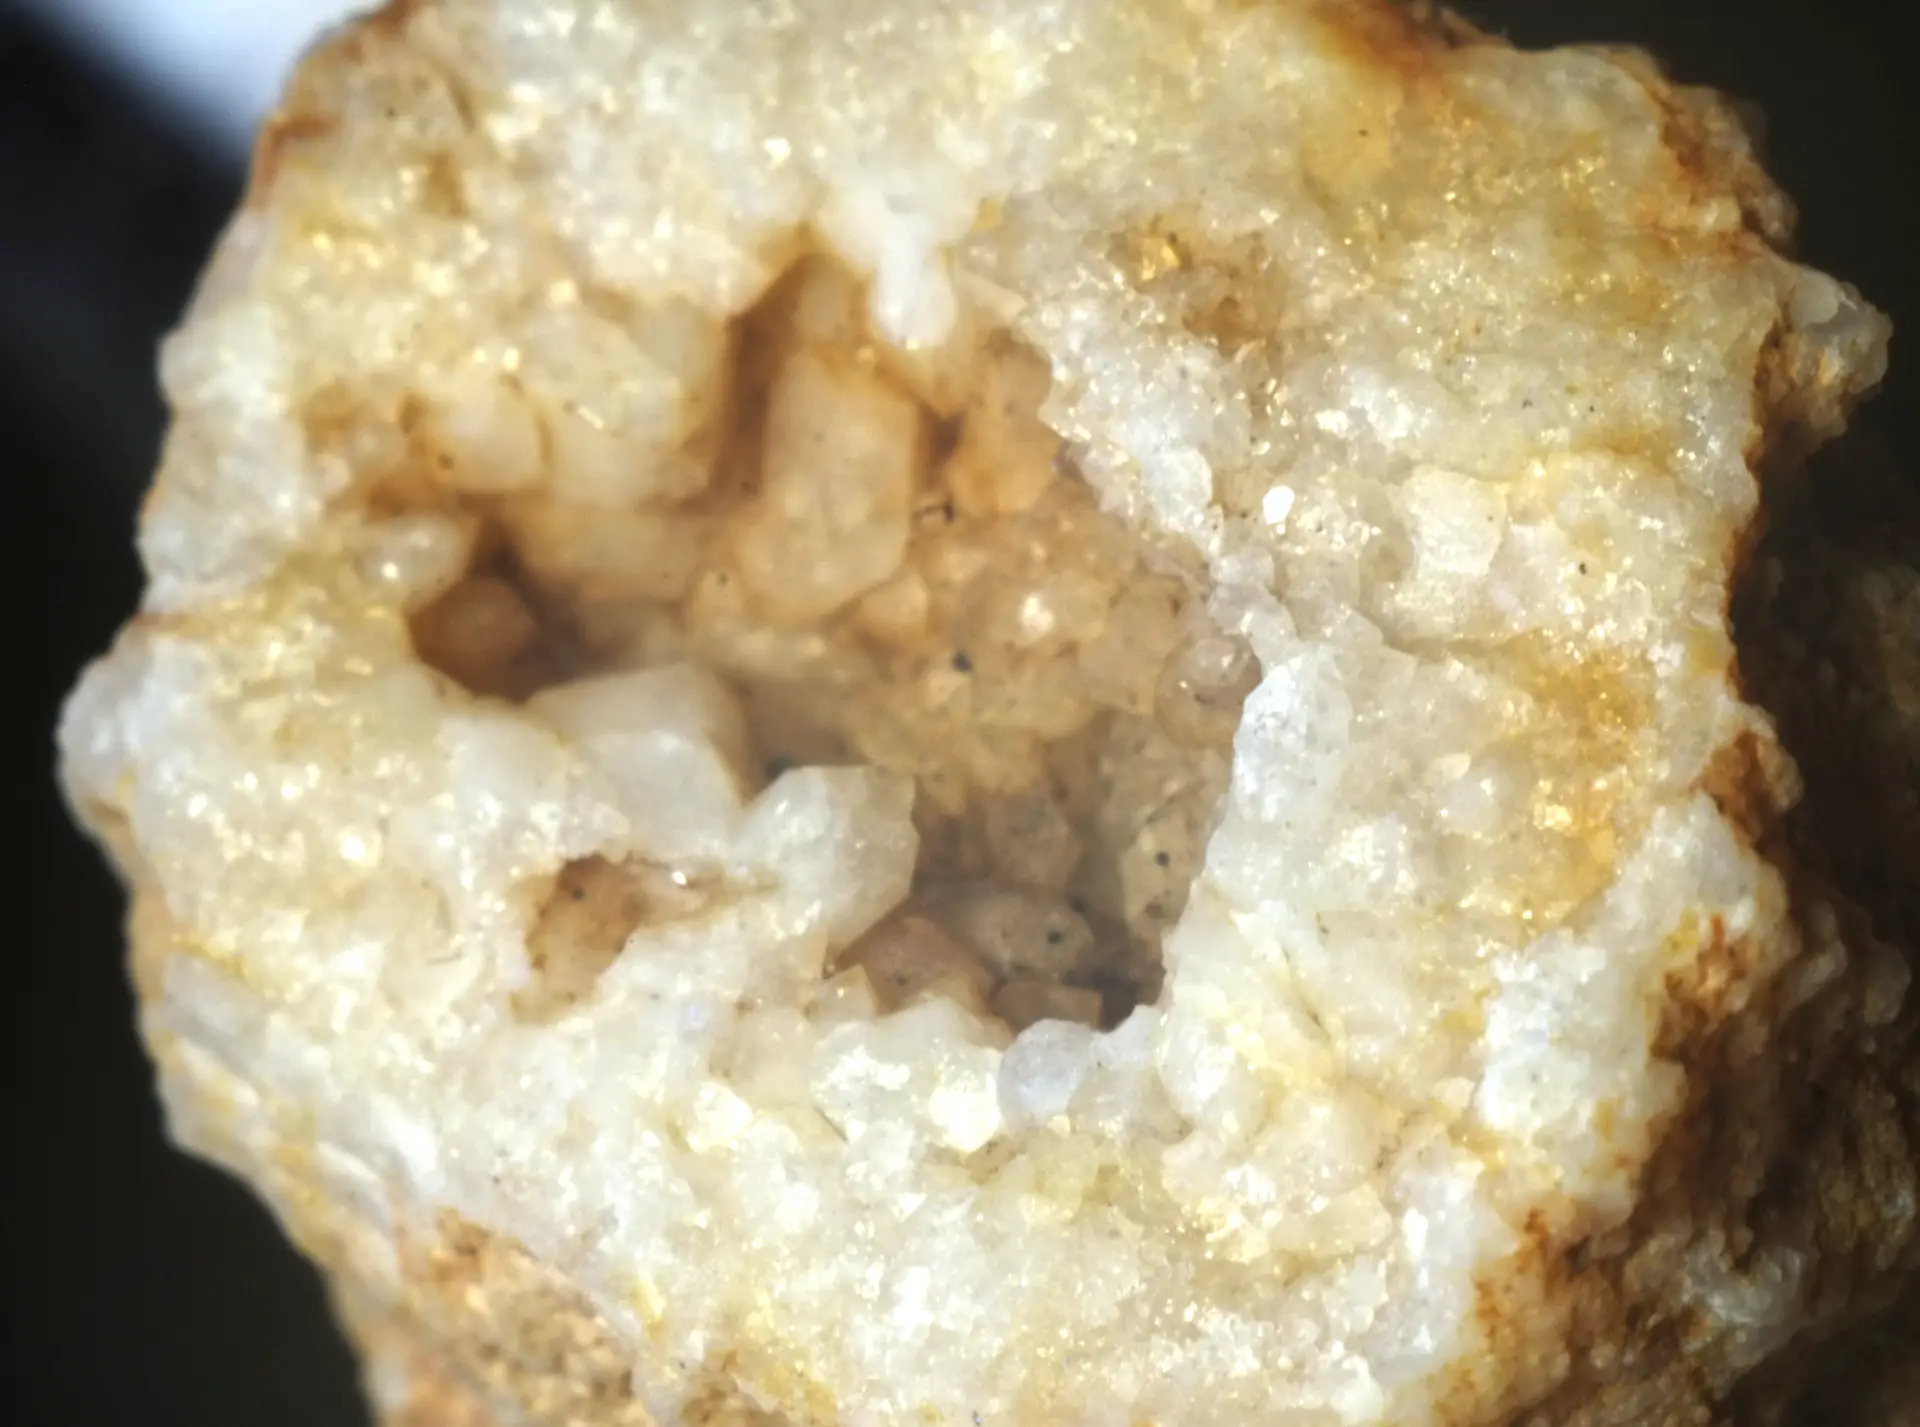
Comparing the dimensions of objects in the photos (when displayed at 100%) with the sizes of the actual subjects, it appears that this setup achieved a 60:1 magnification ratio.
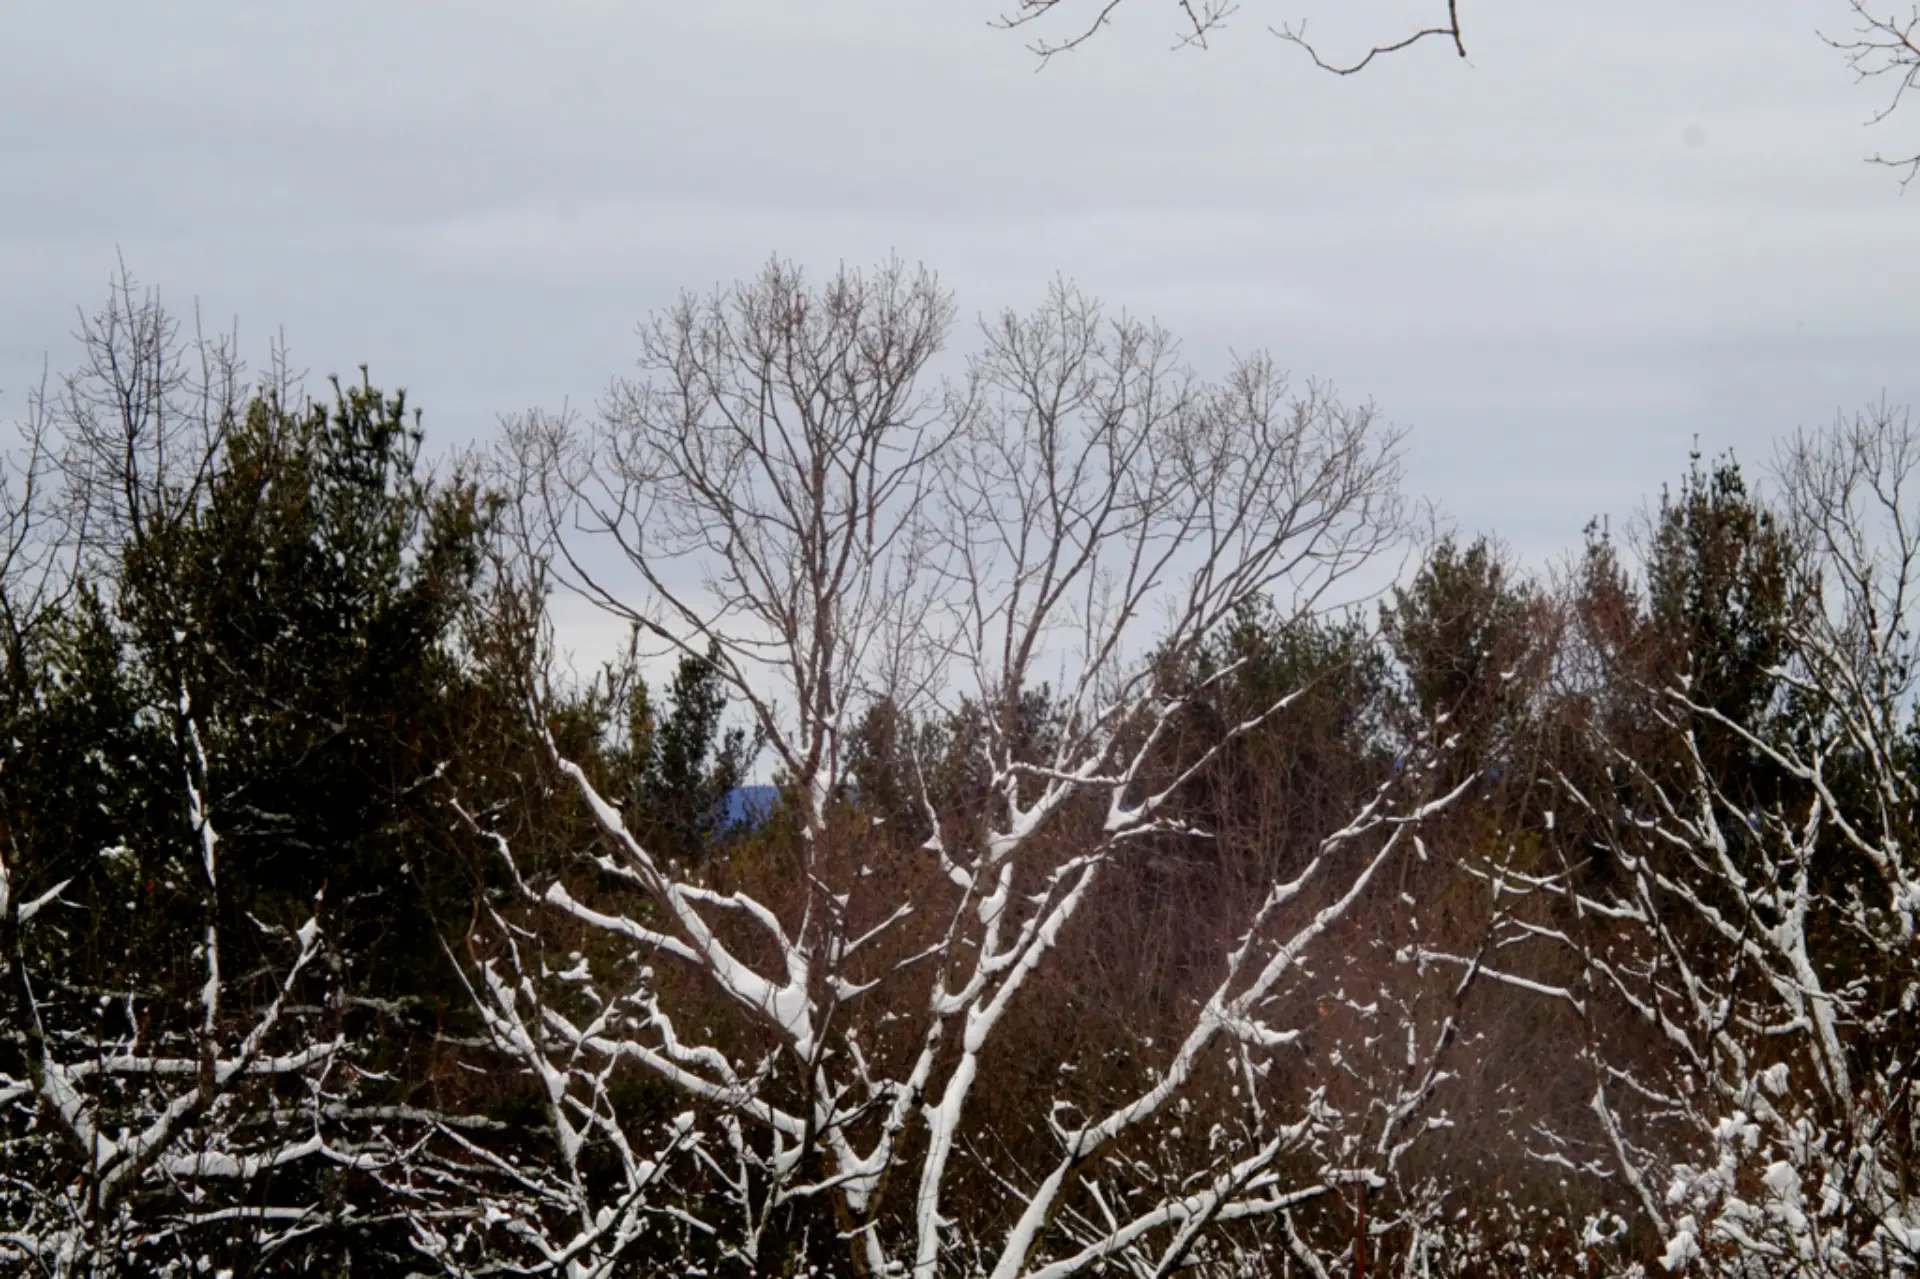
And Into the Snow
It was also wintertime, and a blizzard was burying the Boston area. So I shuffled the tripod around the house and tried some non-macro exteriors. Here are trees at the start of the storm:
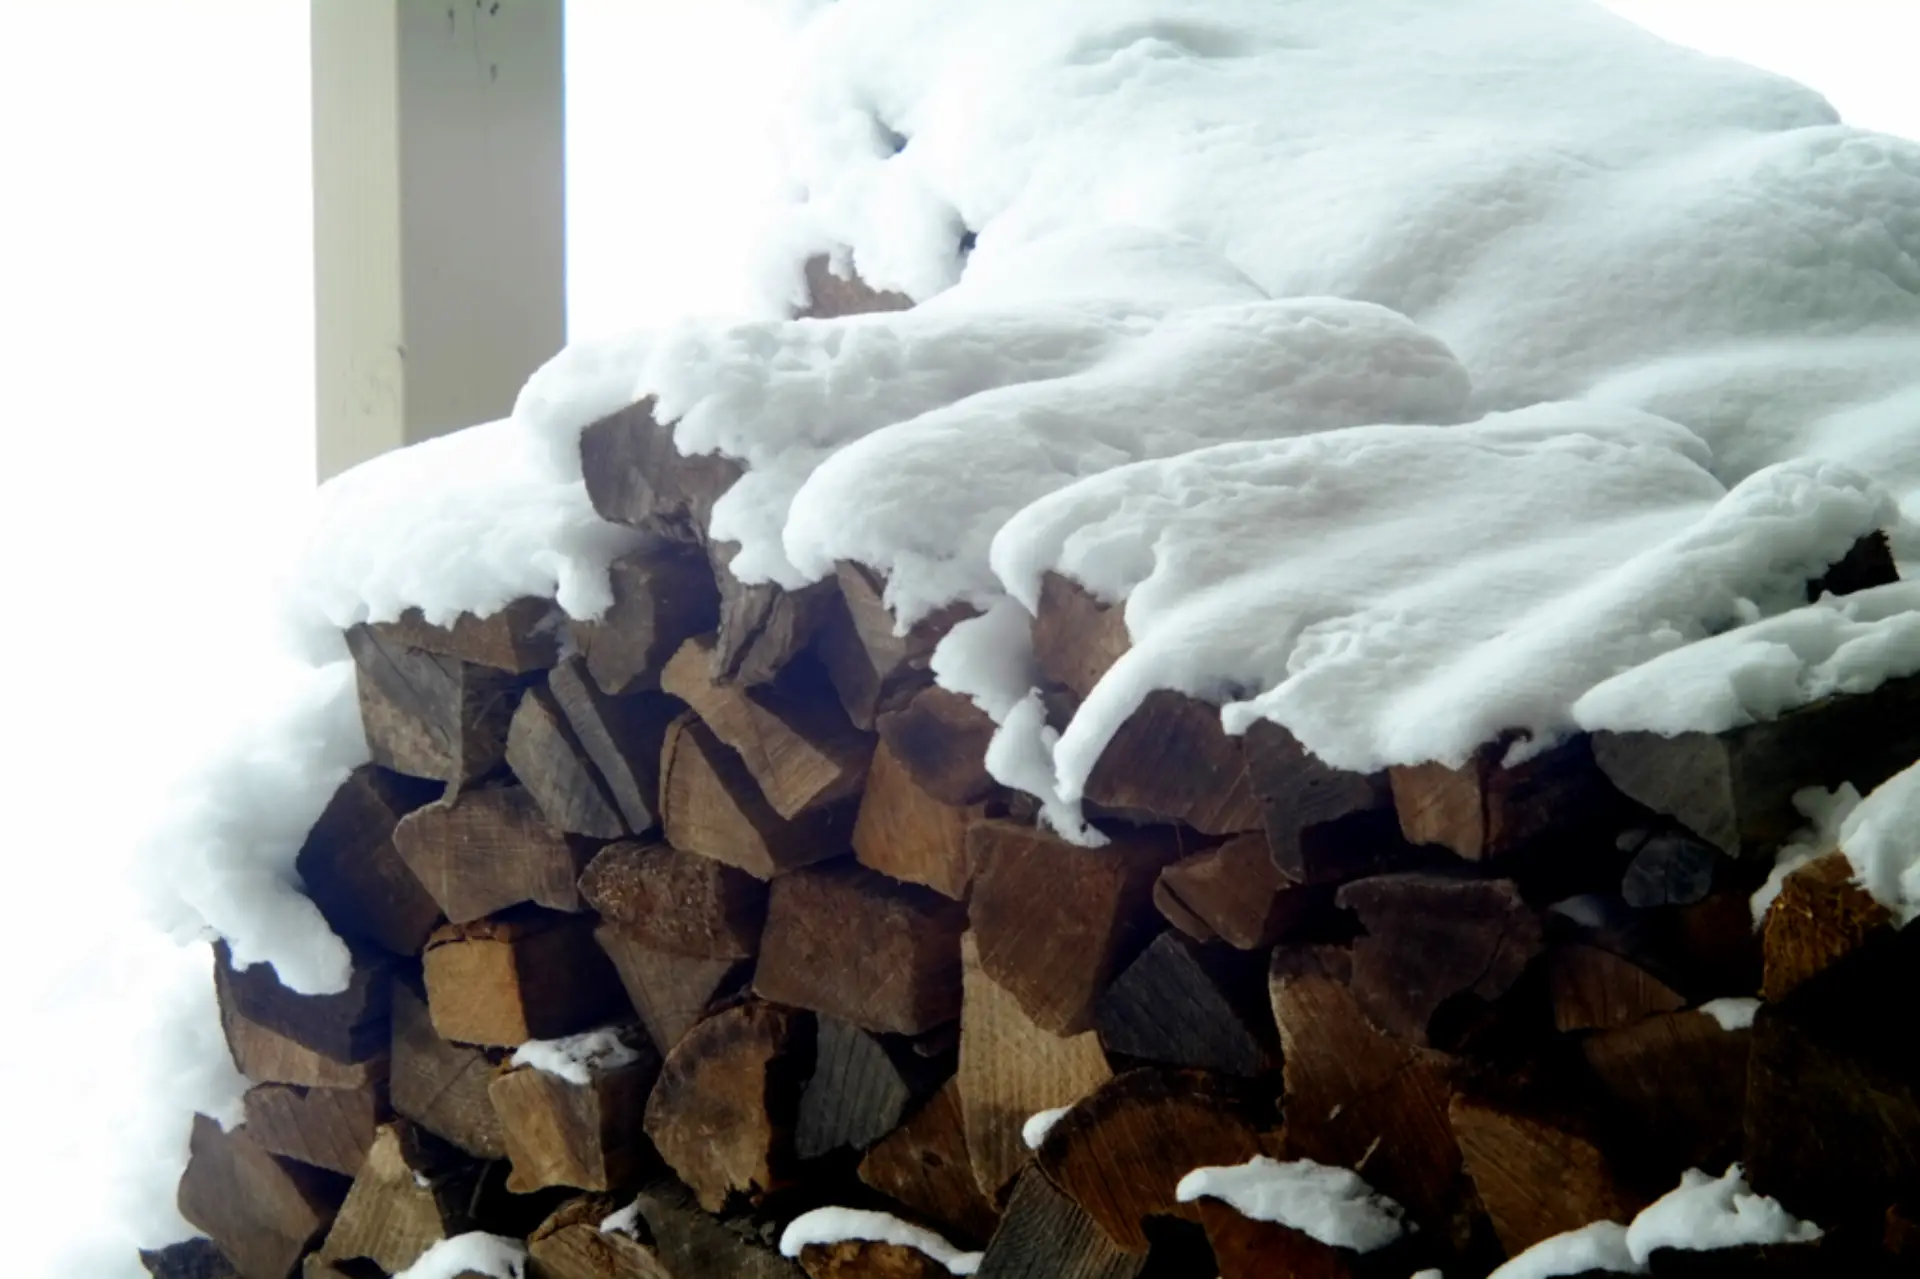
 And here’s the log pile behind our basement later that day:
 Though not too evident above, in bright light– and depending on the aperture and shooting angle– the FrankenFuji lens tended to produce a perfectly rectangular area of “veil flare.” Since its glass looks clean, I’m thinking this may result when light entering through the lens hits the sensor, rebounds back toward the lens’s rear element, and then bounces from it back to the sensor.
Subsequent outdoor shots produced the same effect. So for now, my CyberPunkish “X-Pro1/Monitor-Six-20 FrankenFuji” is probably best used on cloudy days and for macros. And it really rocks those close-ups!
–Dave Powell is a Westford, Mass., writer and avid amateur photographer.
Share this post:


Comments
Ibraar Hussain on That Time I Built an X-Pro1/Monitor-Six-20 “FrankenFuji”
Comment posted: 29/02/2024
Comment posted: 29/02/2024
Gary Smith on That Time I Built an X-Pro1/Monitor-Six-20 “FrankenFuji”
Comment posted: 29/02/2024
Comment posted: 29/02/2024
Eric on That Time I Built an X-Pro1/Monitor-Six-20 “FrankenFuji”
Comment posted: 29/02/2024
A great read and great images. Thank you for sharing.
Eric
Comment posted: 29/02/2024