From very early in my photography I have been fascinated by the unique look and simply luscious tones infrared images can produce. Ansel on steroids. I have only been able to produce anything like decent images recently but pre-digital, inspired by Sir Simon Marsden’s work (www.sirsimonmrsden.co.uk or www.jamescwilliamsphoto.com), I tried some Ilford SFX 200 film that has extended sensitivity up to 740 nm (nanometers). At the time I only had a 6x red R25 filter which produced an infrared result of sorts and I didn’t take it any further. Sir Simon used the same R25 filter but with Kodak High Speed Infrared, sensitive up to 900nm and with less sensitivity to visible light. That combination and a lack of an anti-halation layer gave much more dramatic results with the halo effect so characteristic of his work.
So these ramblings are some of my experiences with infrared that may be of help or interest if you are of a like mind. All, I must stress, on a strictly practical level.
The digital influence
Came the digital age and it seemed the same effect could be achieved in software and I did produce some passable results with Affinity Photo. When I changed to a Sony A3000 with an EVF I found it was able to “see” in the infrared, established with the TV remote test. An R72 filter on my 28-200 Tamron zoom produced some quite good digital images, focus and framing being just possible with the EVF.
Encouraged, I bought some 35mm Rollei Infrared 400 and used the same lens and filter on my Nikon F801 (the Tamron focus scale lacks an IR index but, usefully, I was able to establish focus points with the digital camera which worked with film). A simple adapter allowed me to use the same filter on my Tamron 17mm, which does have an IR index.
I have also used Rollei Infrared with my Meopta TLR and Retina rangefinder with good results. I vary dilution and development in Rodinal for different speed ratings and grain.

Adjusting focus.
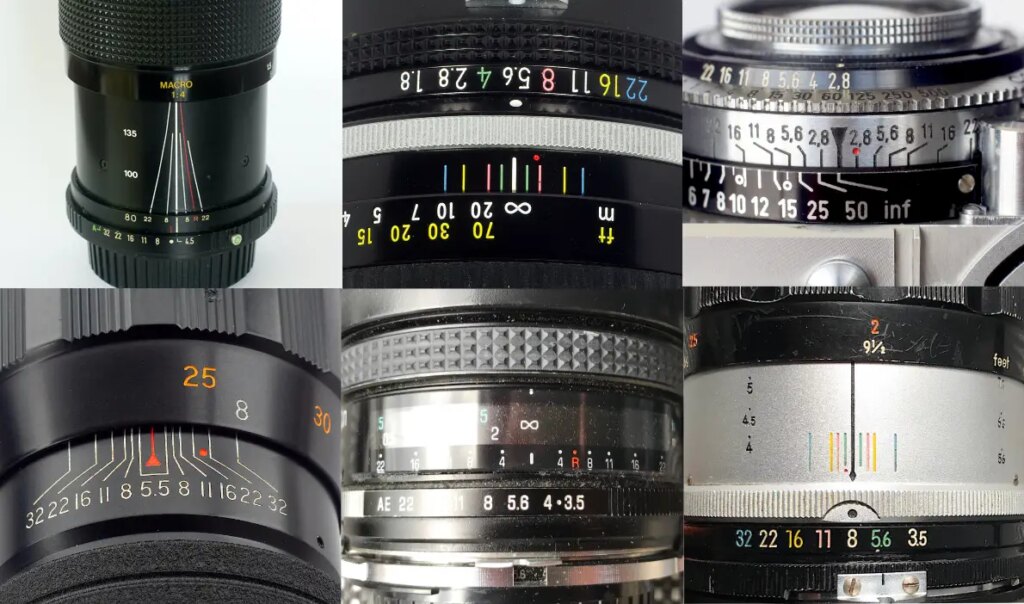
The principal consideration when photographing in the infrared is focus adjustment. Because IR light comes to a focus further from the lens, i.e. behind the plane of focus of visible light, the lens has to be moved forward a little, i.e. focussed closer, before making the exposure for optimum sharpness. Many lenses are marked with a second focus index to help with this, but some lenses do not so how do you decide how much to allow.
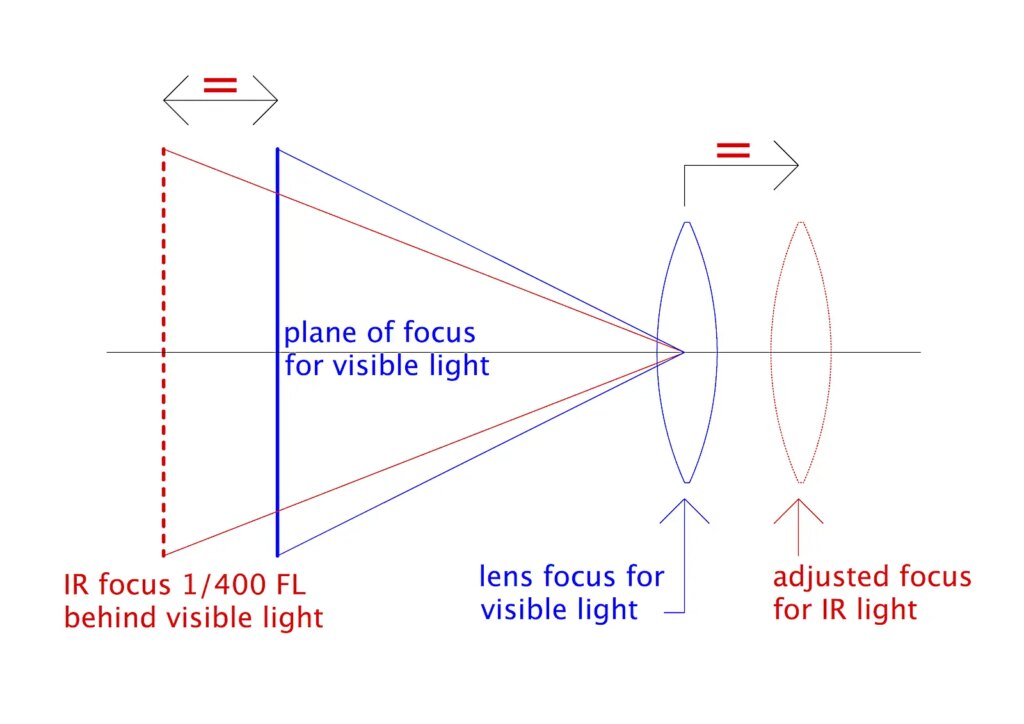
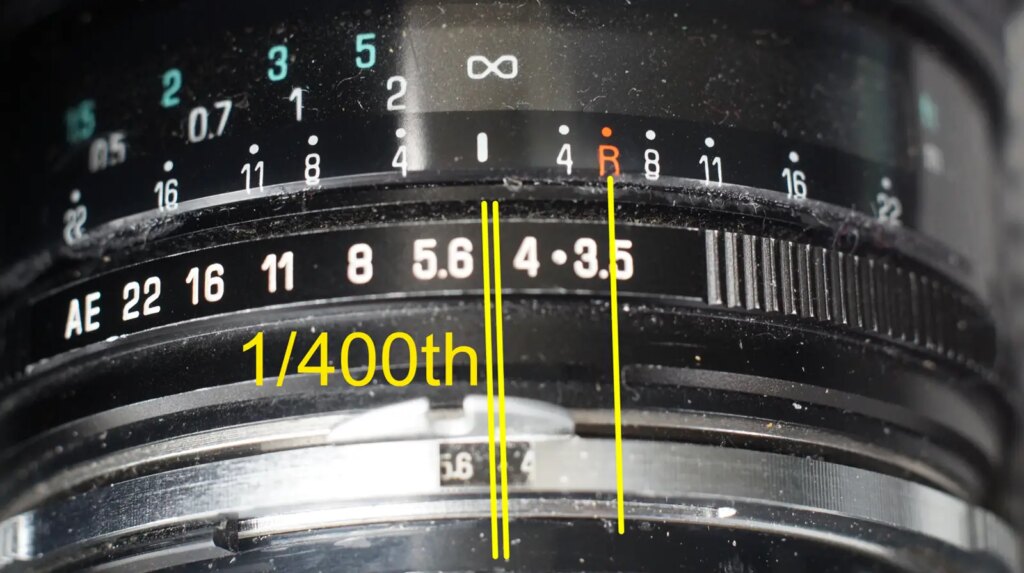
My curiosity was aroused by a throw-away remark I read on a forum suggesting that the focus point for infrared is placed 1/400th of the focal length (focal length x 0.0025 in mm) closer than for visible light. In practical terms the lens is moved away from the film/sensor by this amount.
To test this, I measured the extension of the lens when changing focus from the normal focus index to the IR mark on my 50mm Retina and 300mm Hanimex lenses to see if they both showed this value. Careful use of a digital calliper read 0.13mm for the Retina against a calculated 0.125mm and 0.83mm against 0.75mm for the Hanimex. Both pretty close given the set up and the less than exact distance markings.
Helical focus gear influence.
A further factor influencing the amount the IR mark is offset radially is the gearing of the focus helical, which controls how far a lens moves in and out for any given rotation of the focus ring.
Comparing how much the focus ring has to be turned from ∞ to 10 feet on similar focal length lenses, the 50mm f2.8 Retina Xenon lens rotates about 20º and the 55mm f3.5 Micro Nikkor only 5º. The Xenon needs turning far more for the finer control needed when adjusting a rangefinder by eye. The Nikkor, designed for close work with a long focus movement, is used on SLRs that have various focussing aids (microprisms, electronic rangefinder etc) making it easer to focus accurately with less rotation because of the higher gearing needed for the greater extension. So the same focus adjustment but made with very different amounts of rotation, i.e lower or higher gearing.
Variations.
I did find an anomaly with my 17mm Tamron which requires a tiny 0.05mm focus adjustment based on 1/400th FL (17/400). Its total focus extension is only 1.8mm made with an arc of approx. 130º from ∞ to closest focus. The 0.05mm focus adjustment is reached with rotation of only 0.35º yet the IR mark is offset much more at around 10º.
So complex, probably inverted telephoto, wide angle lens designs lacking a mark may not conform, and will need tests to establish the offset needed for best focus. Older zoom lenses seem to conform but more modern zooms with complex optics may vary, like the 17mm. I don’t have a suitable lens to be able to check this, however, or the knowledge of optical design to explain it.
Practical application.
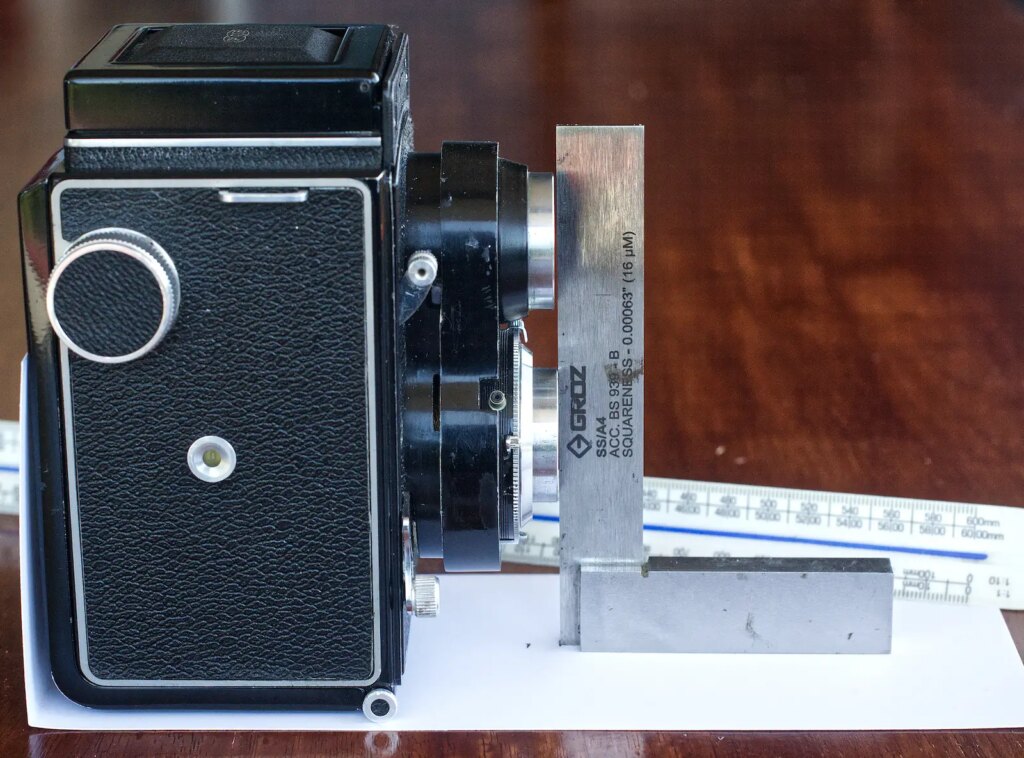
With my Meopta Flexaret IV, which has no IR index mark but quite a long focus movement, I established the position of the index for this camera by measuring the focus movement and calculating the offset.
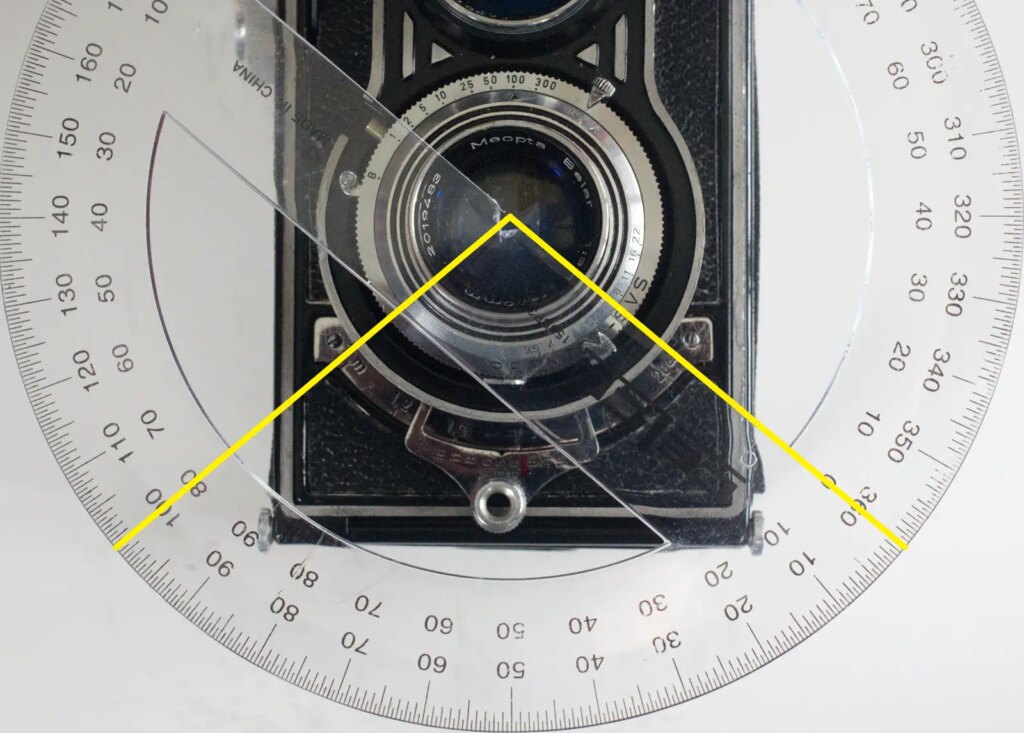
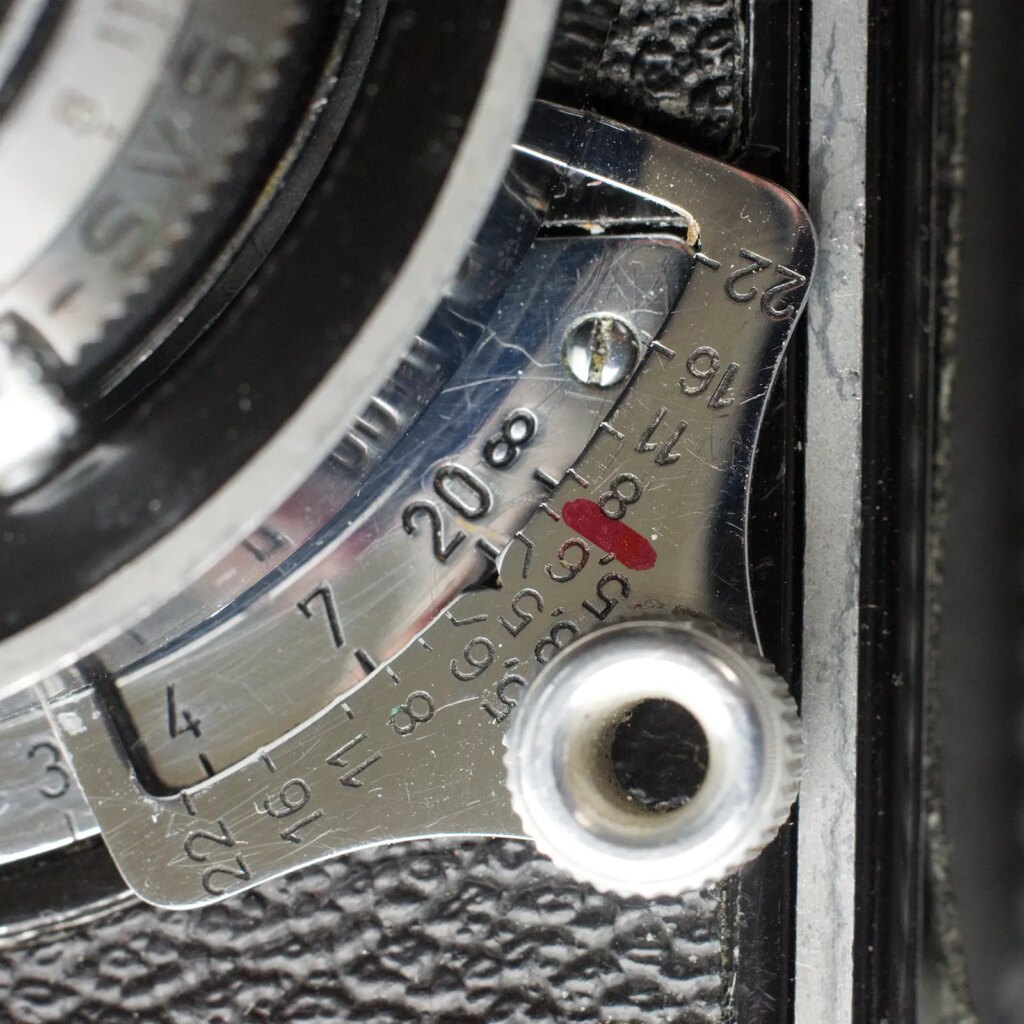
The Meopta’s focus quadrant describes a total arc of approx. 100º with an extension of 7.5mm or 14º for an extension of 1mm (100/7.5). The adjustment of 0.2mm (80/400) is achieved with an arc of 14 x 0.2 = 3º, now marked on the scale.
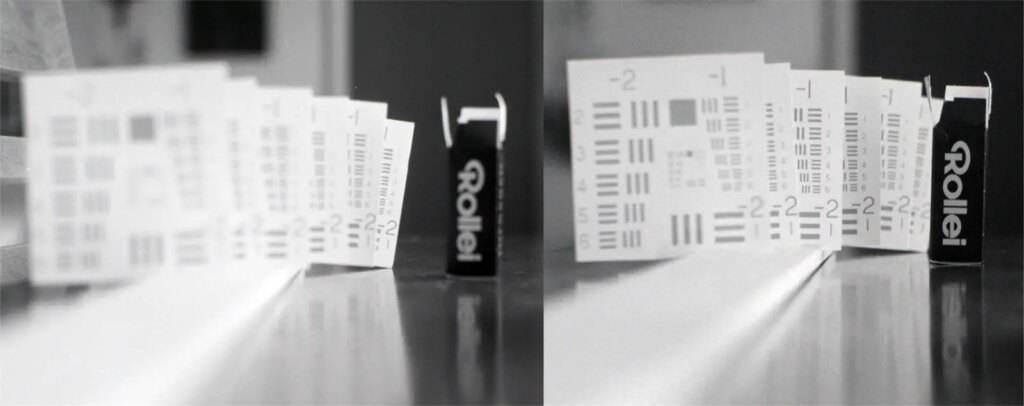
A check on its accuracy, when I ran an IR film through the camera, appears to bear out these basic assumptions, the adjusted focus setting producing sharpest results. The film box in both examples is placed at the point of focus for visible light.
Other things to take into account.
Apart from focusing, there are other things that have become apparent to me.
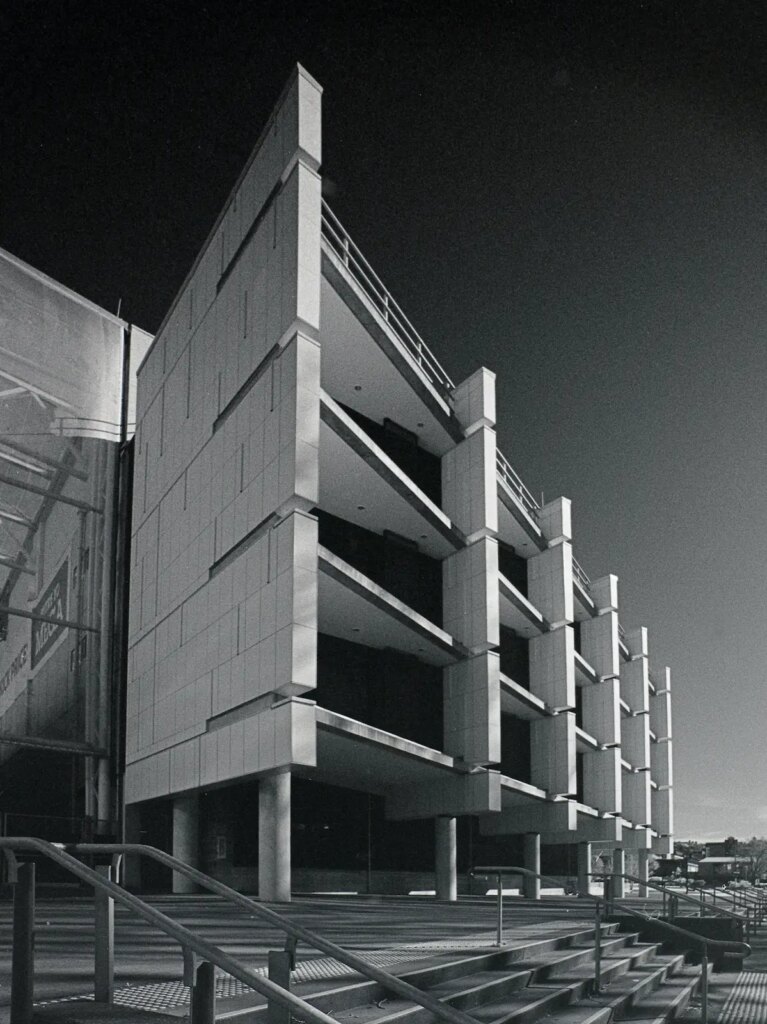
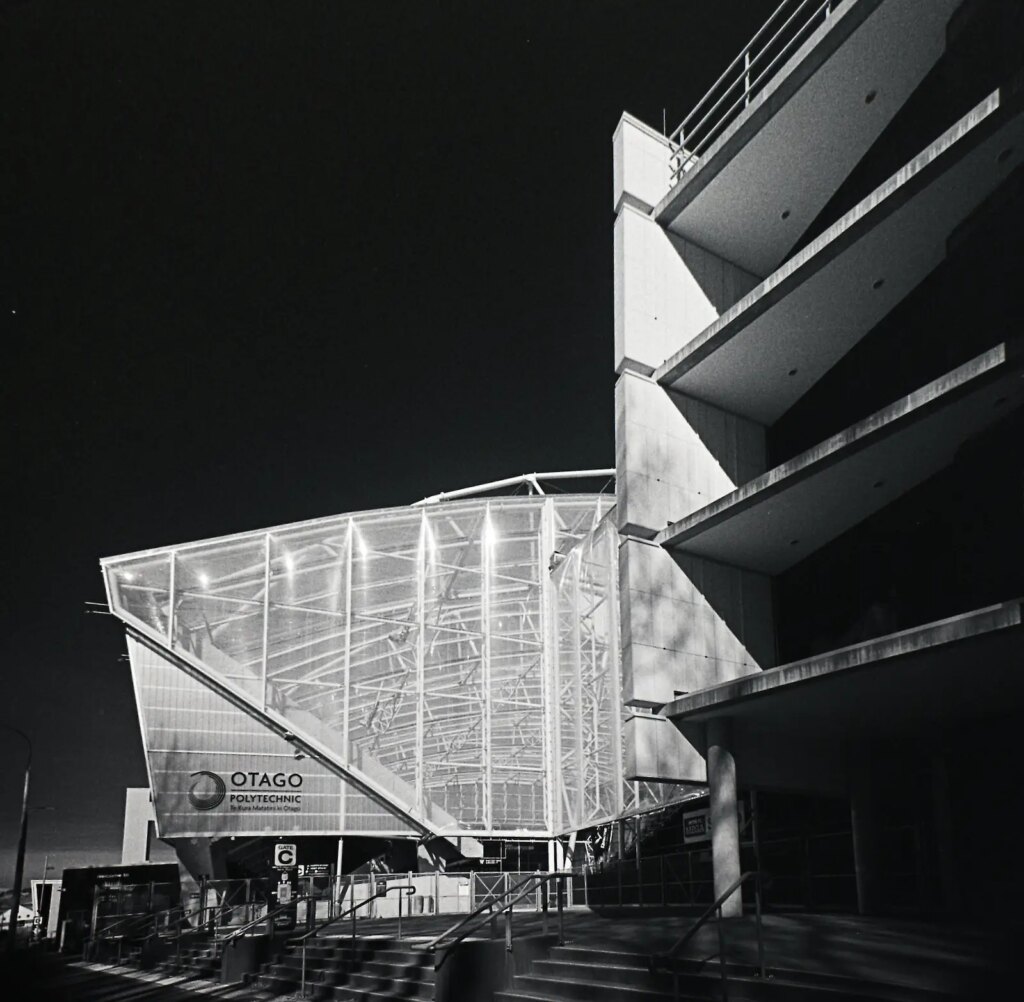
Even though a tripod is recommended with an SLR I have found I can juggle the filter on and off the lens to adjust focus without moving the camera too much handheld. The stadium shots were made this way. A tripod is definitely more precise but generous framing can work, especially if perspective correction is needed later.
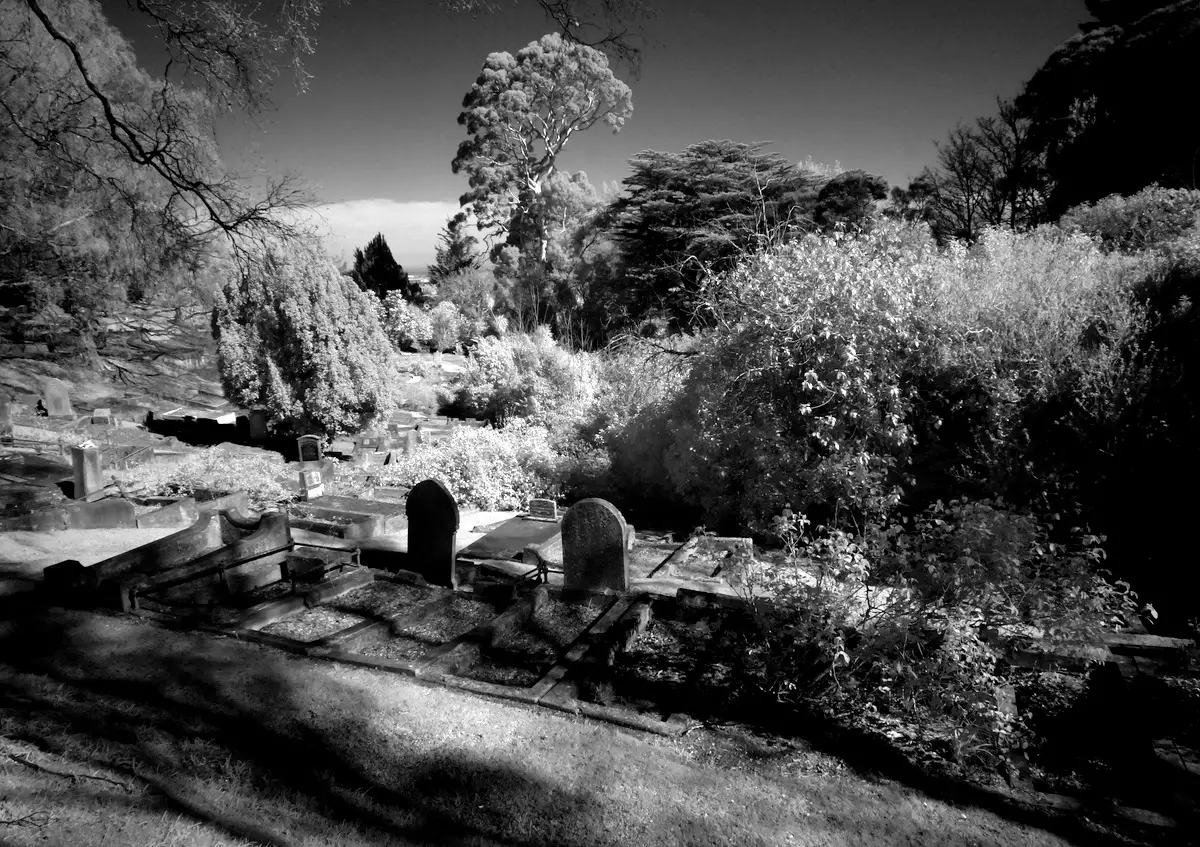
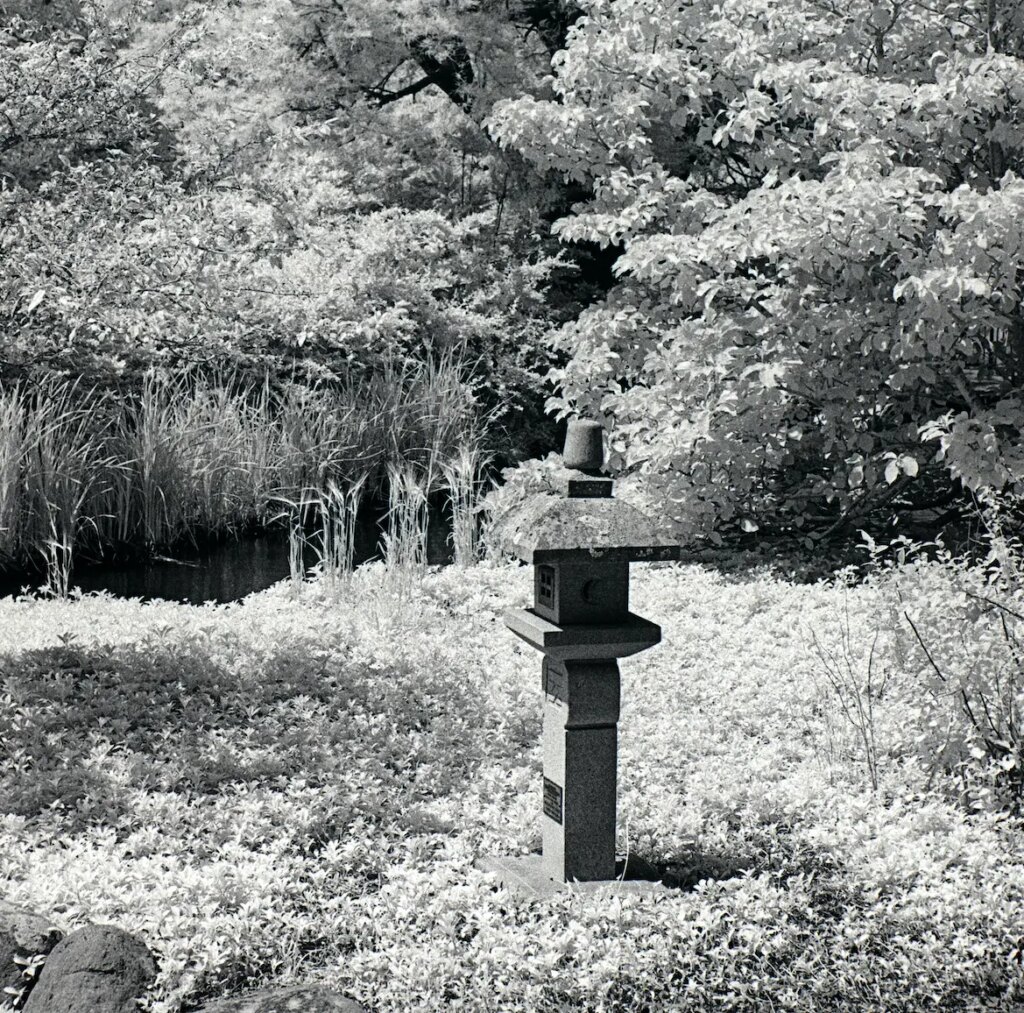
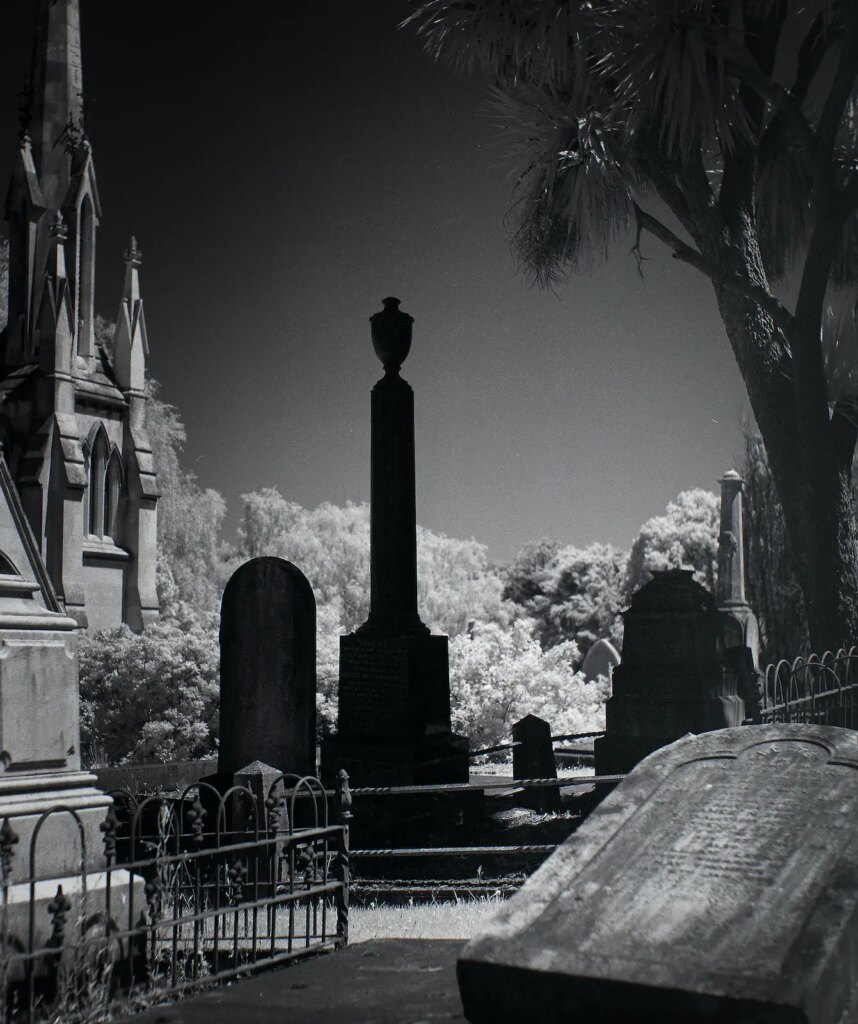
Another significant comment is to look at tone values carefully, which can be very different than in visible light. Sunlit foliage, for example, can be the same tone as stonework and the like and there will be less contrast between them than appears to the eye. Equally, contrast can be boosted by placement of shaded elements within the composition.
At close range, focus adjustment is essential for sharp focus but depth of field can be enough to cover most other subject distances with shorter focal lengths and smaller apertures.
Otherwise, shooting IR is no harder than any other sensitised material and is certainly as rewarding if not more so.
Conclusions.
To summarise, my conclusions from all this, which I stress again, are on a purely practical level, are as follows:-
1. The offset can be assumed to be a standard value of 1/400th of the focal length for most unmarked prime lenses.
2. The amount of offset needed varies and is dependent on the helical focus gearing. The shorter the overall throw, the smaller the offset is likely to be and vice versa. Note that macro lenses have a larger rotation than standard lenses.
3. Offsets for most shorter focal lengths are generally small and may be covered by a small nudge closer in focus and setting an aperture of at least f5.6 or smaller for close work.
4. If in doubt bracket to test.
And, finally.
If you are still awake, I hope this may prove helpful. I could well be on completely the wrong track in some areas of course and I am more than happy to be put right. It mostly seems to work in practice for me, however, which is the object of the exercise. Next in line to have some IR film loaded is a Zeiss Box Tengor which could be interesting.
Share this post:


Comments
Dr. Ko on Focus Adjustment and Other Considerations when Shooting Infrared
Comment posted: 11/04/2023
Not sure about APO lenses.
Comment posted: 11/04/2023
Comment posted: 11/04/2023