Nearly ten years ago my good friend and amazing artist Sinead McDonald taught me cyanotype printing, and ever since then I’ve been meaning to get back into it on my own, but things were never quite aligned. These last 6 months I started getting serious about making it happen, and looked at how I could get hold of the chemicals.
Cyanotype printing is dead simple really: you mix the chemicals in artificial light, coat your paper, let it dry, and once it’s dry you expose to sunlight with a negative over the paper. The opaque areas of the negative are unaffected, the light areas turn lighter. (I sent the negative files in high res to a printer for them to be printer on transparent plastic sheets. )
When you wash the paper after a few minutes of exposure, the unexposed areas are washed away, resulting in a mostly white colour, and the exposed areas turn blue. You have a blue and white image, very cool looking. You can increase the contrast by coating the print in citric acid (ie. lemon juice) before washing, which turns the blues deeper and darker.
That’s all there is to it… provided you have the chemicals. Which turns out to be an issue here in Hong Kong as, until now, no one I know sells ready made cyanotype fluid or do it yourself kits. I thought I could import the kits through amazon or adorama, but it turns out that shipping any chemicals into Hong Kong as an individual resident is forbidden, I’m sure you can guess why.
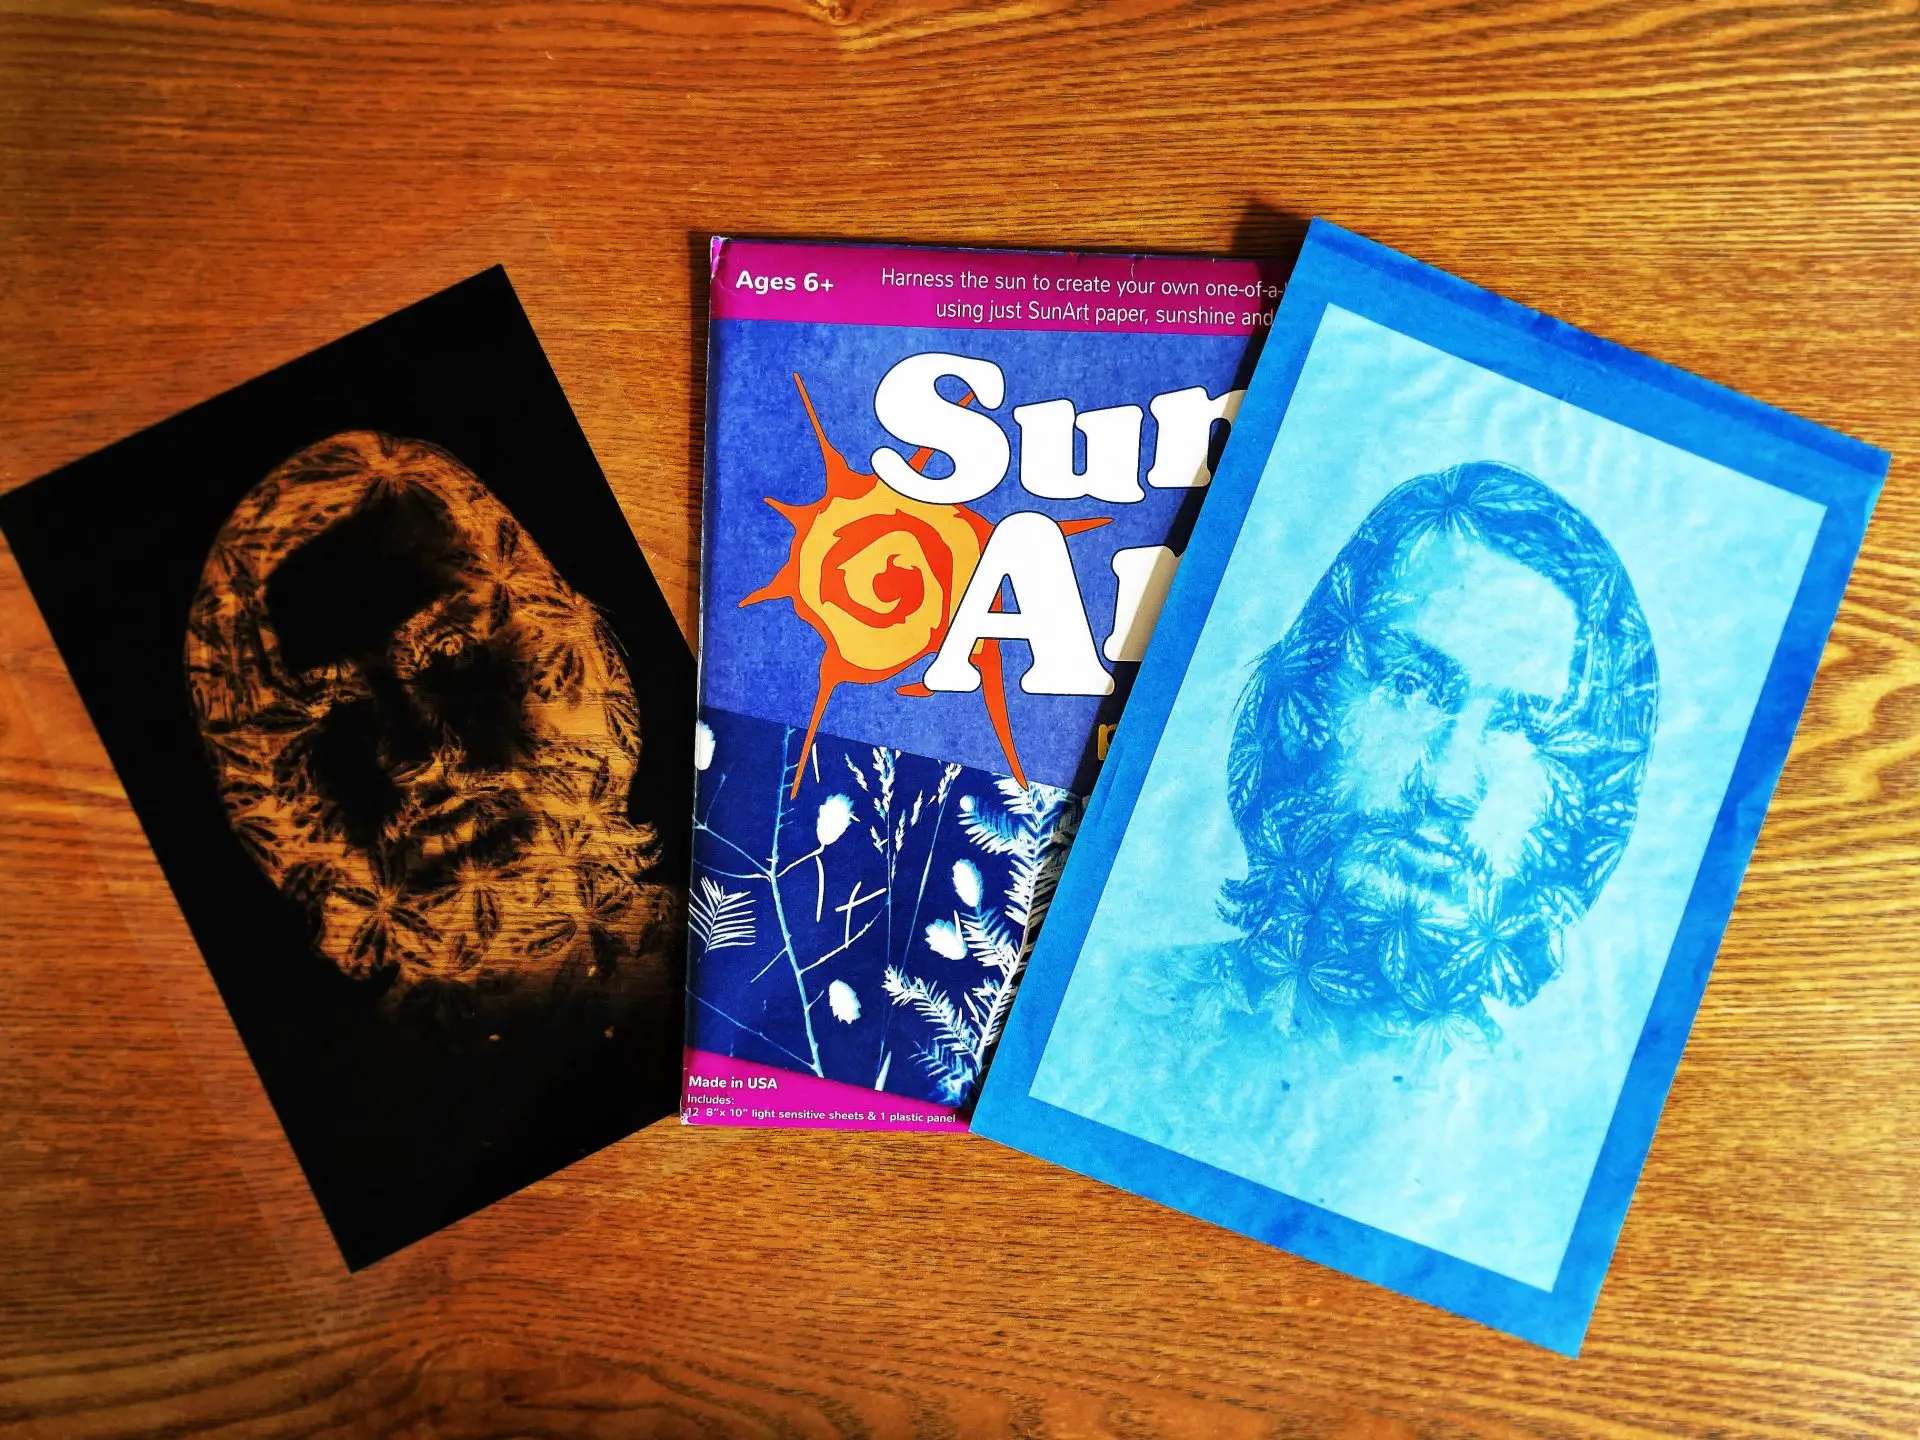
So desperate was I to start this technique again, I got some pre-coated cyanotype paper shipped over. Since the sheets are coated already, I’m importing paper, not chemicals. I ordered two sets, one small(ish), a little over A5 in size under the brand SunArt, and one large(ish), close to a narrow A4, under the brand Sun Print. Both can be found easily on various online stores. For all intents and purposes, they are the same.
Since the sunlight is very harsh here in the summer and since my balcony is mostly exposed to the direct sun in the late afternoon, I started exposing pretty much immediately. For my first print I prepared a bath of lemon juice because I wanted contrast. A few minutes of exposure, and the print was ready to wash. The result wasn’t quite as interesting as I hoped it would be.
The deep blues were pleasant, but the areas that I expected to be white were in fact light blue. Since the lemon juice deepens all the blues, that light blue became darker as well, and the contrast was nowhere near what I was hoping for. It would take me a few more attempts to figure out what was going wrong.
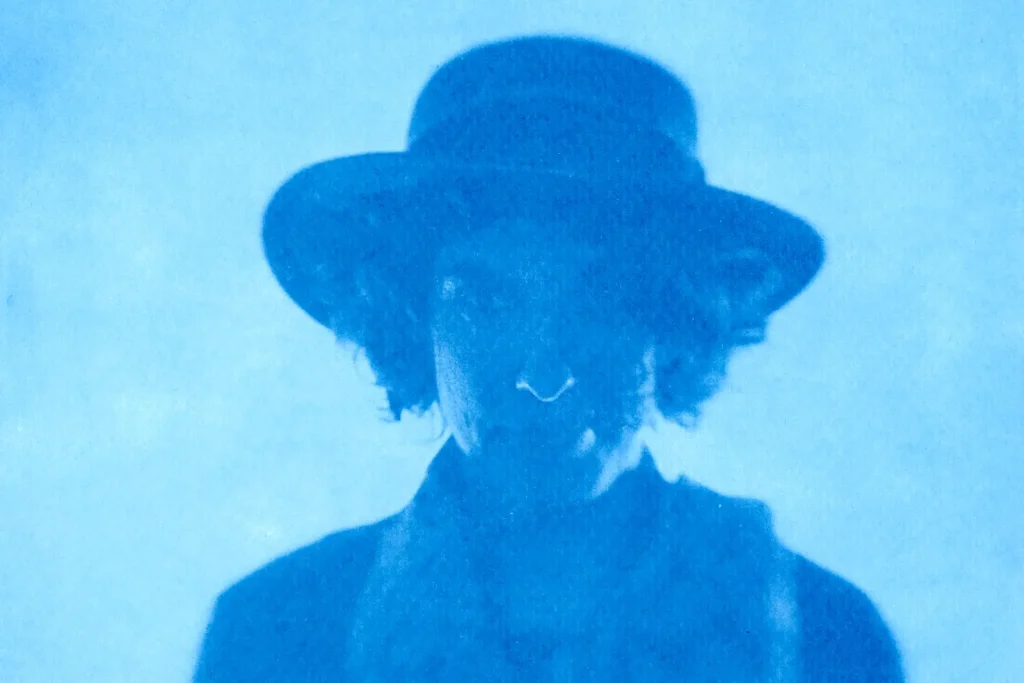
Daniel Long-Leaves / Cyanotype print on Sun Print paper / Model: Daniel.
I did my second attempt the next day, using a photo I dearly love, another one of my Human Nature(s) project (I’ve written about it here if you’re interested). The negative has clear contrasts and I was hoping it would be more legible that my first try. I also skipped the lemon juice phase to see the difference. This one turned out much better, lighter than the previous one, but still with plenty of detail and texture.
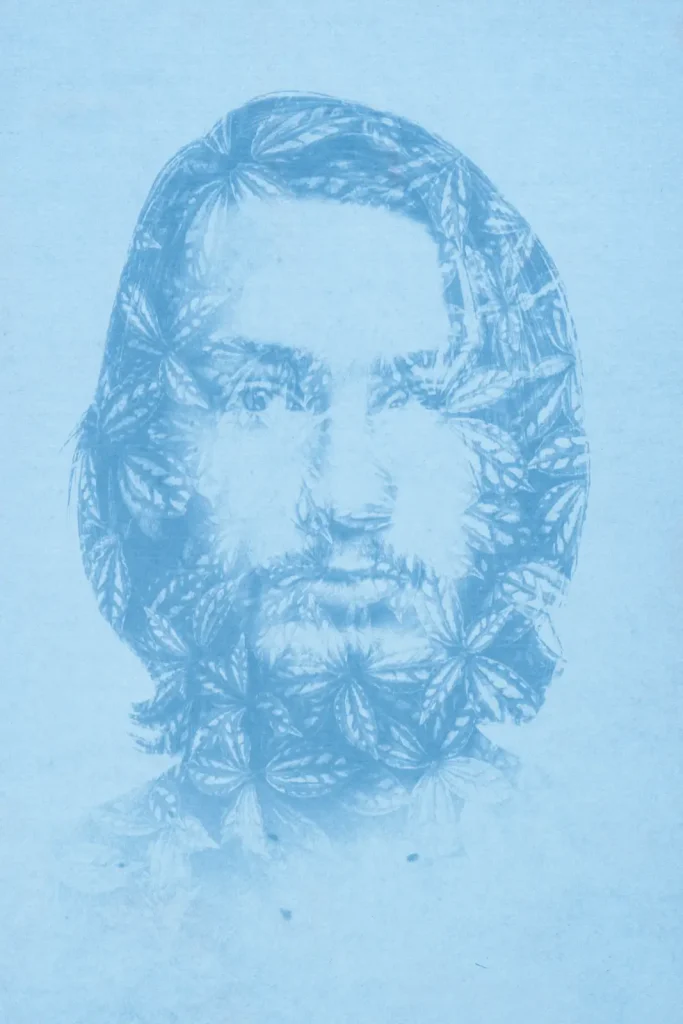
Aluminium Beard / Cyanotype print on Sun Print paper / Model: Lucien
A few days later, this being the summer holidays, I showed to my 8 year old daughter how she could do cyanotype prints with leaves and twigs she brings back from the park. She loved it, but having seen my photo prints, she wanted one of herself, which I couldn’t readily do without asking the printer for another transparency. I had the idea instead of working with a silhouette. I took a digital backlit shot of her head in the sunset light, printed it on my home printer, cut around the silhouette and she used that and various leaves to produce her own print.
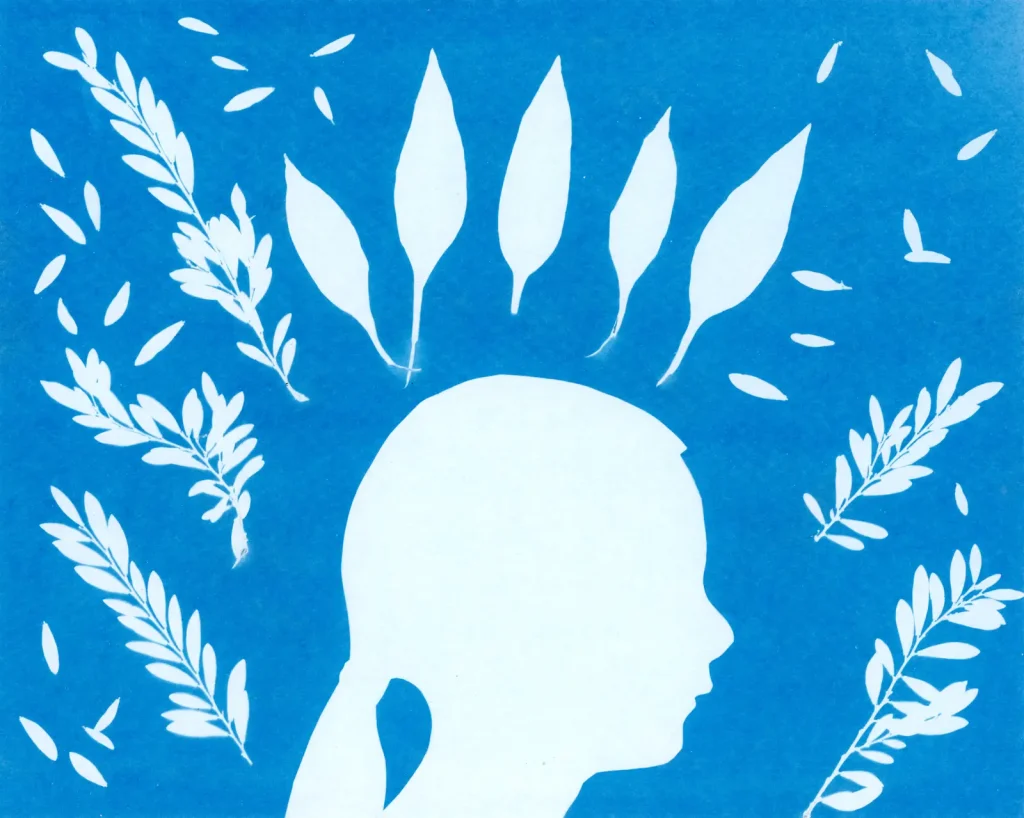
Princess Mad / Cyanotype print on Sun Art paper / Model: M.
You will notice immediately that there are no light blues here: the light areas are blue, and the dark areas are white. That’s when I understood what was happening with my printed transparent negatives: the blacks weren’t black enough, they let some light through. It could be that I hadn’t ensured the blacks were properly black in my initial files, or it could be that no matter how black they are some light comes through because the ink isn’t fully dark.
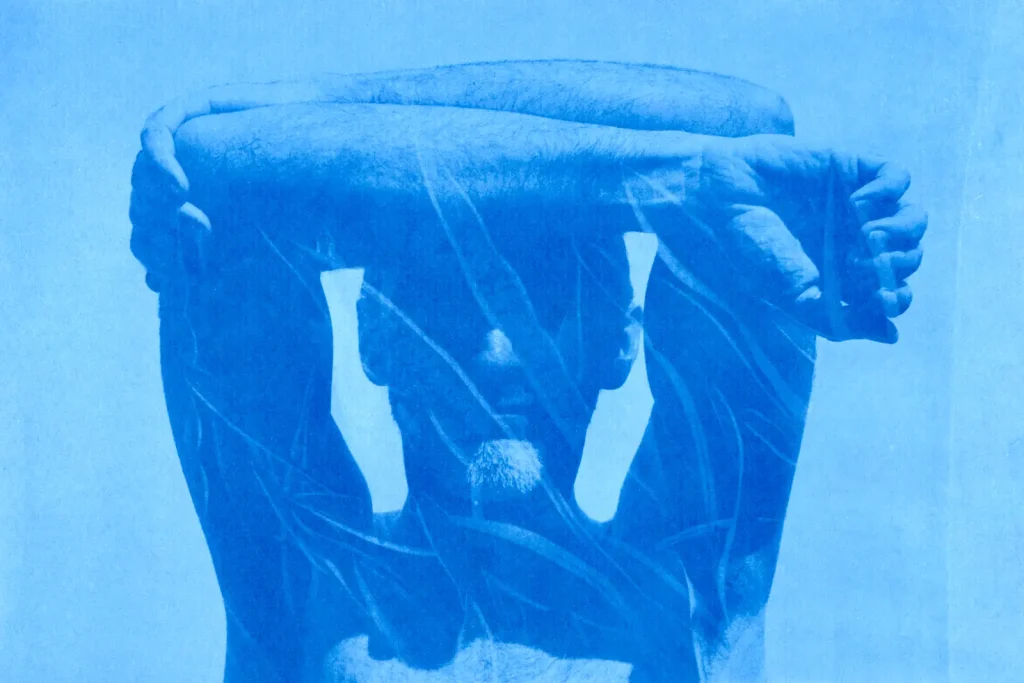
Still, having liked the results of my second print, I tried some more. I had negatives from a set of lensbaby sessions I had done these last two years and thought that the dreamy look of the lensbaby could work really well with the cyanotype process. What I had not remembered from Sinead’s advice ten years ago was that you need to pick really contrasty shots in the first place. Cyanotype does not resolve gradual shades of grey so well. So the next one was a failure again.
The one after though, also a Lensbaby film portrait, came out really nice. This is one of my favourite portrait shots, one I have entitled Devil and the Deep Blue Sea, and have always thought would look cool as a cyanotype. This one was lemon juice processed, and in this particular instance that deeper blue works really well.

I’ve got more prints since then, some successful and some not so much. Cyanotype is an inherently unpredictable printing process, so that’s not all that surprising. I’m starting to understand the limitations of the paper itself as well. And again, it’s not really surprising. Both Sun Print and SunArt are cheap products, and particularly cheap and thin papers. That creates its own set of issues and limitations.
On the plus side, these pre-coated papers are really easy to use and relatively cheap. The batch of pre-coated sheets even comes with a white sheet of plexiglas (which is transparent to the sunlight, I’m guessing, although maybe I should try using that instead of my sheet of glass to see if it makes a difference ?) so that you don’t need to get a glass sheet yourself. Another plus (if that’s what you’re after) is that the paper has limited texture and is very evenly coated so that quite a bit of detail carries over from the negative.
On the minus side, the paper is super thin which means that once dry it crumples very easily, even when pressed for long. Also, because it’s so evenly coated, you get an image that’s less erratic than what you might get with your own paper and chemicals, which again may not be what you’re after.
Still, if you’re new to cyanotype and want to give it a shot, you can do worse than give these papers (or equivalent brands) a try. It’s a simple and low-fuss way of experiencing the technique and a good way to decide if you’re ready to step up, coat your own paper, etc.
There are many more of my prints on my Instagram @benfelten, as well as more traditional film shots. Check it out if you liked this!
Share this post:


Comments
Ben Garcia on Cyanotype Printing with Pre-Coated Paper – By Benoît Felten
Comment posted: 02/09/2020
Comment posted: 02/09/2020
Sroyon on Cyanotype Printing with Pre-Coated Paper – By Benoît Felten
Comment posted: 03/09/2020
Comment posted: 03/09/2020
Comment posted: 03/09/2020
Comment posted: 03/09/2020