I’m not quite sure what triggered it, maybe a number of small mental prods: my son’s interest in film (he uses his Mum’s old Pentax K1000), being given a roll of Fuji C200 and a desire to try out my late cousin’s old Minolta XG-M with said film.
Well, it’s been about twelve months since that flame of interest in film was reignited in me, starting off with using the above camera/film combo – that half-forgotten tactile pleasure of loading the film, manually setting everything and the itchy anticipation of how the negs will look upon their return from the lab.
It also got me thinking about all the little green and yellow boxes full of slides that I have stashed in a cupboard, most not looked at for many a year…
Up until recently only the only means of digitising film had been my old Epson 4870 flatbed, a good scanner that for me produces pleasing results (if used within its limits), particularly with colour negatives. It’s achilles heel, though, for me has been it’s handling of transparencies.
The desire to see these slides come to life again in a way that the flatbed couldn’t muster got me thinking: why not try the digi camera “scanning” method? I didn’t want to make a huge financial outlay (at least not to start with), so, what to do?
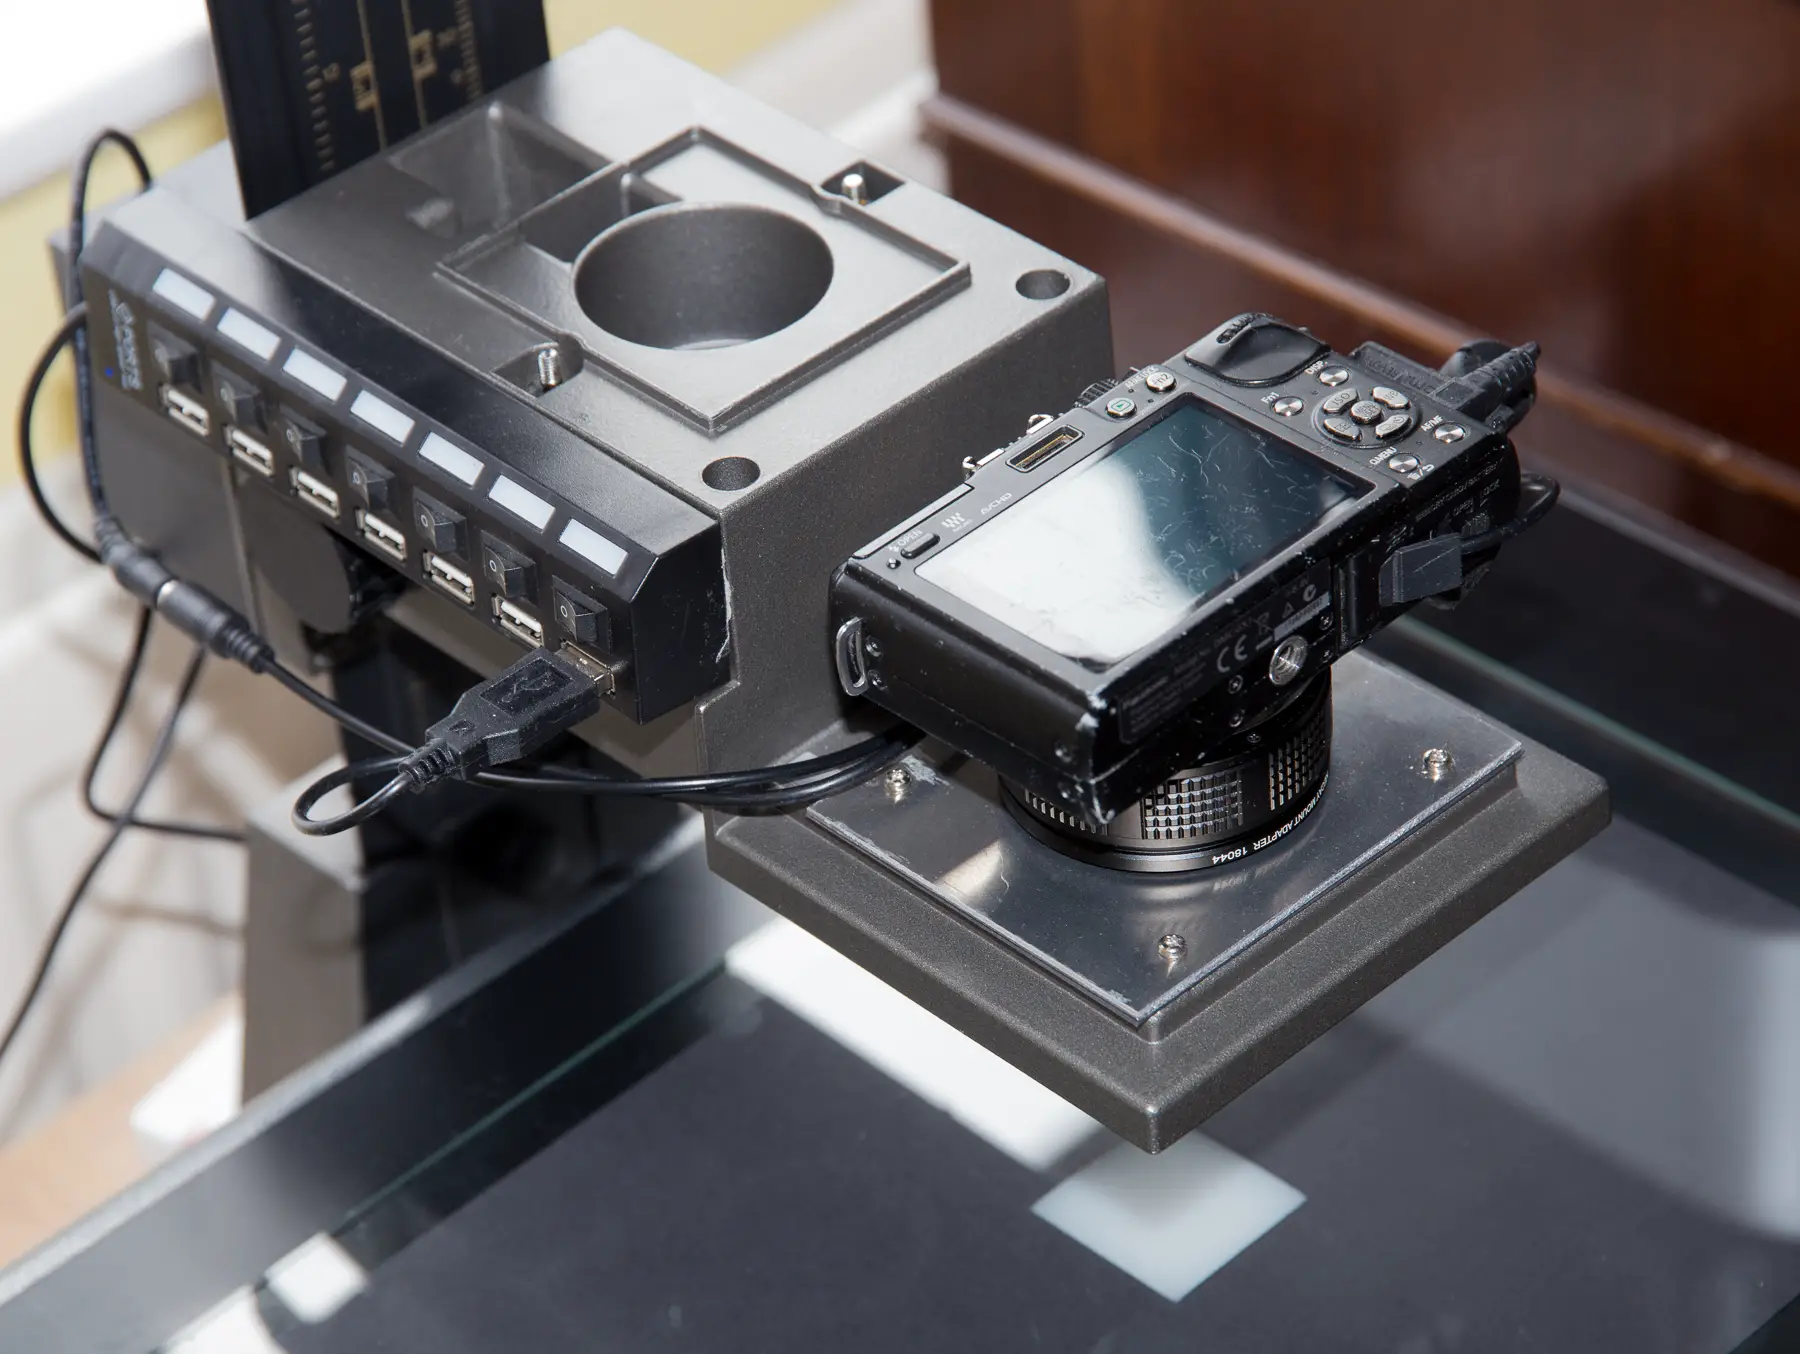
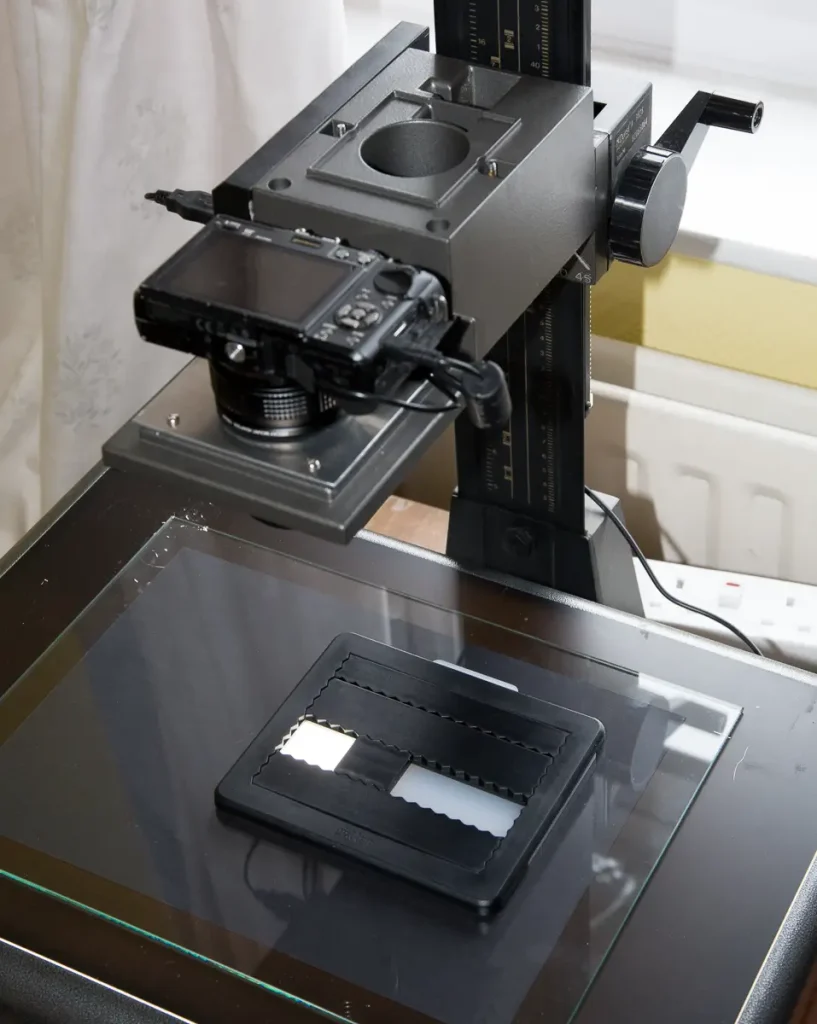
This was when the idea of somehow making use of my Durst M670 colour enlarger that had been languishing in the loft for years (decades?) came to mind.
Along with keeping costs down, another prerequisite of this little project was to keep the enlarger in a condition where any mods done were fully reversible as I couldn’t quite bring myself to start carving it up. The thought of removing any chance of a return to a little darkened room somewhere down the line was a sacrilegious move too far. This odds of me revisiting the wet stuff, certainly at this time, are about the same as me taking a quick jaunt to the moon and back, but I still can’t bring myself to do it. This does, of course, mean I have a cupboard full of enlarger parts that “might come in useful one day”. The end result is where the inspiration from our collective good friend Heath Robinson came in. Having carefully removed all unnecessary parts I was left with little more than a slightly quirky looking copy stand.
To mount the camera and lens combo I fabricated a small 1.5mm thick aluminium plate that was screwed into place using the fixing holes of the top of the old bellows, just under where the neg holder would have slid in. In the centre of this plate I cut a hole to allow an M42 thread to pass through. This enabled me to use extension tubes and adaptors “clamped” around this plate simply by sandwiching it at the appropriate junction. Part of the decision to use the M42 arrangement came about due to the space limitation in the aperture left in the frame where the bellows used to go.
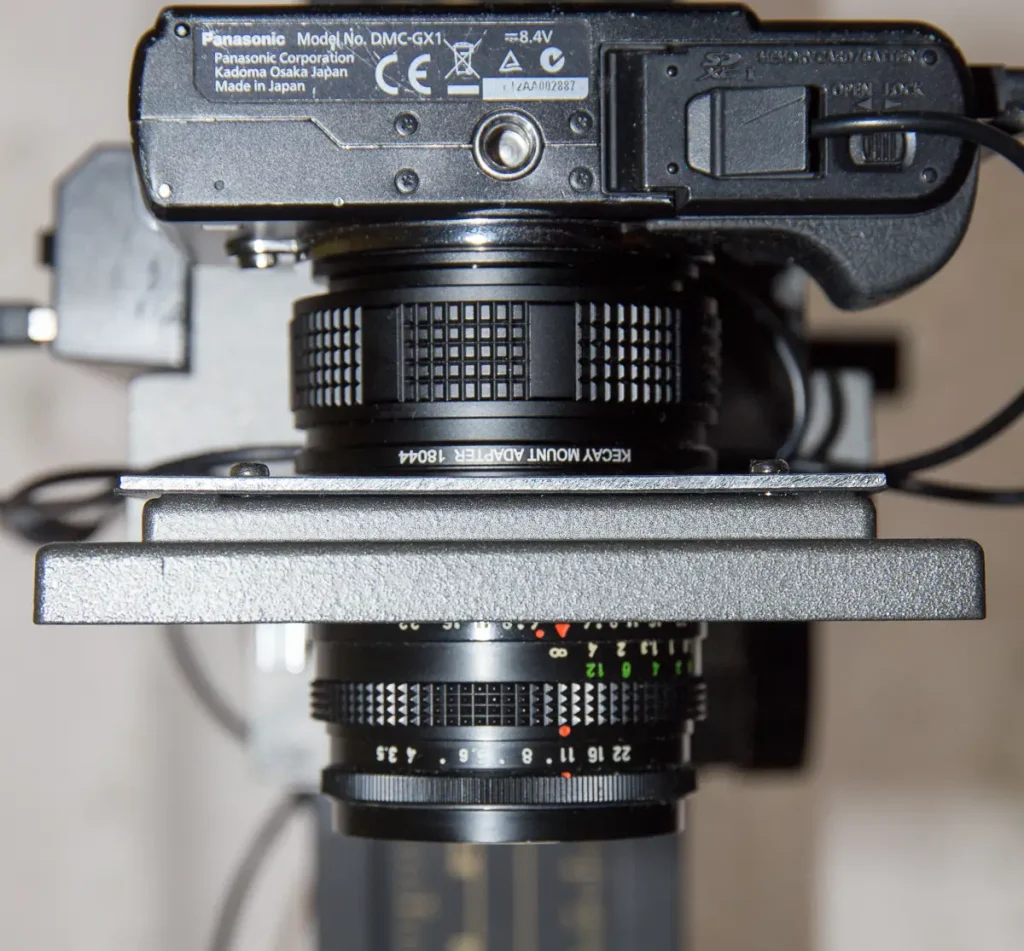
Another prerequisite for this rig was that I wanted to keep it set up for use without tying up my dslr. A wander round a popular auction site resulted in me obtaining an old Panasonic GX1 for about £50. It has defects in the back display, namely a few clumps of dead pixels, hence the price. Fortunately are not enough to cause any bother in this instance. It works fine in all other regards. Using this with a helical adaptor mount and suitable extension tubes allows for most (if not all) film sizes with minimal wastage of sensor pixels.
The surprise in this article’s title came in the choice of lens. My initial choice was my El Nikkor 50mm f2.8N. A superb optic when used in it’s normal sense but, sadly, in this configuration it was unable to shine. At it’s best setting for central sharpness the edges of the frame were very soft with quite a noticeable amount of CA. The only way to minimise this was to stop it way down. This, of course, meant losing a lot of its potential, so the search was on to find a better option.
I tried various options from the lenses in my possession but to no avail…. well, that is until I tried my old Meyer Lydith. Surely not I thought, especially as it’s not meant for these macro-level purposes. Still , in for a penny, in for a pound, so on it went. I had no expectations. How could this humble wide angle creation from the cold war era produce anything worthwhile in such such an odd setup? Well, you could have knocked me down with a feather. It was sharper over most of the frame than any other option I had to hand (of which I bashfully admit there are a few). Sadly it was let down by about a quarter of the frame at one end being soft and smeary.
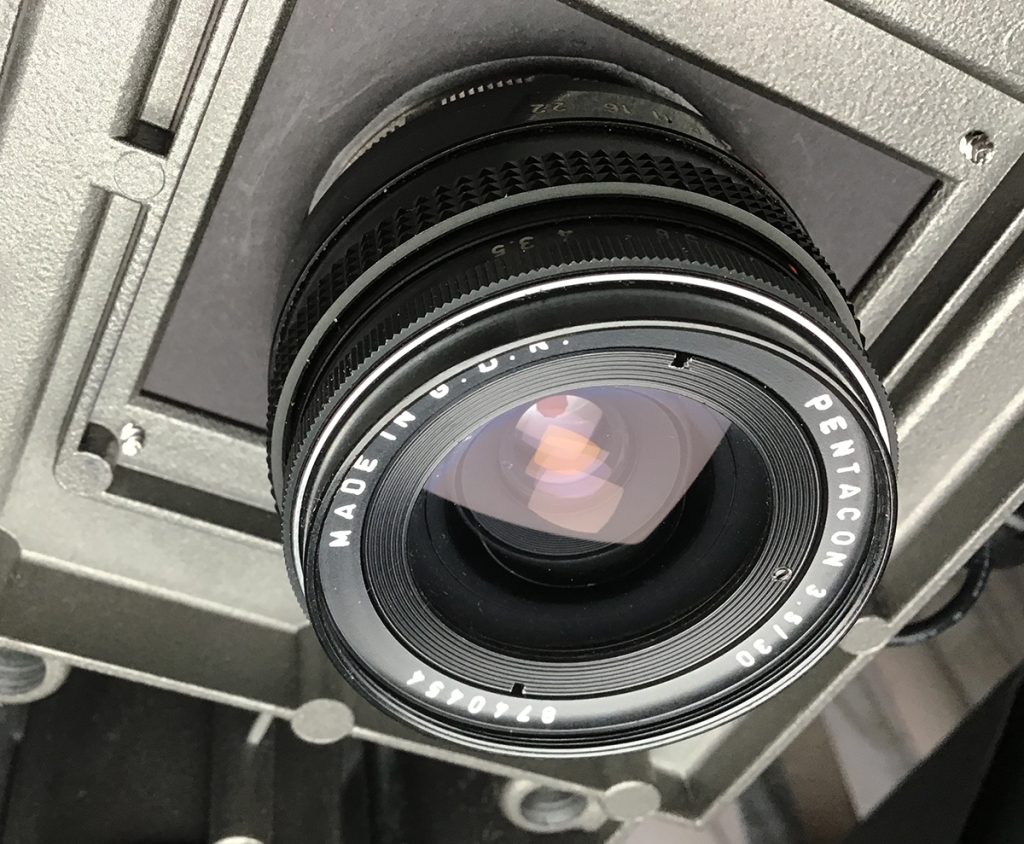
So near yet so far, so, what next? A little online research showed that this lens is prone to this issue, but if you get a good copy you’re in for a bit of a treat. A quick call to my local camera shop resulted in obtaining another, later version of the Lydith under the Pentacon banner, and Bingo! Not only does this one have it’s aberrations under somewhat better control, it’s even sharper than the first one. It’s not perfect by any means. It suffers from a small amount of (easily correctable) barrel distortion and to get the best from it I need to bias the 35mm frame towards the top of the Panasonic’s sensor area to minimise the remaining softness along the bottom of the frame. (straight forward to do due to the differing frame proportions). Fortunately it’s optimal aperture is around f8-f11 so this helps minimise focus issues. Being a preset lens means I can focus it in a similar manner to a more typical enlarger lens.
All in all I am very pleased with the outcome of this endeavour. The transparency scans I get are far better than the flatbed with more editing manoeuvrability in the shadow areas particularly. One happy chappy here.
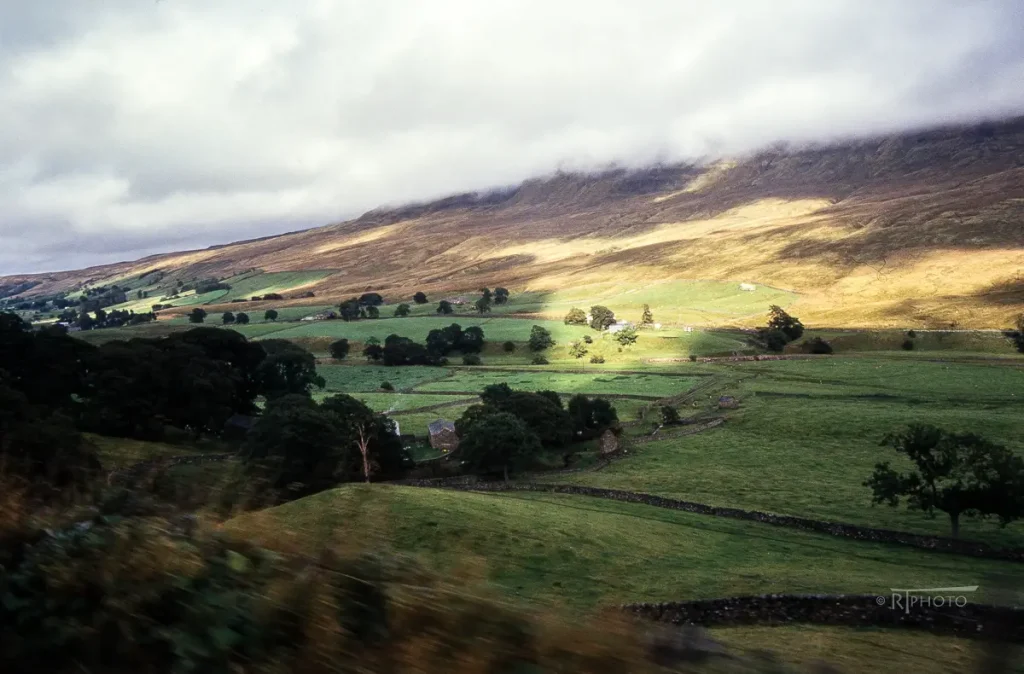
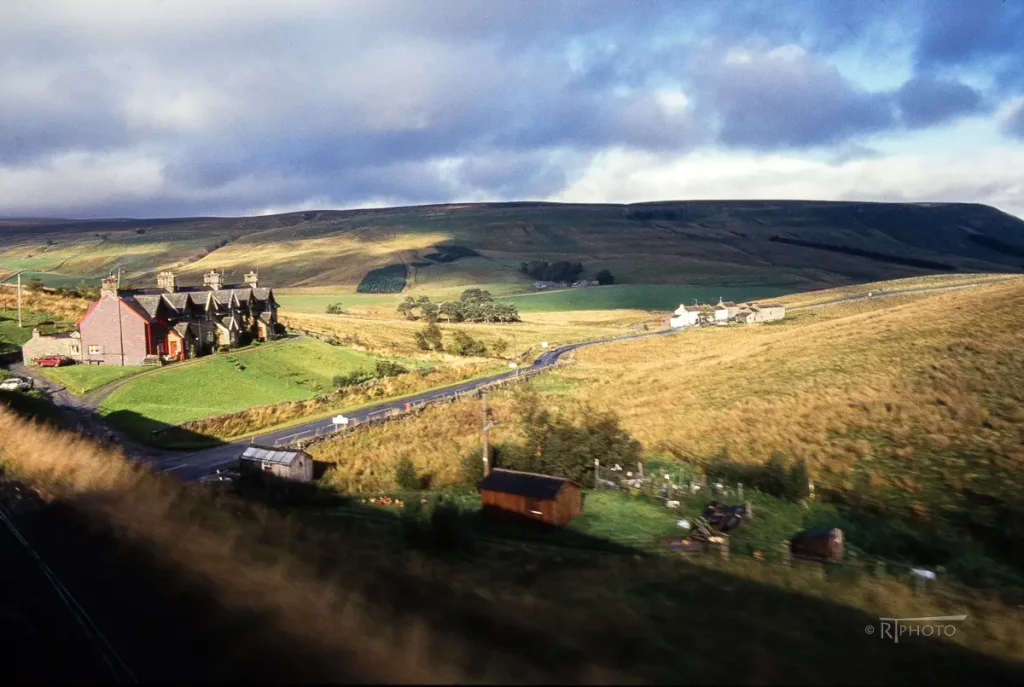
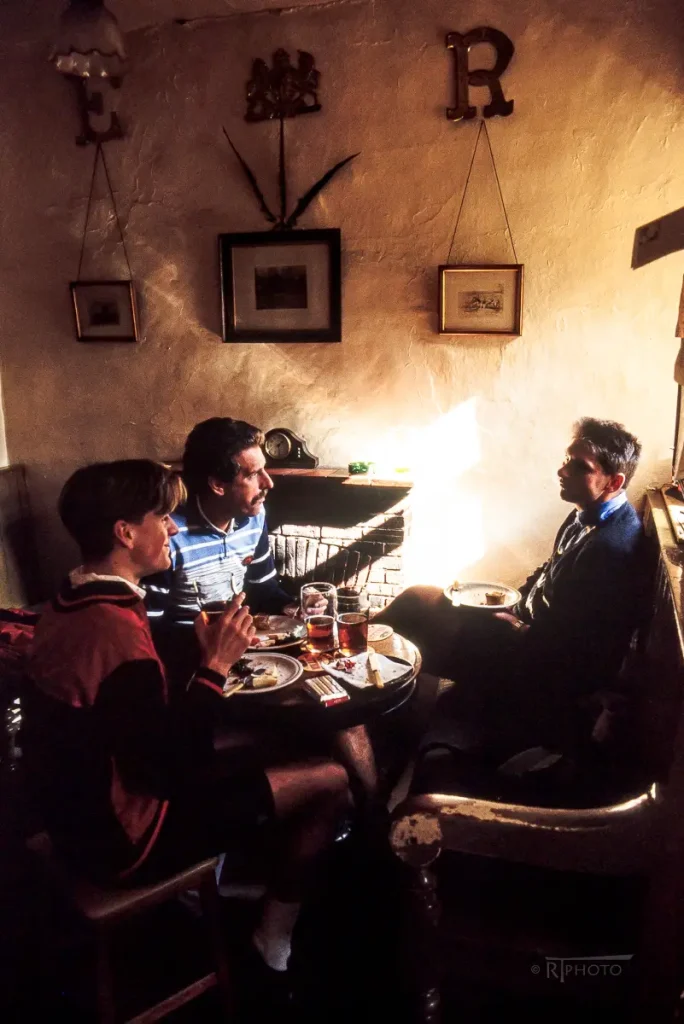
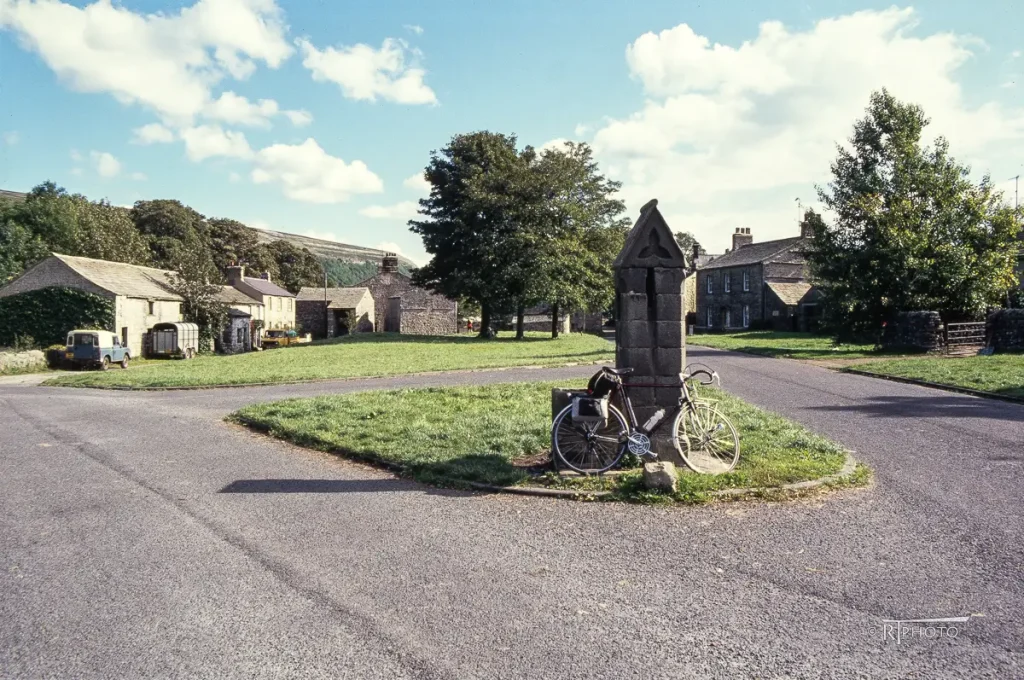
Below are a few slides to give you a taste. These were taken 30 years ago upon my first visit to the Yorkshire Dales, cycle-touring with friends. The film used was the old Fujichrome 100, predecessor of Provia. The light during that week was magical.

The last pic shows the rig’s latest addition sitting on the lightbox. A welcome gift from Santa. Up to now I’ve been using the old film-strip holder from my Epson. I’ve not yet had a play with the pixl-latr, so I look forward to giving it a try.
Thank you for reading this, especially if you persevered through my written meanderings. I hope you gained something from it all, even if it only helped you get a good forty winks.
Share this post:


Comments
Digitising – Faffy’s Fotos on A Digitisation Rig with a Nod To Mr H Robinson and a Surprise Along The Way – by Ralph Turner
Comment posted: 06/02/2021
Matt Bigwood on A Digitisation Rig with a Nod To Mr H Robinson and a Surprise Along The Way – by Ralph Turner
Comment posted: 06/02/2021
Comment posted: 06/02/2021