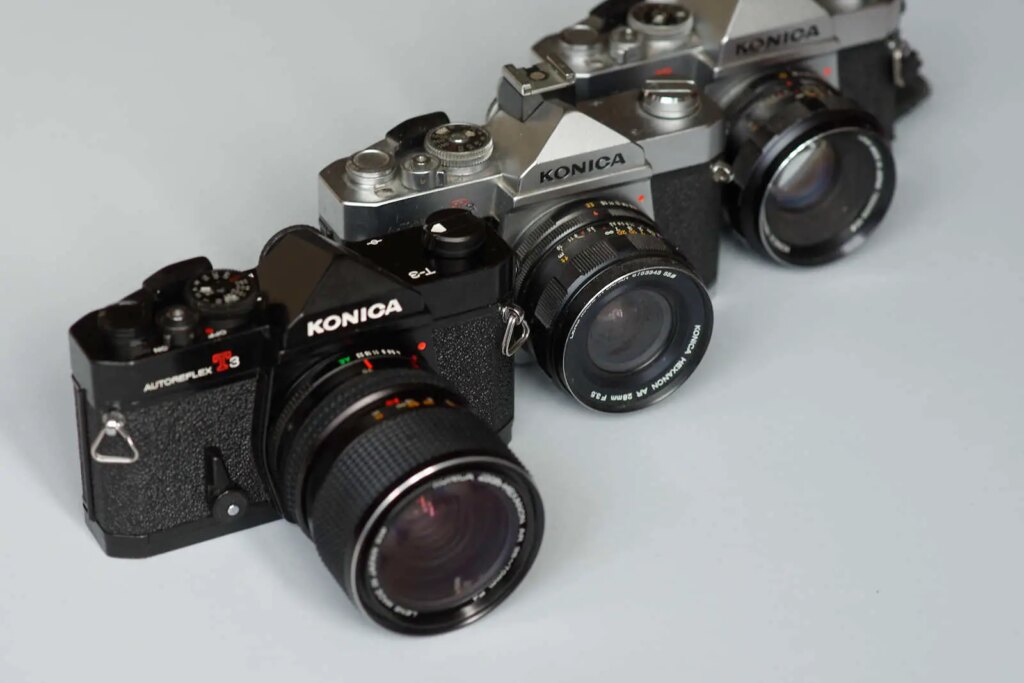
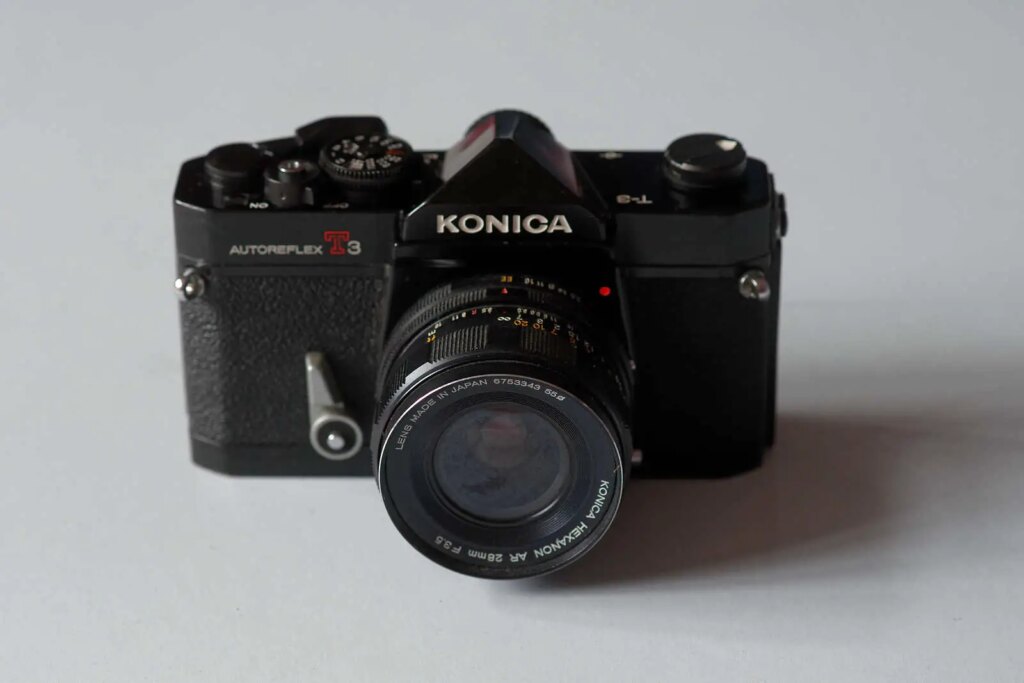
The first camera I owned and used extensively was a Konica Autoreflex T3; a real brick of a camera. I was always a big advocate for the T3, and used it extensively for 20 years. In recent years the T3 has started to be recognised as a minor (heavyweight) classic.
About 15 years ago I was able to pick up a copy of the revised nT3 version, which featured split-image and microprism focus aids, a squared off pentaprism and a viewfinder blind. Both cameras featured in my 35mmc review of the Autoreflex T3.
A Black T3
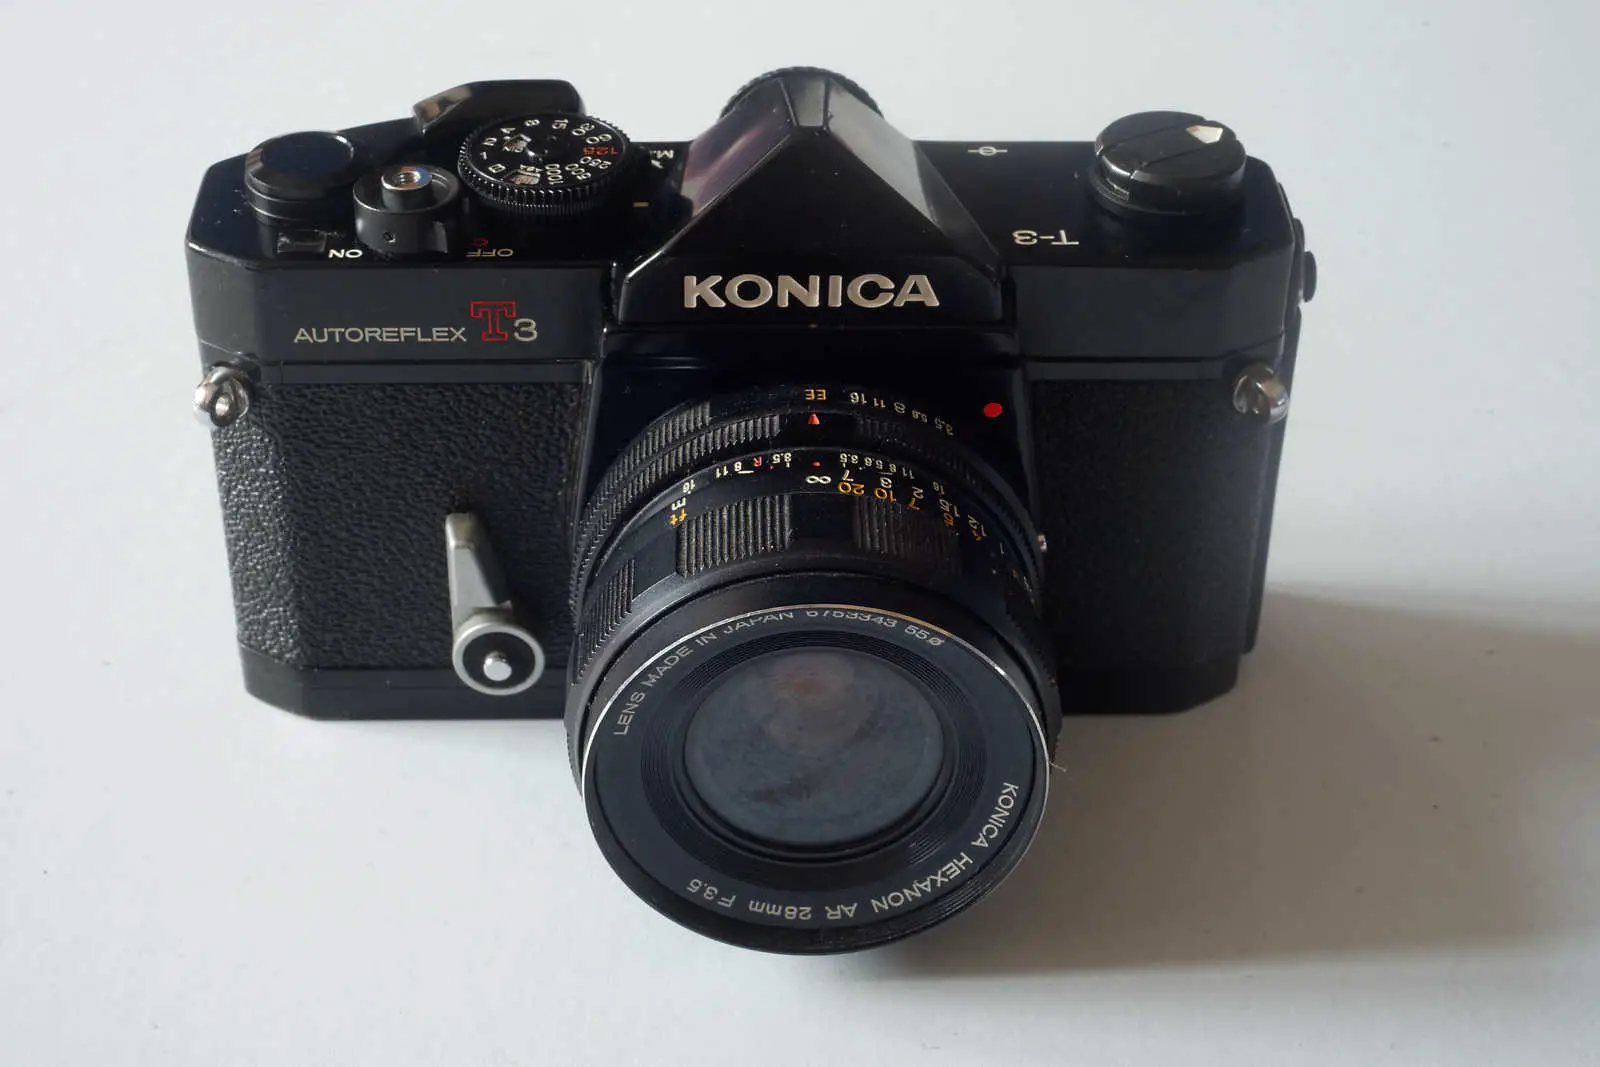
Recently on a popular auction site, a black pointy-top T3 came up. Sold as seen, untested, but seemingly in good condition. I put in a bid and won.
When it turned up it did not disappoint. Although I’m not a big fan of 70s zooms, it had a nice looking 35-70 f/4.0 attached. Possessing an earlier serial number than my first T3, It is in very good condition. Just a minor scuff to the pentaprism and some rubbing/retouching near the strap lugs.
The only bit that I was unsure of was the screw-in battery cover, which was aluminium rather than black. The cover could be original. Painted metal would chip quickly on an ‘open by coin’ cover. Pictures of the undersides of black Autoreflexes that take PX675 batteries seem to all feature an aluminium cover. If anyone can confirm what colour the original cover should have been I would be grateful.
Under the battery cover there was no evidence of corrosion. Unfortunately putting some fresh zinc-air batteries left the meter needle in the viewfinder firmly at the top of the scale. Far more firmly than on the other two copies I have, almost as if it was stuck.
Looking for an easy fix
To cut a long story short, I found a repair article and delved under the bonnet.
The T3 seems to have been designed to be very easy to work on. It features sub-assemblies that are able to be swapped out quite easily. This, along with the availability of repair manuals, might be part of the reason the British Army used T3s in the early 70s.
With hindsight I should have done more homework and read the whole repair guide before starting. I still ended up in the same place. The meter needle wasn’t stuck. The galvanometer it was attached to really didn’t want to deflect it down the scale.
Another instance of a 60 year-old camera working fine mechanically, but let down by electrical components.
What I’m left with is a lovely looking black T3 that actually works (apart from the meter). I’m quite happy with that for the price I paid. But what I’d really like is a fully working, metering black-bodied T3.
What constitutes a black body?
The bits that are different between the chrome and black T3 are:
- film wind lever,
- shutter speed dial,
- rewind crank,
- top plate,
- bottom plate,
- front plate and
- self-timer lever.
The top and bottom plates are really easy to remove (and swap) as are the bits that go through the top plate. The front-plate requires the bayonet to be removed before it comes off. The bayonet is shimmed. Care is required to make sure the bayonet goes back correctly and maintains the right registration distance across the frame.
Swapping top plates
I confess I do have form for swapping top plates. It is generally a very easy thing to do. Both of my Minolta SRT 101s had top plate dents and a top plate from an SRT Super came available. The SRT Super features a nicer-looking top plate without the bevels present in the 101. It also has an overhang to provide a view of the aperture ring through an aperture direct window.
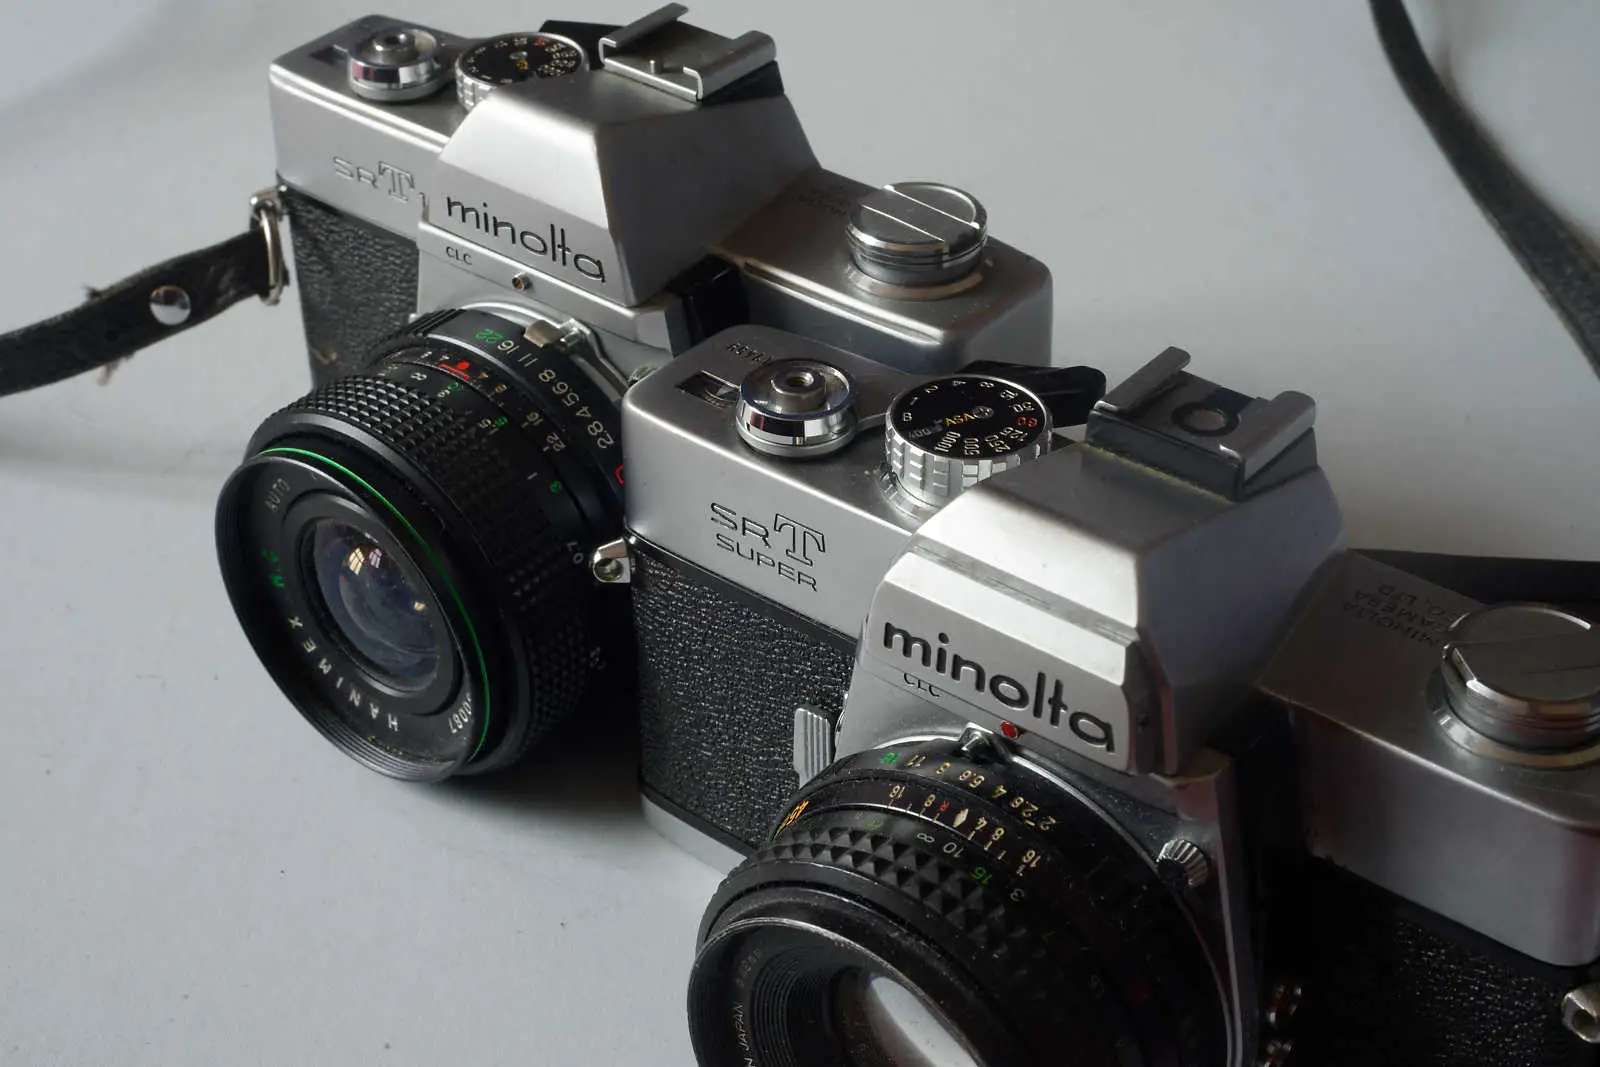
Once transplanted to one of the SRT 101s the camera is still functionally a 101. It has no apertures in the viewfinder (transferring the prism is a much bigger job). It has no workable hot-shoe and lacks the split-image and microprism combined focus aids (replacing the screen is even more invasive than changing the prism). The result is purely cosmetic. I feel a bit shallow for liking the camera better with the new top plate, but it is the one I tend to reach for.
Decisions
I needed to decide whether to re-dress one of my current working T3s. One of them has a sentimental value to me, while the other is the (more desirable) slightly updated model. That later model already has a black self-timer/stop down lever, so I maybe wouldn’t even need to swap that over.
Close but yet..
I did an ‘exploratory’ to see just how easy it would be to replace the nT3 top plate with the black T3 one. I knew that there would simply not be room for the eyepiece blind, and I might not be able to use a flash shoe. The losses could be acceptable for a working black bodied T3 with both focusing aids in the viewfinder, if the changes were reversible.
The eyepiece blind of the nT3 comes off quite easily with two screws, but the plate beneath it has was also redesigned and widened. I could bodge the camera so that the ‘pointy’ top-plate would fit, but it would not be reversible. It feels a bit like an act of vandalism on what is currently a fully functional camera.
Trying on a new suit
What I’ve decided to do (almost as an exercise) is to re-dress my precious original T3. I hope people will find my documenting it here of interest.
It might only be a temporary change. In any case it is purely cosmetic as all the mechanics of my camera will still be the same. If, once I’ve used it, it seems too abstracted from ‘my’ original camera, I might switch it back. At the very least, it will give an opportunity to properly clean the original chrome body without the rest of the top-plate furniture getting in the way.
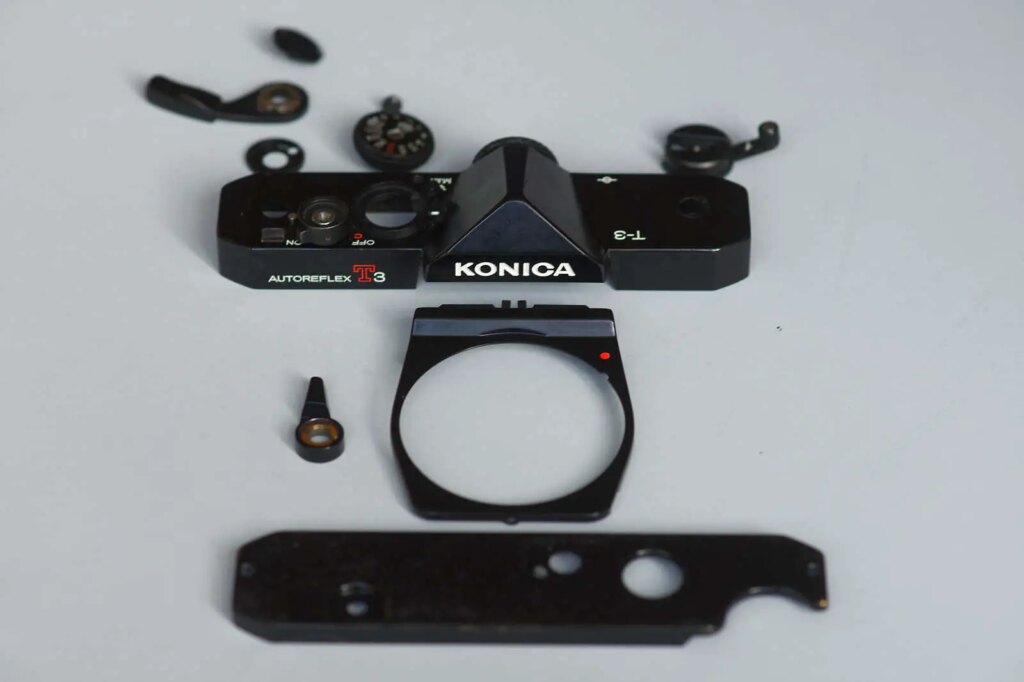
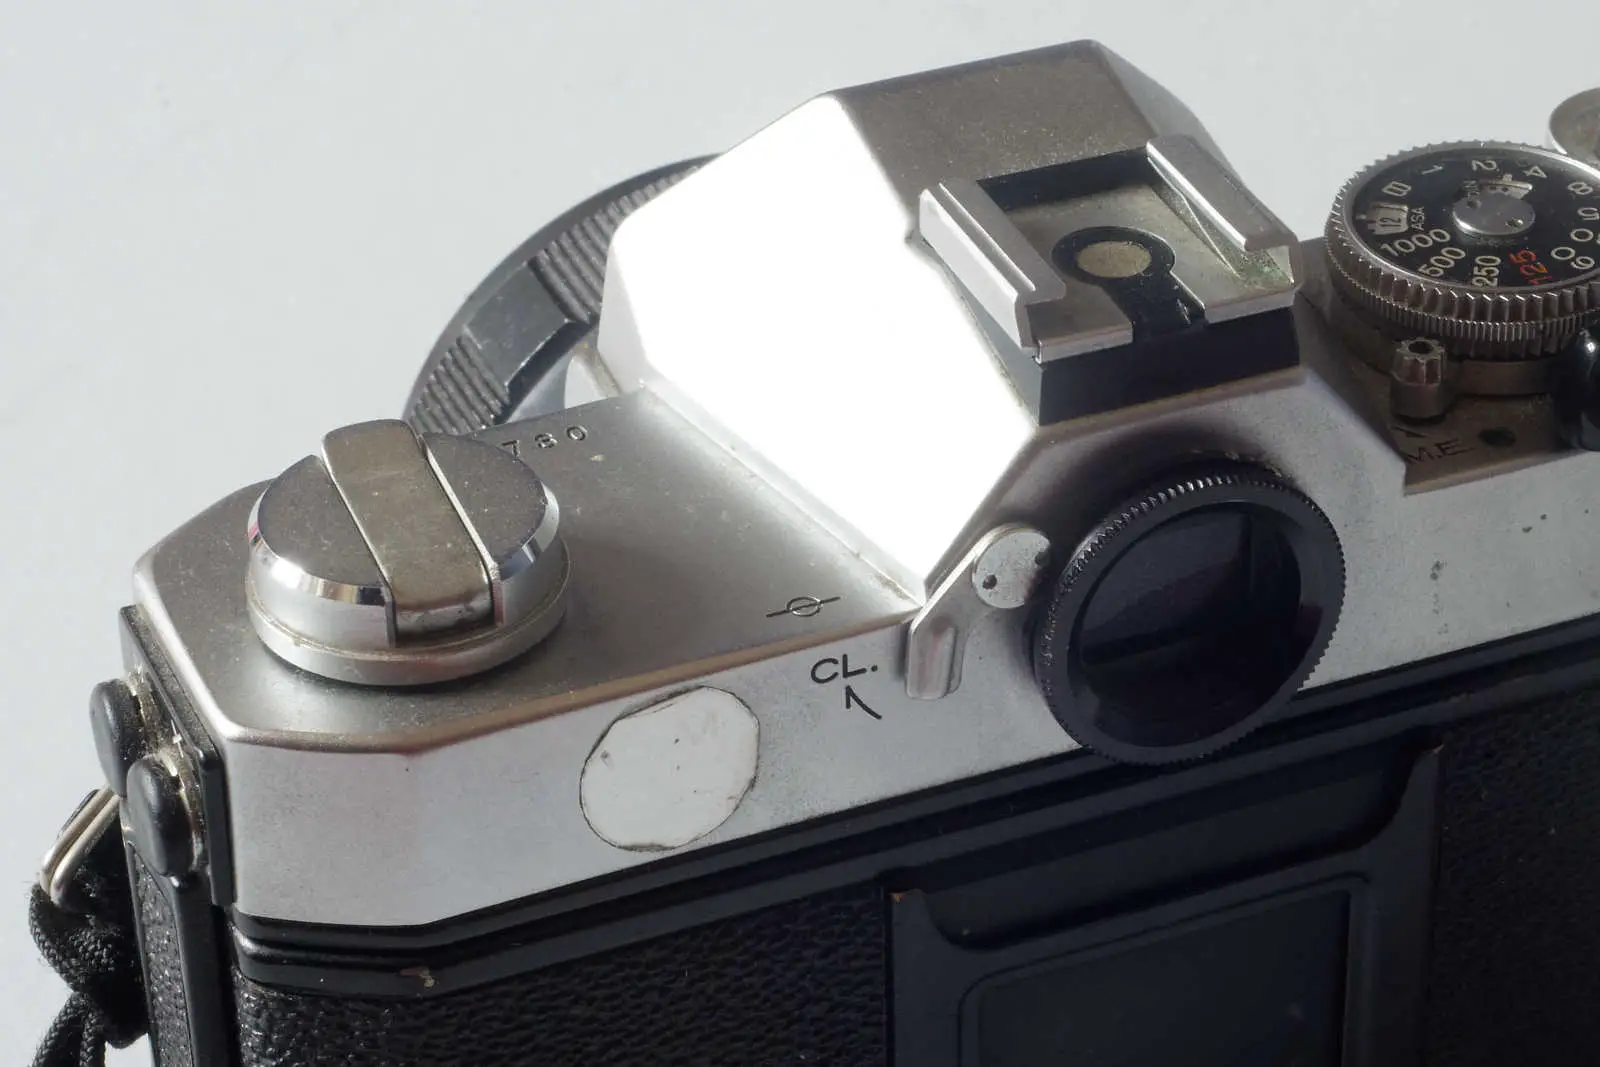
From the top..
The Top Plate of the T3 is unusual in that it doesn’t have any additional screws to hold it in place. Instead it is held by lock rings around the rewind lever, shutter speed selector and wind on lever.
Film advance lever
The wind on lever is capped by a round threaded plate that unscrews anti-clockwise. There are no key slots or holes, so you need to use a high friction surface to try and turn it. If it is really stiff you might need to use a vice or pliers. If you do need to do this remember to protect the edge of the plate with something soft (like tape).
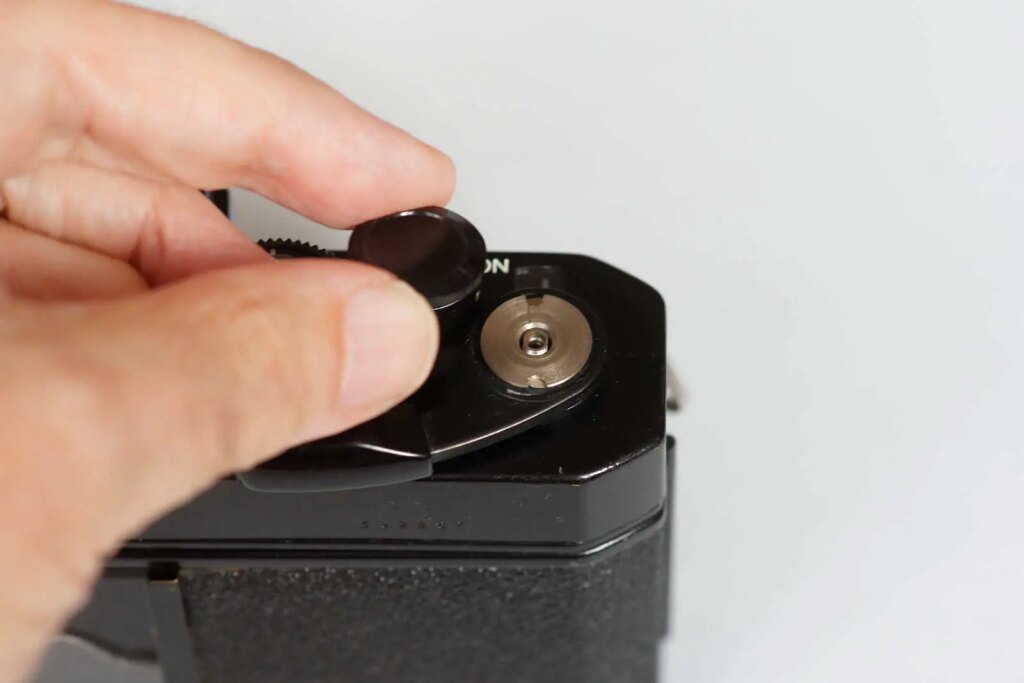
Underneath the capping plate is another plate with slots on it, which also unscrews anticlockwise. You can either remove this with a proper lock ring spanner, or with careful use of a pair of needle-nosed pliers.Once the slotted plate is unscrewed you can lift the wind-on lever clear in one piece along with the slotted plate and the washers between them. Beneath that is a cam that also needs to be lifted clear of the spindle.
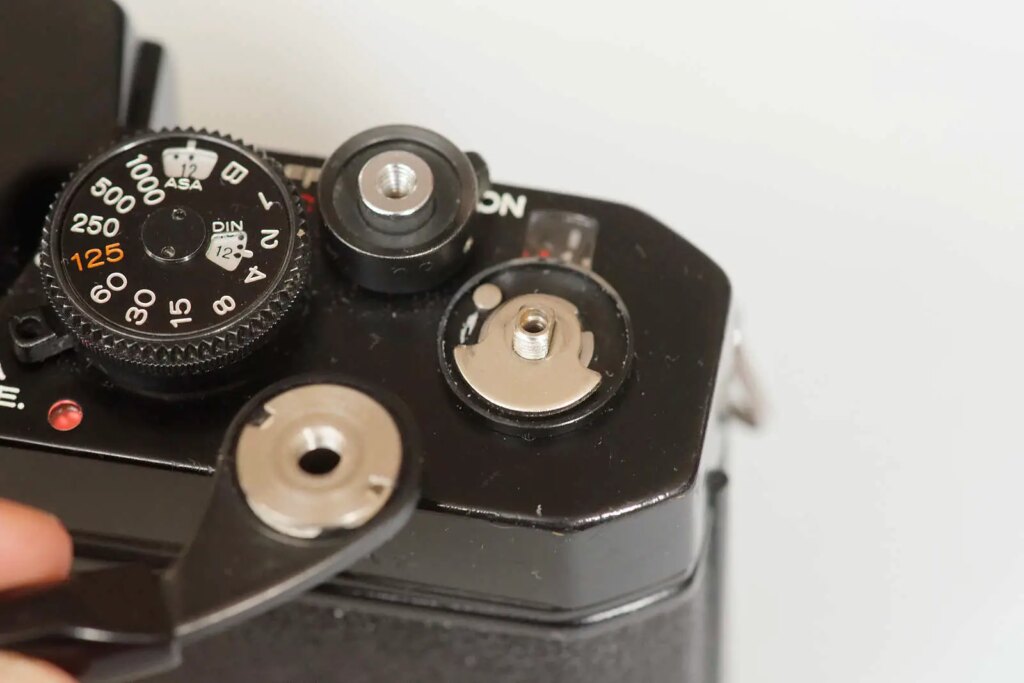
With the cam removed you can see a second lock-ring for removal with a suitable tool. The ring and the circular tray beneath it then lift clear.
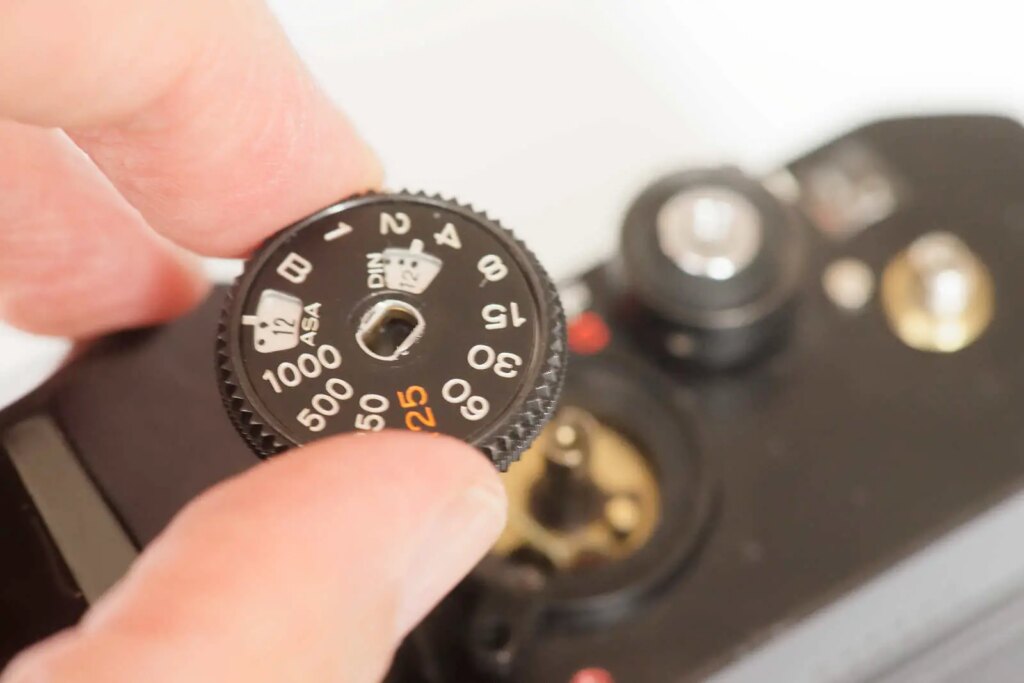
Shutter speed dial
The shutter speed dial is held in place by a flat-topped screw in its centre. First set the speed to 1000 and the ASA to 12 (not essential, but it helps making sure the bits go back in the right places). Then, using a pair of dividers (or even better the proper tool) unscrew the flat topped screw anti-clockwise. With the flat-topped screw removed you should be able to remove the whole dial, plus the two plates on top of it away in one piece.
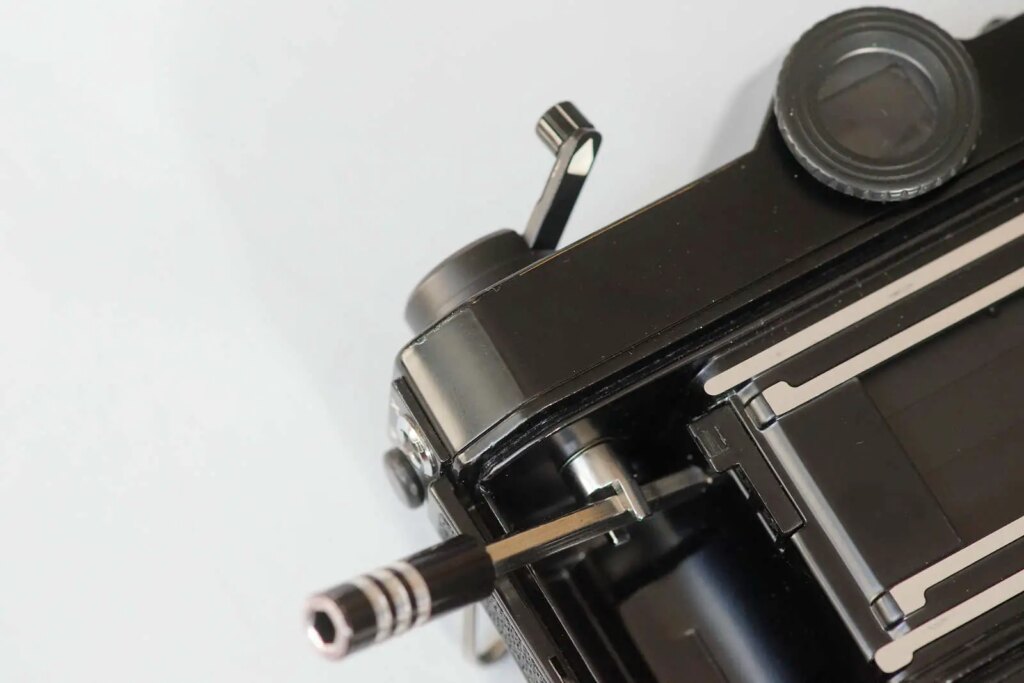
Rewind crank
To remove the rewind crank, open the back of the camera (small tab at bottom left of the camera body) and put a bar across the fork under the crank. Unscrew the crank anti-clockwise and set the two sections aside.
Undo the lock ring that is now visible with a proper lock ring spanner, or (carefully) with a pair of needle nosed pliers.
Top plate removal
For an original T3, the top plate should now simply lift clear. The fit is snug, so it might need to be eased.
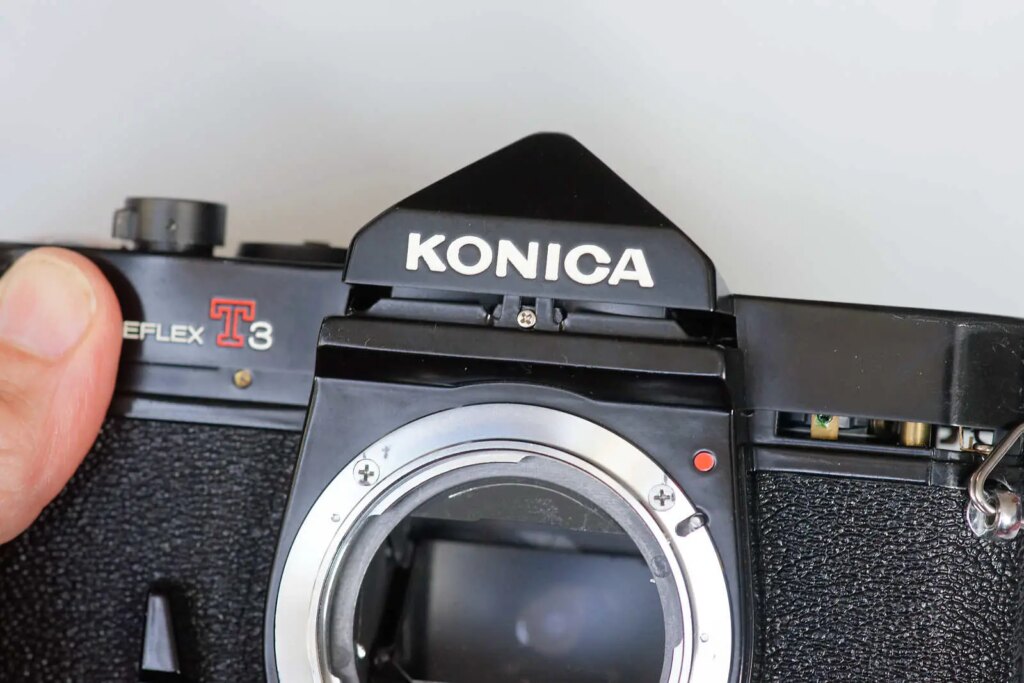
For an nT3 you need to undo the flat topped screw at the centre of the viewfinder blind lever and remove the lever before the top will come off.
What do we see?
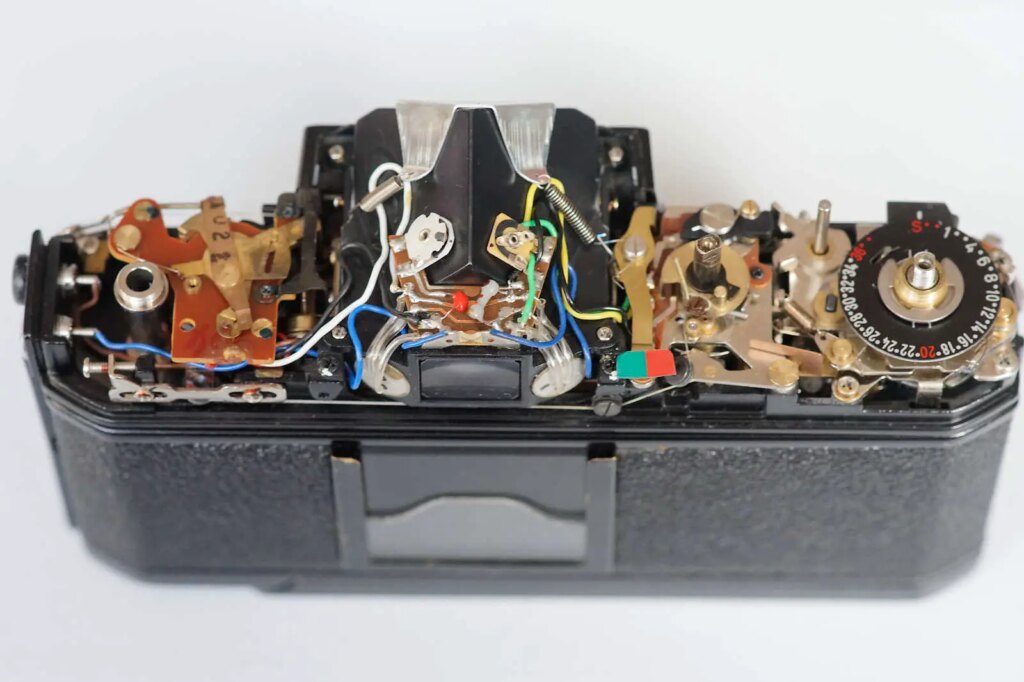
Under the hood, there are an array of ‘modules’ that make the camera work. dealing (roughly from left to right) with exposure, viewing, shutter and wind-on). There are a number of adjustments including a potentiometer on top of the pentaprism for adjustment of the meter. I’d advise not to touch if you don’t fully understand what you are doing. In general Konica put blobs of wax on any critical adjustments – be very careful before you fiddle with any of those.
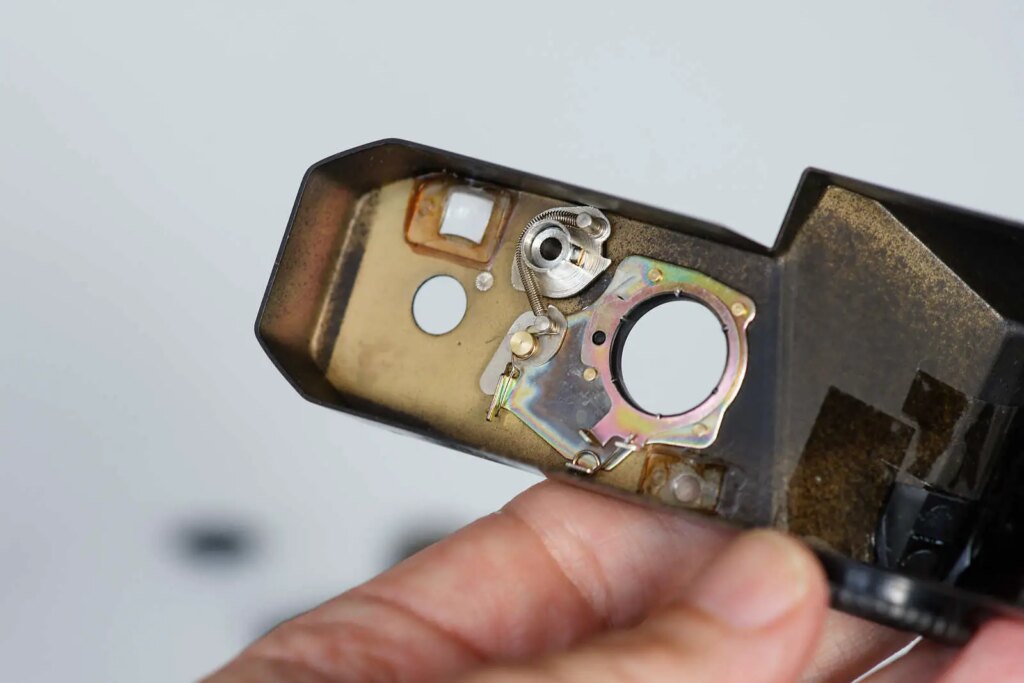
If you look at the underside of the top plate you will see that a number of sub-assemblies – things like the shutter lock and battery check switch and the double exposure lever are firmly attached to the top-plate – a nice touch that makes reassembly much easier.
Down Below
To remove the base-plate, you need to remove the battery cover and the three retaining screws. The plate then simply lifts clear.

In front
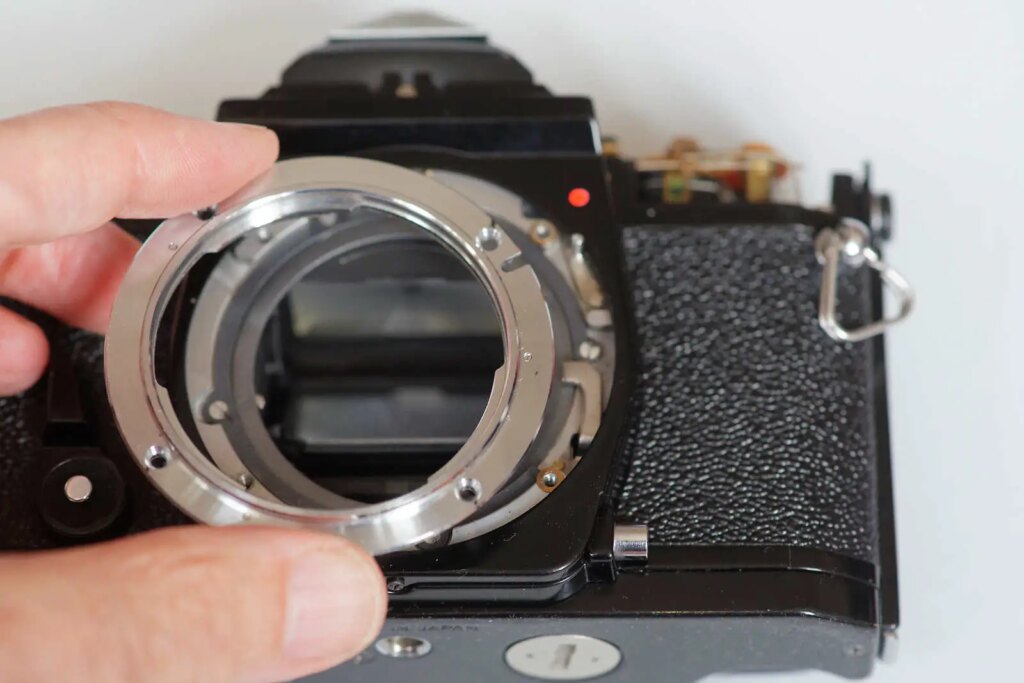
Face plate
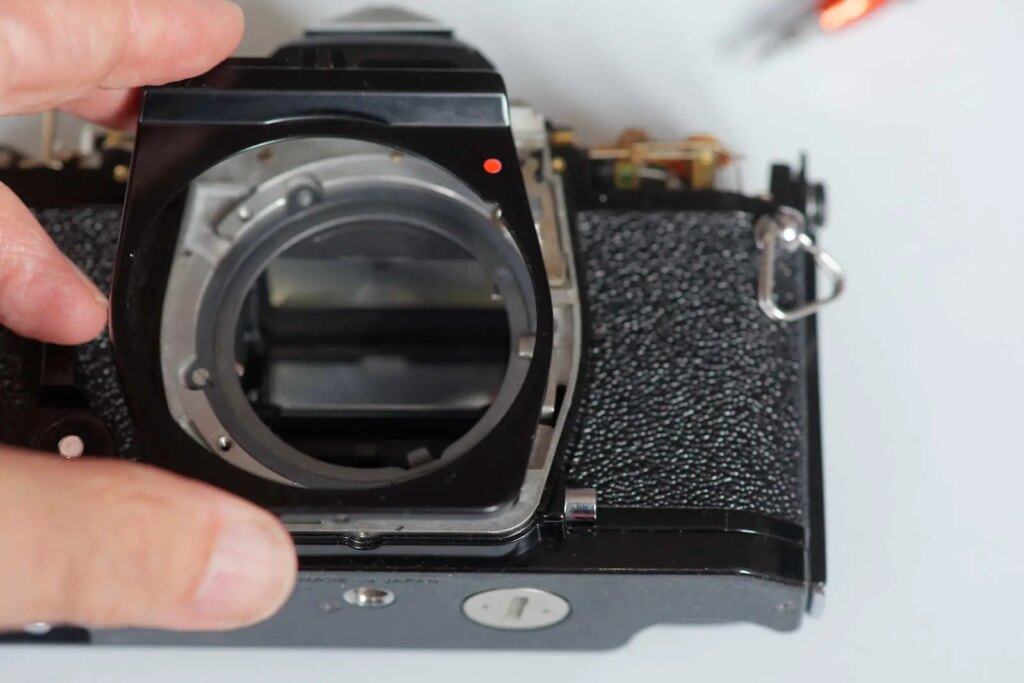
To remove the front plate around the lens, you need to undo the four screws that hold the bayonet on. The screws that hold the mount may be shimmed and a flat plane of focus will be dependent on the same shims going on the same mount screws. Make careful note of which shims go where if you need to remove them at all.
The facia plate is now just held by two screws. One at the top which is normally hidden under the top plate wile the other is on front edge of the camera base, just in front of the tripod mount.
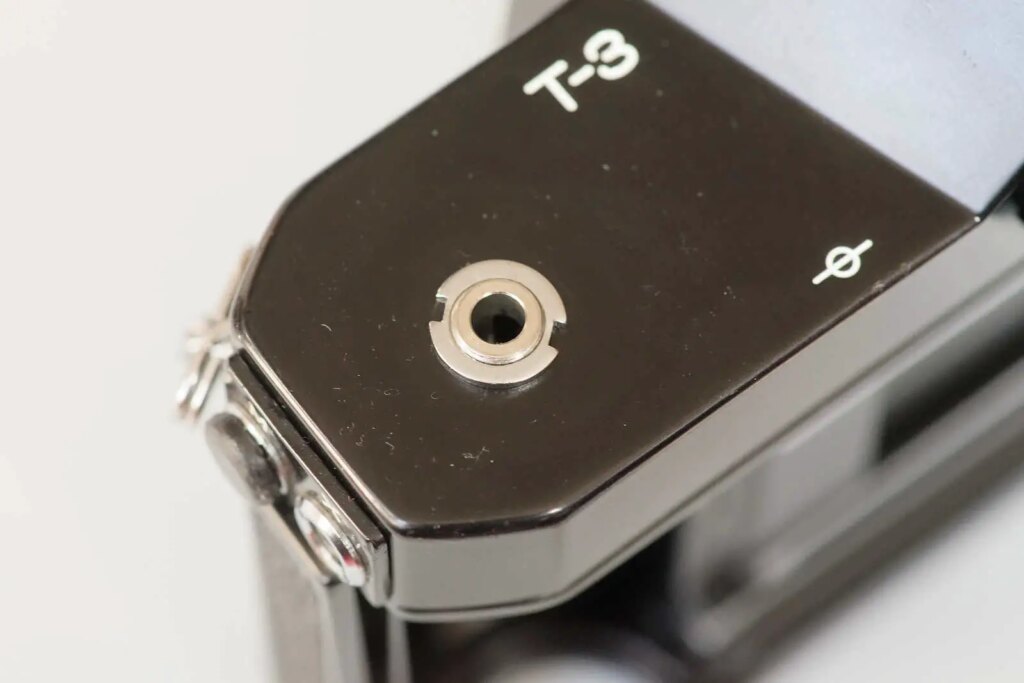
Self timer/DoF preview lever
The other ‘black body’ item is the self timer lever, which on the T3 also doubles (triples?) to lock exposure and stop down the lens when pushed towards the mount.
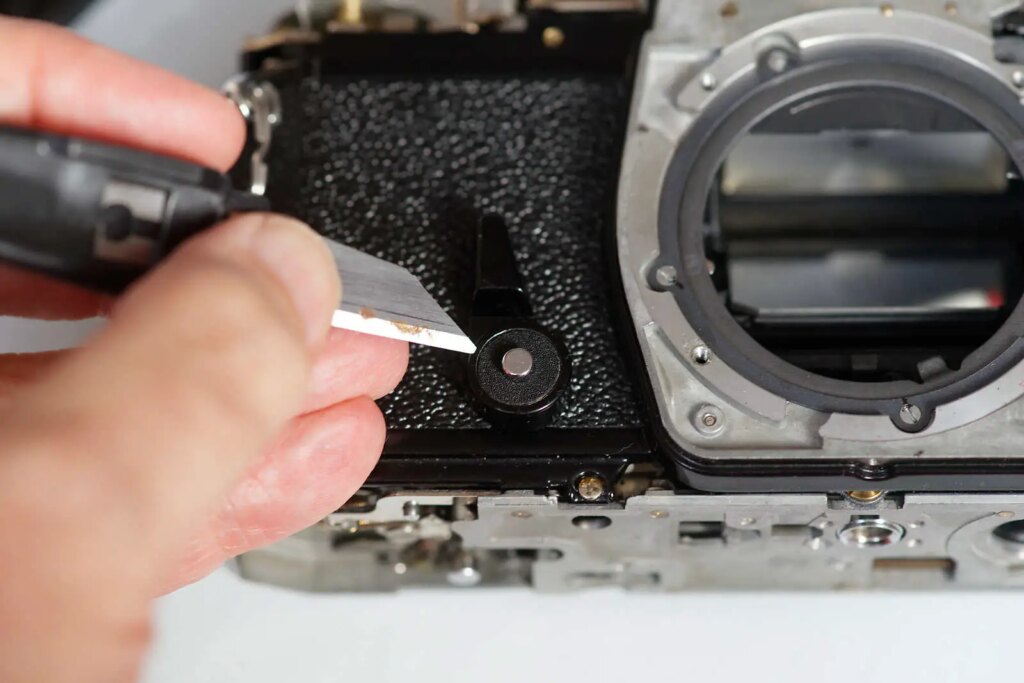
On the original pointy-top T3 a fabric washer needs to be prised up, before a lock ring is revealed.
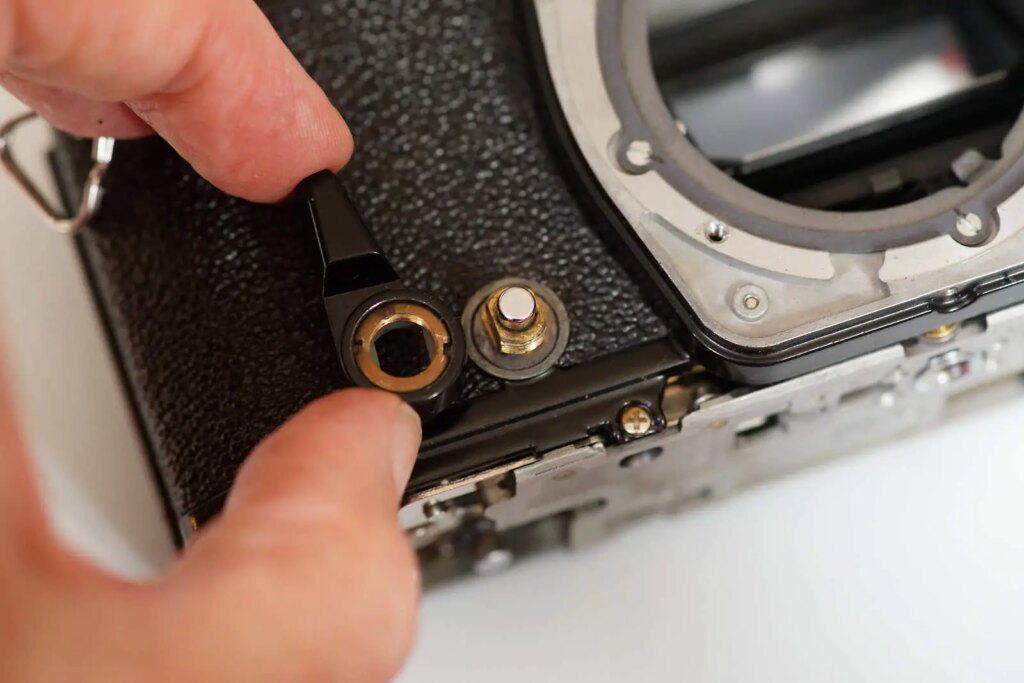
Once it is unscrewed, the lever just lifts clear.
Reassembly
Reassembly just involves reversing the process. In the end I decided to keep the original silver-grey self-timer lever on my now otherwise black and fully functional T3. Partly because I’d have to get some glue to stick the fabric facia that covers the lock ring back on and partly because I quite like the idea of having a reminder that this is my old chrome T3 under the new suit.
Remember to leave clues!
If you do go down the ‘Franken-camera’ route and swap items around between cameras it is an idea to leave notes for someone who opens them up later. These can give clues to explain why an early serial number might be present on what appears to be a later body. For example, I’ve written a note in pencil on the inside of the film door of the SRT with in incorrect top, explaining that it is a 101 rather than a super. If I keep the black plates on the T3, I will write a note on the base of the main body noting the original serial number (which otherwise only appears on the top-plate).
Other articles on repairs and the internal workings of analogue cameras can be found here.
Share this post:


Comments
Louis Sousa on Baby’s in Black – Swapping Body Plates on the Autoreflex T3 – By Bob Janes
Comment posted: 09/11/2022
Comment posted: 09/11/2022
Kodachromeguy on Baby’s in Black – Swapping Body Plates on the Autoreflex T3 – By Bob Janes
Comment posted: 10/11/2022
Comment posted: 10/11/2022