Preface: This article seems to have caused a few raised eyebrows, and in some cases heated responses that amount to the idea that the author of this article is “wrong”. The purpose of this article – or at least why I chose to approve it for publication – was to encourage the discussion. There is no one answer to the problem of digitising film. This article simply aims to highlight some of the perceived issues from both a technical (theory-based) perspective, and from a practical (subjective) perspective. If you wish to discuss the pros and cons from your own perspective in the comments, then please feel free, but please refrain from just stating the author to be “wrong” as this adds nothing to the conversation. Please also note, we are only talking about photography here, if this makes you angry, then it might be worth taking a step back. Finally, if you wish to read an article that makes the opposing argument – ie. in favour of camera scanning – then please read this article. Thanks, Hamish… now, over to Marco:
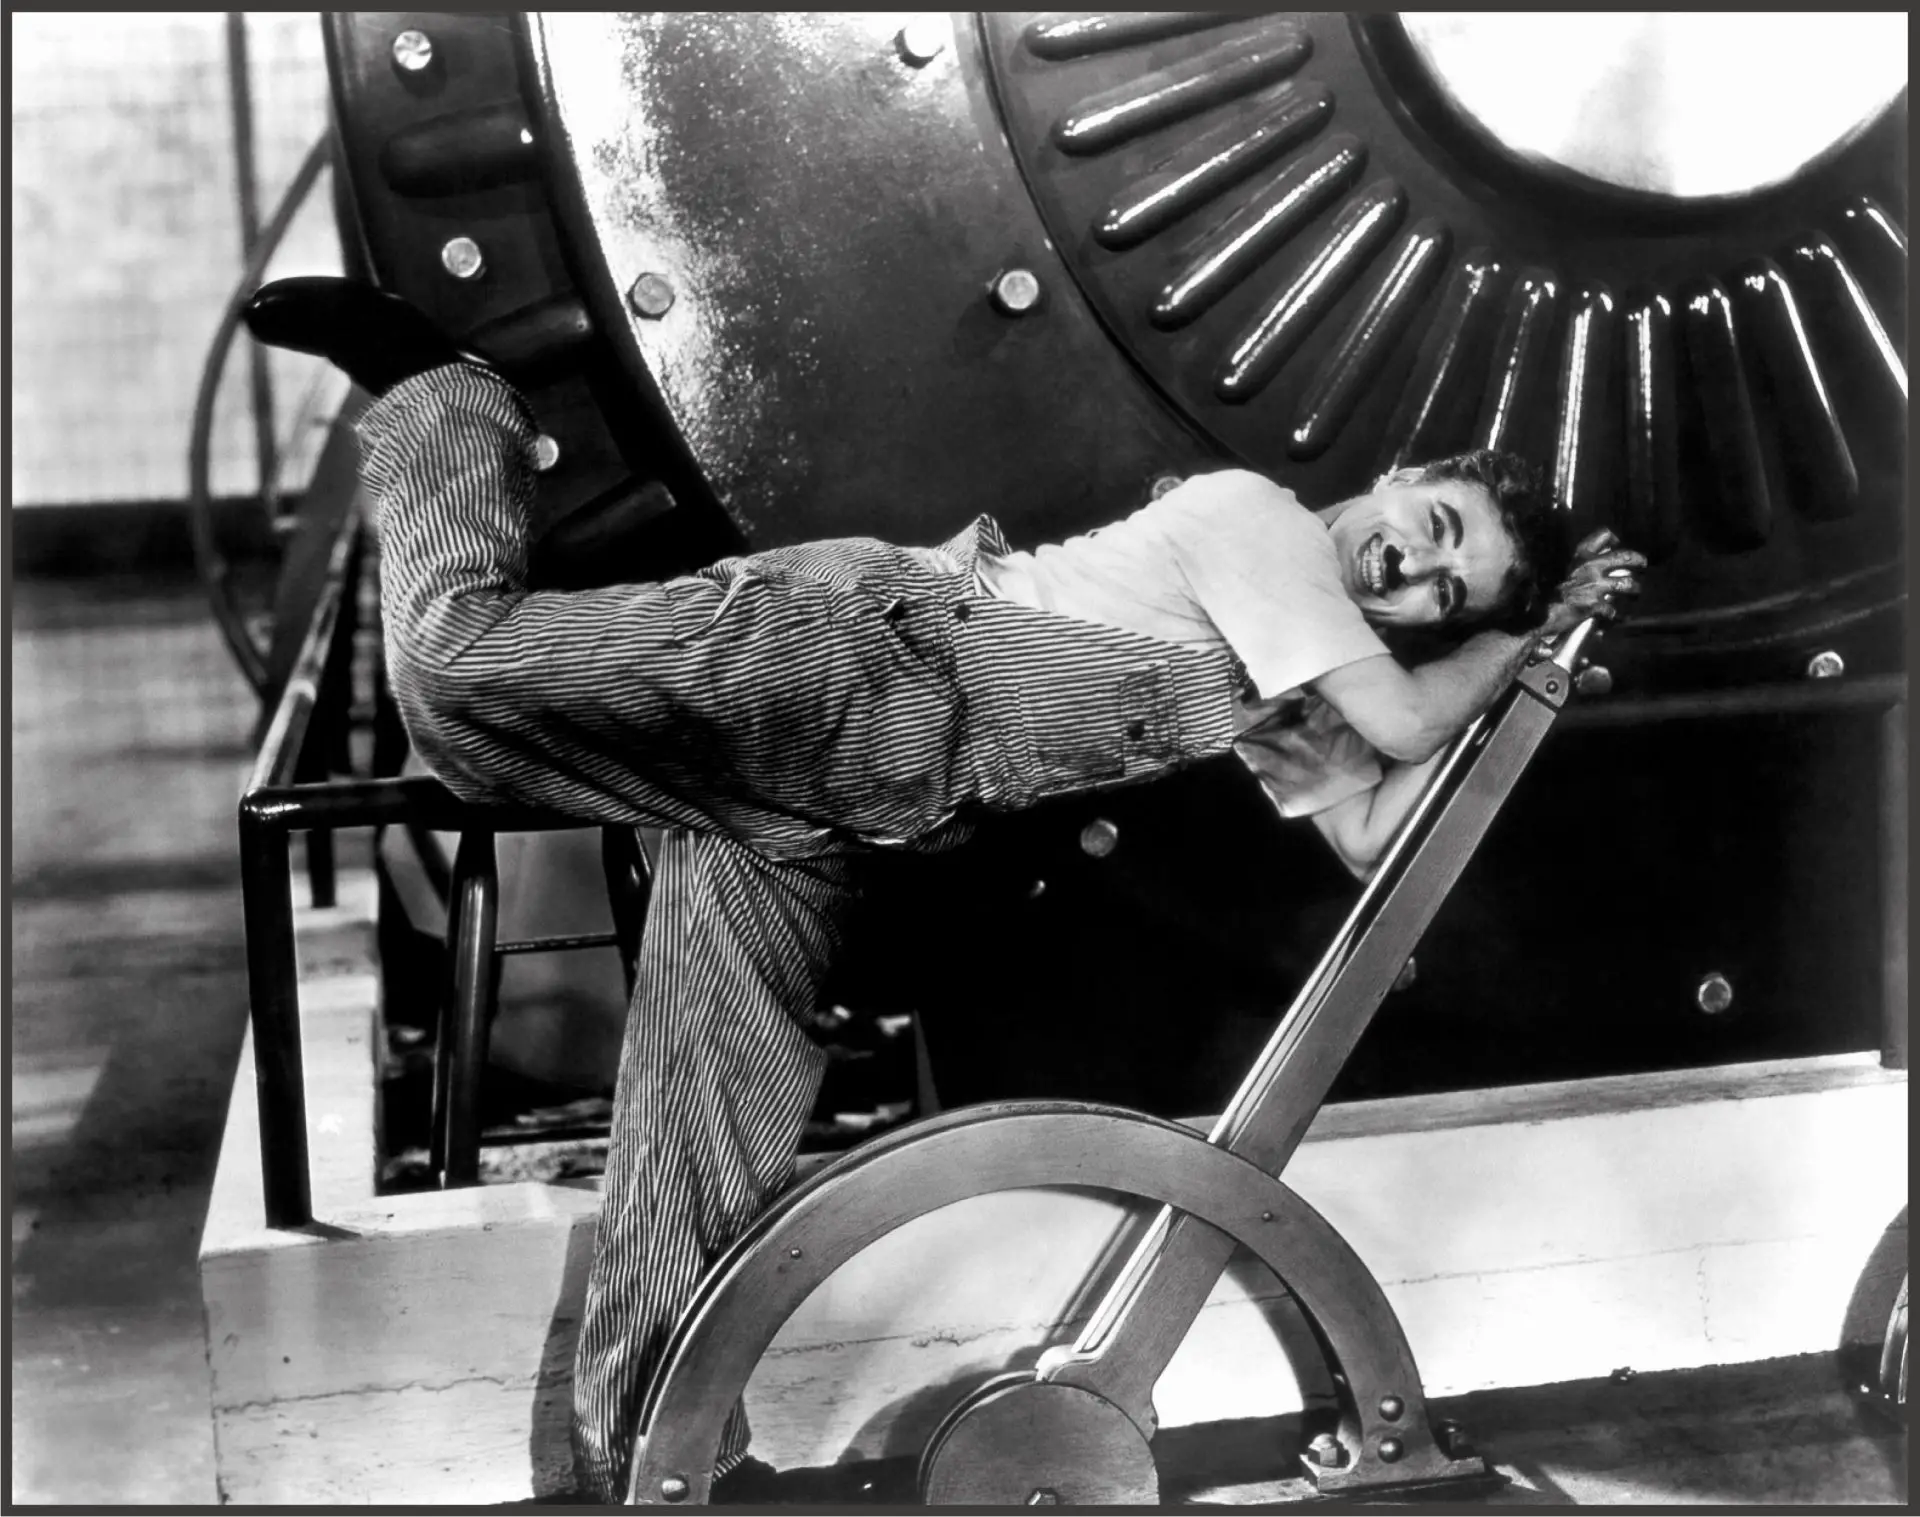
Featured image movie still from Modern Times, Charlie Chaplin (Platinum-toned remix of United Artists, Public domain,<https://creativecommons.org/licenses/by/2.0>, via Wikimedia Commons.)
While there is much interest in scanning with a digital camera, there are other ways of scanning negatives: using a lab or home-scanning with a dedicated scanner. Scanning with a digital camera sounds appealing: “I’ll save money and get better results.” But… There’s always a but. There is a downside – cost in space, $ € ¥ £, time. Lots of time. It’s a bit like the home-brew PC culture of yore. Before it was ubiquitous. Bespoke computers, just like suits. But DIY.
Space
The setup will take up space, more space than the standard standalone scanner. Much more than a lab scan. And, unless it’s hidden away, it may not be that attractive. And even if it is hidden, it may be time-intensive to setup.
Cost $ € ¥ £
First the equipment: mirrorless digital camera, macro lens (not extension rings), film holder, light source, copy stand/tripod… While there are many options to consider, some brands offer helpful accessories: pixl-latr. Negative Supply. Valoi. There are others with bundled packages: copy stand, light source, film holders. But they don’t include the camera or lens, both of which are expensive and problematic.
My take: the camera will need at least 45 mega-pixels for a 35mm standard frame and even more for medium format. If you’re only scanning b&w, then use a monochrome camera. When the monochrome has the same resolution as a colour digital camera, the monochrome will be far more accurate with a higher resolution (line pairs per mm). The object is to try to make the sensor as high-res as possible to eliminate artefacts. Some might disagree, but this is what the maths says to me for me to get the sort of quality of images I want. There are many choices, but of course higher resolution cameras tend to be newer and more expensive.
Some maintain that a camera for scanning can do double duty – scan negs and make images in field. Seems like a plus, but then there’s the ordeal/cost of setting up the digitising rig each time you want to use it to ensure that everything is in “focus” and rock-steady. Leaving the camera in place also has a downside – spending a fair amount of money for a camera that just sits there doing nothing for most of the time. Even using the lens in the field would be problematic – subjecting it to damage etc. Now we’re stuck evaluating the trade-off between money and time. Complexities abound.
As for the components (film holder, light source and copy stand), they are usually assembled separately, even from one manufacturer. You’ll need to choose a good copy stand – one that is stable and has a sufficiently long throw to capture the entire frame of the negative with the camera and lens setup. All of this to ensure good results. The issue is, the good ones are expensive and have a bigger footprint.
Even then, lens choice is problematic. You don’t just need a good macro lens vetted by the experts, you need a good copy of that macro lens. This can make even finding a lens an issue, even after you’ve done all that research to find that one with a good-enough flat field etc.
Then there’s the software, and the continuing cost – the upgrade cycle of digital. And the subscription model for software: low upfront cost at the expense of monthly payments.
The scanning software I use was a one-off purchase with lifetime support, augmented with open source (free) software packages to process the RAW files. No ongoing subscriptions to worry about.
Compatibility
While cameras produce high-quality RAW format, there is a downside. Not all RAW is created equal. Each camera manufacturer has its own proprietary version. As a result, interpreting (reading) RAW requires specialised tools. Tools can either be imbedded in the image processing software or as add-ons (aka plugins).
As for converting RAW into a standardised format, Adobe Camera RAW Photoshop, Photoshop Elements, After Effects, and Bridge all support RAW. Plugins work in some but not all programs. The Negative Lab Pro plug-in only plays well with Lightroom and is not free.
Adobe DNG Converter can convert some RAW files into DNG, just not RAW files produced by all camera models.
Then there’s the legacy issue. Read any VHS/Betamax tapes, floppies…lately? Will that particular variant of RAW be readable in twenty years, or even five? To be safe, convert RAW files to DNG (Digital Negative Format) for safe-keeping. Twice the disk space required. Just saying.
Some cameras can produce DNG files. For those cameras, consider making images in DNG, to maximise the amount of information:
- Use image editing programs that can read the DNG directly or that can invoke plug-ins/add-ons to convert DNG to TIFF
- Use external programs to convert DNG into TIFF or other formats specific to the image editing program. Gimp can process files produced by Darktable in TIFF or XCF [Gimp] format, preserving the maximum amount of information in the source.
Choose lossless file formats to preserve as much information as possible, rather than JPG, for example.
Time
Time is another “hidden” cost. There’ll be time spent:
- Choosing the set up and assembling the physical components.
- Setting-up. Putting the physical (copy-stand etc) in place, unless it’s always in place and one camera is always there, adding yet another expense. In contrast, flatbed scanners are small and unobtrusive.
- Scanning the negatives. There is no downtime. Scanning is labour-intensive. Each frame must be positioned and advanced by hand. And there are no breaks. It’s tedious, unlike dedicated scanners. And no, you cannot “Set it and forget it”. Time spent scanning a set of negs with a scanner is more like attending to the developing process during semi-stand developing.
- Post processing. It will require much more time than expected to fix deficiencies in the way digital cameras render a scene.
- Extra time inverting unless you opt for spending more $ € ¥ to have an image processing program like Lightroom or a plugin for Lightroom like Negative Lab Pro do the conversion. Or use an alternative like Rawtherapee or Darkroom, which both have problems. And even then, they may not be able to deal with the artefacts that are the result of scanning with a digital camera.
- Extra time eliminating dust (His Dark Materials). Film attracts dust like a magnet, requiring more time during post-processing to stamp out and can remove most of the dust from colour negs through the IR channel. And there’s the benefit that a scanner can invert while scanning. As a result, no waiting and scanning only the negatives deemed “keepers”.
- Extra time fixing small artefacts. Camera resolution is over-stated. Each sensor element (sensel) responds to only one RGB channel while the output pixel contains all three. How? Interpolation using proprietary algorithms. Different sensors may have different “views” of the scene, just like the human eye. Perhaps scanning b&w negs with a monochrome digital camera might work.
- Time wasted, scanning negs that aren’t worth it. Although loupe and light table can show you if the neg is sharp, it cannot tell you it is worth doing. Contact sheets were useful in past. The tradeoff is akin to the proverbial “pray and spray”. Not every neg on a roll is worth scanning, unless the images were made thoughtfully, with care. It’s a tradeoff between enough choice and the “tyranny of choice”.
- Scanning larger negatives. This will come at either a higher cost or lower resolution. Try scanning an XPan image 65mm x 24mm. Or a Chroma Cube image 72mm x 24mm. Or a medium format neh up to 6 x 12. A 6 x 6 colour neg will need 100mb at 1800dpi. A 4 x 5 …. And, no, stitching won’t work. It would require too much precision. Besides, when moved, 35mm film may bend slightly differently
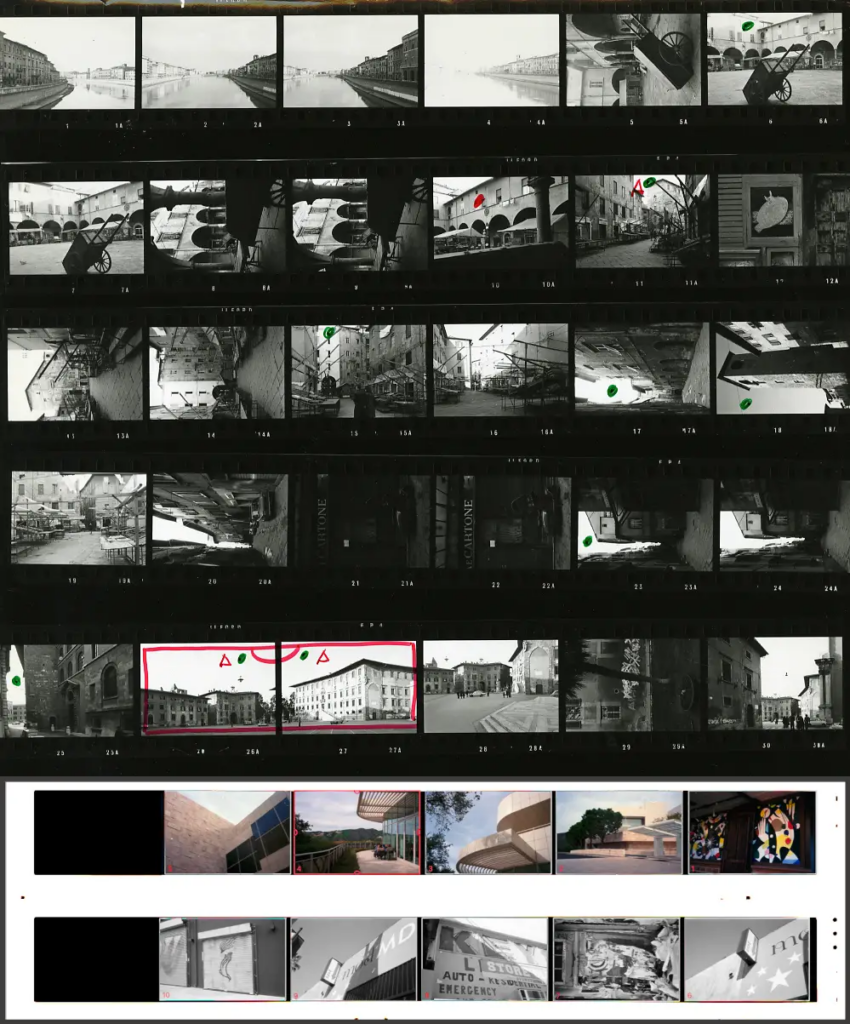
Top: part of a b/w film proof sheet.
Bottom: A colour and b&w “virtual light table” with my negatives in a scanner program (Silverfast AI Studio). The program supports zooming-in to the selection. On the virtual light table, colour images are Kodak Ultramax 400; the b/w on Ilford HP5+, both at box.
Trade-offs
There are always tradeoffs. Remember “the perfect is the enemy of the good”
- Consider choosing software and deciding whether to buy or opt for the subscription model – low upfront costs but more over time.
- Consider bulk loading, for example. It may save money but at the expense of possibly scratched negs, fewer film stocks to play with and convenience. It’s worth doing a thought experiment. Unintended consequences.
- Take the tradeoff between home-scanning and lab-scanning. Do I want to spend the time to go to the lab/pick it up and wait? And the expense of coming and going – time and money. Just some of many factors to consider. It’s a judgement call, after all.
For scanning, I opted for purchasing a scanner several years ago, buying scanning software and using open source programs for manipulating (even inverting) the images.
Your mileage may vary.
Conclusion
And no I do not use a digital camera for scanning. I’ve never had one. Only an iPhone. So it’s an opinion. Sort of… But having worked so long in analogue photography, computer science and computer graphics, I know the underlying principles. Instead, I use a scanner with Silverfast AI Studio to convert negatives to positives and to output in RAW for open source programs to convert and process.
- Gimp for image editing
- Darktable or Rawtherapee for converting DNG files to TIFFs.
I consider that with film it is worth taking the time to compose carefully and thoughtfully, to see and not merely look. As for cameras, I just prefer analogue to digital, older cameras too… A camera is merely one element in an arsenal of tools. For me, using a camera is a way to slow down, to contemplate, to be in the moment and to focus on quality not quantity. Film is expensive. So is time. That’s my approach – only one of many.
Share this post:


Comments
Art Meripol on A Cautionary Tale about Scanning Negs with a Digital Camera
Comment posted: 09/06/2023
BILL C WHITE on A Cautionary Tale about Scanning Negs with a Digital Camera
Comment posted: 09/06/2023
Comment posted: 09/06/2023
Comment posted: 09/06/2023
Comment posted: 09/06/2023
There are even more options in the « digital » darkroom than in the « wet » darkroom. Scanning is one part of interpreting the negative, post-processing another.Erik Brammer on A Cautionary Tale about Scanning Negs with a Digital Camera
Comment posted: 09/06/2023
Lots of complexity with camera scanning indeed. You seem to recommend a flatbed scanner. Is there a model that can really do a decent job on 35 mm negatives or slides? Haven’t found one.
Luckily, I have a Nikon Coolscan V ED on loan from my brother for 35 mm.
For 120 negatives, I am using my GFX 50R plus an 80 Mamiya 645 macro lens on a tripod. Yes, this is tedious to setup, and once everything is aligned and in focus, don’t even dare stomping on the floor too hard, or you will have to wait for a while for the vibrations to fade out.
I would love to have a dedicated film scanner that does 35 and 120, but they are virtually impossible to get.
Recommendations welcome.
Thanks,
Erik
Comment posted: 09/06/2023
Jim Hofman on A Cautionary Tale about Scanning Negs with a Digital Camera
Comment posted: 09/06/2023
Karen McBride on A Cautionary Tale about Scanning Negs with a Digital Camera
Comment posted: 09/06/2023
Comment posted: 09/06/2023
Ibraar Hussain on A Cautionary Tale about Scanning Negs with a Digital Camera
Comment posted: 09/06/2023
To be honest though, most people scan to look at photos on a screen or upload to flickr, website, facebook etc even 35mmc doesn't allow huge files to peer at - - so unless wanting a huge print with exact colour fidelity and highest resolution it all looks like a waste of time and effort to invest heavily in scanning contraptions for the highest IQ just to pixel peep.
Likewise my bewilderment at hobbyist or amateurs with 45 MP expensive cameras just to photograph random stuff and to zoom in and marvel at how you zoomed into an ant at 1000 yards.
Just to ad - just for the pleasure of viewing - nothing beats a Transparency projected in a dark room
Ralph Turner on A Cautionary Tale about Scanning Negs with a Digital Camera
Comment posted: 09/06/2023
Comment posted: 09/06/2023
Comment posted: 09/06/2023
Rod MacFadyen on A Cautionary Tale about Scanning Negs with a Digital Camera
Comment posted: 09/06/2023
Faby on A Cautionary Tale about Scanning Negs with a Digital Camera
Comment posted: 09/06/2023
I saw somewhere that a properly developed black and white is about 6 mpx (3000x2000).
Mrs Nyquist and Shannon are whispering in my ear that I need to sample twice as much so as not to be penalized too much. 6x2=12 !
My D7200 without moiré filter offers me 24mpx...
All's well.
Mr Nikon sold me an ES-1 ~ 99€.
I place my SB-800 50cm behind my D7200 60mm macro and roll!
I shoot a 36 exposure in 20mn.
For an amateur who rarely shoots 40x60 on paper, that's fine!
I wouldn't say the same thing about color or slides...
though?
Gary on A Cautionary Tale about Scanning Negs with a Digital Camera
Comment posted: 09/06/2023
Bob Janes on A Cautionary Tale about Scanning Negs with a Digital Camera
Comment posted: 09/06/2023
I use both dedicated film scanners (an old Minolta Scan Elite II and a newer Plustek 135i) and full frame digital cameras to digitise my negatives.
While my go-to method for 35mm negatives is the Plustek 135i (so easy..), there are some tricky 35mm negatives and slides that I’ve gone on to shoot with a camera. I find that a 24 MP full frame Bayer sensor is equivalent to something like 2400 lpi scans on my dedicated film scanner (so a little behind, but you have to pixel peep to tell the difference). Both are superior to the Epson 4600 lpi flatbed scanner that I used to have (may it rest in peace) - don't make the mistake of thinking more lpi automatically means sharper scans.
For medium format, my only option is camera copies and I don’t find any real problems with the results.
To address some of the issues you highlight…
• I already have macro lenses and to be honest I’ve never met a macro lens I didn’t like. I don’t see why extension tubes shouldn’t work OK. Worth a try if you have them anyway.
• I find 24 MP fine even for medium format negatives.
• I have a decent tripod which is suited to macro work. I have developed quick methods of setting up, illuminating and squaring up to negatives - put a mirror where the negative holder would be and position the camera so that the centre of the lens is centre of the frame – then you are square to the subject (aren’t optics wonderful?)
• I doubt any raw format will not be able to be opened by future RAW software. I’ve used SR2 files from an old Sony R1 with modern software, SR2 has not been on a production camera for well over 10 years.
• Even if they have the same suffix, raw files from a 2005 Canon 30D will be a very different format to something from a modern Canon. The same goes for DNG files – there will be significant difference between old ones and new ones. Raw converters will simply throw up their hands at a DNG file that is not in the precise format that is expected (DXO PL doesn’t like the DNG files that VueScan produces).
• Negative inversion is not so difficult – in DXO PL you can do this by simply inverting the tone curve – I dare say a similar operation would work with other raw converters.
• Dust is always a problem, and cleanliness is the thing to aspire to while digitising by any method. IR dust removal is great for colour negs that have been through the wars, but you still need to get them as clean as possible for the best results.
As I say, to each their own and the key thing is to find something that works for you. Personally, I find flatbeds rather disappointing for scanning, but maybe I haven’t been using the right flatbeds.
Doug Anderson on A Cautionary Tale about Scanning Negs with a Digital Camera
Comment posted: 09/06/2023
90 percent of the negatives I scan are 35mm B&W. For this application the digital camera scanning rig is much much faster and less fussy to use than either of the dedicated scanners, and it produces noticeably sharper scans.
The BEOON rig and light pad fit in a 13x13x12 dairy crate that lives under my work station. It takes me no more than a minute to take it out, plug in the light pad, turn on the camera and take the first shot. It takes me significantly longer to start up either of the dedicated scanners and fit the first strip of negatives into the holder.
I use the Plustek for 35mm color negatives to avoid having to buy and learn Lightroom and Negative Lab Pro to deal with the color images. It's slow and the scans aren't as sharp as those from the BEOON rig, but they are better than those from the Epson for 35mm.
I use the Epson flatbed for 6x6 negatives when I am making 11x11 or smaller prints. Taking multiple shots of each frame with the BEOON rig and stitching them with Panorama Stitcher produces much better results but it is such a nuisance that I only use it for the occasional larger print.
Tyler Montgomery on A Cautionary Tale about Scanning Negs with a Digital Camera
Comment posted: 09/06/2023
I started doing it for 1)cost, 2)control, and 3)overall better quality than labs I've sent to who use Noritsu scanners. I find that my colors and overall image exposure are much better using NLP and LR. What made it easier was that I had a nice digital camera to begin with.
I have never used a dedicated film scanner such as a Plustek or Pacific Image. I have never used a flatbed scanner for film purposes. I would buy an all-in-one 35mm and 120 scanner tomorrow if it was modern, high resolution, relatively quick and had tech support.
My only experience has been camera scanning 35mm and 120 with a Fuji X-T4 and various macro lenses, now a Nikon 55mm f/2.8, in a dedicated film stand and Valoi setup.
After getting annoyed not being able to quickly take off and use my X-T4, I specifically sought out a lens adapter with an Arca Swiss mount so I could mount the adapter and not the lens. This way, I can pop off the camera in 2 seconds and use it. I have it mounted on an L-bracket as well, so I can rotate 90 degrees to scan 120 and do stitching without disconnecting or unscrewing anything.
For 35mm in the Valoi system, it is quick with an uncut roll, only taking ~10 minutes. With 26mp, I can resolve the grain on basically everything, except slide film and super high-resolution copy film such as Adox CMS II (IDK if anything can). This is roughly 4,000 DPI.
For 120, it is much more of a bear since I find that I need to stitch in order to get close to the same resolution as 35mm, which is the whole point of 120. This equates to roughly 40mp for 6x6. Even so, I'm only able to hit about 3,200 DPI. I'm still able to resolve most film grain but I cannot get Ilford Delta 100.
The problem though, is that this is when it works perfectly. First, I found that Fuji RAW files are not really compatible with LR as they 'worm' the image when manipulated. Using a Fuji RAW to DNG converter fixed that. I initially tried to used Film Lab instead of NLP and the colors were awful. NLP fixed that. Once I introduced stitching, I found a bunch of problems. The 7Artisans 60mm Macro I was using worked great for 35mm, but it's field curvature is too great to get stitched images. I replaced this with a 55mm f/2.8 Nikkor and that solved it, but I need to check flatness every time I scan, even when in a dedicated holder, because the slightest variance introduces the same problem.
This whole discussion leaves out large format. I'm not sure what to do when I want to start shooting 4x5. I'll probably but a 4x5 film holder and stitch.
Overall, I think 35mm SLR scanning is quite easy and gets great results with entry-level macro lenses and lower pixel cameras (20-25mp). Scanning 120 with a lower resolution camera introduces a lot of problems due to stitching, either from poor optics, poor alignment or film flatness without a proper holder. Ultimately, I think SLR scanning with a hi-res (50mp) or greater camera solves nearly all common problems since you can capture without stitching.
The bottom line though, is that camera scanning film is really a "figure it out" sort of process. I think there would be good money in developing an 'all-in-one' solution.
I really like the results I get with camera scanning but I would give this all up instantly though if a company made a 35mm/120 scanner that hit 4,000DPI and did it relatively hands off with an uncut roll. I don't think that's going to happen though.
Comment posted: 09/06/2023
Comment posted: 09/06/2023
Comment posted: 09/06/2023
Troy on A Cautionary Tale about Scanning Negs with a Digital Camera
Comment posted: 09/06/2023
Fact of the matter is the only decision to make after you have researched it is if you have the time. Once you make your mix-mash digitalizing setup at home, repeating the setup becomes muscle memory. Everyone has Lightroom and Negative Lab Pro is good enough.
David Hume on A Cautionary Tale about Scanning Negs with a Digital Camera
Comment posted: 10/06/2023
Personally, I currently use a combination of out-sourced professional scanning on dedicated film scanners, home scanning on a flatbed, and home digitising with a DSLR or mirrorless. All are good for different applications in my opinion. DSLR scanning is for me much quicker than using a flatbed and yields better results than a flatbed (for 135 film) whereas of course a V800 flatbed would win for an 8x10 tranny... A Coolscan 5000 is wonderful, but man, so slow! And I can't do panoramic 135s on it so there's not much use to it at all for me personally.
I would encourage anyone to try home digitising and doing their own curve inversions in LR - even with an iPhone if only to compare their own attempts with what software like NLP or results from a professional scanner will give. And different operators in Pro Labs give different results too - it's tricky when a new person starts working there and you get different scans back...
As for resolution; experience tells me that 12MP (3000x4000) is just fine for 24 x 36mm film, and if you're doing something like an XPan then 24MP (6000px on the long edge) is just fine too.
But as I and others have said - it's not like one method is better than another, there are a range of plusses and minuses to them all, and experimenting and being sensitive and open to all possibilities allows us a better understanding of the nuances of each method.
Alex G on A Cautionary Tale about Scanning Negs with a Digital Camera
Comment posted: 10/06/2023
Comment posted: 10/06/2023
Comment posted: 10/06/2023
Jeremy on A Cautionary Tale about Scanning Negs with a Digital Camera
Comment posted: 11/06/2023
1. A pixel shift camera that maintains proper grain structure by using a de-bayer algorithm. The Pentax K70 is crazy good for the price, Panasonic S5 for better results. Zero issues with either of these. I had an Olympus, but it had some odd issues with pixel shift that forced me to get rid of it.
2. Kinetronics Staticvac to take care of the dust, so I don't miss ICE. I have the vacuum set up inline with the EFM v3 so the film passes out of the vac' and into the holder.
3. For software, Negmaster BR cost me $80 (no subscription), with works from within Adobe Bridge (free product, no sub)
4. DxO Camera Lab, which I bought like 4 years ago on a holiday sale 50% off (so no subscription)
Process:
Tethered camera shooting straight to a Macbook -> invert the negatives in Adobe Bridge -> then open in DxO where I apply my saved profile for that film stock type. Tweak from there, but I don't usually do much, since at that point I've already got results better than any lab I've ever used.
Total time for a single roll? I don't know, maybe 25 minutes. For each additional roll, perhaps 5 more minutes. I've done 10 rolls in an hour before when I hurried. Frankly I don't understand people talking about it being "constant work". My scanning through the holder takes less time than loading the negs into holders for scanning...
For scanners I still do own an XA Super and a v850, but I will probably sell them sometime soon. I've compared output in extreme detail and created prints up to 40" x 30".
Comment posted: 11/06/2023
Bill Brown on A Cautionary Tale about Scanning Negs with a Digital Camera
Comment posted: 11/06/2023
My main client, which I've produced work for since 1990 has every neg and digital file he's ever shot since the 1980's. His negative archive is housed in a climate controlled room and every shoot is logged in a binder for referencing. I can locate any negative in under five minutes. The vast majority of his negative archive was shot with Hasselblads , some 35mm and some panoramic negs shot with a Noblex Pro 6/150 U also. His clientele are very discerning and spend thousands of dollars for his prints that I produce. His non-negotiable is best quality so he has owned a Howtek and an Imacon film scanner. The scans I got from the Howtek were impeccable. Every detail on the negative or transparency was rendered beautifully but the software was limited and it required a dedicated G4 Mac. When he purchased this scanner he was on the bleeding edge so the cost was well above 10,000. I scanned some of my personal work and I could get a 300 MB 16 bit tif scan from my 35mm Kodachromes. Most tweaking took place in PS. Most know this but always keep sharpening applied during scanning to a minimum or none at all. Do critical tests to find the best workflow. When he updated to the Imacon the scan software was a definite step up in tweak ability. Beautiful scans! Several have talked about how slow dedicated scanners are. How long it takes to pull a beautiful scan is relative in my opinion. Once the scan begins I'm working on something else so it's not like it slows me down.
All this brings me to present day. He recently moved the scanning workflow to digital capture with a GFX 100 tethered to a Mac Studio running the most recent version of Capture One. I can say I was skeptical but we did side by side tests before he sold the Imacon. We pixel peeped and could see no real loss of definition. We created presets for conversion and have all the capabilities of CP 1 to tap into. The scans I'm pulling now are the best ever and the PS work has been reduced to a bare minimum. I'm a convert! I could go on but I will stop so as to not make this any longer. I'm sorry I can't reveal the pieces in his kit other than the GFX since this is how we compete in the ever difficult and changing world of photography. The trade-offs I mentioned at the beginning are associated with curly negs and those panoramic negs. As yet I haven't met that challenge so I don't have any opinions. What are your non-negotiable wants for your scans? Create a plan and go from there. The high-end Epson bed scanners do a very nice job and you can make custom neg holders for odd sized film stocks.
Alexander Seidler on A Cautionary Tale about Scanning Negs with a Digital Camera
Comment posted: 11/06/2023
My device for scanning (including light source, filmholder and macro-lens) is always ready to use and focus is set.
It is half of the size of a serious flatbed scanner.
Scanning 36 images of 135 film takes 10 minutes. No dust because no glass surface.
I use a canon 5D3 i bought for 300 Euro and a Micro Nikkor 60mm f2,8 worth 70 Euro.
I think some of you arguments are not really valid.
But still there is a complex and unsettling thing about camera scanning: the digital processing.
In this point i think you are right that a good scanner/software package could save some time.
Ohnirebeb on A Cautionary Tale about Scanning Negs with a Digital Camera
Comment posted: 11/06/2023
I have the unshakable feeling that I just read a long movie review, only to find out in the last paragraph that the film critic has not actually seen the movie in question.
If anyone wants to read a short and useful comparison of scanning methods (Lab vs. Flatbed vs. DSLR), I would recommend this post instead : https://casualphotophile.com/2020/08/14/digitizing-negatives-at-home-a-comparison-of-methods-and-results-dslr-vs-flatbed-vs-lab-scans/
I will add that if flatbed scanners are OK for 120 film scans, they are probably the worst possible choice for 35mm.
And dedicated 35mm scanners like the Plustek Opticfilm 8200 (which I own) are not great either. They are awfully slow, and the light source is so harsh and concentrated that it reveals every last tiny scratch on your film. So you waste a lot of time correcting that in post. (The automatic Infrared scratch detection only works with colour negative, not B&W. And it doesn't do a great job, in my opinion).
Cheers!
Comment posted: 11/06/2023
The post points out the problematic areas of scanning with a digital camera not just in terms of the final image, but in the process, setup, choice, acquisition etc. The Casual Photophile post takes an entirely different approach. It is only concerned with the acutance of the image and trying to match the image to the lab scan. But the lab scan is only an interpretation. Much depends on the skill of the lab tech. It is particularly relevant with colour negs. One comment made on that post encapsulates the problem This probably warrants another piece, but bear with me. Scanning is just one step in an interpretive process. Here are just some of the options with scanners: emulsion side up/down, anr glass, film holder, output [tiff/dng], single/multi exposure, straight scan vs. inversion using a specific film type. The Casual Photophile post has several issues: A lab scan is not necessarily the best interpretation of the neg. It’s a personal choice. ANR glass really only just flattens negs. Raw scan was to TIFF not DNG. Silverfast uses that tiff output for its HDR product. It is not intended for any other use. I contacted them about this. [Cook knows her tools]. The scan to TIFF is really dark, resulting in a washed out positive. ¿Is it a multi-exposure scan [hdr]? Is sharpening done and if so when/how? This may explain the softness of the scanner output. In digital cameras the conversion from scene to image is proprietary. The better comparison would be a multi-exposure scan of the neg to dng as a positive in 16-bit greyscale, followed by an inversion. Straight lab scan as a slide with no correction at all. DSLR scan, preferably using a monochrome sensor. And, if there's sharpening, we'll need to account for it. Scanner scan at optimal settings [expert chef]. Scanning is only one link in the entire process. Each step is an interpretation. It’s a dance. There are just too many variables. And not enough time. There's more to scanning than meets the eye. CheersHuss on A Cautionary Tale about Scanning Negs with a Digital Camera
Comment posted: 11/06/2023
“And no I do not use a digital camera for scanning”
Weird how I haven’t encountered any of his issues. Maybe it is because I actually do use a digital camera to scan film? Instead of imagining how bad things would be?
Anyone else looking for advice on whether to scan film w a digital camera, I suggest asking those who do. Anyone in the Los Angeles area who is on the fence and would like a real live demonstration? I’d be happy to give one.
Comment posted: 11/06/2023
Comment posted: 11/06/2023
Andrew on A Cautionary Tale about Scanning Negs with a Digital Camera
Comment posted: 12/06/2023
So, in my case, digital camera scanning was indeed the cheapest and most efficient way to go. But to each his/her own.
PS. I use a Sony A7RIV for scanning as well as going out and about photographing.
Faby on A Cautionary Tale about Scanning Negs with a Digital Camera
Comment posted: 12/06/2023
Enlargers generally use light obtained through a diffuser (soft images: diffraction) or a condenser which allows a beam of parallel rays (more detailed images: reduced diffraction).
One idea would be to use a condenser system to generate the light for our digitizers, and thus further detail our results.
(If you've got an enlarger, why not just photograph the negative?)
Rawtherapee is a free dematrixing software package that enables neutral RAW processing (without gamma curves?) and includes a negative processing option.
It allows you to send the .tiff file directly to Gimp (or other software).
Negmaster provides valuable exposure information (right exposure):
https://negmaster.com/blog/howto/how-to-correctly-expose-when-scanning-film-with-a-dslr/
G on A Cautionary Tale about Scanning Negs with a Digital Camera
Comment posted: 12/06/2023
Comment posted: 12/06/2023
Comment posted: 12/06/2023
Marco Andrés on A Cautionary Tale about Scanning Negs with a Digital Camera
Comment posted: 12/06/2023
¿Confirmation bias? Don’t want a digital camera. Personal choice. Digital cameras aren’t bad. They're just not for me. Prefer mechanical cameras. Fear that, like a computer, a specific digital camera will not endure. It’s also clear that the digital camera is becoming a niche market just like film cameras. Cellphones are more than adequate for the point-and-shoot crowd.
Gil Aegerter on A Cautionary Tale about Scanning Negs with a Digital Camera
Comment posted: 13/06/2023
Comment posted: 13/06/2023
Lee on A Cautionary Tale about Scanning Negs with a Digital Camera
Comment posted: 14/06/2023
Comment posted: 14/06/2023
Lee on A Cautionary Tale about Scanning Negs with a Digital Camera
Comment posted: 14/06/2023
mampfer on A Cautionary Tale about Scanning Negs with a Digital Camera
Comment posted: 15/06/2023
After reading the conclusion for a second time and calming down a bit, I find myself even more confused.
"I consider that with film it is worth taking the time to compose carefully and thoughtfully [...]" is a statement I couldn't agree more with, yet we both have such different stances on the scanning aspect.
I feel like the author extents into gear elitism and nitpicking with his DSLR scanning suggestion whereas that last paragraph suggests that the quality of the perceived image should be the most important thing.
I say perceived, not scanned, since at the end, we enjoy the result as humans, and not as computers, in shapes, thoughts or ideas captured on film, and not pixels.
I dare say that a lazy phone scan of a great picture still yields a more enjoyable result than the best scanning setup in the world would yield of a mediocre picture.
Chris Barne on A Cautionary Tale about Scanning Negs with a Digital Camera
Comment posted: 17/06/2023
I also recently got a camera scanning set up and negative lab pro.
Total cost for the scanner (£100 on eBay) software (Vuescan, £100) was £200.
Total cost for camera scanning: an enlarging lens (El-Nikkor 50/2.8, £25 on ebay), a focussing helicoid (£16 on ebay, a LED panel (£34 on scamazon), a 3D printed film carrier (free but cost would actually be £5), copy stand (£70, eBay came with an enlarger) and software (negative lab pro, £98) was roughly £250.
This doesn't factor in the cost of my d750 which I already owned (before I even shot film at all, boo hiss). At the same time this also doesn't factor in the cost of my PC, and lightroom.
Scans can be had for £10 for TIFF files from Take It Easy lab, which is my local. So 20 rolls to break even on the scanner, and 25 for the camera set up.
But the big difference is: the scanner takes AGES. It's a bad scanner in terms of speed, I'm aware but a 36 exposure roll of film will take me a whole evening to get through. Camera scanning, I can be done with 36 exposures in about 20 minutes and done editing within an hour.
Given that I have access to both methods - my scanner hasn't even been switched on since I got the copy stand set up. It's faster for the same results and with a bulb blower and a film carrier dust isn't even an issue.
45MP for a 35mm frame is excessive, my scanner outputs 20MP files on the settings I have and my camera setup will net me a file that is around 22-23MP after some light cropping. I usually end up 45-50MP files with my 645 medium format stitches, which are 3 photos top, middle and bottom stitched automatically in lightroom. I've had 0 issues apart from one case which was a lone street lamp in the dark. I just stitched that one manually in photoshop.
Basically I would say that if you can get a cheap enough dslr (of which there are plenty) and build up a macro lens from an enlarging lens and extension tubes like I have, that will be the best of the three worlds of speed, quality and price.
My scanner is an incredibly cheap example and I highly doubt that people will be finding many for that price.
I'm also going to echo other commenters - you spent an awful long time waxing lyrical about a method you yourself have claimed you never used. I think this is disingenuous and unfair. I myself turned down camera scanning in favour of a dedicated 35mm scanner when I started because I read that Epson V500 scanners are not good enough for 35mm (they aren't). Were I to do it all over again I would immediately go to camera scanning without any second thoughts. Articles like this muddy the water and don't tell the true story: cheap 35mm scanners are slow, fast 35mm scanners are expensive and most people shooting film probably already have some sort of digital camera they can use.
But on that note, do you want to buy a dedicated 35mm scanner?
Chris
João Lucas on A Cautionary Tale about Scanning Negs with a Digital Camera
Comment posted: 21/06/2023
Now on dismantling some of the cons that were imagined:
- you don't need 40M pixels, a much more simple 24 or 16 is enough, also remember where will this photos will be shown, you don't need 40M pixels for a Instagram or to print 15x10, also you don't need buy a new camera just because is a higher number especially if the current one is working fine and attends everything that you need
-showing that the autor never digitalized with a camera, you can remove the camera and maintain the rest of the setup square and calibrated.
-a good enlarger lens is not expensive and are smaller than camera lens
- repeating the software issue, there are free or buy one alternatives that can also edit RAW files, and if a newer version happens to drop your camera, you can just use the previous one. How many people still use Photoshop 6 or older?
- and finally the cost, how much is a good film scanner? if one is like me that is coming from digital to analog photography and already has a good camera, using it to digitalize the film is a no brainer, my setup much cheaper compared to a scanner thanks to apart to the stand and adaptors everything is used.
Comment posted: 21/06/2023
Brandon Nedwek on A Cautionary Tale about Scanning Negs with a Digital Camera
Comment posted: 02/07/2023
Comment posted: 02/07/2023
Phil on A Cautionary Tale about Scanning Negs with a Digital Camera
Comment posted: 03/07/2023
The Epson scans take around 17 minutes for a strip of 6 frames in highest quality mode, whereas I can scan a complete 36 roll including set up in well under 15 minutes. The quality is significantly better too.
Of course if you don't have a DSLR then you won't know this!
Marco Andrés on A Cautionary Tale about Scanning Negs with a Digital Camera
Comment posted: 04/07/2023
¿If speed is that important, why bother to use film? It’s inherently slower. Perhaps using film is a meditative experience, a way of slowing down. « ¿Slow food anyone? »
Not every negative is a « keeper » Or necessarily worth keeping. That’s why there used to be proof sheets. The corollary is the larger the negative the greater the care devoted to each image. Cost/benefit.
A prescan on a digital scanner can produce a fairly good proof sheet with negs inverted and colour corrected, with 10 or more standard 35mm negs at a go. Already saving time – by culling negs and generating a proof sheet (print screen). And you can examine a neg in detail as a colour-corrected positive.
Hands on time is even less – just ask the scanner to find the frames. At least 10 at a time. And you don’t have to be there once you initiate a batch scan.
In contrast, camera scanning requires more work to invert and colour correct. Each neg must be scanned separately. Even if it’s not worth keeping.
So there are trade offs. That was one of the points raised in the piece.
Finally the comment is that it appears I’ve reviewed a restaurant without eating the food. Two differing points of view. To each her own [Chacun à son goût.]
There are inherent problems with digital sensors when scanning colour. Scan in digital monochrome then. De gustibus non est disputandum. [there is no accounting for taste]
Tom Deveron on A Cautionary Tale about Scanning Negs with a Digital Camera
Comment posted: 09/07/2023
I recently took ownership of a Minolta Dimage Elite 5400 and I'm having a whale of a time! It's not very fast but it is good at what it does. It's pretty good at not scanning the physical damage and dust on the negatives. I actually have some 45 year old colour negatives in Minolta 16 size! I just ordered some 110 transparency mounts to try and get them in the scanner properly (I tried 3d printing an adapter but it didn't go well!).
I now have the excitement of scanning 30 year old 35mm negatives that I only vaguely remember actually taking and seeing the images come up on a screen.
Comment posted: 09/07/2023
Gary Smith on A Cautionary Tale about Scanning Negs with a Digital Camera
Comment posted: 28/07/2025
I'm here because I followed a trail of links in articles from the article posted today.
I have been scanning 35mm and 4 x 5 film negatives using my 42mp Sony a7R3. My 35mm set-up uses the Valoi Easy35 3D printed device attached to my camera. It is easy to use and packs away nicely when not in use.
I also use FilmLab s/w for my color inversion. It has been much easier than manually doing the inversions from within a typical post-processing s/w.