I had been trawling the online market places and managed to snag a Minolta Hi-matic 7s on trademe (the NZ version of ebay). It was advertised as being in excellent condition with everything working as it should and clear glass, Sounds great I thought! so I chucked a bid on in the dying minutes to win the auction. After a few days of anticipation and excitement it finally arrived encased like a giant egg in about 3m of bubble wrap, it even came with a musty smelling leather case – no chance of being damaged in transit. Or so I thought. After unwrapping it was immediately obvious there was damage to the lens:
After raging to my co-worker about it and having a cup of tea to calm down I took a second look and hit up uncle Google to see if there was anything I could do. After following a few threads I came across an old teardown blog piece on a Hi-matic 9 with pictures from at least a decade ago, as the 7s and Hi-matic 9 are pretty close in build I decided I’d have a little look see if I could fix the lens. Here’s how it all went down.
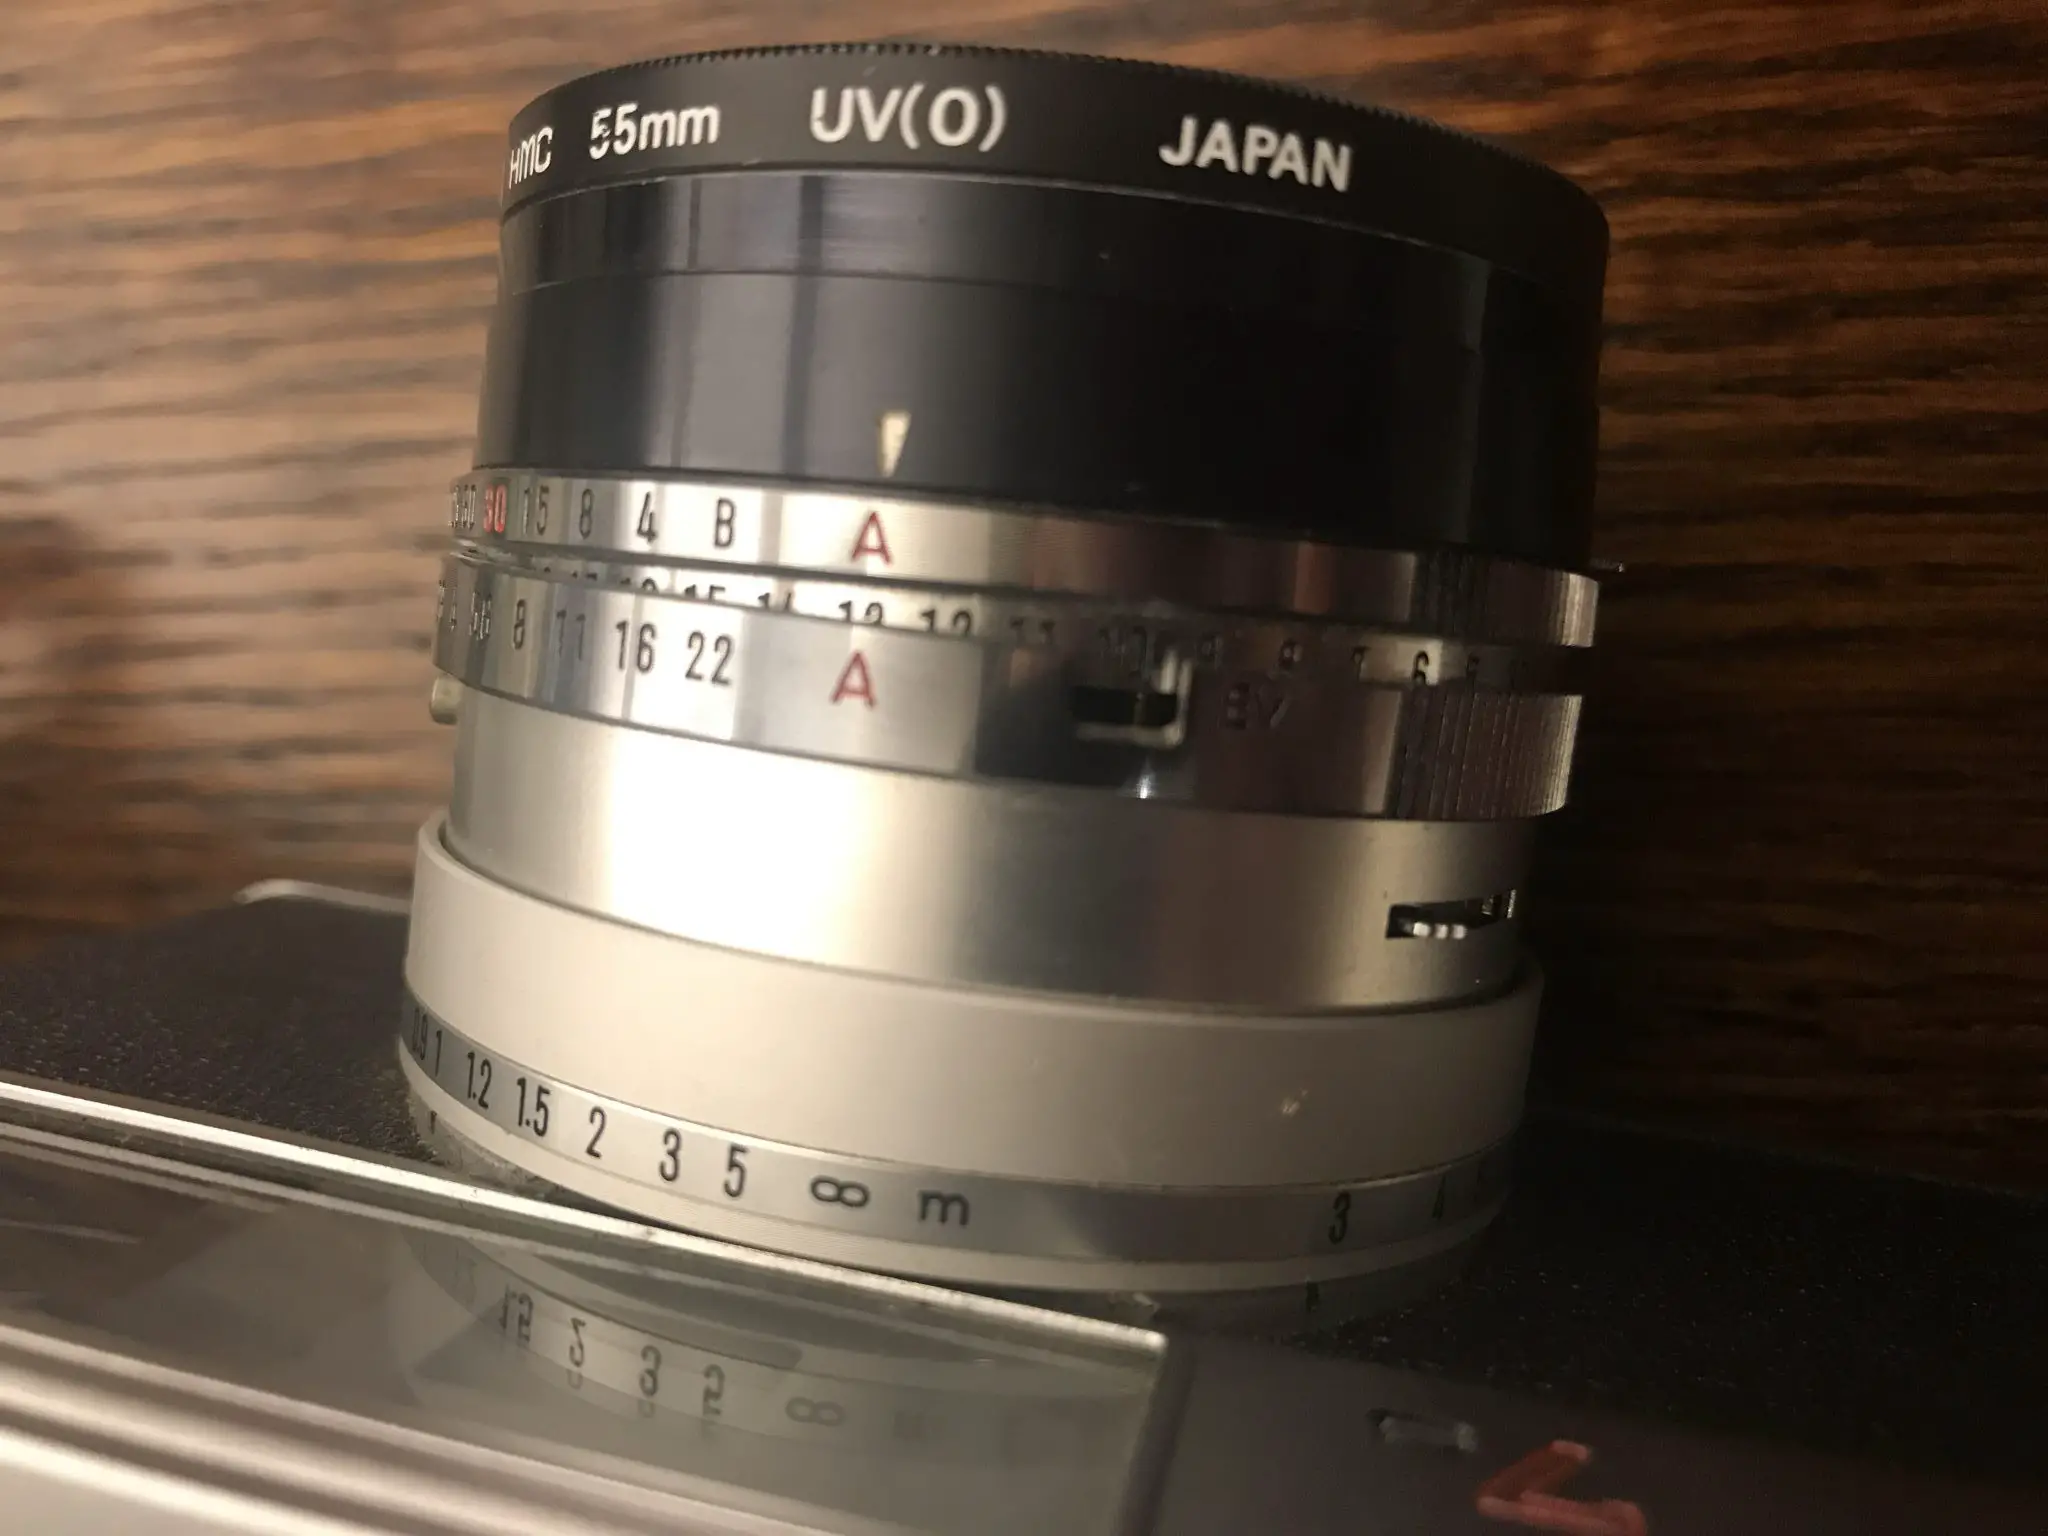
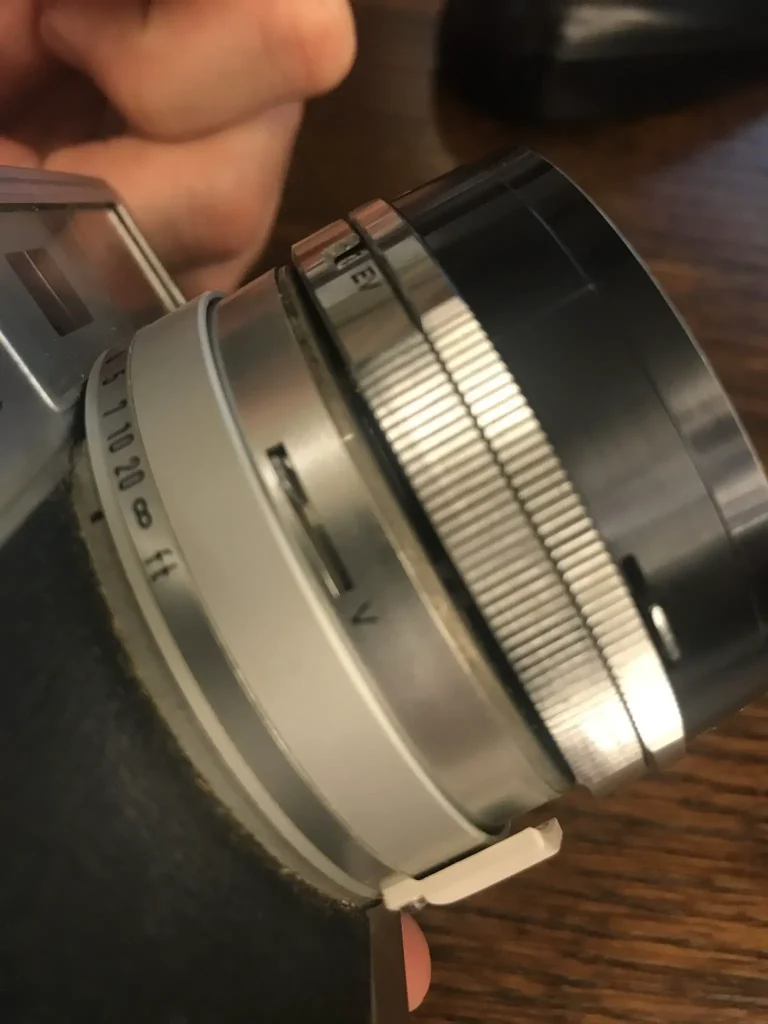
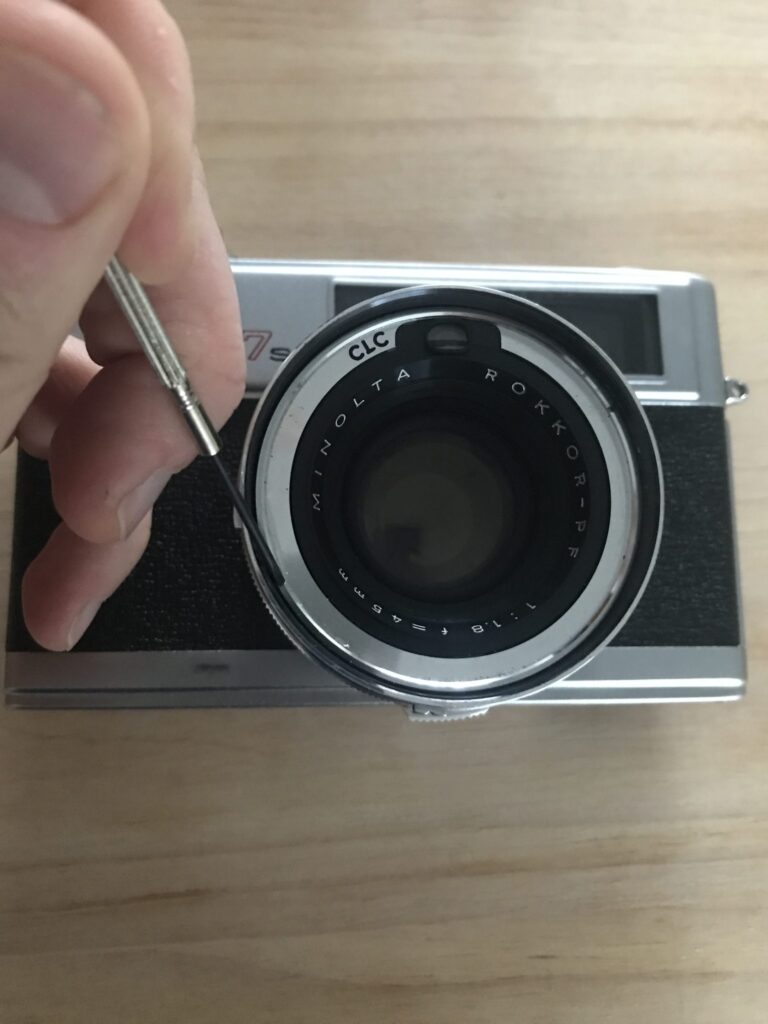
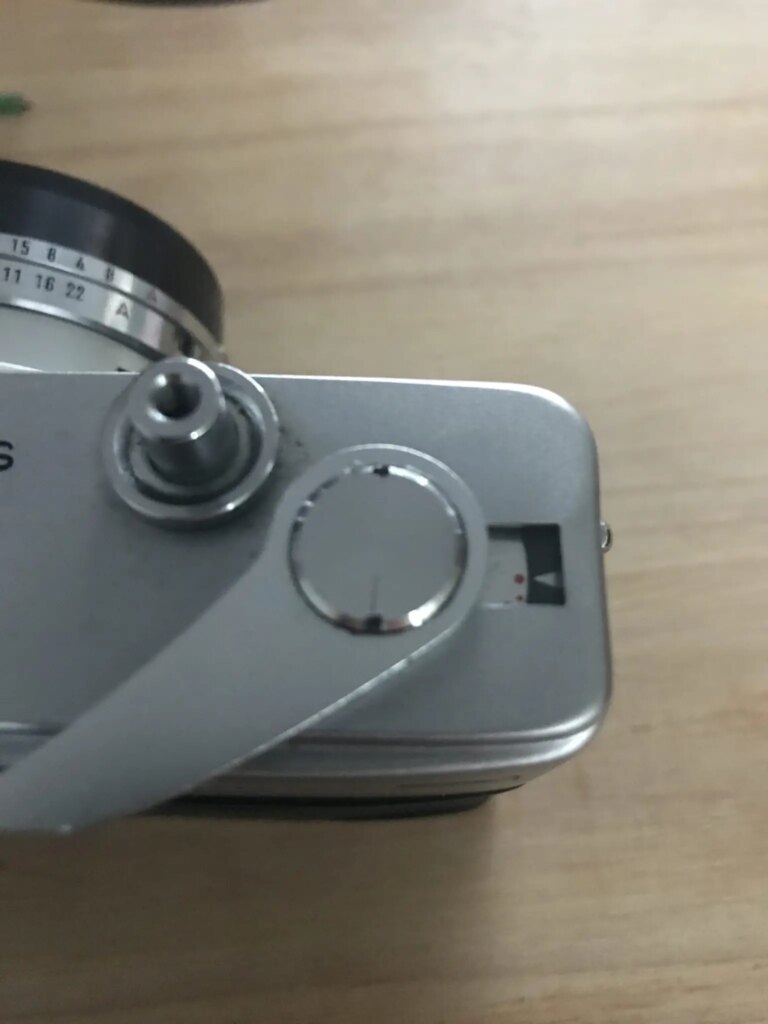
Removing the shutter assembly was relatively straight forward, you just unscrew the threaded silver split ring on the front of the lens. According to the teardown guide you can buy a special tool to do this but I’m cheap so I just jammed a small jewellers screwdriver in to one of the notches and loosened it until I could undo it by hand. Once this is removed the whole CLC sensor assembly pops out of the front.
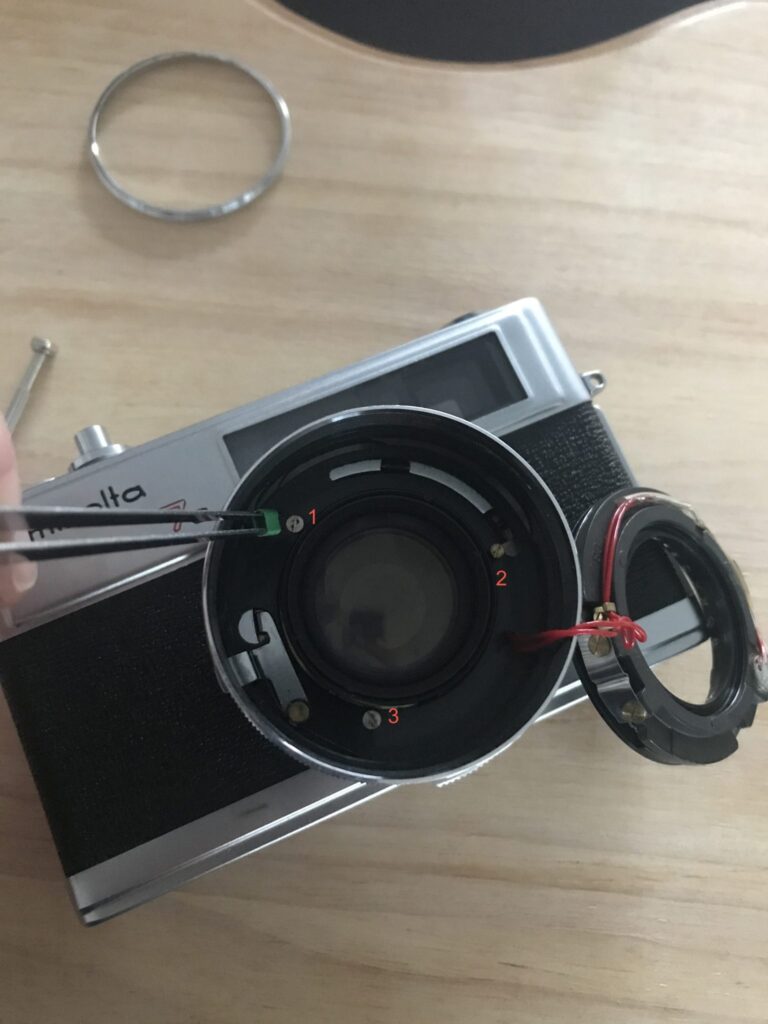
Behind here there are 3 small screws which attach the shutter assembly to the helicoid assembly and rest of the lens barrel. Two of the screws had worked themselves completely loose and were just rattling around inside the housing. I replaced the screws and put everything back together and the lens was so much better. Turns out the 7s is renowned for having a tiny amount of lens wobble so I’m fairly confident this is now back to its original state.
Next I popped the back and checked the seals, well they were long gone and drier than my Nans roast dinner. What was left of the hinge seal looked like it would disintegrate if you so much as looked at it funny. I spent the next 20mins scraping all the old seals out with some cotton buds, toothpicks and isopropyl.
With the seals done I moved into the battery compartment. During my research online I read you can replace the old Mercury battery with a 1.4V zinc air hearing aid battery which is readily available in supermarkets here in NZ, so I took the camera for a trip to the local super and grabbed a 4 pack. I ripped the packet open in the carpark, chucked one of the batteries in and set the camera to Auto and…..nothing. Huh. maybe I got the polarity wrong, so I began the battery dance – removing the battery and putting it back in the other way around. try again, nothing. Open it up put the battery back in again the other way just in case I somehow didn’t seat it properly and not a sausage. That EV needle was going nowhere. Well bugger, looks like the meter is bung as well. This was not turning out to be a good purchase and at this point I did some swearing as I was a bit annoyed the auction was misleading. I flicked the guy an email explaining what had happened so far, and he agreed to my request of a partial refund. Top bloke.
The next day I decided to take the top off and have a look at the meter just on the off chance a wire had come loose or there was a damaged solder join. It’s a pretty simple process, you can remove the film advance lever by unscrewing the circular plate on top of it.
To get the film spool wider off you have to lift the little winding arm and turn it until you can see the ring beneath with two notches in it.

I fell back on my tried and true technique of jamming a small screwdriver in and just kept winding anticlockwise until it went tight. Once tight you can use the spool arm to unwind the rest of the way.
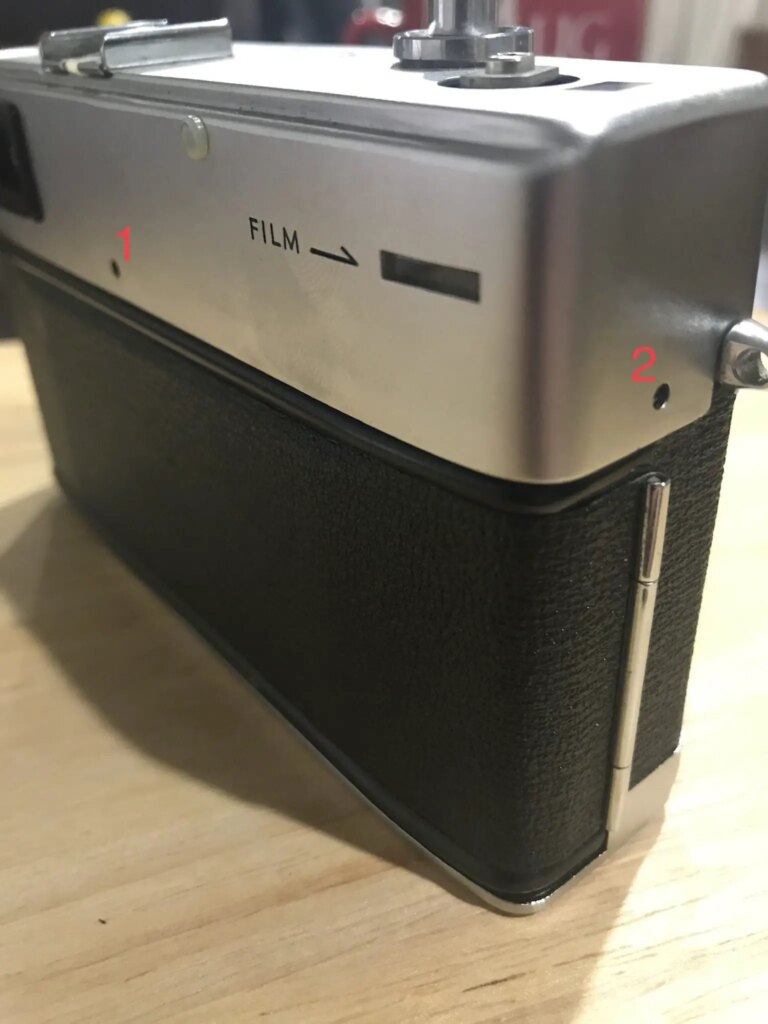
At this point I removed the small screw in the back of the top plate (I think theres one on the side also but mine is missing this screw anyway) and the top lifted right off. (If you do this, a word of caution. The shutter release falls out the bottom so be careful not to lose any bits!)
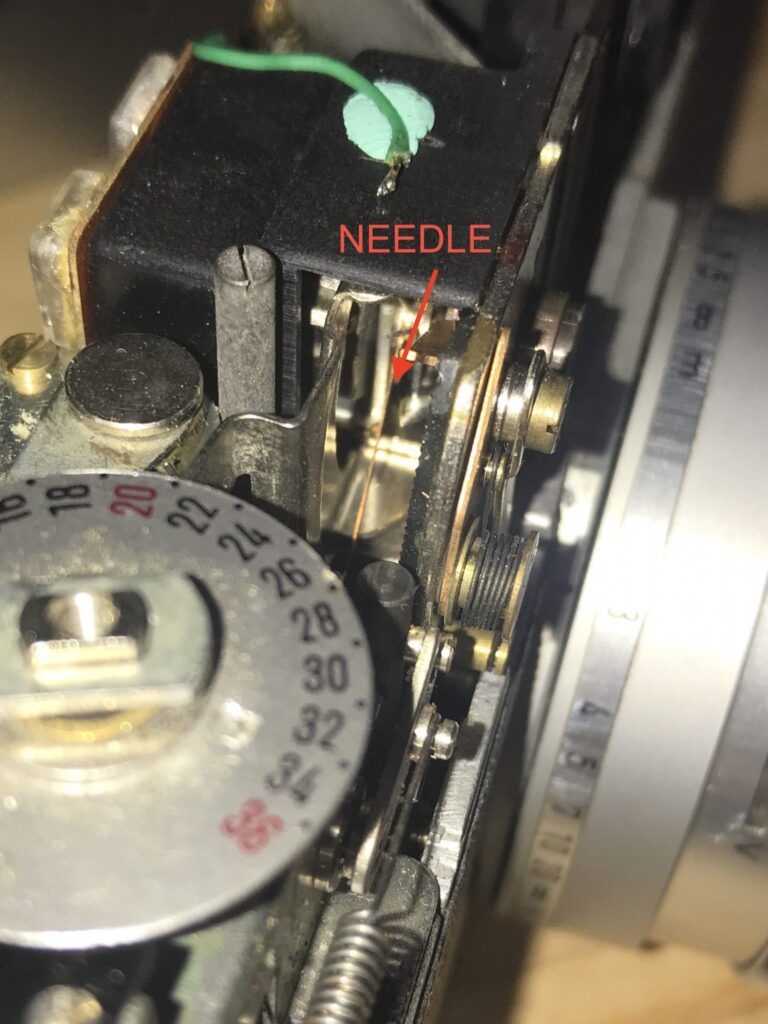
With the top off I used my multimeter to test the continuity between the battery compartment and the EV meter and it was reading 1.4V. I also checked the EV meter was functioning by shining a light source at the CLC sensor on the lens and observing the resistance value changing on the multimeter. At this point I was confident the EV meter was getting voltage from the battery and that there are no bad solder joints or loose wires and it was functioning correctly but the EV meter needle goes nowhere, it just doesn’t move. It didn’t appear to be stuck and I could move it freely by poking at it with a toothpick.
While carefully moving the needle with a toothpick I could see a small magnetic coil attached to the needle but it’s quite a way inside and kinda difficult to get to.
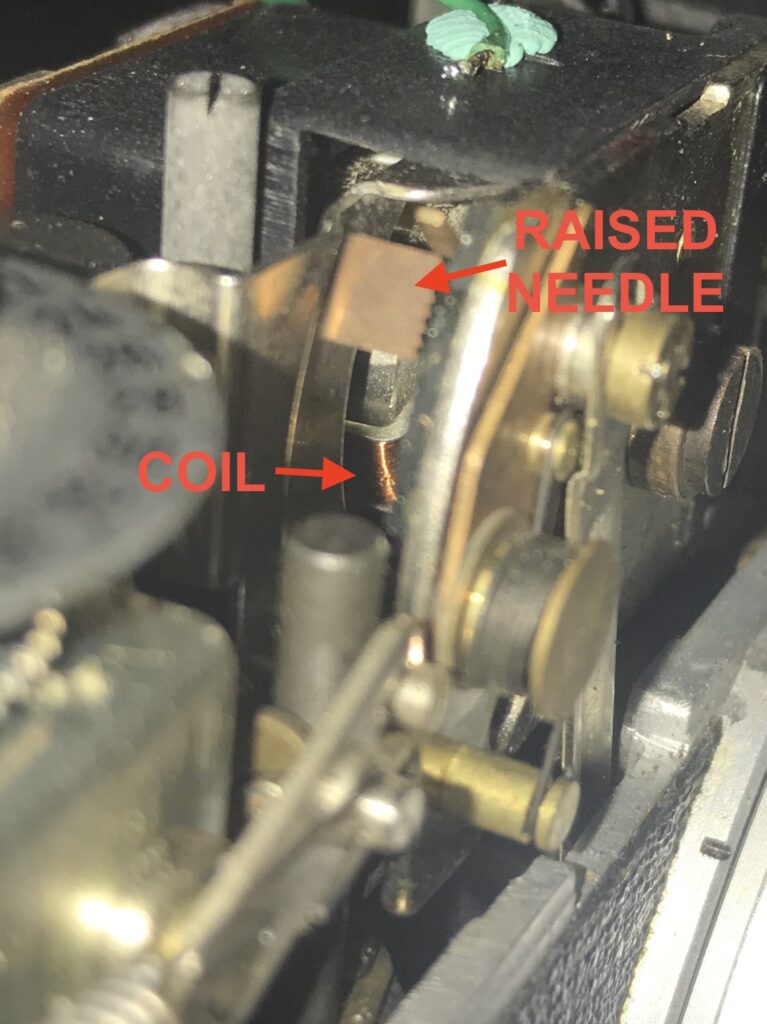
I suspect the coil may be damaged but at this point I’ve given up tying to fix it and decided to cut my losses and put the camera back together.
The whole experience has been kind of fun, Ive always liked dismantling things and seeing how they work and it was cool to figure out how the trap mechanism works for the exposer meter but I definitely lost a bit of love for it after all this and abandoned the camera on the shelf. About a week or so later my feelings of rage had subsided and I figured I may as well chuck some film in it and see whats its like. So armed with my Weston light meter I loaded an old roll of Kodak BW400cn, taped the door up and shot it manually.
This camera wasn’t done with throwing me a curveball just yet, I could have sworn I loaded the film correctly but when it came to rewind the film (on Christmas day too!) I began rewinding and felt the familiar pop as the film enters the canister on what must have been the 6th turn of the spool winder. So its fairly safe to say I probably shot a heeeeap of multiple exposures on 1 or two frames. I can only guess that the film wasn’t quite sitting on the winder teeth properly so when I was winding on it wasn’t actually dragging the film across to the take up spool. Queue more raging and copious swearing especially at the thought of the missed Christmas day photos.
After all that, I finally put another roll through the Minolta a week or so ago and made sure it was wound onto the take up spool extra tight before closing the back. Here are some shots:


After getting the first roll back my feelings for this camera have definitely warmed, it performed really well and I’m super happy with the shots I got. I do regret not shooting with a wider aperture to see how soft it gets and what the bokeh is like wide open so maybe thats for another roll. While it’s still a bit of a chunky munky in the weight departmen, its earned a spot on the camera shelf for a little while longer yet.
If you got this far, thanks for reading! If you liked this article you can find me on instagram @mattevansphoto and follow me to see more results with the Minolta Himatic7s.
Share this post:


Comments
Johan on (Mis)adventures with a Minolta Himatic 7s – By Matt Evans
Comment posted: 10/02/2019
Comment posted: 10/02/2019
Comment posted: 10/02/2019
Matt on (Mis)adventures with a Minolta Himatic 7s – By Matt Evans
Comment posted: 10/02/2019
John on (Mis)adventures with a Minolta Himatic 7s – By Matt Evans
Comment posted: 10/02/2019
Comment posted: 10/02/2019
Graham Orbell on (Mis)adventures with a Minolta Himatic 7s – By Matt Evans
Comment posted: 10/02/2019
I still have an early Hi-Matic with a selenium cell light meter not requiring a battery. That’s an advantage with an old camera that could otherwise require an obsolete battery or suffer a battery leak. My Hi-Matic is as new. ( I also live in NZ)
Comment posted: 10/02/2019
Dominique Pierre-Nina on (Mis)adventures with a Minolta Himatic 7s – By Matt Evans
Comment posted: 10/02/2019
Helge on (Mis)adventures with a Minolta Himatic 7s – By Matt Evans
Comment posted: 11/02/2019
The Olympus and Canon ones are very overrated. Not as robust and with worse optics.
Small is not the point of a rangefinder. Going smaller also means a worse finder with a smaller finder patch.
The point of a RFs is no camerashake from shutter and mirror and ability to focus better in low light. Also the finder has unique qualities in (over)coverage, clarity and limitless depth of field.
The 7s has a reputation of being hard to service though, that’s why it’s nice that it’s so plentiful and cheap.
The S2s lens is probably sharper in absolute terms, probably one of the sharpest lenses ever for 35mm, but the S7 lens is just so incredibly sweet and alround great in its rendering I have to make it the winner if pressed.
Matt Evans on (Mis)adventures with a Minolta Himatic 7s – By Matt Evans
Comment posted: 11/02/2019
Helge on (Mis)adventures with a Minolta Himatic 7s – By Matt Evans
Comment posted: 11/02/2019
Small and fiddly and dare I say a tad cheap feeling compared to the sixties RFs.
Same with the 35 SP only it is bigger and with a slightly better lens.
I frankly prefer the Trip 35, the Konica C35 or even a Kodak Retina for a pocketable in that range. They give practically indistinguishable results.
Dont get me wrong, it’s not a bad camera, but value for money is not good compared to the competition.
How often is choosing your shutter speed really an issue when you casually bring a camera?
It still takes up room in a pocket, and requires a large pocket at that. Personally I’d rather have something more substantial around my neck, than a small flimsy matchbox that flaps in the breeze.
When you get a far better and faster lens too, it’s a nobrainer in my mind.
Kosmo Foto Weekender: 17/2/19 - Kosmo Foto on (Mis)adventures with a Minolta Himatic 7s – By Matt Evans
Comment posted: 15/04/2019
Bert T. on (Mis)adventures with a Minolta Himatic 7s – By Matt Evans
Comment posted: 19/08/2019
I picked up a Hi-Matic 7s on ebay which is also in need of some major TLC, including a wobbly lens barrel. So I put it aside and decided on picking up a Canonet QL17. That too had several issues- frayed battery wire, filthy viewfinder, and a focus misalignment. I decided on NOT spending anymore money on what could possibly be another broken camera, and decided that I would attempt to repair the QL17 myself. Yes, uncle Google is extremely helpful. I just performed a complete teardown, cleaned things up, soldered a new battery lead, and aligned the ghost image in the VF. Good as gold now.
This has given me the confidence to have at my broken Hi-Matic 7s and bring it back to life. I'll be doing that soon.
Kasia Liszka on (Mis)adventures with a Minolta Himatic 7s – By Matt Evans
Comment posted: 23/10/2019
I bought off Trademe and the light meter isn't working either... Unfortunately, I'm not as technically able as you are to dismantle my camera... so I don't know what I'm going to do about that, may ask for a partial refund as well?
CupcakeG2 on (Mis)adventures with a Minolta Himatic 7s – By Matt Evans
Comment posted: 10/02/2020
I restored mine recently. I got this camera from an impossible place. I also refer to your writings when I'm desembling my camera. Thanks for writing this!
Check out my restoration here.
https://instaxmagic.com/2020/02/09/a-strange-incident-regarding-a-minolta-7s-camera-part-1/
Dave on (Mis)adventures with a Minolta Himatic 7s – By Matt Evans
Comment posted: 29/04/2022