I have been intrigued by the look of the sprocket holes with the actual photo, so I wanted to try to replicate it. It is a effect mostly used on colour images and it seems quite trendy at the moment. In order to achieve this look you need to own a camera which takes photos that are larger than 35mm cameras do. As such, one of the easier ways to do this is to load 35mm film in a medium format camera. This can be done in a couple of ways.
One of the ways this can be done is by loading a 35mm roll of film with a pair of plastic adapters that slot onto the top and bottom of the film cartridge allowing it to slot into the slot where the 120 spool would go. These adapters are quite easy to find online, and if you have a 3d printer can even be printed yourself. You can see how these adapters are used on Canny Cameras here, and on 35mmc here.
The other option – which is what I have done – is to take the paper from an already exposed roll of 120 film and load it up with a 35mm film.
Loading up an existing 120 film spool means that there is no need of any adapters and is possible to change the roll when you are out shooting, where using the adapters you have to be in a dark room (or use a dark bag) to remove the exposed film. Loading the 120 film spool can be a bit tricky and it requires a dark room, but if you are careful is not too bad.
Spooling 35mm film
Once the 120 paper roll is unwound, I mark the start and the end of where the 35mm film will with a piece of masking tape. As in the picture here below, the start of the film can be taped in the light but the end must be done in the dark room, so the tape previously put in place helps when in the dark to locate the place I have to cut the film and tape it in place.
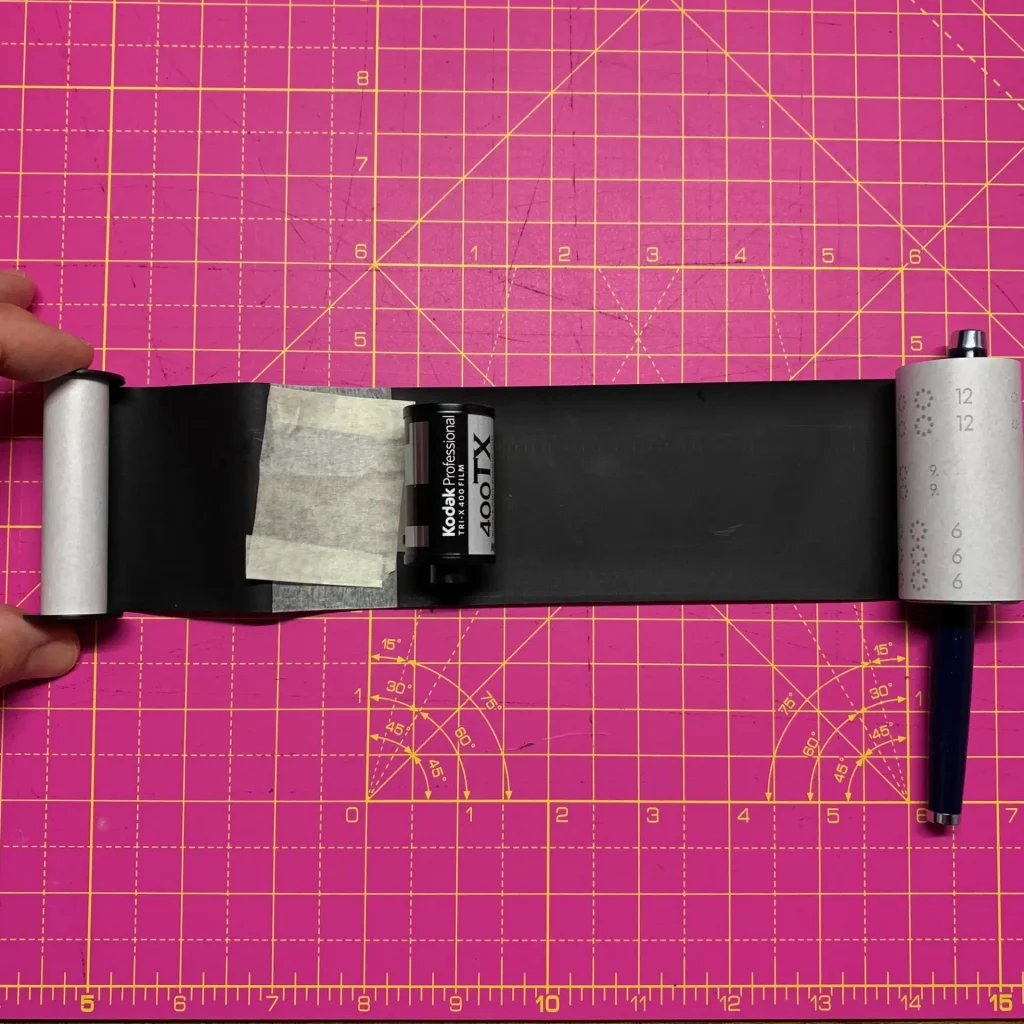
I also put a couple of little wings on the ends of the tape – this helps me find the edge so I can peel the tape off easier when I come to develop the film later.
I am also very careful to position the film in the centre of the black paper.
I then prepare another stripe of masking tape with the two little wings at the ends ready to move into the dark room to unroll the rest of the film.
If you do this yourself, don’t forget you will need scissors to cut the film too!
In the dark I found it challenging to keep a good tension rolling the film. It was also hard to judge that I was rolling it up in centre of the black paper. It was just a matter of concentration and being calm.
When I arrive at the end and I can feel the final stripe of masking tape, is time to cut the film and tape it in place with the strip of previously prepared masking tape.
At this point I double check the tension and secure the roll with an elastic band around it.
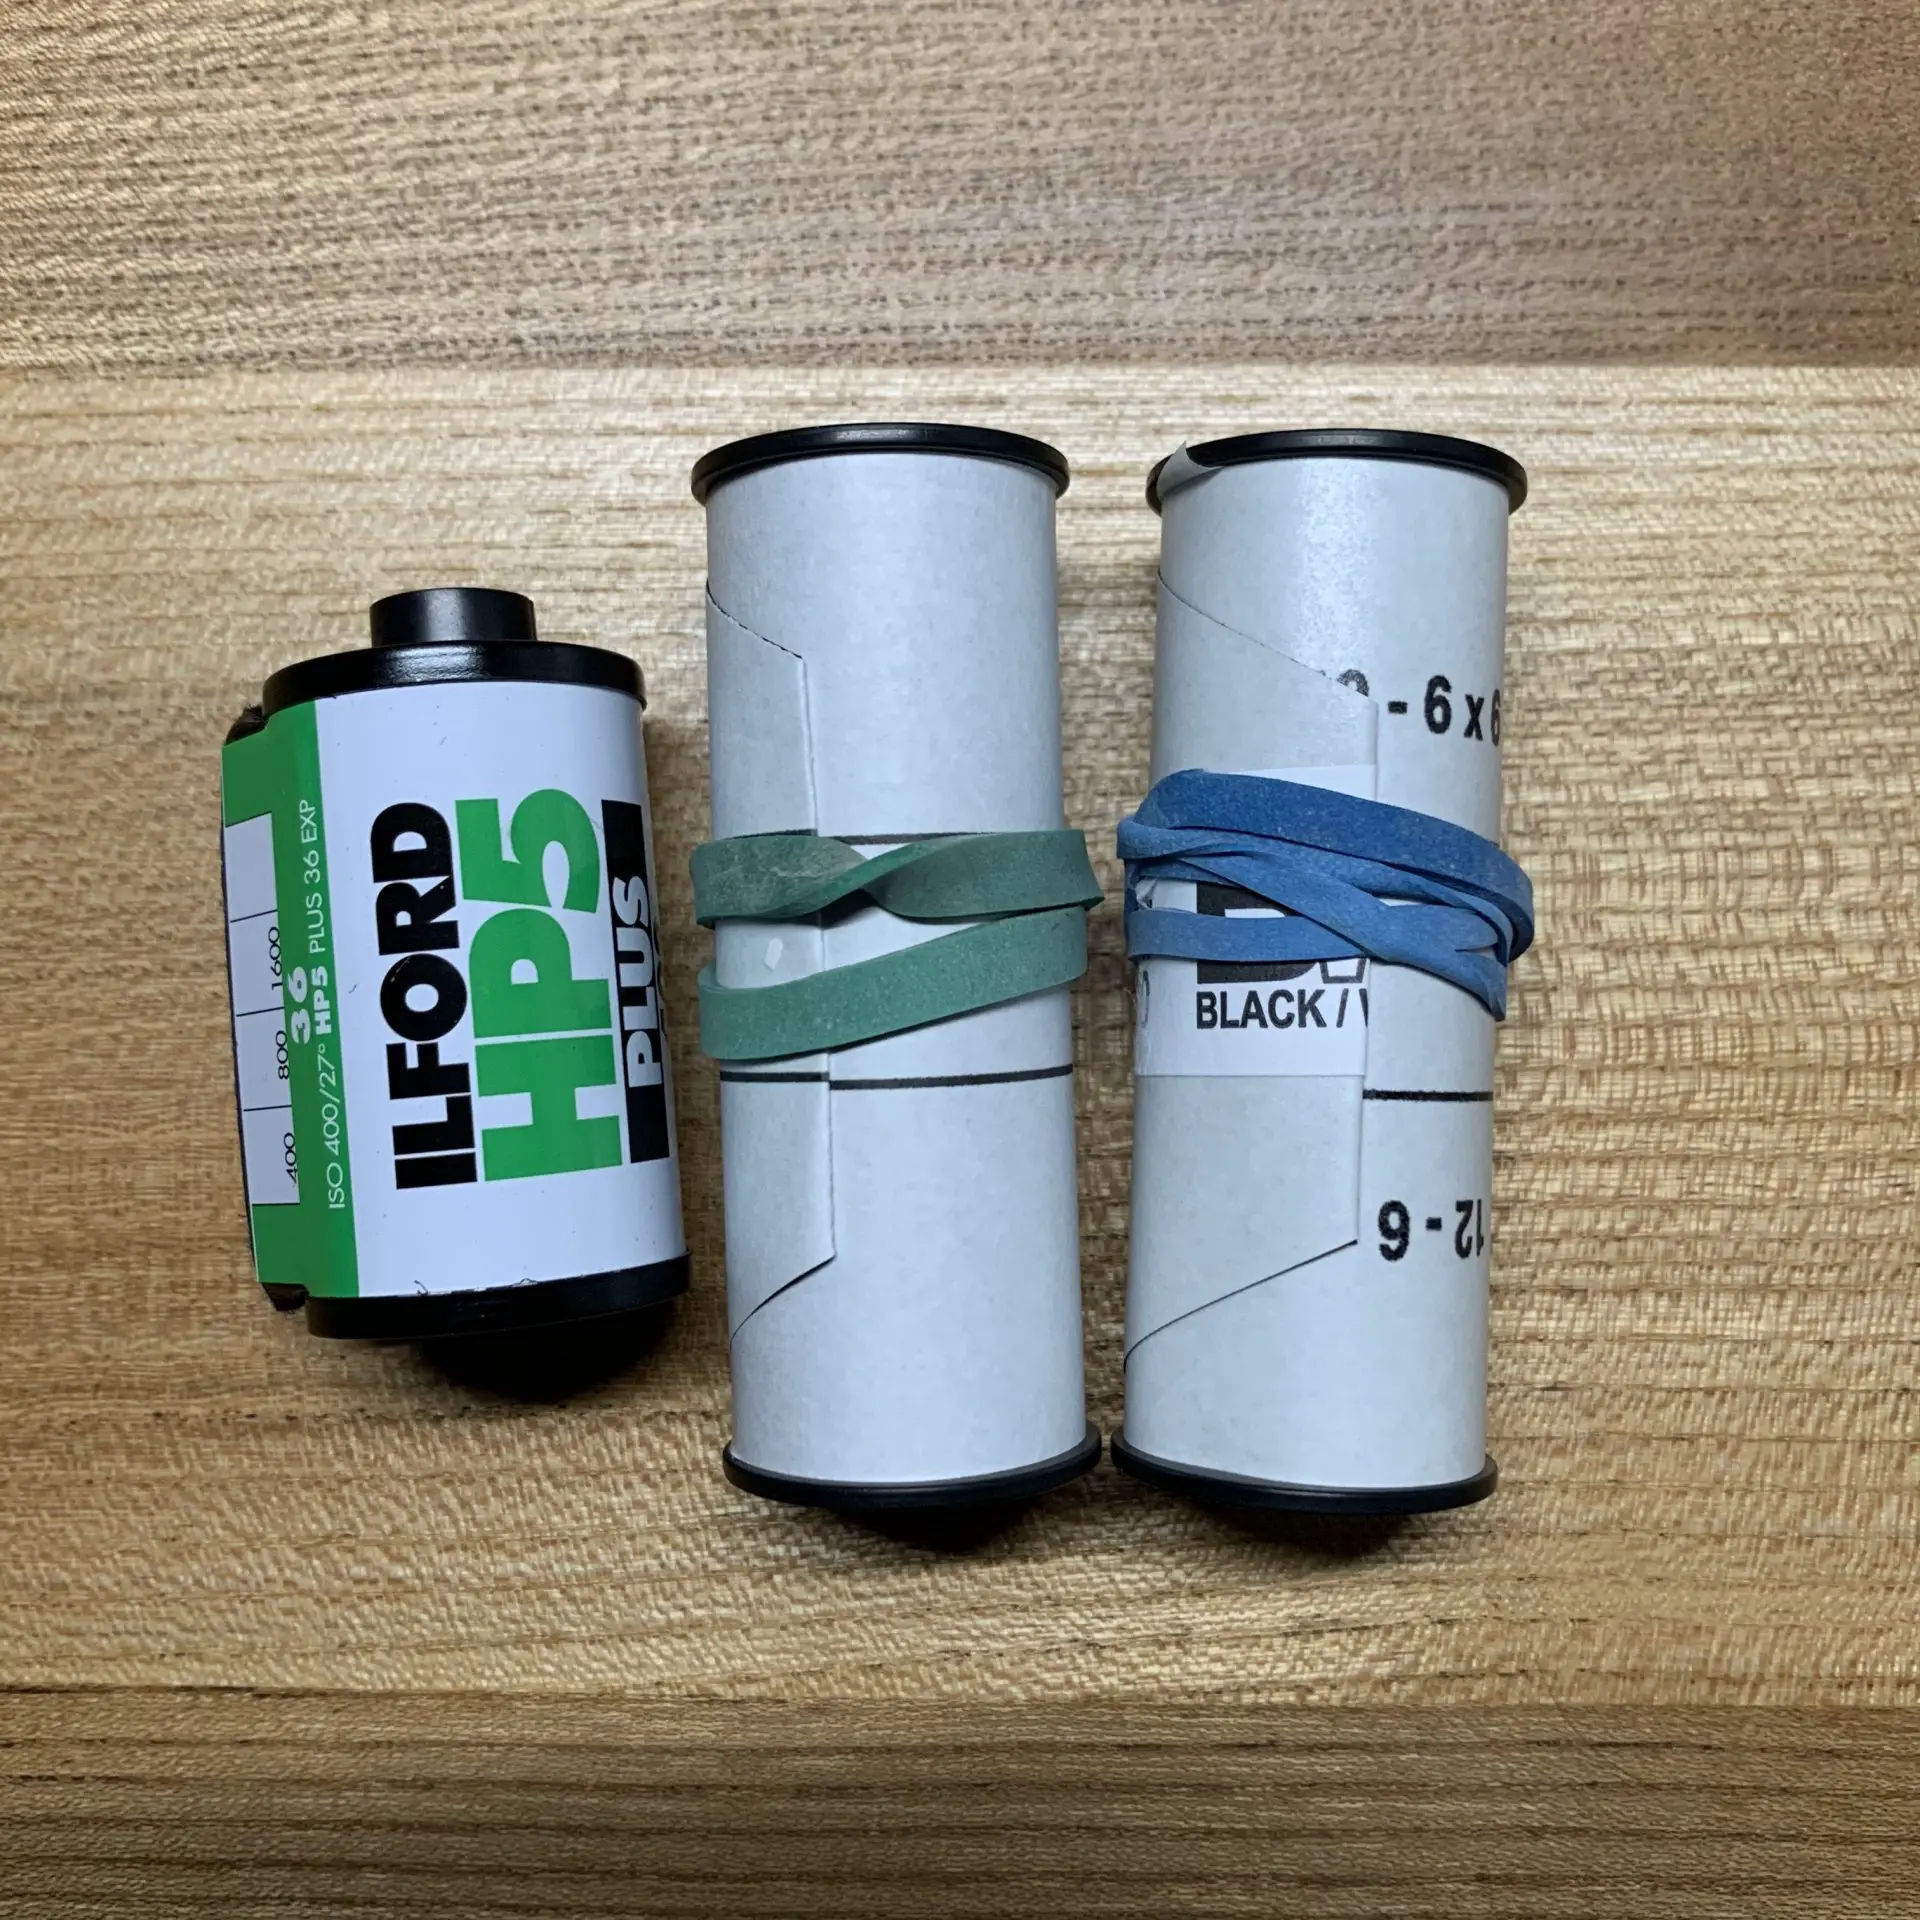
As a reference a roll of 120 is roughly 82cm long, with a roll of 36 exposures I obtained two rolls of 120.
Job done! It is more difficult to describe than to do. With a bit of care I prepared a couple of rolls in 20 minutes the first time, so it was time to shoot.
The Results
Using this process, I shot a roll of Ilford Hp5 (developed in ID-11) and a roll of Tri-x (developed in HC-110).
As soon as I got the rolls out of the tank, I noticed that I didn’t waste a lot of film. If you use the adapters (depending also on the camera you are using) is easy to waste a good chunk of film because 120 film has the paper leader. This is one of the reasons why I wanted to go on the route of re-loading the 120 roll instead of using the adapters.
Here below is a photo of two stripes of film out of the tank.
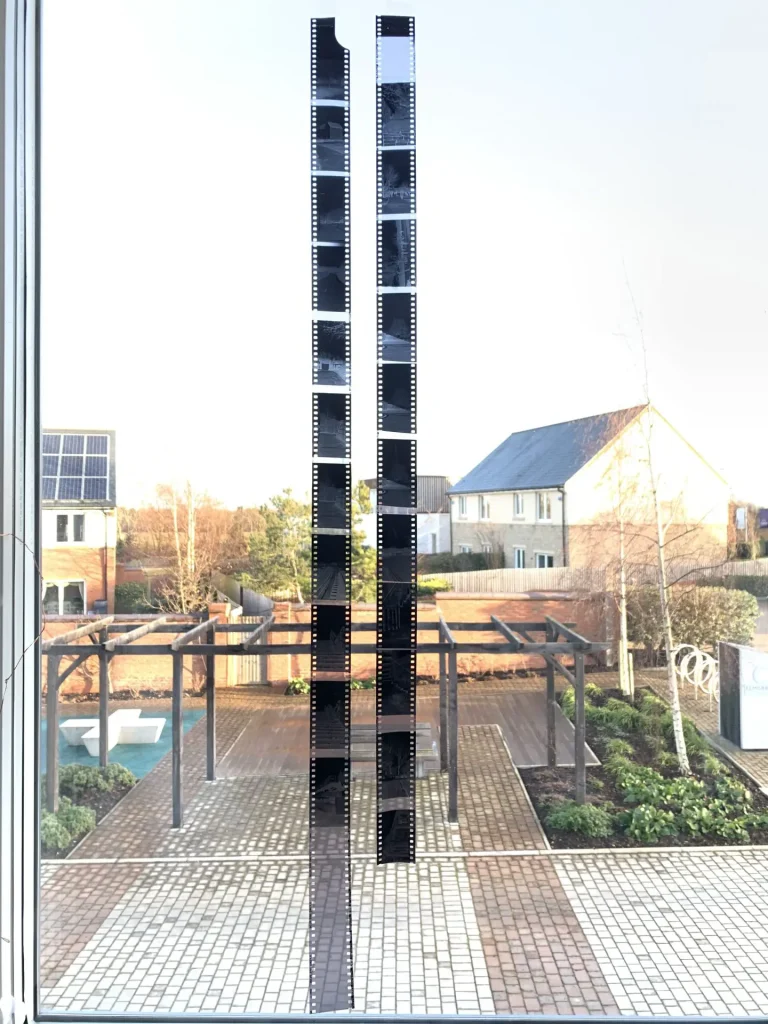
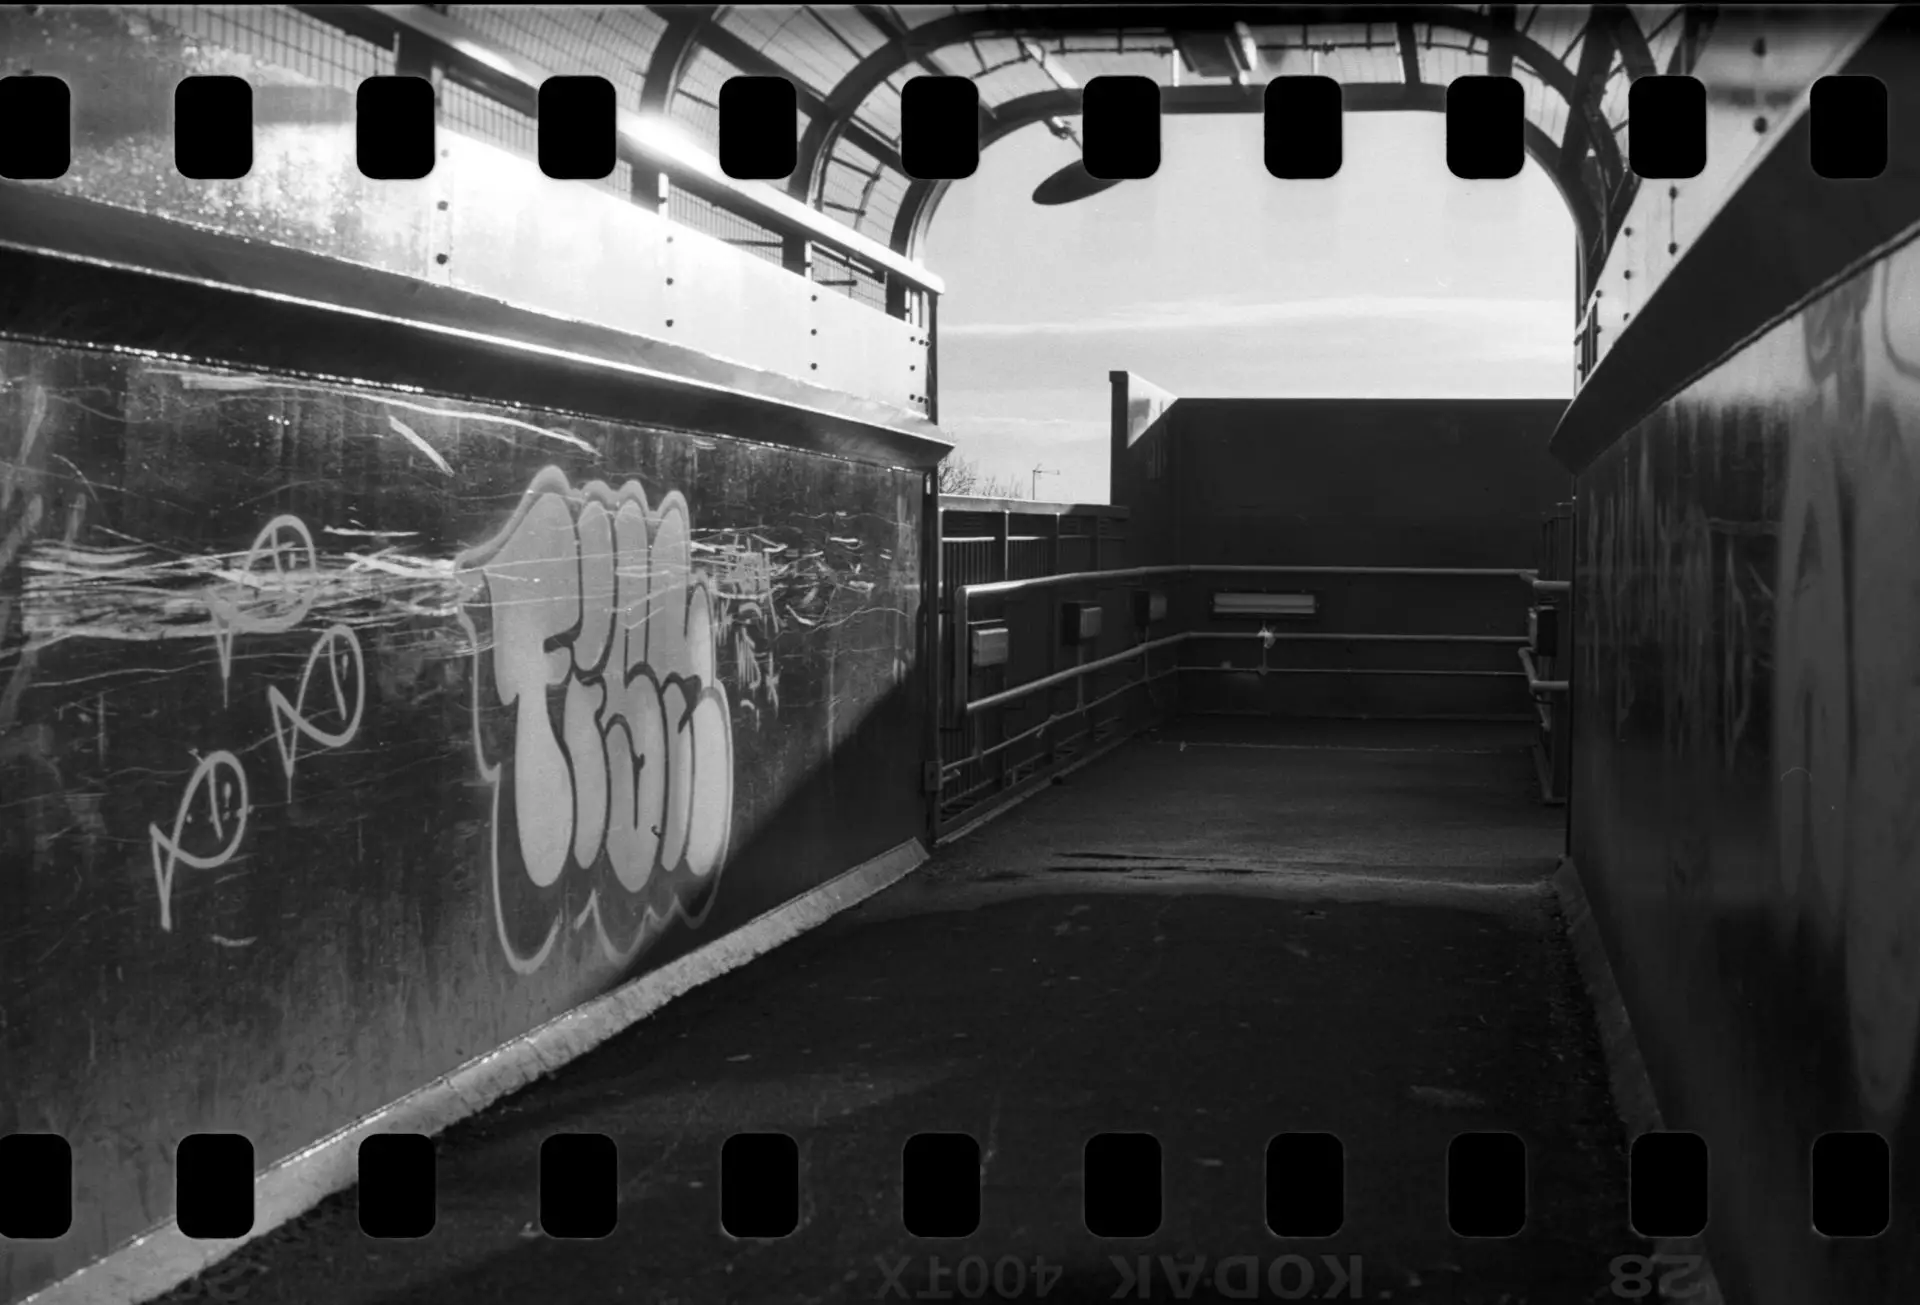
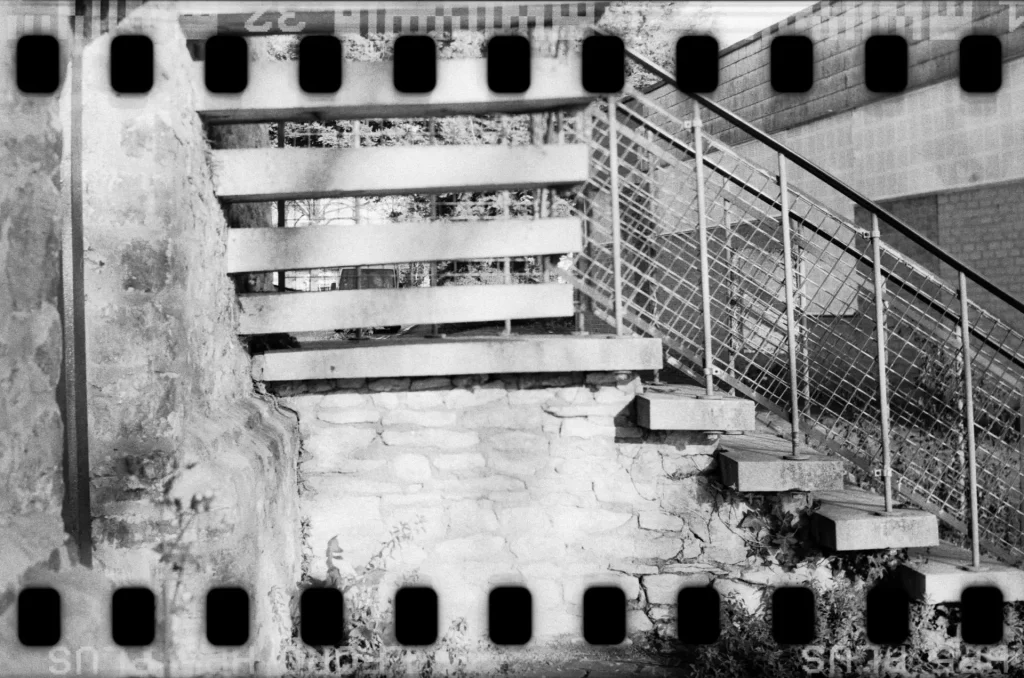
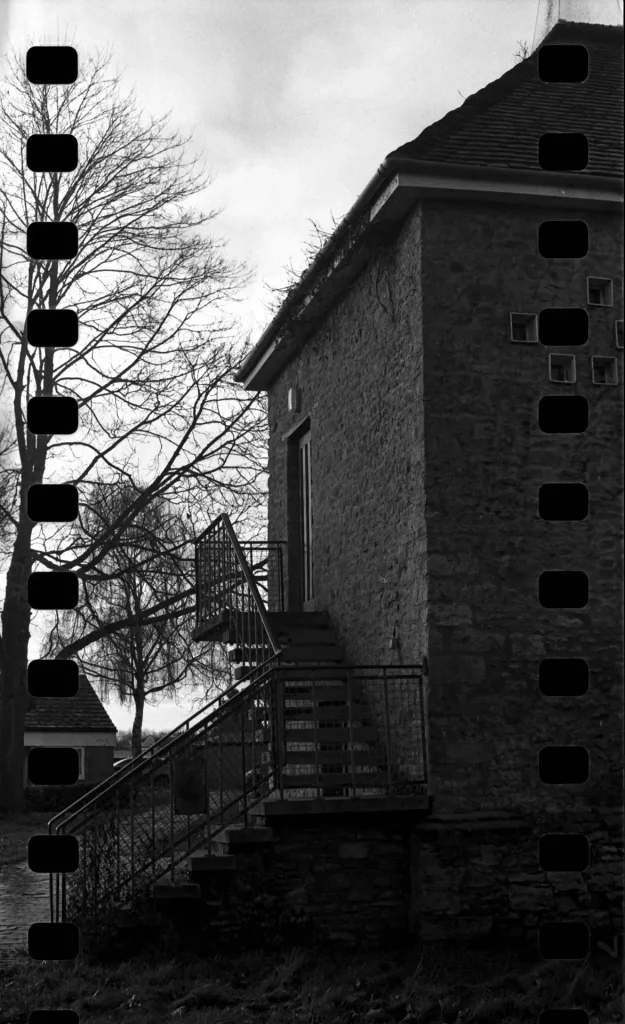
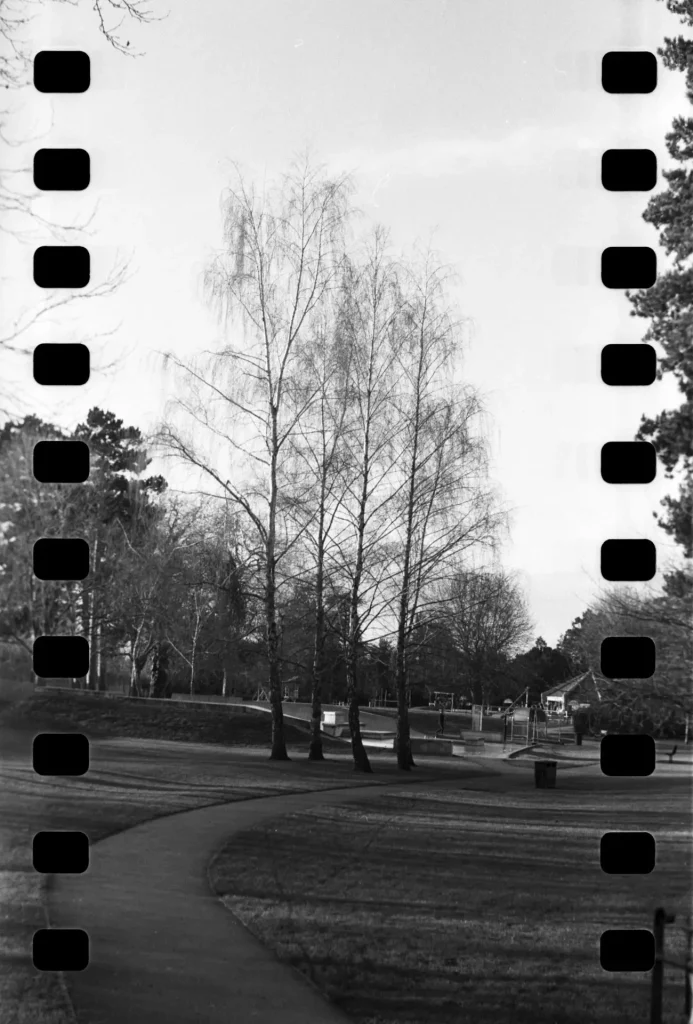
As a first time I was quite pleased with the outcome. I managed to shoot 11 frame per roll. Here below some images from the roll of HP5.
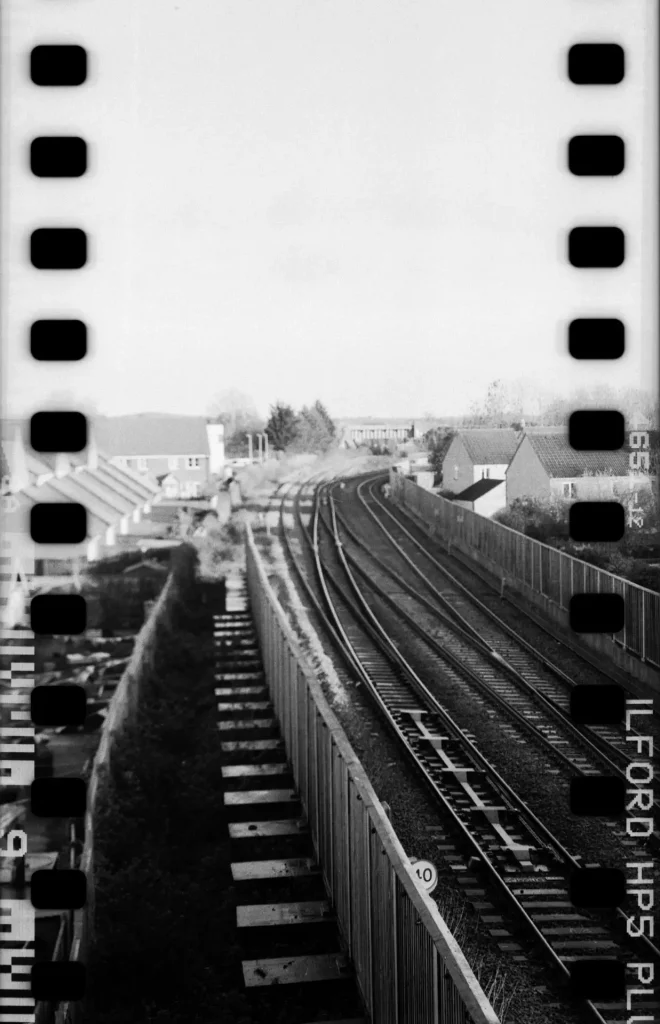
Because in the Yashica 124G the film runs vertically, I had to consider that all the images where in portrait orientation. It is fair to say that when I wanted to shoot in landscape orientation, I had to guess the composition more. It is quite difficult to look into viewfinder from the side without a tripod.
That said, the composition is always a guess. First of all you have to hope that the film is centred on the paper roll and then is difficult to imagine where the sprocket holes are going to be in the end because even if you assume that the film is centred, it is not always straightforward to estimate where the image is going to finish.
Another thing to bear in mind is that you need to make the image straight in camera. If the image is not straight, you can’t rotate/crop in post process because if you do that the result will be a straight image with wonky sprocket holes, which doesn’t look great.
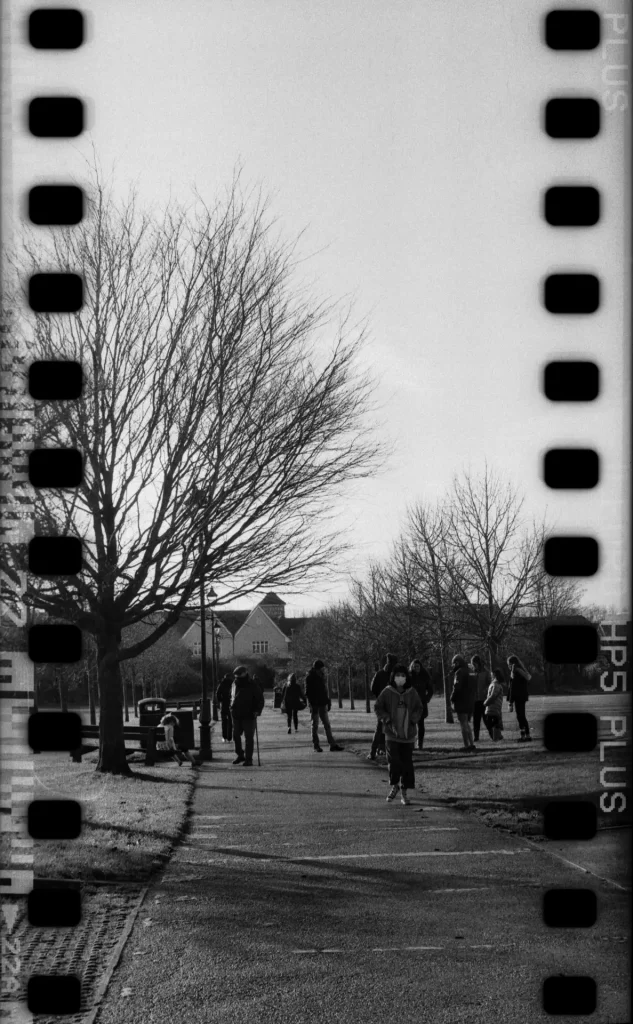
Here below some images from the roll of Tri-X
Another thing I found I needed to consider is the scanning process. In “auto” mode, the scanner freaks out as it tries to compensate for the black holes. The result is that the images will be very light. In order to avoid this, I used the auto settings in just a portion of the images and then switched to manual in order to enlarge the scanning window including all the portion of image I wanted including the sprocket holes.
All the process was a bit laborious and required a bit of patience but at the end it was a lot of fun and I am pleased with the results. It is something I will definitely explore more.
If you fancy, you can check out my Instagram or twitter.
You can read more about my journey into shooting film here.
Cheers,
Andrea
Share this post:


Comments
Rock on Loading 35mm into 120 Camera (Without Adapters) – By Andrea Bevacqua
Comment posted: 11/01/2021
Comment posted: 11/01/2021
Sroyon on Loading 35mm into 120 Camera (Without Adapters) – By Andrea Bevacqua
Comment posted: 11/01/2021
If you're using adaptors (which I also tried, before switching to the backing-paper method), the leader wastage problem is relatively easy to fix – you can attach a piece of film or paper (of the right length of course) to the 35mm film leader. But there's also some wastage between frames. This is because the 35mm film doesn't have backing paper, so it's more "tightly wound"; advancing pulls out more film than needed, especially as you get to the end of the roll. This too can be dealt with if your camera has a 220 film setting (my MF cameras don't).
The other issue with using adaptors is that on some older cameras (like the Agfa Record, one of the cameras on which I've done this), the film advance doesn't have a hard stop; you simply wind forward it until you see the next frame number through a little window in the back, and then stop. This makes the adaptor method essentially a no-go; you need the backing-paper numbers.
Comment posted: 11/01/2021
Bob Janes on Loading 35mm into 120 Camera (Without Adapters) – By Andrea Bevacqua
Comment posted: 11/01/2021
I tend to use a 'folder' for these as it is slightly easier to cope with horizontal shots. Other things to consider are: Cheaper 35mm film (such as Foma or Kentmere) tends to have less writing in the perforations area - and if you can find a folder that winds the firm from left to right, you get the wording the right way up by default. Spacing is an issue - I tend to mark the wind on knob with a pencil mark and make sure that it does two full rotations (although towards the end of the roll 1.5 may be OK).
One way of coping with the straightness problem is to deliberately put your pictures 'on the wonk'.
Comment posted: 11/01/2021
Comment posted: 11/01/2021
Matthias Rabiller on Loading 35mm into 120 Camera (Without Adapters) – By Andrea Bevacqua
Comment posted: 11/01/2021
Comment posted: 11/01/2021
Gil Aegerter on Loading 35mm into 120 Camera (Without Adapters) – By Andrea Bevacqua
Comment posted: 12/01/2021
Comment posted: 12/01/2021
Comment posted: 12/01/2021
Comment posted: 12/01/2021
Charles Higham on Loading 35mm into 120 Camera (Without Adapters) – By Andrea Bevacqua
Comment posted: 12/01/2021
Comment posted: 12/01/2021
Charles Higham on Loading 35mm into 120 Camera (Without Adapters) – By Andrea Bevacqua
Comment posted: 12/01/2021
Holly on Loading 35mm into 120 Camera (Without Adapters) – By Andrea Bevacqua
Comment posted: 12/01/2021
Thank you for sharing!
Comment posted: 12/01/2021
Aloy Anderson on Loading 35mm into 120 Camera (Without Adapters) – By Andrea Bevacqua
Comment posted: 13/01/2021
Comment posted: 13/01/2021
Marco C on Loading 35mm into 120 Camera (Without Adapters) – By Andrea Bevacqua
Comment posted: 13/01/2021
Comment posted: 13/01/2021
Jarosław on Loading 35mm into 120 Camera (Without Adapters) – By Andrea Bevacqua
Comment posted: 14/03/2021