When I first got back into analogue photography back in 2015, the biggest problem for me was how do I get these analogue images into a digital format to post on either a blog, Flickr or Instagram. Yes, I could get the lab I was sending to, to scan the images but this was costly and also there may only be half-a-dozen images that are worth scanning plus I was developing my own B & W and so that needed to be scanned at home.
Looking at the scanners on the market and the cost of them, the Epson V550 seems to fit the bill, the cost was around the £200 mark and it would scan 35mm and 120.
For the first year using this scanner was ok the black and white images turned out reasonable, the colour film could be a bit temperamental sometimes and still have colour shifts but by and by I got on ok with it but after about a year I started to notice that a lot of my images had a lot of dust on them but the dust wasn’t coming from the actual negatives but from the scanner. It seems as though dust managed to get inside the actual scanner and attach itself to the light that scans images, I did manage to dismantle the scanner and clean up the dust but within a couple of months the dust was back in there and the whole process had to be repeated.
With the amount of dust on the images I was spending more time cleaning them than I wanted to.
Around this time DSLR scanning was starting to become a bit of a thing so I picked up a 50mm macro lens to fit on my Nikon d5100. I also had an old Jessops lightbox with daylight balancing lights which I used to use for viewing slides.
First off I would use the scanners film holder from the Epson, laid across the lightbox and have the DSLR setup on a tripod pointing down to the images and although this worked for a while there was always a lot of light bleed from the light box. The next solution was to use some black card and cut this to frame around either the 35mm or 120 film. Then it was just a matter of focusing the lens onto the image and clicking away at the frames I actually wanted.
Although I did have to be careful as the black card sometimes scratched some of the negatives which wasn’t ideal.
Then finally I moved onto the pixl-latr, although the pixl-latr helped a great deal the biggest problem was setting up and using the DSLR.
Having no permanent place to leave the camera and tripod set up, it was always a pain making room on the kitchen table to scan. There was also the problem of then getting the images from the SD card onto the computer and finally start editing.
Add to this what software to use to convert colour negatives to positives, not having Lightroom meant I couldn’t use Negative Lab Pro, so other alternatives needed to be found. Other programs like GIMP, RAWtherapee, darktable and the desktop version of FilmLab app were tried but personally I could never get, what I considered a decent colour rendition of the negatives. By this time I was considering giving up shooting colour film and only shooting B&W.
Around this time I bought a new mobile phone, the Google pixel 4a phone. Whilst playing around with it I took a couple of quick snapshots of some B&W negatives with it and was surprised to see how good they looked.
The pixel size of the phone image is 3000 pixels by 4000 pixels so pretty close to what the DSLR was and the images seem to be very good especially if you were only using them for something like Instagram although I have printed up to A4 and the prints look fine.
Scanning with the phone is a much quicker way to scan and setup, I can use a much smaller tripod and the images are there straight away to edit on the phone or send to Google photos to edit on the main computer but so far all my editing has been done within the phone.
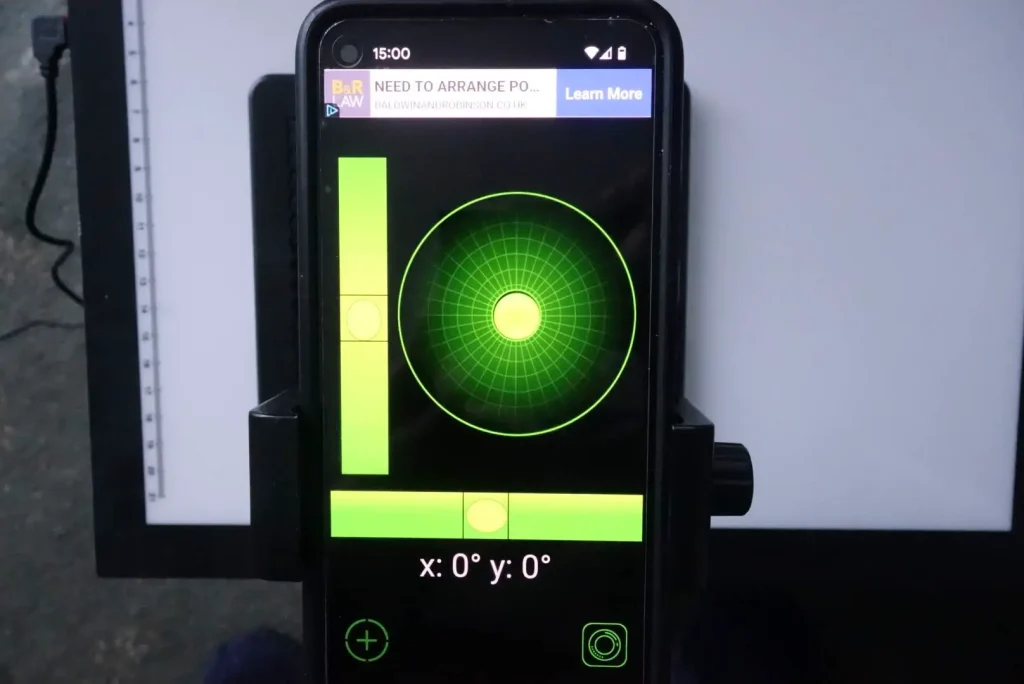
I use a mobile phone holder attached to the tripod so the phone is horizontal over the pixl-latr and to make sure that the phone is square to the board I use a spirit level app on the phone.
Once this is done it is just a matter of zooming the phone in to about 2.4x to fill the screen with the image.
The software I use to edit on the phone is Snapseed, even for a phone app this is quite a powerful piece of software. It allows you to do the basic things like crop, rotate and adjust brightness, contrast saturation, highlights and shadows.
Some of the more powerful tools are curves, dodge and burn, being able to change the exposure values and a host of others which I haven’t fully used yet.
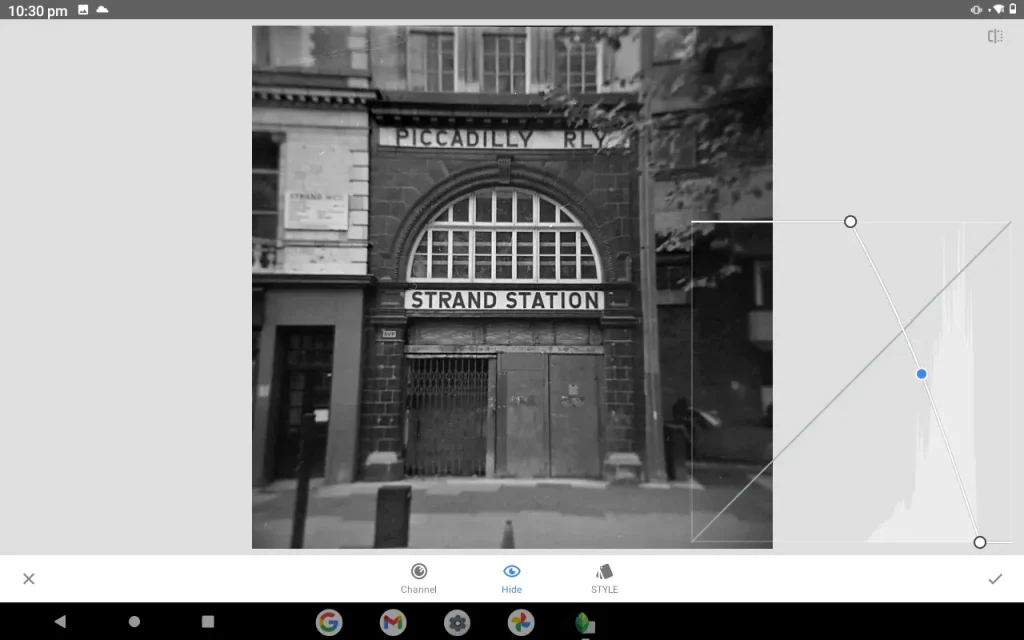
When using Snapseed for B&W negatives it’s pretty much a case of inverting the curve and then making minor adjustments to get the image the way that you like it.
For a colour negative it is a bit more involved but because there is slightly less to play with it makes it easier to get to a reasonable colour positive quite quickly.
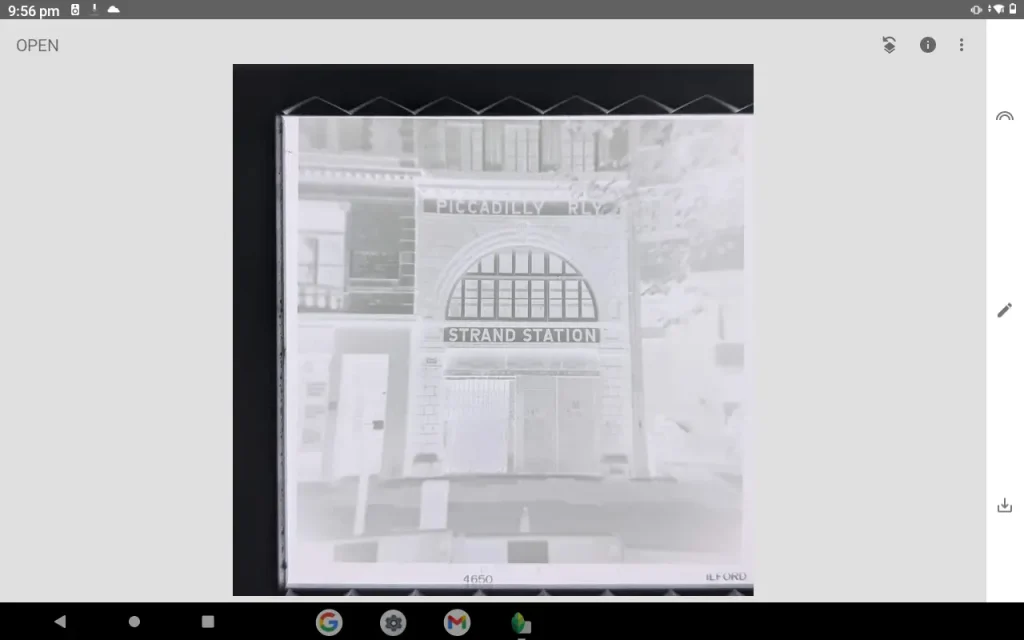
I will go through the process of how I get to a colour positive. First opening the image in Snapseed, you need to click on tools to take you to the main palette, this is where all the adjustments can be made and every time you make an adjustment you will press a tick to take you back to the main screen and then back into tools.
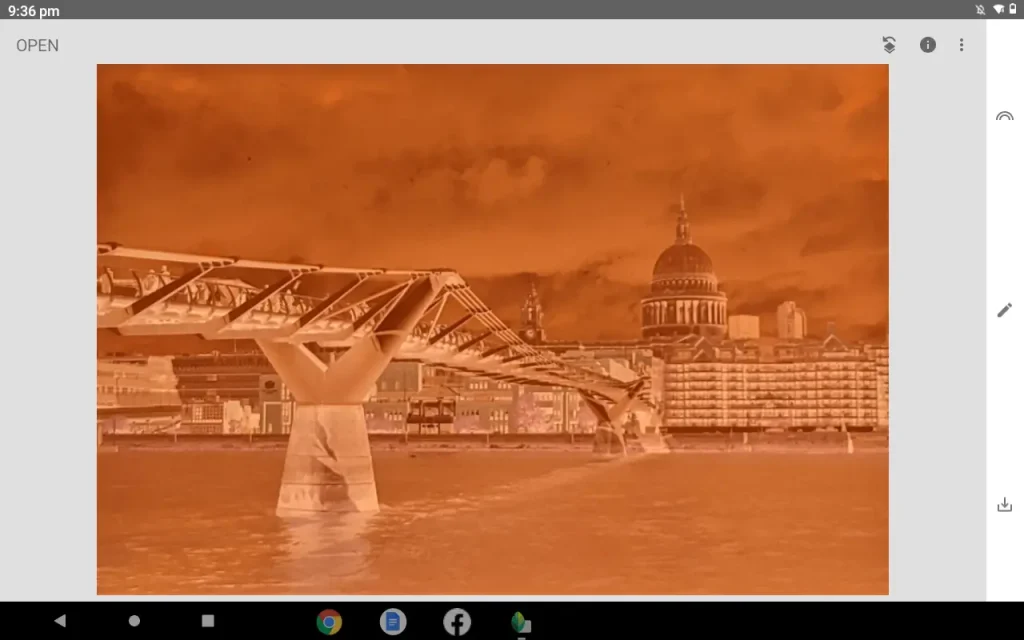
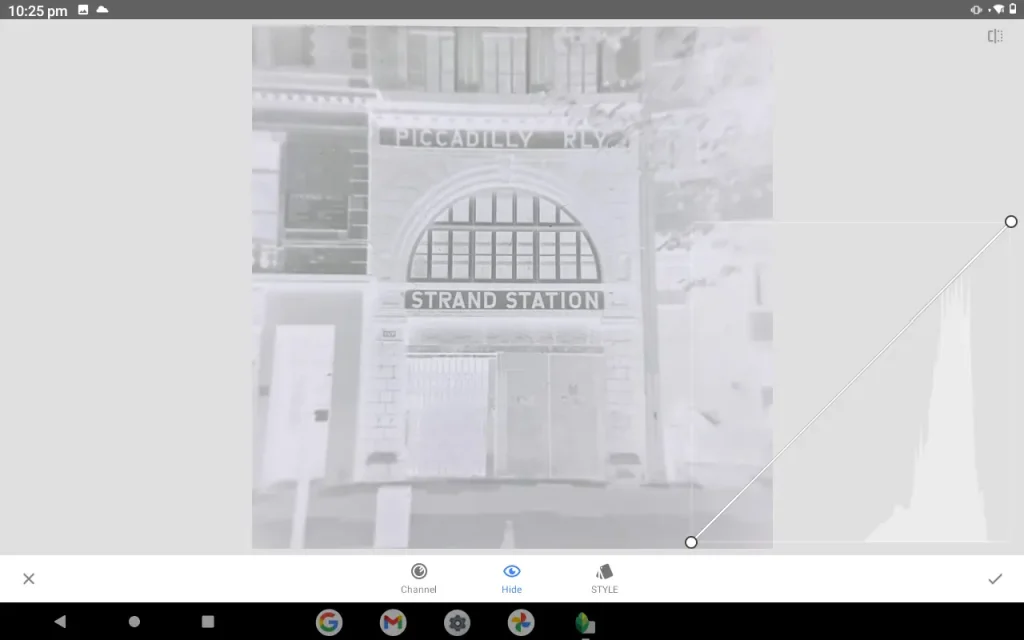
Once I’ve scanned the image onto my phone I will take the image into Snapseed and the first thing to do is any rotation and cropping. From there I will go into the curves. In the curves palette you have three options, the central one that looks like an eye will bring up the curves layer and show the histogram of the image, clicking this with turn the histogram on or off.
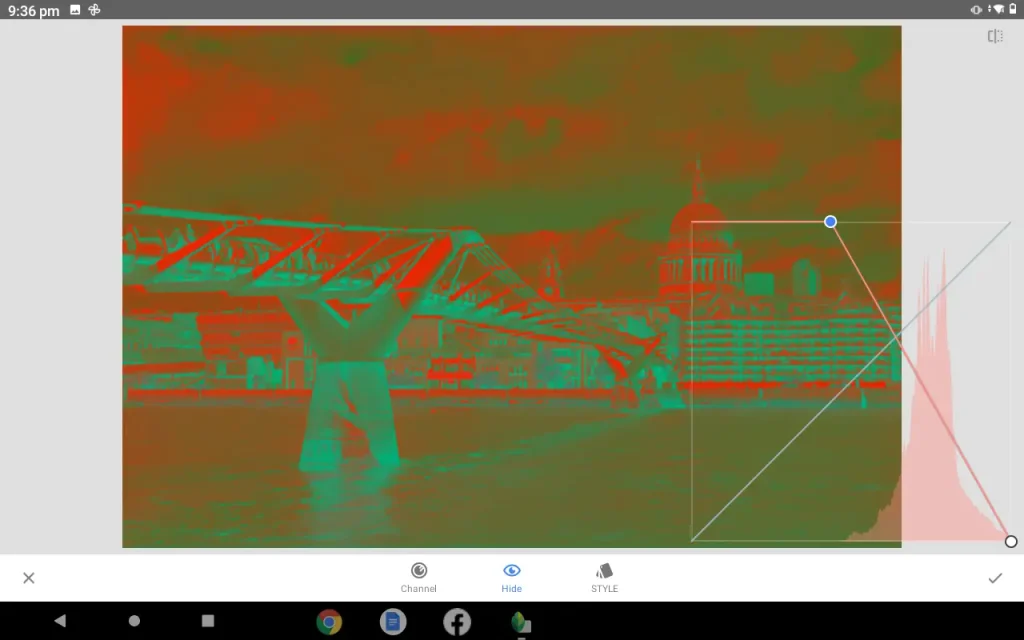
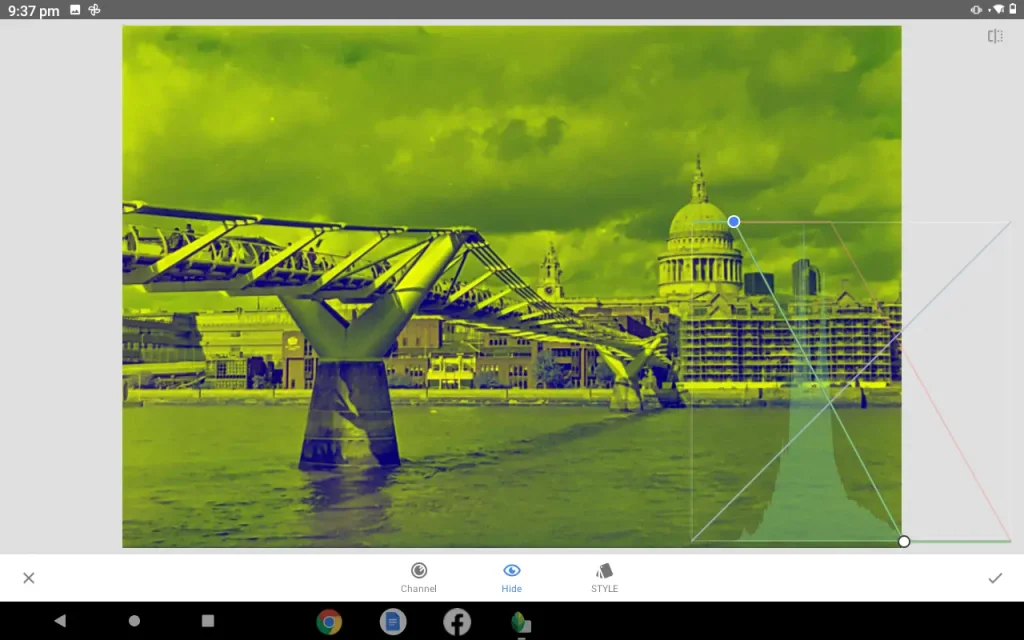
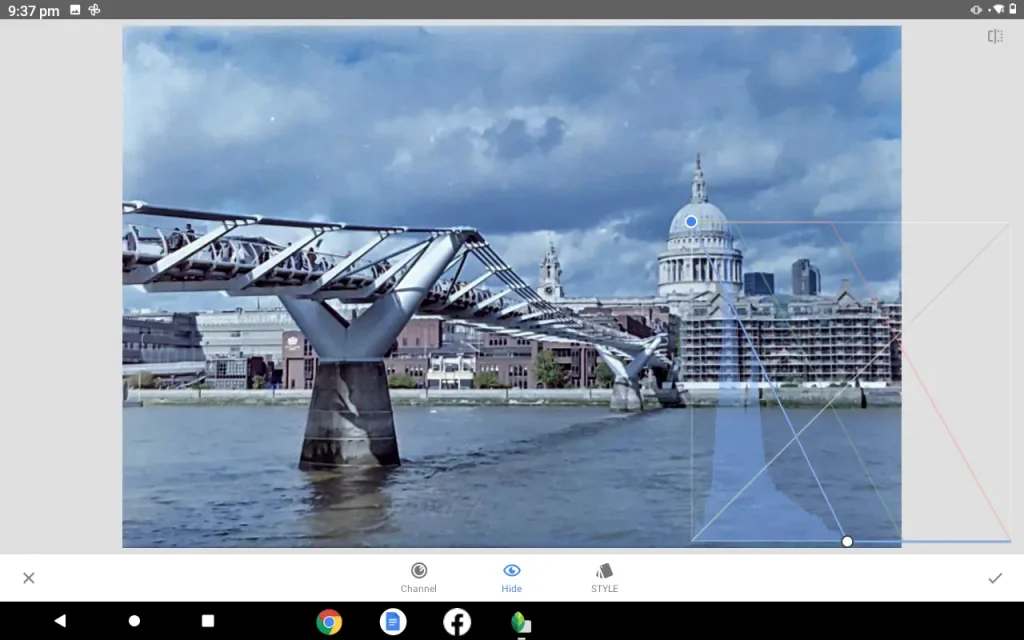
The style icon will give you a lot of different pre-set options for the curves but the one we are interested in is the left-hand one, the channel icon. When you open this it will give you five different options ranging from RGB, red, green, blue and luminance. The ones we need to concentrate on are the red, green and blue. I usually start with the red, if you press the red dot it will bring up the red channel and it is then just a case of inverting this and moving the sliders into each side of the histogram. This is then done for the green and the blue and it gets you into the ballpark of having a positive image and it is just a case of slightly adjusting each of these three channels to get the desired colour correction. You can also use the luminance to brighten or darken the actual image.
Once this is done, pressing the tick takes you back out to the tools, clicking the tools again and into the main palette you will then look for the tune image button by pressing this you will see two icons in the bottom centre of the screen. The right-hand one is the auto adjust and the left-hand one is for manually adjusting the image. You can also place your finger on the middle of the screen and this will bring the same palette up and you can slide up and down to do the fine adjustments. These include everything from brightness, contrast, shadows, highlights and warmth.
Personally for me I found this the best way to edit and convert my images, I still get a reasonable size file that is more than good enough for Instagram, to print out at least up to A4 size and have had my Zine printed with images “scanned” this way.
Using this technique to get images scanned, is probably not everybody’s cup of tea but I find it to be a quick, easy and useful way to get colour or B&W images.
Share this post:


Comments
Ailbíona McLochlainn on Using a Mobile Phone And a Free App To Scan Negatives – By George Griffin
Comment posted: 11/03/2022
Comment posted: 11/03/2022
Bob Janes on Using a Mobile Phone And a Free App To Scan Negatives – By George Griffin
Comment posted: 11/03/2022
Regarding getting the camera/phone square to the negative - I've used various methods with spirit levels and such, but saw rather elegant suggestion that if you put a mirror in place of the negative holder and aim the camera at it - when the centre of the lens is at the centre of the frame, you should be dead square...
Comment posted: 11/03/2022
Murray Kriner on Using a Mobile Phone And a Free App To Scan Negatives – By George Griffin
Comment posted: 11/03/2022
After reading all the pains involved with converting to a digital format, think I'll just be a film enthusiasts for life. Even though my camera collection flows through many formats, 35 mm being the majority of which, think I'll reserve my medium formats for greater enlargements, blanketing the civic avenues and streets for the Range-Finder and SLR use. I've never been the casual snap-shot follower, risking my job security just to always have a film camera at the ready. Glad you sorted thru all the digital to-do.
Eric Norris on Using a Mobile Phone And a Free App To Scan Negatives – By George Griffin
Comment posted: 11/03/2022
Comment posted: 11/03/2022
Tony on Using a Mobile Phone And a Free App To Scan Negatives – By George Griffin
Comment posted: 12/03/2022
Comment posted: 12/03/2022
Graham Orbell on Using a Mobile Phone And a Free App To Scan Negatives – By George Griffin
Comment posted: 13/03/2022
It’s very slow but can be speeded up going for lower quality.
I’m also wanting to experiment with DSLR copying and what you have written about your experience is very helpful.
Of course the orange mask is the biggest problem ( Vuescan has many presets for different negs )
Every make and type of film has a different color orange mask which is why there is no simple method.
Vuescan also has the option to process DSLR camera scans by setting the input to “file” instead of “scanner” I can’t completely understand the instructions on how to do this but it is an option and I’ll eventually work it out. If someone knows please tell me!
My idea is to eventually tether a Canon DSLR with macro lens to my iMac and save the exposures to a dedicated flash drive
Then hopefully process in Vuescan that I already own. It’s not expensive with lifetime ownership and free upgrades. ( I’m not associated)
If I can’t do it on Vuescan a friend who once used Photoshop professionally tells me he can show me how to easily do it with PSE. But VS with its presets for different color negatives each with different color masks sounds good in theory.
I’ll also experiment with your suggestions
About 60 years ago I worked for 6 months in a color print lab, until I tired of being in the dark all day. Back then almost everyone used slide film, projected slides and we made prints for them. At that time the company was the only place in New Zealand doing so, but that quickly changed.
One of my jobs was making inter-negatives and processing them. I used a German professional duplicating machine which was virtually a vertical SLR with bellows and light box below and with 50 foot loads of film. It’s name was Homrich ( I’m not sure if that spelling is absolutely correct) The interesting thing was that it was automated to make 3 exposures on each slide that was copied. It had automatic exposure in turn through each of Red, Green, and Blue additive filters onto 1 frame of inter negative film, and this gave excellent automatic colour correction. But as with our color negative orange masks, each make of (positive) slide film required different predetermined presets to be dialed in. Kodachrome was most popular and most predictable. Each of the 3 exposure times would be different measured inside the camera head. Usually from memory between 1/10 and 1 second. Even drastically underexposed original slides could be corrected quite well often surprising the owners.
In connection with your comment that scanning software is all ten years old. In fact Vuescan is right up to date. Mine was updated yesterday.
Anyway thanks for your article with ideas that I’ll also experiment with
Comment posted: 13/03/2022
Graham Orbell on Using a Mobile Phone And a Free App To Scan Negatives – By George Griffin
Comment posted: 13/03/2022
Epson does has an updated scanning software version that runs on Monterey. But that latest Epson Scan software is bare bones and not much use.
I believe the reason Epson haven’t bothered with a proper update is that Vuescan is so good and so established in the scanning world that Epson can’t compete. Vuescan ( Hamrick Software) regularly email out newsletters whenever something is new. I received one a couple of days ago, and it is being constantly updated, working on most scanners and operating systems.
I also have a couple of iPads and an android phone and I like to make use of them all, which I why I’ll also experiment with your helpful suggestions. A couple of days ago I received a very well made small light box negative copy unit with a very good negative carrier and another carrier for mounted slides from Aliexpress. It cost about NZ$40 delivered in 11 days. Currency conversion about £20 ? . An almost identical unit named “Nikon” no doubt out of the same factory in China sells in our shops for NZ$289
But as we’ve discussed it’s the orange mask that is the main problem with DSLR copying, complicated by every make and type of color negative film having a different colour mask.
My recommendation for what it is worth is to find a particular film that that works for you and try to stick to it.
That is not so easy as there is obviously a world wide shortage of colour film. All our main film sellers in New Zealand seem to be more or less “out of stock” of almost all 35mm colour films.
But a shop in our local village selling mainly binoculars, and overlooked by photographers still has about 10 rolls of Kodak Gold 200 remaining, and I hope to snap up about 4 of them shortly. .
51 Game Login on Using a Mobile Phone And a Free App To Scan Negatives – By George Griffin
Comment posted: 18/06/2025
Marco Andrés on Using a Mobile Phone And a Free App To Scan Negatives – By George Griffin
Comment posted: 18/06/2025
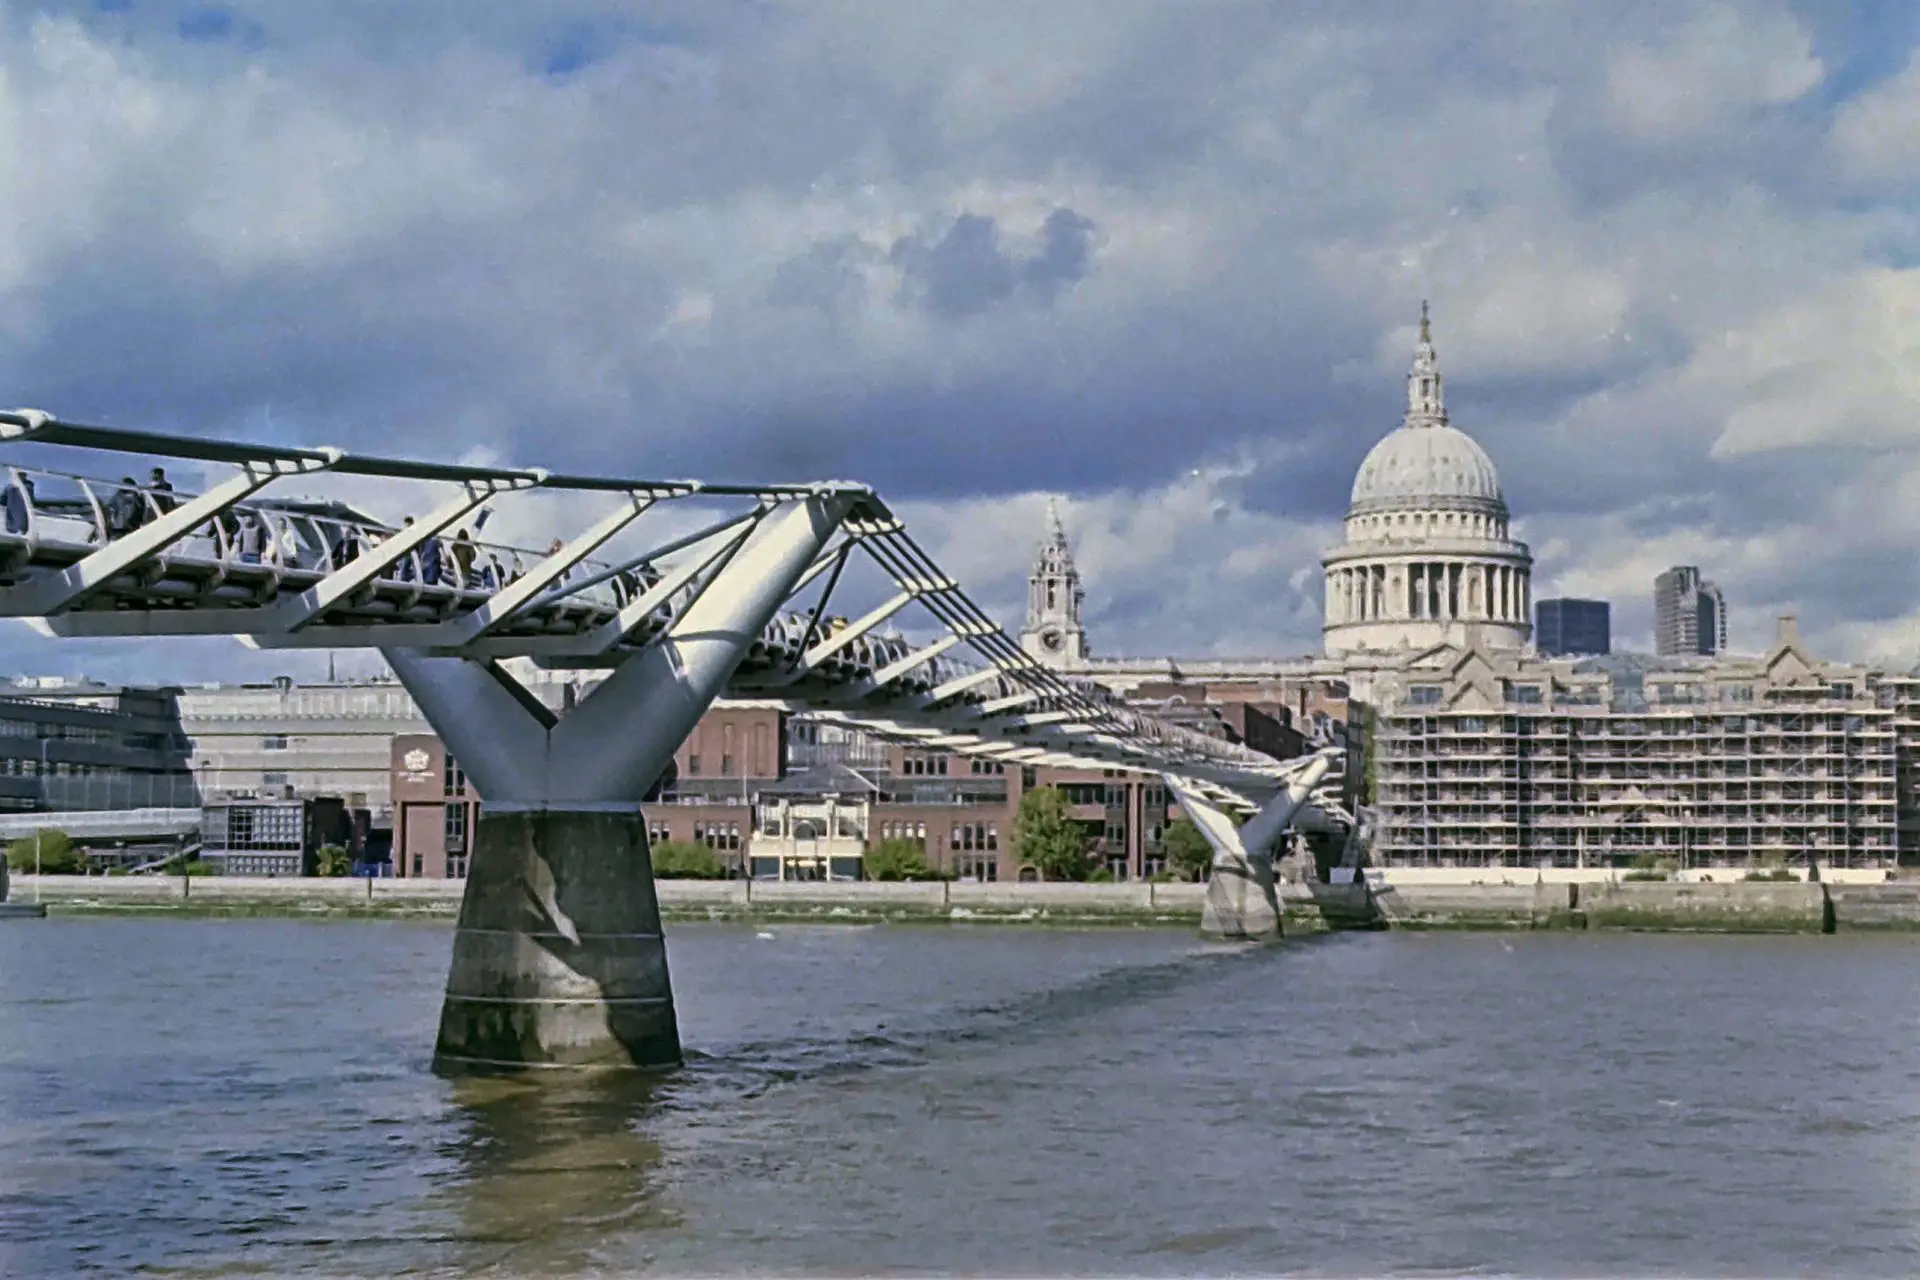
Here is a comparison of different methods of inverting the lede image [bridge]:
https://drive.google.com/file/d/1hvB1nqudIjnQ5E6P6krm95ker8GiEmBB/view?usp=sharing
Top – your image of the bridge
Middle - SmartConvert
Bottom – Gimp manual inversion.
To invert manually, you'll need to correct for the colour cast of the film base layer, as others have mentioned.
Include a section of unexposed film in each "scan" and use the following method to remove the influence of the base layer:.
https://www.alexburkephoto.com/blog/2019/10/16/manual-inversion-of-color-negative-film
Bottom line, inverting a negative is just as much art [judgement call] as science. For colours, you may also need to correct the colour temperature, manipulate the contrast and even the curve.
No longer use Gimp to invert since SmartConvert makes it really simple.
Gary Smith on Using a Mobile Phone And a Free App To Scan Negatives – By George Griffin
Comment posted: 18/06/2025
FilmLab allows you to cut/paste your inversion recipe from one shot and paste it to all files in a folder. Nice concept however unless all of your shots were shot under the same lighting not particularly useful.
My most recent roll of color I just sent to the lab for developing and scanning. You can see a few images here: https://www.dpreview.com/forums/post/68318275 or in my last post to this thread: https://realphotographersforum.com/threads/the-oregon-coast.27050/