The title suggests I can’t do DIY which is not entirely true. I have been known to wield a hammer from time to time but while the results are functional they‘re not particularly pretty. However, my stubborn hubris was no match for the skills necessary to convert my storage space into my new darkroom. If this resonates then this article is for you. On the other hand If you’re one of “those” people who can put up shelves and shit then you can just go ahead and read this with smug abandon.
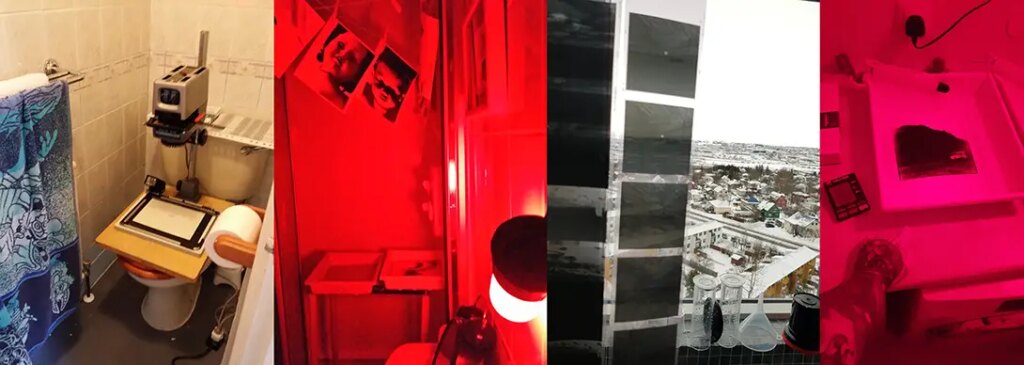
Like most of us I’ve previously shared my darkroom space with something else, i.e. bathroom or laundry room. I’d often dreamed of having my own dedicated darkroom space, one especially free of humidity and the smells of man. An agreement was forged between me and The Hobbit (husband) that when we owned our own home I would get my wish.
In 2021 shit got real and the house hunt was on. All potential suitors were met with the same scrutiny, is there a space suitable for a darkroom, with no windows, next to a water source, bigger than a shoe box etc. I wasn’t prepared to skimp after all this time and so if it wasn’t perfect then it wasn’t going to work. The winner presented itself as a little storage room with no windows situated right next to the bathroom. I didn’t get a look inside due to it doubling as Monica’s closet so I would have to wait until move in day to see exactly what I was working with.
In the meantime I knew I’d be without a darkroom for a while so I did a big push to get my ongoing projects up to date before I had a break. The closer we got to moving the more I was shitting myself that the room wasn’t going to be as big as I’d hoped. I wasn’t expecting it to be a cavernous echo chamber or anything but as long as I could fit in the essentials that’s all that mattered. When the big day finally arrived I could barely contain the excitement and anticipation of what this room would be like.
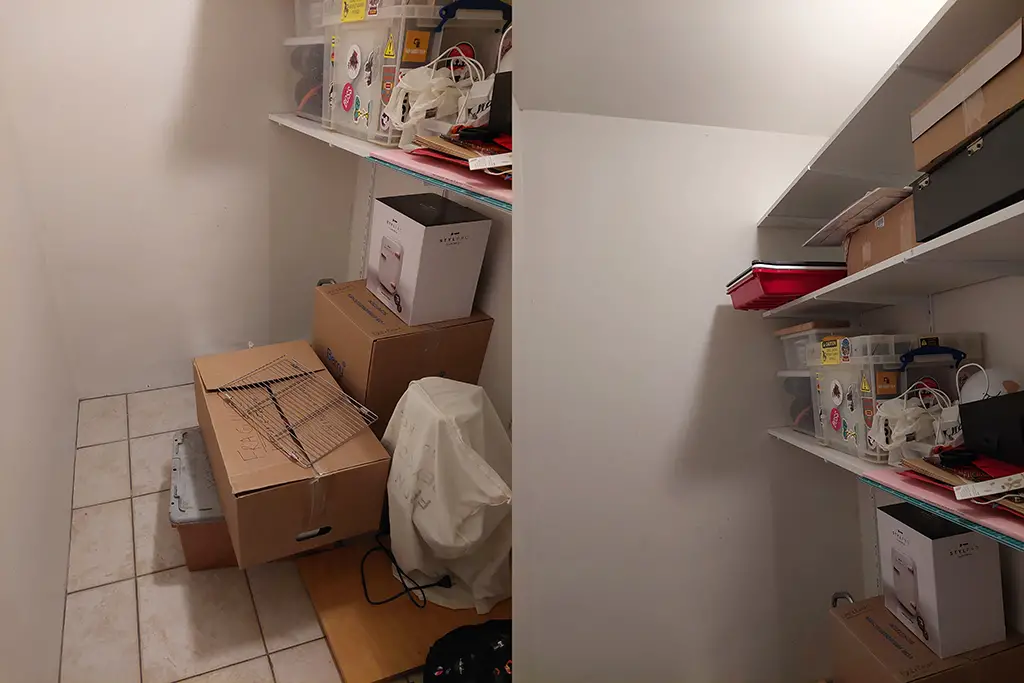
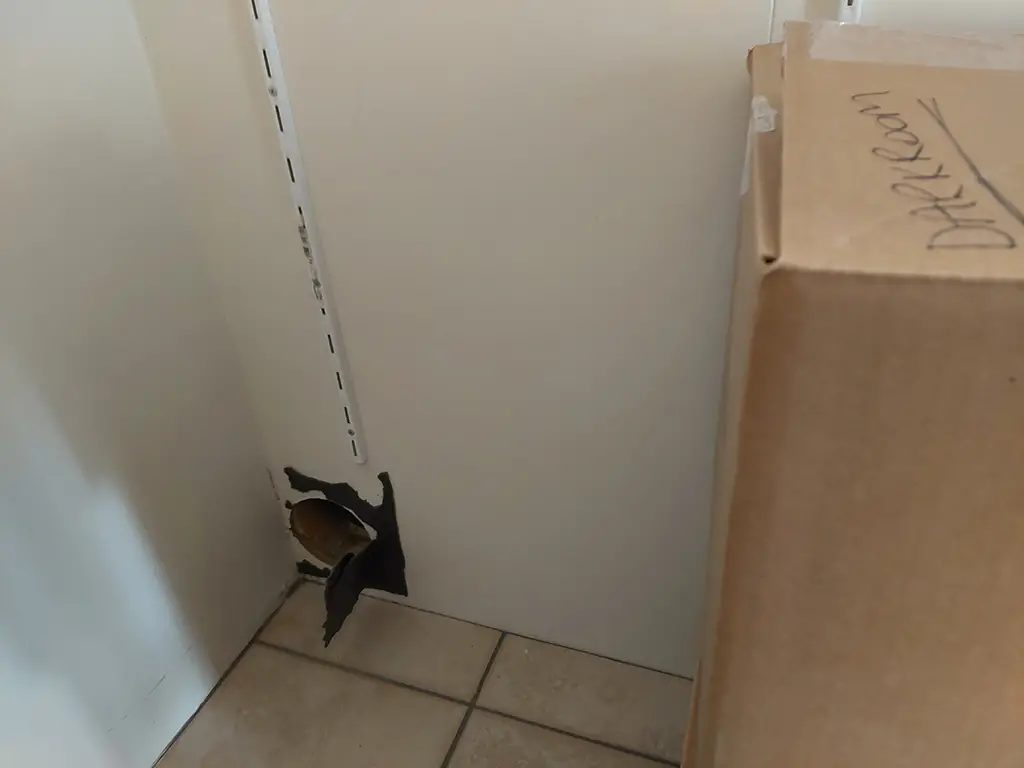
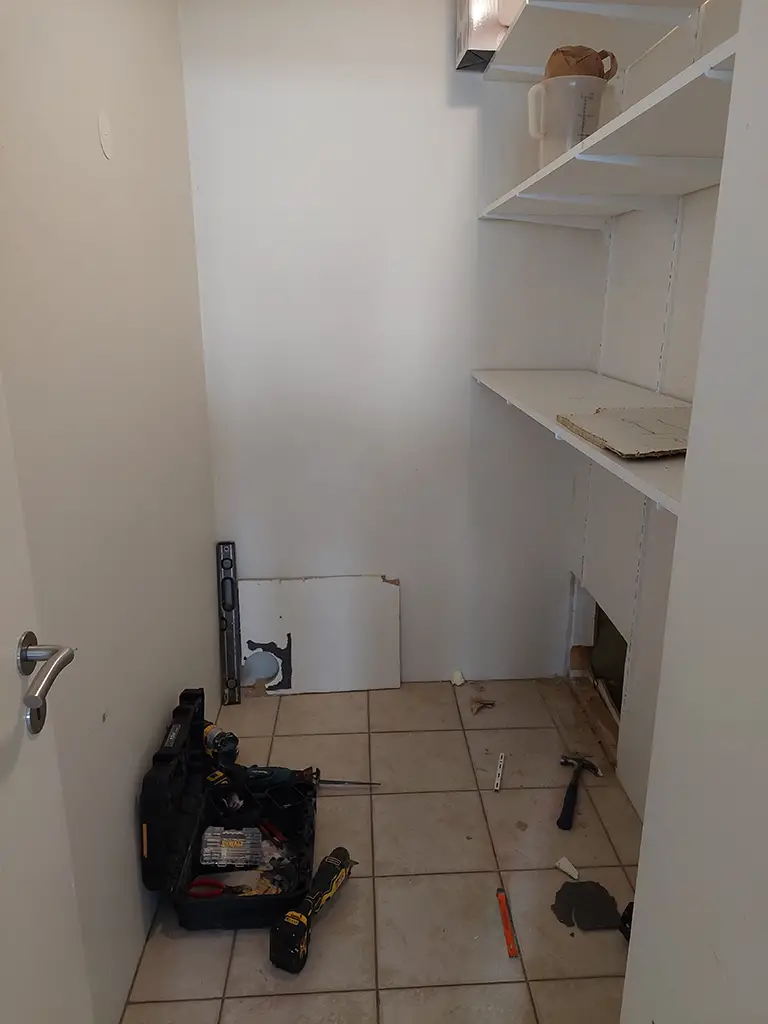
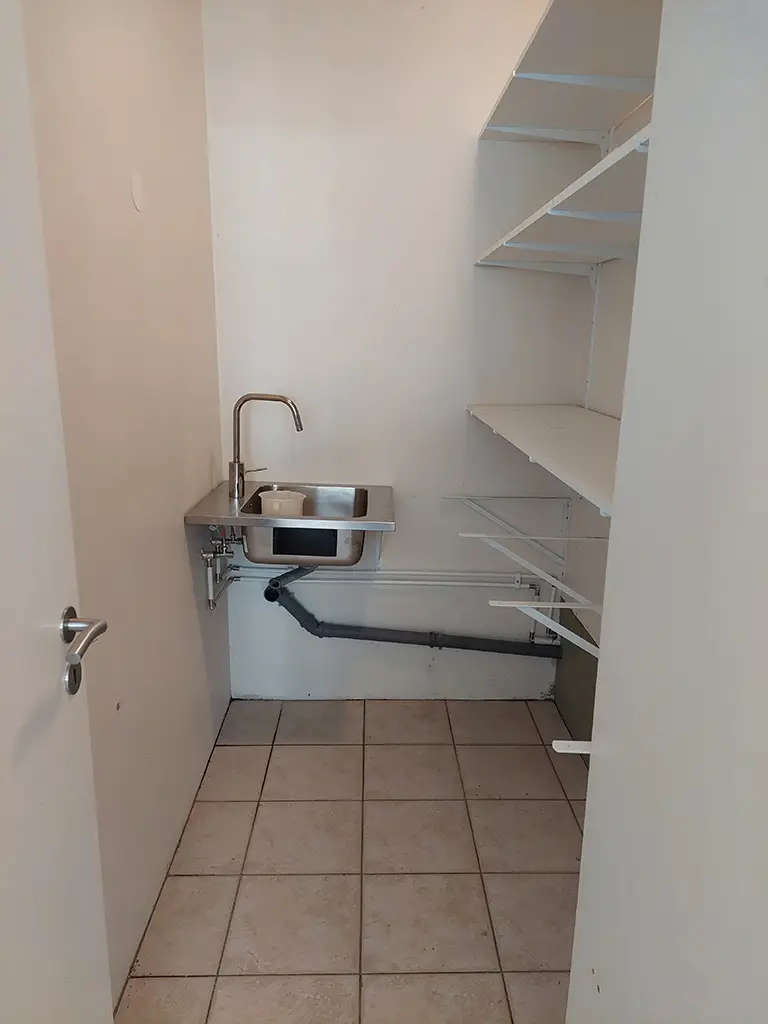
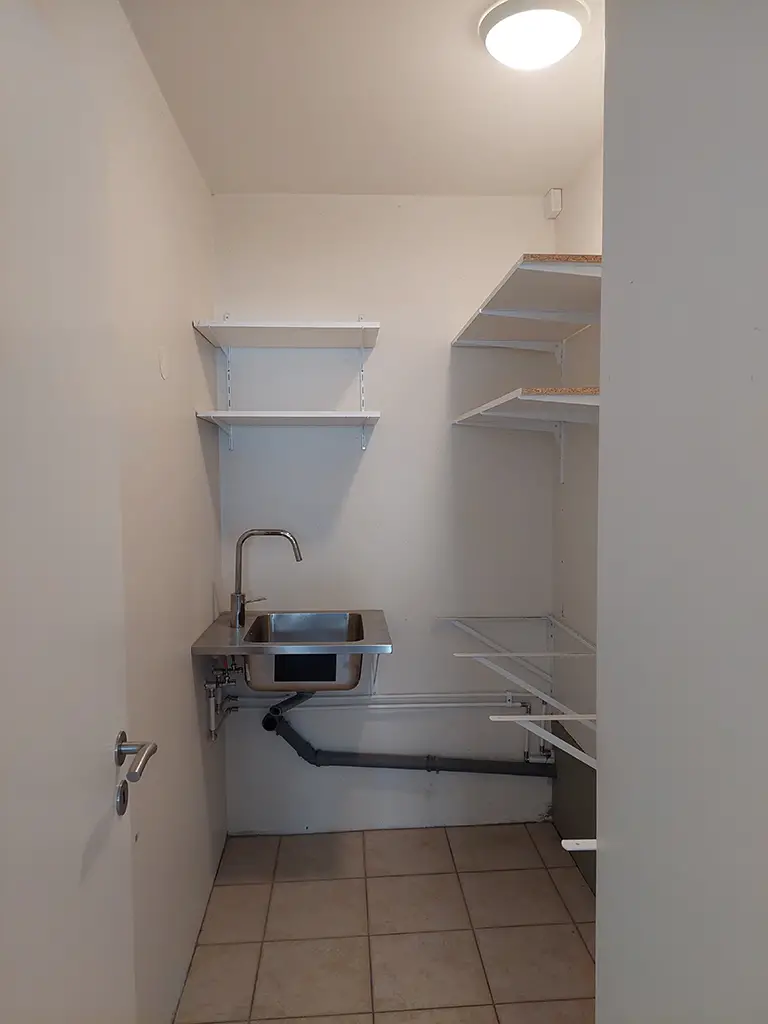
The verdict was in, the room was a winner, thank fuck! Mounted on one wall were mercifully three long shelves (I honestly don’t think I could put up a straight shelf to save my life). There was a ceiling light although the switch for it was located on the outside of the room. Hiding behind ugly plastic covers were holes in the wall with wires behind, so while there were no plug sockets fitted, I had a fair idea you could get a sparky to fit some. There was a medium sized round hole in the bottom corner of the room which had been covered over with some weird sticky foam shit. The Hobbit kindly volunteered to shove his arm in the hole and film where it led (under the bath). I figured it would just make it easier for a plumber to sort out water to the room. The overall size of the space, while not huge, was workable so I got to measuring and thinking up possible layouts.
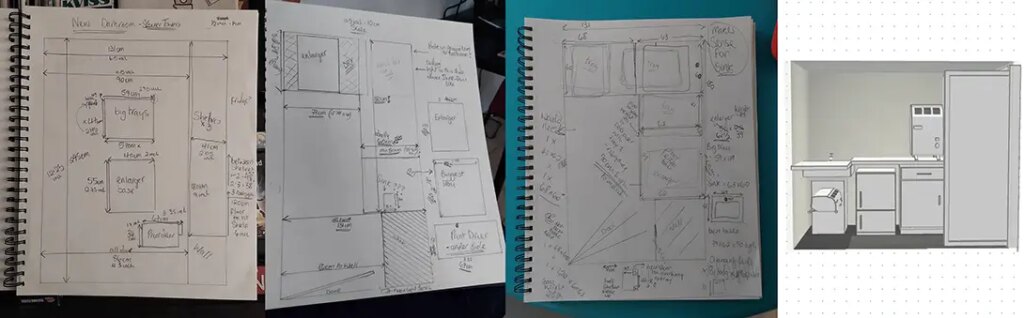
I initially envisioned a large darkroom sink across one wall but wasn’t fully sold on the idea for logistical reasons (it’s not something easy to find in Iceland and importing is a bit flouncy). I’d been given some larger trays so I needed to ensure whatever I did worked with those or it would be a pain in the arse to use them. I measured the room, I measured all my stuff, I drew up possible plans but progress sort of stunted a bit after.
The Hobbit was championing me to build stuff myself, he had this notion in his head that because I’m not afraid to swing hammers around and am a master at building Ikea that I’d somehow be able to knock this room together without breaking a sweat. I just felt eclipsed by the prospect of it. Sure I could buy some wood and bang something together but would it be level? Probably not. Would it stay up forever? Probably, because I’d bang 100’s of nails in that bitch, but would it be pretty? Fuck no. I certainly couldn’t do plumbing (despite the Hobbit saying it’s just water lego) and fuck touching electrics. I felt a bit defeated. However, the Hobbit had other ideas.
My darling Hobbit is a never ending chasm of want, I affectionately call him the unstoppable wanting machine. My darkroom was causing a bottleneck to his never ending list of STUFF so he nudged me with all the grace of a sledge hammer, coming on board to try and help. He encouraged me to compile a list of what I would need to begin with and I decided a sink was probably the starting point as everything else would be built around it. So that’s what we would try to find first.
Armed with measurements and a vague list of ideas we visited Bauhaus. A shop that spans for miles and compels you to desire the sweet relief of death after ten minutes aimlessly wandering up and down the vast aisles. I proceeded to measure all the sinks but alas none would work with the trays and I didn’t want to compromise yet. After slogging around Bauhaus for what felt like a lifetime (it’s like dog years, one minute spent in these big DIY stores is around one hour knocked off your life) we abandoned ship no further along in the quest.
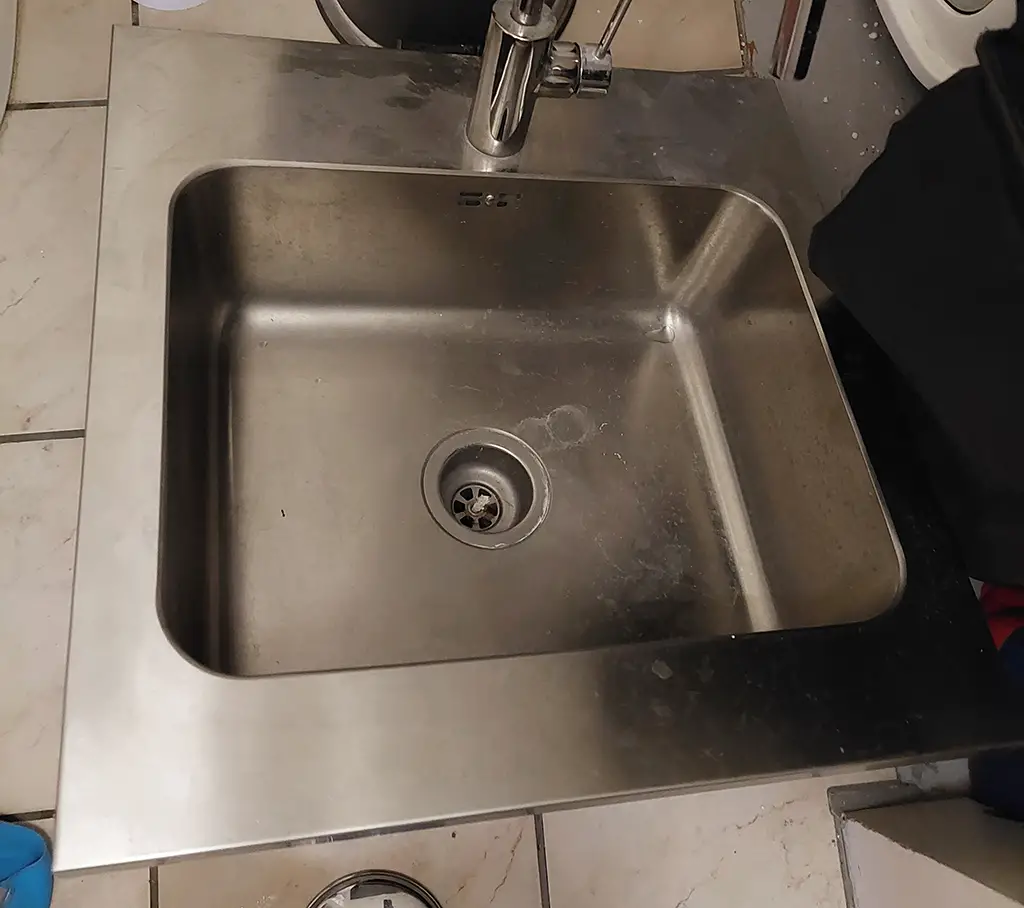
The local recycling centre sells used but functional sinks that have been thrown away, so we threw caution to the wind and went to see what they had to offer. The place is like a legitimate dumpster dive market only open at select times and is quite popular. So we arrived at opening time along with a hoard of other people. This day they had sinks galore and one in particular wasn’t too far off being a usable size. Even though I was clearly deliberating over this sink the vultures were circling and fixing to swoop in at any time. The Hobbit noticed and wisely told me to just buy the fucking thing because someone else would, we’d already been approached by one vulture. From pure desperation and fear of envious vultures I paid the not too shabby price of £8 and wanged it in the boot for later.
Despite the bargain sink I had grown tired of this building lark and so I decided to put all my energy into throwing money at the problem and just find someone to do it for me instead. I needed the big three, electrician, plumber and carpenter, ideally all in one place, so I scoured the internet in search of this mystery saviour. I got nowhere fast so I started asking tradespeople I’d worked with at my day job to see if any wanted a side hustle or knew someone that did. They didn’t.
Then the Hobbit found some people advertising on Facebook. First to arrive was a plumber straight out of a stereotype, slightly bedraggled, bandaged wrist with blood showing through and a penchant for sucking through his teeth. I thought he understood the assignment (fit the sink, get water from the bathroom next door) but he wanted to go about it in the most batshit way. He wanted to take pipes from the laundry room, through the bathroom, behind the toilet and under the bath before finally reaching the darkroom (the equivalent of driving from Spain to France by starting in Portugal). I estimated he would need approximately a football field’s worth of pipe to do it that way but I said just send me a quote. To add insult to injury as he was finishing he took a phone call but instead of leaving he parked his arse on my bath and sat chatting shit on his phone for an eternity while I stood like a lemon willing him to just fuck off. Two weeks later he finally emailed to say he couldn’t take the job due to some bullshit excuses and that was the end of that.
Next through the revolving door of my house was another guy from Facebook. He seemed pretty interested, so much so that I dared to imagine I’d found the one. He said he’d send a quote in a few days, which didn’t materialise. When I contacted him he apologised and said it would be another few days, then a week and on it went with the excuses and promises with no follow through. One month after his initial visit the bubble finally burst and he dumped me and my poxy darkroom because he had bigger fish to fry (I’m paraphrasing). Seemingly regretful about keeping me on the hook for so long he said he would give me some numbers of people who may be interested. He didn’t.
I’m not ashamed to admit this was the straw that broke the Laura. My darkroom didn’t seem to want to materialise beyond a second hand sink and an empty cupboard with no water or power. After having a good cry and a day off from the whole escapade I got back on the hunt, abandoning Facebook as a source because it clearly wasn’t the one. Instead I investigated a company I’d previously dismissed as too flouncy who make countertops called Fantofell. They use a company called G-Verk to do the installation work and so they are who I contacted next. I was beginning to feel like Vivien in Pretty Woman (only less prostitutey) when no one would take her money. I had nothing to lose by trying them and so booked an appointment for someone to come and yank my chain a bit more.
A week later a nice man turned up wearing a bluetooth earpiece, personal organiser in hand and no seeping bandages in sight. He looked at all my plans and said they’d be able to get it done before Summer. I hadn’t expected to ever get it done let alone have a functioning darkroom in a matter of weeks! Icelandic summer is from June to August which is when the whole working population go on holiday simultaneously and services come to a painful crawl, you simply cannot count on being able to get shit done. So on this day in April to not only be told the work will be accepted but it will be complete within one month just felt like a miracle.
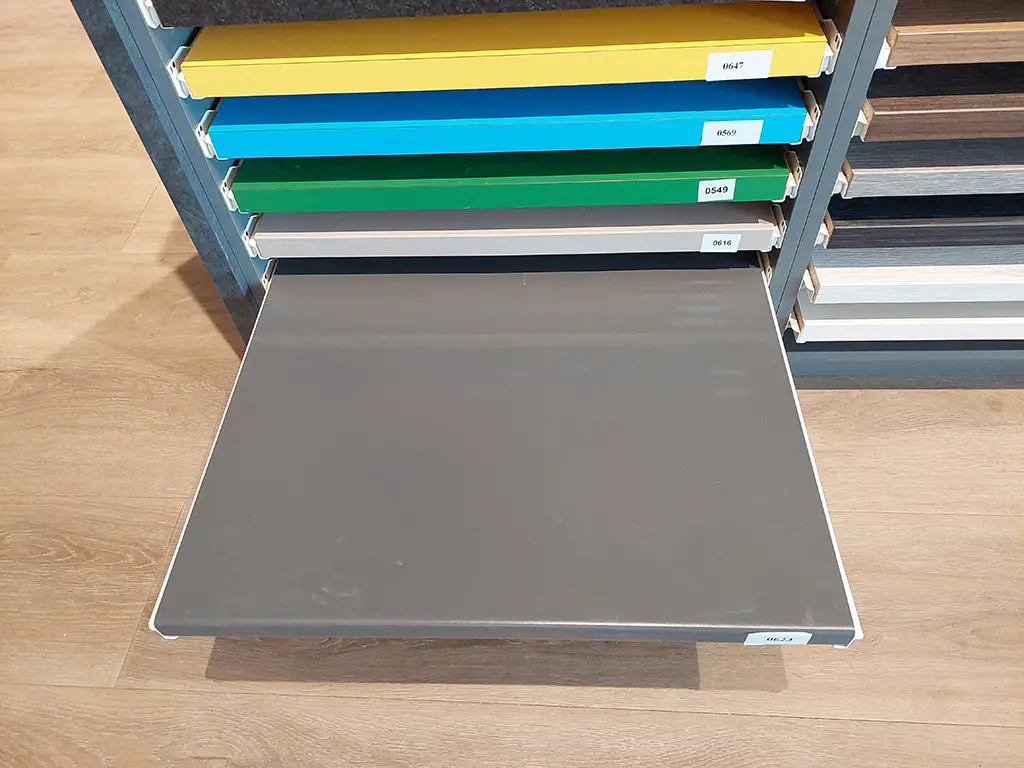
In the meantime I went to Fantofell to choose my countertop, which I did the next day. I plumped for a smooth grey option, easily wipeable, no glare, nothing fancy for a room that is perpetually in darkness. With all this done it was time to just sit back and wait for the start date.
A couple of weeks later I was descended upon by two guys, Wheezy (for obvious reasons) and his mate. I wasn’t prepared for the noise that would ensue of them obliterating my bathroom but no pain no gain. Clearly the old Gert next door wasn’t prepared for it either because later in the day I found her haunting my hallway shouting at the builders. The drama was them ripping off the tiles, drilling out the concrete behind the bath taps to do water lego that would run through the bigger hole Wheezy had opened up from the darkroom. I was the moron that hadn’t considered this part and so the whole bathroom and contents were now dusted with a thin layer of obliterated concrete and old neighbour tears. All in all a very productive first day.
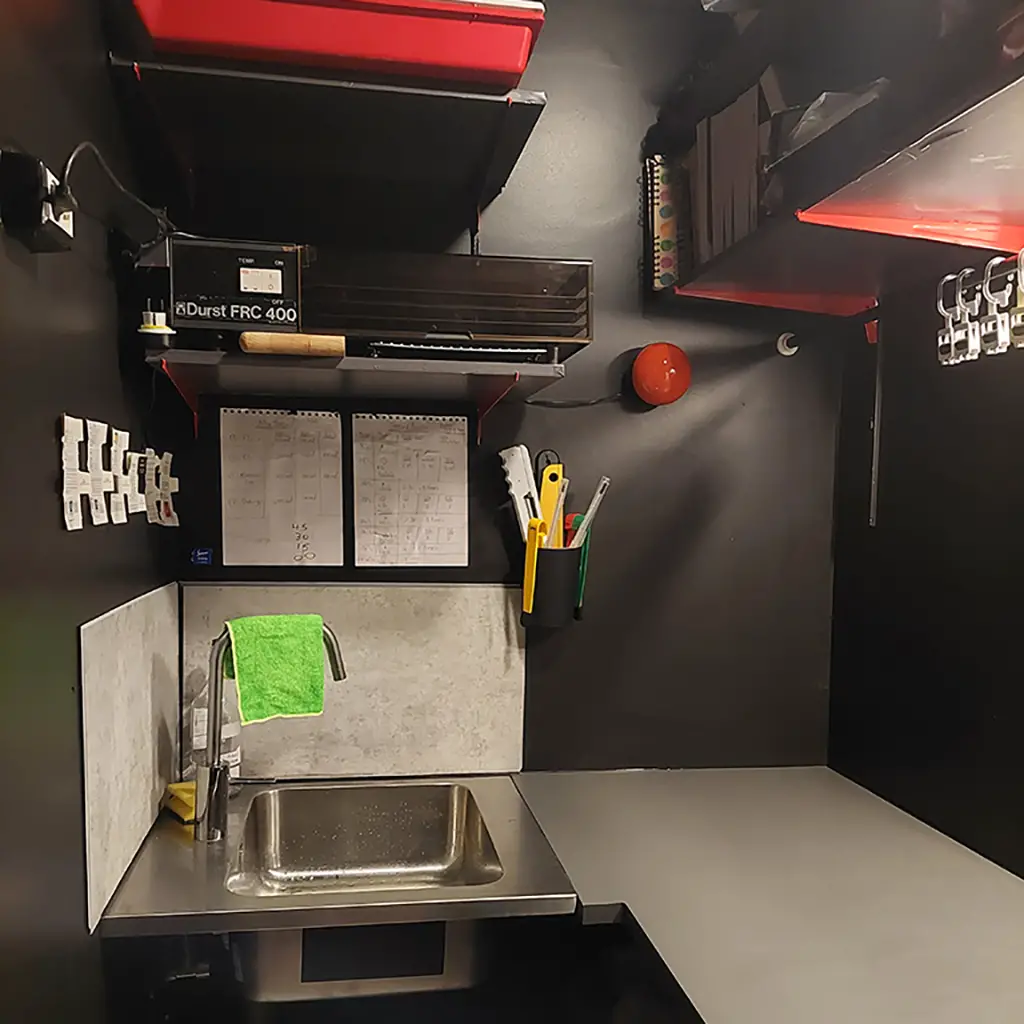
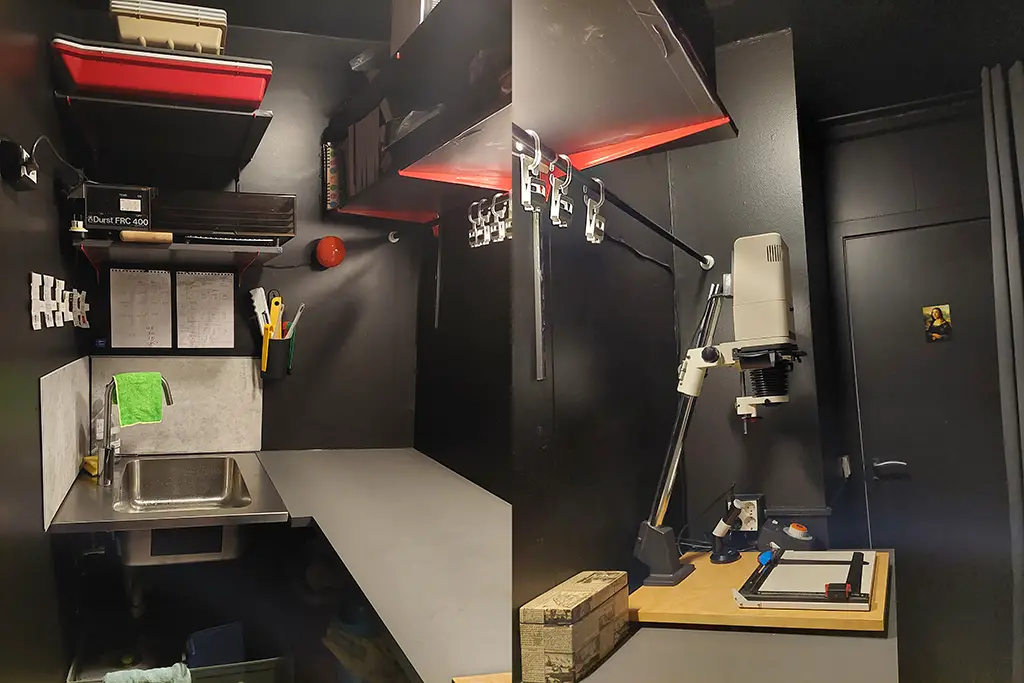
As the week drew on new players entered the chat, one of my favourites being Einstein the plumber who would appear at random to gently rib Wheezy and his mate, grapple with my sink and declare he’d come back to run pipes somewhere. Meanwhile Wheezy and his mate measured my room while shouting numbers at one another for an unreasonable amount of time. Bluetooth Man had given them my measurements for the countertop and it turned out they weren’t entirely accurate and had caused a numberwang. In my defence my measurements were correct for where I’d stood to take them but I’d failed to notice that the room wasn’t quite square, more like a slightly wonky diamond. I trusted they knew what they were doing and just left them to all the loud number exchanging. The brackets they put up filled me with confidence anyway and the sink was fitted in the corner so it was taking shape.
The existing shelves were mounted on adjustable brackets slotted into overly long metal rungs. I had Wheezy cut them in half and remount one half over the sink to house the offshoots of shelves he’d shortened for me to make way for the enlarger to extend upwards. This made the shelving much more accessible to someone vertically challenged as myself.
At some point Captain Birdseye appeared to retile the bombsite bathroom before Einstein could reattach the shower. Meanwhile Einstein himself was preoccupied searching for a missing piece of water lego he needed to finish connecting the sink and Wheezy was waiting for the countertop to be finished before it could be fitted and so next stop was electrics. Enter the Elusive Sparky who would show up for around 5 minutes at a time, say he needed to go get something real quick and then not come back for 2 days.

In fairness to the Elusive Sparky whenever he appeared he did the business and I liked his energy, even if it was a bit chaotic. He had no issue moving the light switch to the inside of the room and fitted several plug sockets for maximum coverage. The biggest issue was the ceiling light. When turned off it still emitted a small amount of light and so was never truly off. I got the Elusive Sparky on the case and true to form he said he needed to get something that would kill the circuit and turned up 2 days later but he fixed it whatever it was. I also asked for the ceiling light to be moved further over because it was being blocked by the shelves but he had a better solution. Naturally that materialised after 2 days and was a small plug in strip light that he fitted nicely underneath the lowest shelf before riding back off into the night one last time.
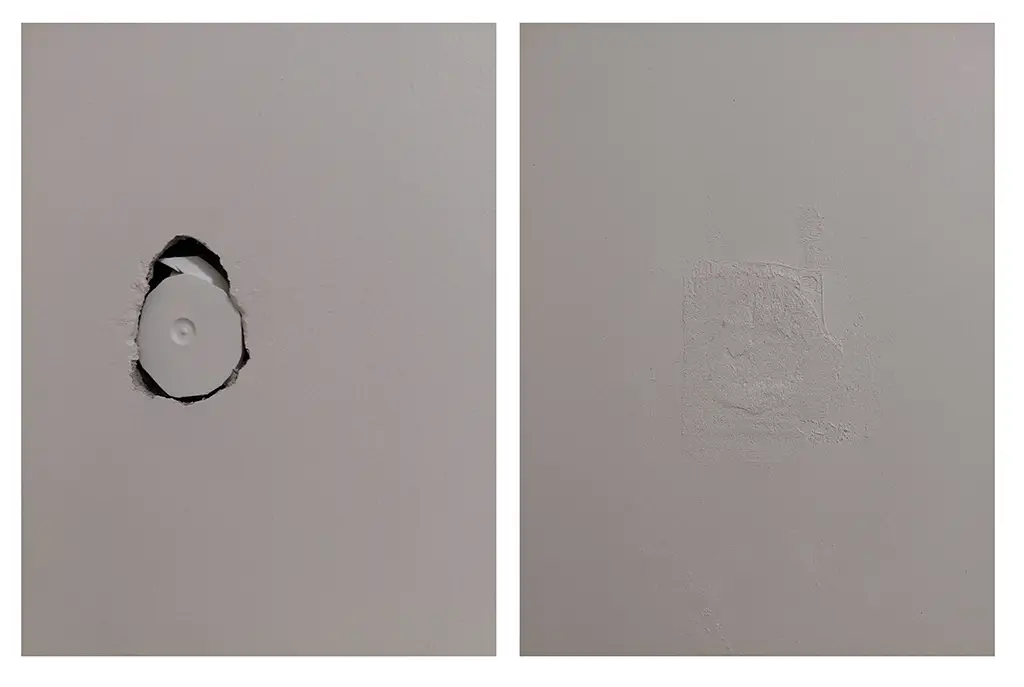

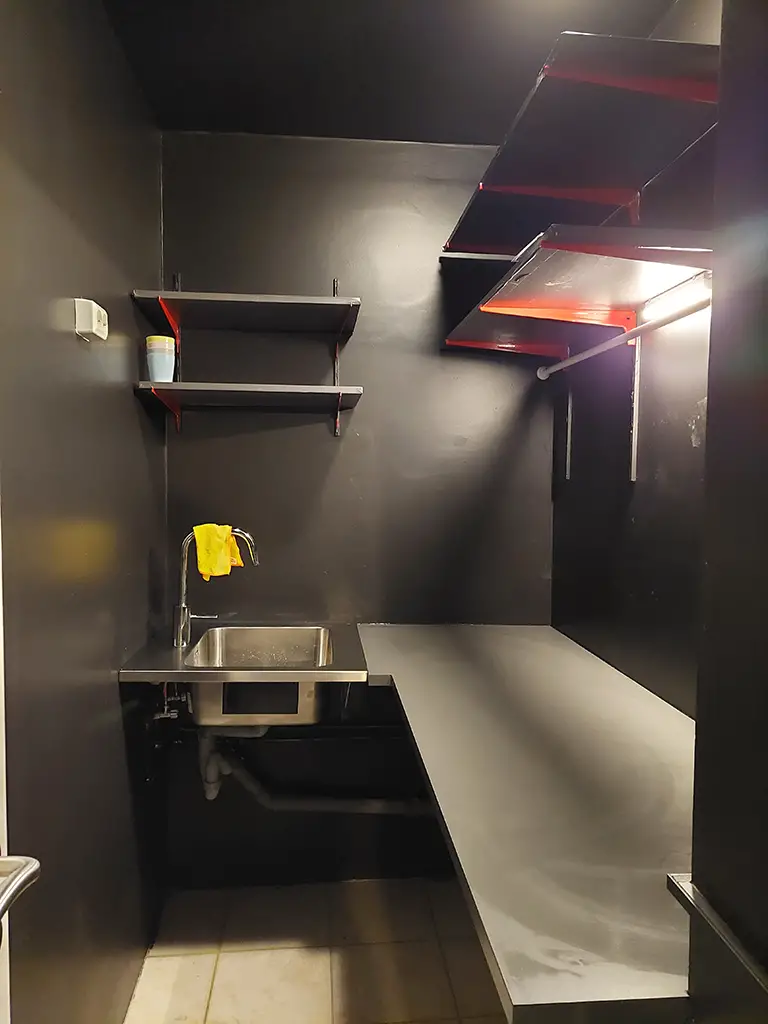
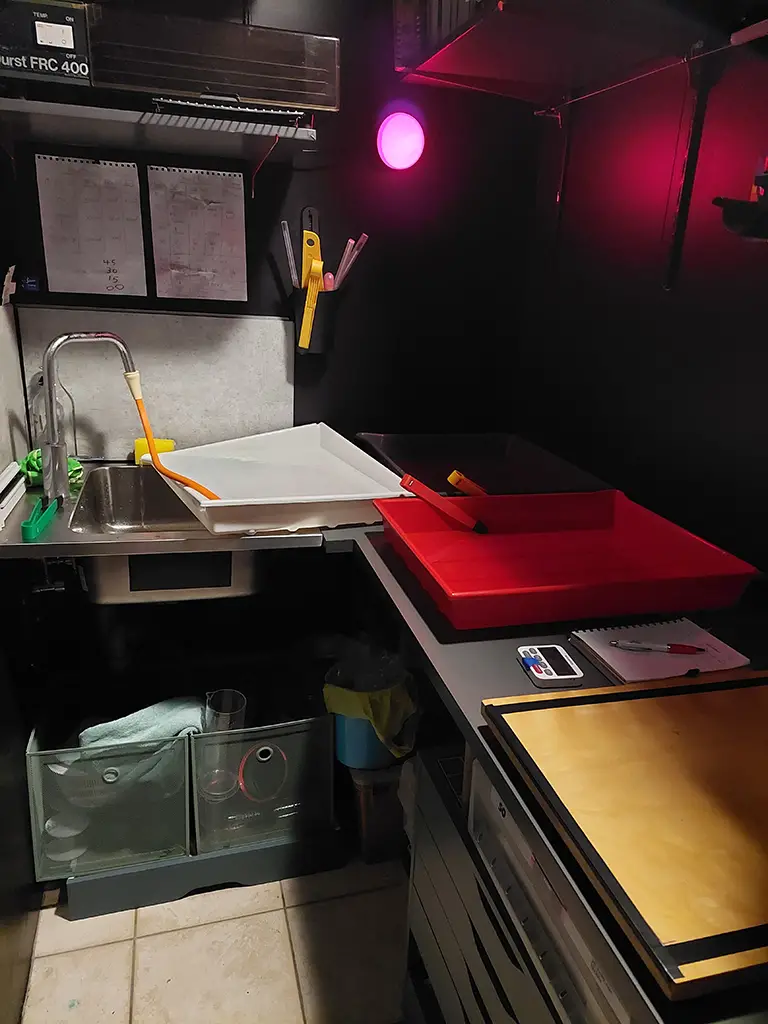
In between all this chaos I took myself back to Bauhaus and stocked up on supplies to paint the room black. My limited DIY skills could handle this much. I filled the holes in the walls by cutting down the plastic covers, shoving them unceremoniously in the holes and polyfiller over. There’s something satisfying about painting a white room black, it somehow feels naughty but I liked it. I didn’t want to paint the shelves as it felt too messy and time consuming so I wrapped them in grey sticky-back vinyl instead. I wrapped the brackets in a bright red, I thought it would add a touch of colour to the room but also thought they might disappear under the red light giving the illusion that the shelves float (they don’t but they do look funky).
The white plug sockets I wrapped up as much as possible in black electrical tape. I asked the Elusive Sparky for black ones but he couldn’t find any wherever the fuck it was he kept disappearing to. In the meantime Einstein came back to finish his gubbins and so all that was left was the countertop which Wheezy and his mate finally fitted at the end of May. Building works complete it was now time to settle in and finish off the bits and bobs that I could do myself.
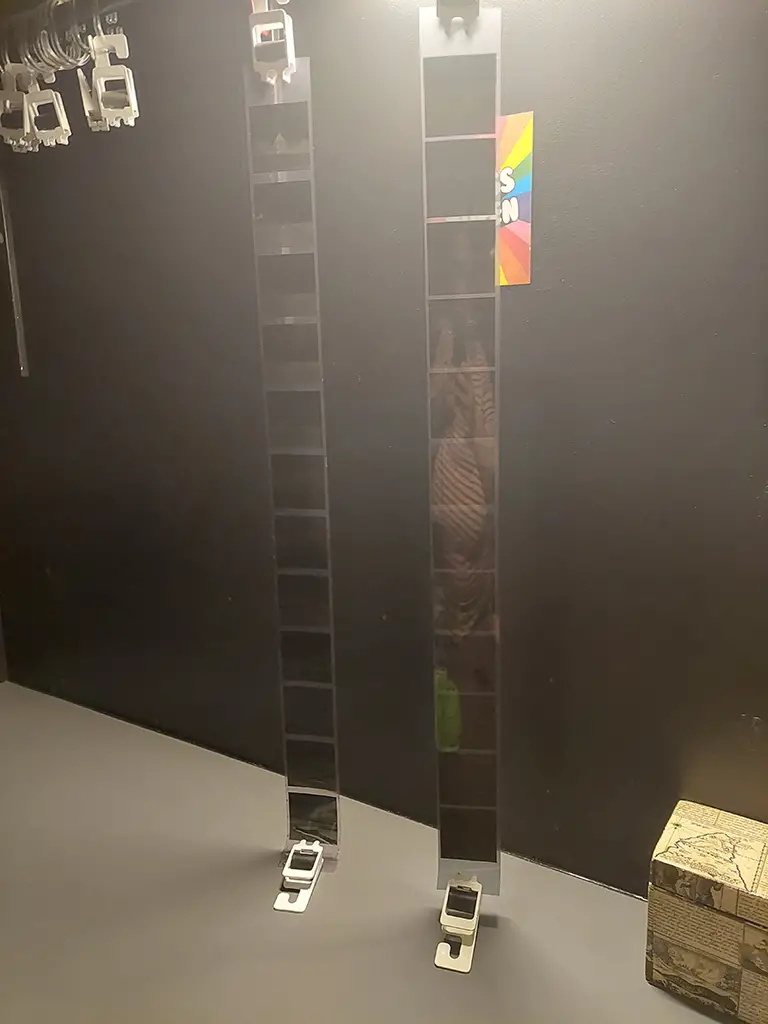
For hanging negatives I mounted an adjustable shower curtain pole underneath the lowest shelf. However, it wasn’t high enough and the negative clips sat uncomfortably on the counter not letting the negatives hang freely. I hung an Ikea wire up instead eliminating the need for curtain hooks and moved the shelf up a touch for good measure which fixed the issue.
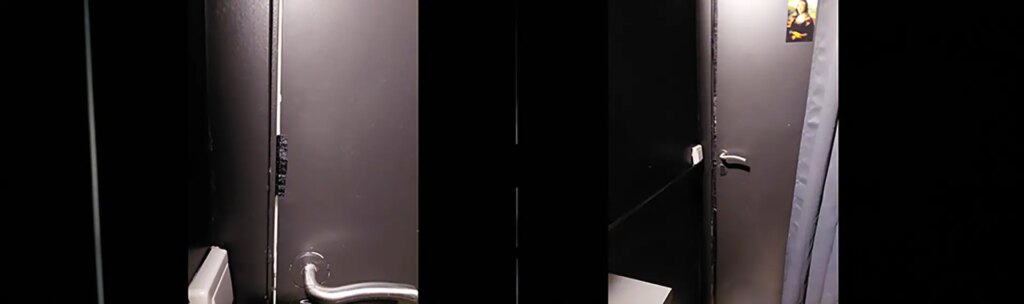
Next step was cutting out light from the cheap piece of shit door that doesn’t fit well in the frame resulting in gaps you could drive a bus through. I bodged the biggest gap at the bottom of the door by sticking on a plastic strip I found in Bauhaus. It gently scrapes the floor as you open the door but it blocks most of the light anyway. The opening side of the door I used sticky black vinyl to create a pleat that covers the gap when closed. What can I say? It works, it shouldn’t, but it does. I hung two blackout curtains on one shower curtain pole above the door to block out any remaining light. The ideal future solution would be a better door but for now this works.

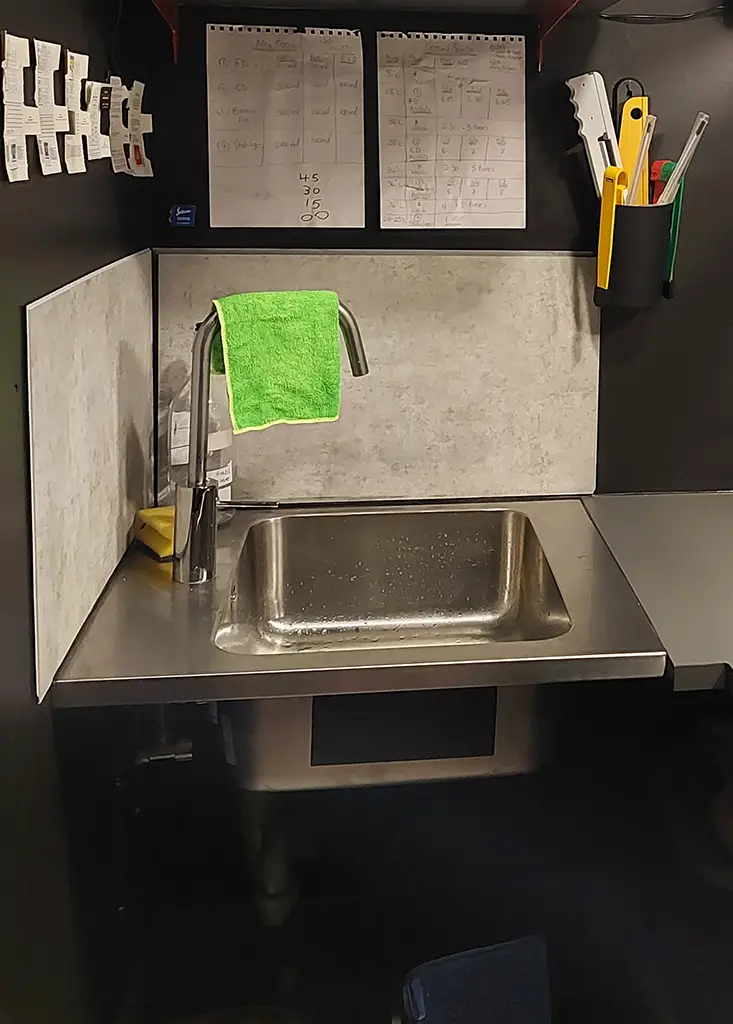
Moving over to the sink and the tap has all the pent up pressure of a prepubescent teenager, spraying its load up the wall whenever you go near it. So on a quick visit to the local DIY store (not the giant life force sucking one) I picked up two large bathroom tiles and some super strength tile glue and stuck those bitches to the wall as a backsplash. They looked better before I attempted to do the sealant, slightly poisoning myself with the fumes in the process, but they do the job and now my wall won’t be ruined by over enthusiastic taps.
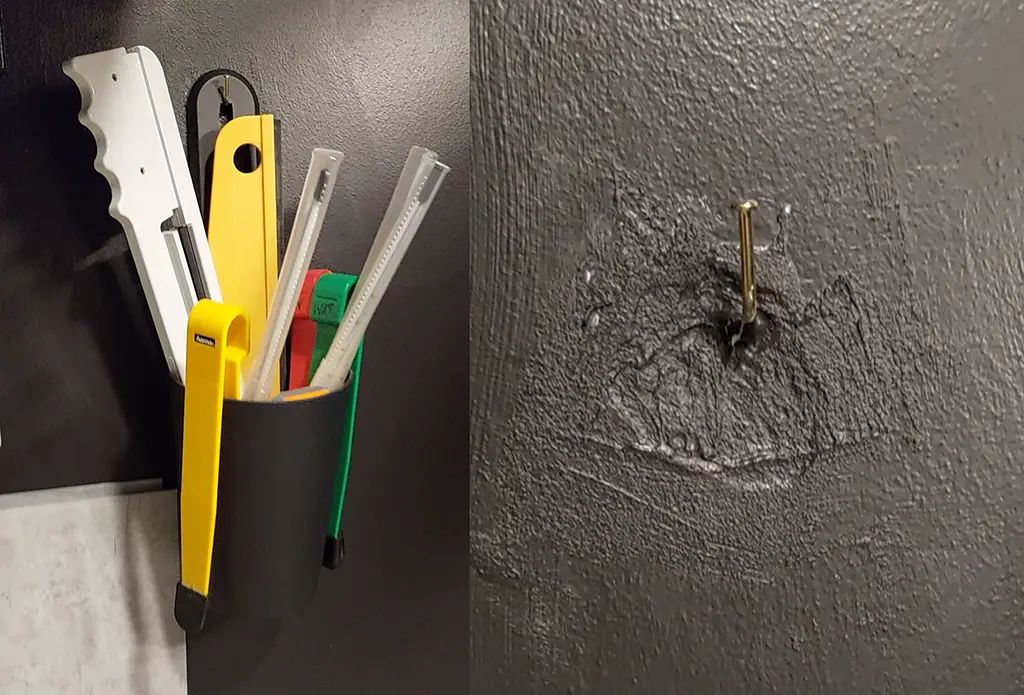
One consistent issue was the walls. They’re like drilling into granite. I have no idea what my house is made from but these walls are not ones to take nails, picture hooks or sharpness of any kind. Several bent pins and one broken drill bit later I gave up on conventional methods. The most creative was while trying to put a pin above the sink to hang a pot with tongs and thermometers in. Using a hammer simply bent the pin and took half the wall out with it in protest. I attempted to drill a hole in the centre of this mess but this just angered the wall further. Born out of frustration I superglued the bent pin into what was now a far too wide but not very deep hole and polyfillered the fucker in and painted it black. The pot hangs, it’s sturdy enough but I wouldn’t hang anything more substantial from it that’s for sure.
I took the room for a full test drive as soon as possible. The only problem I had was the water tray didn’t fit quite right and after trying multiple angles I settled on a precarious balancing act. Perhaps shocking to no one it eventually collapsed into the sink and sent water everywhere. I posted about it on Instagram and got a nice message saying I should try a Kodak Syphon. A quick google revealed it to be the perfect tool for the job and I received one for Christmas as a well hinted gift.
Christmas day revealed it to be missing the bit that attaches to the tap as well as the metal clips holding it to the tray. However, due to me being too stubborn to send it back I made it work using a combination of my negative washer hose, curtain hooks and gravity and hey presto it works! I can now have the trays in a good position and constant flowing water on the wash.
As an honourable mention I‘m still in two minds about whether to get a fridge or not. Feel free to comment your thoughts on that and if you think you should or should not refrigerate open chemicals because the internet sure as shit doesn’t know the answer as far as I can tell. But all in all I‘m definitely in love with my little Laura dungeon and I’m sure it will grow and adapt over the years to come.
So in conclusion of this epic tale of one woman’s dream to have her own darkroom I’d say I’ve achieved what I set out to. It’s taken time, some heartache, several builders and some tweaking on my part but definitely very little DIY skills. It definitely goes to prove you don’t need to know how to build stuff with wood and shit to have your own darkroom but it certainly helps if you know someone who does!
Go for Laura!
Website www.hassywonderland.com
Instagram hassywonderland
Other things I‘ve written at jolly 35mmc here
Share this post:


Comments
Bob Janes on Building a Darkroom with Little to no DIY skills – by Laura Cogan
Comment posted: 13/03/2023
Comment posted: 13/03/2023
John Fontana on Building a Darkroom with Little to no DIY skills – by Laura Cogan
Comment posted: 13/03/2023
Comment posted: 13/03/2023
Comment posted: 13/03/2023
Comment posted: 13/03/2023
Comment posted: 13/03/2023
Comment posted: 13/03/2023
Comment posted: 13/03/2023
David Wood on Building a Darkroom with Little to no DIY skills – by Laura Cogan
Comment posted: 13/03/2023
Comment posted: 13/03/2023
Art Meripol on Building a Darkroom with Little to no DIY skills – by Laura Cogan
Comment posted: 13/03/2023
Comment posted: 13/03/2023
Martin JONES on Building a Darkroom with Little to no DIY skills – by Laura Cogan
Comment posted: 13/03/2023
Comment posted: 13/03/2023
Laura Cogan on Building a Darkroom with Little to no DIY skills – by Laura Cogan
Comment posted: 13/03/2023
Juna on Building a Darkroom with Little to no DIY skills – by Laura Cogan
Comment posted: 13/03/2023
Laura Cogan on Building a Darkroom with Little to no DIY skills – by Laura Cogan
Comment posted: 13/03/2023
Ted Ayre on Building a Darkroom with Little to no DIY skills – by Laura Cogan
Comment posted: 14/03/2023
Comment posted: 14/03/2023
Alessandro Bellafiore on Building a Darkroom with Little to no DIY skills – by Laura Cogan
Comment posted: 14/03/2023
Comment posted: 14/03/2023
Joe Van Cleave on Building a Darkroom with Little to no DIY skills – by Laura Cogan
Comment posted: 14/03/2023
Regarding a safelight, I’ve recently started using a head-mounted LED light that has a comfy elastic headband strap and red LED as one of its functions. The angle of the light can be adjusted. Wearing it now fills in those otherwise dark corners of my darkroom that used to always be in shadow.
Comment posted: 14/03/2023