In a recent post on 35mmc, I talked about shooting with 110 film in the second decade of the 21st century and highlighted some challenges involved in shooting the format.
While I got some decent results from my cut-down Kaiser reels, I got the impression that the grooves in the reels were obstructing development of the very edges of the frame using my preferred ‘stand’ development method.
A number of 35mmc subscribers followed up in comments with possible sources of processing reels and systems that will take 110 / 16mm film. I’m intending to add a postscript to that article in due course which will incorporate their suggestions. Certainly, if you have access to the commercial reels they mention from Jobo and Yankee Clipper (which seem to mainly be available in the US) and are planning on doing a fair amount of 110/16mm developing, these sound like a good way to go. I may treat myself if I ever get back to NYC (sigh).
On my side of the Atlantic there don’t seem to be any commercially available 16mm reels available. I was sure that there must be a simple way of developing 110/16mm and getting consistent results, without breaking the bank. What I’ve done is to go back to my original idea of wrapping the film, emulsion-side outermost, around a tube. This article seeks to document my method, show you some (reasonably clean) results and demonstrate how to make your own version. Materials will cost something in the order of £3.48 (£2.49 for a set of plastic folder dividers, plus another 99p for a roll of insulating tape).
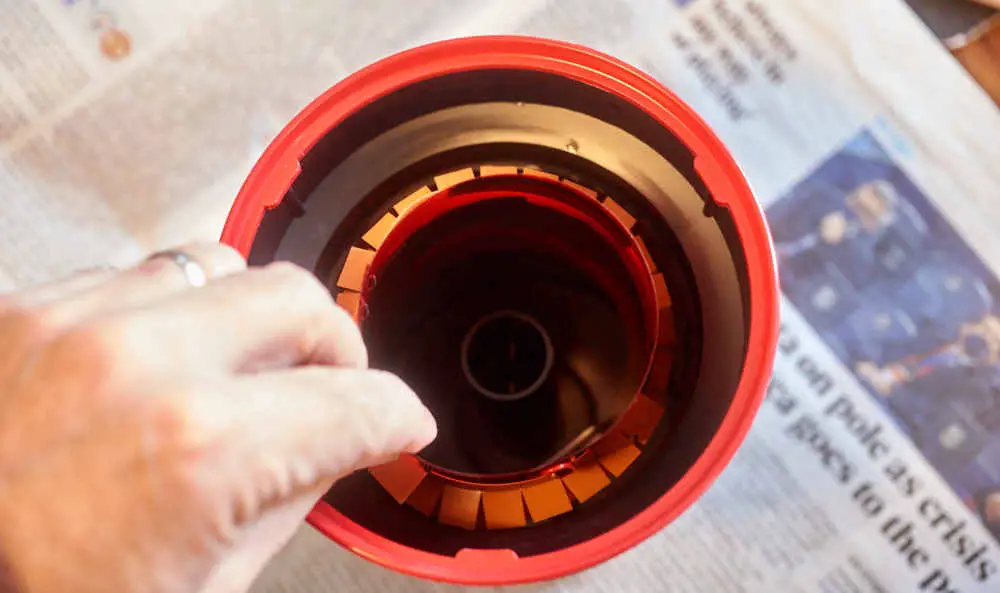
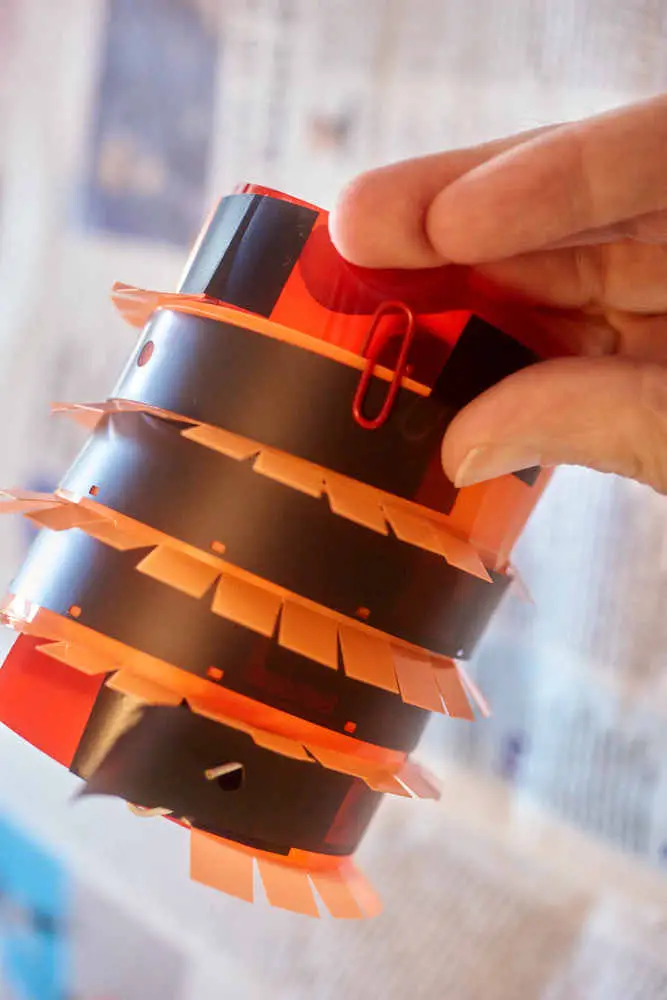
The 110 ‘Tube’
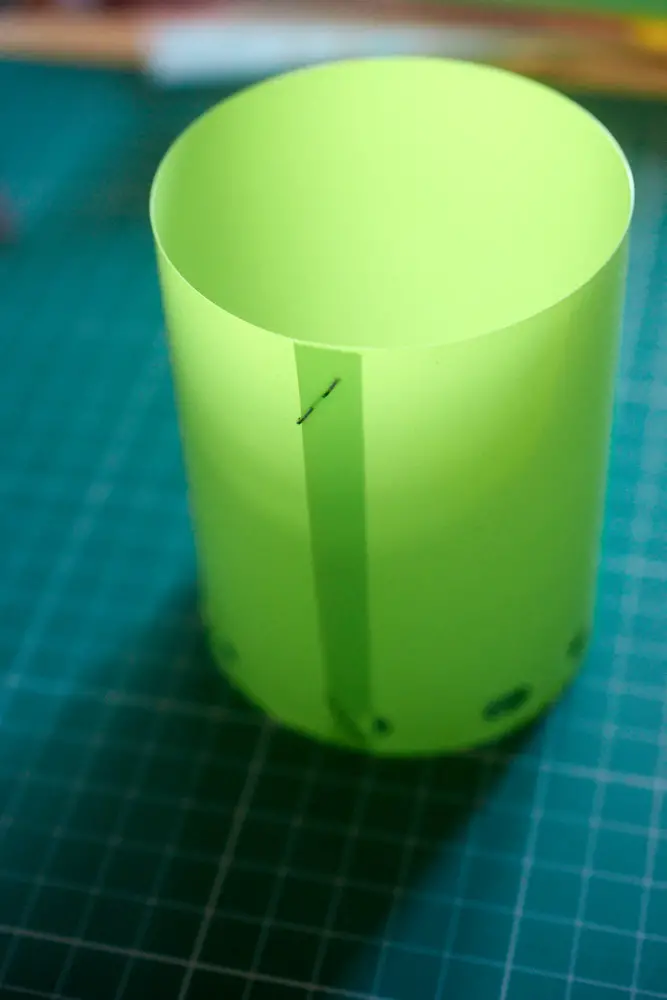
The tube itself is formed from a sheet of flexible plastic, although a suitably sized bottle with the top and bottom cut off could also be used. This tube sits inside an existing developing tank (in my case a Patterson 4) with about 1 cm between the outer surface of the tube and the inner surface of the tank. Because the tube itself is not light-tight, the inner core of the tank needs to sit inside the tube to complete the light-seal and stop stray light exposing the undeveloped film. Wrapped around the tube is a strip of flexible plastic which serves as a guide to help align the film in the dark bag. The strip is just a bit deeper than the film itself, and incorporates a fanned out section of approx 10 mm below it to stop one loop of film slipping down onto the one below. The ‘fan’ also serves to keep the tube a reasonably standard distance from the outside of the tank.
As you can see, the tube is higher than it needs to be for the length of a spiralled 24 exposure 110 film (78 cm): this is because the tube will tend to float in the developer. The extra height of the tube will ensure that the bit of the tube holding the film will stay under the developer when the top is in contact with the water-tight lid.
Loading the tube
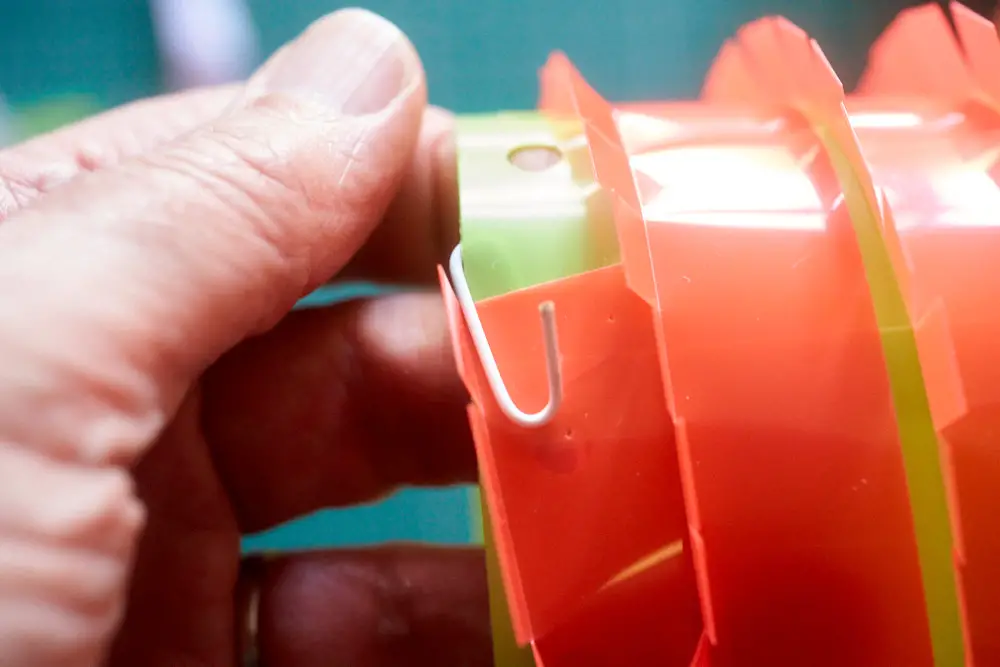
When loading the film in the dark, you need to ensure that you are loading the film with the emulsion outermost — so you will be coiling it against its natural curl. A paper-clip with an end bent out will help to hook the end of the film to.
You then need to feed the film between the little tabs, turning the tube as you go…
At the top of the tube, the film can be held with another paper-clip.
Development
To ensure coverage, I overfilled the tank — not a huge extra expense when you are using R09 at 1-50 for stand development. I think I made up 650ml, which is well over the top for even 2×35 mm films in a Patterson 4 tank. I can confirm that the tube works very well for stand development (1 hour according to my app). Aware that the developer would be entering via the centre of the tube, I had cut away a triangle of plastic from the bottom of the tube to make sure the developer could flow to the outside of the tube. In the end the fact that the tube wants to float meant that the developer flowed quite freely between the inside and outside the tube. The tube should also be fine for inversion development, but unfortunately it will be too high to fit between the spirals of a Patterson reel set on its widest 120 setting. Those who like to agitate by twiddling the little stick in the centre of the tank may have to settle for picking up the tank and ‘swooshing’.
The results
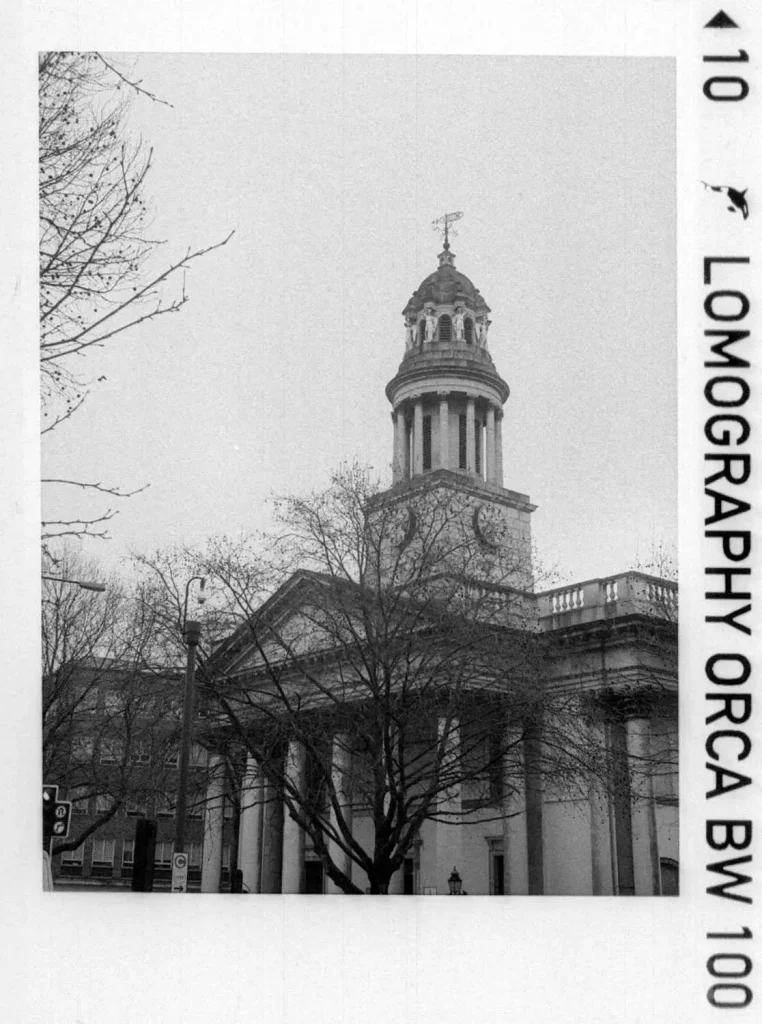
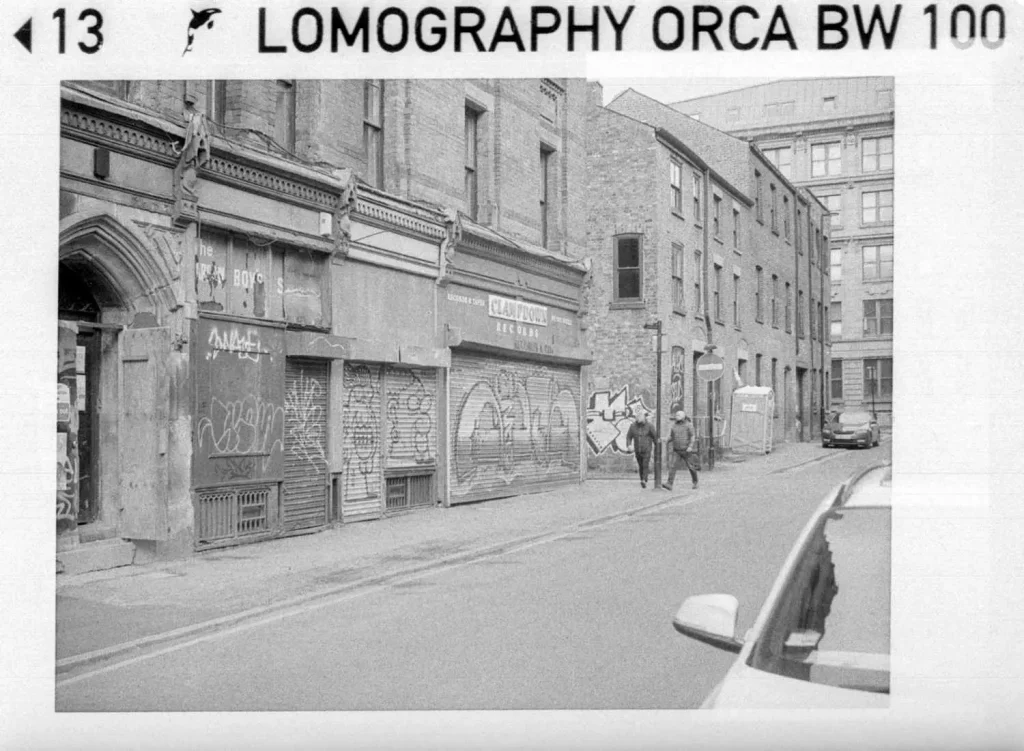

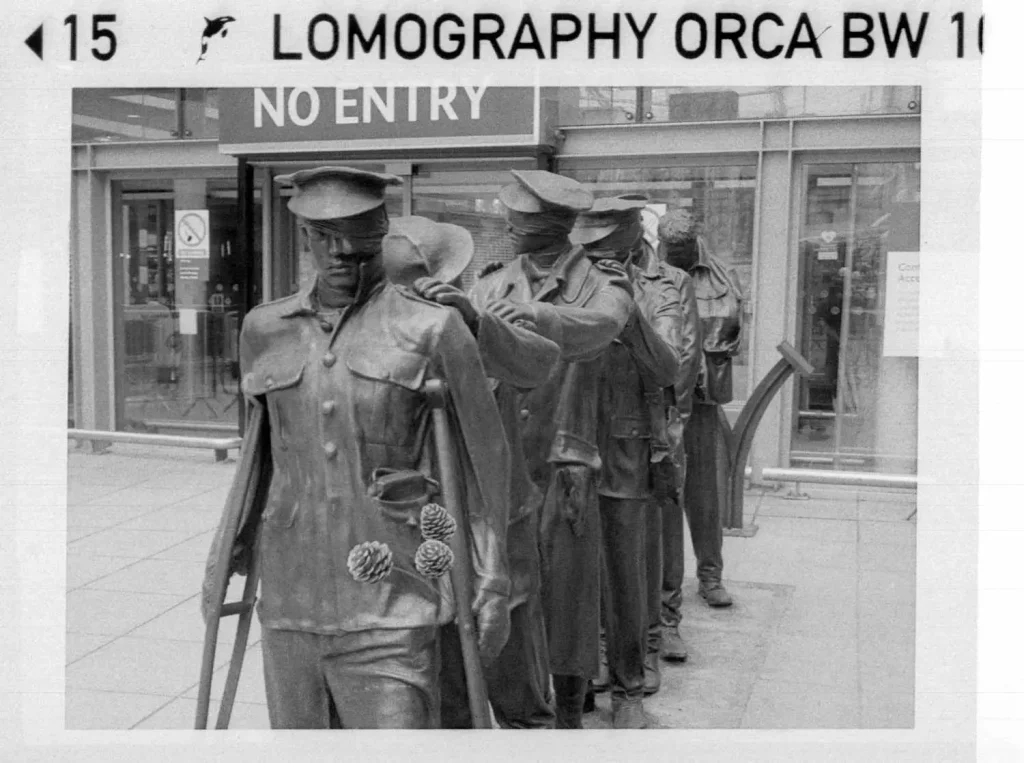
All these were taken with a little Minox 110s rangefinder camera. As you can see, the resultant pictures are cleanly and evenly developed.
How to make your own ‘Tube’
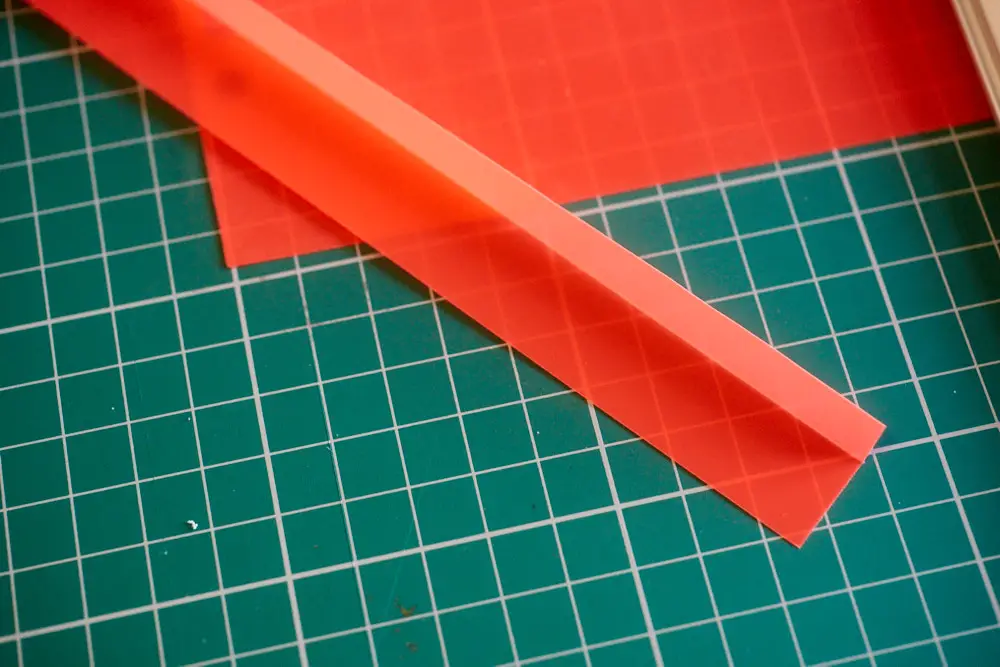
Any plastic sheet material should work, but I used some plastic folder dividers. I recommend cutting mats, steel rulers, sharp knives and lots of care.
For a Patterson ‘Super System 4’ tank 24×9 cm works fine — those dimensions should work reasonably well for other tanks that take two Patterson reels. The binder slots should help chemicals flow from inside to the outside of the tube (although as the whole thing floats, it is not too much to worry about if the plastic doesn’t have holes in it).
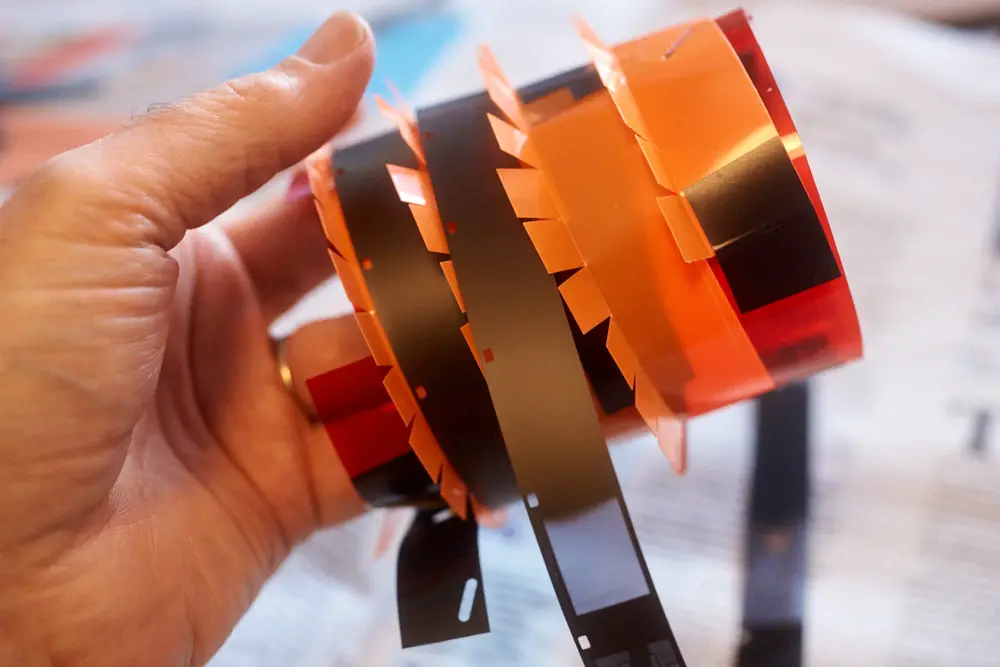
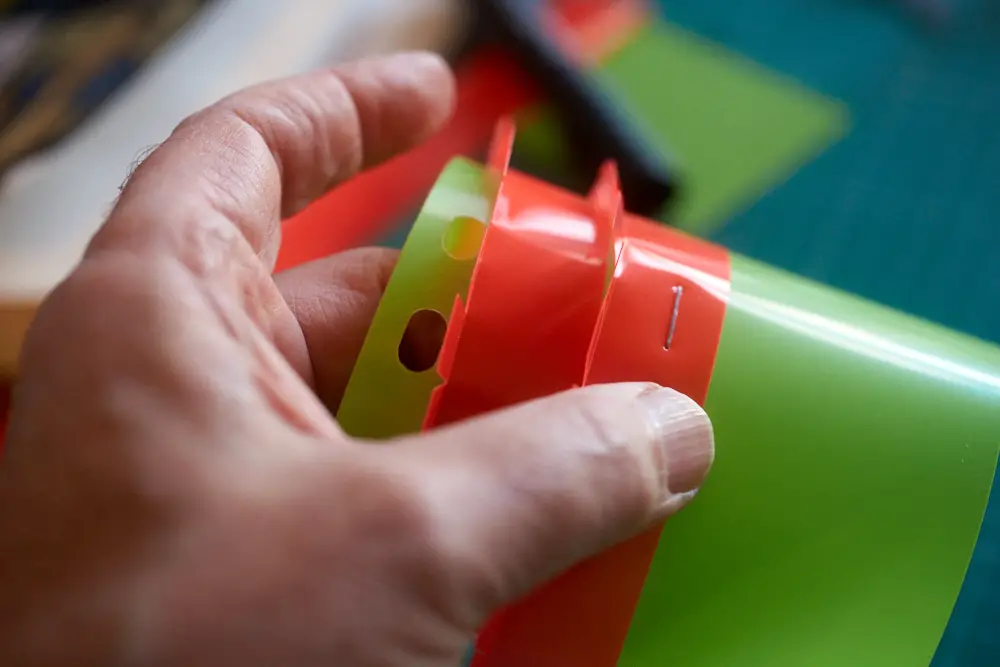
The sheet joined to form a tube with a 1 cm overlap. I originally used electrical insulating tape for the prototype, but reinforced with staples in case the developer affected the tape. In the event it was fine, but I’d mislaid the roll of tape by the time I was making the demo one. Stapes by themselves should be fine, but will probably show rust fairly quickly and may scratch the non-emulsion side of the negative – so I’d recommend covering them with some form of tape.
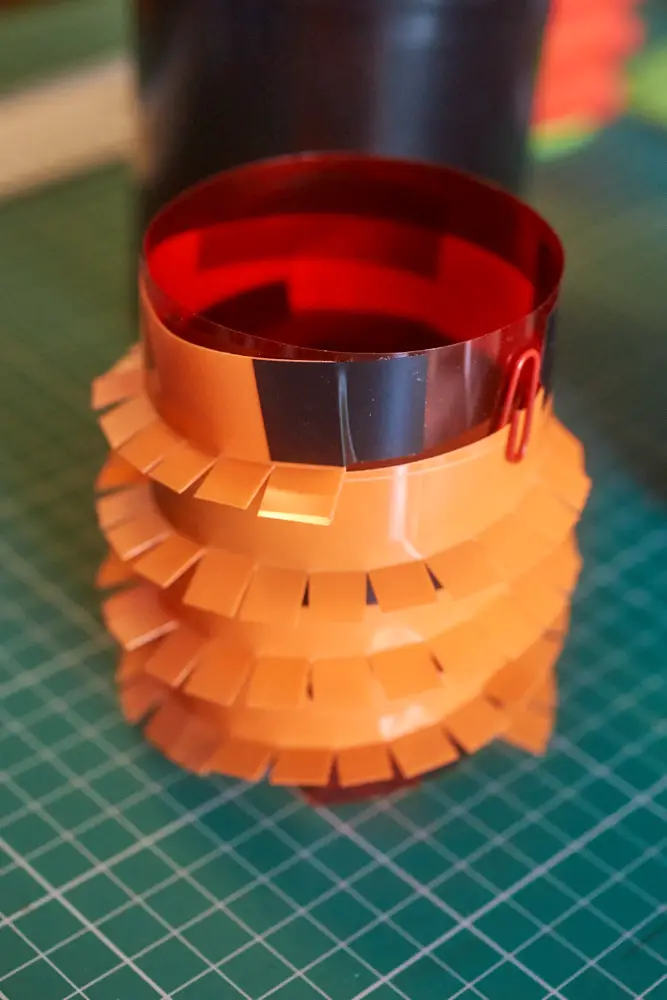
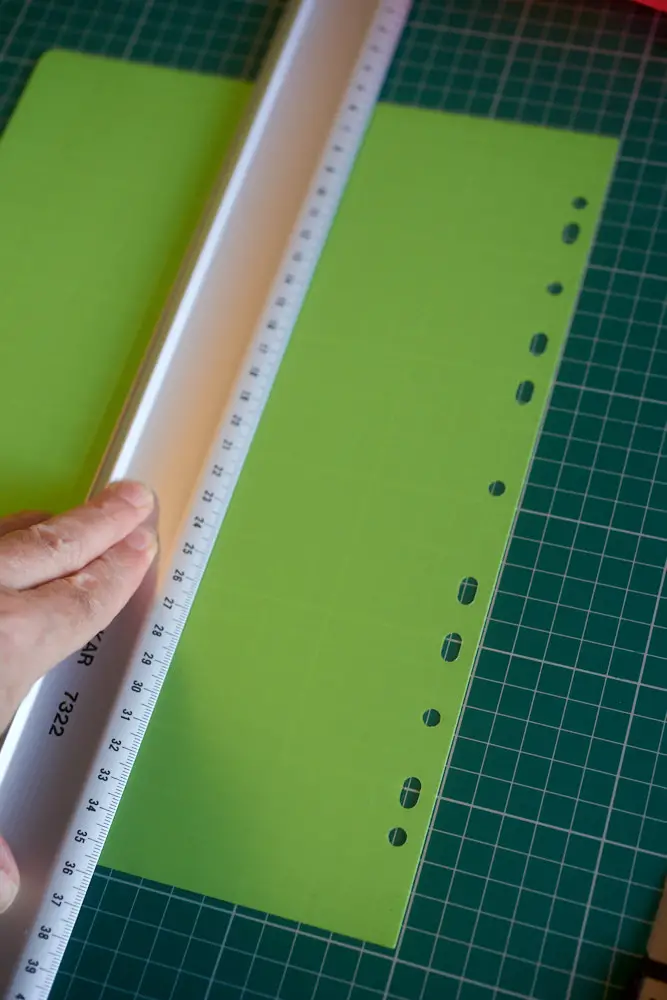
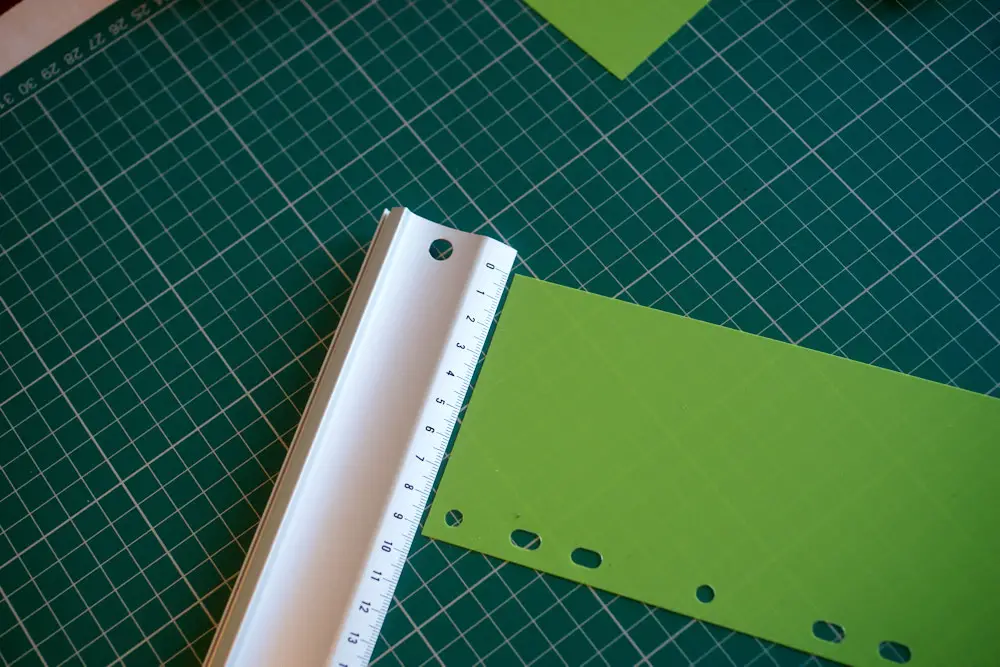
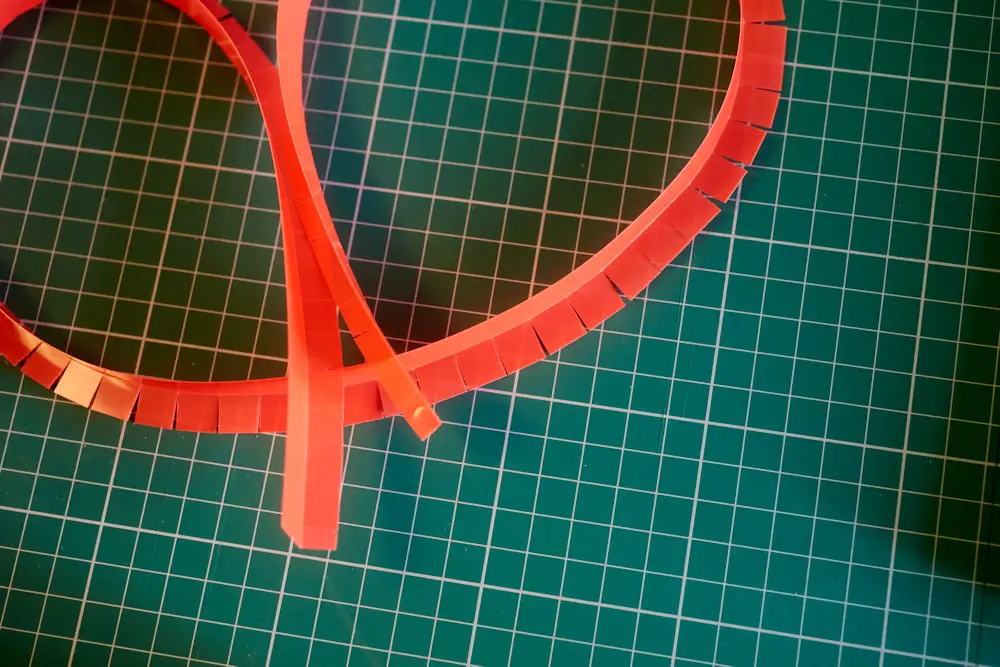
Cut 27 mm strips off the long side of one of the plastic sheets and lightly score one side with the back edge of the knife 10 mm in. Fold at this line so that the strip forms a ‘L’ shape with one bit 17 mm and the other 10 mm. You will need three of these strips.
On the short leg of the ‘L’ make cuts every 10 mm — this allows the strip to ‘fan-out’ as it wraps around the tube.

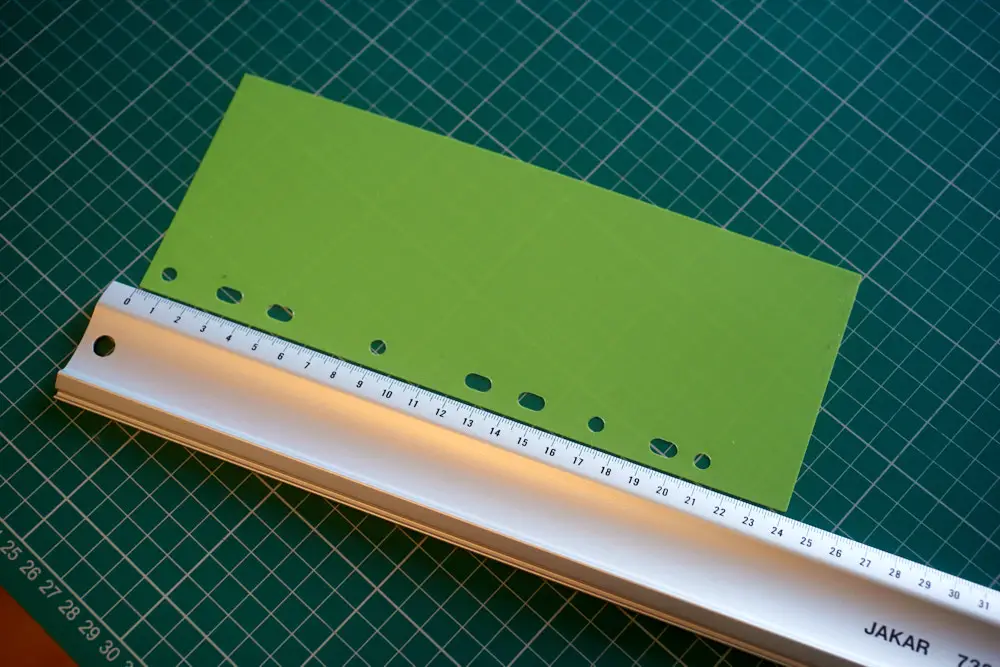
Once you have your three lengths of fanned strips, join them together with a short overlap and then trim so that the total length is 78-80 cm.
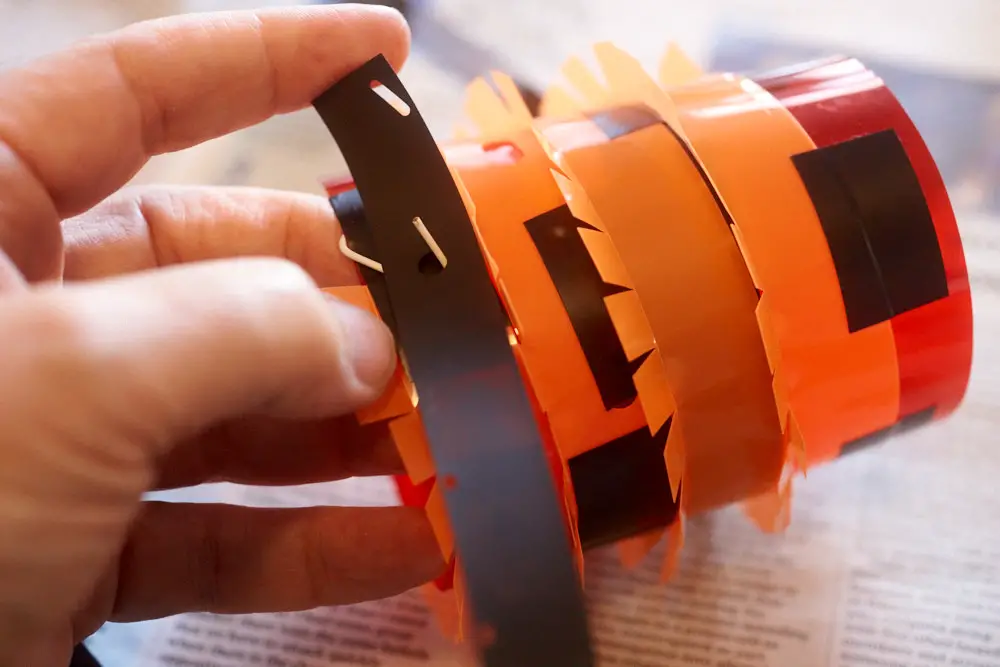
Clip one end of the ‘L’ strip to the bottom edge of the tube, then feed the strip around the tube, securing in place each time around, either with a staple or with insulating tape.
The strip will probably go around the tube just over 4 times. Try to coil closely enough that you get a decent ‘collar’ at the top of the tube as that will help make sure all of your film stays under the developer.
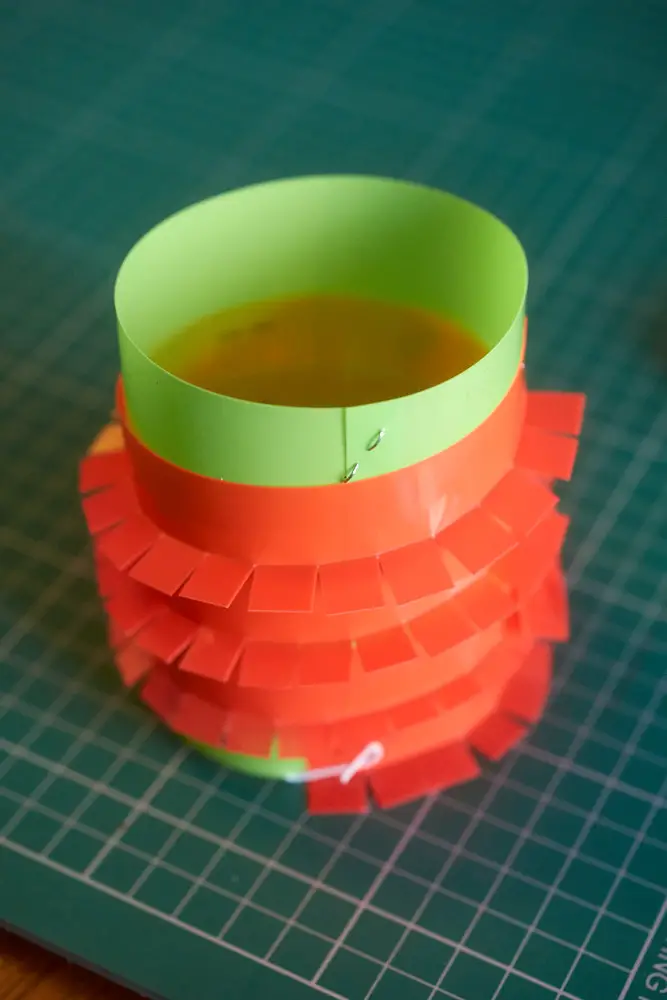
If you fix paper clips at each end of the strip it will enable you to secure the film when it is in the dark bag. Leaving the bottom one with a ‘prong’ sticking up will make securing the start of the film easier in the dark. The other end of the film can be held by a paper-clip used in the more conventional way.
The tube in place in the Patterson 4 tank. If using one of these tubes in another type of tank, check that the length of the tube does not interfere with securing the tank lid. Make sure that core is in the tank before the lid goes on to make sure everything is light-tight.
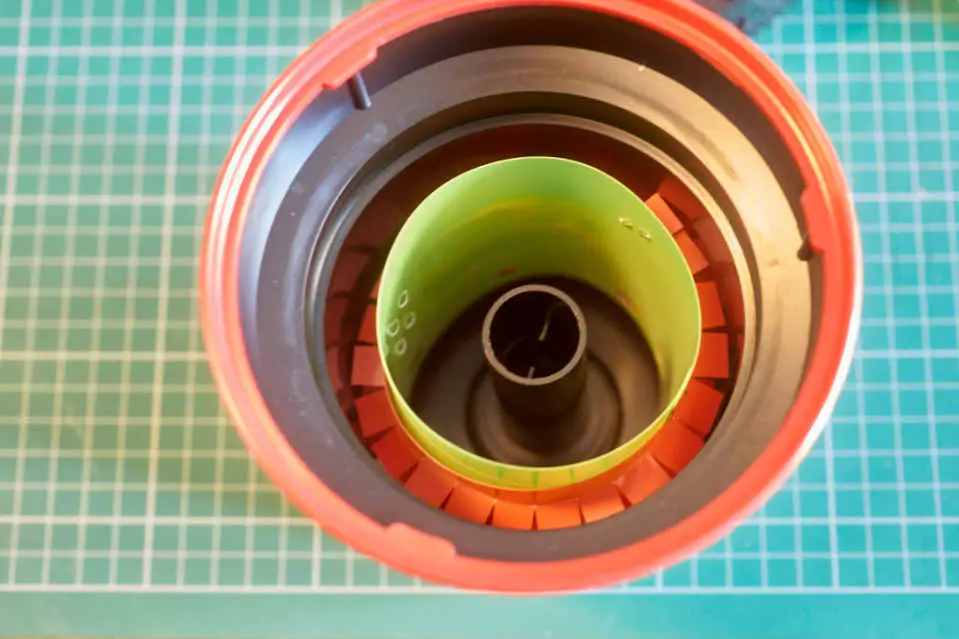
I stress these tubes don’t have to be dayglo. Those were the colours I had, and it seemed like a way of differentiating the different bits for the demo photographs.
Conclusion
This is one solution to the problem of holding 110 or 16mm film for development at home. I stress it is not the only way — and it may be some distance off the best way, but it does seem relatively effective, particularly for stand development. I’d love to hear other ideas or relevant experiences in the comments, and if you do try to make one yourself, I’d love to know how you got on. If this article inspires you in any way to solve any other problem you are up against — all the better.
Share this post:


Comments
CLARE HENNESSEY on A DIY Solution for 110 / 16mm Film Developing – Take the Tube – By Bob Janes
Comment posted: 13/04/2021
Tobias Eriksson on A DIY Solution for 110 / 16mm Film Developing – Take the Tube – By Bob Janes
Comment posted: 13/04/2021
Do you or anyone have experience exposing 16 mm film in 110 cameras? I wish to find a doable solution - the big obstacle is sprocket positions and how the cameras 'read' the film.
Comment posted: 13/04/2021
Comment posted: 13/04/2021
Nigel on A DIY Solution for 110 / 16mm Film Developing – Take the Tube – By Bob Janes
Comment posted: 13/04/2021
Comment posted: 13/04/2021
Mikko on A DIY Solution for 110 / 16mm Film Developing – Take the Tube – By Bob Janes
Comment posted: 13/04/2021
Comment posted: 13/04/2021
David R on A DIY Solution for 110 / 16mm Film Developing – Take the Tube – By Bob Janes
Comment posted: 20/11/2025