Back in 1972 Kodak introduced a new format for stills film. Kodak reused the 110 designation, which had originally been used for a roll-film format about 70 years previously. The 110 cartridge was a single integrated unit which was easy to load and required no rewinding at the end of the roll. The frame size was 13x17mm – not all that dissimilar to the digital Micro 4/3rds format (13.5x18mm).
Having recently borrowed a couple of 110 cameras, I decided to go about shooting, developing and scanning the film myself.
A bit of History & Background
Developments in film emulsions meant that miniature cameras (135 format) enjoyed great popularity in the 1960s, but there were problems perceived with the format. For one thing, although the film could be contained in a small light-tight cassette, there was a need to return the film to the cassette after exposure. This tended to lead to rookie mistakes like opening the back before rewinding and so losing at least some shots off the roll (less of a problem with later 135 cameras, which tended to automatically rewind). There was an attempt to deal with this with the introduction of 126 film, which produced square 28mm images on 35mm width film with a single sprocket hole per frame, but the 126 cartridge didn’t hold the film very flat in the gate and limited how small you could make the camera.
The other problem was economic and lay with the original use of 35mm film for cinema production. Because of the need to feed the film through cinema equipment at high speed and accuracy, 135 film had sprocket holes on each edge. Those sprocket holes meant you lost a good proportion of the width of the film – and (frustratingly for film manufacturers), you wasted valuable silver salts in treating large areas of celluloid backing that would never be exposed to light.
Physical Attributes
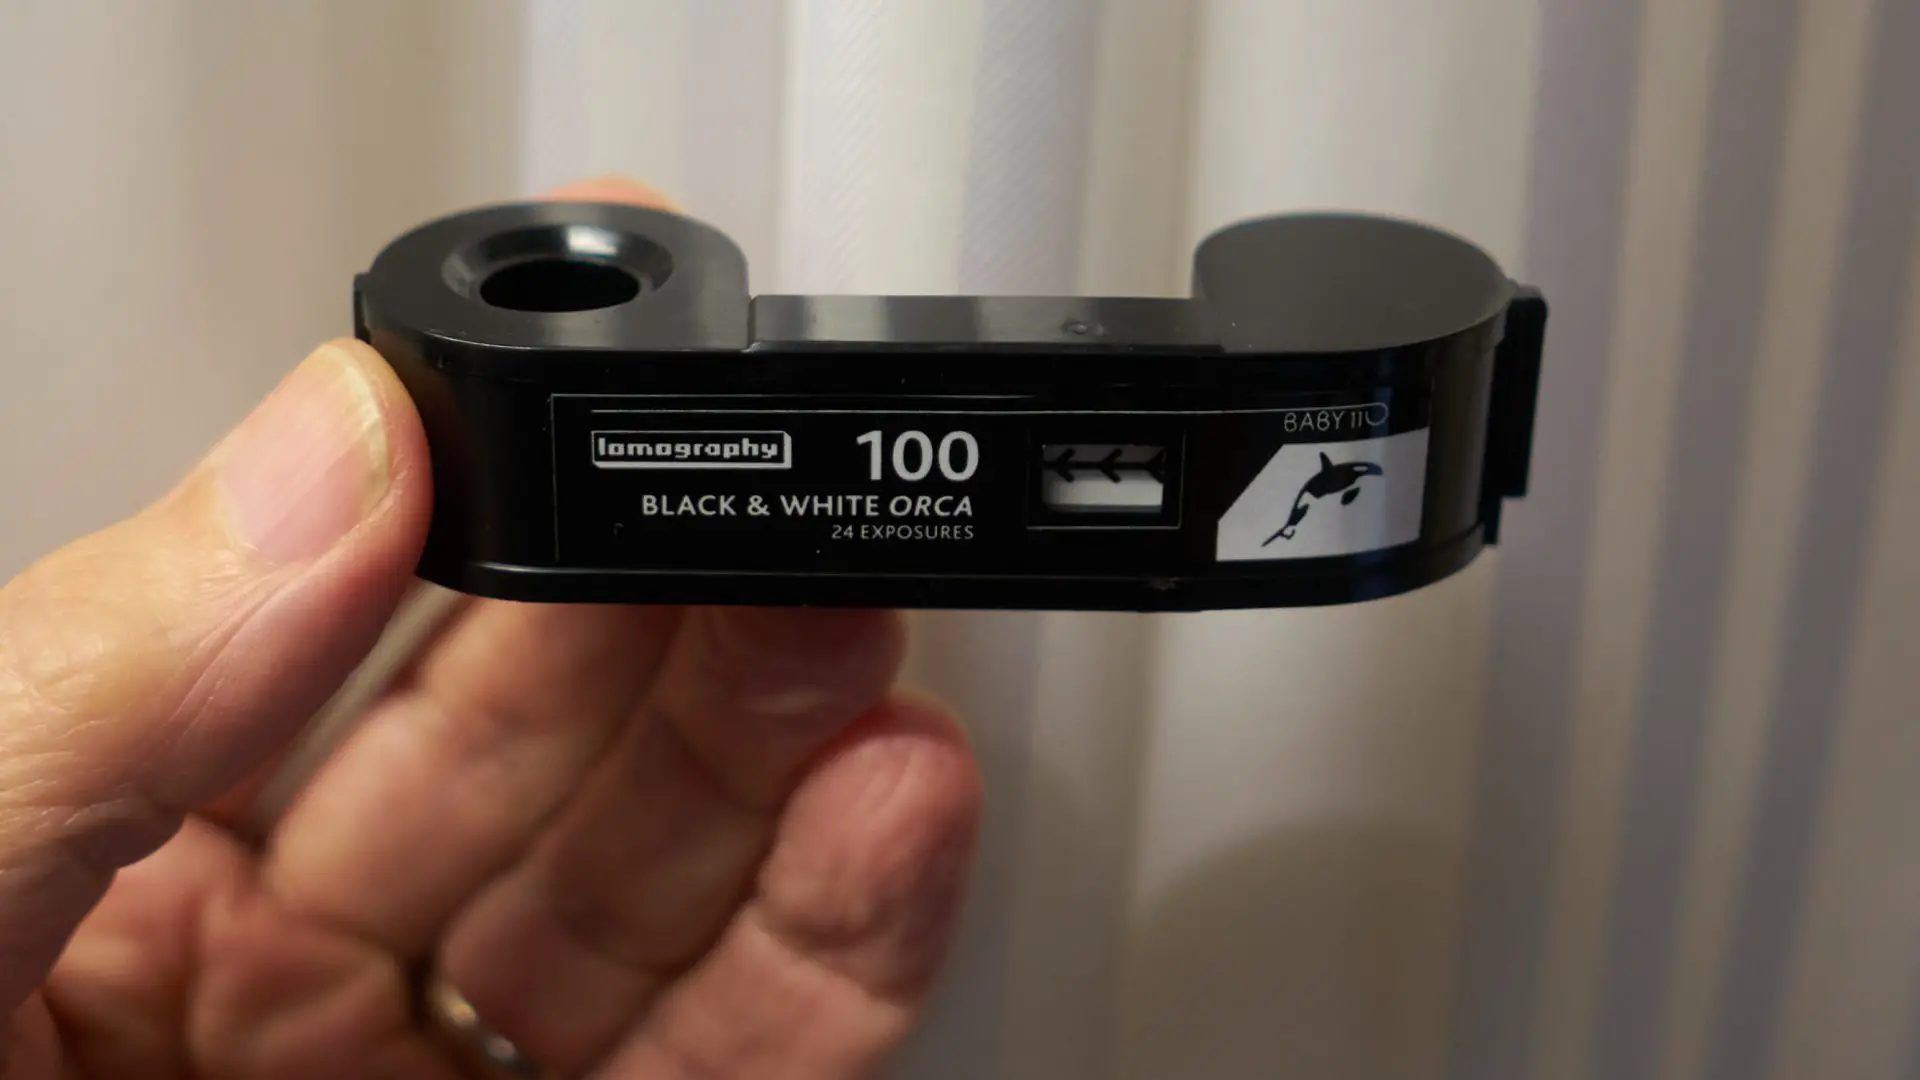
The 110 cartridge is a sealed unit with two seperate light-tight containers for exposed and unexposed film. If the back of a 110 camera is opened part way through a roll, it is only the frame that is exposed in the cartridge gate that will be wasted. In the end the film is still not held flat against the gate by a pressure plate, but the lenses are wider with greater depth of focus which somewhat overcomes this.
The cartridge is designed to only fit into the camera one way and the film has a single sprocket hole that is physically sensed by the camera to tell it when the next frame has been advanced. Because the single perforation is between the frames, it means that a greater proportion of the total width of the film can be used for image area – in the case of 110, only 3mm of the total 16mm width is lost to a border. The 16mm width also made it compatible with existing processing kit for sub-miniature stills cameras and 16mm cine equipment
Like 126 film before it the 110 cartridge has an aperture in its rear, which allows a frame number printed on backing sheet to be viewed through a window in the backs of 110 cameras, so film counting is simplified.
The Issues
The 110 format recognised low and high film speeds, but the exact sensitivity of low speed was never properly defined and could be as low as 64 for Kodachrome but could be as high as 80 or 100 for other print films. High speed was generally 400, but early 110 cameras can predate its introduction and will expose it as if it was a low speed film. In some cases, getting ‘correct’ exposure might be a bit of a lottery.
The thing that 110 was most criticised for was obvious grain on enlargement, this is the sort of thing that improved with advances in film emulsions, but the improvement in film emulsions also made larger formats better too…
The Cameras
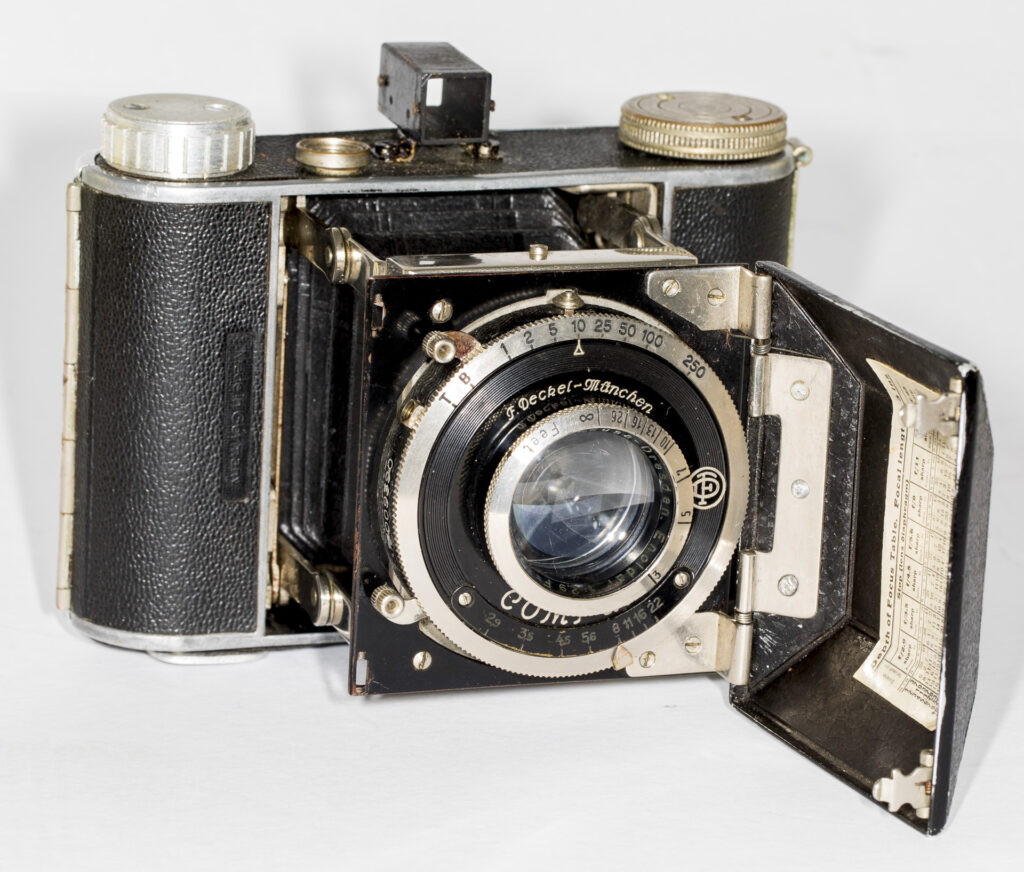
Kodak introduced the 110 cartridge with a series of ‘Pocket Instamatic’ cameras (building on the 126 ‘Instamatic’ cameras introduced a decade previously). The Pocket Instamatic adopted a form-factor of a shallow brick with a viewfinder in line with the taking lens. A lot of cameras that used the 110 cartridge adopted the same form-factor and relatively unsophisticated point-and-shoot ethos.
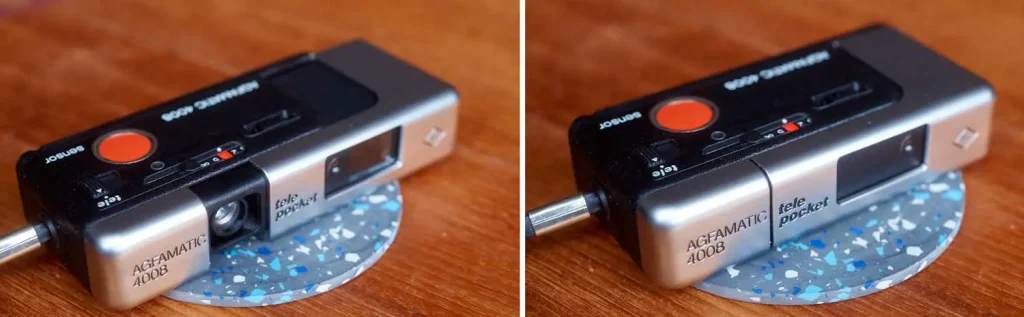
The relative size of 110 cameras lent themselves to dual lens setups that would have been impractical in a 35mm camera, they often incorporated a combined sliding cover and wind-on as seen in some of the classic Minox subminiature cameras and some even incorporated autowinders before they were commonly seen elsewhere.
As well as point and shoot cameras, there were also a number of SLR cameras using the 110 cartridge. Minolta introduced two separate generations of 110 zoom SLRs, while Pentax produced the diminutive Pentax 110 with a detachable autowinder and tiny interchangeable lenses. Because they allowed the photographer to judge focus reasonably accurately, these SLR cameras were able to use faster lenses, but the need to view via a prism led to these camera shying away from the ‘classic’ 110, long, thin, deep form factor.
In addition to the SLRs there were other more sophisticated models that combined the 110 cartridge and fast lenses with rangefinder focusing.
Shooting and Processing 110 Film in 2021
Due to 110 film not being hugely popular these days, there are plenty of cameras available on auction sites for not much money, but I was lucky enough to borrow two 110 cameras, the Canon 110 ED and Minox 110s (reviews available via the links).
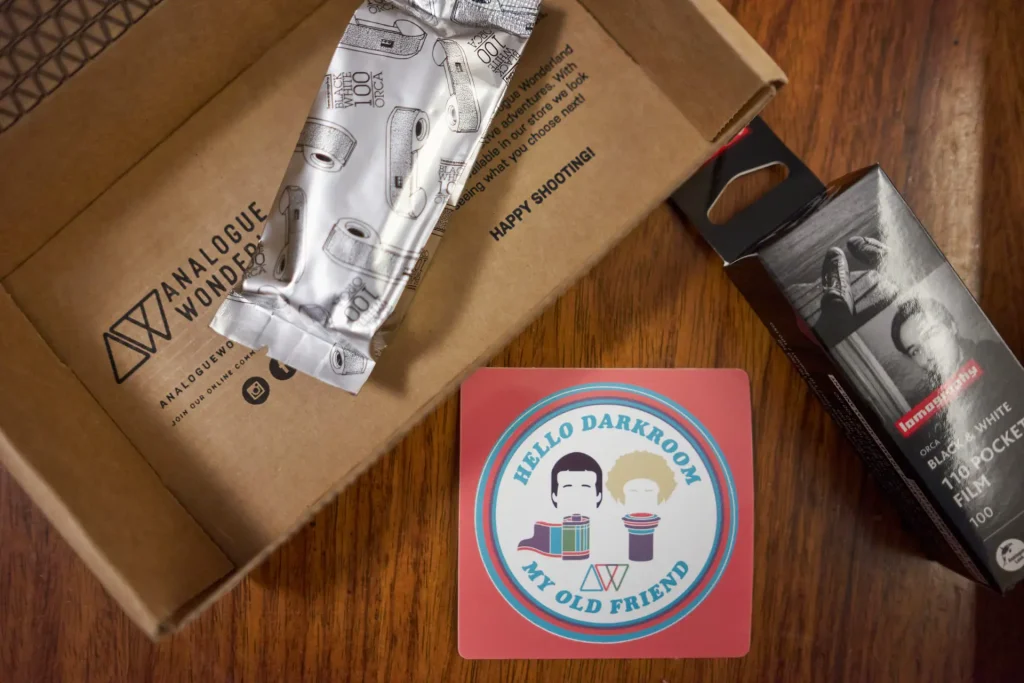
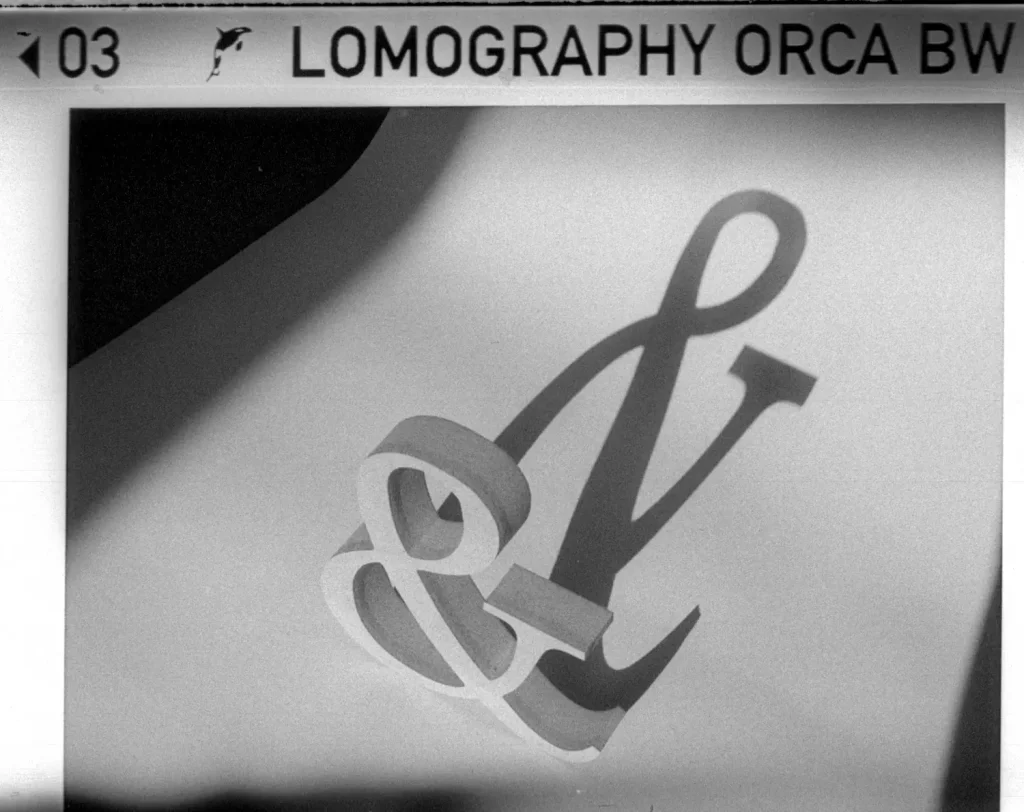
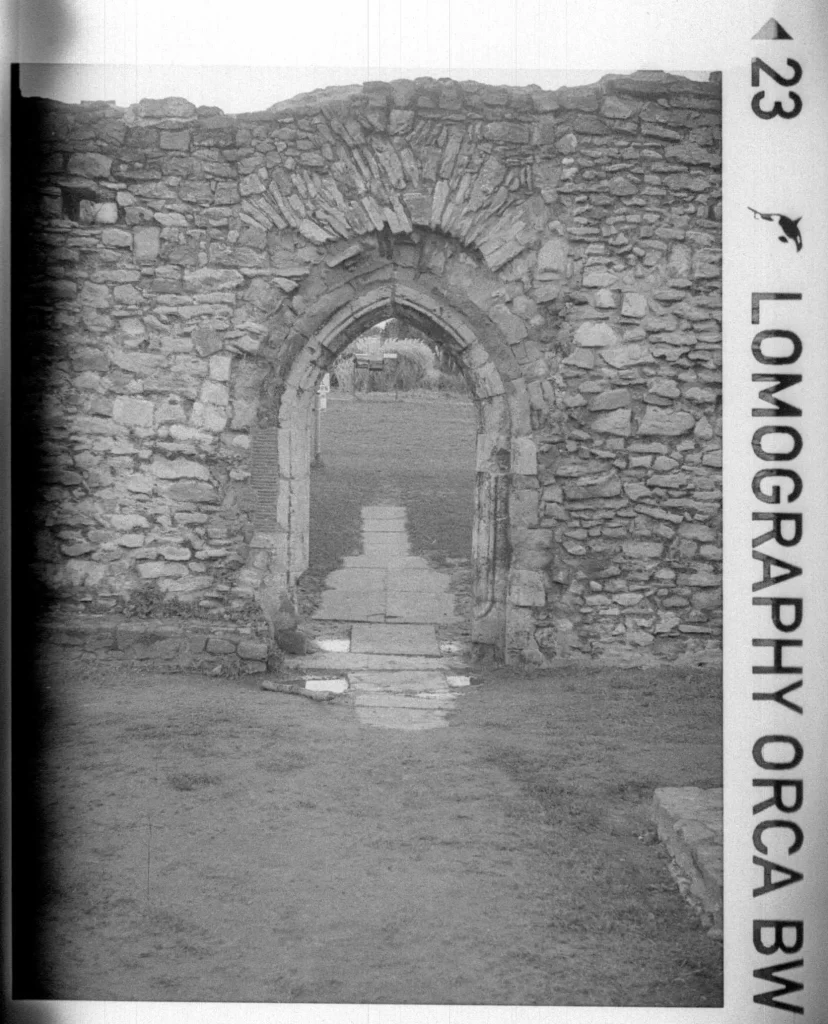
Having borrowed some 110 cameras, I had thought that I’d have to try to find some outdated colour film and pay for it to be processed – however, I was pleasantly surprised to find that Lomography have been producing some proper B&W 110 film for a few years.
In fact, currently Lomography are the lifeline for any 110 camera owner. They sell colour and black & white films at reasonable prices through readily available channels – but they are currently the only supplier (all credit to them for not milking it).
The other name you will see for 110 suppliers is Fukkatsu. Rather than being a wind-up this was an attempt to launch a new film producer back in 2012 (I’m told Fukkatsu means ‘Revival’ in Japanese). It was short lived – any stuff manufactured will be quite old at time of writing.
You can buy outdated film on the internet, but will likely have to put up with colour shifts or other artefacts of time.
As such, I went for Lomography film. Whilst being more expensive than I would normally pay to source a roll of 35mm film, the 24 exposure cartridges were not exorbitant, even with postage from Analogue Wonderland added on.
110 Film Processing Kit
Sourcing and shooting the film is one thing, what to do with it next is another hurdle.
Although B&W film for 110 has long been available – and although you would expect that equipment for dealing with 16mm film would be relatively commonplace – reels for processing 16mm film in Patterson-type tanks are rare. Jobo and Yankee Clipper 16 mm compatible tanks and reels are available new in North America, but they don’t seem to be available elsewhere. In Europe, 16mm reels that fit a Paterson tank, once a cheap item, now command hen’s-teeth prices on auction sites. There are Russian 16mm reels and tanks for cine film, but those are priced even higher.
I decided that the essential thing was to hold the 16mm film in such a way that the emulsion could come in contact with developer – At first, I played with ideas that would have wound the film around a tube in a gentle spiral, taped at each end with the emulsion facing outwards, but decided that the chances of something coming adrift during development and getting uneven development was quite strong, and I really wanted to have a reasonable chance at getting shareable results off the first attempt.
There are various posts on the internet which describe adapting a standard Patterson-style 135/126-120/220 reel to take 16mm film and I decided this was probably the best way to go.
Some of these sets of instructions should leave you with a fully functional, locking and auto-feeding reel, but exact measurements are scant, and I was planning to process perhaps just 2 films, so I decided I would not need to produce something that worked exactly like a fully functional Patterson reel – namely that the locking bit could go out the window.
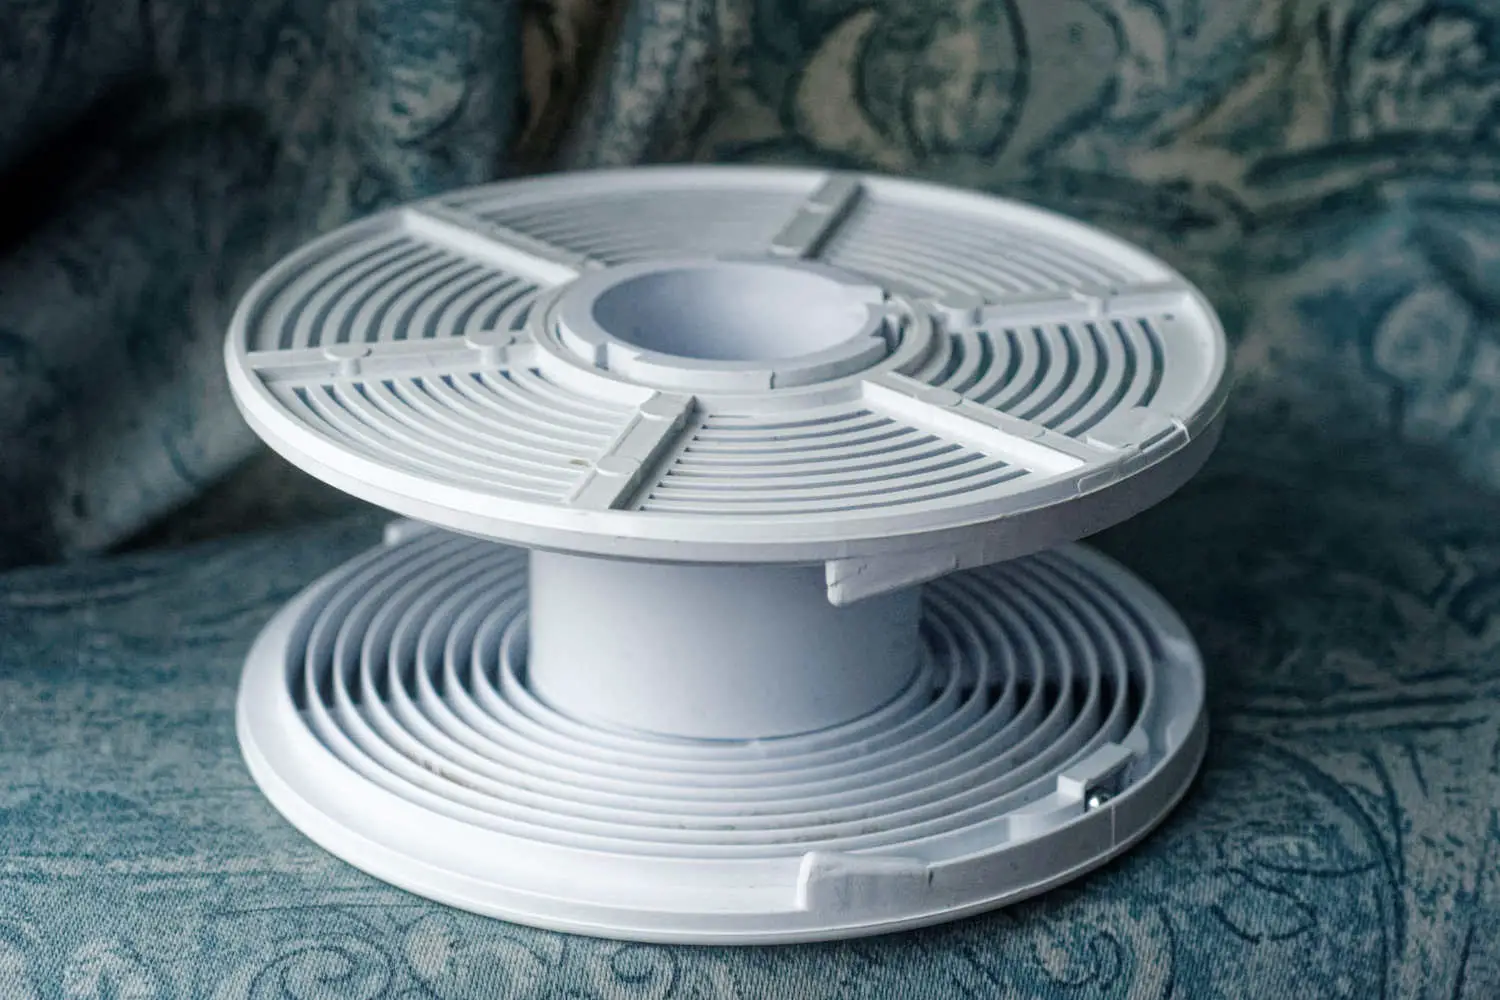
The first developing tank I bought for home development well over 10 years ago was a Kaiser knock-off of a Patterson 2 tank. The reels for this tank worked, but were nowhere near as smooth in operation when it came to auto-loading as the genuine Patterson reels, so one of Kaiser reels, long put aside from front-line use, could easily be sacrificed.
Now, as I don’t use inversion agitation, I don’t need the two halves of a reel to lock together – instead I should be able to rely on gravity to hold things together. If I used stand development (which is something I’ve been dabbling with recently) this could be even less of a risk – and stand development in super-dilute R09 might well help to get finer grain and maybe deal with any exposure ‘glitches’ from using old cameras with approximate film ISO and using non-standard batteries.
I decided that my aim would be to cut down the fixed outer collar of one of my Kaiser reels, so that it would slip down and rest an appropriate distance from the reel with the slots and articulated core. I would then use glue to attach the bit of cut off tube, along with the stubs that align in the slots on the other reel on the other end, so that both of the guides for inserting the film were lined up, this should also allow the two halves of the reel to slide sufficiently to auto-load the film (although I’ve been used to manually feeding these Kaiser reels when they have been less than fully co-operative in the past). In the end, once I started to check assembly of the reel, I realised that a clip on the core would lock everything in place in any case.
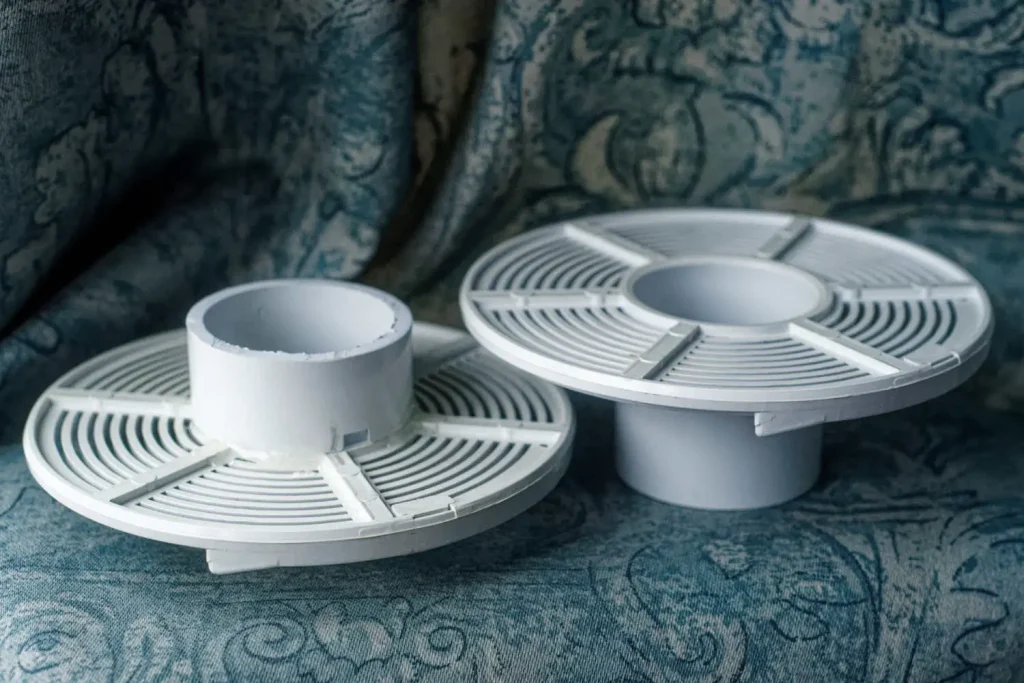
I figured that the outer sleeve is designed to be flat against the other reel to accommodate 35mm wide film. I measured the depth of that collar at 29mm (so the depth of the grooves in the spiral account for the other 6mm required). On that basis, cutting the collar down to 10mm should accommodate space for 16mm wide 110 film.
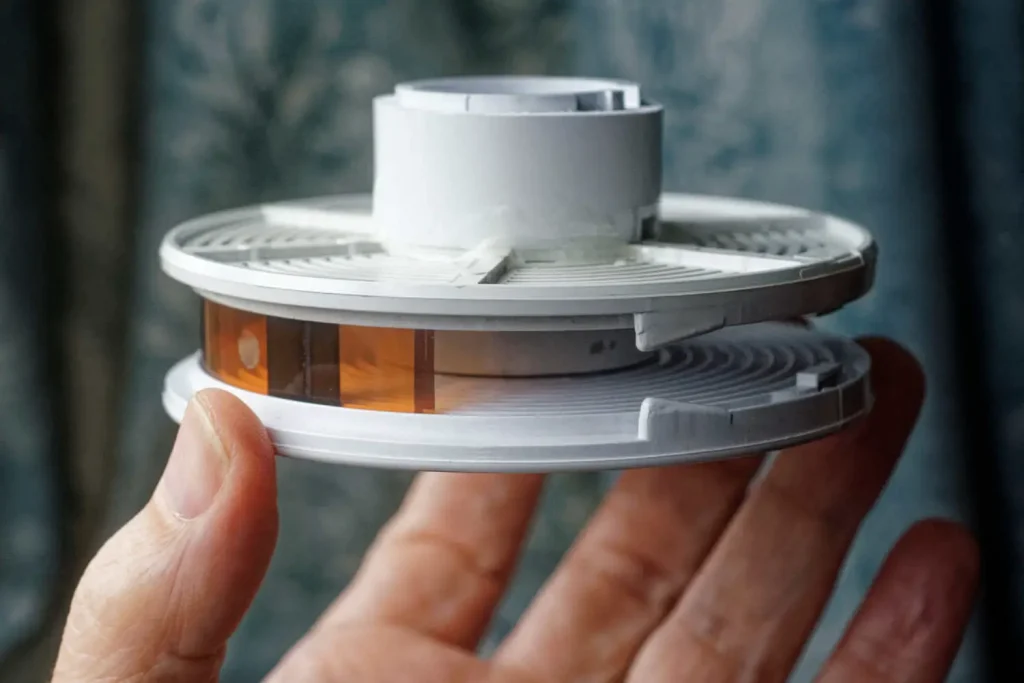
I measured, marked and sawed off the excess from the tube. After cleaning-up I slipped the cut down tube over the spindle on the other half of the reel and offered up a bit of 110 negative from a developed film. At this point the old homily ‘measure twice, cut once’ started to run through my head – not for the first time in my life, I was short… However, I was close enough that I should be able to start the film off in the dark-bag and once the film was enough in place to attempt to auto-load, the slight spacing should be OK. If you go this way, remember that it is probably easier to take a bit extra off with abrasive paper than it is to add some back on. I ended up making myself a thin plastic washer from an old English Heritage membership card.
I epoxied the off-cut tube (cut side uppermost) on the top of the modified reel, aligning the two notches so that the wider tab and wider slot on the unmodified lower half of the reel aligned.
For extracting the film from the cartridge, I found some useful instructions on the internet – these explained that after frame 24, you could wind the film on until you saw the first X’s on the backing paper and then remove the cartridge from the camera – this leaves you with a bit of visible film in the gate, which you can hook out with a toothpick. This way the cartridge stays intact and you can reuse it with cut-down film.
I ran into a problem in the dark-bag, because the film would not full out of the exposed chamber after the first 15cm. I got around this by breaking open the cartridge, separating the film from the backing paper by touch and them simply loading it onto the reel – no problem. Thinking about it afterwards, I think my problem may have been my trying to pull the film from the exposed chamber, rather than pulling the backing paper and letting the film follow it out. Looking at the anatomy of the lomography cartridge afterwards, it seems rather lightweight (so maybe not designed for reloading) and pulling the film back out the way it came, even if eased by the backing paper, would still lead to the emulsion of the film potentially dragging against the plastic of the cartridge – so I decided I’d simply break open future Lomography cartridges.
Results
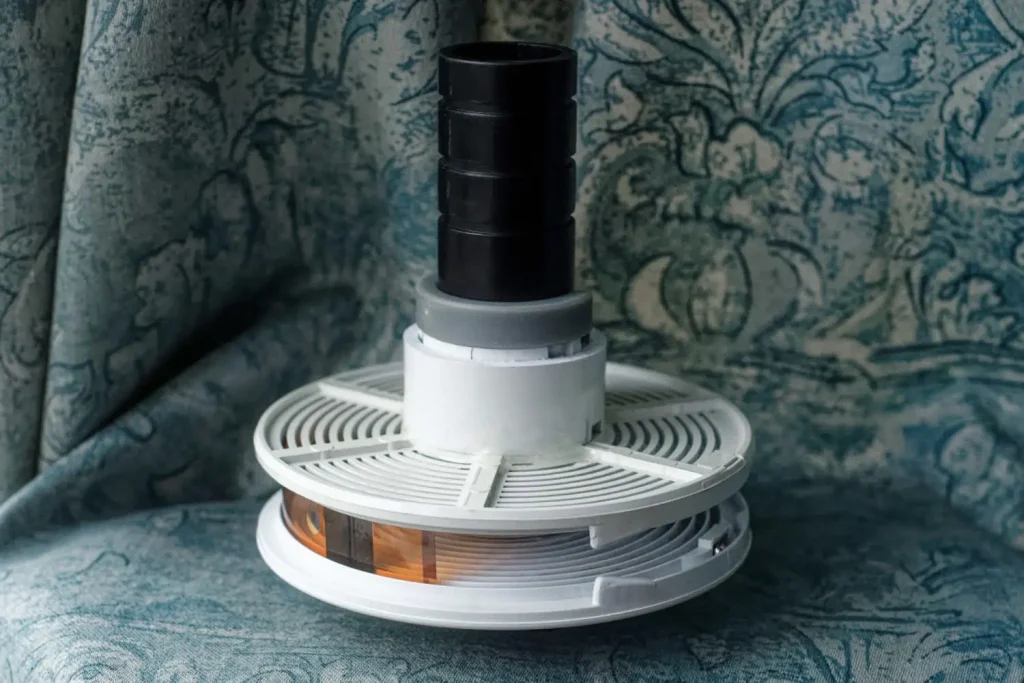
My first film was a success, although all did not go according to plan. Some instructions for stand development just say to dilute the developer down and leave the film to stand in it for 60 minutes, pretty much regardless of temperature, but the app I use for processing times actually gives longer times for colder temperatures, so after pouring in R09 at 1 to 50 dilution and giving it an initial swoosh around and tap on the counter to dislodge any bubbles, I left the tank in my (quite cold) kitchen for 85 minutes.
For the stop bath and fixer, I used the agitator rod, which on the Kaiser tank gives a slight up-down movement in addition to rotating the spiral, but part way through agitating the fix, I felt a resistance that worried me, so after that I gave a swoosh every minute until the fix time was done. After an initial wash, I opened the tank to see if I’d chewed up my film, and was slightly puzzled that the reel was empty – I found the film in the bottom of the tank, unchewed and seemingly properly fixed (I do tend towards over-fixing – I’m English and also over-boil vegetables).
I can only think that the film must have made its way out of the spiral while I was twiddling the agitator during fixing, so I’m doing to try to ensure that the two halves of the reel stay better attached for future developments and will probably agitate for stop bath and fixer by giving the tank a swoosh every minute, rather than use the Kaiser agitator.
For the second film, I added a collar under the clip to hold the two halves of the reel together better. The stand processing and swooshing for stop bath and fixer worked well, with the film staying in the reel, although there were lines at the periphery of the film where the film seemed under-developed. I’m guessing that the developer might have been blocked from the emulsion in places by the edges of the slots on the reel. The effect was nowhere near as noticable on the first film.
Digitisation
Once we have an image on those tiny negatives, there is still the need to digitise them to get them to a reasonable viewing size.
Options include:
- a flatbed – but I’ve always found this to be an unsatisfactory method of digitisation (maybe my flatbeds are not high-spec enough), so it would be a last resort.
- a digital camera to copy the negatives and then invert in post – but it would mean using macro lenses at their largest magnification – and then still needing to crop (although maybe only slightly if I used an APS-C camera with a full-frame macro lens), plus I’d imagine that problems of making sure everything was square would be amplified. For 24 exposures, the time saving for actual time taken to digitise would likely be cancelled out by set-up time. So, very workable, but probably not my first choice.
- a dedicated film scanner that can scan 35mm film – now, of course, 110 and 35mm do not align, but I reckoned that I could trap 110 film in a 35mm film strip holder and get half the 110 frames totally within a 35mm frame. I could then reposition and scan the other half. Resolution would, of course, be halved.
110 Film Scanning in practice
I found the easiest way of scanning was to cut the negatives into strips of 6 frames, which tends to fit nicely within the bounds of a typical 35mm film scanners width, allowing for as little as two positionings to scan all 6 shots on a strip.
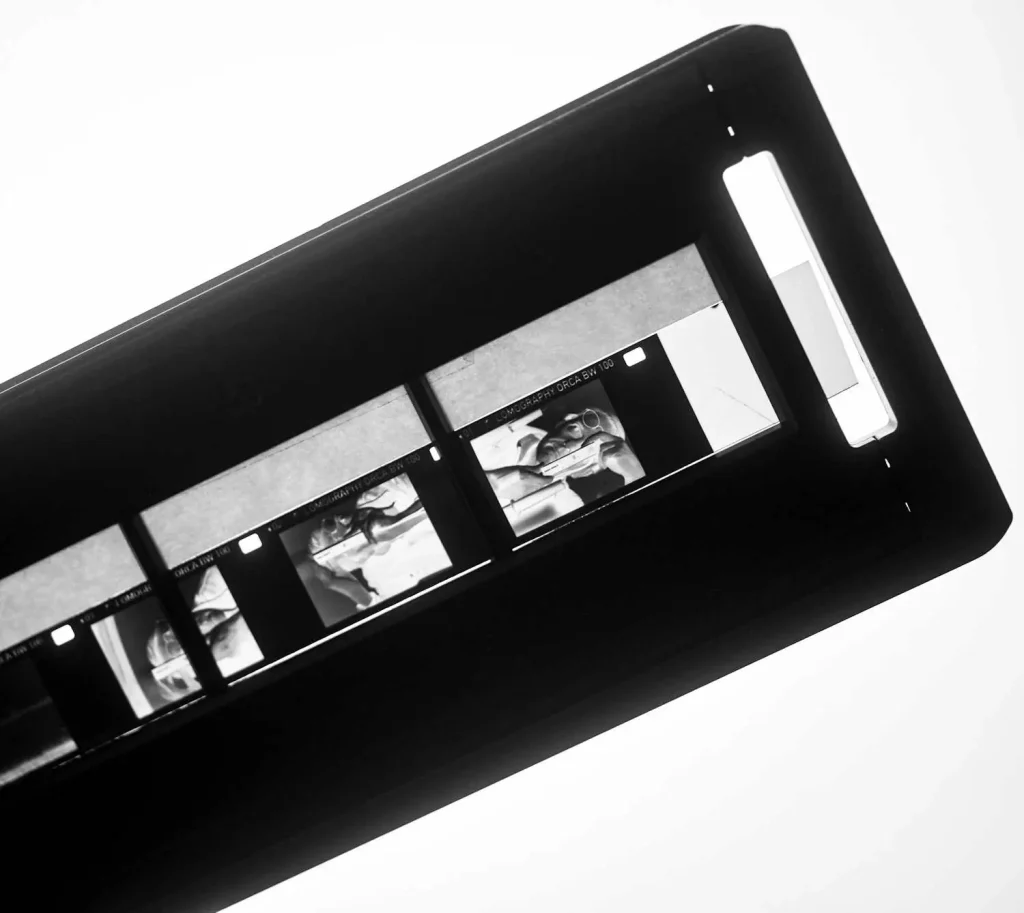
I positioned the negatives consistently by taping a strip of plain paper onto the inside of the film strip holder so that the negatives could but up against the edge of the paper. You might also want to add some paper or tape ‘bridges’ across the ends of the 1st and 5th apertures for the ends of the negative strip to rest on so that they don’t curl below the film holder.
I found that it was easy to arrange the negative strip of 6 so that only two negatives were not fully visible, so I scanned the 4 frames that were clear, then ejected the film holder, repositioned the film and scanned the last two shots (which tended to be the 3rd and 5th on the strip). Some care is needed to make sure your scanning software is exposing for the correct areas, so I did each negative individually rather than using a batch method. I chose to scan in the frame numbers along with the frames, although others may prefer to mask those out.
If you are planning to shoot 110 more regularly, you might want to look at the Lomography Digitaliza for use with flatbed scanners. If you are more interested in digitising with a digital camera, another cheaper option would be pixl-latr which has a 110 mask optionally available here
Photos

110 Film in 2021 – Conclusions
The cameras are cheap and easy to get hold of – they might not be the most advanced cameras, but they still have a certain appeal. My mini reviews Canon 110 ED, Minox 110s and a review of the Rollei A110 are available via the links.
To my mind, the most practical way of using a 110 camera in the third decade of the 21st century, is to process B&W, either using Lomography’s Orca film, or by processing C41 film in B&W chemistry. Some people might have alternatives if they have the capacity to process C41 themselves, or if they have a good local processor. In such circumstances, colour may be an option.
For home processing, I feel that someone is missing out on an opportunity to produce a commercial 16mm reel. That Lomography manage to justify producing 110 film shows that the high-end 110 cameras still have their advocates, while reels that would take 24 inches of 16mm film would also serve the subminiature community using the little ‘spy’ minoxes and the non-110 Minoltas.
My DIY cut-down reels work, but the undeveloped edges show at least a potential for improvement. It may be that conventional agitation would give more even development, but that could also lead to problems with keeping the two halves of the reels together. I think if I were to experiment further I might try the cut down reel with some degree of agitation to see if that gives more even development, but I also find myself drawn to the idea of reliably wrapping the film, emulsion side out, to a suitable sized tube. I feel there should be a better solution and I’d welcome ideas and suggestions in the comments.
As far as scanning is concerned, the little 110 negatives come out quite well when scanned at 2800 on a 135-sized film scanner. The Lomography film doesn’t seem too grainy at all and would possibly benefit from higher resolution scanners or digital photo copies.
Even if the Lomography film isn’t to your taste, it is possible to respool 110 film cassettes with cut down film, 16mm cine film or microfilm. I found this to be one of the more helpful resources on this topic.
Ultimately, 110 isn’t the perfect format and its true that it’s small size does lead to increased relative grain size, but sourcing film, shooting the cameras, and finding ways to develop and scan on a shoestring has been an enjoyable experience.
Share this post:


Comments
John Furlong on 110 Film in 2021 – A Guide to Shooting, Developing and Scanning – By Bob Janes
Comment posted: 04/03/2021
I've encountered white spots on the negs of Lomo films - usually on the first few frames. I gather this is caused by pinholes in the backing paper and the recommended fix is to put PVC tape over the window in the camera back.
You mentioned Fukkatsu film - I see that Analog Wonderland have got it back in stock.
Cheers,
John F.
Comment posted: 04/03/2021
Neal A Wellons on 110 Film in 2021 – A Guide to Shooting, Developing and Scanning – By Bob Janes
Comment posted: 04/03/2021
For those who want ready-made equipment, the Yankee Clipper II developing tank is currently available from retailers. It has been in production many years (I bought my first around 1960) so lots are available used. They do not invert but work well on formats from 120 to 110.
For flatbed scanning, Lomography currently makes the 110 digitizer scanning mask. I use one on my Epson scanner quite satisfactorily.
It is a bit of an investment to buy these items (tank is $20 and the Digitizer is $40.) I use a Pentax auto 110 SLR and have enjoyed shooting and scanning many rolls this way.
Comment posted: 04/03/2021
Comment posted: 04/03/2021
Sean Mahan on 110 Film in 2021 – A Guide to Shooting, Developing and Scanning – By Bob Janes
Comment posted: 04/03/2021
davesurrey on 110 Film in 2021 – A Guide to Shooting, Developing and Scanning – By Bob Janes
Comment posted: 05/03/2021
In the 80s, when I did a lot of travel to “interesting” countries, I often left my 35mm kit at home and used a Pentax Auto 110 kit. Time has not been kind to the negatives and they are now preserved digitally.
Also my parents were a bit photo-phobic but I bought them 110 cameras and still have one which I keep for nostalgia.
As well as the Pentax Auto 110 I have a Minolta Pocket Autopak 460TX and a Canon 110ED and your article has encouraged me to get some more film and take them for a spin.
Dave
davesurrey on 110 Film in 2021 – A Guide to Shooting, Developing and Scanning – By Bob Janes
Comment posted: 05/03/2021
Comment posted: 05/03/2021
Comment posted: 05/03/2021
Comment posted: 05/03/2021
Comment posted: 05/03/2021
Comment posted: 05/03/2021
Comment posted: 05/03/2021
davesurrey on 110 Film in 2021 – A Guide to Shooting, Developing and Scanning – By Bob Janes
Comment posted: 05/03/2021
You might want to look for example at the Canon 110ED review on photojottings.com where they mention this (apologies Hamish for referencing another web site on here.)
Dave
Martin JONES on 110 Film in 2021 – A Guide to Shooting, Developing and Scanning – By Bob Janes
Comment posted: 05/03/2021
Comment posted: 05/03/2021
Case on 110 Film in 2021 – A Guide to Shooting, Developing and Scanning – By Bob Janes
Comment posted: 06/03/2021
I’ve also been obsessing over 4x4 TLRs lately, which has led me to cutting down 120 film and respooling on 127. Can you share some of the resources you’ve come across regarding reloading 16mm film into used 110 cassettes? I absolutely love the idea of shooting Portra in the Velveeta Shells & Cheese camera!
Comment posted: 06/03/2021
Benjamin on 110 Film in 2021 – A Guide to Shooting, Developing and Scanning – By Bob Janes
Comment posted: 11/06/2021
* Lomography Digitaliza 110 film holder
* Panasonic G9 (a micro-4/3 camera)
* This macro lens: M.ZUIKO DIGITAL ED 60mm F2.8 MACRO
Basically, you have a 1:1 ratio, and as you mention, the sensor is pretty much the same size as the film, so you don't get much cropping to do. And anyway, the sensor resolution largely outperforms the film resolution, at least on my old Kodak film.
Thanks to that, I could see again, those wonderful, crappy photos with tons of light leaks!
Film Fridays: How to shoot, developing and scan 110 film in 2021: Digital Photography Review - 5starbase.com on 110 Film in 2021 – A Guide to Shooting, Developing and Scanning – By Bob Janes
Comment posted: 11/06/2021
Film Fridays: How to shoot, developing and scan 110 film in 2021: Digital Photography Review – the gadget g on 110 Film in 2021 – A Guide to Shooting, Developing and Scanning – By Bob Janes
Comment posted: 12/06/2021
Lucas on 110 Film in 2021 – A Guide to Shooting, Developing and Scanning – By Bob Janes
Comment posted: 17/02/2022
Comment posted: 17/02/2022
Alice on 110 Film in 2021 – A Guide to Shooting, Developing and Scanning – By Bob Janes
Comment posted: 16/11/2022
Comment posted: 16/11/2022
Bob Janes on 110 Film in 2021 – A Guide to Shooting, Developing and Scanning – By Bob Janes
Comment posted: 28/03/2024